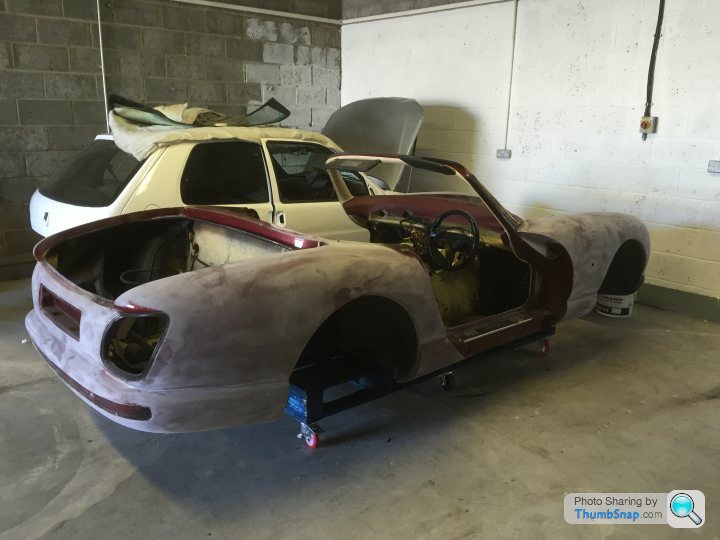
Undressing Kate, my Chim 430 resto.
Discussion


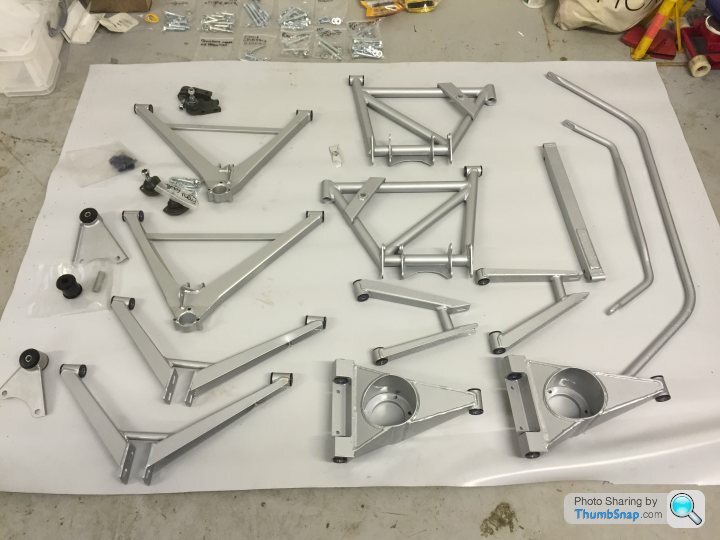
marcus1875 said:
Those small bits look nice and clean!
Cheers mate 
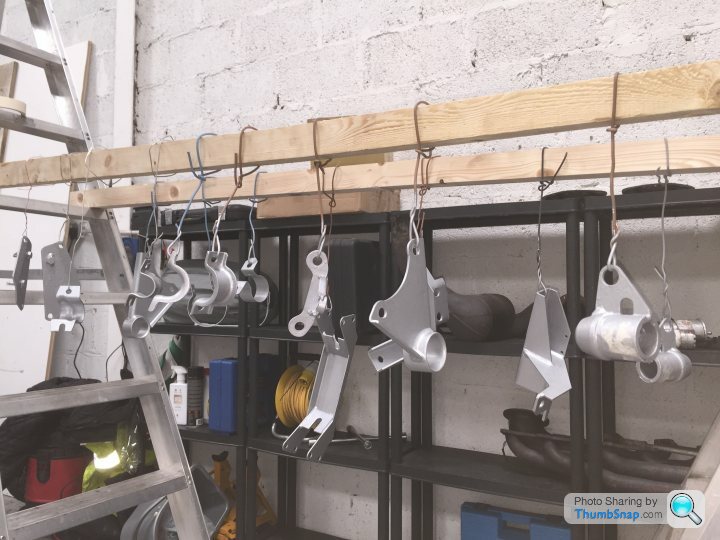
They got another going over and first coat of paint last night. Possibly 2 more coats and they'll also be done.
67Fox said:
That chassis and small parts looks gooooooooddd. Really nice in silver.
Nice work by the way.
So next it will be :- ""Just put at all together like "IKEA" .
.  "" OR "plug and pray" !!
Good luck anyway, just pulling you leg.
Thanks Fox Nice work by the way.
So next it will be :- ""Just put at all together like "IKEA"
. "" OR "plug and pray" !!Good luck anyway, just pulling you leg.
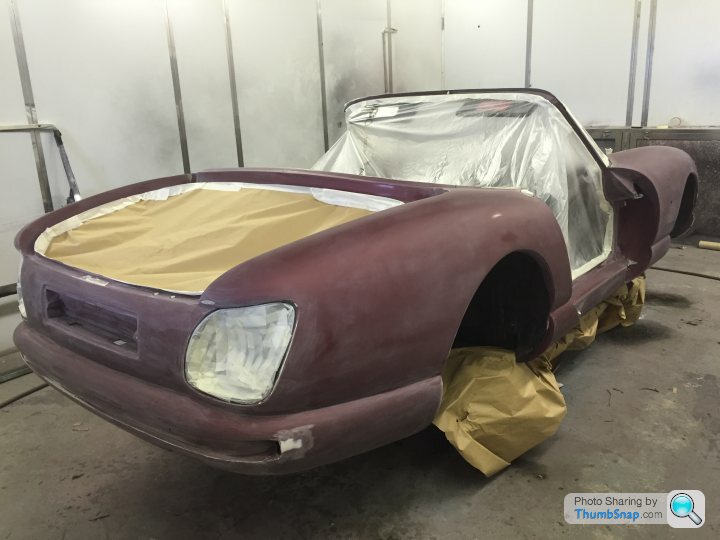
It was originally silver so just trying to stick to my plan of restoration to factory colours.
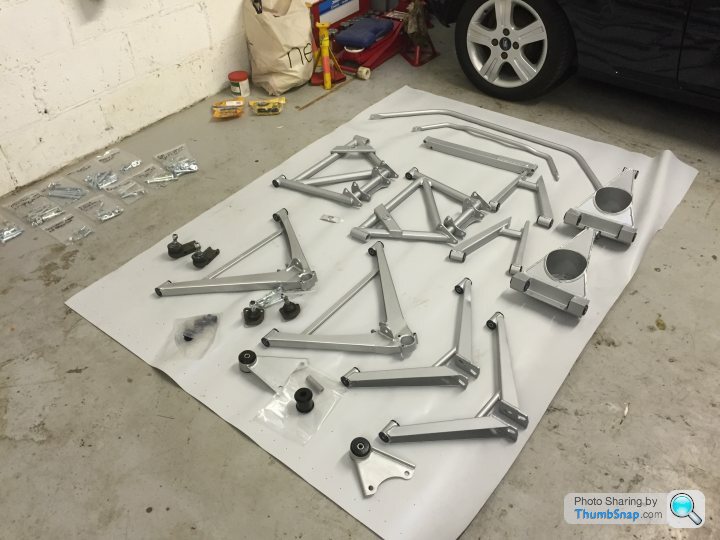
As for the build, I hope I don't have too many spare nuts, bolts and screws left at the end like my IKEA builds

I've tagged and taken notes and photos throughout the tear down process so should be fairly straight forward putting her back together again.
Cokes said:
Thanks Fox
It was originally silver so just trying to stick to my plan of restoration to factory colours.
As for the build, I hope I don't have too many spare nuts, bolts and screws left at the end like my IKEA builds
I've tagged and taken notes and photos throughout the tear down process so should be fairly straight forward putting her back together again.
It's only nuts and bolts mate! It was originally silver so just trying to stick to my plan of restoration to factory colours.
As for the build, I hope I don't have too many spare nuts, bolts and screws left at the end like my IKEA builds
I've tagged and taken notes and photos throughout the tear down process so should be fairly straight forward putting her back together again.
Cokes said:
Thanks Fox
It was originally silver so just trying to stick to my plan of restoration to factory colours.
As for the build, I hope I don't have too many spare nuts, bolts and screws left at the end like my IKEA builds
I've tagged and taken notes and photos throughout the tear down process so should be fairly straight forward putting her back together again.
Top tip for when you get to fitting your manifolds and Y-piece: Fit the RH manifold first, this will be the most awkward if you have left your starter in place, do the bolts up tight. Then fit the LH manifold but leave the bolts approximately 10mm proud, then fit the Y-piece and clamps/bolts, then tighten up the LH manifold bolts. It was originally silver so just trying to stick to my plan of restoration to factory colours.
As for the build, I hope I don't have too many spare nuts, bolts and screws left at the end like my IKEA builds
I've tagged and taken notes and photos throughout the tear down process so should be fairly straight forward putting her back together again.


Well earned. I've been a bit of a lurker as cant post well on my phone, but your chims coming on well and looking great. I'm also going down the 2 pack epoxy route, as I feel the powdercoat is just a liability, and very hard to touch up and re-seal should there be any scraped or damage to the outer coating.
Good luck with the rebuild, Looking forward to seeing the progress
Good luck with the rebuild, Looking forward to seeing the progress
I'm embarrassed to say I haven't started yet, and am shelling out the work to Southways early next year. Just don't have the time or a garage sadly, but did managed a y peice swap today
Will definitely post pics when done, although it won't be my hard works sadly.
Keep up the good work matey.
Will definitely post pics when done, although it won't be my hard works sadly.
Keep up the good work matey.
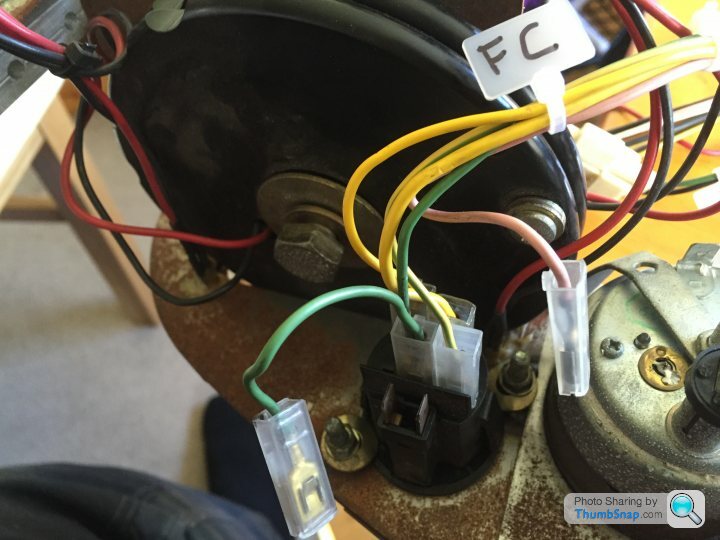
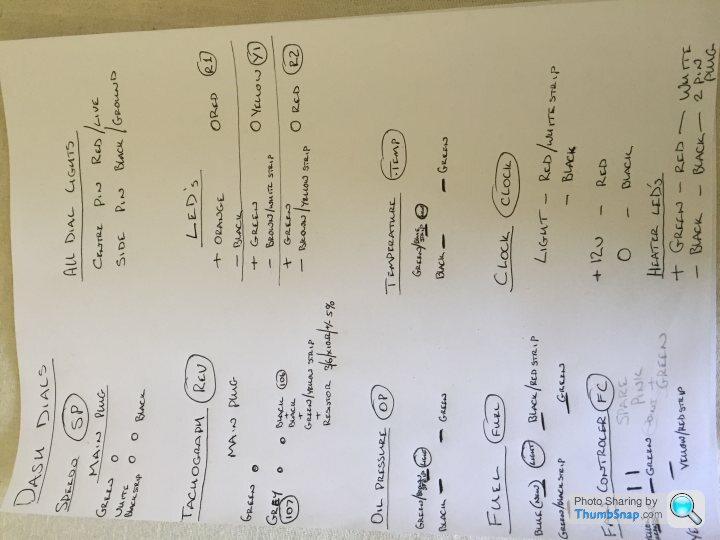
Today's task was to disconnect the dials.
Lots of random colours but I think I took enough notes.
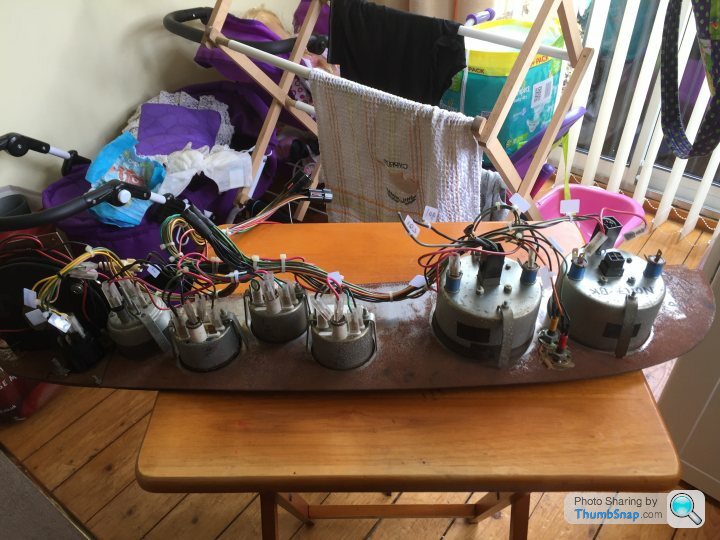
Speedo
Missing ground on the lights
Tachometer
Missing ground on the lights, lots of random goings on with the main plug.

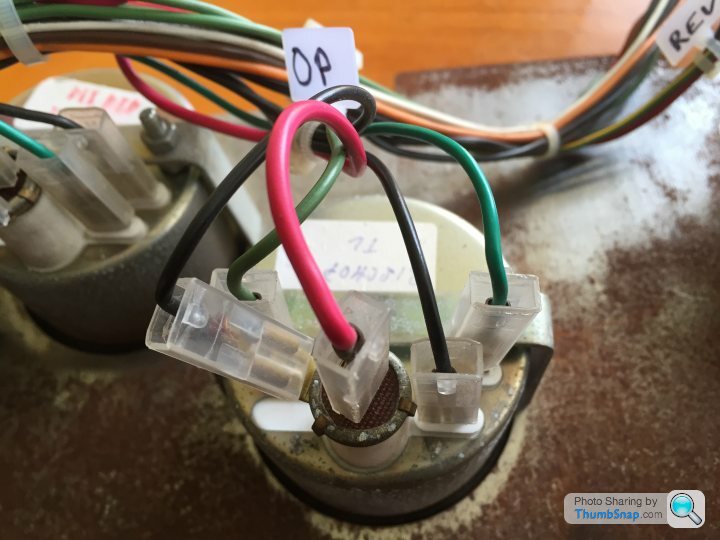
Oil Pressure
All ok.
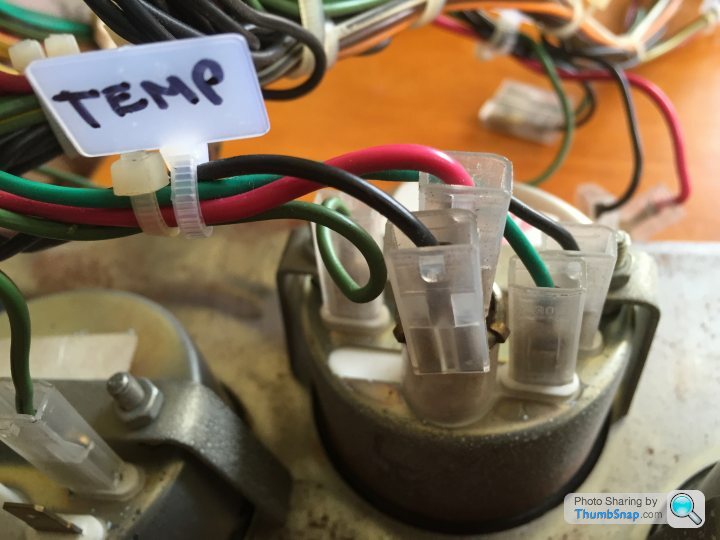
Temperature
All ok
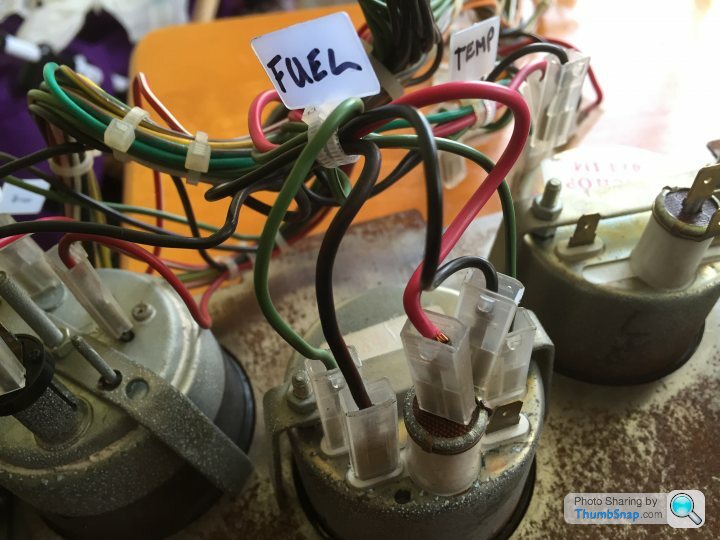
Fuel
Loose connection on light live
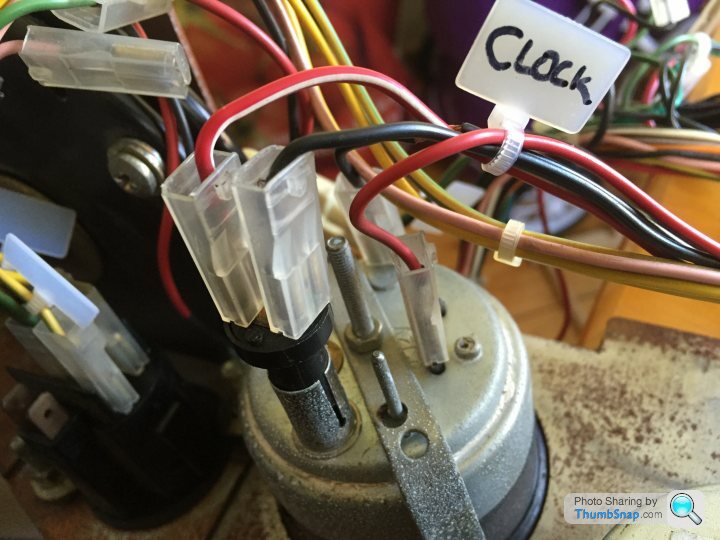
Clock
All ok
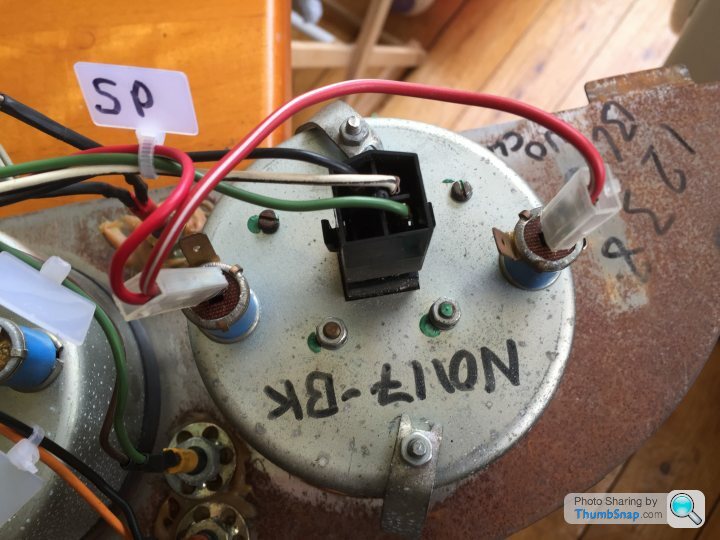
Heater fan controller
Pink and green disconnected and were tied back out the way.
Are these for the light or just spare ?
And finally, my scribblings.
Lots of random colours but I think I took enough notes.
Speedo
Missing ground on the lights
Tachometer
Missing ground on the lights, lots of random goings on with the main plug.
Oil Pressure
All ok.
Temperature
All ok
Fuel
Loose connection on light live
Clock
All ok
Heater fan controller
Pink and green disconnected and were tied back out the way.
Are these for the light or just spare ?
And finally, my scribblings.
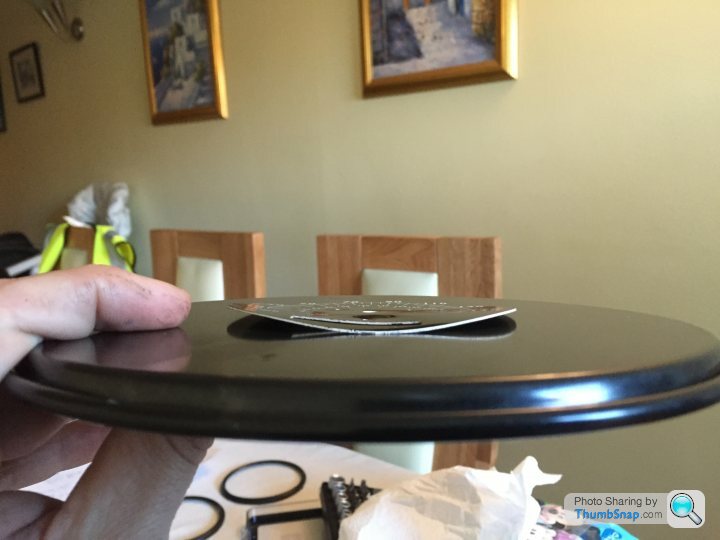
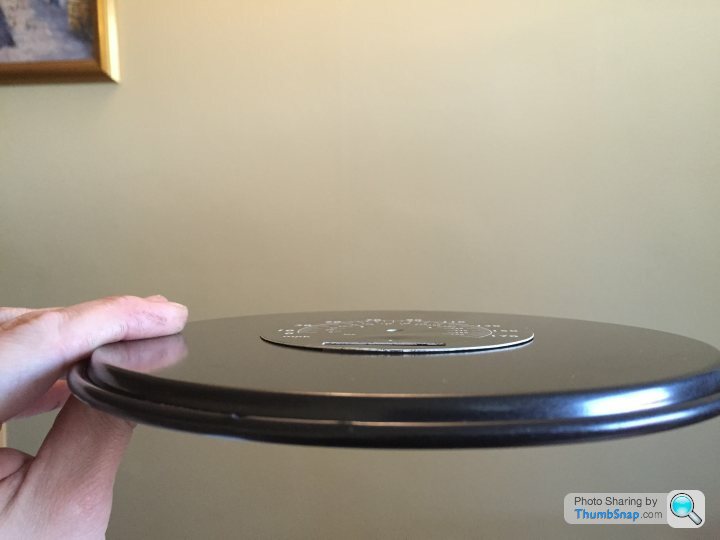
The dials are getting a change of scenery
Plus with 2 bases from the wife's baking tins and her hair dryer (shhh, don't tell her) I've managed to flatten the face which was very distorted. Also the clear ring round the dial that illuminates it had fallen into the gauge and so was giving no light at night to see the Rev counter.
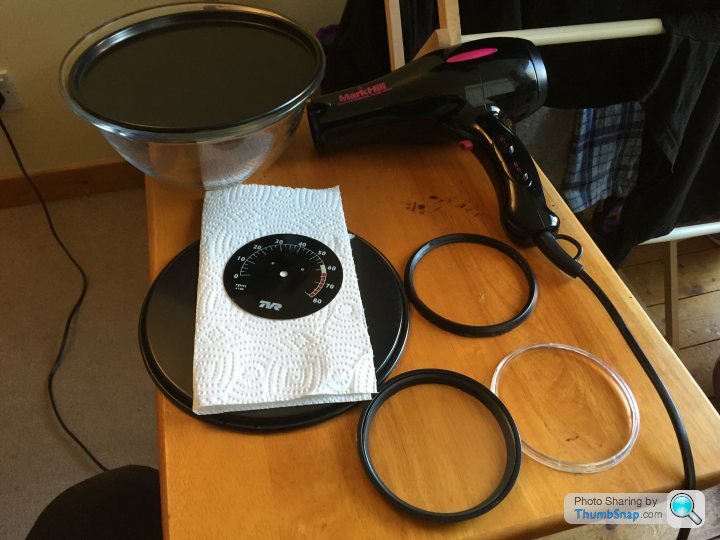
And while its out, it's clean and touch up paint where required.
Plus with 2 bases from the wife's baking tins and her hair dryer (shhh, don't tell her) I've managed to flatten the face which was very distorted. Also the clear ring round the dial that illuminates it had fallen into the gauge and so was giving no light at night to see the Rev counter.
And while its out, it's clean and touch up paint where required.


Gassing Station | Chimaera | Top of Page | What's New | My Stuff