J400 GED Chimaera Chassis refurb
Discussion


J400GED said:
robsco said:
Tremendous approach, good work. A proper TVR owner. I wish I had the skills to take on a job of this magnitude.
Thanks mate, if you can snip a tie wrap or undo a nut and bolt, you can what I have done here. Just be methodical and don't be afraid to ask for help.
robsco said:
When a friend of mine "helped" me remove the Cerbera's engine last year, my designated role was "cable tie cutter". It was a much bigger job than one would ever imagine.
Sounds a bit anal/OCD, but I am saving any tie wraps that I cut off just to see how many I end up with! Evening All,
Today's update:
Seats out

Battery and box removed, Centre Console removed
Speed sensor disconnected. to get it through the body I dismantled the multiplug
Removed the gear knob
And inspection hatch sorry, no pics
Handbrake switch loom tie wrap
Then I drained the brakes
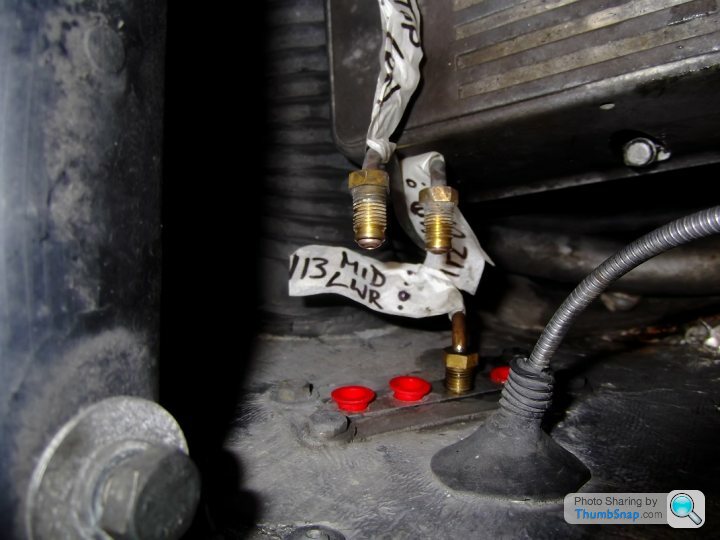
and disconnected the brake pipes from the bulkhead
Next, I moved onto removing the fuel tank
Boot upper trim panel,
Tank lower fixing bolts - these are not captive nuts
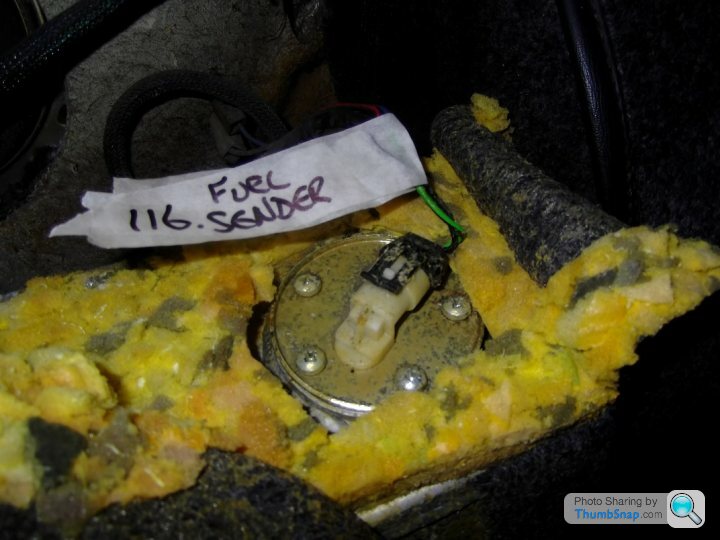
Unplugged the fuel sender - this wasn't actually necessary
Disconnected the fuel filler hose
Disconnected the carbon return hose at the filler neck

Removed the 2 upper tank fixings
The I cut the carbon return hose near the LH rear suspension ( will be re-connected with an in-line connector at a later date
And finally before the chassis bolts start flying, I disconnected the fuel pump loom
Next I started to remove the chassis bolts
2 front bolts first,
then the rear bolts - unfortunately, one bolt sheared
So, jobs for Saturday 7th March
Remove the remaining chassis bolts
Position the car for the lift
Disconnect the steering column
Prep for lift - potentially Sunday.
Today's update:
Seats out
Battery and box removed, Centre Console removed
Speed sensor disconnected. to get it through the body I dismantled the multiplug
Removed the gear knob
And inspection hatch sorry, no pics
Handbrake switch loom tie wrap
Then I drained the brakes
and disconnected the brake pipes from the bulkhead
Next, I moved onto removing the fuel tank
Boot upper trim panel,
Tank lower fixing bolts - these are not captive nuts
Unplugged the fuel sender - this wasn't actually necessary
Disconnected the fuel filler hose
Disconnected the carbon return hose at the filler neck
Removed the 2 upper tank fixings
The I cut the carbon return hose near the LH rear suspension ( will be re-connected with an in-line connector at a later date
And finally before the chassis bolts start flying, I disconnected the fuel pump loom
Next I started to remove the chassis bolts
2 front bolts first,
then the rear bolts - unfortunately, one bolt sheared
So, jobs for Saturday 7th March
Remove the remaining chassis bolts
Position the car for the lift
Disconnect the steering column
Prep for lift - potentially Sunday.

I spent today making a body dolly - same concept as Cokes - sorting out lifting equipment and removing the chassis bolts.
Well, it's ready for the body lift - almost. 
Two bolts have sheared across the lifting plane - i.e. two horizontal bolts have sheared and the lift will be vertical - so I need to sort those first.
Two vertical ones sheared as well but that's not a concern.
The horizontal sheared bolts are Left Hand Lower behind the fuel tank and LH Outboard Fwd seatbelt mount.
The difficulty depends on the thickness of the GRP in those areas.
The rear bolt that sheared went 3mm from the head and the seatbelt bolt flush with the head.
Well, it's ready for the body lift
- almost. Two bolts have sheared across the lifting plane - i.e. two horizontal bolts have sheared and the lift will be vertical - so I need to sort those first.
Two vertical ones sheared as well but that's not a concern.
The horizontal sheared bolts are Left Hand Lower behind the fuel tank and LH Outboard Fwd seatbelt mount.
The difficulty depends on the thickness of the GRP in those areas.
The rear bolt that sheared went 3mm from the head and the seatbelt bolt flush with the head.
That sucks
I was luck to only sheer 1 bolt although it was across the plain.
Been told to get these http://pages.ebay.com/link/?nav=item.view&alt=...
Good luck with the lift mate. We can compare pictured and stories tomorrow night.
I was luck to only sheer 1 bolt although it was across the plain.
Been told to get these http://pages.ebay.com/link/?nav=item.view&alt=...
Good luck with the lift mate. We can compare pictured and stories tomorrow night.
Twistygit said:
I used a cutting disc to trim my snapped bolts plenty of room for outrigger without damaging the body. I also had a front and back snap I cut the chassis at front and repaired when body off, didn't want to damage body.
Thanks Twistygit, I'll have a look at it in the morning.J400GED said:
robsco said:
When a friend of mine "helped" me remove the Cerbera's engine last year, my designated role was "cable tie cutter". It was a much bigger job than one would ever imagine.
Sounds a bit anal/OCD, but I am saving any tie wraps that I cut off just to see how many I end up with! Right, here we go.
An excellent days work today
First problem was to sort out the rear chassis bolt that had sheared, fortunately there was a shim between the body and the chassis which, when removed, allowed me room to hacksaw through the sheared bolt.
Unfortunately I damaged the GRP when trying to ease the body past the LH outboard seat belt bolt. The GRP was very thin there - fortunately this fixing is for the belt not the body.
Once that was done and my "Lift Team" appeared, it was very straight forward and Ta Da!
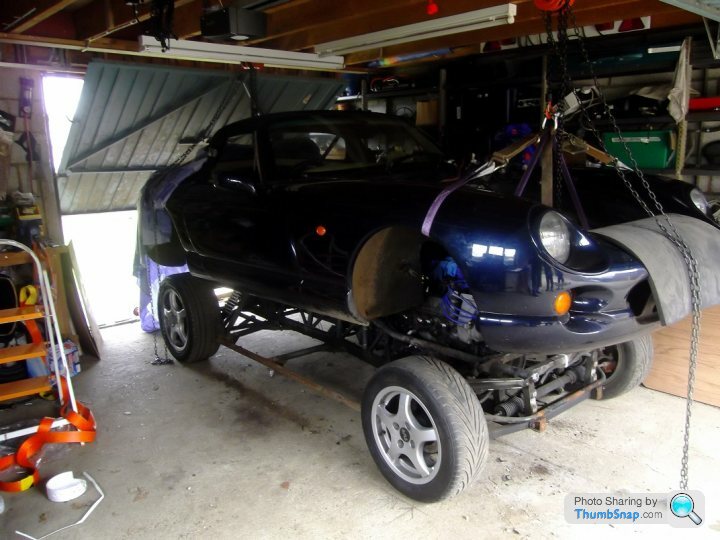
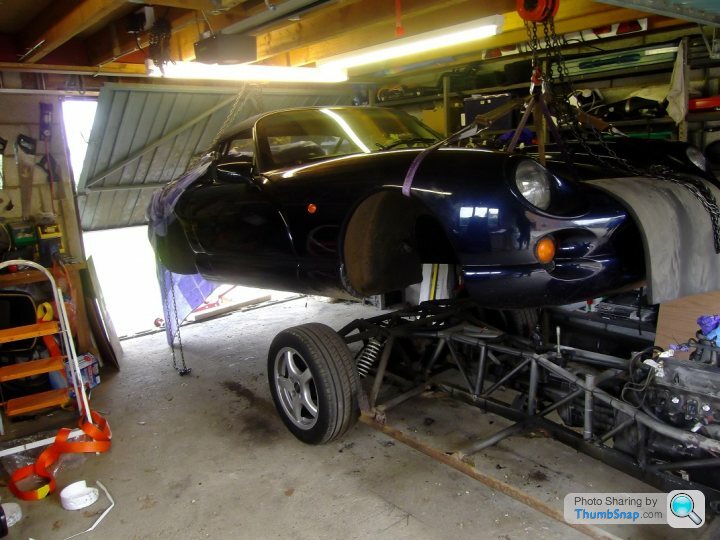
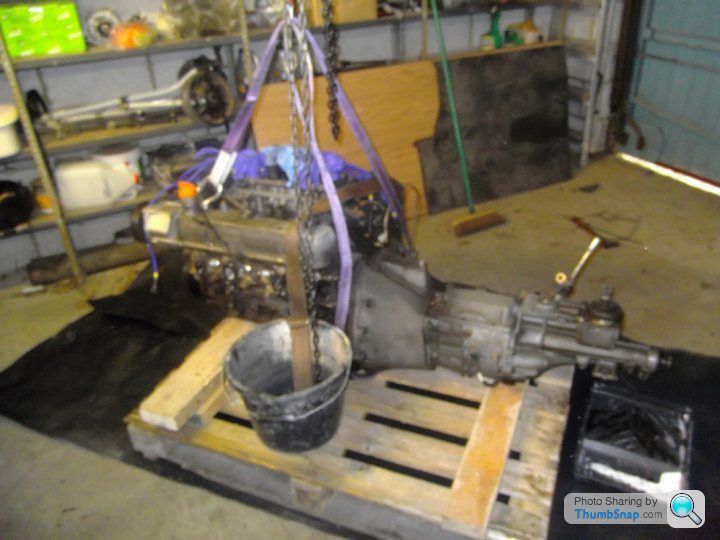
As an added bonus, we got the engine and Box out as well
And just for good measure, it all still fits in the garage.

I will examine the Chassis next weekend and update further
An excellent days work today
First problem was to sort out the rear chassis bolt that had sheared, fortunately there was a shim between the body and the chassis which, when removed, allowed me room to hacksaw through the sheared bolt.
Unfortunately I damaged the GRP when trying to ease the body past the LH outboard seat belt bolt. The GRP was very thin there - fortunately this fixing is for the belt not the body.
Once that was done and my "Lift Team" appeared, it was very straight forward and Ta Da!
As an added bonus, we got the engine and Box out as well
And just for good measure, it all still fits in the garage.
I will examine the Chassis next weekend and update further

 superb.
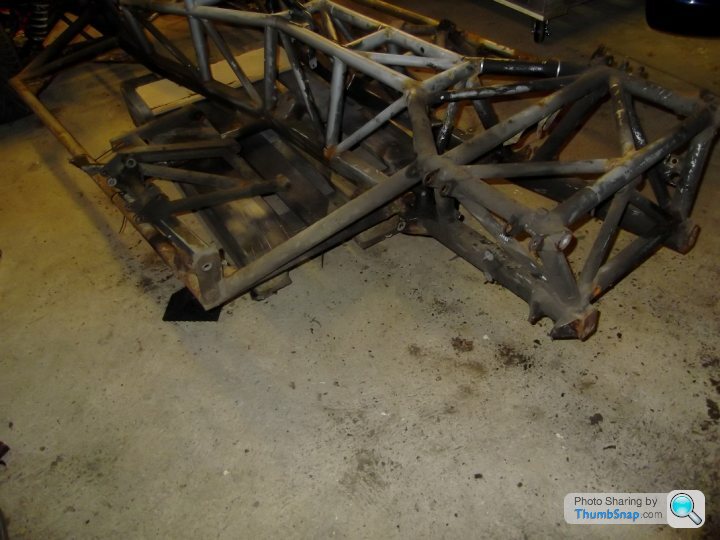
The chassis is going to Engineer 1949 for him to work his magic. At first glance both the forward outboard corners of the outriggers are shot and the driver's rear belt mount bracket (in the rear wheelarch) is wafer thin and easily bent by hand 
Next weekend, first job is to make up a dolly to sit the engine and 'box on - single pallet with castors.
Next weekend, first job is to make up a dolly to sit the engine and 'box on - single pallet with castors.
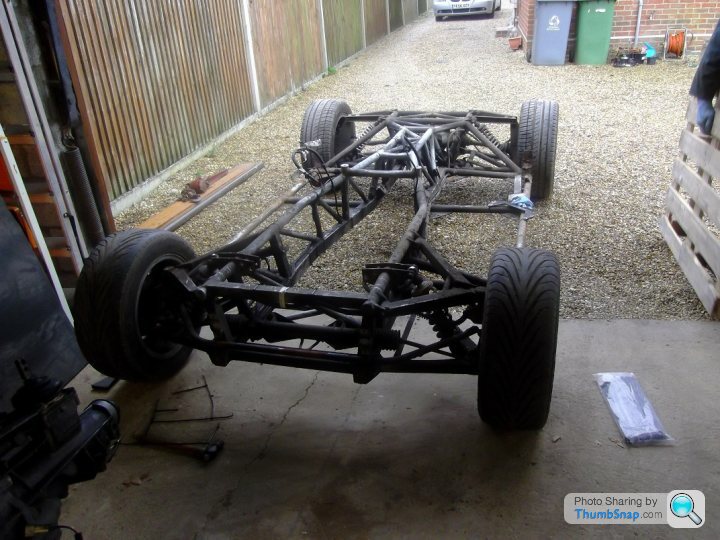
Right, today's update. Basically I stripped all the rear end.
From this:
to this:
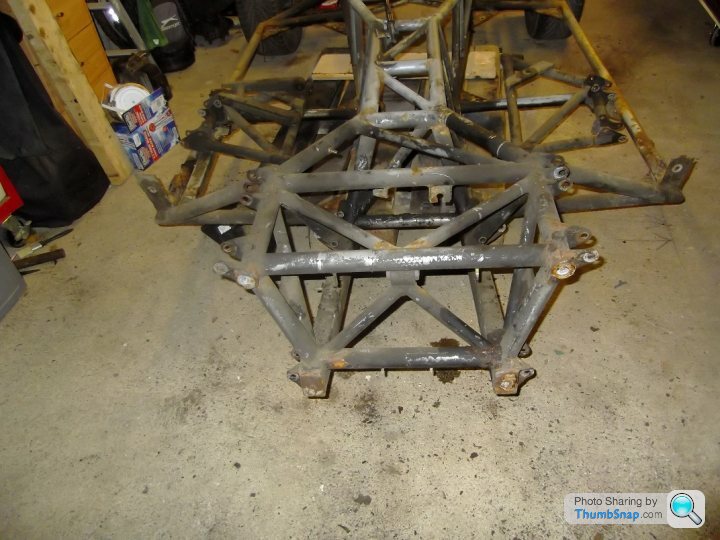

Not a lot to say as it was a lot of tie wraps and nuts & bolts to remove.
All the rear suspension is stripped down, including the toe adjusters. An odd thing was that both the upper wishbones had a polybush at the front and metalastic at the rear.
Jobs for tomorrow are strip front end of the chassis, remove bushes if there's time.
From this:
to this:
Not a lot to say as it was a lot of tie wraps and nuts & bolts to remove.
All the rear suspension is stripped down, including the toe adjusters. An odd thing was that both the upper wishbones had a polybush at the front and metalastic at the rear.
Jobs for tomorrow are strip front end of the chassis, remove bushes if there's time.
shake n bake said:
From the pics the chassis looks pretty good, anything lurking?
The inside of both the front outboard corners of the outriggers are shot. The top rails under the manifolds look borderline. The rear end of the right hand lower chassis rail looks ropey as well.
Both of the rear seat belt mounting brackets are shot.
I still haven't had a proper look over it yet either.
Gassing Station | Chimaera | Top of Page | What's New | My Stuff