J400 GED Chimaera Chassis refurb
Discussion


Chassis being collected next Friday to go for refurb. Looks like complete outriggers, chassis upper rail from behind the front upper dampaer mounts back to just before the bend in the top rail and a new plate on the rear of the left hand lower rail.
Then hot zinc spray and 2 part epoxy paint in white.
Once the chassis is gone, it's time to look at the engine. Current jobs list is check the state of wear of the clutch and the cam and replace the water pump.
Then hot zinc spray and 2 part epoxy paint in white.
Once the chassis is gone, it's time to look at the engine. Current jobs list is check the state of wear of the clutch and the cam and replace the water pump.

 ed!
ed! I got a couple of quotes for the expected work - e.g. outriggers and top rail under the exhaust manifolds. They were very close to each other on price, so I had to consider logistics and based my decision on the below:
RT Racing = 147 miles.
Southways = 218 miles.
Brundall Motorsport - 17 miles.

RT Racing = 147 miles.
Southways = 218 miles.
Brundall Motorsport - 17 miles.
With the chassis out of the way, spent the last couple of days cleaning and painting. 
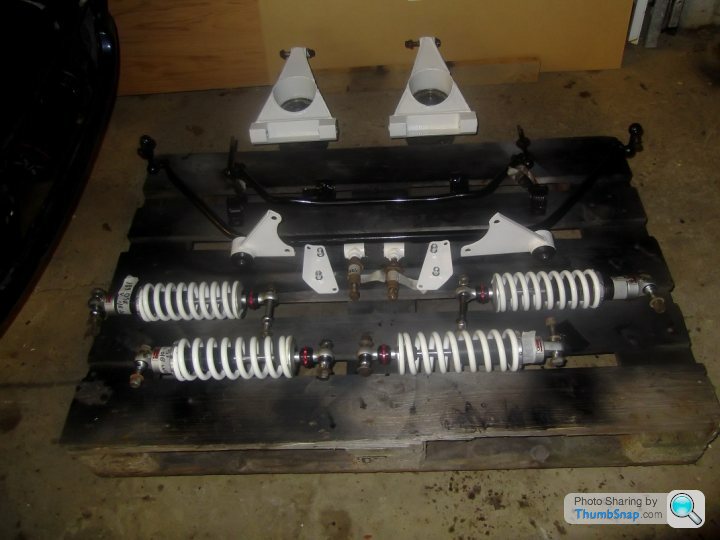
I also actually fitted some new bushes ready for the rebuild.
Next weekend's jobs are:
Replace the Diff nose seal.
Clean up and paint the driveshafts.
Re-pack the CV joints and fit new gaiters.
Then it's on to the engine and gearbox.
I also actually fitted some new bushes ready for the rebuild.
Next weekend's jobs are:
Replace the Diff nose seal.
Clean up and paint the driveshafts.
Re-pack the CV joints and fit new gaiters.
Then it's on to the engine and gearbox.
J400GED said:
With the chassis out of the way, spent the last couple of days cleaning and painting.
I also actually fitted some new bushes ready for the rebuild.
Next weekend's jobs are:
Replace the Diff nose seal.
Clean up and paint the driveshafts.
Re-pack the CV joints and fit new gaiters.
Then it's on to the engine and gearbox.
Good job there! That price was from someone I know yes, but I had to buy the riggers first. This was just the work... still not a bad price. Two full days of work!I also actually fitted some new bushes ready for the rebuild.
Next weekend's jobs are:
Replace the Diff nose seal.
Clean up and paint the driveshafts.
Re-pack the CV joints and fit new gaiters.
Then it's on to the engine and gearbox.
Today's jobs were replace the Diff nose (input) seal and paint the driveshafts ready for repacking and new gaiters.
First up the Diff nose seal.
Step 1: Mark the nut, shaft and propshaft flange - so you know where the nut should be tightened to on re-assembly.
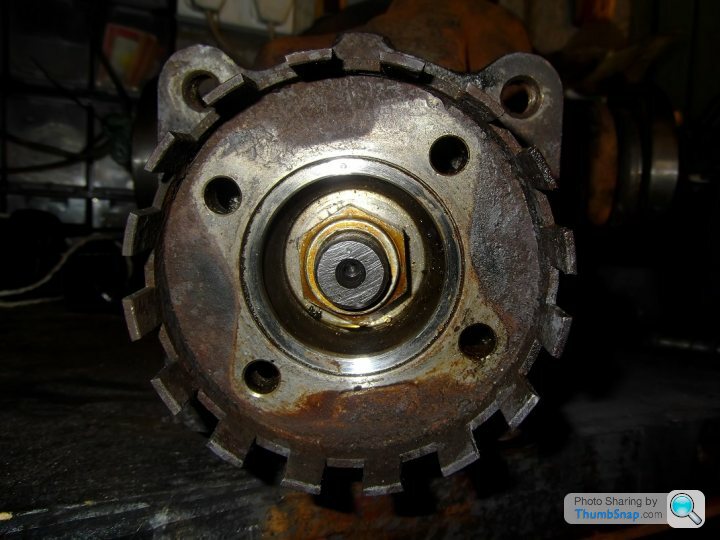
Step 2: As belt and braces, I also measured the distance from the front face of the input shaft to the front face of the nut as well as counting the number of threads visible.
Step 3: Mark up the socket with which you undo the nut - to make it easier to count the number of turns required to remove the nut.

Step 3: Remove the nut - IMPORTANT count the number of turns it requires to remove the nut and write it down.
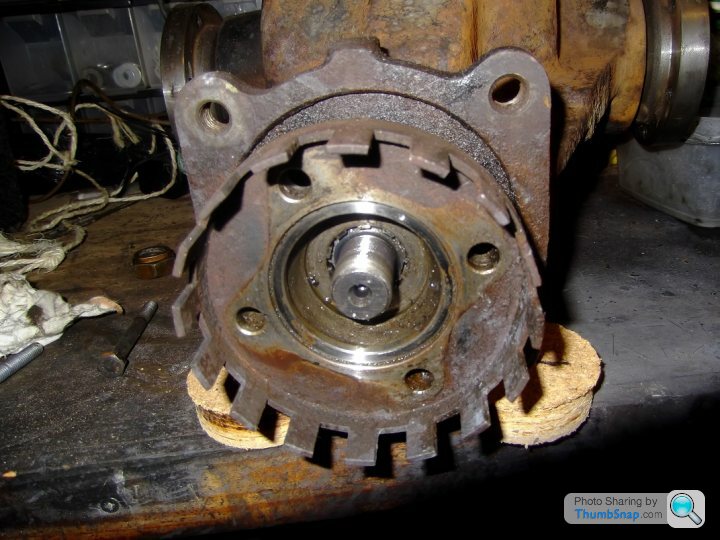
Step 4: Remove the driveshaft flange - mine came off easily, although I have heard tell of people requiring a puller to remove it.
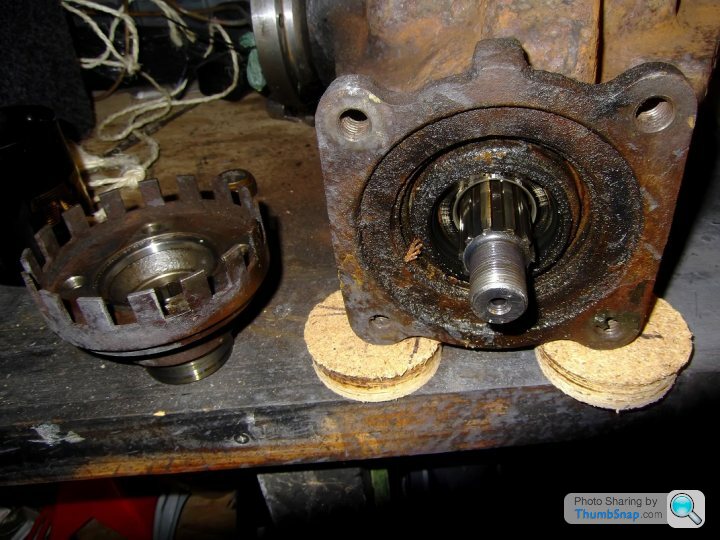
Step 5: Clean up the old seal as much as possible prior to removing it, to avoid any dirt getting into the diff.
Step 6: Remove the old seal, noting it's orientation ready for fitting the new seal.
Step 7: Fit new seal. I gently tapped mine in using an old bearing outer race which sat nicely onto the new seal body (metal part, not the rubber part). I could tell when it was seated correctly as the sound of the hammer taps changed - you'll recognise it when you hear it.

Step 8: Refit the nut, counting the number of turns as you go. This is where the marks in step 1 come into play. Tighten the nut until the marks line up exactly as they were when you started, if you have done this with the correct number of turns then the load on the input shaft is the same as before.

Trust me, the marks do line up as before, it's an optical illusion because the pic was taken from a different angle.
Job done!
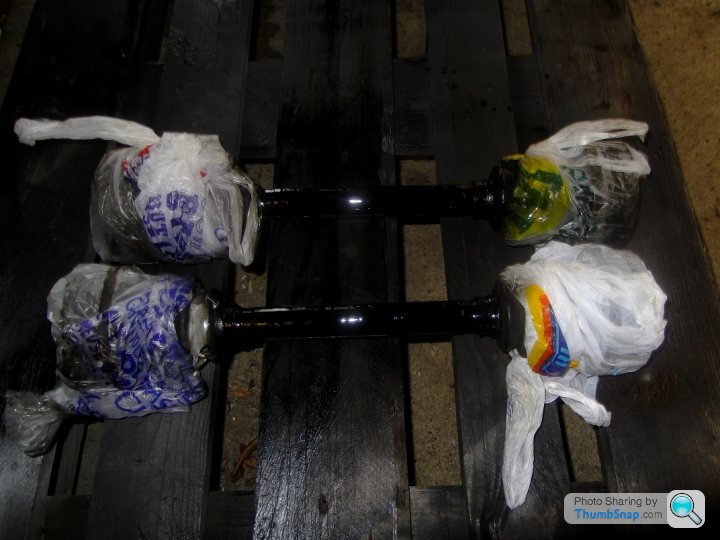
Then I painted the drive shafts ready for re-packing and new gaiters.
Now it's time to go to the Driving Range
First up the Diff nose seal.
Step 1: Mark the nut, shaft and propshaft flange - so you know where the nut should be tightened to on re-assembly.
Step 2: As belt and braces, I also measured the distance from the front face of the input shaft to the front face of the nut as well as counting the number of threads visible.
Step 3: Mark up the socket with which you undo the nut - to make it easier to count the number of turns required to remove the nut.
Step 3: Remove the nut - IMPORTANT count the number of turns it requires to remove the nut and write it down.
Step 4: Remove the driveshaft flange - mine came off easily, although I have heard tell of people requiring a puller to remove it.
Step 5: Clean up the old seal as much as possible prior to removing it, to avoid any dirt getting into the diff.
Step 6: Remove the old seal, noting it's orientation ready for fitting the new seal.
Step 7: Fit new seal. I gently tapped mine in using an old bearing outer race which sat nicely onto the new seal body (metal part, not the rubber part). I could tell when it was seated correctly as the sound of the hammer taps changed - you'll recognise it when you hear it.
Step 8: Refit the nut, counting the number of turns as you go. This is where the marks in step 1 come into play. Tighten the nut until the marks line up exactly as they were when you started, if you have done this with the correct number of turns then the load on the input shaft is the same as before.
Trust me, the marks do line up as before, it's an optical illusion because the pic was taken from a different angle.
Job done!
Then I painted the drive shafts ready for re-packing and new gaiters.
Now it's time to go to the Driving Range
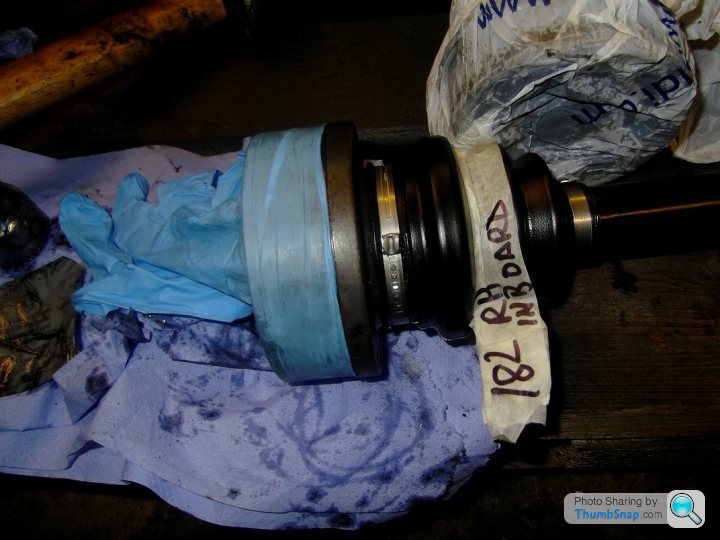
Following in on from Friday, I've now stripped inspected and re-packed the driveshaft CV joints with new grease and fitted new gaiters.
Here is the process I used:
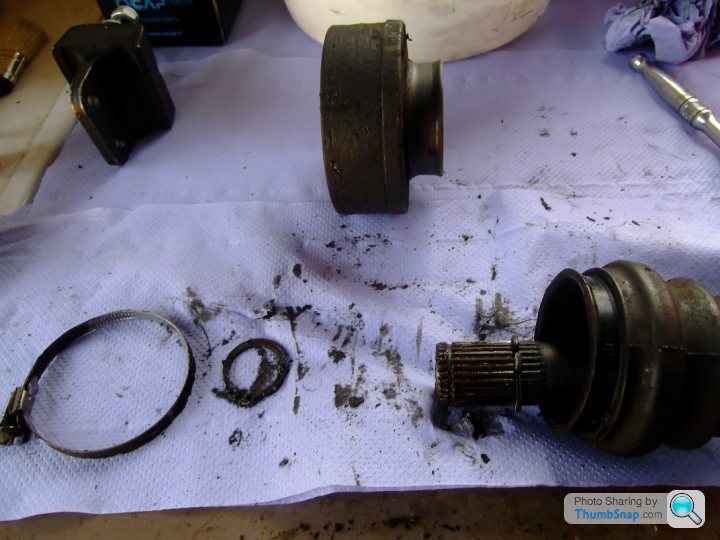
Step 1. Remove the gaiter clips.
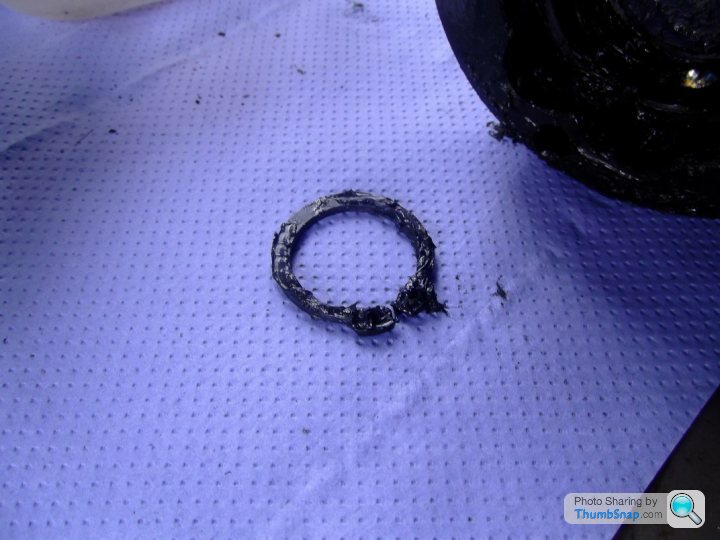
Step 2. Remove the outer circlip.

It's in there somewhere.
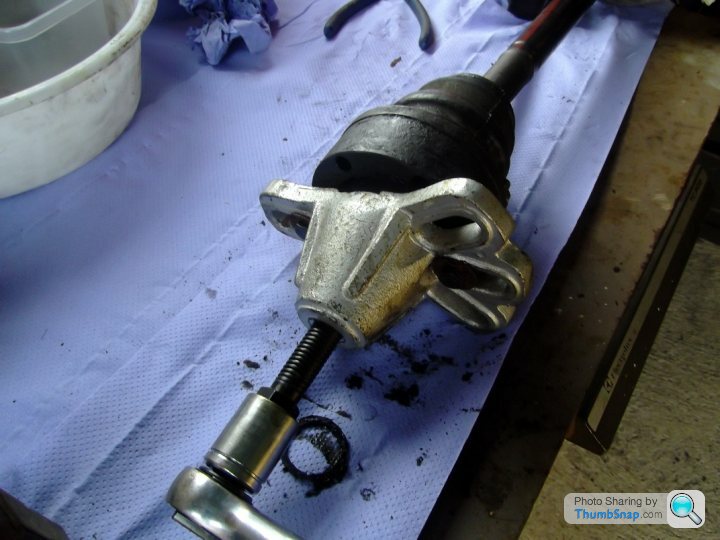
Step 3. Remove the cv joint from the driveshaft. As you can see, I used a hub puller.
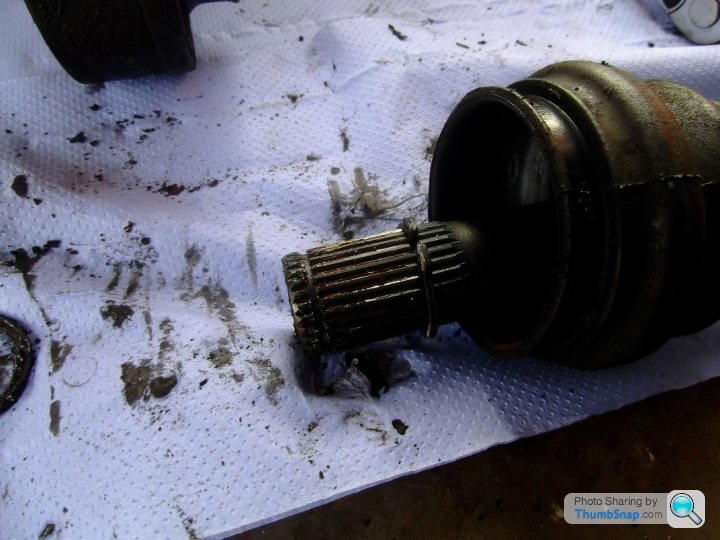
Step 4. Remove inner circlip, inspect and clean the shaft splines then fit new gaiter and refit the circlip.
Step 5. Note the orientation of the inner race. Mine have a groove on the rear face (inboard to the driveshaft) and the thin point on the inner race points towards the wide portion of the outer race.
See pics.
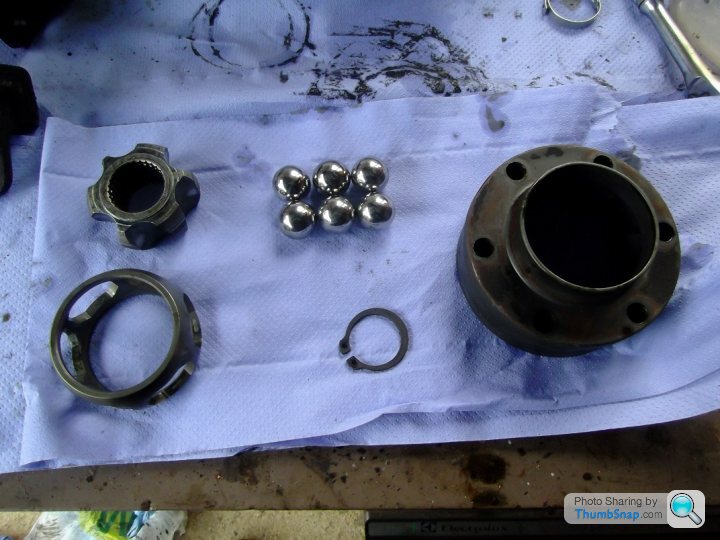
I also noted the orientation of the cage relative to the inner race.
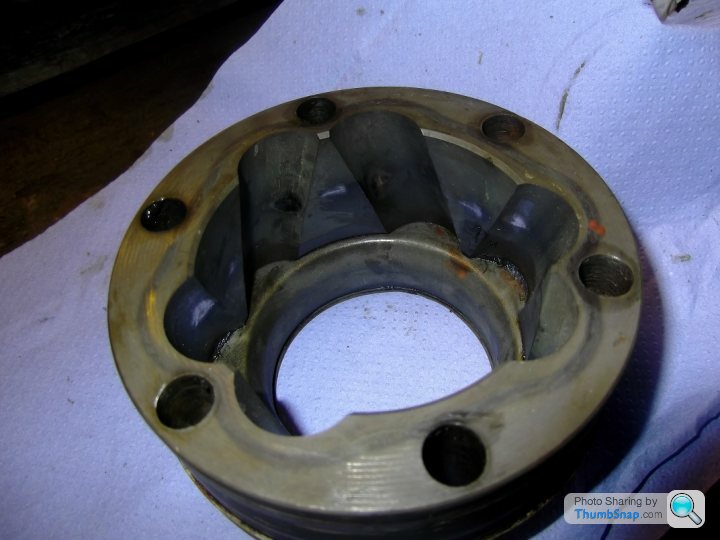
Step 6. Dismantle the race, cage and bearings. You have to rotate the cage until a bearing can be popped out.
Step 7. Clean all components. I used white spirit and a brush.
Step 8. Inspect all parts. I found witness marks (shiny bits in above pic) but no chunks missing or scores or pitting. Note: the flash on the camera has accentuated the shiny bits above.
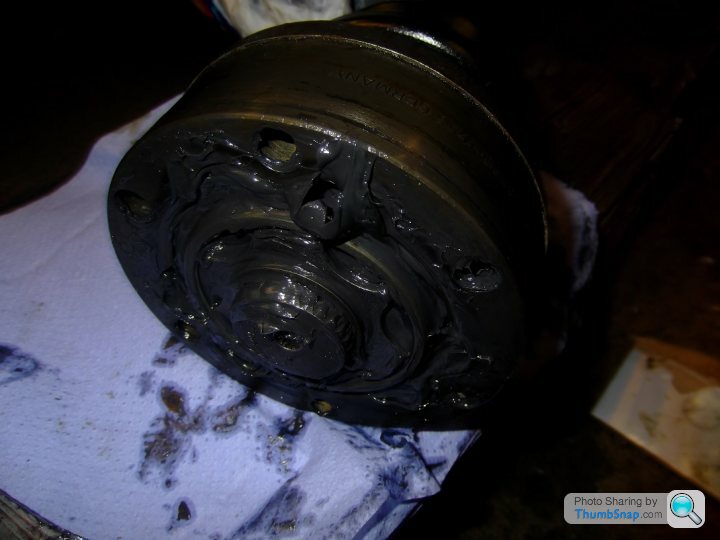
Step 9. Apply new grease and rebuild the cage and races, working the grease in as best you can.
Step 10. Refit CV to Drive shaft. I used a suitable socket and hammer to drift it on, standing the driveshaft upright but standing on cardboard.
Step 11. Refit outer circlip.
Step 12. Push gaiter over CV joint collar and refit/replace gaiter clips.

Step 13. Add some rubber protection.
Step 14. Do the other three.
Here is the process I used:
Step 1. Remove the gaiter clips.
Step 2. Remove the outer circlip.
It's in there somewhere.
Step 3. Remove the cv joint from the driveshaft. As you can see, I used a hub puller.
Step 4. Remove inner circlip, inspect and clean the shaft splines then fit new gaiter and refit the circlip.
Step 5. Note the orientation of the inner race. Mine have a groove on the rear face (inboard to the driveshaft) and the thin point on the inner race points towards the wide portion of the outer race.
See pics.
I also noted the orientation of the cage relative to the inner race.
Step 6. Dismantle the race, cage and bearings. You have to rotate the cage until a bearing can be popped out.
Step 7. Clean all components. I used white spirit and a brush.
Step 8. Inspect all parts. I found witness marks (shiny bits in above pic) but no chunks missing or scores or pitting. Note: the flash on the camera has accentuated the shiny bits above.
Step 9. Apply new grease and rebuild the cage and races, working the grease in as best you can.
Step 10. Refit CV to Drive shaft. I used a suitable socket and hammer to drift it on, standing the driveshaft upright but standing on cardboard.
Step 11. Refit outer circlip.
Step 12. Push gaiter over CV joint collar and refit/replace gaiter clips.
Step 13. Add some rubber protection.
Step 14. Do the other three.

 Way behind you and Cokes now. Been out for over 3 weeks....
 Gassing Station | Chimaera | Top of Page | What's New | My Stuff