Surrey Roof improvements - Part II
Discussion


Following on from the 'Surrey Roof improvements' topic
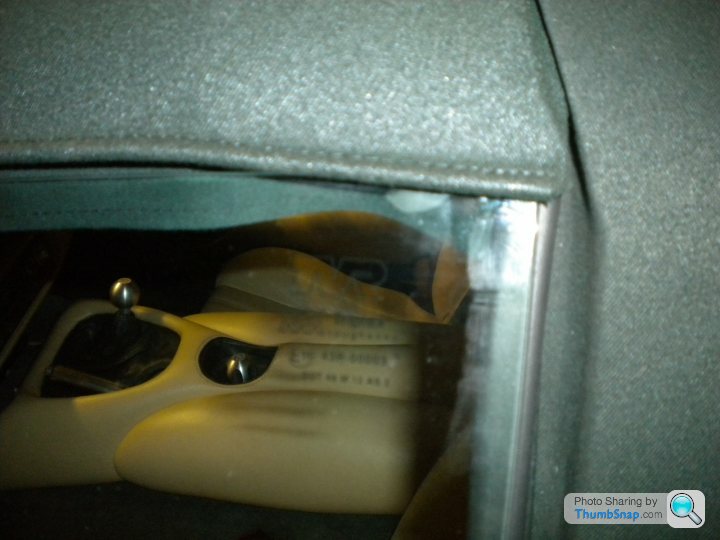
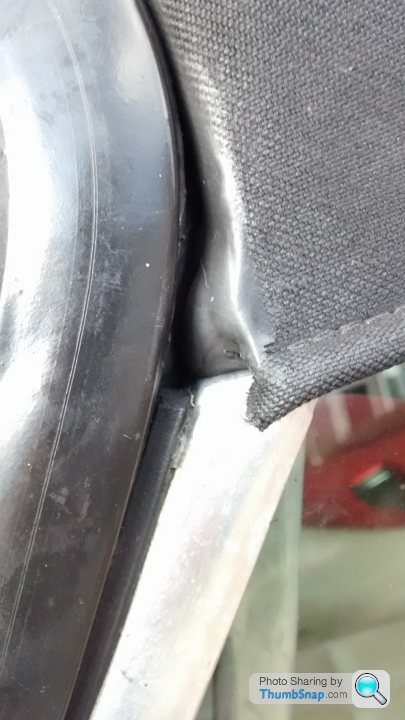
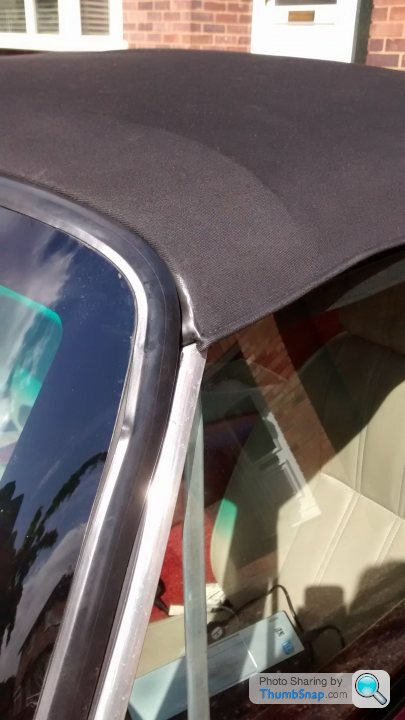
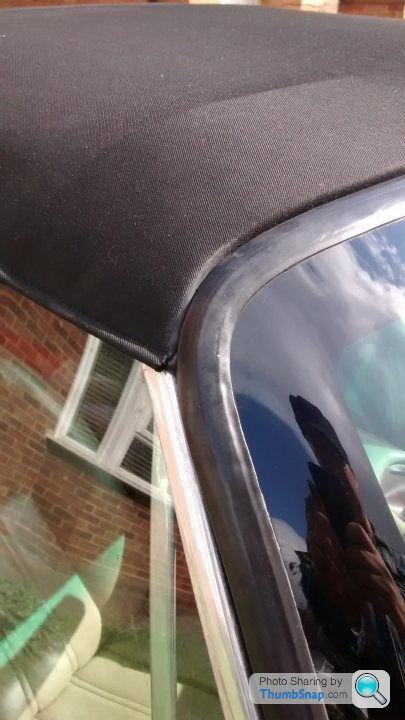
The replacement swing-eye bolts as explained in the previous topic have worked perfectly but there is still a natural angle that forms between the rear section and the main roof. This causes the window flap to twist and deform. A great pity this wasn't designed better in the first place but there is a simple fix to make the flap lie flat to the side windows.

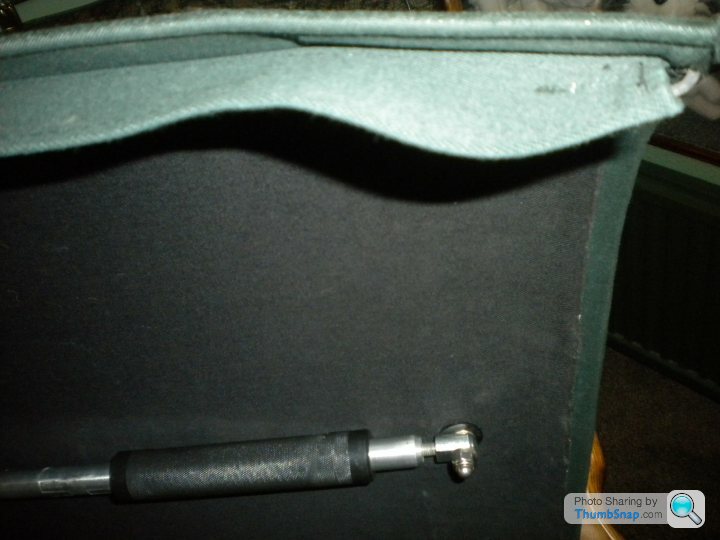
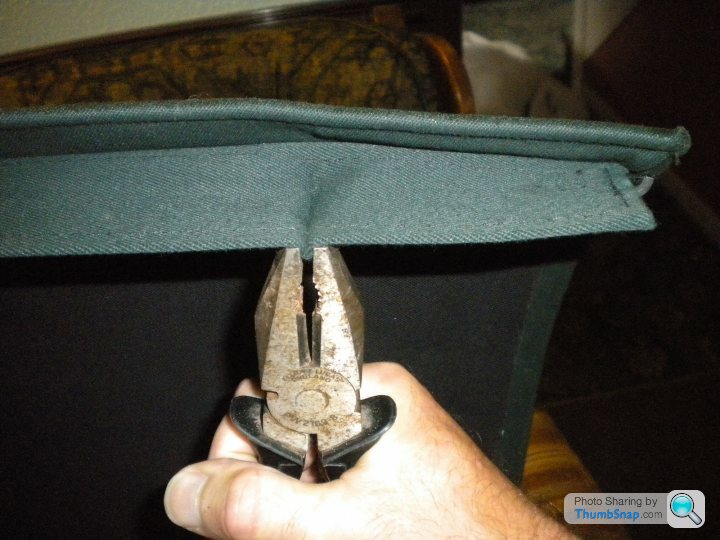
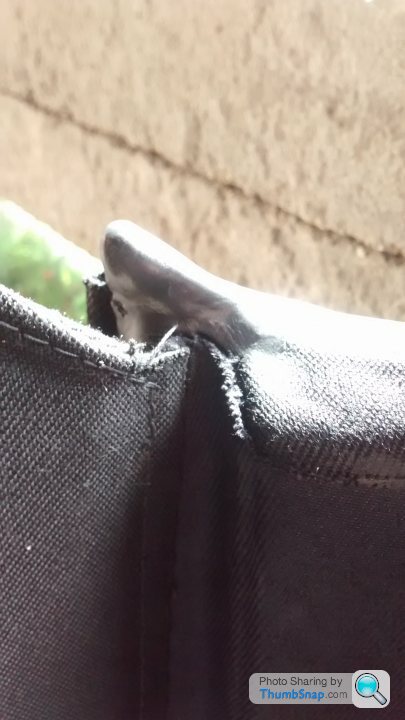
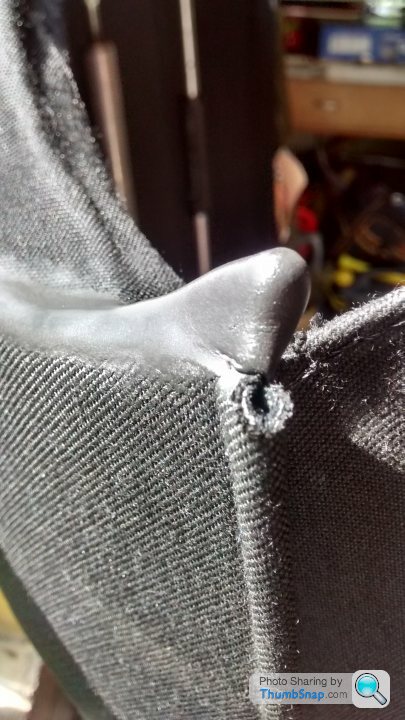
The annoying window flap twist can easily be pulled flat but securing it in this position is not easy. I first tried to stitch it with twine but this didn't have the strength to hold it firm so I resorted to a small tie-wrap which easily holds the required crease in place.
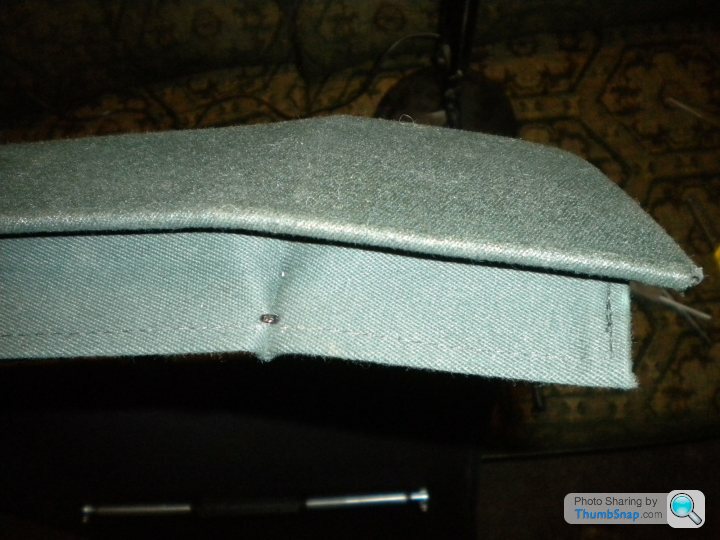
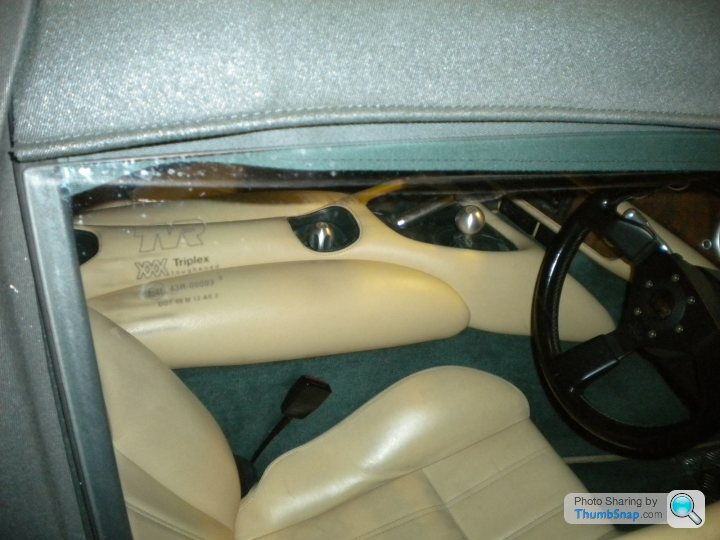
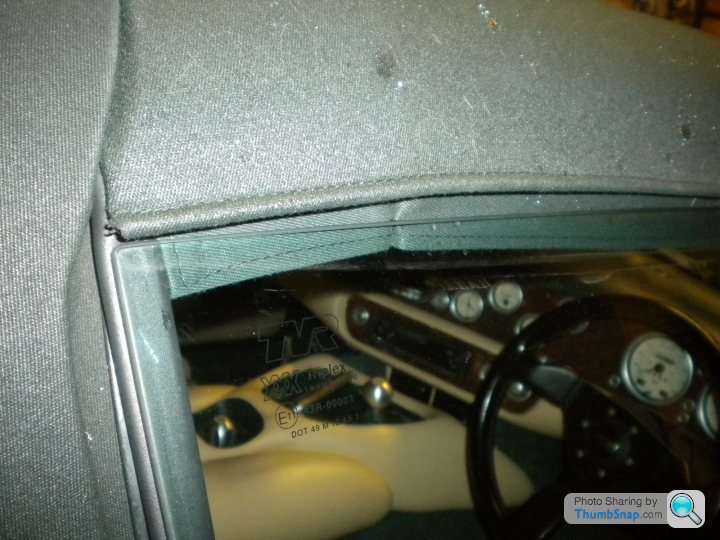
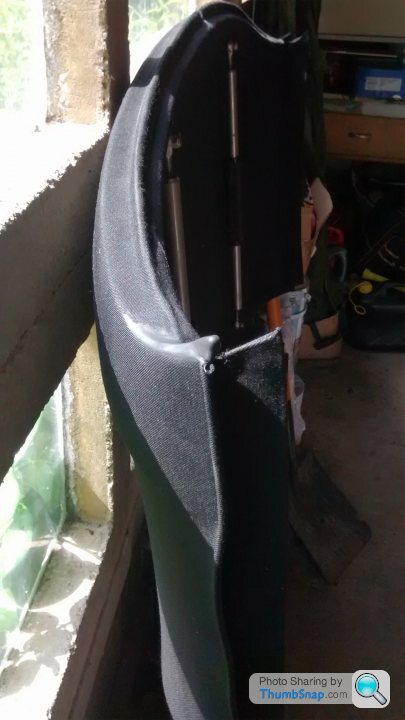
I followed with a hot steam iron to flatten out the remaining twists and refitted the roof panel. As shown, the flap now sits flat onto the side windows

The replacement swing-eye bolts as explained in the previous topic have worked perfectly but there is still a natural angle that forms between the rear section and the main roof. This causes the window flap to twist and deform. A great pity this wasn't designed better in the first place but there is a simple fix to make the flap lie flat to the side windows.
The annoying window flap twist can easily be pulled flat but securing it in this position is not easy. I first tried to stitch it with twine but this didn't have the strength to hold it firm so I resorted to a small tie-wrap which easily holds the required crease in place.
I followed with a hot steam iron to flatten out the remaining twists and refitted the roof panel. As shown, the flap now sits flat onto the side windows
mk1fan said:
The shortest distance etc........
I meant to post it on the other thread but I think the flaps need to go outside the window, not inside. That said, this little tweak would help that too.
I wonder if the manufacturer is watching?
Definitely inside! The flaps aren't far enough out to sit neatly outside. I do know someone who pulls them outside if he's parked up and it's raining I meant to post it on the other thread but I think the flaps need to go outside the window, not inside. That said, this little tweak would help that too.
I wonder if the manufacturer is watching?
My opinion is that the flaps can go either inside or outside depending upon your own requirements.
When motoring on the likes of motorways its handy to allow the flaps to be on the outside. This allows some air flow in the cab.
When its raining, the flaps can be on the inside, thus allowing the water to run down the windows and maintain the cab as watertight.
My own roof is a good fit, and has not been tweeked.
mk1fan said:
Curious, I find it quieter and better weatherproofed with the flaps out.
I don't own a Surrey Roof so cannot comment on experience, but without some sort of rubber seal pressed against the window top would not the water simply run off the roof and onto the roof underside and bead down between the flap which is positioned on the inside of the window and the inside and the glass, as it is not sealed?portzi said:
mk1fan said:
Curious, I find it quieter and better weatherproofed with the flaps out.
I don't own a Surrey Roof so cannot comment on experience, but without some sort of rubber seal pressed against the window top would not the water simply run off the roof and onto the roof underside and bead down between the flap which is positioned on the inside of the window and the inside and the glass, as it is not sealed?Does that make some sort of befuddled sense ??
portzi said:
I don't own a Surrey Roof so cannot comment on experience, but without some sort of rubber seal pressed against the window top would not the water simply run off the roof and onto the roof underside and bead down between the flap which is positioned on the inside of the window and the inside and the glass, as it is not sealed?
The roof has a 'drip lip' so rain drips off the roof about 10mm beyond the glass surface. I've only had mine since December but it has been out in hard rain a couple of times without any water ingress and with flaps inside both driving and parkedbobfather said:
portzi said:
I don't own a Surrey Roof so cannot comment on experience, but without some sort of rubber seal pressed against the window top would not the water simply run off the roof and onto the roof underside and bead down between the flap which is positioned on the inside of the window and the inside and the glass, as it is not sealed?
The roof has a 'drip lip' so rain drips off the roof about 10mm beyond the glass surface. I've only had mine since December but it has been out in hard rain a couple of times without any water ingress and with flaps inside both driving and parked
ray von said:
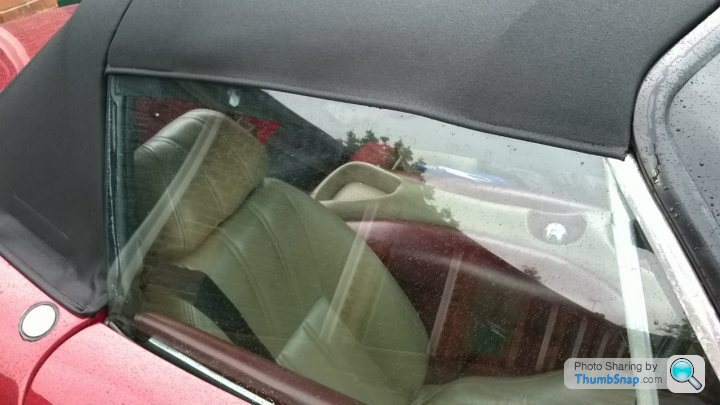
In the picture of the passenger side, how does the window get under the 'lip' when you close the door? It looks too high.
Yes, I spotted that and went back to look, it looks worse in the picture but it is still higher than the drip lip at the very back. The top of the window relaxes inwards a few mm as the door opens and that lowers the height plenty to get under the lip.ETA it was quickly refitted for the photos so it may not be evenly positioned
Edited by bobfather on Thursday 25th August 14:00

Mine doesn't leak at all, TBH I've only ever used the Surrey top in "flaps in" mode as it seems clear to me its designed to work that way.

Up close and being fussy there are quite a few areas that could fit a bit better but compared with others I've seen I got one of the better fits and given the nature of Chimaera build dimension variables I think it's an acceptable effort.
On my car its the header rail profile that proved the poorest fit, while surprisingly it didn't really let water in when sat inside the car you could see daylight in both corners.
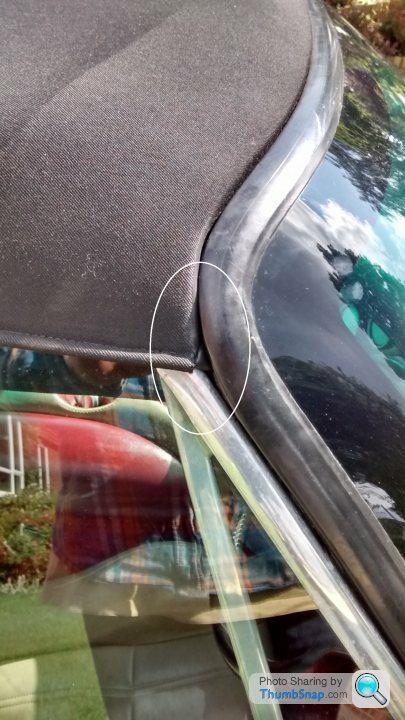
My solution was to build up the corner profiles using a fantastic and very adaptable substance called Sugru.
https://www.youtube.com/watch?v=8fOSo_EN-y4
If you look closely you can just see I'd started to build it up in the above image.
Available in many colours I obviously chose black and soon found the stuff to be very easy to work, it doesn't go off for a good 12 hours so you have lots of time to shape it.

Sugru also allows you to smooth it to a very nice finish and it's mat black colour makes it very unobtrusive against booth the mohair Surrey top material and the rubber windscreen surround.
You can now see I've really started to build it up here, my profiling work is not finished but hopefully shows once it's gone off you end up with something very much like a durable OEM professionally moulded silicone rubber component.
Sugro also sticks like ship to a blanket, this allows it to adhere really well to the corners of the mohair covered header rail and I can confirm it stays stuck too, I built it up over time, if you're not happy with your first attempt it will stick to itself even after the first application has set so you can just keep (invisibly) adding more until the profile is a perfect to your car.
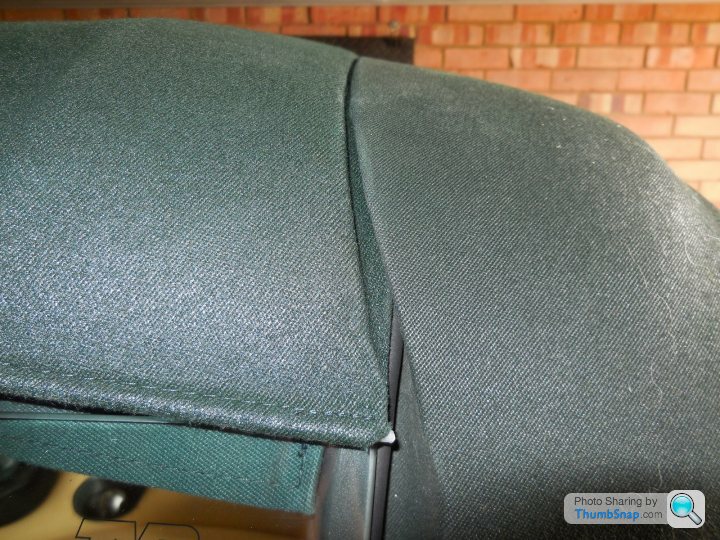
Here are some more images to give you an idea of the corner profiles being built up with the Surrey top off the car:
And here's what I ended up with:
Finally here's the fit to the car:
Actually it looks better that the above now as I've done some more profile work since these photos were taken, quite a bit of the new Sugru material is completely hidden under the screen surround, it creates an excellent seal against the rubber screen seal and you don't really notice the work unless you're looking for it, a casual observer would definitely pass it by.
Wind noise is reduced, the daylight showing gaps are gone and the new Sugro profile helps lift the Surrey top header rail for a better window to drip rail fit too. My Surrey top has gone from fitting acceptably... to a greatly improved fit without the new profile work standing out at all.
Sugru is fantastic stuff, it's not cheap but it goes a lot further than you think, I spent less that £10 doing this header rail profiling work and am extremely happy with the results, the experiment was a great success so well worth the small amount of money I invested.
As it turns out Sugru is a very satisfying substance to work with that in this application gives excellent results
Recommended
Up close and being fussy there are quite a few areas that could fit a bit better but compared with others I've seen I got one of the better fits and given the nature of Chimaera build dimension variables I think it's an acceptable effort.
On my car its the header rail profile that proved the poorest fit, while surprisingly it didn't really let water in when sat inside the car you could see daylight in both corners.
My solution was to build up the corner profiles using a fantastic and very adaptable substance called Sugru.
https://www.youtube.com/watch?v=8fOSo_EN-y4
If you look closely you can just see I'd started to build it up in the above image.
Available in many colours I obviously chose black and soon found the stuff to be very easy to work, it doesn't go off for a good 12 hours so you have lots of time to shape it.
Sugru also allows you to smooth it to a very nice finish and it's mat black colour makes it very unobtrusive against booth the mohair Surrey top material and the rubber windscreen surround.
You can now see I've really started to build it up here, my profiling work is not finished but hopefully shows once it's gone off you end up with something very much like a durable OEM professionally moulded silicone rubber component.
Sugro also sticks like ship to a blanket, this allows it to adhere really well to the corners of the mohair covered header rail and I can confirm it stays stuck too, I built it up over time, if you're not happy with your first attempt it will stick to itself even after the first application has set so you can just keep (invisibly) adding more until the profile is a perfect to your car.
Here are some more images to give you an idea of the corner profiles being built up with the Surrey top off the car:
And here's what I ended up with:
Finally here's the fit to the car:
Actually it looks better that the above now as I've done some more profile work since these photos were taken, quite a bit of the new Sugru material is completely hidden under the screen surround, it creates an excellent seal against the rubber screen seal and you don't really notice the work unless you're looking for it, a casual observer would definitely pass it by.
Wind noise is reduced, the daylight showing gaps are gone and the new Sugro profile helps lift the Surrey top header rail for a better window to drip rail fit too. My Surrey top has gone from fitting acceptably... to a greatly improved fit without the new profile work standing out at all.
Sugru is fantastic stuff, it's not cheap but it goes a lot further than you think, I spent less that £10 doing this header rail profiling work and am extremely happy with the results, the experiment was a great success so well worth the small amount of money I invested.
As it turns out Sugru is a very satisfying substance to work with that in this application gives excellent results
Recommended
^^Nice solution^^
I can see from your roof that the orientation that the fabric is bonded onto the rear hard section is flat, that'll mean tightening the stretcher bars will push it home. My fabric is glued on with the rear section twisted up-over so my roof could never sit properly into the rear gutter and tightening the stretchers only pushes it up, opening the gaps further. Hence my addition of swing-eyes rather than the rose joints
It's a pity Roger can't get consistency into the build process
bobfather said:
^^Nice solution^^
I can see from your roof that the orientation that the fabric is bonded onto the rear hard section is flat, that'll mean tightening the stretcher bars will push it home. My fabric is glued on with the rear section twisted up-over so my roof could never sit properly into the rear gutter and tightening the stretchers only pushes it up, opening the gaps further. Hence my addition of swing-eyes rather than the rose joints
It's a pity Roger can't get consistency into the build process
Agreed mate, not sure why mine is different unless Roger had improved the design by the time his trimmer made mine?I can see from your roof that the orientation that the fabric is bonded onto the rear hard section is flat, that'll mean tightening the stretcher bars will push it home. My fabric is glued on with the rear section twisted up-over so my roof could never sit properly into the rear gutter and tightening the stretchers only pushes it up, opening the gaps further. Hence my addition of swing-eyes rather than the rose joints
It's a pity Roger can't get consistency into the build process
I did supply my own bolt of high quality German "Sonnenland" mohair from the same roll Dave The Trimmer cut and made my new rear section from, this was just to ensure both sections matched exactly (which they do) but I can't see it having a bearing on Rogers’ trimming process?
My inner flaps seem longer than yours too, they extend to the aluminum faux quarter lights that trap them neatly to the cars existing inner seal at that point, this holds the flaps in nicely and while better that the shorter inner flaps they do still bow a little bit.
My solution to the bowing inner flap takes a different approach to yours, I will shortly have Dave The Trimmer stitch a small pochet to each end of the flap to which will be inserted a flexible steel rule, by a happy coincidence I found just the right size for the job and with careful spacing of the little stitched pockets at each end I will be able to spring the flexible steel rule in place when fitting the Surrey top.
The steel rule idea is to create a flat stiffening bar that’s removable, being removable is obviously essential to allow the roof to concertina up as intended when you put it in the boot. With the rule fitted the inner flap will sit flat against the glass and the material will be unable to bow, fitting and removing the two rules will take seconds making it a flexible solution to the bowing flap.
Since the above photos were taken I've also built up the underside of the rear header lip to lift the N/S drip rail away from the very rear corner of the window at that side of the car only, this has worked nicely stopping the glass just catching drip rail at that point.
This Surrey top is an excellent idea and to be honest it's so good it's been the only roof system I've used (come rain or shine) since I purchased it, but like you I can see where there could be a few tweaks and improvements to the fit. In my case these are really only minor and to be expected as every Chimaera is dimensionally unique being a handmade car.
One thing is for sure, the Surrey top has proved a fantastic solution especially when switching between roof on and roof of touring in France with the boot full of luggage, so the small adjustments I've made to improve the fit to my car have been unquestionably worthwhile.
Try the Sugru stuff Bob, I bet you'll like it
Gassing Station | General TVR Stuff & Gossip | Top of Page | What's New | My Stuff