Mark 3 Headlamp conversion
Discussion


hi andy thanks again for taking the time to advise me on how to do it
i'll make contact with all the companies out there to see who can offer the best product/service for diy
fibreon as you said seem to be the main supplier of the pods so may be the most competitive
I thought the pods and lights were fitted first then the covers went on as a last job , but you made everything up including
the covers and then fitted the whole unit is this correct ?
did you have the clear lens or the smoked lens out of interest ?
cheers keith
Edited by PYNEY on Sunday 27th November 16:28
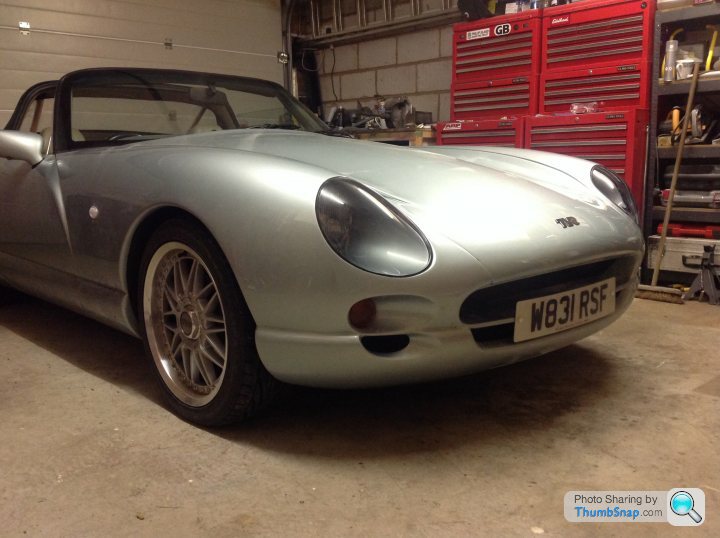
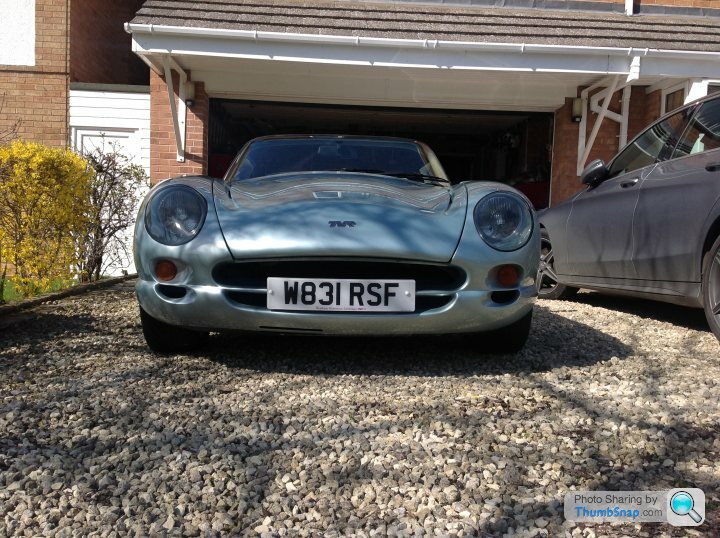
hi all
just wanted to share the outcome of my mk3 headlight conversion and hope it may
help others who want to have it done
I didn't diy fit in the end although i am handy I looked at the cost of having them made up and fitted
by someone that has done this before and for the cost it wasn't worth the agro going the diy route
and possibly making a mess of my p&j lol
light pods were purchased from central tvr as a made up unit and I had them fitted by a local bodywork shop local to me
Thank you to all the guys on this post that gave me good helpful advice "cheers"
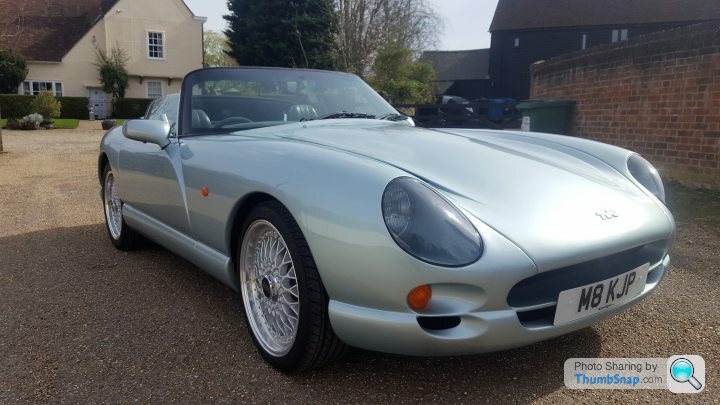
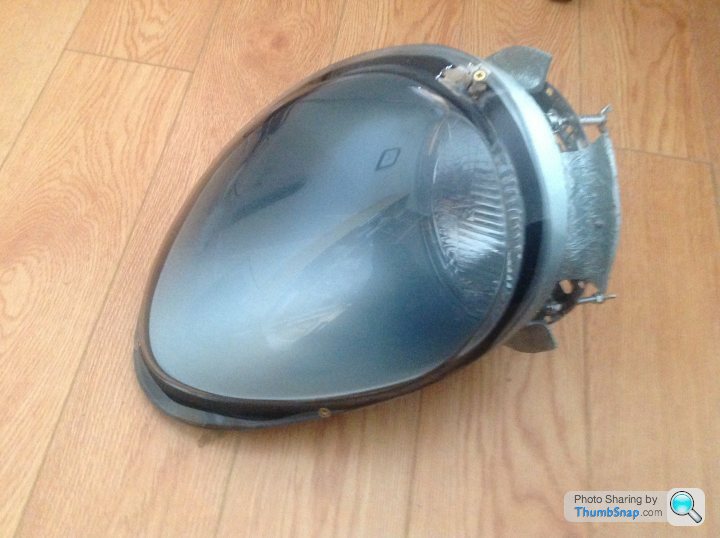
Another offering........just in the process of finishing my MK3 headlight conversion.
I got mine from Adrian at Central TVR, he's not too far away so popped over to pick them up and had the chance to look at a couple of cars being done there.
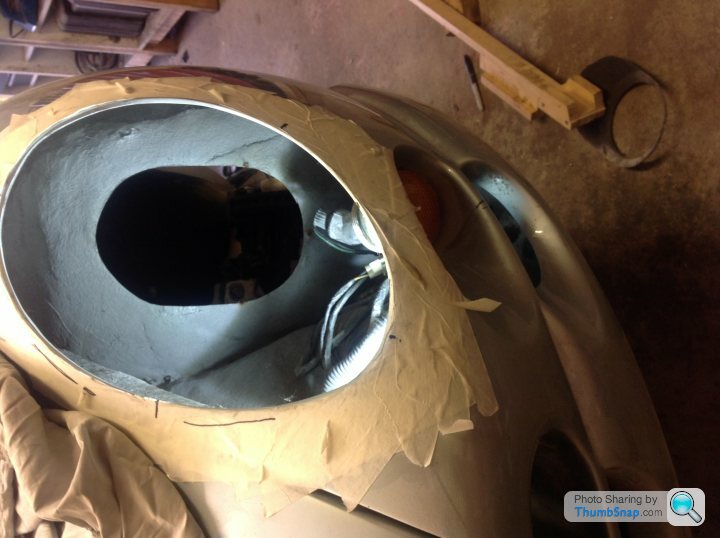
First you need to mark out where you need to cut ........then psych your self up to make that first cut. I found I needed to leave more material at the bottom of the aperture than at the sides an top.
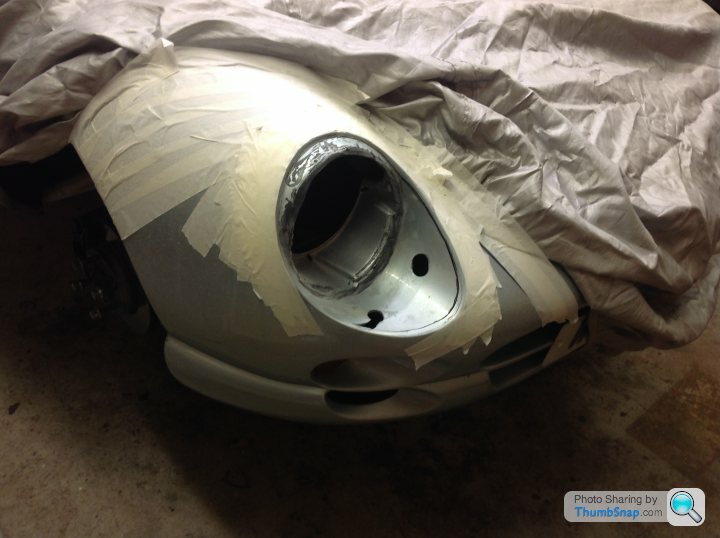
I used an air saw to cut the old bowl out, think you might struggle with a standard electric jig saw. Need to be careful not to damage the paint, particularly around the rim as this is visible when completed. Part of the edge was very porous and was literally just gel coat, I had to do a local repair. I found the thickness of the headlight appeture ranged from about 12mm thick to virtually nothing. The aim is to grind the fibreglass down to a thickness of about 3-4mm which ensures you don't end up with a thick Sikoflex bead between the lens and body.
Best idea is to leave a bit to grind away an area, test the fit, grind some more...test etc. As I said previously I found you needed to leave a bit more of the aperture lip on the leading (bottom edge). Hopefully you can see this on this photo plus where the fibreglass was porous.
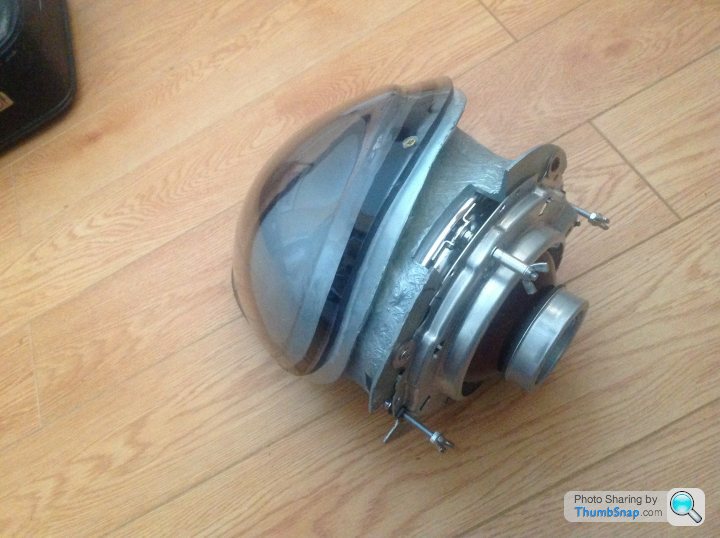
I modified the headlamp adjusters, the originals adjust from the front which is obviously no longer accessible, Central had slotted the other end of the adjusting screws, but it was difficult and fiddly to adjust as there's not much room to get a screwdriver in there without making the access hatch excessively large.
I used a selection of M5 screws, washers, nuts and wingnuts using some loctite and a lock nut with the wing nuts.
I slightly enlarged the wheelarch acces panels.
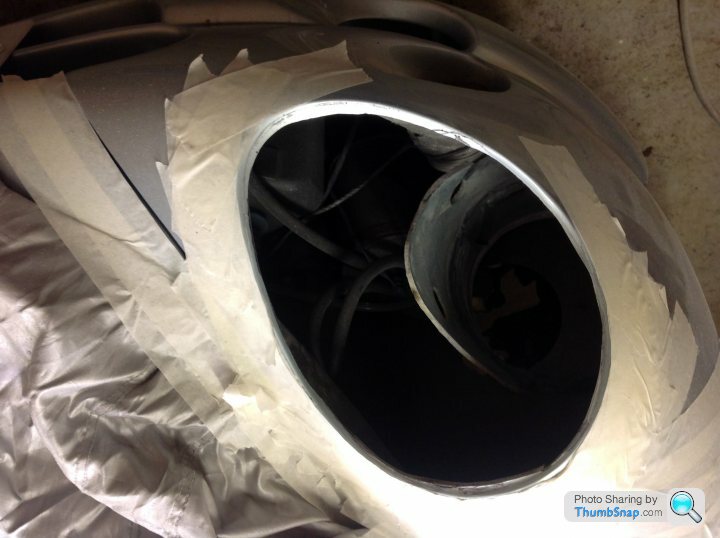
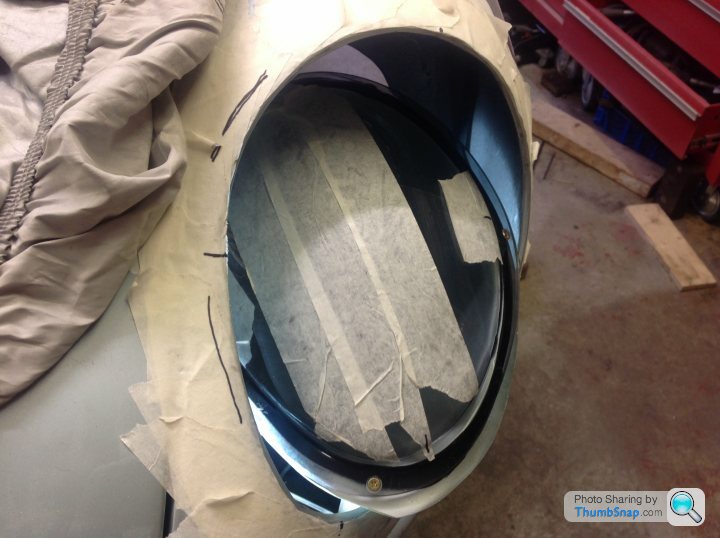
When trial fitting the headlight put some masking tape to protect the lens as its quite a tight fit to ease the unit in....
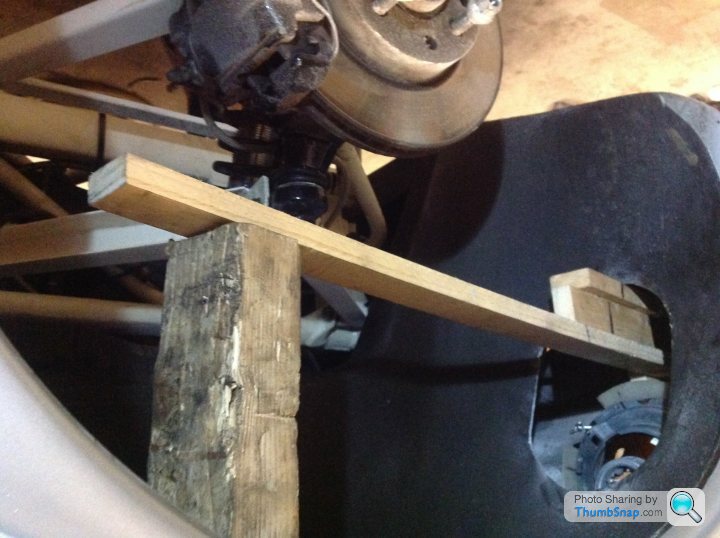
A good Heath Robinson solution to holding the unit in place when gluing in place with Sikaflex. Sorry photo upside down...Apple!!
Still a bit of finishing to do, but here is the results so far. Cheers Pete
I got mine from Adrian at Central TVR, he's not too far away so popped over to pick them up and had the chance to look at a couple of cars being done there.
First you need to mark out where you need to cut ........then psych your self up to make that first cut. I found I needed to leave more material at the bottom of the aperture than at the sides an top.
I used an air saw to cut the old bowl out, think you might struggle with a standard electric jig saw. Need to be careful not to damage the paint, particularly around the rim as this is visible when completed. Part of the edge was very porous and was literally just gel coat, I had to do a local repair. I found the thickness of the headlight appeture ranged from about 12mm thick to virtually nothing. The aim is to grind the fibreglass down to a thickness of about 3-4mm which ensures you don't end up with a thick Sikoflex bead between the lens and body.
Best idea is to leave a bit to grind away an area, test the fit, grind some more...test etc. As I said previously I found you needed to leave a bit more of the aperture lip on the leading (bottom edge). Hopefully you can see this on this photo plus where the fibreglass was porous.
I modified the headlamp adjusters, the originals adjust from the front which is obviously no longer accessible, Central had slotted the other end of the adjusting screws, but it was difficult and fiddly to adjust as there's not much room to get a screwdriver in there without making the access hatch excessively large.
I used a selection of M5 screws, washers, nuts and wingnuts using some loctite and a lock nut with the wing nuts.
I slightly enlarged the wheelarch acces panels.
When trial fitting the headlight put some masking tape to protect the lens as its quite a tight fit to ease the unit in....
A good Heath Robinson solution to holding the unit in place when gluing in place with Sikaflex. Sorry photo upside down...Apple!!
Still a bit of finishing to do, but here is the results so far. Cheers Pete

Hi All
Really fancy this conversion to the headlights, been thinking about it for a while, had my car 4 years now!!
Anyone know/ recommend someone in or around the Bath/Bristol area. Have a great car body sprayer but not sure about headlight upgrade which I certainly want to do at the same time.
Really fancy this conversion to the headlights, been thinking about it for a while, had my car 4 years now!!
Anyone know/ recommend someone in or around the Bath/Bristol area. Have a great car body sprayer but not sure about headlight upgrade which I certainly want to do at the same time.
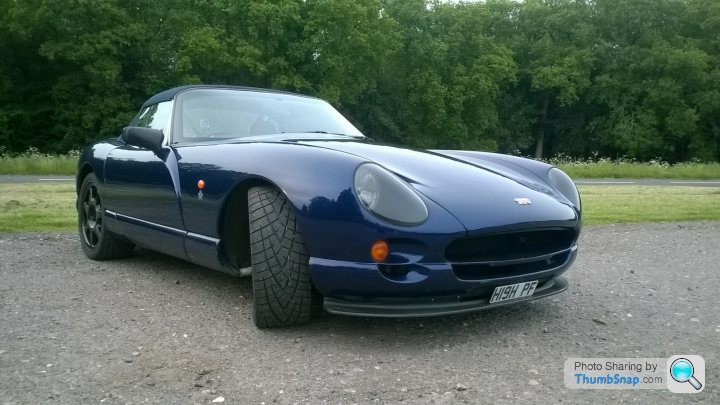
TheRainMaker said:
That is a great photo. Never been a fan of the front of the Chim, a bit too MGB for my liking but I think they look fantastic with the Mk3 conversion.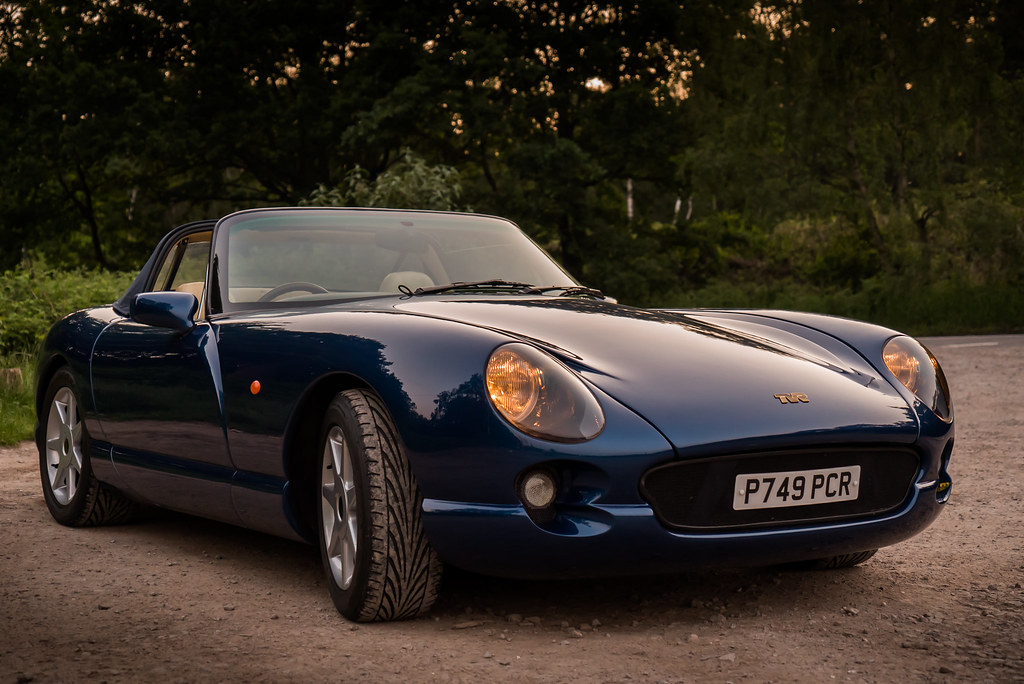
Gassing Station | Chimaera | Top of Page | What's New | My Stuff