Chimaera 500 work begins
Discussion


dbv8 said:
I like those diff mounts.
Mine are coming back off along with the diff for a refurb so i may well copy your design.
Did you beef up the rear mount also?
No not yet. As its such a small bracket i was thinking either to copy the design using aMine are coming back off along with the diff for a refurb so i may well copy your design.
Did you beef up the rear mount also?
thicker gauge of steel and adding extra pickup points to the diff casing, or a nice alloy billet
item


TJC46 said:
Is all the extra tubing just bolted on underneath? How much ground clearance will you have?
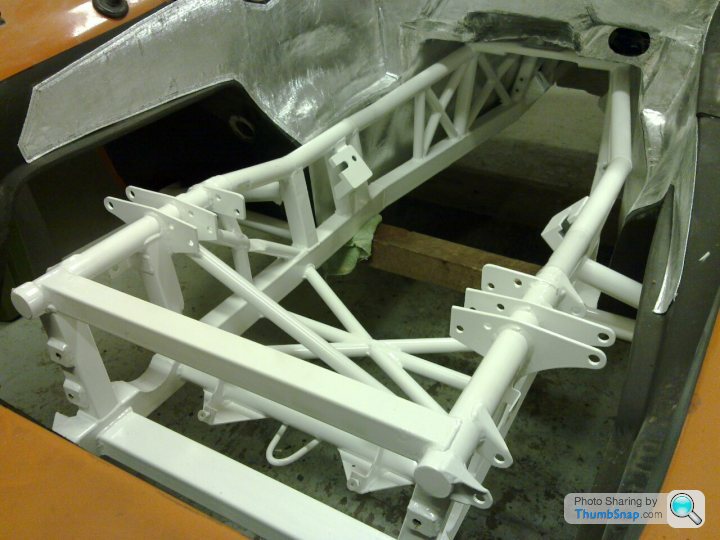
The frame bolts to the underside of the chassis every 300mm where it replace the exhaust mounting plate and also protects the sump, I`ve lost 40mm ground clearance due to the larger sump, and was unable to mount the engine any higher as the supercharger pulley catches the bonnet. The frame also ties the two lower chassis rails together as theres rather a big distance from the front cross tie in section to the rear 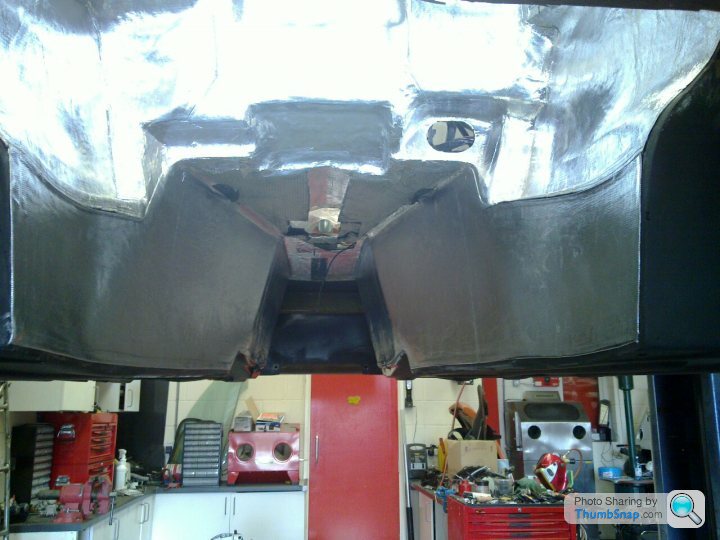
I decided to extend the heat sheild foil the length of the tunnel which should help a little to slow the heat soak
Conian said:
Why do you all powder coat your chassiseses (?) white?
for me it'd just get v dirty v quick and i think i'd have gone with black
Bad memories of white motorbike wheels.
Its the orginal colour for car, including grey and silver depending on what tvr had in stockfor me it'd just get v dirty v quick and i think i'd have gone with black
Bad memories of white motorbike wheels.
 I was gonna go with orange but then changed my mind. If it needs a touch up in the future white an easy colour using POR15
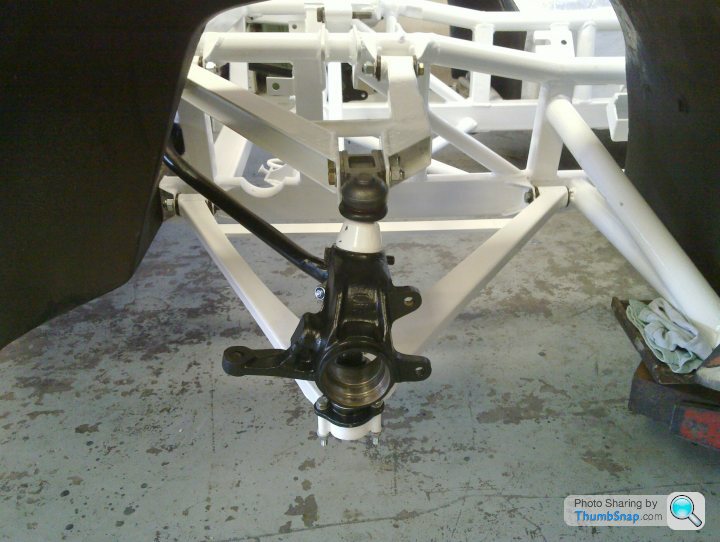

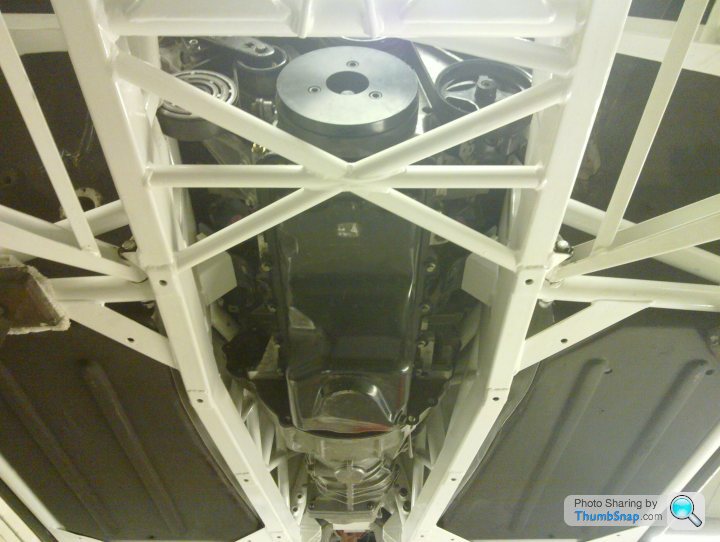
 To say it fits like a glove is an understatement! A surgical glove perhaps, I hadn`t done a trial fit with the mid shift kit on the gearbox. But two jacks and engine hoist sorted it
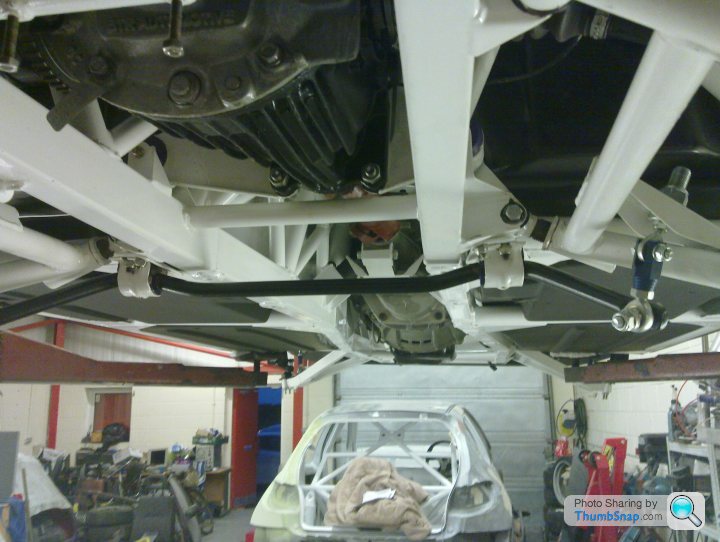
Marty V8 said:
v8ndy said:
I decided to extend the heat sheild foil the length of the tunnel which should help a little to slow the heat soak
Love the project.
Can you tell me where you got the heat shield from as I am looking to replace mine on my Griffith. Thanks.
Cheers
Marty
PS we need more pictures

i got the glass foil from a fellow pistonheader in the classfied section,
so can`t help you there fella

Marty V8 said:
Fantastic work. Im jealous of the workshop. Speaking of which, whats the car in the background - is it a rally cross Fiesta or something similar?
What are you planning to do with manifolds? Are they going to come forward like 'normal' TVR items, or will they go down the side of the block and maybe loop back under the car?
What are you planning to do with manifolds? Are they going to come forward like 'normal' TVR items, or will they go down the side of the block and maybe loop back under the car?
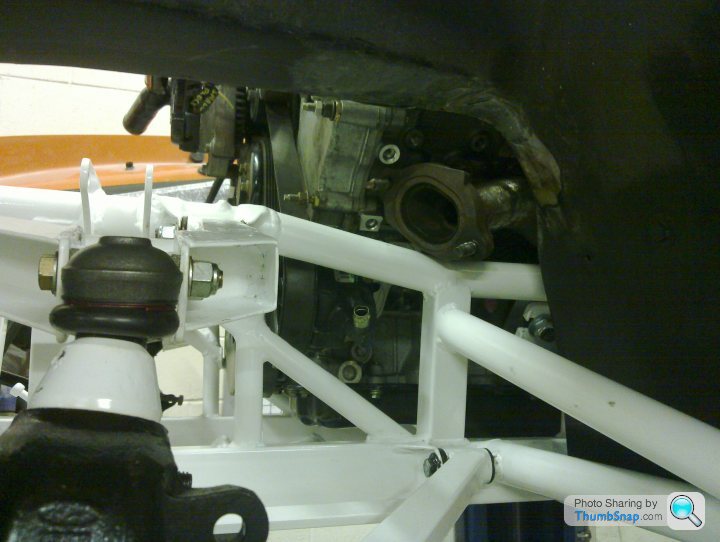
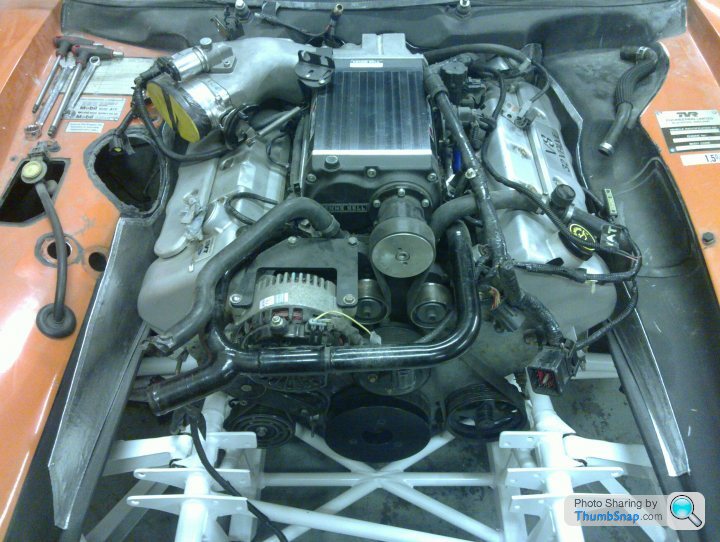
I`ve turned the manifolds to look forward to meet up with the standard main cat of the chimaera, that way it`s an easy exhaust replacement in the future, In turning the manifolds around i`ve had to alter the front
upper wishbones to allow the room for exhaust. One of my aims is to not make to many bespoke parts, that way any future owners
 can easily maintain it. The car in the background is a 206WRC thats just awaiting the shell repainted, but i`ll start another post for it when its completed
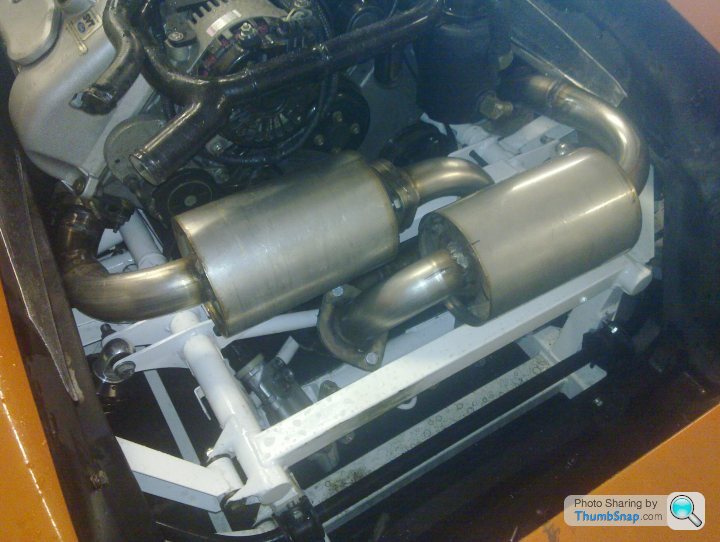

I`m not sure if the balancer pipe does improve or alter the sound of the exhaust, but i just followed the design of the after market systems for Mustangs, Its a 2 1/4" system, any bigger the engines known to suffers from losing low down torque, with the balancer pipe it is suppose to aid in keeping the temperatures up in the empty exhaust due to the firing order of the engine and maintain the gas speed. Its a full de-cat running three silencers and i`m hoping its not going to be over loud! But i can get on with plumbing the oil and water now as i know where to avoid the exhaust 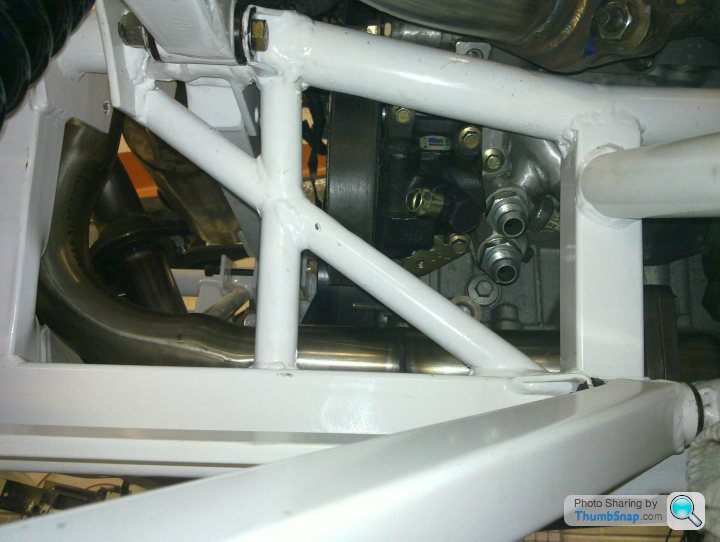
Mark_S_24 said:
Top job mate, keep it up.
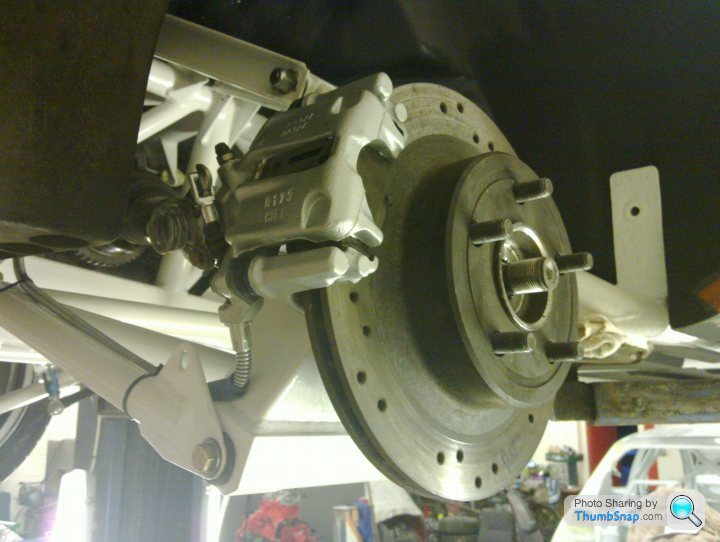
The exhaust looks very close to the crosmember, will it contact when the engine is moving on the mountings during driving?
Mark
Everythings very close! The exhaust looks very close to the crosmember, will it contact when the engine is moving on the mountings during driving?
Mark
 The engine mounts are pretty stiff but untill its up and runing i won`t know were it`ll catch, Although i can take up to 10mm of the exhaust flanges as they`ve got the least clearance but i`ll wait and see
Gassing Station | Chimaera | Top of Page | What's New | My Stuff