Replacing rear discs and pads on Audi RS4 B7 Cab
Discussion


If like me you have been astonished at the price of replacing your rear discs and pads via Audi dealers, you might be interested in having a go at doing it yourself. I managed to source some genuine Audi rear discs from Deutscheparts (£579) and the pads from Stoke Audi (£81). So here is a how to guide to replacing them:
1. make sure the car is safely parked on a flat surface and secured with bricks
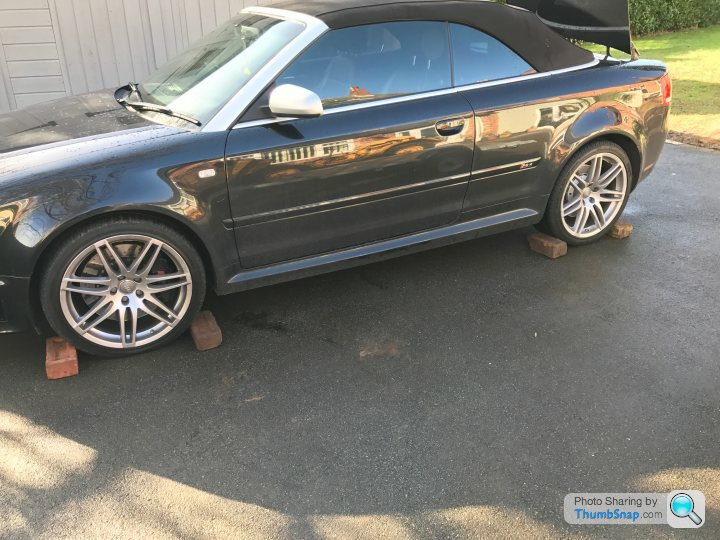
2. Loosen off the wheel nuts and jack up the rear wheel at the jacking point
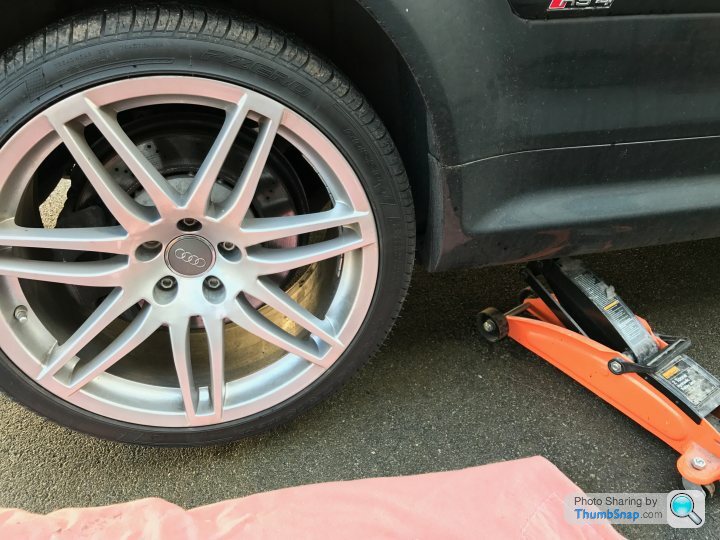
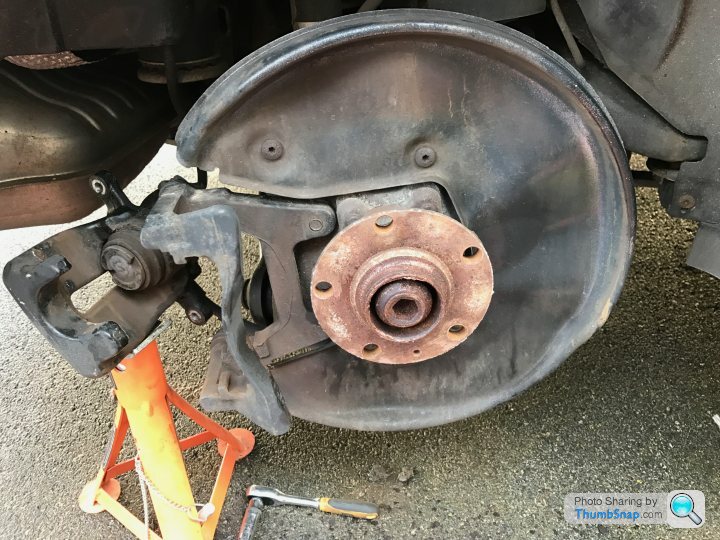
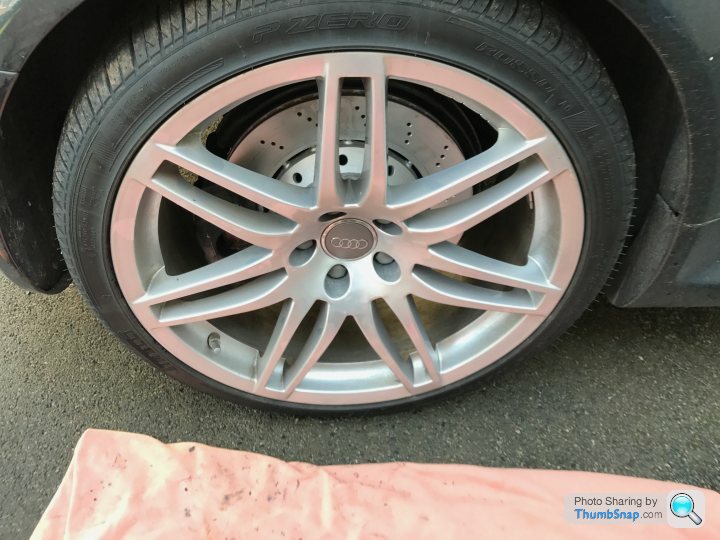
3. Remove the wheel nuts fully and carefully remove the wheel, exposing the rear disc and caliper
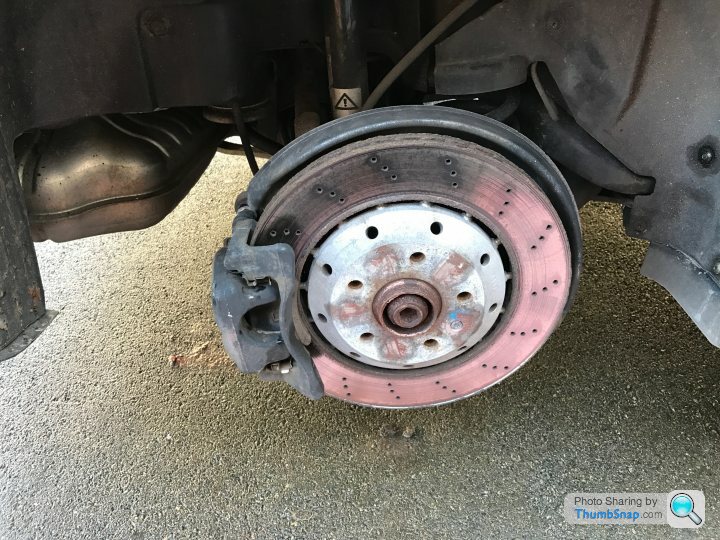
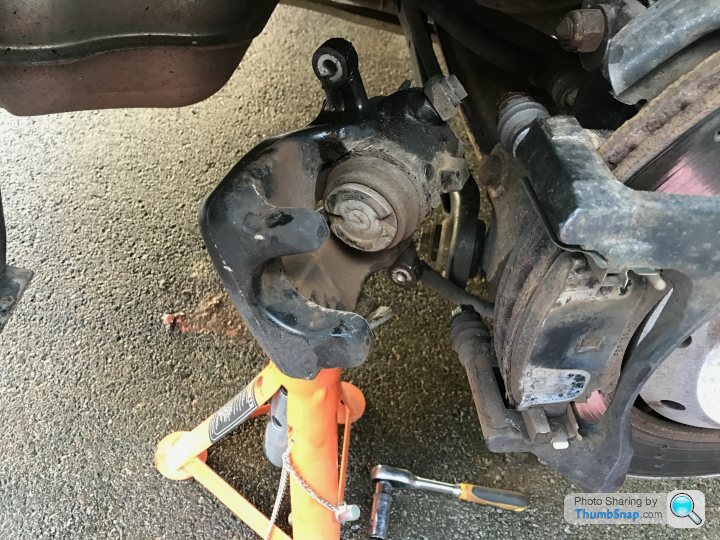
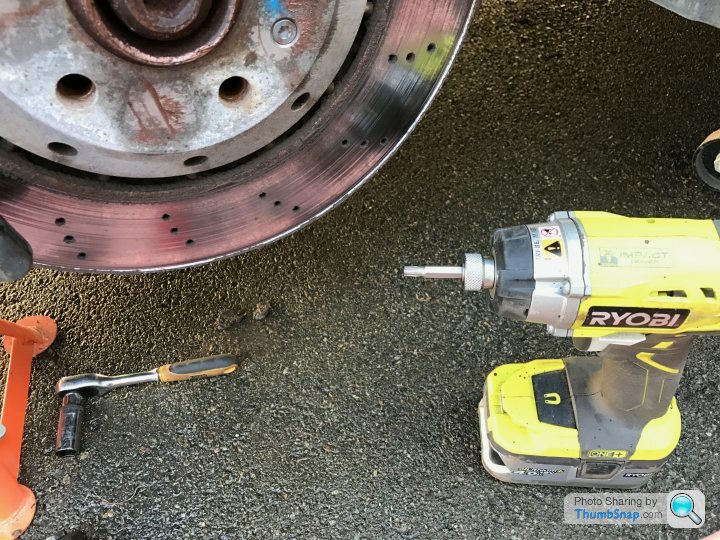
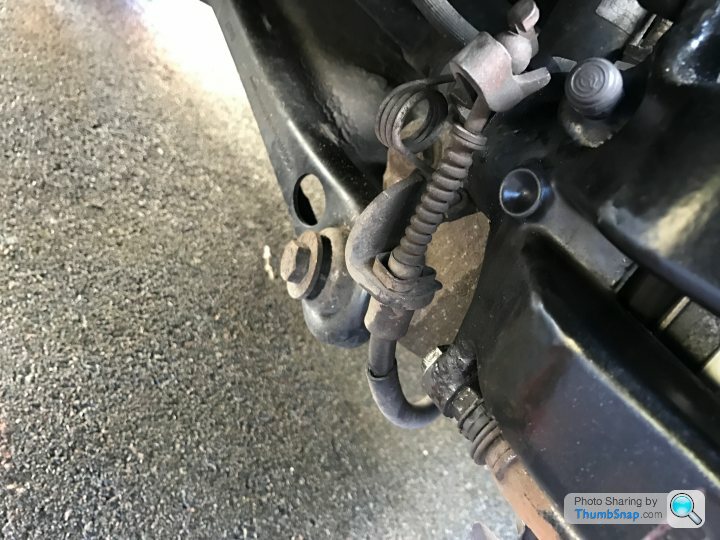
4. Prepare to remove the brake caliper - you will need a 13mm socket and a 15mm ring spanner and a little WD40
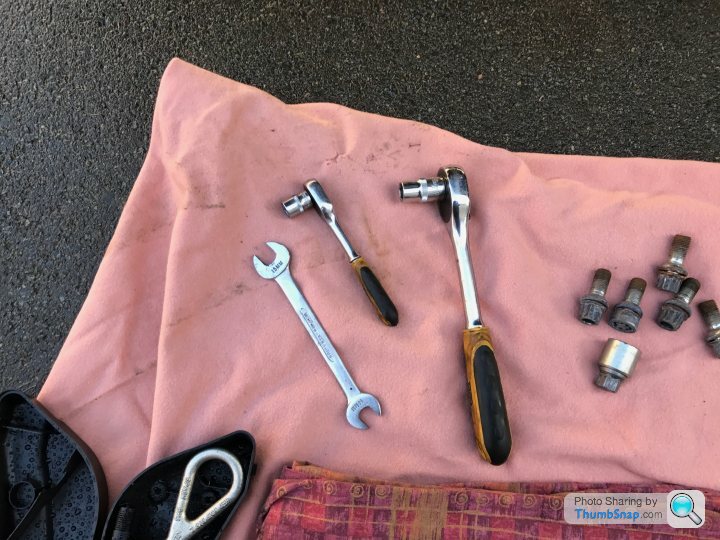
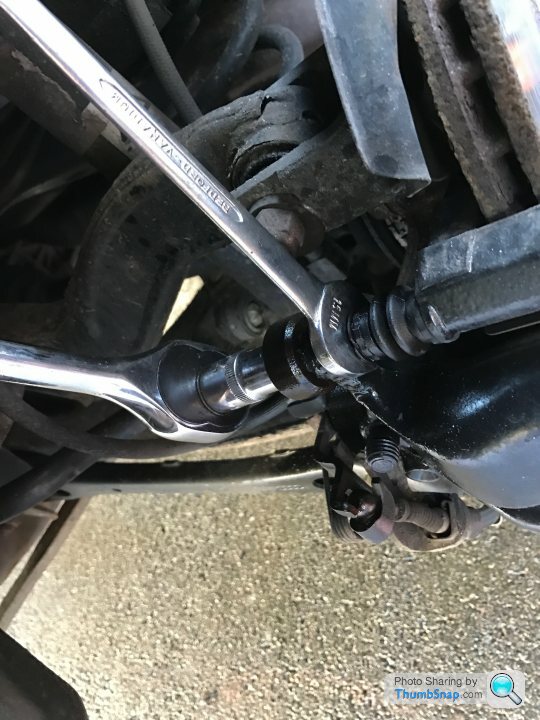
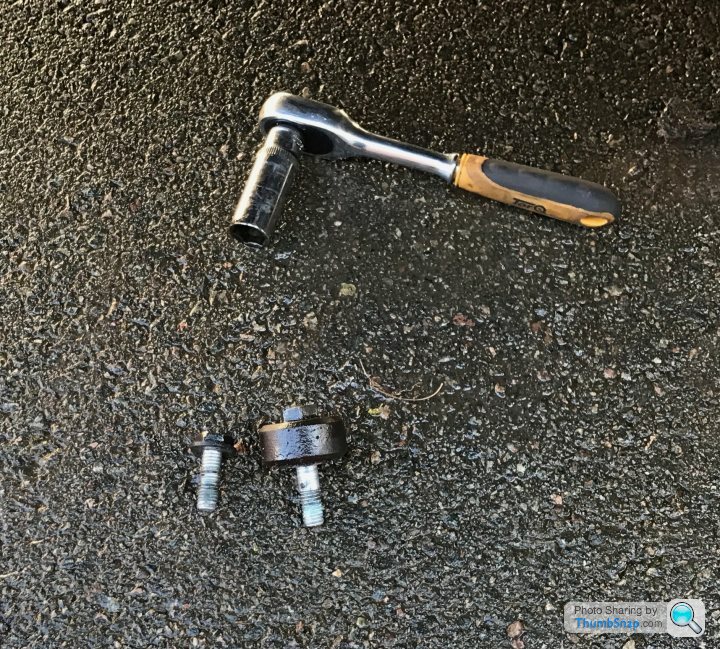
5. Using the ring spanner and socket, unscrew the top and bottom securing nuts on the caliper and remove both
6. Now, make sure that the handbrake is off
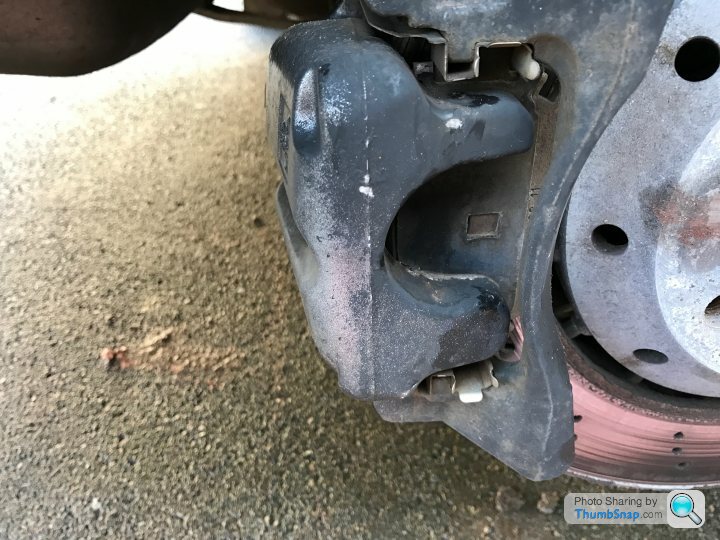
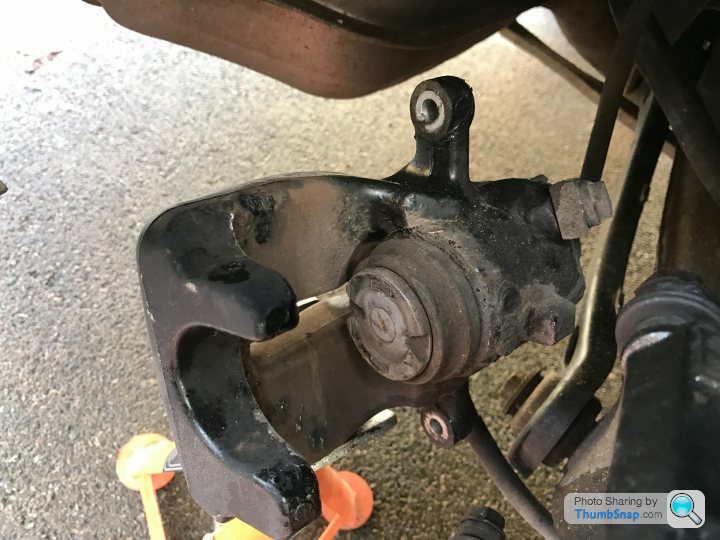
7. Position a jack stand close-by, gently pull the caliper off, bringing it to rest on the jack stand - ensuring you dont stress the brake pipe and cable
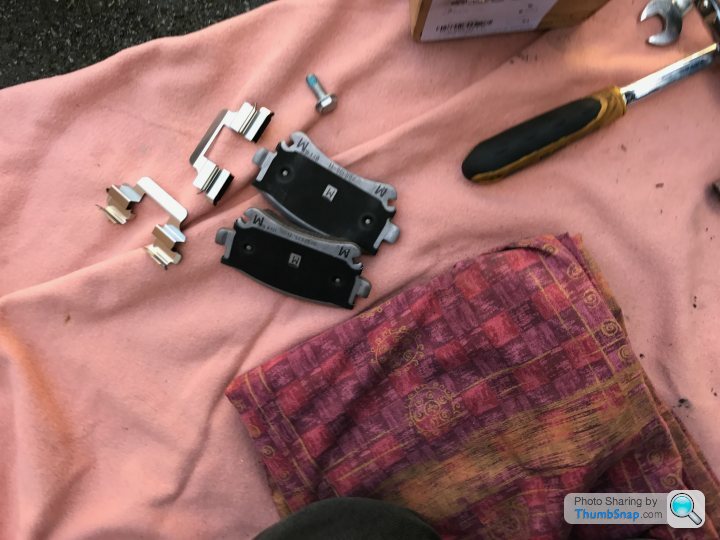
8. Now remove the old pads and securing clips
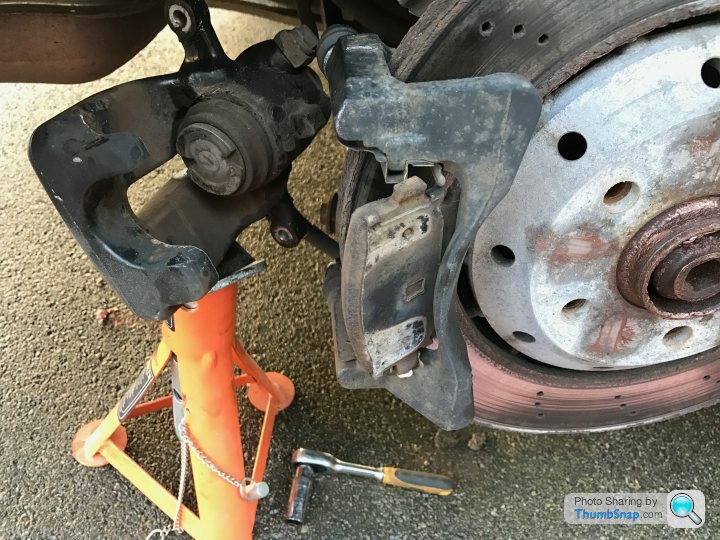
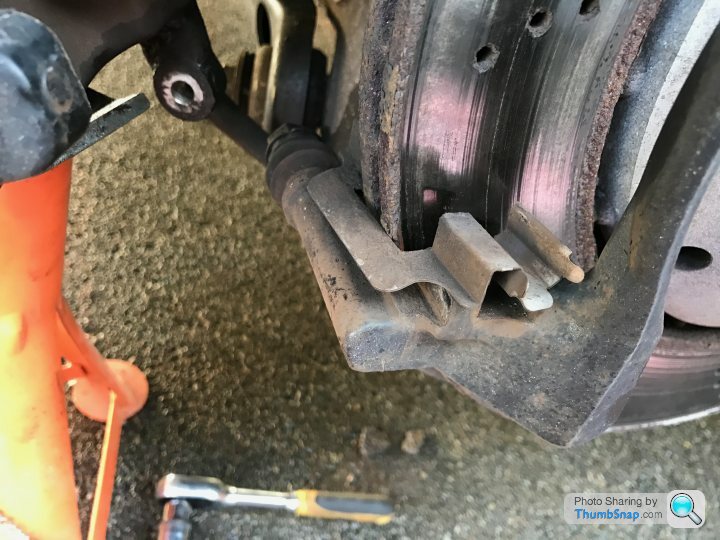
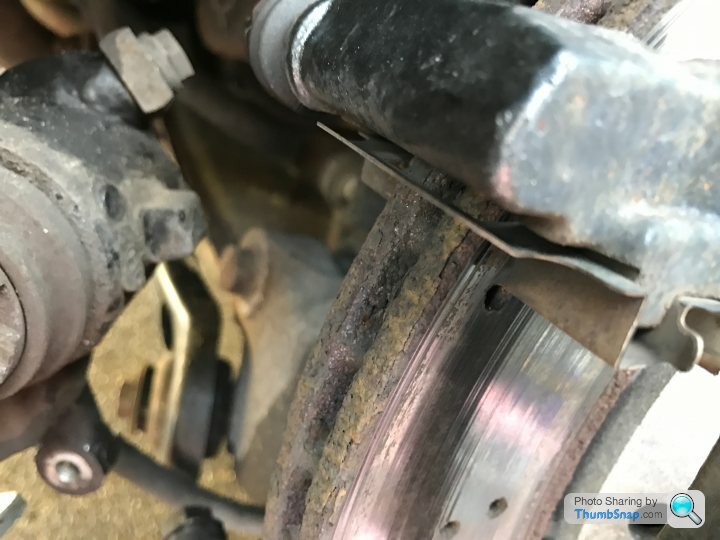

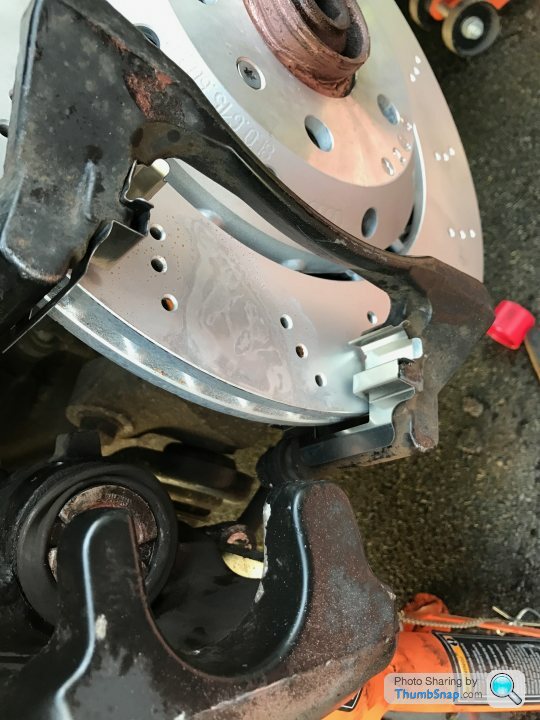
9. Now, unscrew and remove the retaining screw on the disc hub
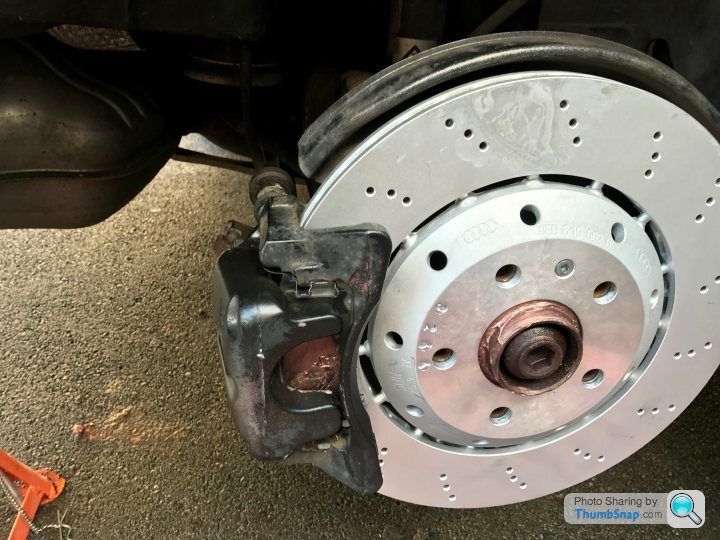
10. The disc can now be carefully removed - it might need a little persuading, you can tap the back of the disc, whilst rotating to ease it off the hub
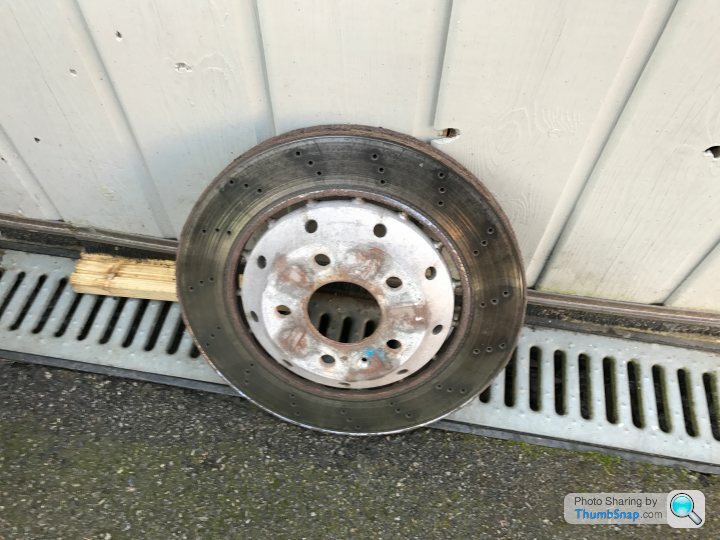
10. A quick clean up of the hub, blowing away any corroded crud and dirt from the old disc

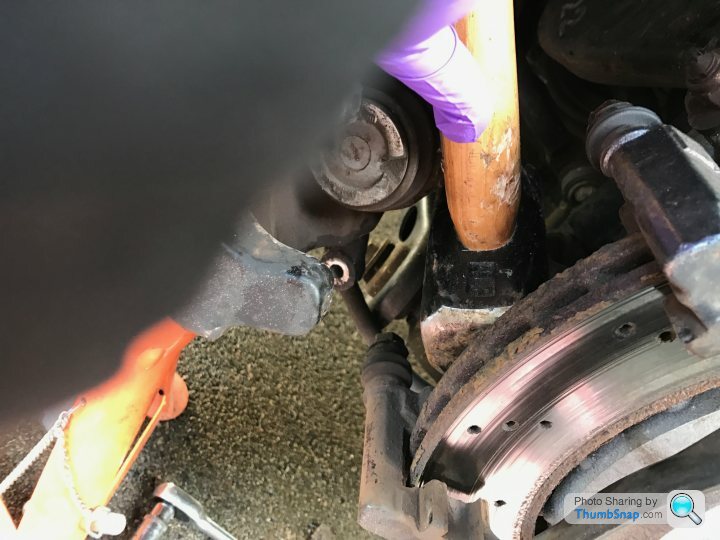
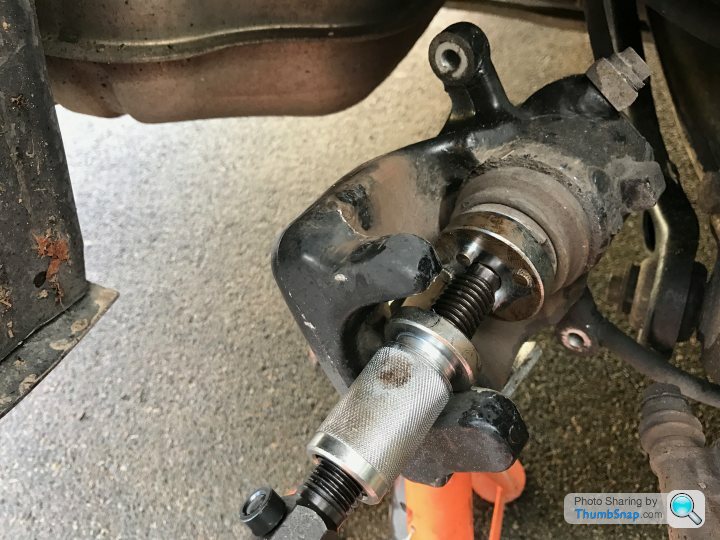
11. Now, turning the attention towards the piston in the caliper. Because the discs have worn, the piston will be "out" and it needs to be pushed back in before the new disc and pads can be fitted. This can be a bit tricky as the piston can be very stiff and difficult to push back in
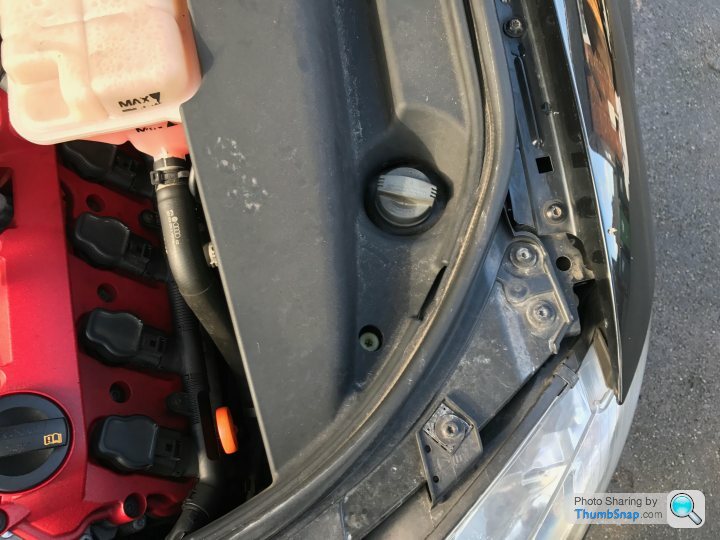
So, first check the brake fluid level. If your car has been serviced and the brake fluid topped up, when you push the piston in, the brake fluid will spill out. So using a clean "squeezy bottle" you can "suck out" any excess brake fluid before you start compressing the piston back in
To compress the piston, you will need a compressing tool. Audi do have a specific tool, but this one works just as well and cost around £20 from my local Autospares shop
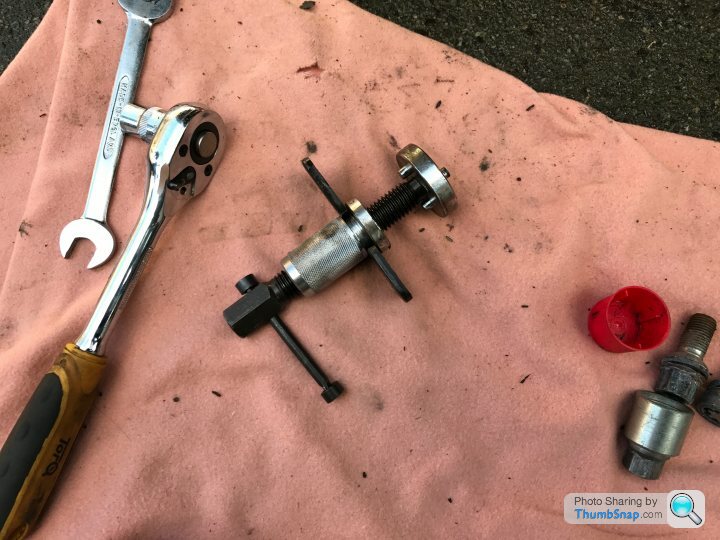
The tool needs to be positioned correctly and then the plate fixed - before screwing to turn the piston, adjusting to push inwards. This can be difficult so patience and brute strength is required. Eventually the piston can be fully retracted to allow the new disc and pads to be fitted

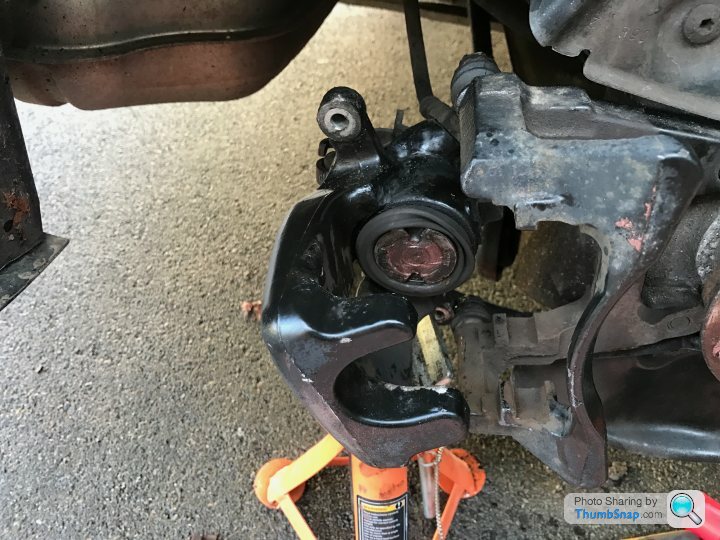
12. Now the hub can be "greased up" with a little dab of copper grease. Note, take care not to get the copper grease near the hub nut threads

and the new disc fitted and secured with the retaining screw
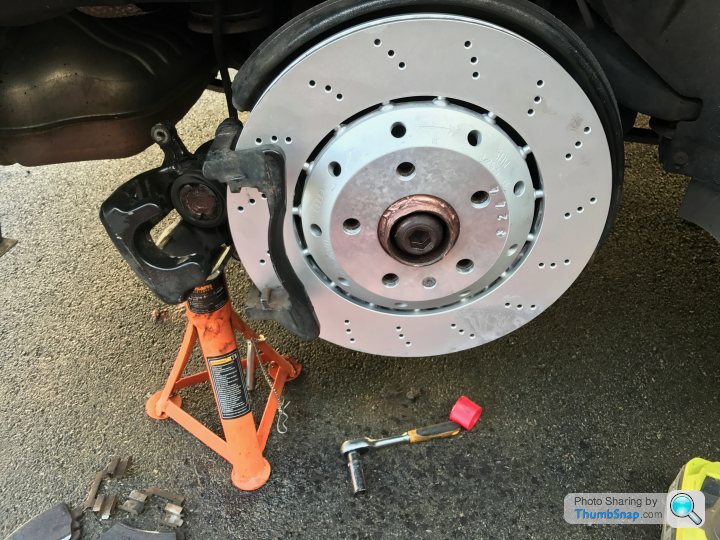
13. Now, time to fit the new clips and pads - adding a little bit of copper grease to the back of the pads
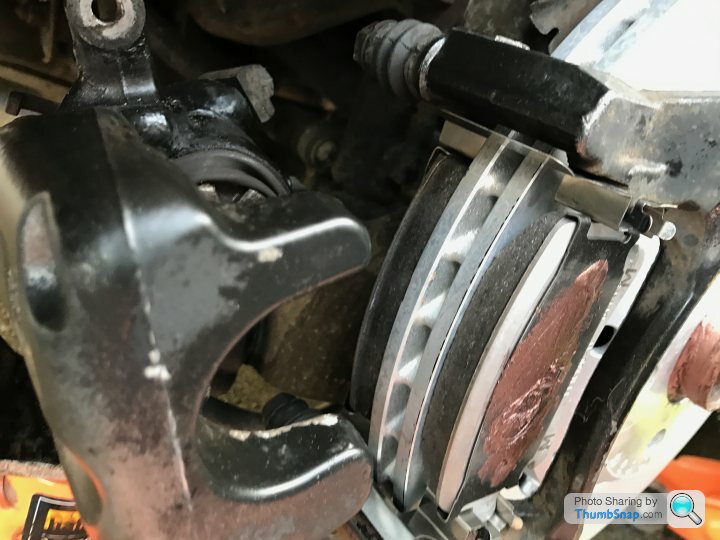
14. Now the caliper can be refitted - carefully sliding over the brake pads to line up with the securing bolts. In the brake pad kit, a new lower bolt is included - which can now be fitted. As in step 5 - use the 15mm spanner and 13mm socket to tighten up the top and bottom bolts securely.
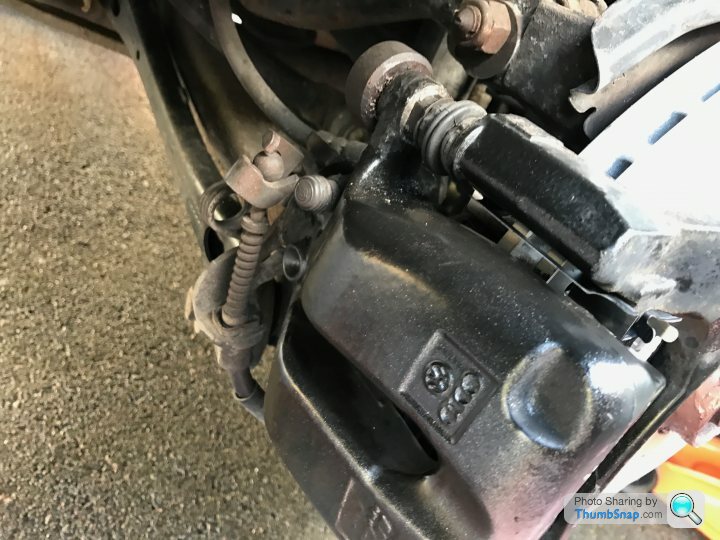
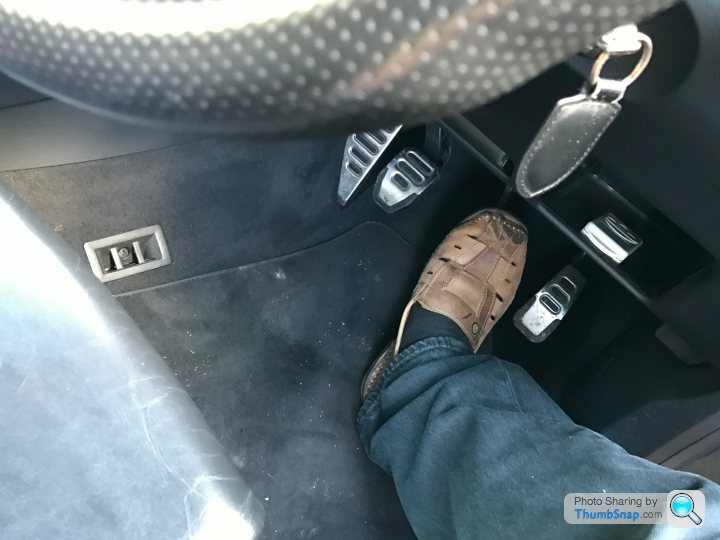
15. Once the caliper is securely on, press the brake pedal to release the piston into an operating position and check the brake fluid levels - topping up if needed - before closing the brake fluid reservoir cap
16. Now, refit the wheel and secure all wheel bolts and caps
17. Finally - take for a test drive to make sure that everything is working as it should
18. Repeat for the other wheel!
I hope that this has been helpful. Doing it myself has saved around £330 compared to a main Audi Dealer. It is not that hard a job. One side takes around 45 minutes. The hardest part is getting the pistons back in. Needless to say, after a 100 miles or so you will need to re-check that all nuts are tight and secure.
1. make sure the car is safely parked on a flat surface and secured with bricks
2. Loosen off the wheel nuts and jack up the rear wheel at the jacking point
3. Remove the wheel nuts fully and carefully remove the wheel, exposing the rear disc and caliper
4. Prepare to remove the brake caliper - you will need a 13mm socket and a 15mm ring spanner and a little WD40
5. Using the ring spanner and socket, unscrew the top and bottom securing nuts on the caliper and remove both
6. Now, make sure that the handbrake is off
7. Position a jack stand close-by, gently pull the caliper off, bringing it to rest on the jack stand - ensuring you dont stress the brake pipe and cable
8. Now remove the old pads and securing clips
9. Now, unscrew and remove the retaining screw on the disc hub
10. The disc can now be carefully removed - it might need a little persuading, you can tap the back of the disc, whilst rotating to ease it off the hub
10. A quick clean up of the hub, blowing away any corroded crud and dirt from the old disc
11. Now, turning the attention towards the piston in the caliper. Because the discs have worn, the piston will be "out" and it needs to be pushed back in before the new disc and pads can be fitted. This can be a bit tricky as the piston can be very stiff and difficult to push back in
So, first check the brake fluid level. If your car has been serviced and the brake fluid topped up, when you push the piston in, the brake fluid will spill out. So using a clean "squeezy bottle" you can "suck out" any excess brake fluid before you start compressing the piston back in
To compress the piston, you will need a compressing tool. Audi do have a specific tool, but this one works just as well and cost around £20 from my local Autospares shop
The tool needs to be positioned correctly and then the plate fixed - before screwing to turn the piston, adjusting to push inwards. This can be difficult so patience and brute strength is required. Eventually the piston can be fully retracted to allow the new disc and pads to be fitted
12. Now the hub can be "greased up" with a little dab of copper grease. Note, take care not to get the copper grease near the hub nut threads
and the new disc fitted and secured with the retaining screw
13. Now, time to fit the new clips and pads - adding a little bit of copper grease to the back of the pads
14. Now the caliper can be refitted - carefully sliding over the brake pads to line up with the securing bolts. In the brake pad kit, a new lower bolt is included - which can now be fitted. As in step 5 - use the 15mm spanner and 13mm socket to tighten up the top and bottom bolts securely.
15. Once the caliper is securely on, press the brake pedal to release the piston into an operating position and check the brake fluid levels - topping up if needed - before closing the brake fluid reservoir cap
16. Now, refit the wheel and secure all wheel bolts and caps
17. Finally - take for a test drive to make sure that everything is working as it should
18. Repeat for the other wheel!
I hope that this has been helpful. Doing it myself has saved around £330 compared to a main Audi Dealer. It is not that hard a job. One side takes around 45 minutes. The hardest part is getting the pistons back in. Needless to say, after a 100 miles or so you will need to re-check that all nuts are tight and secure.
ogrodz said:
Indeed - the Audi dealer price is also a few hundred pounds higher!
I am told that the VW Phaeton W12 rear discs are compatible - at around £140 a pair. I think the letters R&S contribute heavily to the price!
Are the Phaeton discs floating as well? I ask as I've not seen floating discs be even vaguely cheap.I am told that the VW Phaeton W12 rear discs are compatible - at around £140 a pair. I think the letters R&S contribute heavily to the price!
Hol said:
When I was looking at B7 RS4's 5 years back a lot seemed to have advisories for worn discs,
Not surprising when you see the prices. I was told to assume a grand for replacement fronts back then.
You sometimes have to look beyond that!Not surprising when you see the prices. I was told to assume a grand for replacement fronts back then.
A friend of mine has a B7 RS4 where the lip of the rear discs were skimmed so as to make them look 'good'; it was done prior to his ownership with the receipt being left in the documents surprisingly. They almost certainly will require replacing next time despite it not having an advisory agaisnt them.
I will be doing this soon, and it's nice to see the discs can be removed without taking off the carrier! This is a very thorough guide with plenty of good quality photos. I know it can be time consuming to keep stopping to pick up the camera at every step, so fair play.
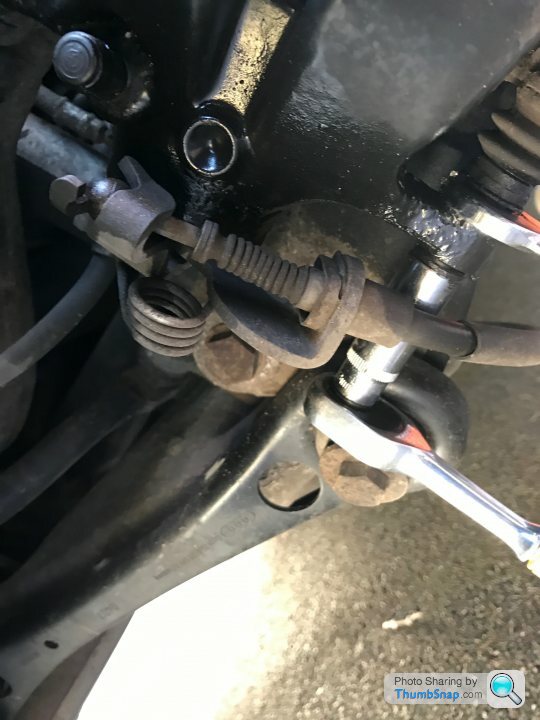
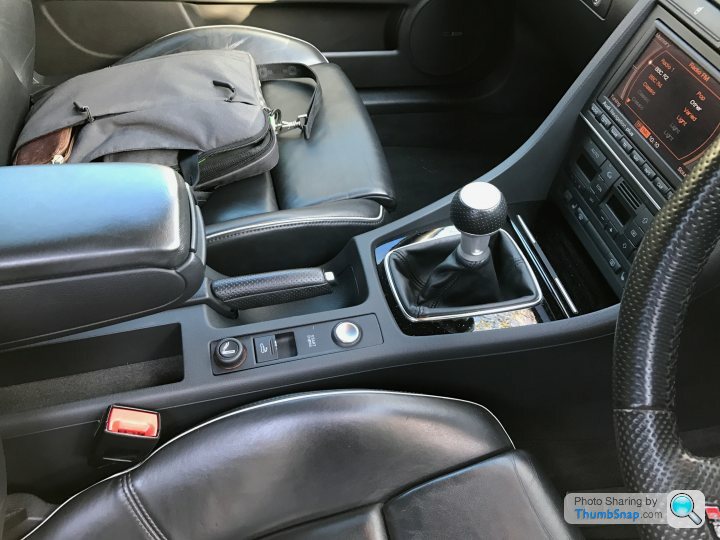
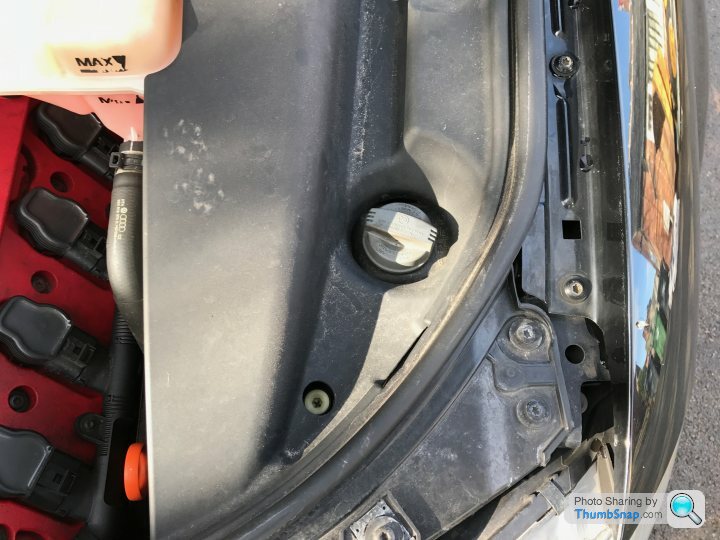
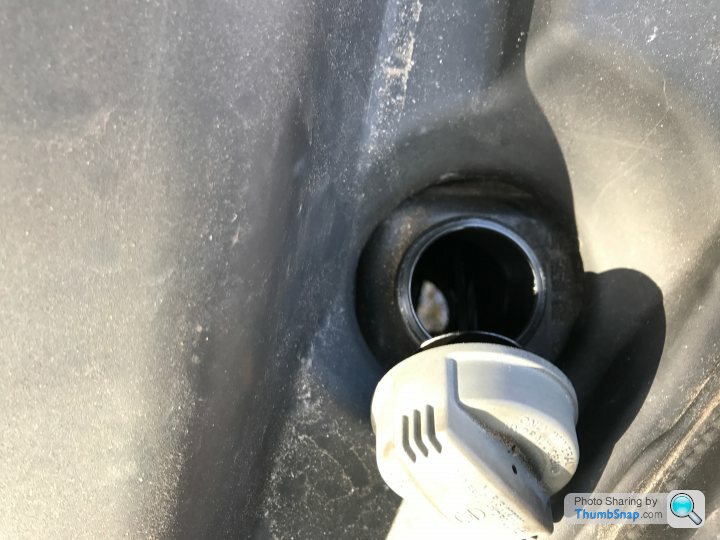
However I just wanted to add, for the benefit of anyone else doing this in the future, that the reservoir pictured in the power steering reservoir, not the brake fluid reservoir.
Also the ELSA procedure says not to remove the top caliper bolt, just remove the lower one and swing the caliper up. That's probably why only the lower bolt is supplied with the brake pads. Not sure why, but that's what it says.
Gassing Station | Audi, Seat, Skoda & VW | Top of Page | What's New | My Stuff