Griff Partial Refurb - Nearly There
Discussion


Marty V8 said:
Hi,
When it's finished I wont be bored. I'll be driving it like I stole it
do it its people like you who are the soul of marque, suppose i do my bit by farming out all my work but i do not mind cannot be Project managing Vessel conversions and living abroad for 300days plus a year. mine comes back with new carpets and hood next week i,ll maybe post pictures cause nowt better to doWhen it's finished I wont be bored. I'll be driving it like I stole it
looking fwd to seeing you on the road
cheers jim
wycoller said:
do it its people like you who are the soul of marque, suppose i do my bit by farming out all my work but i do not mind cannot be Project managing Vessel conversions and living abroad for 300days plus a year. mine comes back with new carpets and hood next week i,ll maybe post pictures cause nowt better to do
looking fwd to seeing you on the road
cheers jim
Jim,,looking fwd to seeing you on the road
cheers jim
thanks for the comments. Its true I have been called a 'soul' before, but its usually prefixed with the word 'are'

Following on from the previous posts...
The body work was now more or less completed...


...so it was time to start rebuilding the motor. The engine was built back to standard '500' spec with new bearings(cam, crank big ends), new 885 cam, followers and adjustable pushrods (rather than using shims). The pistons received new rings as the pistons themselves were in good condition. The heads were pretty good too with almost no discernable wear of the valve stems, so new valve stem oil seals were fitted.
Not really much more to say about the engine rebuild as it was pretty standard stuff. The thing that took the time was in cleaning 10 years of accumulated crud off all the ancillaries that were to be re-used.
I must say a big thanks to Jim Robinson (www.jrv8@btinternet.com) who supplied me with my engine parts and a lot of advice. Give him a try for engine parts as he has been rebuilding Rover and Chevy V8's for decades and is well known for his engines which are more usually supplied for Cobra Replica's.
Finally got the motor back in the car mid-June 2011

and it was then 'just' a case of nailing everything back together.
The body work was now more or less completed...
...so it was time to start rebuilding the motor. The engine was built back to standard '500' spec with new bearings(cam, crank big ends), new 885 cam, followers and adjustable pushrods (rather than using shims). The pistons received new rings as the pistons themselves were in good condition. The heads were pretty good too with almost no discernable wear of the valve stems, so new valve stem oil seals were fitted.
Not really much more to say about the engine rebuild as it was pretty standard stuff. The thing that took the time was in cleaning 10 years of accumulated crud off all the ancillaries that were to be re-used.
I must say a big thanks to Jim Robinson (www.jrv8@btinternet.com) who supplied me with my engine parts and a lot of advice. Give him a try for engine parts as he has been rebuilding Rover and Chevy V8's for decades and is well known for his engines which are more usually supplied for Cobra Replica's.
Finally got the motor back in the car mid-June 2011
and it was then 'just' a case of nailing everything back together.
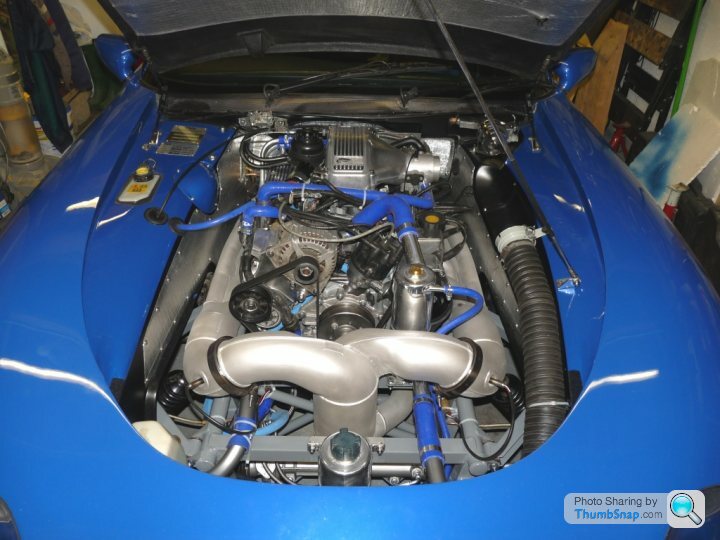
I wanted to brighten up the engine a bit so cleaned some bits and pieces. I painted the fins of the rocker covers and plenum chamber with Halfords high temp gloss back paint, building it up in a couple of layers to get a decent thickness of paint.

I wasnt bothered about not managing to stay within the lines (I was always cr@p at art) because after the paint dried I just used glass paper wrapped round a sanding block to take the excess paint off.
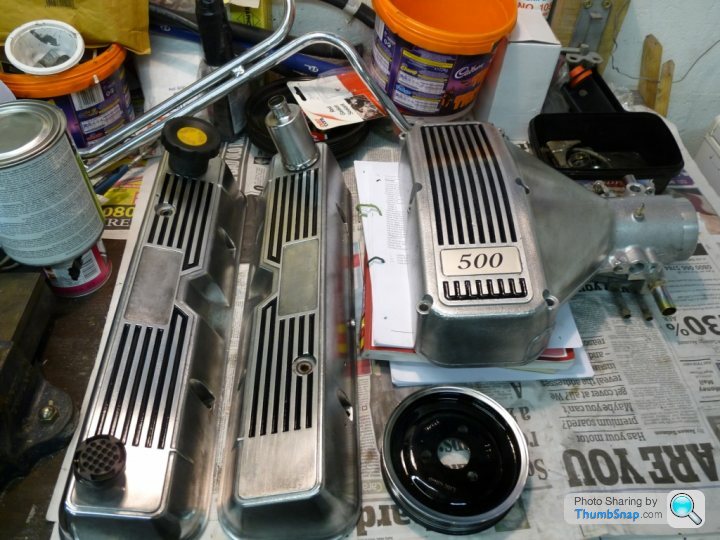
The photo also shows the heater pipes that run along the offside of the engine. These were just cleaned down and quickly polished.
The pulley wheel was originally all black but just to give it a bit of a lift I polished the paint off the rim and repainted the rest of it.
As the paint was a bit past its best on the water pump pulley I also took it all off as well.
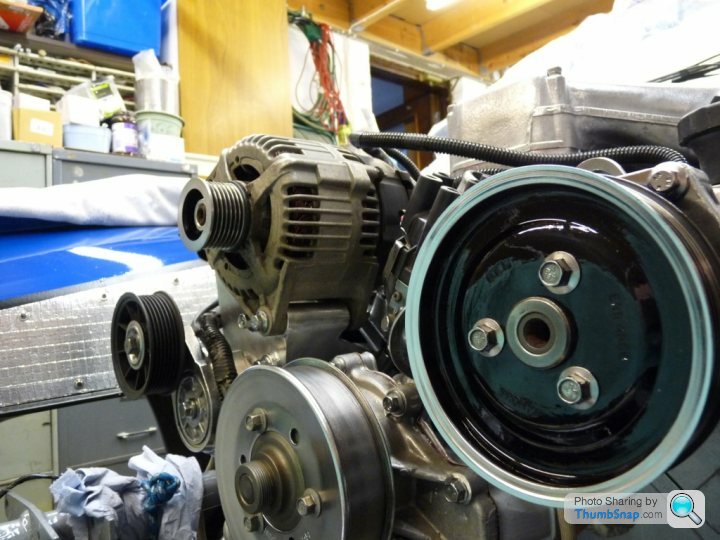
I also did the same with the crank pulley - not that much of it is seen when its on the car.
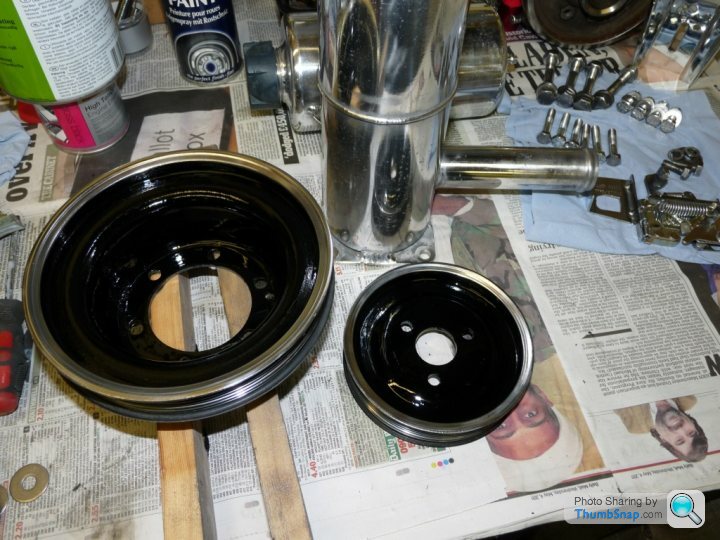
None of the pulleys is as nice as a chromed jobbie, but it cost me nothing but a bit of time and some paint, and it brightens the motor up a bit.
I wasnt bothered about not managing to stay within the lines (I was always cr@p at art) because after the paint dried I just used glass paper wrapped round a sanding block to take the excess paint off.
The photo also shows the heater pipes that run along the offside of the engine. These were just cleaned down and quickly polished.
The pulley wheel was originally all black but just to give it a bit of a lift I polished the paint off the rim and repainted the rest of it.
As the paint was a bit past its best on the water pump pulley I also took it all off as well.
I also did the same with the crank pulley - not that much of it is seen when its on the car.
None of the pulleys is as nice as a chromed jobbie, but it cost me nothing but a bit of time and some paint, and it brightens the motor up a bit.
MPoxon said:
Is it wrong to have engine pulley envy?
.... they look great
I have a horrible feeling though that when they get some moisture on them they will start to go brown as they and a lot of the bolts I cleaned up have no corrosion protection. I should have really laquered them, but time was pressing and I wanted to get the car back on the road in time for the 'lovely' summer we are having..... they look great
Still it'll give me something to do over winter

Following on from the previous post...
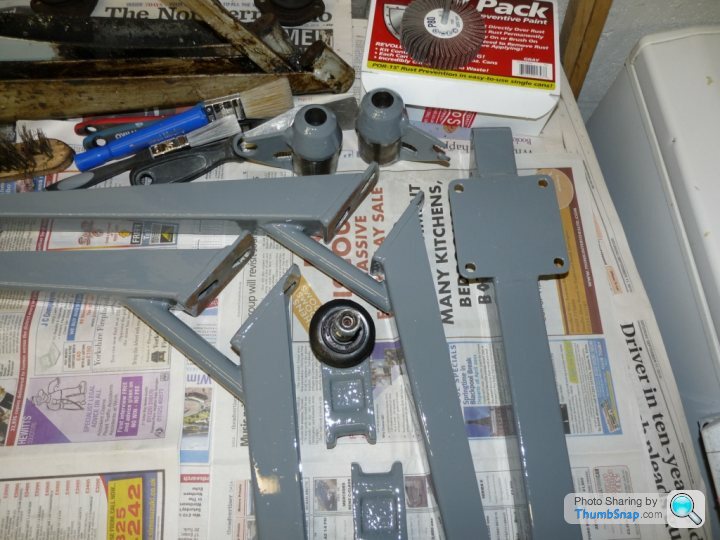
Once the engine was built up and initially started, I completed the front suspension installation. All wishbones had previously been prepp'd and painted with POR15. The anti-roll bar had had what was left of the rotten powder coating taken off and been sprayed. The front suspension was put together with new ball top ball joints, new bearings in the hubs (even though there was nothing wrong with them, it seemed prudent to renew them) and new anti-roll bar drop links.
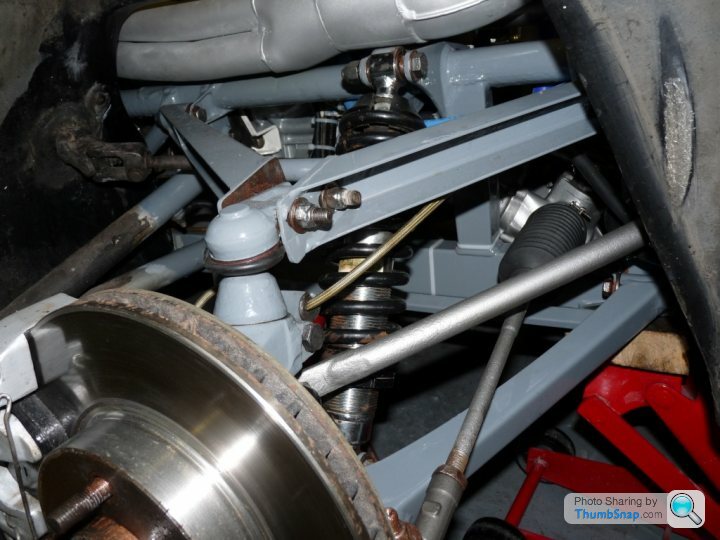
Although I had got a set of the stainless steel coolant pipes from ACT, I couldnt manage to get the offside one to sit down properly over the chassis rails, and it was uncomfortably close to the exhaust manifold, so I reverted to the original steel pipes. One of them had rubbed/rotted through so needed brazing before fitting. These also got sprayed before fitting. These can be seen in the photo below along with the ARB.
Ive also used hose offcuts and wrapped them round the pipes to prevent them from rubbing on the chassis.
So the car is now more or less finished. Ive still got some tidying up to do including insulating the heater pipework in the passenger footwell and replacing various bits of carpet and trim.
The car passed its MOT with no advisories a couple of weeks ago, but the weather hasnt allowed me to go and play much before the end of this week. Ive also had to swallow the yearly insurance bill and 6 months road fund in order to get it road legal, so its been an expensive month.
future plans
1. Drive it - a lot. The drive it some more.
2. Fit air-con - wanted to do this for a while and was considering it as part of the rebuild, but I dont have all the parts and wanted more info before I tackled this....and I wanted to get the car back on the road as well.
3. Make up a vented bonnet with Chimaera style gills. These are already being produced by one of the bodywork parts suppliers, but I thought I would give it a go just for the fun of it Ive got a damaged Chimaera bonnet from fleabay and the intention is to hack it apart for its gills. All I need then is a secondhand Griffith bonnet thats in reasonable shape to graft them into, although something tells me that it wont be that simple somehow.
Cheers and thanks to all who've helped me out.
Marty
Once the engine was built up and initially started, I completed the front suspension installation. All wishbones had previously been prepp'd and painted with POR15. The anti-roll bar had had what was left of the rotten powder coating taken off and been sprayed. The front suspension was put together with new ball top ball joints, new bearings in the hubs (even though there was nothing wrong with them, it seemed prudent to renew them) and new anti-roll bar drop links.
Although I had got a set of the stainless steel coolant pipes from ACT, I couldnt manage to get the offside one to sit down properly over the chassis rails, and it was uncomfortably close to the exhaust manifold, so I reverted to the original steel pipes. One of them had rubbed/rotted through so needed brazing before fitting. These also got sprayed before fitting. These can be seen in the photo below along with the ARB.
Ive also used hose offcuts and wrapped them round the pipes to prevent them from rubbing on the chassis.
So the car is now more or less finished. Ive still got some tidying up to do including insulating the heater pipework in the passenger footwell and replacing various bits of carpet and trim.
The car passed its MOT with no advisories a couple of weeks ago, but the weather hasnt allowed me to go and play much before the end of this week. Ive also had to swallow the yearly insurance bill and 6 months road fund in order to get it road legal, so its been an expensive month.
future plans
1. Drive it - a lot. The drive it some more.
2. Fit air-con - wanted to do this for a while and was considering it as part of the rebuild, but I dont have all the parts and wanted more info before I tackled this....and I wanted to get the car back on the road as well.
3. Make up a vented bonnet with Chimaera style gills. These are already being produced by one of the bodywork parts suppliers, but I thought I would give it a go just for the fun of it
Ive got a damaged Chimaera bonnet from fleabay and the intention is to hack it apart for its gills. All I need then is a secondhand Griffith bonnet thats in reasonable shape to graft them into, although something tells me that it wont be that simple somehow.Cheers and thanks to all who've helped me out.
Marty
Edited by Marty V8 on Sunday 24th July 21:41
TVR Dummy said:
Marty
Can you confirm the paint you used on the wishbones/chassis? POR 15? Which colour and where from?
Just doing my wishbones and like the grey rather than silver.
Any tips or advice for getting a good finish and adhesion?
Hi,Can you confirm the paint you used on the wishbones/chassis? POR 15? Which colour and where from?
Just doing my wishbones and like the grey rather than silver.
Any tips or advice for getting a good finish and adhesion?
Sorry for not replying before now. I thought the thread had gone dead tbh.
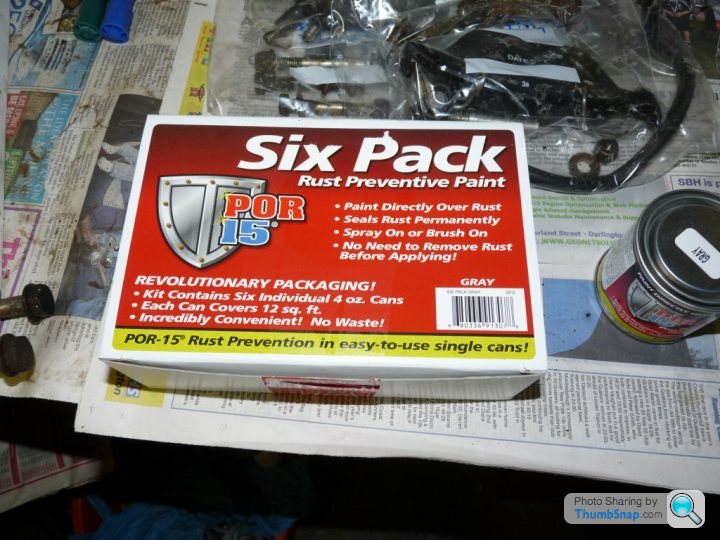
Yes, the paint I used was POR15. I used the grey colour. Got it from Frosts - a kit of 6 small tins - see below.
POR15 likes a bit of a rough surface to grab hold of....dont we all (or is it just me?). I went down to the bare metal where the plastic coating had already started to come away, but in other places I just roughed up the surface of the plastic coating if it looked intact.
Make sure its all very clean. I used copious amounts of brake cleaner to get the waxoyl and other crud off. I prefer this to using Gunk as the brake cleaner doesnt leave a residue. Trouble is it gets quite expensive to clean large areas with brake cleaner, unless you are able to buy it in bulk. You can always use Gunk or something else and do a final clean down with brake cleaner before painting.
When I was prepping a component or the chassis I would clean down the part I was looking at and give it a very close inspection. If there was any doubt about the plastic coating, I took it off down to the metal. You learn to look for small patches in the plastic coating that look raised in relation to the coating around it. When you find these, chances are that the coating has been compromised and there is corrosion beneath it.
The design of the bottom wishbone is excellent for trapping all sorts of nastiness so have a good look inside it, particularly in the inner sections at the ball joint end. I dug all sorts of crud out of mine before they were good enough to paint. You wont really be able to get into this area properly without taking the bottom wishbone off or at the very least, unbolting the bottom shock mount. Photo below hopefully shows the area in question better than Ive described it.
Try to get a second coat of POR15 on whilst the first coat of POR15 is still just a bit tacky. This is okay if you are doing small areas or wishbones on their own. It can get very messy when trying to get a second coat on the whole of the chassis, when none of the previous coat is completely dry.
If you are going to dismantle the suspension to paint the wishbones, dont forget to file or cut out with a sharp knife any POR15 that you may have got in the holes of the bottom wishbone for the shock and anti-roll bar mounts. POR15 is quite thick and will make life difficult when you come to replace the bolts if the holes arent cleaned out.
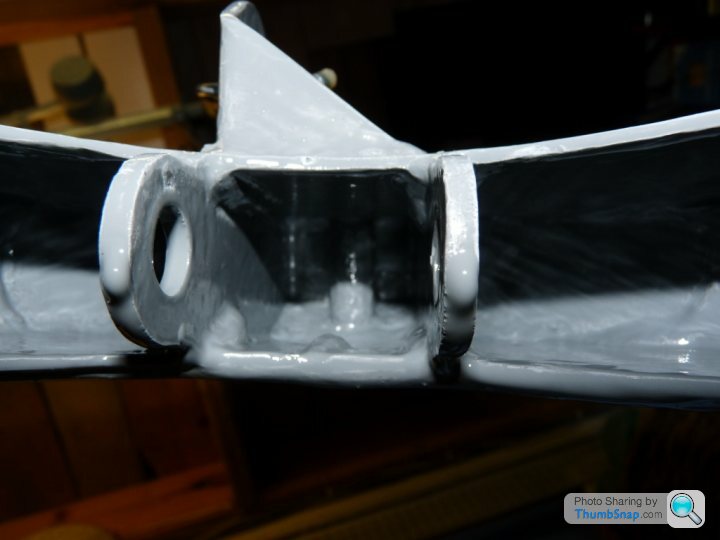
It also may sound obvious but if you have the suspension in bits to paint, dont paint the inner surfaces where the ball joint fits on the top wishbone either. It will close the gap between the ball joint, spacer (or spacers) and the wishbone up too much. Photo below illustrates where not to paint the top wishbones.
Good luck.
Cheers
Marty
Marty
Thanks for the tips. I picked up some used wishbones which had a bit of surface rust, started to prep them and got a bit carried away! Ended up using some Nitromors paint stripper to remove the old coating, they are now more or less back to metal on most surfaces, I did struggle with one of the lowers, the powder coating was much tougher to remove that the other three wishbones.
Just finishing off today with an angle grinder, wire brush wheel etc, trying to get a good key for the POR 15.
Thanks for the tips re leaving the joint faces un-painted, I have new ball joints and spacers and they are a tight fit.
Paint should arrive tomorrow I hope and Griff should be back on the road by the weekend.
TVR Dummy said:
Marty
Thanks for the tips. I picked up some used wishbones which had a bit of surface rust, started to prep them and got a bit carried away! Ended up using some Nitromors paint stripper to remove the old coating, they are now more or less back to metal on most surfaces, I did struggle with one of the lowers, the powder coating was much tougher to remove that the other three wishbones.
Just finishing off today with an angle grinder, wire brush wheel etc, trying to get a good key for the POR 15.
Thanks for the tips re leaving the joint faces un-painted, I have new ball joints and spacers and they are a tight fit.
Paint should arrive tomorrow I hope and Griff should be back on the road by the weekend.
Glad I could help. Thanks for the tips. I picked up some used wishbones which had a bit of surface rust, started to prep them and got a bit carried away! Ended up using some Nitromors paint stripper to remove the old coating, they are now more or less back to metal on most surfaces, I did struggle with one of the lowers, the powder coating was much tougher to remove that the other three wishbones.
Just finishing off today with an angle grinder, wire brush wheel etc, trying to get a good key for the POR 15.
Thanks for the tips re leaving the joint faces un-painted, I have new ball joints and spacers and they are a tight fit.
Paint should arrive tomorrow I hope and Griff should be back on the road by the weekend.
Its what we're all here for after all.Post some photos when you've finished.
Regarding tight clearances on wishbones, you've just reminded me...I had one that was very tight as well. I managed to get the ball joint and spacers into the wishbone but had to sit one end on the ground and put pressure on the other end of the wishbone in order to open the gap out to accept spacers and ball joint. This then caused me problems when I tried to fit the wishbone - because I had opened up the gap to fit the ball joint, it had reduced the distance between the chassis pick-up points and I couldnt fit it.
Ended up stripping it apart again and filing the ball joint mounting faces of the wishbone flat and also dressing the spacers so that I could fit it all together without having to open the gap up to fit the ball joint. It also meant that the wishbone then fitted quite sweetly at the chassis pick-up points as well
Fantastic looking engine bay - great effort, one day mine will look like that...maybe.
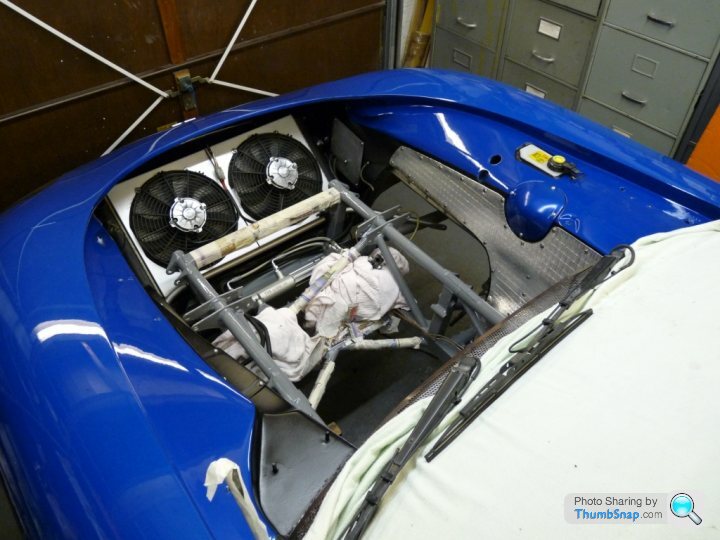
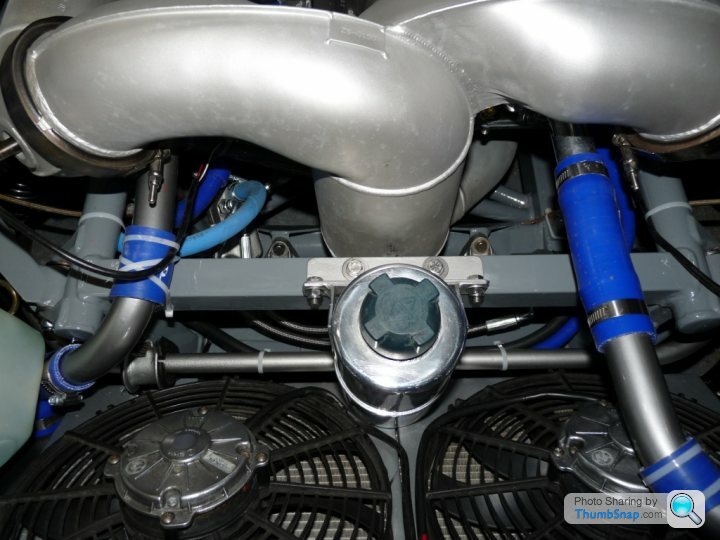
For now though I just need to get my radiator fixed. While the old one is out I like the painted shrouds on yours and may do something similar. What paint did you go use? Given that the shrouds are plastic but will still be in a hot/damp environment I don't want to end up with cracking or peeling paint.
Thanks.
Tim.

Great stuff and something I wish I could get round to doing! Time to get it dirty now.........
I have a vented bonnet (the original is in the rafters of the garage) and it makes a huge difference. I would just say do it and see for yourself.
The body tub doesn't get hot as the hot air is chucked over the sides, and the car sits patiently in traffic without the fans whirring all the time! On a long journey round France in 31C the cabin felt great and we even needed the heater on when the sun went down!
TimJM said:
Fantastic looking engine bay - great effort, one day mine will look like that...maybe.
For now though I just need to get my radiator fixed. While the old one is out I like the painted shrouds on yours and may do something similar. What paint did you go use? Given that the shrouds are plastic but will still be in a hot/damp environment I don't want to end up with cracking or peeling paint.
Thanks.
Tim.
Hi,For now though I just need to get my radiator fixed. While the old one is out I like the painted shrouds on yours and may do something similar. What paint did you go use? Given that the shrouds are plastic but will still be in a hot/damp environment I don't want to end up with cracking or peeling paint.
Thanks.
Tim.
Been away for a week so have only now got round to replying. Thanks for the compliments as well.
WRT the paint on the rad shrouds, its good old Smoothrite Silver. Its been heat treated several times now and shows no sign of peeling.
Regards
Marty
Veg said:
Great stuff and something I wish I could get round to doing! Time to get it dirty now.........
I have a vented bonnet (the original is in the rafters of the garage) and it makes a huge difference. I would just say do it and see for yourself.
The body tub doesn't get hot as the hot air is chucked over the sides, and the car sits patiently in traffic without the fans whirring all the time! On a long journey round France in 31C the cabin felt great and we even needed the heater on when the sun went down!
Thanks for the comments. The car has now got 500 miles on it since the rebuild, so yeah its been dirtied already.....I have a vented bonnet (the original is in the rafters of the garage) and it makes a huge difference. I would just say do it and see for yourself.
The body tub doesn't get hot as the hot air is chucked over the sides, and the car sits patiently in traffic without the fans whirring all the time! On a long journey round France in 31C the cabin felt great and we even needed the heater on when the sun went down!
Info on the vented bonnet is good to hear so thanks for posting that. Just need to get my mitts on a reasonable secondhand Griff bonnet now.
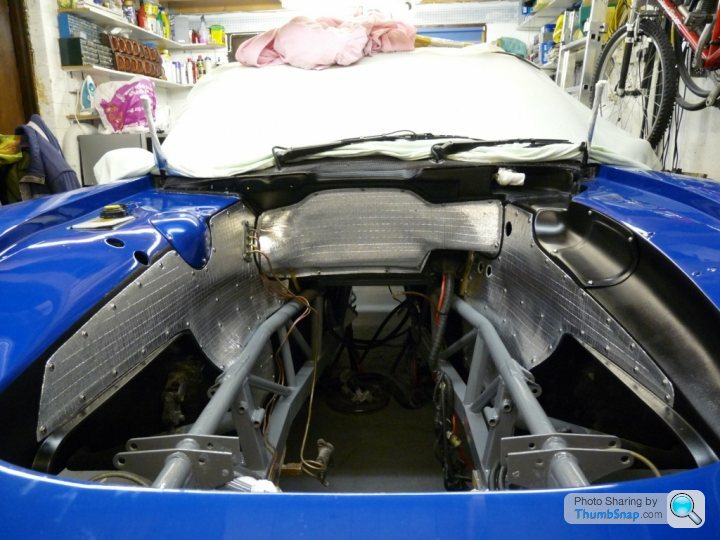
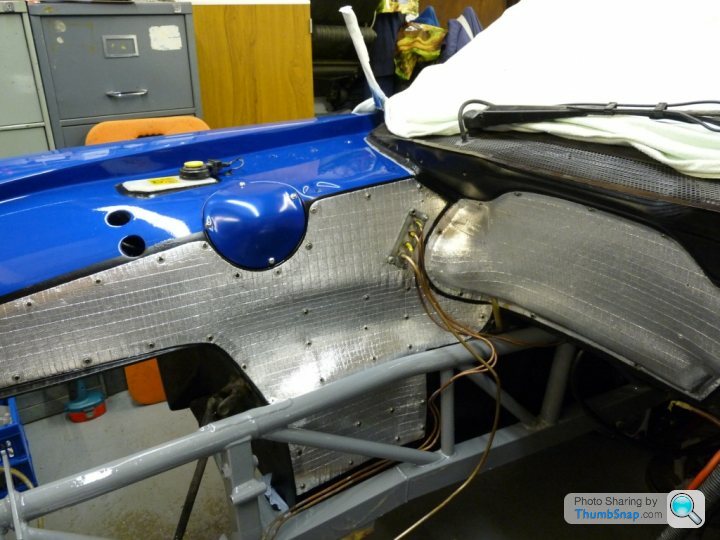
Cabin heat (or rather the reduction of) is something I want to do more work on. I've already changed the heater valve which did wonders and have also increased the area of heat matting that I put around the inner wings during the rebuild. The vented bonnet should also assist with the reduction of heat soak, which can only be a good thing.
cheers
Marty
Gassing Station | Griffith | Top of Page | What's New | My Stuff