My Baby Blue Build
Discussion


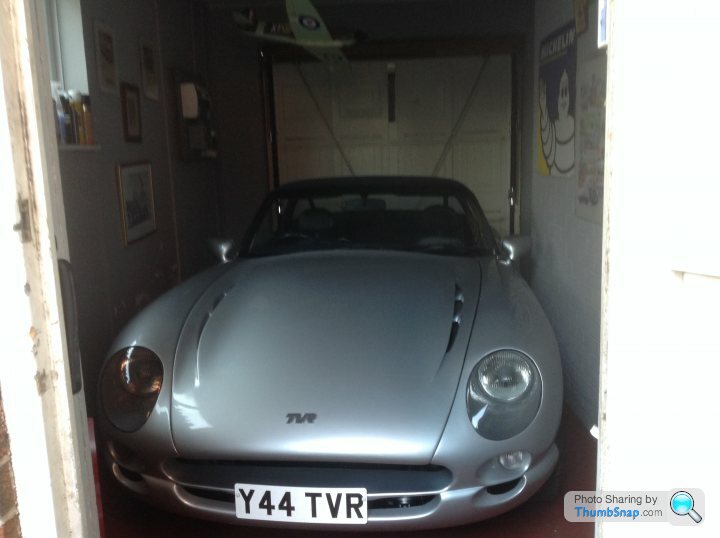
Mike, how's it going? On the road now? I was attracted to this thread by the photos of the Griffith body in such a stunning colour ... I am down the other end of the A65 in Ilkley, I would love to see your car some day. I am in Clitheroe too every now and then, I am sure that you can guess where exactly! John
Hi Guys sorry it's still on going. Been a little distracted recently. Made some good progress though. I'm 95% there now. Considering 18 months ago there was nothing at all left on the chassis and nothing in or on the tub, to get most of 8t back together is fantastic. Still making slight improvements here and there when I get chance. Such as more modern connectors here and there. Polishing this and that still. I'm half way through polishing up the maf. Next will be the bonnet catch.
Most of the interior is in now and complete. There is a few things to do. I've got both doors on but I've got an issue with the passenger door window not working need to figure that out.
I've been lazy not getting my impreza Ps rack sorted so it's been delaying me starting the car.
My next thing is I need to get the rough re clothed. Any suggestions on who can do that in the north west?
Johnzo your welcome to come and view but it has to be finished first haha. I'm. Only 10 mins away from J36 of the M6. I'm hoping I can get my finger out this next month it should be running and driving with a fresh MOT.... Well maybe #facepalm
In fact let me update this list too.
Fit spot lamps - done need to test
Fit headlamps - done need to test
Fit sidelights
fit blue conduit to cabling under body - done
Lower tub onto chassis - done
Bolt tub to chassis - done
Connect break and clutch lines to alloy boss - done need to test for leaks
connect break master cylinder to engine breather - done
connect under body cables. - done
Connect earth to chassis from body (engine) - done need to test
Connect and seal engine wiring to tub wiring sealing in bulkhead. - done
fit dashboard and instruments
connect all engine hosing and fill with coolant - hoses connected need to fill
connect air con pipes - done need to test for leaks
fit fuel tank - done need to test for leaks
connect to fuel pump - done
fit male type breather to fuel expansion line - done
connect fuel return pipe. - done need to test for leaks
clean and paint (possibly wrap) exhaust manifolds - done
clean and paint (possibly wrap) exhaust y pipe - done
fit exhaust manifolds and y pipe - manifolds done
fit exhaust system and under neath bracket. - done
fit additional carpet and trim - done
fit seats - done
Fit induction system
Test all electricals
Fit impreza pinion
Measure and cut down steering column to length
Connect hydraulic lines to ps
Fill power steering
Bleed brakes
Track wheel alignment
Purchase some thinner tyres for front wheels (currently to wide to turn properly)
Purchase locking wheel nuts
Get car weighed and suspension set up.
MOT


I think some colours suit the Griff, some don't - that is one that absolutely does. Add Gulf Orange racing stripes to match the chassis if you get bored? Trimmers - I'd ask TVR specialists who they use to play it safe. There used to be Martrim in northwich, if they're still going, and I know Peter Lenton in Cheadle, Manchester is good interior-wise but don't know if he does hoods.
Awesome. Simply awesome
Awesome. Simply awesome


Ok not much more to get done. Lights all wired up and working a treat. Got a ecu fault stopping me from starting her up.
So decided to get the brakes bled up, clutch bled up and finish off some minor things like rerouting a few cables so there neater.
Cables done.
Lights done but need some new bulbs.
Brakes.... Errrr
Clutch.... Errr
Ok so attempted to bleed the clutch. Pressed the clutch pedal down, it goes down but does not spring back. So after a but of faf I came to the conclusion that the master cylinder is screwed.
So for anyone who wants to do this without removing everything I will let you know this is possible to do and takes around 30mins.
1. Remove the black domed cover
2. Undo the clutch slave bleed nipple this will drain any fluid in the system. In my case I did this but no fluid came out as the plunger in the system was stuck closed. Pressed in.
If like me then use some blue garage towling to soak up the fluid.
3. Remove the 1/2 inch brass fitting which has the copper pipe on the master cylinder.
4. Wrap a thick cloth around a 13mm spanner. Put it onto the top bolt head. Inside the car undo the 13mm top nut the spanner will move around slightly in the open hole until it's undone. But with the towel on it won't mark the paint.
5. Bottom bolt. Ok I used a 1/4in drive 13mm socket, and 4inch extension to my ratchet. If you ratchet is metal wrap with the towel again. Now you have just enough room to feed it past the front of the clutch master cylinder. Then underneath to the bottom bolt. NOTE: make sure you click the ratchet to undo. Otherwise your going to have to take it back out.
6. Disconnect the pin thing holding the master cylinder.
Ok not to fit the new one reverse the above.
After this issue I decided luckily before moving onto removing the clutch MS I decided to bleed up the brakes.
Similar issue failed brake master cylinder. Not sure what fluid was last in these but I'm guessing it's been the wrong dot fluid and it's rotted them.
So after removing the clutch MS it was quite easy to then remove the brake MS.
I knifed out the silicone holding in the reservoir drained out the fluid. Then pulled off the reservoir while the brake MS was still bolted in. Thus gave me good access to the pipes.
I unbolted the easy rear brake line first. Then unbolted the MS from the drum then moved the MS out through the hole of the reservoir. To access both front brake lines. Unbolted these then swapped the new MS over.
A few pics. Warning however make sure you order the correct clutch MS I've ordered one with a smaller diameter thread hole for the clutch line.
UPDATE: So see my comment further below about the adapter, the clutch MS only comes with the smaller hole now, so an adapter is needed for it to fit.
Edited by Mike8448 on Monday 19th June 10:01
Edited by Mike8448 on Thursday 22 June 14:35
Mike8448 said:
6 simple steps to swapping clutch cylinder
You forgot the upside down thing in the footwell where you start to lose conciousness, pressing 13 y.o daughter into service to hold engine bay spanner while I clout my head repeatedly on steering column, not being able to get the bloody pipe fitting out far enough to clear the cylinder body, and the two bleeding processes - one of clutch fluid, one of claret seepage from fibreglass abrasions. [Jim Royle] 30 minutes my arse [/Jim Royle]

andy43 said:
You forgot the upside down thing in the footwell where you start to lose conciousness, pressing 13 y.o daughter into service to hold engine bay spanner while I clout my head repeatedly on steering column, not being able to get the bloody pipe fitting out far enough to clear the cylinder body, and the two bleeding processes - one of clutch fluid, one of claret seepage from fibreglass abrasions.
[Jim Royle] 30 minutes my arse [/Jim Royle]
I did this on my own. It really was not that bad I didn't get into the car upside down. Just had a torch to light up the footwell a knelt down. I do know what you mean about the claret that a TVR seems to ooze out EVERYWHERE due to the damn fibreglass. HAHA[Jim Royle] 30 minutes my arse [/Jim Royle]
Thanks, Guys appreciate the comments.
UPDATE on the Clutch Master Cylinder!! Just for simplicity and for helping others in the future you order the parts from:
Clutch Master Cylinder
Girling Master Cylinder 5/8 Inch
http://bit.ly/2sUxpCz
Also, you need to ask for an adapter, so on this item, the exit hole is smaller than original. (I dont know the sizes but the guy at Merlin ordered me an adapter etc) So they provided an adapter that is Male to Male then you need to cut off the tip of the existing clutch line, fit the new brass fitting and flare the end.
BRAKE MASTER CYLINDER
Part number BMC4230
http://bit.ly/2sF3rAj
This fits a treat follow the above procedure. It was really quick, quicker than removing the pedal box and steering rack.
Total time taken to remove and refit new for these would be around the 1 hour 30 min mark.
Gassing Station | Griffith | Top of Page | What's New | My Stuff