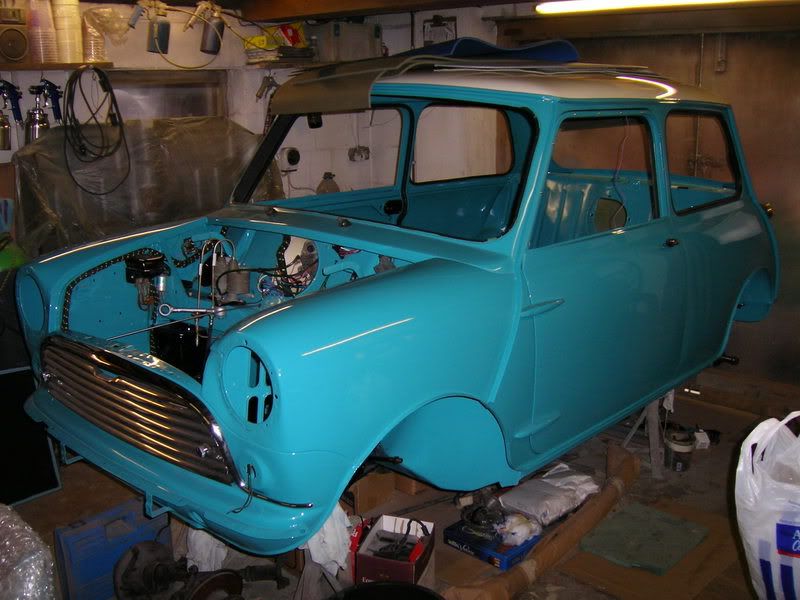
my mark one shell resto............
Discussion


do you fancy a swop clumbo?
both my other minis are surf blue - the best colour i think!, it was actually the second most unpopular colour for mk1s, the first been fiesta yellow
i still havent decided what colour to do this one, a third in surf will be too much i think i might do it almond green.
any more photos?
both my other minis are surf blue - the best colour i think!, it was actually the second most unpopular colour for mk1s, the first been fiesta yellow
i still havent decided what colour to do this one, a third in surf will be too much i think i might do it almond green.
any more photos?
this weekend i had my new lh inner wing to fit, despite it been a heritage panel its a modified later pressing, so like the other side had various bits to remove. unlike the other side the pressing was terrible and it really didnt want to fit. the entire back edge was all mangled up as if the press tool had made it wrong, so it was a foul job.

the first trial fit, the top edge is in the right place, so the outer wing and a panel fit, but thats about it. its took about 2 hours of nibbleing and twisting just to get it to this point. shortly after i gave up and retired to some cans of stella!
i then spent all sunday slowly pulling the wing into line up with all the panels. once it fitted to an acceptable standard i fitted the shocker mount reinforcing panel. this is a panel from mini-machine that is about 75% finished. it needs a bit of tweeking to get it to line up with the inner wing and the triangle stiffner that goes onto the bulkhead, but is an easy task.

shock plate welded in and smoothed off. once this was in i could mark the inner wing to remove the large 'bump' thats pressed into it for a later wiper motor. a bit of marking and a 4" square of jag xj40 roof saw to that.
once that was done it was a boring task of marking all the holes for the plug welds and either drilling or punching the wing or the appropriate seams, then a quick linnish and a final cleco into position. then all i had to do was hammer and dolly along all the seams to pull the cleacos and the panels as snug as possible ready for welding.


the sharp eyed amongst you will notice that the inner wings have the bumps for air vents still in them, ive left them as is for now, i may change them later, but doing them 'off' the car would have twisted the panel even more. they dont really get in the way either.
the first trial fit, the top edge is in the right place, so the outer wing and a panel fit, but thats about it. its took about 2 hours of nibbleing and twisting just to get it to this point. shortly after i gave up and retired to some cans of stella!
i then spent all sunday slowly pulling the wing into line up with all the panels. once it fitted to an acceptable standard i fitted the shocker mount reinforcing panel. this is a panel from mini-machine that is about 75% finished. it needs a bit of tweeking to get it to line up with the inner wing and the triangle stiffner that goes onto the bulkhead, but is an easy task.
shock plate welded in and smoothed off. once this was in i could mark the inner wing to remove the large 'bump' thats pressed into it for a later wiper motor. a bit of marking and a 4" square of jag xj40 roof saw to that.
once that was done it was a boring task of marking all the holes for the plug welds and either drilling or punching the wing or the appropriate seams, then a quick linnish and a final cleco into position. then all i had to do was hammer and dolly along all the seams to pull the cleacos and the panels as snug as possible ready for welding.
the sharp eyed amongst you will notice that the inner wings have the bumps for air vents still in them, ive left them as is for now, i may change them later, but doing them 'off' the car would have twisted the panel even more. they dont really get in the way either.
guru_1071 said:
minipete said:
Don`t sills need to be seam welded on not just spot welded?
they where spot welded by the factory, all ive done is put the sameish qty of plug welds back in the same places.as long as both surfaces are fresh and clean there are no issues.
Keep up the good work....you're doing a cracking job!


had a bit of a sense of humour failure with the shell, took a week off work with high plans, spent sunday and monday struggling with the lh inner wing.
i finally got it welded in, but the fit was such $hit quality that i nearly cut it off and ordered a new one from mini machine. i dont actually know how heritage have made it so bad. the pressing is so wrinkled that the metal is like tissue in some places. once it was actually in, i had to chop a big bit out and make a patch as it was so poor, trying to plug weld it, the metal would just fizz away leaving a perfect plug weld and a big hole round it. i actually think its some kind of factory second.
the other problem is that whilst all the measurements are correct for the sills and floor (side to side) there is a huge gap at the bottom (which will be hidden by the inner a panel, but thats not the point)
anyhoo, for my own good i decided to move onto another project for a couple of days so needed my garage back.
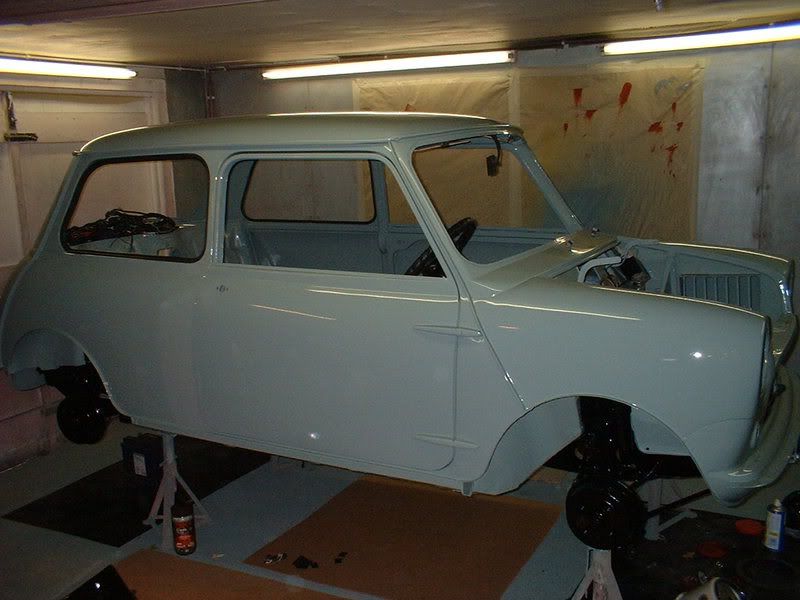
the only place i had to store the shell is shown below, quite apt really as i was ready to throw it off a cliff.
still had a happy half an hour humming the theme tune and shouting 'get the wheels in line, the wheels in line' as the winch pulled my trolley up the ramp, by a quirk of fortune the castors where just wide enough for the ramps........

and thats gonna be it for a few weeks folks, so when i get started again there will be more photos..........

i finally got it welded in, but the fit was such $hit quality that i nearly cut it off and ordered a new one from mini machine. i dont actually know how heritage have made it so bad. the pressing is so wrinkled that the metal is like tissue in some places. once it was actually in, i had to chop a big bit out and make a patch as it was so poor, trying to plug weld it, the metal would just fizz away leaving a perfect plug weld and a big hole round it. i actually think its some kind of factory second.
the other problem is that whilst all the measurements are correct for the sills and floor (side to side) there is a huge gap at the bottom (which will be hidden by the inner a panel, but thats not the point)
anyhoo, for my own good i decided to move onto another project for a couple of days so needed my garage back.
the only place i had to store the shell is shown below, quite apt really as i was ready to throw it off a cliff.
still had a happy half an hour humming the theme tune and shouting 'get the wheels in line, the wheels in line' as the winch pulled my trolley up the ramp, by a quirk of fortune the castors where just wide enough for the ramps........
and thats gonna be it for a few weeks folks, so when i get started again there will be more photos..........
I feel your pain. I spent 3 hours this afternoon messing around with my welder only to end up burning many holes in the car. I am usually ok, but god knows what was happening today, I got so wound up I calculated how much I could recover selling my track bits and scrapping the thing
Hopefully it will be better next weekend.
Your progress is great, keep going.
Hopefully it will be better next weekend.
Your progress is great, keep going.
Fatboy said:
guru_1071 said:
the only place i had to store the shell is shown below, quite apt really as i was ready to throw it off a cliff.
What is that old Coach? And why do you have one lying around? Does it work.Sorry for going off topic!
ive restored it from a complete wreck, it still needs a few jobs doing but should be out and about next year.
the front half is a camper, the back takes a car
Gassing Station | Classic Minis | Top of Page | What's New | My Stuff