Lund's MG Metro 1275 Engine Build
Discussion


More friction and more resistance in the valve train. Pretty simple stuff really. The MG cam (Stamped CAM 6648) will be good for about 6K with a very good head on 1275cc engine. You can fit your double springs - but it really won't need them - the standard single springs will easily control the valves and avoid valve bounce up to 6K rpm.
The single chain bears on both sides of the chain and puts the load in onto the chain links equally. If you put the tensioner onto the duplex chain it only bears on the centre of the chain where the links are virtually touching. So all the load goes into the centre of the tensioner over a very small area. This can cause tensioner failure on higher-revving engines.
I've seen one that's broken and one that was about to break this year alone.
The tensioner is probably OK for engines pulling up to about 5500 rpm regularly, but I would rather not take the risk at all.
I've seen one that's broken and one that was about to break this year alone.
The tensioner is probably OK for engines pulling up to about 5500 rpm regularly, but I would rather not take the risk at all.
Cooperman said:
The single chain bears on both sides of the chain and puts the load in onto the chain links equally. If you put the tensioner onto the duplex chain it only bears on the centre of the chain where the links are virtually touching. So all the load goes into the centre of the tensioner over a very small area. This can cause tensioner failure on higher-revving engines.
I've seen one that's broken and one that was about to break this year alone.
The tensioner is probably OK for engines pulling up to about 5500 rpm regularly, but I would rather not take the risk at all.
Okay cheers Cooperman, thank you again for sharing your experience. Not long now before it's fully built up, need to get myself another flywheel housing oil seal and a few bits and bobs. Do you think the standard mechanical petrol pump is upto the job? I don't see why not.I've seen one that's broken and one that was about to break this year alone.
The tensioner is probably OK for engines pulling up to about 5500 rpm regularly, but I would rather not take the risk at all.
Tom
Cooperman said:
It looks really good Tom. What a great job you are making of it.
Maybe when it's all done we will get the chance to see it at one of the Mini shows.
Peter
I certainly hope so Pete, one last push to get it done. I don't fancy putting it in in the snow however!Maybe when it's all done we will get the chance to see it at one of the Mini shows.
Peter
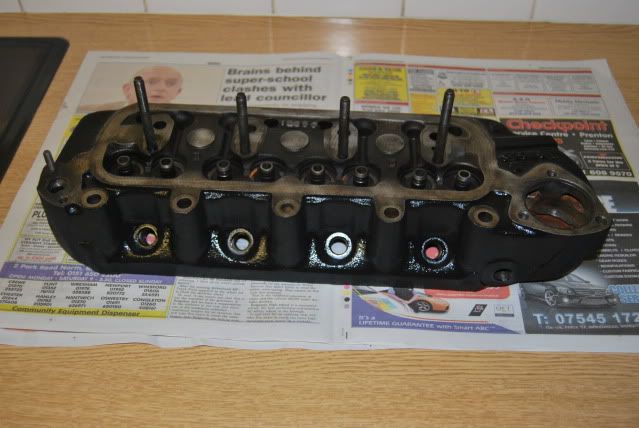
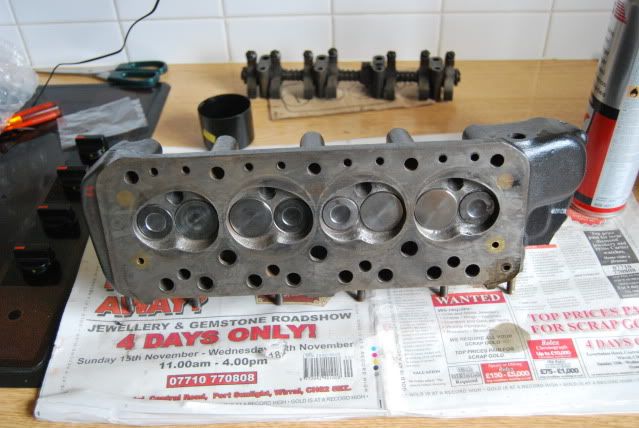
Removed the masking from the cylinder head, looks well. Abit thin in places, dad has said that I shouldn't have primed it as it will react with the top coat and flake off...
Edited by Mini_Lund on Monday 2nd November 20:25
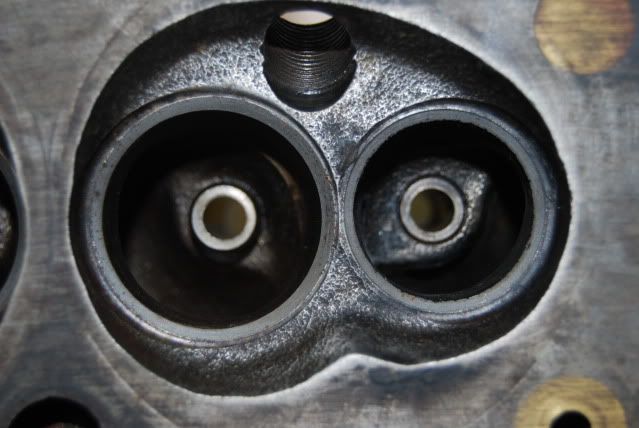

The seats look fine with a good even width of seating for each valve.
One thing you could do would be to smooth out the small steps around the edges of the valve seats, but do it very carefully to avoid damage to the seats. Then if you have a set of old valves the same size, just lay them in and clean up the surface of each chamber with a 1" dia flap wheel in an electric drill. It just helps the airflow in and out slightly.
Alternatively, run what you have then, in time, get another head casting, say an MG Metro one, and gas-flow it yourself, fit new guides and valves and put the comp ratio up a bit to, say, 10.3:1. Then you'll gain quite a bit more.
Peter
Cooperman said:
The seats look fine with a good even width of seating for each valve.
One thing you could do would be to smooth out the small steps around the edges of the valve seats, but do it very carefully to avoid damage to the seats. Then if you have a set of old valves the same size, just lay them in and clean up the surface of each chamber with a 1" dia flap wheel in an electric drill. It just helps the airflow in and out slightly.
Alternatively, run what you have then, in time, get another head casting, say an MG Metro one, and gas-flow it yourself, fit new guides and valves and put the comp ratio up a bit to, say, 10.3:1. Then you'll gain quite a bit more.
Peter
Hi Peter,One thing you could do would be to smooth out the small steps around the edges of the valve seats, but do it very carefully to avoid damage to the seats. Then if you have a set of old valves the same size, just lay them in and clean up the surface of each chamber with a 1" dia flap wheel in an electric drill. It just helps the airflow in and out slightly.
Alternatively, run what you have then, in time, get another head casting, say an MG Metro one, and gas-flow it yourself, fit new guides and valves and put the comp ratio up a bit to, say, 10.3:1. Then you'll gain quite a bit more.
Peter
The valves have cleaned up excellent and the seating seems spot on with no play or wear. I do have another 1275 head; I think the valves are of the same size as the Metro head. It has new inlet valves, double valve springs and bronzed valveguides, however it is very coked up. I might have a play around with this head. How do you suggest removing the step from the chamber? I'll see about getting the MG head re-worked before It all goes in.
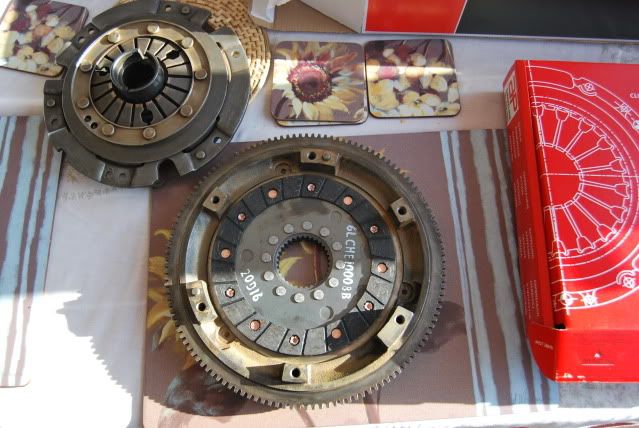
I have just disassembled the Verto clutch and flywheel, I'm after your expertise again, so don't go away just yet! How does this look to you?
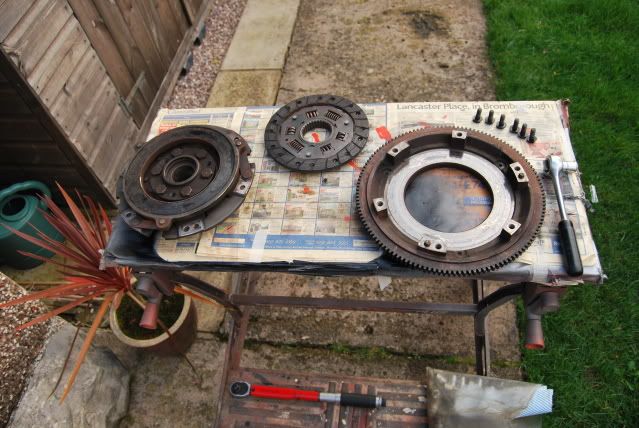
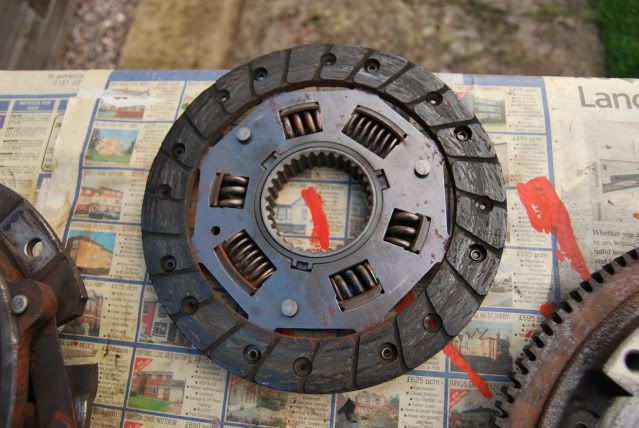
Some macro images of the clutch plates;
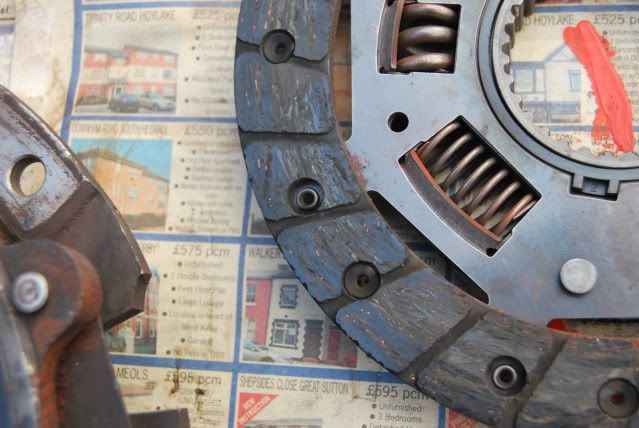
Would it be wise to clean the whole lot in a bowl of hot soapy water, give it a scrub and dry it all out? I would then use brake cleaner to finally clean it.
Tom
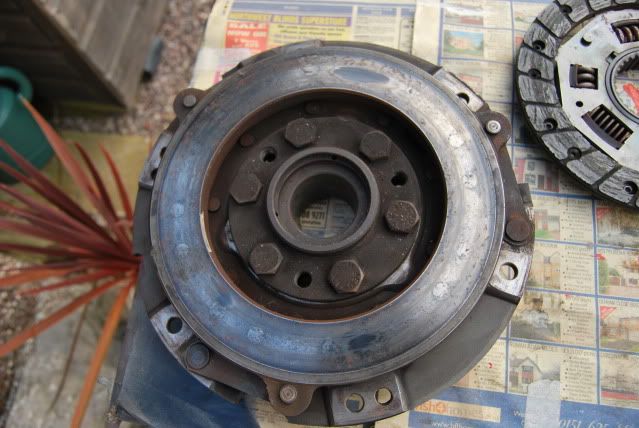
Tom - The Verto assembly is heavy - certainly no performance item. However the longevity is pretty much without question - Mine had over 118K on when the engine/box were finally pulled. Clutch still 100% even with a 30% power increase going through it.
Bare miniumum would be a new metro turbo clutch plate before you stick that little lot back together. Just wouldn't bother messing about with a 2nd hand clutchplate. You've not cut corners so far, why start here?
Bare miniumum would be a new metro turbo clutch plate before you stick that little lot back together. Just wouldn't bother messing about with a 2nd hand clutchplate. You've not cut corners so far, why start here?
FWDRacer said:
Tom - The Verto assembly is heavy - certainly no performance item. However the longevity is pretty much without question - Mine had over 118K on when the engine/box were finally pulled. Clutch still 100% even with a 30% power increase going through it.
Bare miniumum would be a new metro turbo clutch plate before you stick that little lot back together. Just wouldn't bother messing about with a 2nd hand clutchplate. You've not cut corners so far, why start here?
Bare miniumum would be a new metro turbo clutch plate before you stick that little lot back together. Just wouldn't bother messing about with a 2nd hand clutchplate. You've not cut corners so far, why start here?
Do you suggest I purchase this clutch plate;
Clutch Plate Road & Fast Road (HB8017) - GCP204AF
http://www.minispares.com/Product.aspx?ty=pb&p...
What other clutch Items would you think I require, as you stated the new clutch plate would be the bare minimum that you would change.
Edited by Mini_Lund on Wednesday 4th November 15:53
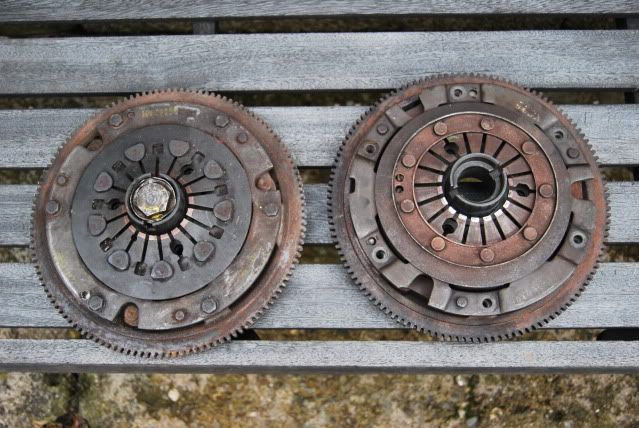
Guys, digging around the garage I found another mini clutch. I suspect its off the Metro 998 that I had as I removed it to get at the flywheel housing for spares. On closer inspection its a Valeo clutch. Does this suggest the clutch was changed at some point or is it standard. I can't tell the difference in weight between the two, but which do you suggest I use?
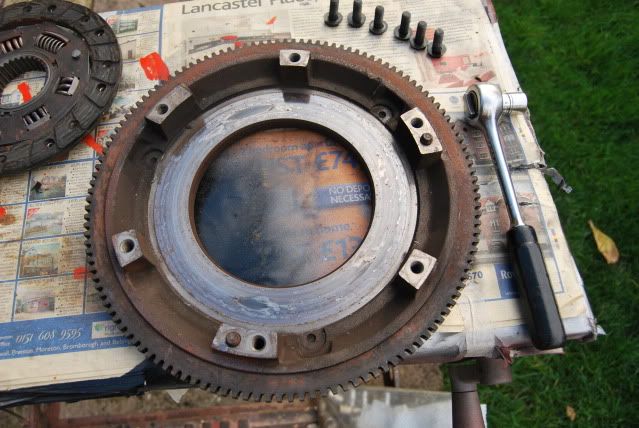
Fast road clutch should be with me sometime next week. I have already successfully cleaned up the ring gear & pressure plate.
Fast road clutch should be with me sometime next week. I have already successfully cleaned up the ring gear & pressure plate.
17/11/09
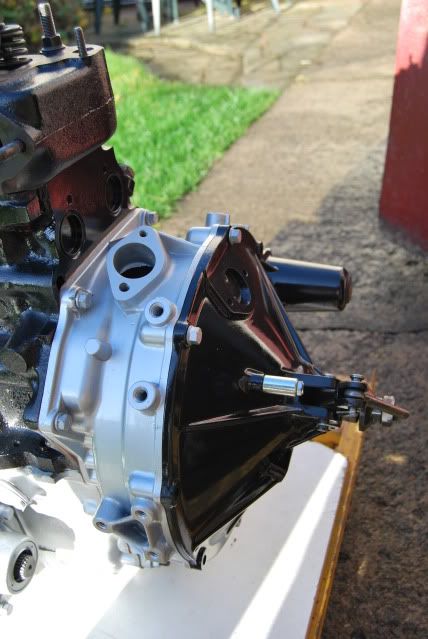
I began assembling the flywheel end cover today, I greased the arm and plunger & renewed the split pins. I am extremely pleased with the finish on the end cover, looks a tad dusty in the sunlight in the photo;

Yet another Minispares order revealed a new AP clutch (HB8017), genuine flywheel oil seal, dust shield & locating bracket for the verto slave.
Tom
I began assembling the flywheel end cover today, I greased the arm and plunger & renewed the split pins. I am extremely pleased with the finish on the end cover, looks a tad dusty in the sunlight in the photo;
Yet another Minispares order revealed a new AP clutch (HB8017), genuine flywheel oil seal, dust shield & locating bracket for the verto slave.
Tom
That all looks great Tom.
Don't forget to back the two large nuts, the overthrow stops, in the centre of the clutch cover right off before re-fitting, then set them accurately after installation and clutch bleeding. It helps to do this final setting before fitting the brake servo and fresh-air pipe (if fitted). The nut size is 15/16". You must use 2 spanners, one of which needs to be 'thin'. If you just use one you can easily snap the ball off the end of the clutch arm. Make sure you put no load on this ball-end when setting the stops.
Don't forget to back the two large nuts, the overthrow stops, in the centre of the clutch cover right off before re-fitting, then set them accurately after installation and clutch bleeding. It helps to do this final setting before fitting the brake servo and fresh-air pipe (if fitted). The nut size is 15/16". You must use 2 spanners, one of which needs to be 'thin'. If you just use one you can easily snap the ball off the end of the clutch arm. Make sure you put no load on this ball-end when setting the stops.
Cooperman said:
That all looks great Tom.
Don't forget to back the two large nuts, the overthrow stops, in the centre of the clutch cover right off before re-fitting, then set them accurately after installation and clutch bleeding. It helps to do this final setting before fitting the brake servo and fresh-air pipe (if fitted). The nut size is 15/16". You must use 2 spanners, one of which needs to be 'thin'. If you just use one you can easily snap the ball off the end of the clutch arm. Make sure you put no load on this ball-end when setting the stops.
Thanks for the tip Peter. I noticed that the haynes gave a standard setting of 0.26", was it wise to apply this setting or as you say, keep it all loosey lucy ready for refinement?Don't forget to back the two large nuts, the overthrow stops, in the centre of the clutch cover right off before re-fitting, then set them accurately after installation and clutch bleeding. It helps to do this final setting before fitting the brake servo and fresh-air pipe (if fitted). The nut size is 15/16". You must use 2 spanners, one of which needs to be 'thin'. If you just use one you can easily snap the ball off the end of the clutch arm. Make sure you put no load on this ball-end when setting the stops.
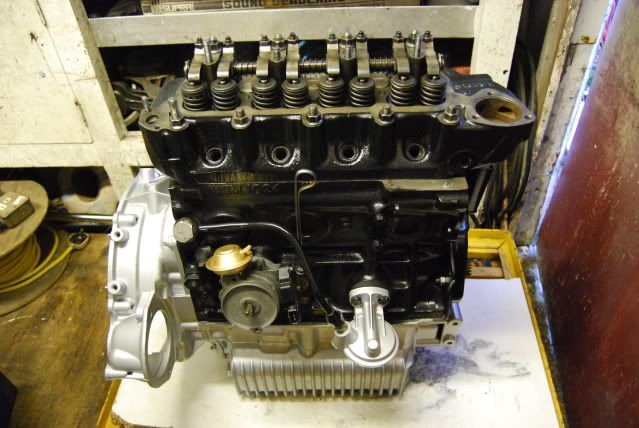
I can't quite get my head round how the slave locating bracket fits, but I'm sure it will become obvious as I fit the end cover. I gave the cylinder head one last clean up and assembled the top hats, springs, valves & collets, along with the rocker assembley.
The push rods were also cleaned and freshly oiled. I placed the head gasket between the block and head, having given the cylinder bores a wipe with oil ready for priming the engine. The cylinder head is now fitted, but not torqued up. I'll find the torque sequence and torque it up properly in the week.
Looking good guys!
Cheers, Tom
Actually you can run without overthrow stop nuts fitted. The very early (i.e. 1959/60) cars did not have overthrow stops. They were introduced due to the high wear rate of early clutches causing owners to incorrectly re-set the arm stop which then allowed damage to the thrust bearings. Personally i don't think the overthrow stops prevcent thrust bearing wear and/or dam age particularly well. I did several rallies with no overthrow stops fitted without any problem, but I did make sure the adjustment bolt gap was set to 0.020".
I just wind out the nuts until they are almost off the plunger, bleed the clutch and set the stop gap to 0.020" and check the clutch movement by pushing down on the pedal. Then I get someone to push the pedal right down, wind in the inner nut - the one with the flange on - until it just touches the casing. Let the clutch pedal up, hold the position of the inner nut and lock it in that position with the outer nut. They are both 15/16" AF. Some say wind the inner nut in one further flat before locking, but as the driven plate wears and the arm stop is adjusted, this can put the overthrow stops in need of further adjustment which is very difficult with everything like servo and air ducts in place.
I just wind out the nuts until they are almost off the plunger, bleed the clutch and set the stop gap to 0.020" and check the clutch movement by pushing down on the pedal. Then I get someone to push the pedal right down, wind in the inner nut - the one with the flange on - until it just touches the casing. Let the clutch pedal up, hold the position of the inner nut and lock it in that position with the outer nut. They are both 15/16" AF. Some say wind the inner nut in one further flat before locking, but as the driven plate wears and the arm stop is adjusted, this can put the overthrow stops in need of further adjustment which is very difficult with everything like servo and air ducts in place.
Hi guys, been busy again today;

Tom
- Re-painted the crankshaft pulley wheel, (as it had a notch on the 'V' which I filed back).
- Cleaned-up and sprayed the alternator brackets & bolts.
- A practise run of assembling the flywheel housing & slave locating bracket. (I understand how it all fits now.
Tom
Gassing Station | Classic Minis | Top of Page | What's New | My Stuff