Lund's MG Metro 1275 Engine Build
Discussion


Cooperman said:
You could get a set of offset keys from Mini Spares, say 2 deg, 4 deg, 6 deg amd 8 deg. That will get you close enough for a good result.
I would just get a standard chain.
Call me if you need to. Email me and I'll reply with my numbers.
Peter
Thanks Pete, I Have purchased the 'Duplex Gears/Chain Set; Genuine Ae Cast Kit,OE Quality'I would just get a standard chain.
Call me if you need to. Email me and I'll reply with my numbers.
Peter
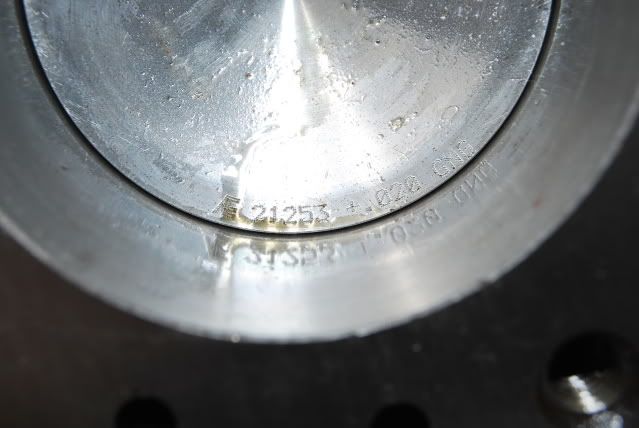
I have the engine back now, its a 1293 with a 0.020" overbore.
Work done:
- Engine Rebore
- High Compression Oversize pistons
- Polished crank
- Re-shelled
1293:
Tom
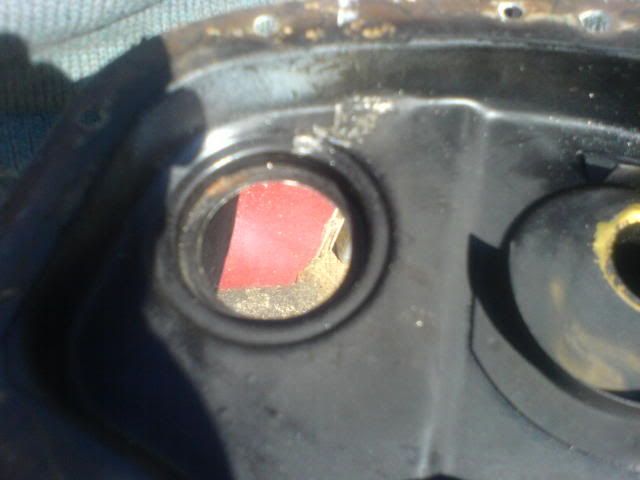
Been busy cleaning up the flywheel housing and cover. I used a Paint & Rust remover poly wheel, along with a wire drill bit - works really well, stripping the corrosion off of the alluminium. As you can see from the photo, part of the flywheel housing has broken off, (the part the breather bolts too). I have the other bit, can it be welded back on? It looked like it had been previously liquid metalled on, but came off when I clenaed it with the wire brush. There's always something! 
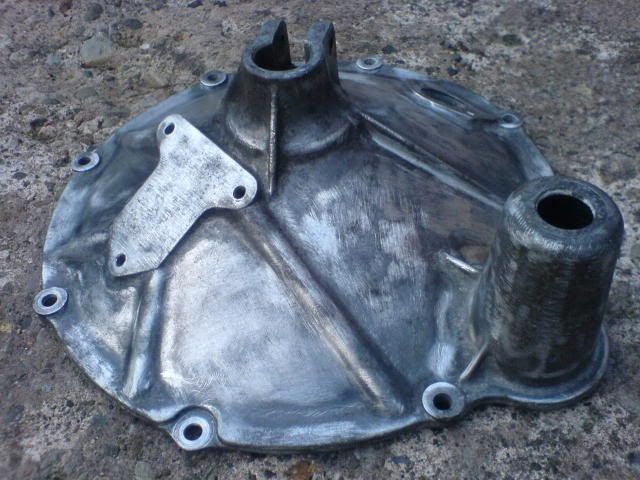

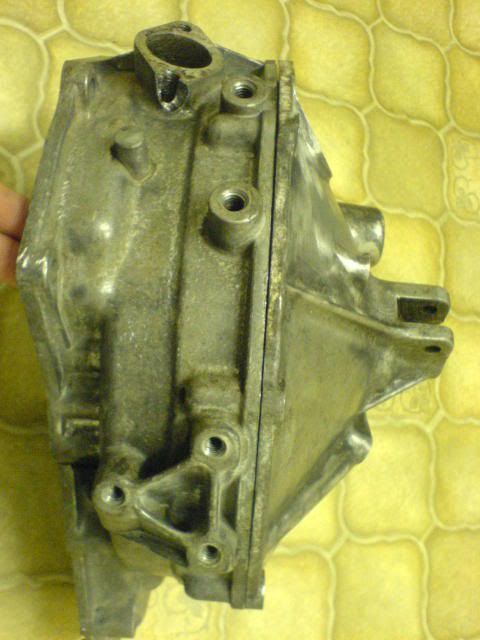
I'll get some Etch primer from halfrauds. I plan to spray the end cover black, and have the housing a metallic silver.
Tom
I'll get some Etch primer from halfrauds. I plan to spray the end cover black, and have the housing a metallic silver.
Tom
Cooperman said:
You could get the transfer gear casing welded, but if it were me I think I would put a breather in another place, like a tapping into the top of an alloy rocker cover, and just repair the damage by aralditing a cover plate on with the bolt in the damaged end also secured by 'slow-set' Araldite. If you file back the Araldite when it's hard and paint the casing it'll not notice. It takes no loads, so no structural issues there.
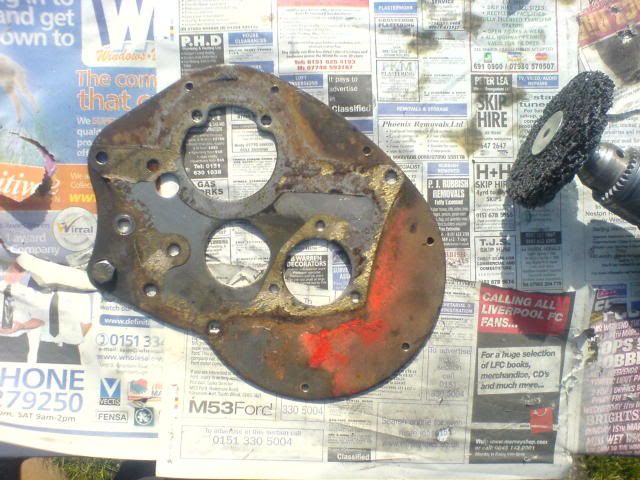
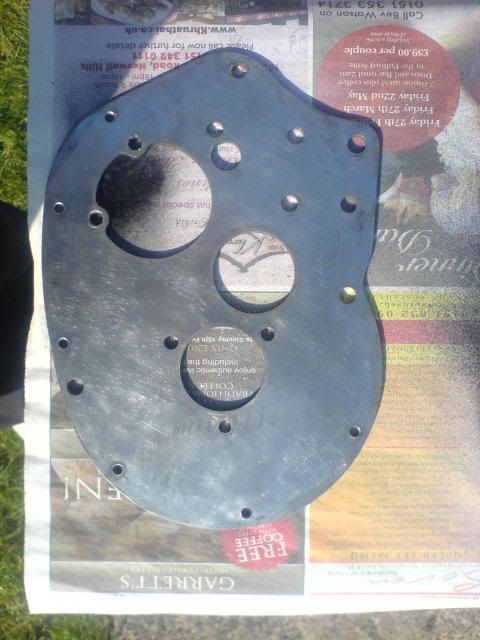
Hi Pete, I have made enquiries and I am having it welded sometime this week. As for painting the block, I have opted for using gloss black enamel. I was concidering using VHT, but it is not necessary to do so.The Cam followers look to be in good condition, am I able to re-use them again? I did not take note of which follower came from where as they fell into the gearbox! One other question; what is used to seal the diff to the gearbox, is it a gasket?
guru_1071 said:
id say the end cover is scrap, for the cost of another is easier just to swop it now than try and repair it, whatever you do its bound to start leaking oil, and its going to be a bigger pain to swop later.
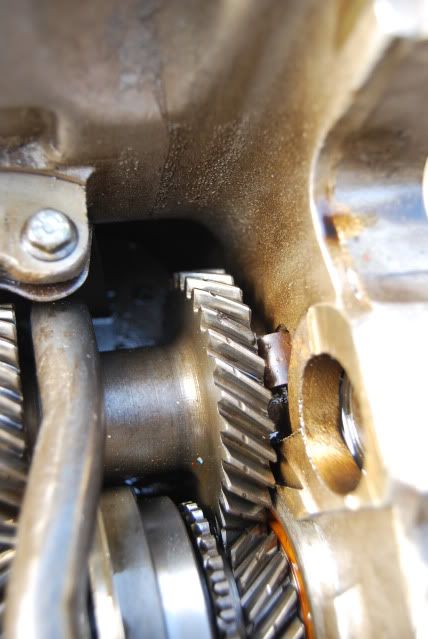
ditto that laygear, its shagged, what ever caused the tooth to break off is probably rattling around (along with the tooth) in the bottom of the box. all that will happen with that laygear is the next tooth along will break etc etc, its only a matter of time. when it next happens though it will probably take the 1st motion with it as well, though i suspect that if you inspected that with a spyglass it will show signs of distress from when the laygear broke
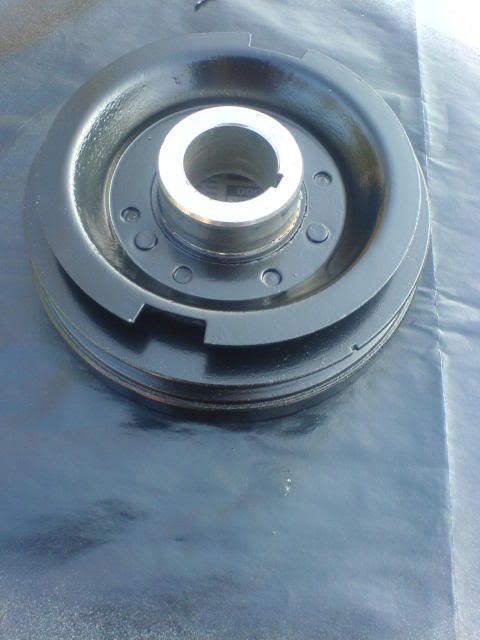
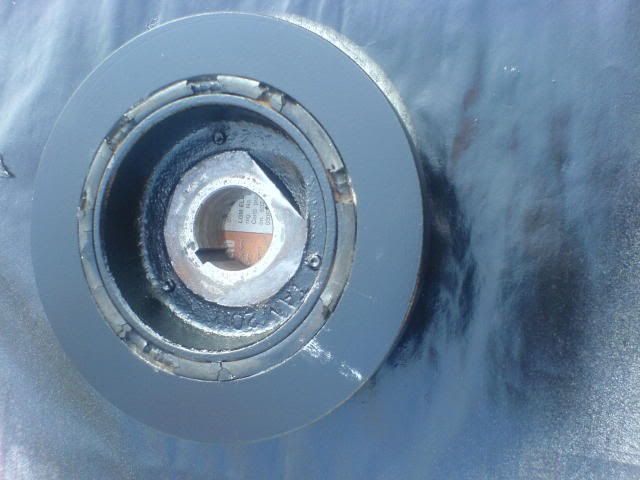
i personally wouldnt use a delaminated from pulley either, but as they are now nla your probably stuck with it unless you either find a better one or swop to the two piece cooper s one.
bad news i know, but thats engines!
also, you cant use the cam followers again if you have mixed them up as the bed into the lodes on the cam.
the diff uses gaskets, some people use rtv only, but this closes all the tolorances up and will not let the diff bearings settle correctly - a bad practice unless the case has been machined with this practice in mind (expensive!)
bditto that laygear, its shagged, what ever caused the tooth to break off is probably rattling around (along with the tooth) in the bottom of the box. all that will happen with that laygear is the next tooth along will break etc etc, its only a matter of time. when it next happens though it will probably take the 1st motion with it as well, though i suspect that if you inspected that with a spyglass it will show signs of distress from when the laygear broke
i personally wouldnt use a delaminated from pulley either, but as they are now nla your probably stuck with it unless you either find a better one or swop to the two piece cooper s one.
bad news i know, but thats engines!
also, you cant use the cam followers again if you have mixed them up as the bed into the lodes on the cam.
the diff uses gaskets, some people use rtv only, but this closes all the tolorances up and will not let the diff bearings settle correctly - a bad practice unless the case has been machined with this practice in mind (expensive!)
Edited by guru_1071 on Wednesday 18th March 18:11
 ks.
ks.Okay, I'll take the box off the spare 1275 and have a look at that one. I might end up swapping parts over to make one good gearbox unit. I have a 2 spare Hosuing's however, one is 998 and is ever so slightly different on one bolt, and the other is on the spare 1275 but doesnt have a breather in the correct place. Is it essential to have a breather on the fly cover?
I'll purchase a new set of followers - are the ones with the oil holes in necessary?
Thanks once again. Tom
guru_1071 said:
there is no difference between either a 998 or a 1275 end cover bar the drilled breather. its fairly easy to drill the blocked off bit out and drill and tap the holes for the bolts.
Last time I looked there was a slight difference, I'll have another look tomorrow and we can play spot the difference 
ETA: spelling errors, too much Stella Artois ... off to find the wife!

Edited by Mini_Lund on Wednesday 18th March 23:27
Edited by Mini_Lund on Wednesday 18th March 23:28
Can't get the flywheel off the other 1275 and I have just managed to strip the bolts of their thread - it wasn't my flywheel to ruin either  I'm starting to think am I really good at anything? I have also just spent another £130 at minispares, bought some cam followers, flywheel puller, and a full set of HILO's. I shouldn't have, but I did.
This engine build is really starting to get me down. Bad times!
I'm starting to think am I really good at anything? I have also just spent another £130 at minispares, bought some cam followers, flywheel puller, and a full set of HILO's. I shouldn't have, but I did. This engine build is really starting to get me down.
Bad times!robminiman said:
Mini_Lund said:
Can't get the flywheel off the other 1275 and I have just managed to strip the bolts of their thread - it wasn't my flywheel to ruin either I'm starting to think am I really good at anything? I have also just spent another £130 at minispares, bought some cam followers, flywheel puller, and a full set of HILO's. I shouldn't have, but I did.
This engine build is really starting to get me down. Bad times!
think thats bad i owe my dad a lot of money and broke my mini then tryed to fix my scooter and failed then broke it even more im about ready to push them both into the middle of the yard and set them on fire anoyed is not the word I'm starting to think am I really good at anything? I have also just spent another £130 at minispares, bought some cam followers, flywheel puller, and a full set of HILO's. I shouldn't have, but I did. This engine build is really starting to get me down.
Bad times! I knew it would cost me alot finacially, I just don't like spending my money on what I already have. Hopefully it should all come together in the end. I stated that I'm on my own for this engine build and want to do it by myself, but I think Im going to ask my dad to get involved.
ETA: Sledge hammer didn't work neither. The thread on th flywheel is 'fubar' so keeps shredding the bolts. What drastic measures can I take to get the flywheel off? I only want the g/box!
Edited by Mini_Lund on Thursday 19th March 18:20
Skyedriver said:
Just a a thought from someone with far too much money tied up in a mini somewhere...and with a flywheel that didn't want to come off...
You have removed the large 33mm (??) bolt, have you removed the washer behind it?
Sometimes you just forget these things...
Yes both bolt and washer have been removed; I'll buy some heavy duty bolts with more thread on them as the threads on the (now threadless) bolts are too short anway, there just not enough thread to ensure a fully fastened puller! I guess they just use cheap metal and a 20 year old, rusted-on flywheel will eat through them all! I'll be persistant. I will get this g/box off! I just hope its in good condition without broken teeth! You have removed the large 33mm (??) bolt, have you removed the washer behind it?
Sometimes you just forget these things...

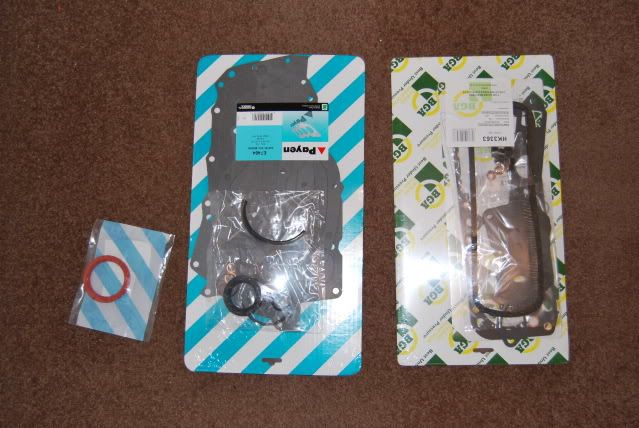
Hi all, been a little bit busier today, not acheived alot, but its a step forward toward completion. I cleaned up and thoroughly oiled the primary gear assembley and refitted that, same again with the cam followers/tappets & loosley installed the cam back into place. I'm just awaiting a full gasket set, so haven't put the front plate and locker washer back on yet.
Flywheel cover is being welded and then re-tapped for a tenner.

Full gasket set and oil seals:
Flywheel cover is being welded and then re-tapped for a tenner.
Full gasket set and oil seals:
Edited by Mini_Lund on Thursday 26th March 22:28
Edited by Mini_Lund on Friday 27th March 00:41
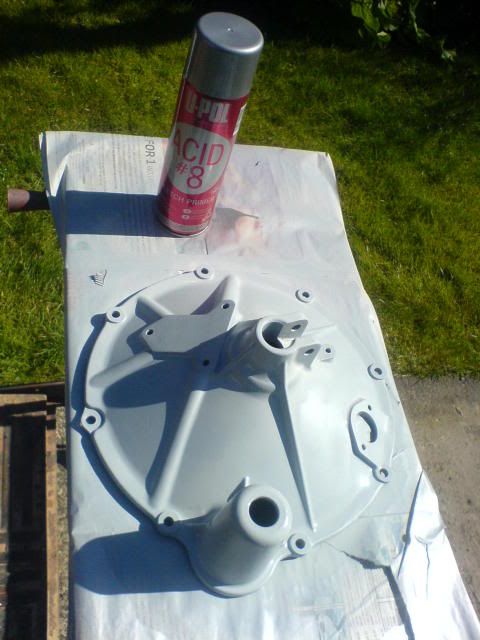
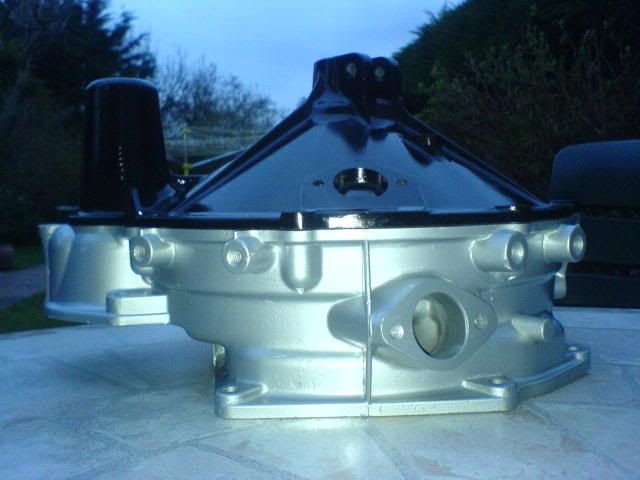
Hi all, with today being nice and sunny, decided to crack on and etch prime the aluminium housings.
I have had the housing breather bit welded and re-tapped. I dressed the welds and fillered it to smarten it up abit. Here's the result, top coat of silver paint:

Impressed?
Sprayed front plate:


Pete, I also knocked out that dent in the timing cover. Is this all I need to do for the chain to fit?
Tom
I have had the housing breather bit welded and re-tapped. I dressed the welds and fillered it to smarten it up abit. Here's the result, top coat of silver paint:
Impressed?
Sprayed front plate:
Pete, I also knocked out that dent in the timing cover. Is this all I need to do for the chain to fit?
Tom
Edited by Mini_Lund on Sunday 29th March 19:38
FWDRacer said:
Why have you painted the end plate? If the paint ends up coming off (Think about the conditions it will experience, heat cycling + Hot oil) it'll end up in your oil system and probably go through your bearings 
I'm all for tidying stuff up etc
I have removed the inner ring, drilling out the spot welds (I had a little accident and managed to penetrate the timing cover!). However, I have welded the hole and put a skim of filler over the top to 'tidy it up abit'. I'm all for tidying stuff up etc
Sanded down the primer, and will clean it properly in due course.

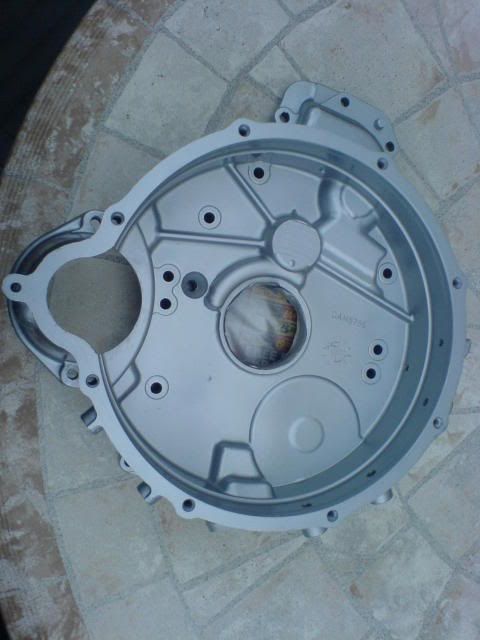
Also, what is the purpose of the squared bit of metal, bottom right of the oil seal?
Removed dent and inner ring;

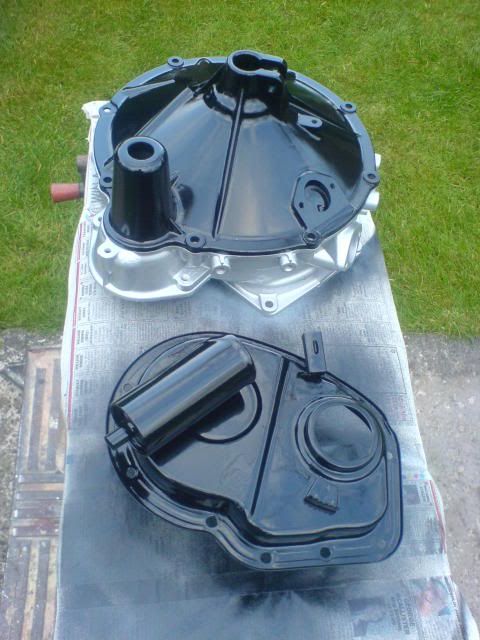
After etch priming the housing, I decided to use silver enamel, and a coating of lacquer; (now complete)
Gave the end cover an initial coat of enamel gloss black. Its due a second coat and I will also lacquer this:
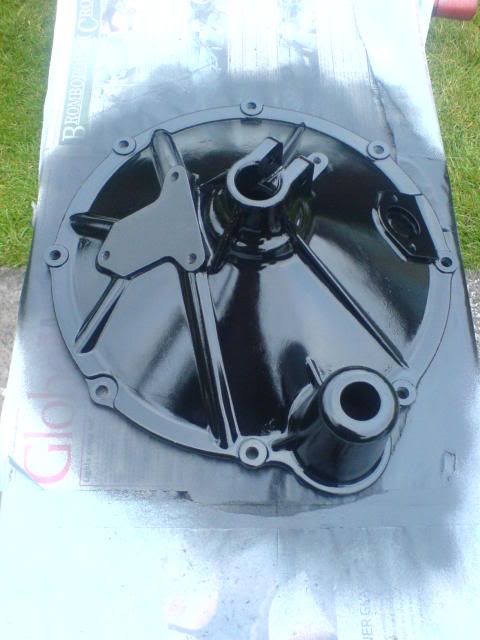
Together:
Slowly but surely getting there && Guys, If I had realised that fitting a duplex timing chain was this much effort, I really would'nt have bothered!
Edited by Mini_Lund on Tuesday 31st March 20:19
guru_1071 said:
Mini_Lund said:
Also, what is the purpose of the squared bit of metal, bottom right of the oil seal?
on the very early metros there was a special tool that fitted into it to help set the timing. it was never used on the mini (and ive never seen anybody use it for anything, or seen the tool that fitted into it.....)i just chop it off, looks untidy.
also, if your using that cover in a mini, you really need to flatten the breather by cutting the outer edge off and welding a plate onto it. it is possible to use it as it is, but you have to space the fan so far from the pump so it doesnt hit it that fitting the rad becomes seriously hard work.
you can buy the later covers with the ready flattened side from minispares for not a lot of money (for far less than the hassle of sorting the round canister breather out on yours)
Edited by guru_1071 on Tuesday 31st March 20:39
Well I'm going to have to spacer the fan as I've finished spraying the timing cover now. 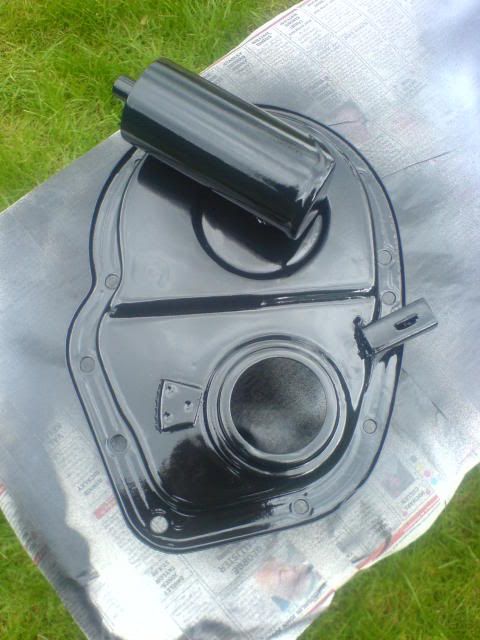
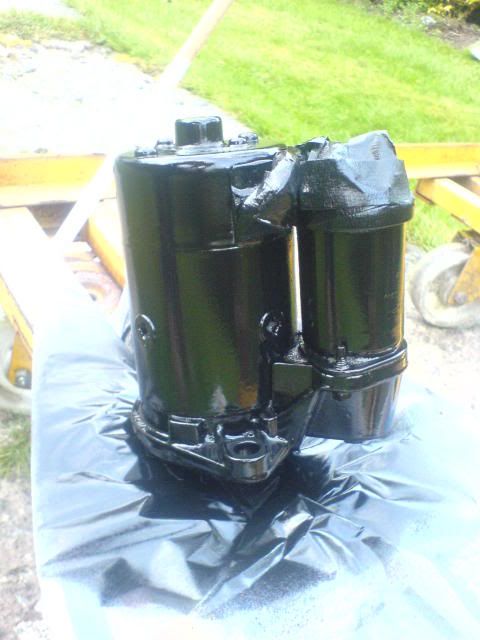
Sprayed Starter Motor;
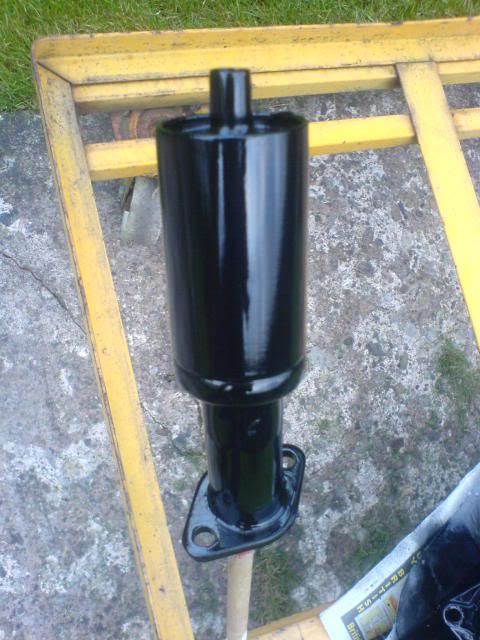
Breather;
guru_1071 said:
sorry about that.
i really wouldnt use it, as the 3/9 spacer you have to fit causes all sorts of proplems with the fan, it makes it nearly impossible to fit the rad!
Im debating what to do now, I might try it with the fan spacer and see how I get on. Too much pain and heartache has gone into that timing cover and it finally looks the mutts nutts!i really wouldnt use it, as the 3/9 spacer you have to fit causes all sorts of proplems with the fan, it makes it nearly impossible to fit the rad!
Have you a photo of what is to be done to the front plate? I've an idea of what is to be done, but can't picture it.
Thanks, Tom
Cooperman said:
I think he means 3/8" spacer!!!
FAN SPACER (3/16") actually 5/32 just under 4mm Edited by Cooperman on Monday 6th April 12:42
Description
Used with most of the stock fans, definitely required if you have a breather type timing cover.
£4.03 inc vat

http://minispares.com/Product.aspx?ty=pb&pid=3...
Does this mean I have to spacer the alternator or does it only spacer the fan out?
guru_1071 said:
you can buy the later covers with the ready flattened side from minispares for not a lot of money (for far less than the hassle of sorting the round canister breather out on yours)
Flattened Breather, £39.08 inc vat http://www.minispares.com/Product.aspx?ty=pb&p...
Bugger that, I'll take the grinder to the breather. By how much needs to come off to clear the fan? This is a real ball ache this is guys!

What do I do about the gauze on the inside?
Edited by Mini_Lund on Monday 6th April 19:18


Hi all,
I am having the gearbox rebuilt by a friend in the mini club whom has built gearboxes and messed with mini's for years and ocassionally still does. However he informs me that he hasn't touched a gearbox in 2 years! I took my box to him and he instantly idenfified it as an early metro box, mk1 metro infact. - how he knows this I have no idea! Its upto the job. Graham will fully rebuild it for me.
However, he's trying to convince me against using the 3:1 differential. He says nothing will touch the mini until 60mph, great..but it will be screaming at 70mph and it will give no-more. He's wanting me to use a 3:44 differential - as standard. What do you guys think?
He also speaks of hardy spicer bits? & he showed me some straight but gears.. no thanks!
What diff would you guys reccommend? I do want it to accelerate well, however I want to be able to cruise at 60 too if possible..
Thanks, Tom
guru_1071 said:
tom
stick to the potjoints, the hardy spicer stuff is expensive and just not required for what you need - we dont even use it on the racers.
id say a 3.4 is too low for road use unless all you do is town and back roads. any long journys it will be a screamer - dont forget that the metro ran tall 13" tyres to make the ratio 'appear' longer
have a look at this site, it works it out quite well.
http://www.guess-works.com/Gearbox/Technical/ratio...
I will be doing town and backroads, however the odd jaunt to a mini show up a dual carriageway wont hurt; 3.44 still sound reasonable?stick to the potjoints, the hardy spicer stuff is expensive and just not required for what you need - we dont even use it on the racers.
id say a 3.4 is too low for road use unless all you do is town and back roads. any long journys it will be a screamer - dont forget that the metro ran tall 13" tyres to make the ratio 'appear' longer
have a look at this site, it works it out quite well.
http://www.guess-works.com/Gearbox/Technical/ratio...
Parts required for gearbox:
ADU7619 Single Roller
AAU1365 Double Roller
Baulk Rings x4 (Leyland specials)
13H9513 1st Motion shaft needle roller with 18mm main shaft
Central Oil Pickup?
Parts required for diff:
12G2583 Diff Cross Pin
2A7015 Pinion x2
2A7062 Bronze Thrust Washers A+ x2
Obvious gaskets and x2 drive flange oil selas..
Does this sound about right to you guys?
The hardened baulk rings are currently out of stock on minispares, I'll have to give them a ring.
Some of the part numbers don't quite match up, having difficulty sourcing the correct parts, can anyone help out?
Thanks, Tom
Gassing Station | Classic Minis | Top of Page | What's New | My Stuff