Discussion


Silver940 said:
Make a nandroid backup now, that way if it crashes you can get back to here in about 10 mins!
Enjoy the extra space!
Good point - doing one now..Enjoy the extra space!
jodypress said:
Funk said:
Done!
I'm back to 'normal' now - all apps reinstalled, contacts in place... It's been a pain in the arse, but I've done it. Learned a lot along the way as well. Now to play with the new apps that come built-in with the Starburst ROM..
Is it really worth the hassle? I too am fed up of low space on a regular basis, but had a look at the steps involved and setting up an install boot disk for my PC for the install seemed a step too far for me.I'm back to 'normal' now - all apps reinstalled, contacts in place... It's been a pain in the arse, but I've done it. Learned a lot along the way as well. Now to play with the new apps that come built-in with the Starburst ROM..
I guess there's a big difference between rooting/flashing because you want new ROMs, and what I wanted which was simply a way to create more space for apps (by tricking the phone into thinking the partition on the SD card is 'phone' memory). Having got this far, I might be tempted to try new ROMs too as with Titanium backup, all my apps and settings can be reinstalled quickly and if it all goes wrong I've got a Nandroid backup I can revert to fairly easily.
The phone also seems to run faster, although that may be down to the fact it's a 'new' install and not cluttered with crap after a year's use. I only have a 'Class 2' SD card which isn't the fastest, but all seems to be working well. Nice to go into the Phone Storage and see 831Mb remaining, even with all my apps installed. I have about 13.8Gb as the FAT32 partition on the card left which is ample.
I think the worrying bit for me was not having someone to guide me through it - it's all well and good saying the info's on various sites, but actually there's TOO much info; finding and understanding the bits that were relevant to me wasn't actually that easy. If anyone wants to do the Starburst ROM, I'll post up a clear step-by-step if you like. I like Starburst as it's exactly like the original HTC installation with Sense UI - just more memory. It's how the phone SHOULD have been set up in the first place in my opinion.
Worth doing? I would say so, despite the hassles along the way. And now the hard work is done, future changes should be a doddle.
Funk said:
On balance, I would say yes it's been worth it. It was more hassle than I'd been lead to believe, and it requires a certain amount of technical know-how to understand the process and what's going on.
I guess there's a big difference between rooting/flashing because you want new ROMs, and what I wanted which was simply a way to create more space for apps (by tricking the phone into thinking the partition on the SD card is 'phone' memory). Having got this far, I might be tempted to try new ROMs too as with Titanium backup, all my apps and settings can be reinstalled quickly and if it all goes wrong I've got a Nandroid backup I can revert to fairly easily.
The phone also seems to run faster, although that may be down to the fact it's a 'new' install and not cluttered with crap after a year's use. I only have a 'Class 2' SD card which isn't the fastest, but all seems to be working well. Nice to go into the Phone Storage and see 831Mb remaining, even with all my apps installed. I have about 13.8Gb as the FAT32 partition on the card left which is ample.
I think the worrying bit for me was not having someone to guide me through it - it's all well and good saying the info's on various sites, but actually there's TOO much info; finding and understanding the bits that were relevant to me wasn't actually that easy. If anyone wants to do the Starburst ROM, I'll post up a clear step-by-step if you like. I like Starburst as it's exactly like the original HTC installation with Sense UI - just more memory. It's how the phone SHOULD have been set up in the first place in my opinion.
Worth doing? I would say so, despite the hassles along the way. And now the hard work is done, future changes should be a doddle.
I did a lot of reading and I agree with you, there is way too much info. Took me ages just to actually download the zip file...and I'm reasonably tech savvy.I guess there's a big difference between rooting/flashing because you want new ROMs, and what I wanted which was simply a way to create more space for apps (by tricking the phone into thinking the partition on the SD card is 'phone' memory). Having got this far, I might be tempted to try new ROMs too as with Titanium backup, all my apps and settings can be reinstalled quickly and if it all goes wrong I've got a Nandroid backup I can revert to fairly easily.
The phone also seems to run faster, although that may be down to the fact it's a 'new' install and not cluttered with crap after a year's use. I only have a 'Class 2' SD card which isn't the fastest, but all seems to be working well. Nice to go into the Phone Storage and see 831Mb remaining, even with all my apps installed. I have about 13.8Gb as the FAT32 partition on the card left which is ample.
I think the worrying bit for me was not having someone to guide me through it - it's all well and good saying the info's on various sites, but actually there's TOO much info; finding and understanding the bits that were relevant to me wasn't actually that easy. If anyone wants to do the Starburst ROM, I'll post up a clear step-by-step if you like. I like Starburst as it's exactly like the original HTC installation with Sense UI - just more memory. It's how the phone SHOULD have been set up in the first place in my opinion.
Worth doing? I would say so, despite the hassles along the way. And now the hard work is done, future changes should be a doddle.
This is exactly what I wanted to do to gain more space on the phone and still have the HTC Sense UI.
Can you post up or PM me a simpler step by step guide. I'm not too worried doing the phone stuff, but more concerned with the PC side of things.
My replacement phone arrived today. Waiting for a returns package to arrive so I can send it back, and start all over again waiting for another replacement.
On opening the package, I found the box to be in poor condition, which wasn't a good sign. Not only does the handset look like it has been used as a football during coffee breaks at the factory, it is also the wrong color. I specified, and they knew as it was mentioned every time I called them, that my phone was black. This one is white, and looks awful (muck and scuffs aside). There was also no memory card, which was part of my claim and had been agreed.
So I am still without a phone. It is 16 days since I started the claim process. This is the second time I have used the free insurance that comes with my bank account, and the second time I have been left wanting. First time was a 5800 repair. Initial repair was carried out, but the bottom half of the screen was unresponsive when it was returned. It was sent off again, and returned with the hard buttons not responding, so I sent it back again. The third time I had it back, it would only run for a few mins before locking up, so they had it back again. 5th time lucky when I got it back.
Once the Desire is finally replaced, I do not think I will "take advantage" of the free insurance again, but start to pay for Orange Care, or put the £6 (I think) aside every month and use it to buy a new phone if I need to.
I am very unimpressed with the service I have had on both occasions I have had to use the free insurance.
Not sure if I can name the company who honors the claims, but it is through a Lloyds TSB Gold account.
jodypress said:
I did a lot of reading and I agree with you, there is way too much info. Took me ages just to actually download the zip file...and I'm reasonably tech savvy.
This is exactly what I wanted to do to gain more space on the phone and still have the HTC Sense UI.
Can you post up or PM me a simpler step by step guide. I'm not too worried doing the phone stuff, but more concerned with the PC side of things.
That was the thing that flummoxed me a little as well - I'm pretty tech savvy but this was outside my sphere of understanding. Here's what you'll need to do, step-by-step, to get to where I am now...This is exactly what I wanted to do to gain more space on the phone and still have the HTC Sense UI.
Can you post up or PM me a simpler step by step guide. I'm not too worried doing the phone stuff, but more concerned with the PC side of things.
Be aware that rooting invalidates your warranty.
1) Get 'SMSBackup' on your phone, use this to back up SMS messages. I also have 'BookmarkSB' which backs up my bookmarks.
2) Get 'Titanium Backup' from the Market. It only works on rooted phones, and is where I ran into some issues - I couldn't run Titanium without rooting, but I couldn't root without doing a hard reset as the Unrevoked process failed originally. I sort of got around this by using AppBrain which kept a record of all my apps (but not my settings - I lost things like game progress etc - nothing to cry about). Using AppBrain is fairly useful anyway, so I'd install that from the Market and 'Sync' your apps with your AppBrain account online (which can use your Gmail address). Make sure your contacts are saved as Google contacts, this will mean they simply sync 'over the air' when you're on the new ROM.
3) Go to http://unrevoked.com/ and download the HTC Desire version.
4) You will also need to download the Windows drivers for Android from here: http://unrevoked.com/rootwiki/doku.php/public/wind... which also gives you instructions for how to install them.
4a) NEW POINT TO CHECK - Ensure you have the HTC Sync installed - this installs the "HTC BMP USB Driver" the "HTC Driver Installer" and "HTC Sync". You must then uninstall ONLY the HTC Sync part - leave the USB Driver and Driver Installer installed - Unrevoked won't work without these installed.
5) Run Unrevoked, and let it do its stuff. It guides you through the process and worked really well. You will need to enable 'USB Debugging' - Settings > Security > Applications > Development > USB Debugging
6) If Unrevoked gives a failure message like I received ("error: Failed to get root. Is your firmware too new?") then you'll need to do a hard reset.
7) ONLY DO A HARD RESET IF YOU CAN'T GET ROOT:
- With the phone turned off, press and hold the VOLUME DOWN button, and then briefly press the POWER button.
- Wait for the screen with the three Android images to appear, and then release the VOLUME DOWN button..
- Press VOLUME DOWN to select CLEAR STORAGE, and then press POWER.
- Press VOLUME UP to start the factory reset.
9) Once you have root access, backup your apps using Titanium. Next you need to back up the original phone ROM as a precaution - this is known as a 'Nandroid' backup. To do this, boot into Recovery:
- Press and hold the Vol Down button and power button - you'll be presented with a new, rooted menu entitled 'ClockworkMod Recovery'
- Scroll down using the trackpad to 'Backup and Restore'
- Select 'Backup' - the phone will backup the core operating system to the SD card.
11) Now we need to partition the SD card. I used Gparted - this page suggests you DON'T partition using the Recovery console, in order to avoid errors. I am a person who likes to avoid errors! Here are the steps for partitioning using Gparted:
- Download the Gparted .iso file from here: http://sourceforge.net/projects/gparted/files/gpar...
- You'll end up with a file called 'gparted-live-0.8.1-3.iso'. This is an image file that you'll need to burn to CD. I used ImgBurn which can be downloaded here: http://www.imgburn.com/index.php?act=download
- Open the image file in ImgBurn and follow the instructions. It will spit out a 'Live CD' which you can boot from. I used my laptop as I wanted access to the instructions on the PC. However, this part is relatively straightforward. Despite my original complaints about the Gparted disc mucking up my Windows install, I've used Gparted subsequently and it was fine - clearly an error on my part somewhere - the Gparted LiveCD works great.
- You'll get a menu screen - click 'Gparted Live (Default)
- A load of stuff will scroll up the screen and a menu will appear asking about Keymaps. I selected 'Don't touch keymap' - just hit 'Enter'
- You'll be asked what language you prefer - type '02' and then hit enter
- When asked what mode you prefer, type '0' and hit enter
- You'll be presented with the Gparted desktop. It will open the partitioning editor. On the right-hand side is a drop-down box - select the SD card, which will be identifiable by its size. Mine is a 16Gb card and showed up as 14.8Gb. Be VERY careful to make sure you select the right device, as if you accidentally change the partitions of your hard drive, you'll end up being unable to boot your PC. One of the benefits of doing this on the laptop was that it only has one hard drive and that's 250Gb - so not easy to get wrong! The only other device was the card reader with my SD card in.
- Now you've selected your SD card, you'll be presented with a screen that shows the partitions. Since I'd backed up all my data, I deleted the partitions and started from scratch. Right click on the partitions and 'Delete'. You should be left with a grey box showing 'Unallocated - 14.8Gb' (or whatever size your SD card is).
- Right click on the unallocated space. Click 'New'. You're at the 'Create New Partition' window. Adjust the 'New Size (MiB) down by around 1040 (this will give you around 1Gb of new 'phone' storage). Ensure that the 'Free Space Preceding' is '1', and that the 'Align to' box says 'MiB'. On the right, ensure 'Create as' is set to 'Primary Partition' and that the 'File System' is set to FAT32. No label is required. Click 'Add'. It's important that the FAT32 partition comes first.
- Now you'll have a screen with a green box showing 'New Partition #1' and the size. On the grey unallocated part to the right, right-click and choose 'New'. The default sizes will be whatever's left (around 1Gb) on your card. The only change you'll need to make on this page is to change the File System to 'ext4'. Click 'Add', and then the 'Apply' button at the top of the screen. Once that's done, close the Gparted window and click 'Exit'. The machine will reboot, so make sure you've removed the LiveCD from the DVD tray to allow it to boot back into Windows.
If you're installing the RCMix ROM, you won't need the Data2SD installer so you can skip all of that.
13) Download the Starburst zip file from here: http://starburst.droidzone.in/wp-content/plugins/d... Don't unzip it once downloaded, it needs to stay zipped. You will need to create a login ID on the Starburst site in order to download.
14) Download the Data2SD installer from here: http://starburst.droidzone.in/wp-content/plugins/d... Again, leave it zipped.
15) Copy the Starburst_Classic_1500.zip and Data2SDInstallerX5E.zip to your SD card.
16) Now you need to wipe the phone (you DID take that Nandroid backup earlier, didn't you..?
 )
)- Boot into Recovery
- Scroll down (using the trackpad) to 'Wipe Data/Factory Reset' and select (using the optical touchpad)
- Scroll to 'Yes' and select
- **NOTE - IF YOU'RE INSTALLING RCMix ROM, YOU DO NOT NEED DATA2SD - SKIP TO STEP 22****
19) Now hit the power button to turn the phone off - you'll notice you have an option in there for 'Recovery'. Select this option. The phone will reboot into the Recovery console.
20) In the same way you installed the Starburst ROM, you need to install the Data2SD zip file through the 'Install Zip from SD card' menu. Reboot the phone.
21) The phone will reboot and when you get into the settings, you should find that you now have 'Phone memory' of around 1Gb!
22) Now you can go about getting all your info back on the phone. If you were able to take a Titanium Backup, copy the original SD card contents across from the backup you took earlier (I wasn't able to do this, so had to reinstall all my apps via AppBrain). Run the Titanium restore.
23) Install SMSBackup from the Market and restore your SMS messages. Install BookmarkSB to restore your bookmarks. You'll need to log into the Market with your Google account to download.
24) Under the 'Sync' folder (Settings > Accounts and Sync) add your Google account; all your contacts will resync over the air.
25) Once all your apps and contacts are back, do a Nandroid backup of the 'new' phone settings to the SD card (and copy it to a backup folder on your PC).
Disclaimer: this is, to the best of my recollection, how I did everything last night. There may be a couple of steps that you'll need to double-check and I'm sure that if anyone spots an error in my instructions, they'll point it out. There is no substitute for checking everything twice and understanding what you're doing before you do it!
I hope this helps those who are in the same position I was in - overwhelmed by the amount of info out there which wasn't clear enough - but who would like their phone to perform better and be rid of those annoying low memory warnings once and for all!
There's one other benefit to this by the way - with App2SD, if you mounted the SD card for access through the PC, apps on the card wouldn't work properly. With Data2SD being a partition, all apps continue to work even with the SD card mounted as only the FAT32 partition gets mounted.
By the way, whenever I mount the SD card, Windows asks if I want to 'Scan and fix removable disk (P:)?'. Always click 'Continue without scanning' as I've found the 'Scan and fix (recommended)' option causes problems.
I'm off to rest my fingers, hope this is useful to some of you! It took me a while to get there, but overall I would say it's very much worth it. I'll also be happy to help out with advice if I can!
Oh, and one nice touch I found today; the Starburst ROM re-enables 'Wake from Optical Pad' - a feature I'd been annoyed to find wasn't enabled on the Desire after having it on the Hero.
Edited by Funk on Wednesday 15th June 18:15
TazR6 said:
Once the Desire is finally replaced, I do not think I will "take advantage" of the free insurance again, but start to pay for Orange Care, or put the £6 (I think) aside every month and use it to buy a new phone if I need to.
I am very unimpressed with the service I have had on both occasions I have had to use the free insurance.
Not sure if I can name the company who honors the claims, but it is through a Lloyds TSB Gold account.
I've got insurance through 'Fonesafe' who were brilliant when I needed them. I had a T-Mobile G1 which I dropped getting out of the car. The phone was sent off and within a week or so they sent me back a G2 saying the G1 wasn't repairable so they'd given me an upgrade. The phone clearly wasn't brand new, but its condition overall was excellent. I pay £6.99 a month for Fonesafe and I think there was an excess charge of £25.I am very unimpressed with the service I have had on both occasions I have had to use the free insurance.
Not sure if I can name the company who honors the claims, but it is through a Lloyds TSB Gold account.
I just got 2041 on Quadrant. I suspect that is due to the use of a Class 2 SD card. Still, it's nearly 4 times faster than the 'boggo' Desire!
Oh, and a MASSIVE thank you to Silver940 for your help last night chap - much appreciated!
Edit: Holy crap - I've just overclocked using No Frills and hit 2298 on Quadrant!
Oh, and a MASSIVE thank you to Silver940 for your help last night chap - much appreciated!
Edit: Holy crap - I've just overclocked using No Frills and hit 2298 on Quadrant!
Edited by Funk on Saturday 28th May 16:39


Funk, you're a superstar, that's awesome. I'll be giving it a go tomorrow I reckon. I too came from a Hero and loved the esire, but the low memeory was bugging me. I even bought the Desire outright so no warranty to void...lol.
I need to check the clas of my SD card, been ages since I removed it from the phone.
I need to check the clas of my SD card, been ages since I removed it from the phone.
Funk said:
I just got 2041 on Quadrant. I suspect that is due to the use of a Class 2 SD card. Still, it's nearly 4 times faster than the 'boggo' Desire!
Oh, and a MASSIVE thank you to Silver940 for your help last night chap - much appreciated!
Edit: Holy crap - I've just overclocked using No Frills and hit 2298 on Quadrant!
Careful with Data2SD roms. They give inaccurate Quadrant scores (had it explained to me once but wnet right over my head) and they can really hammer your SD card. That said - you can't argue with all that lurvely space!Oh, and a MASSIVE thank you to Silver940 for your help last night chap - much appreciated!
Edit: Holy crap - I've just overclocked using No Frills and hit 2298 on Quadrant!
Edited by Funk on Saturday 28th May 16:39
If you want Sense and something that's even faster (although not according to Quadrant) try the new LeeDroid 3.0.7 rom with Data++. Keeps only the stuff you often need on the phone and the rest of the app is on card which isn't used as much. You can also, due to the internal space saved by this, re-partition your internal memory so that you can fit more on the internal space anyway - less taken up by the rom.
Gren said:
Funk said:
I just got 2041 on Quadrant. I suspect that is due to the use of a Class 2 SD card. Still, it's nearly 4 times faster than the 'boggo' Desire!
Oh, and a MASSIVE thank you to Silver940 for your help last night chap - much appreciated!
Edit: Holy crap - I've just overclocked using No Frills and hit 2298 on Quadrant!
Careful with Data2SD roms. They give inaccurate Quadrant scores (had it explained to me once but wnet right over my head) and they can really hammer your SD card. That said - you can't argue with all that lurvely space!Oh, and a MASSIVE thank you to Silver940 for your help last night chap - much appreciated!
Edit: Holy crap - I've just overclocked using No Frills and hit 2298 on Quadrant!
Edited by Funk on Saturday 28th May 16:39
If you want Sense and something that's even faster (although not according to Quadrant) try the new LeeDroid 3.0.7 rom with Data++. Keeps only the stuff you often need on the phone and the rest of the app is on card which isn't used as much. You can also, due to the internal space saved by this, re-partition your internal memory so that you can fit more on the internal space anyway - less taken up by the rom.
All-in-all, it's how the Desire SHOULD have been from the word 'go'.
A few months ago there was a thread or post on here where a poster made his own car cradle for his desire using a few bits from ebay, does anyone remember it?
I've just replaced my Otterbox commuter case with the Casemate barely there so i'm keen to get a decent cradle for the car, i seem to remember the cradle in question was suitable for use with the Casemate case.
I've just replaced my Otterbox commuter case with the Casemate barely there so i'm keen to get a decent cradle for the car, i seem to remember the cradle in question was suitable for use with the Casemate case.
If it helps, I have a CM 'Barely There' case on mine and it fitted perfectly into this screen mount from Tesco of all places:
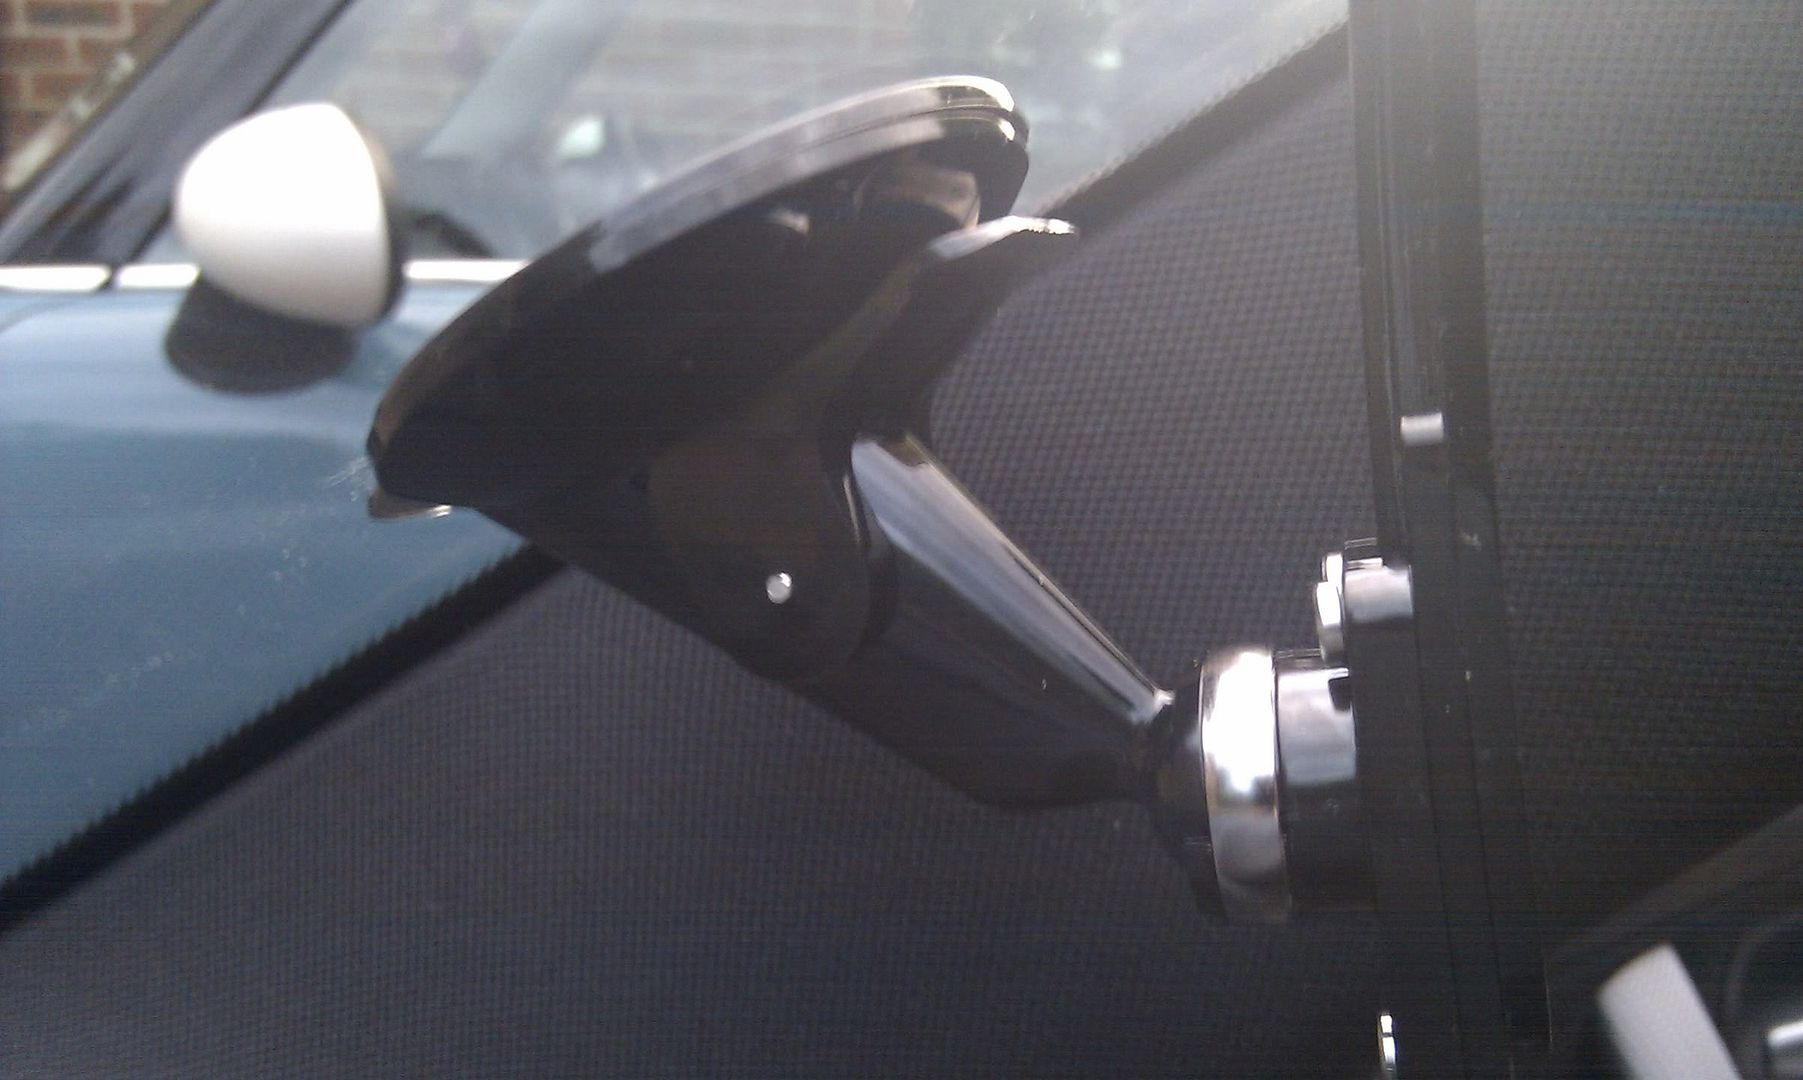


Amazon have it here: http://www.amazon.co.uk/Griffin-Technology-GC17109...
Seems to have attracted a couple of duff reviews, but I've had no problems with mine at all.
Amazon have it here: http://www.amazon.co.uk/Griffin-Technology-GC17109...
Seems to have attracted a couple of duff reviews, but I've had no problems with mine at all.
Cheers Funk, that looks really good, have you posted those pics on here already?
As it happens i've just ordered a couple of these: http://www.nokia.co.uk/find-products/accessories/a...
Paid just short of £8 each from Amazon, it looks nice and descreet and should ok for my crappy works Nokia as well
As it happens i've just ordered a couple of these: http://www.nokia.co.uk/find-products/accessories/a...
Paid just short of £8 each from Amazon, it looks nice and descreet and should ok for my crappy works Nokia as well
Funk thanks very much for your guide
All went smoothly except a couple of issues:
Already had an Android USB driver so had to remove that and delete the software for it to use the bootloader version
On trying to install Appbrain for the first time it said not enough space
Have googled that and found (for me) the solution was to reduce ext4 to under 1GB (it was 2.5) - I used Gparted again but just used the resize feature to shrink it
Thanks again
Gassing Station | Computers, Gadgets & Stuff | Top of Page | What's New | My Stuff