Sublime Pandamonium II
Discussion


Liquid Knight said:
So the standard 1108 cam' belt is...
...1015mm long and the belt needs to be...
...1020mm long.
Hmmmmmm....
Any ideas how to get engine grease from a tailors tape measure?
Firstly. I watch your threads with much amusement. You are clearly a proper loon with some tenacity! Full marks sir....1015mm long and the belt needs to be...
...1020mm long.
Hmmmmmm....
Any ideas how to get engine grease from a tailors tape measure?
Secondly. I may be missing the point here so forgive me if I'm misguided, but I don't want you to make a blooper.
You've measured the existing belt outside, which is fine but....
You've measured the "new one" across all the pulleys teeth which will give you a smaller dimension than measuring across the outside of the new belt.
The new belt will need to be more than 5mm longer than the existing one.
I guess the only way to replicate it is to have a bit of belt over all the pulleys before the tape measure. That way you accommodate for the belt thickness.
Good luck and thanks for keeping me entertained!
Liquid Knight said:
Ah-haaaaaa! The Cinquecento Sporting has two different size cam' belts. One with 104 teeth and the other has 125 teeth. The Punto 75 has two different belts as well. One with 108 teeth and the other has 129 teeth. I assume this is for power steering or something even more sinister.
All I need to do when I get home from work tonight is count the number of teeth on my old belt instead of measuring it and get the next size up.
The number of teeth is usually printed on the back of the belt, though it might have worn off if the belt is well used.All I need to do when I get home from work tonight is count the number of teeth on my old belt instead of measuring it and get the next size up.
http://partsforallcars.com/spares/partscat_listing...
I've found a bought the correct belt at last (hopefully). The 1108 manifold gaskets I already have and a 1368 head gasket will mean Guff II's engine will be ready to fit soon.
I've found a bought the correct belt at last (hopefully). The 1108 manifold gaskets I already have and a 1368 head gasket will mean Guff II's engine will be ready to fit soon.
My two 1108 engines decided they didn't want me to use either of their crank wheels...
...on the 1368 block. The Punto one came off without incident and the Cinquecento ones both sheered the location points.
The only one I have left is attached to the Repo-Seicento and I may need that as yet.
...on the 1368 block. The Punto one came off without incident and the Cinquecento ones both sheered the location points.
The only one I have left is attached to the Repo-Seicento and I may need that as yet.
http://www.ebay.co.uk/itm/270976178493?ssPageName=...
£18 for the head gasket I need and other gaskets that are selling separately for between £6 and £10 each. Free gasket then.
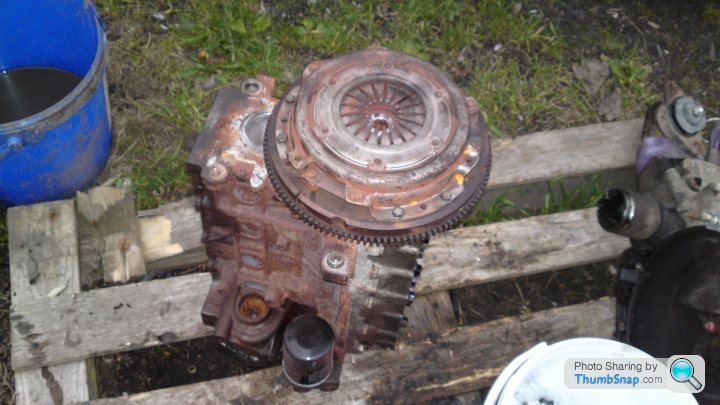
The Cinquecento Sporting flywheel and clutch are now fitted ready I'm taking the head to work over the weekend to clean the ports out.
£18 for the head gasket I need and other gaskets that are selling separately for between £6 and £10 each. Free gasket then.
The Cinquecento Sporting flywheel and clutch are now fitted ready I'm taking the head to work over the weekend to clean the ports out.
Belt and cam cover gasket arrive today.
I have a new and interesting problem with the engine that I need to work out next.
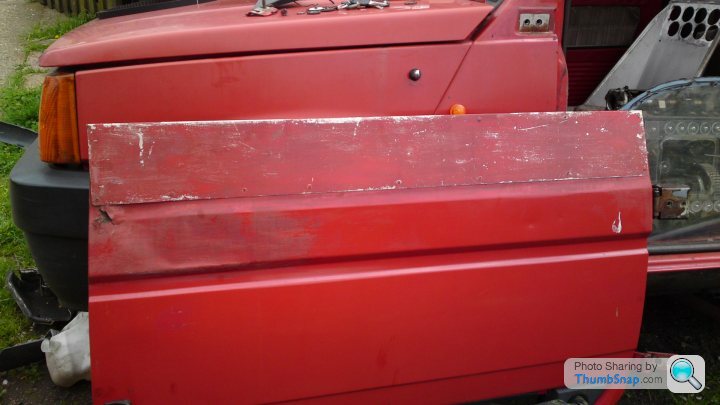
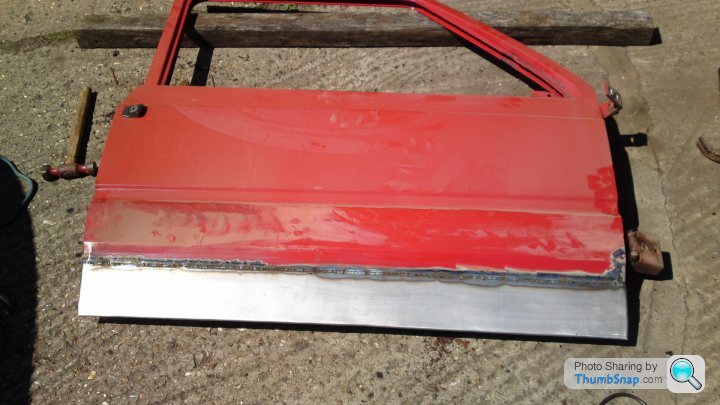
So this morning I went to my local suppliers and bought some lip panels to use as sills. Got the car up on ramps and took the door off to get to the sill and inspect it properly.
Turns out the passenger side is solid apart from the lip at the back where the plastic trim was a water trap. As I'm widening the arches anyway I'll leave it until then. While I had the door off and raw materials I decided to fix that instead.
Drilled the Aluminium plate off...
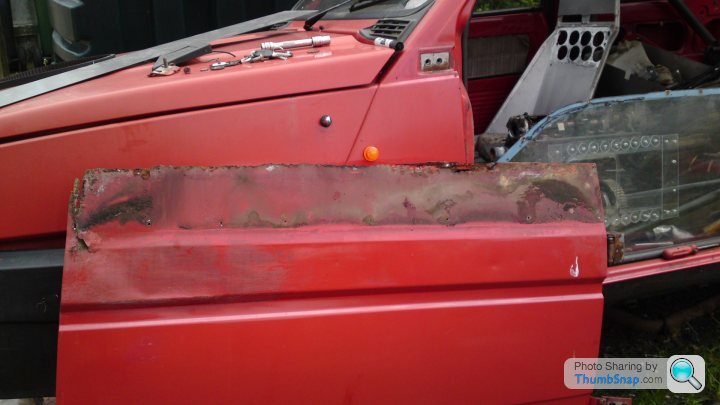
...cut as much rust away as necessary, welded a lip in place...
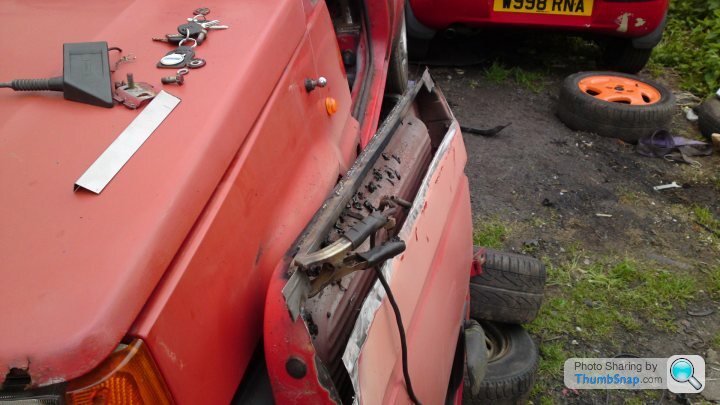
...and ran out of gas. Went into town to get more and someone very kindly put my hammer through the window for me.
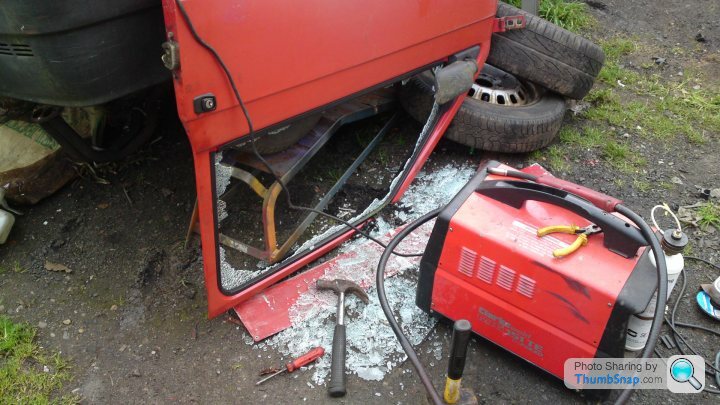
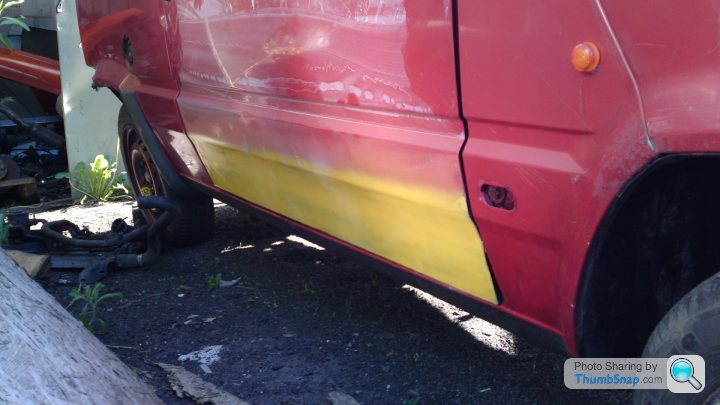
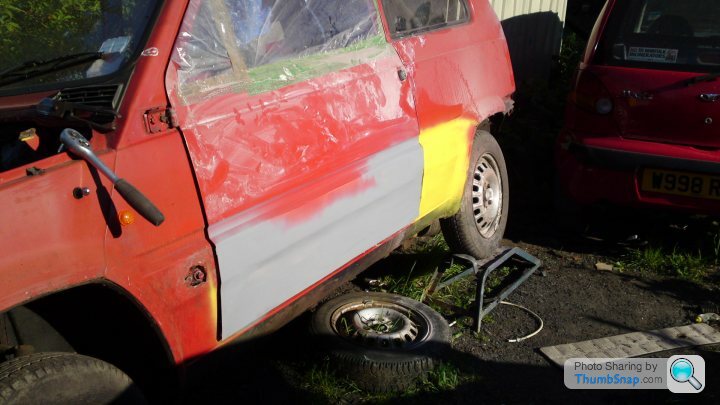
Seam welded and flapped a panel to the door...
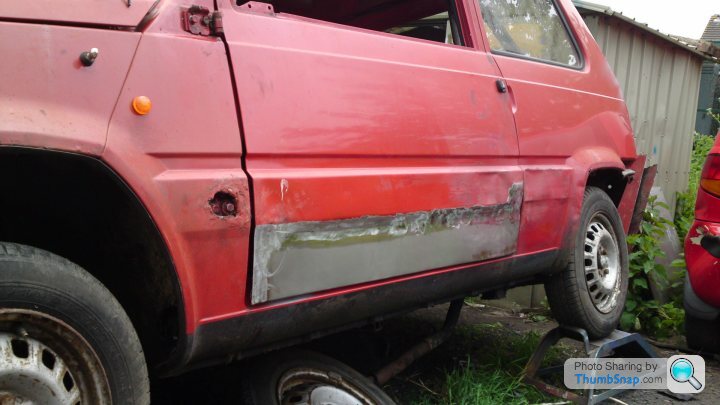
...once the door was hanging a quick coat of yellow...

...to protect the bare metal from the rain...
...that arrived just after I covered the window frame with plastic.
In other news. The Repo-Seicento is sold to Kev' as his latest van of death decided it didn't need a clutch any more.
I have a new and interesting problem with the engine that I need to work out next.
So this morning I went to my local suppliers and bought some lip panels to use as sills. Got the car up on ramps and took the door off to get to the sill and inspect it properly.
Turns out the passenger side is solid apart from the lip at the back where the plastic trim was a water trap. As I'm widening the arches anyway I'll leave it until then. While I had the door off and raw materials I decided to fix that instead.
Drilled the Aluminium plate off...
...cut as much rust away as necessary, welded a lip in place...
...and ran out of gas. Went into town to get more and someone very kindly put my hammer through the window for me.
Seam welded and flapped a panel to the door...
...once the door was hanging a quick coat of yellow...
...to protect the bare metal from the rain...
...that arrived just after I covered the window frame with plastic.
In other news. The Repo-Seicento is sold to Kev' as his latest van of death decided it didn't need a clutch any more.
http://guff-racing.com/
Crap it already exists. It didn't when I did a search before but it does so now I have to change the name and colour scheme of my Panda.
Great minds thinking alike rather than plagiarism.
Crap it already exists. It didn't when I did a search before but it does so now I have to change the name and colour scheme of my Panda.
Great minds thinking alike rather than plagiarism.
I've come up with a solution to the belt and pulley problem. Hopefully it will work. To get things running I have been looking for a manual choke conversion for the X-1/9 carb'. The cheapest one I've found was £25 plus V.A.T and postage. Then I found this...
http://www.ebay.co.uk/itm/230790697811?ssPageName=...
...manual choke Webber for a Fiat for a Tenner.
Made a pair of templates...
...just need get hold of some 3mm steel and a bit of pipe to make a manifold adapter.
Just need to get a sump sorted and hope the pulley idea I had works. Then it's just brakes, suspension, wheels, paint, mount the seat, mount the harness, make the polycarbonate windows and replace the windscreen for M.O.T.
In about five days spread over the next four weeks.
Gulp!
So I've been experimenting again.
I've put the 1368 crank pulley back, retrofitted the 1368 water pump and replaced the cam pulley.
I tried the original belt...
...too short. So I tried the Punto 75 belt...

...perfect fit and enough play for the tensioner not to foul the head...

...the Grande Punto belt has 124 teeth so I guess I need one that has 128 or 129.
I've put the 1368 crank pulley back, retrofitted the 1368 water pump and replaced the cam pulley.
I tried the original belt...
...too short. So I tried the Punto 75 belt...
...perfect fit and enough play for the tensioner not to foul the head...
...the Grande Punto belt has 124 teeth so I guess I need one that has 128 or 129.
129 tooth belt from a 2007 Grande Punto for £9.99
http://www.ebay.co.uk/itm/120918889043?ssPageName=...
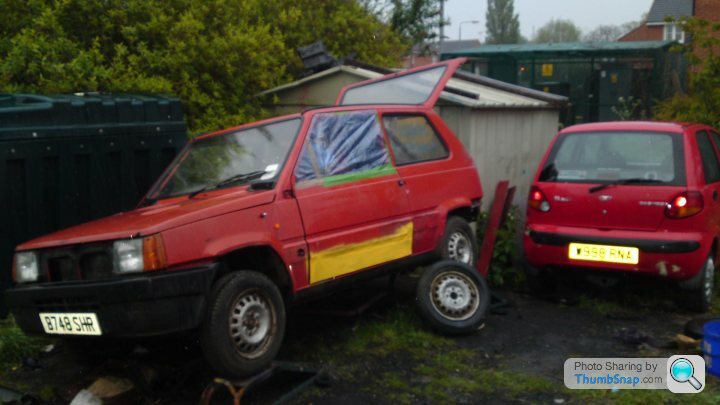
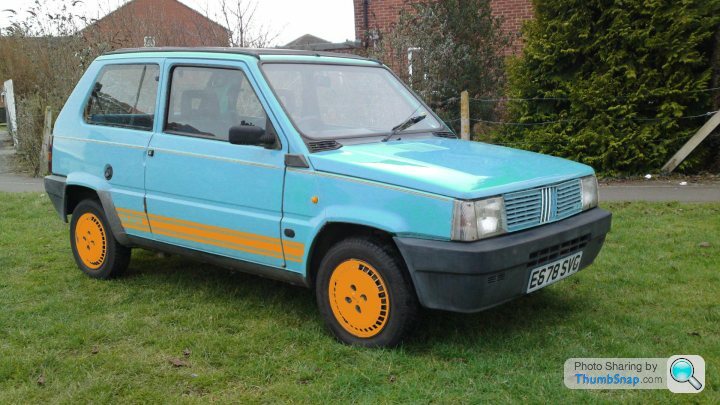
This could be controversial. I've stuck new Panda script on a Mk II Panda...
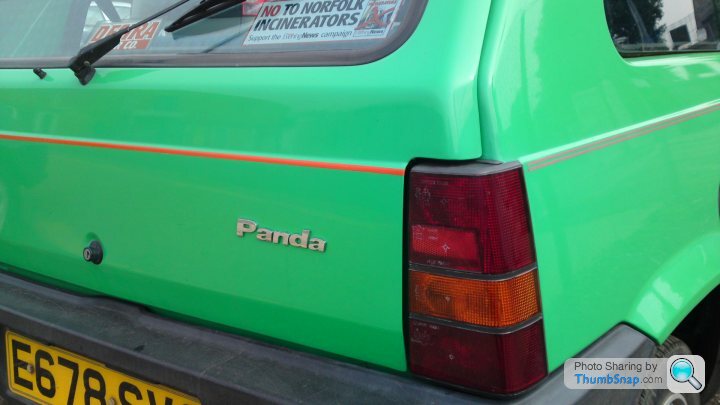
...because I couldn't find an original badge and was fed up of the holes and scratches where the badge was taken.
http://www.ebay.co.uk/itm/120918889043?ssPageName=...
This could be controversial. I've stuck new Panda script on a Mk II Panda...
...because I couldn't find an original badge and was fed up of the holes and scratches where the badge was taken.
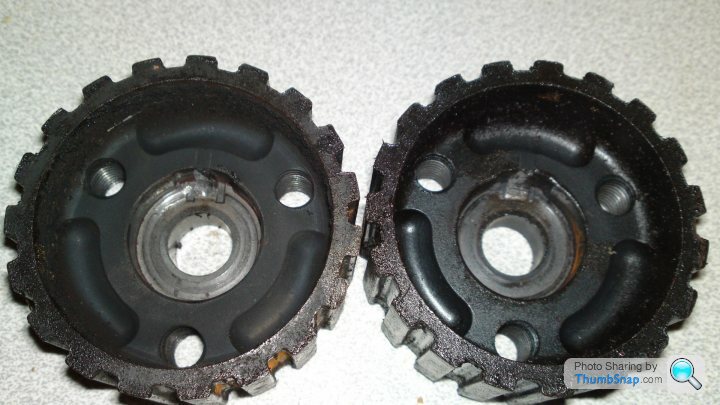
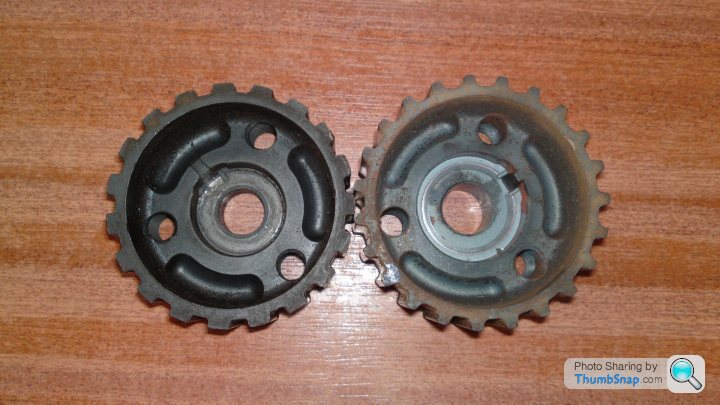
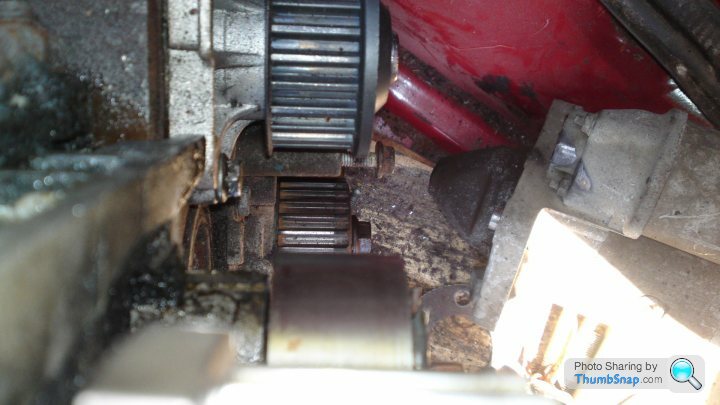
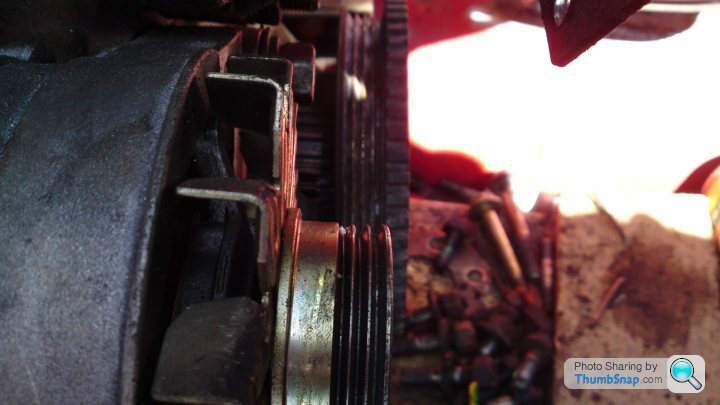
With new belt number three on it's way I thought I'd spent today getting the engine ready to fit it.
I needed to make the 2007 Panda pulley fit the 1996 cam'.

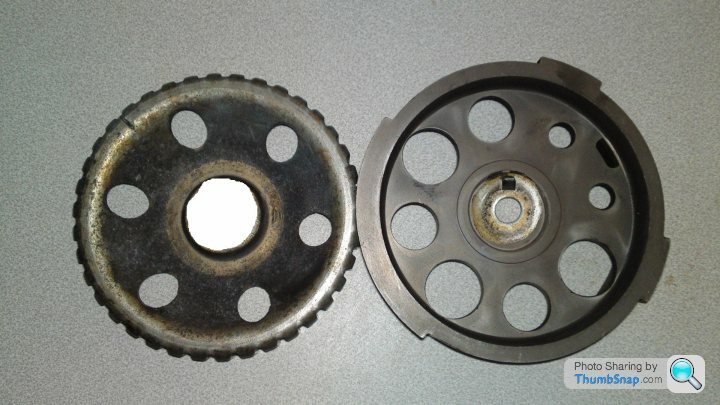
Easy enough with MS Paint but more fun with a grinder.
I left a gap big enough to lock the washer in place with a nut and bolt and weld the two together.
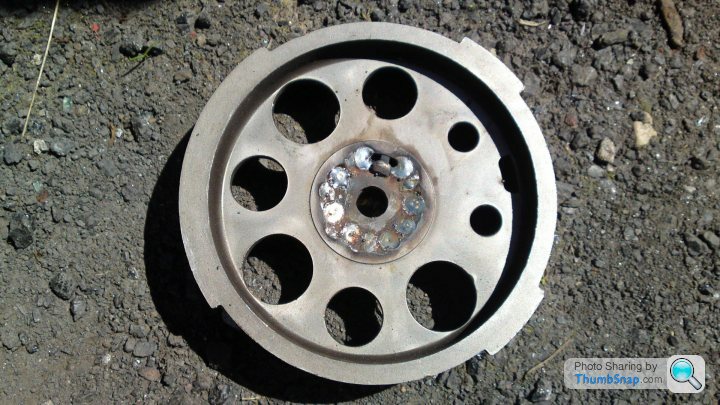
Due to the different sized holes on the new Panda pulley the outer rim is counter balanced.
The counter balance weights on the rim of the pulley foul the head where the cover bolts in. I solved this problem with a grinder as well.
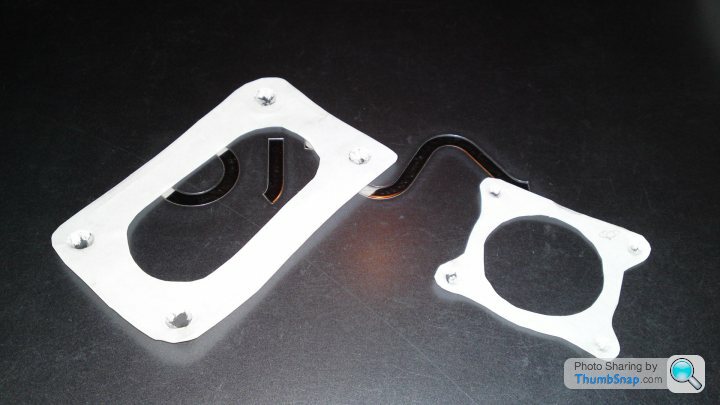
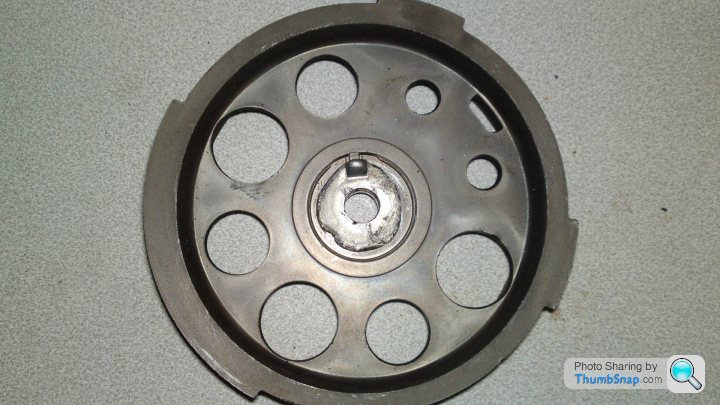
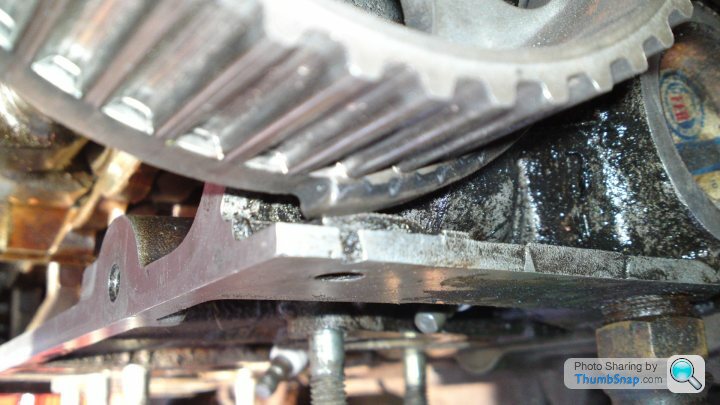
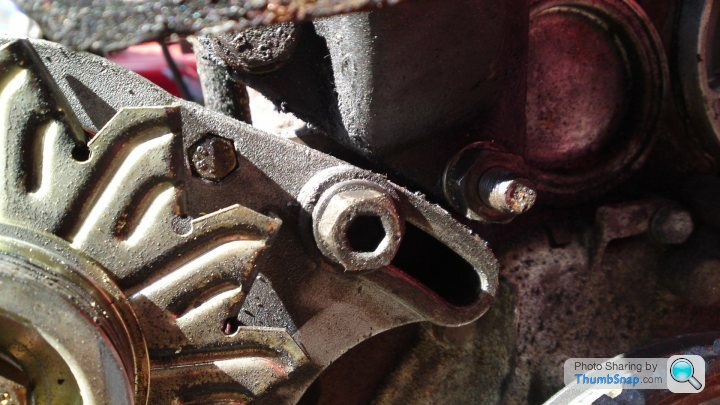
I also needed to fit the wider tensioner from the new Panda head. First the shorter mounting bolt had to come out...
...and fit the mounting bolt from the new Panda head as well. Well worth the £1 it cost me eh?
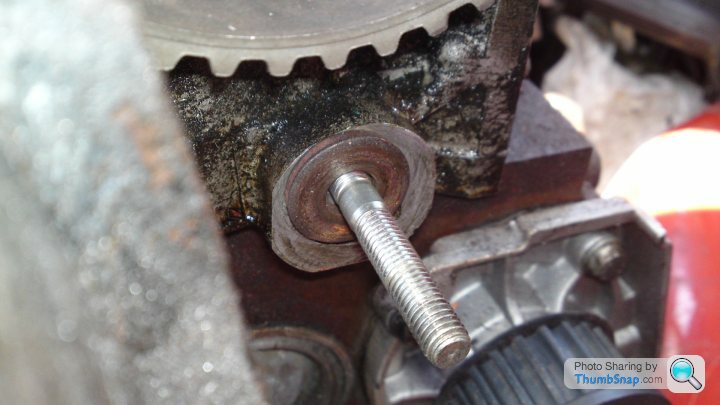
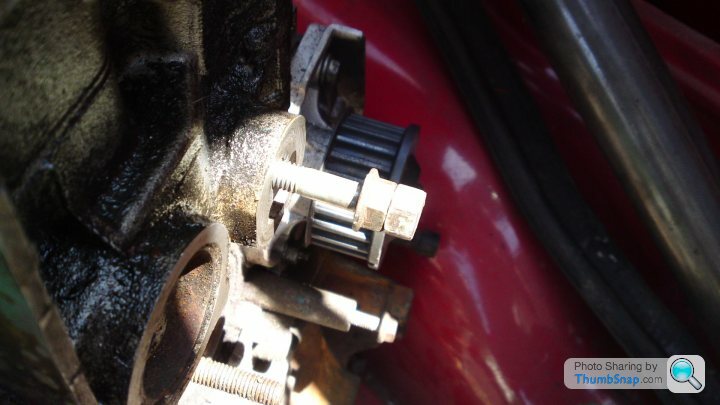
I needed a 3mm washer behind it to clear the core plug at the end of the 1108 head. I fitted the top pulley to make sure it lines up perfectly to the water pump...
...cam pulley to tensioner...
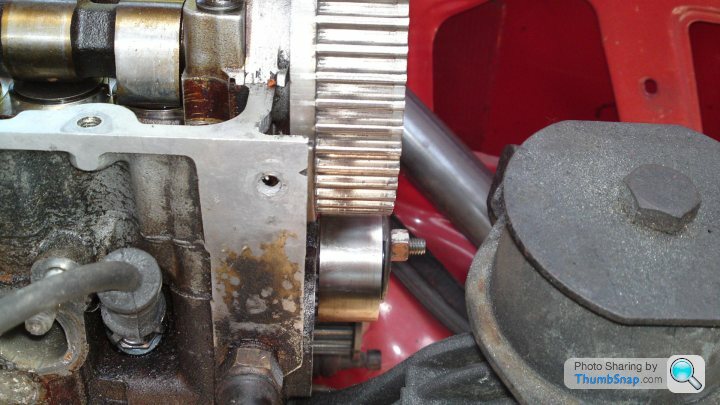
...and finally tensioner to crank pulley.
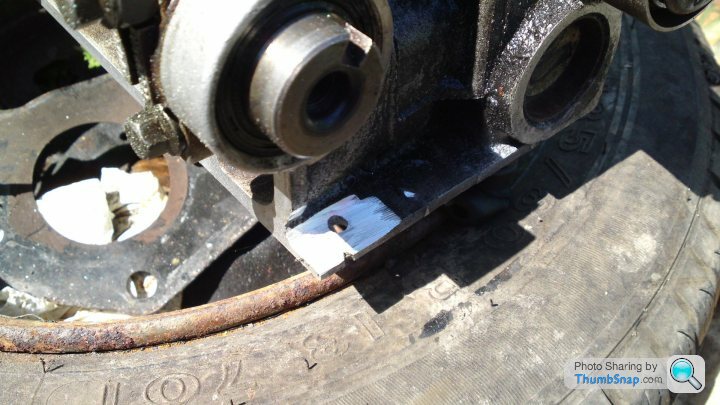
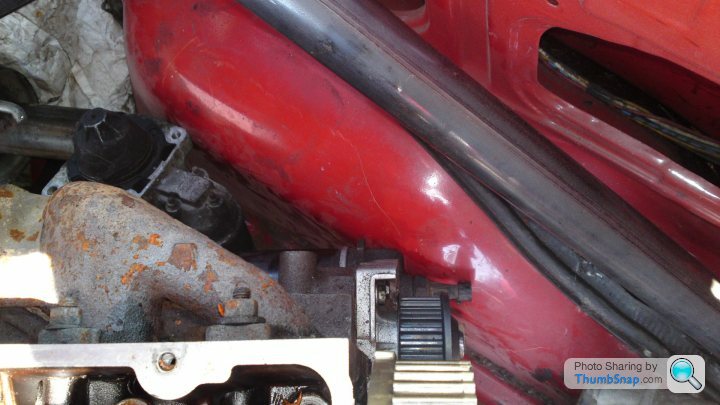
Other things I needed to make sure about. The Panda engine mount, alternator and distributor.
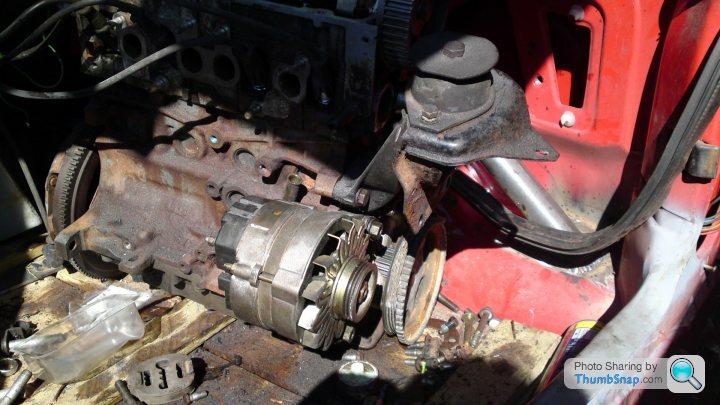
The alternator is bloody close...
...but lines up well.
Marked TDC and as soon as the belt arrives I'll finally know it the top and bottom timing is synchronous.
That's about it. I spent the rest of the day playing with a two stoke and rotary engine. That's all gardening is to me. Have a weekend of dirty welding ahead.
I needed to make the 2007 Panda pulley fit the 1996 cam'.
Easy enough with MS Paint but more fun with a grinder.
I left a gap big enough to lock the washer in place with a nut and bolt and weld the two together.
Due to the different sized holes on the new Panda pulley the outer rim is counter balanced.
The counter balance weights on the rim of the pulley foul the head where the cover bolts in. I solved this problem with a grinder as well.
I also needed to fit the wider tensioner from the new Panda head. First the shorter mounting bolt had to come out...
...and fit the mounting bolt from the new Panda head as well. Well worth the £1 it cost me eh?
I needed a 3mm washer behind it to clear the core plug at the end of the 1108 head. I fitted the top pulley to make sure it lines up perfectly to the water pump...
...cam pulley to tensioner...
...and finally tensioner to crank pulley.
Other things I needed to make sure about. The Panda engine mount, alternator and distributor.
The alternator is bloody close...
...but lines up well.
Marked TDC and as soon as the belt arrives I'll finally know it the top and bottom timing is synchronous.
That's about it. I spent the rest of the day playing with a two stoke and rotary engine. That's all gardening is to me. Have a weekend of dirty welding ahead.
Edited by Liquid Knight on Friday 25th May 22:30
So a day of ups and downs for me. Starting with an all time low. I used P40 filler for the first time since I bought my first welder.
If I had taken the time I could have spot and popped the pannel straight but the £999 challenge isn't a concourse event I had a lot to do today.
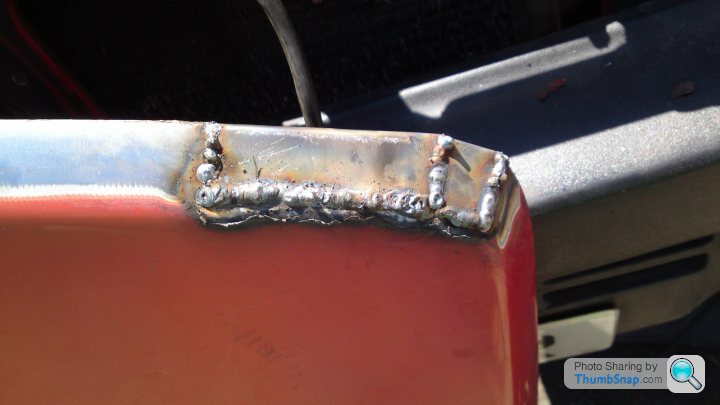
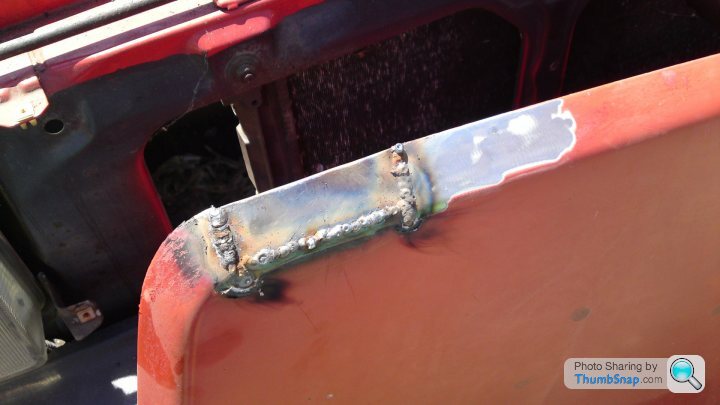
First I needed to get the bonnet M.O.T friendly so cut away the holes in the front corners (sharp edges) and filled with new metal.
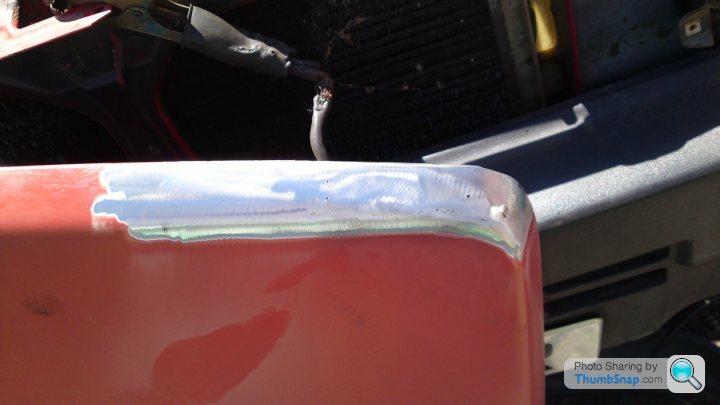
To make up for my P40 indiscretion I used a safe amount of welt so I could grind and flap it back...
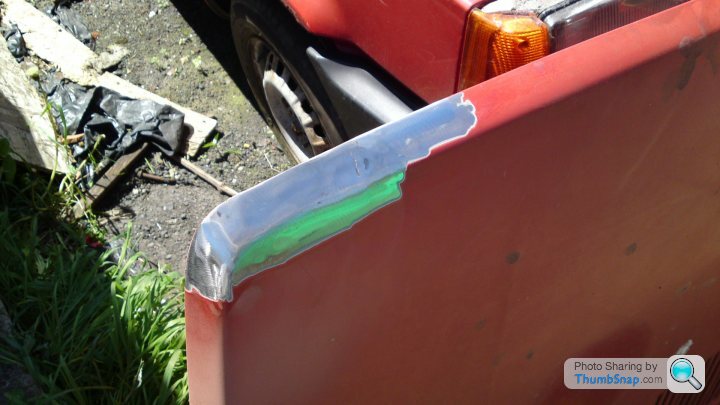
...and a little filler (Grrrrr!) to tidy up the flap groves.
Okay before I go on. I hate filler! The guidelines suggest you use a pea of hardener for every golf ball of the stuff. In my opinion (sorry I this causes any offence) if you need a golf ball of filler you haven't done enough metal work and should give up and start again.
So next on my list of things to do was door number two.
Seam welded along the top and stitched the bottom lip.
Grind, flap, fill, sand, fill, sand, fill, sand, wet and dry, prime, paint, leave to dry and re-hang.
I also finished of the rear quarter filling and tidied the passenger door.
While I had the filler out I finished the bonnet and refitted it.
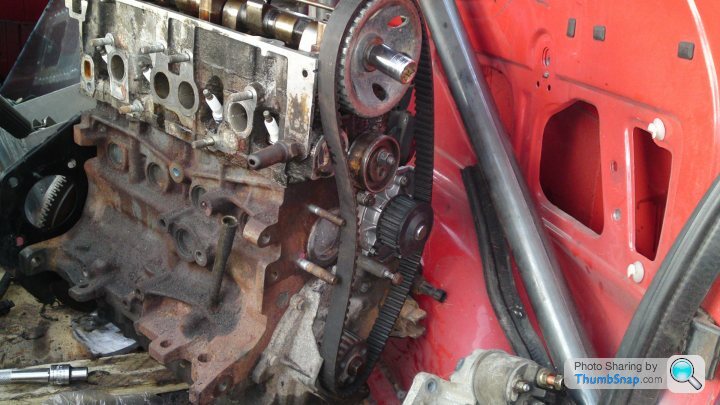
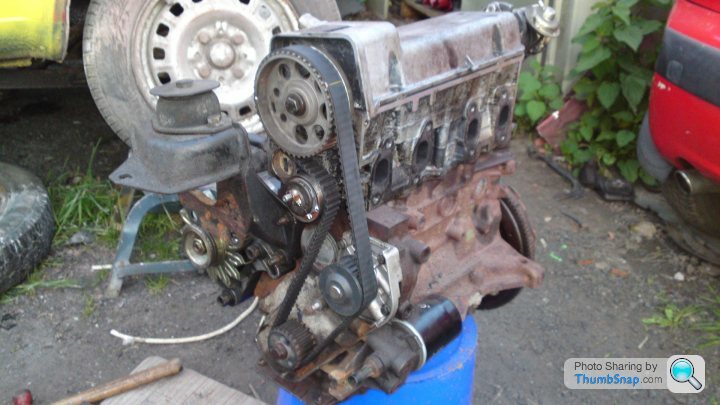
In other news the belt arrived so.....
....ladies and gentleman....
....boys and girls....
....I present to you...
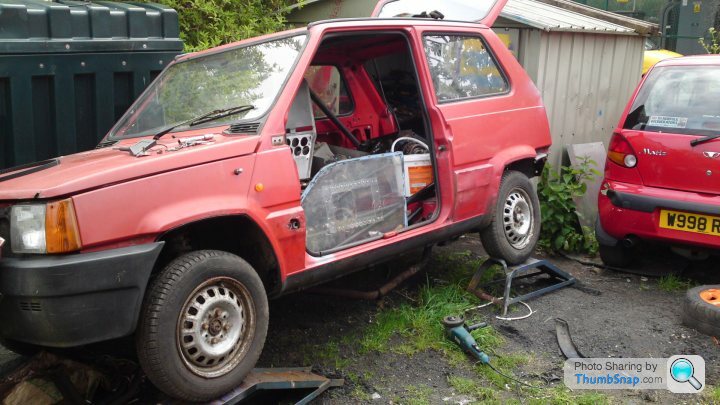
...the Fiat FINE engine.
If I had taken the time I could have spot and popped the pannel straight but the £999 challenge isn't a concourse event I had a lot to do today.
First I needed to get the bonnet M.O.T friendly so cut away the holes in the front corners (sharp edges) and filled with new metal.
To make up for my P40 indiscretion I used a safe amount of welt so I could grind and flap it back...
...and a little filler (Grrrrr!) to tidy up the flap groves.
Okay before I go on. I hate filler! The guidelines suggest you use a pea of hardener for every golf ball of the stuff. In my opinion (sorry I this causes any offence) if you need a golf ball of filler you haven't done enough metal work and should give up and start again.
So next on my list of things to do was door number two.
Seam welded along the top and stitched the bottom lip.
Grind, flap, fill, sand, fill, sand, fill, sand, wet and dry, prime, paint, leave to dry and re-hang.
I also finished of the rear quarter filling and tidied the passenger door.
While I had the filler out I finished the bonnet and refitted it.
In other news the belt arrived so.....
....ladies and gentleman....
....boys and girls....
....I present to you...
...the Fiat FINE engine.
Edited by Liquid Knight on Saturday 26th May 21:48
So; not so busy today. I din't get much in the way of dirty welding done because to be honest it was too hot to be faffing about under a rusty Panda. I have the car booked in for paint next weekend so I'd better get it done (set myself a deadline to get my arse in gear). Once again I was distracting myself with fiddly stuff.
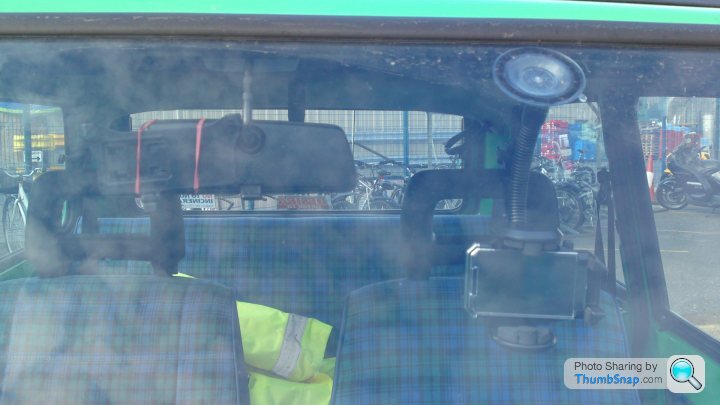
Thanks to the vandalism the other week I needed to replace the window. I used the polycarbonate one from the Cinquecento trimmed down to fit the Panda and a little trial and error later...
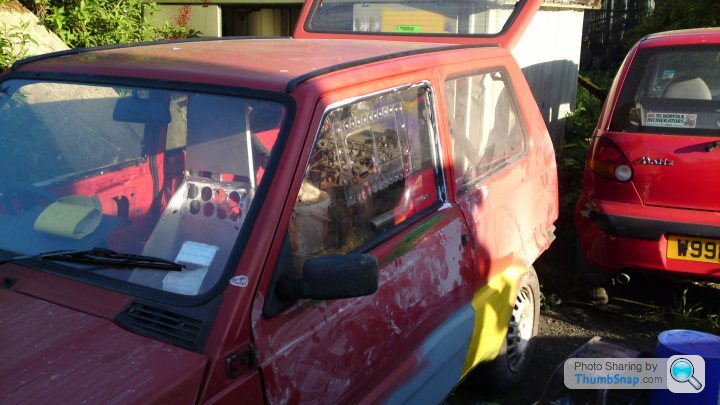
...the passenger window I put the seal on the frame and stuck the rubbers to it. Not looking too great the drivers window I put the seal inside the rubbers and stuck the window in place that way. I'm using the original rubbers instead of pop rivets so you shouldn't be able to tell from a distance.
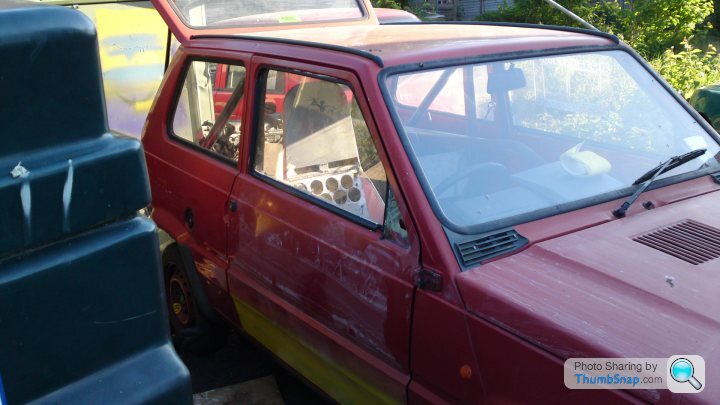
This may not look any different than previous photo's but...
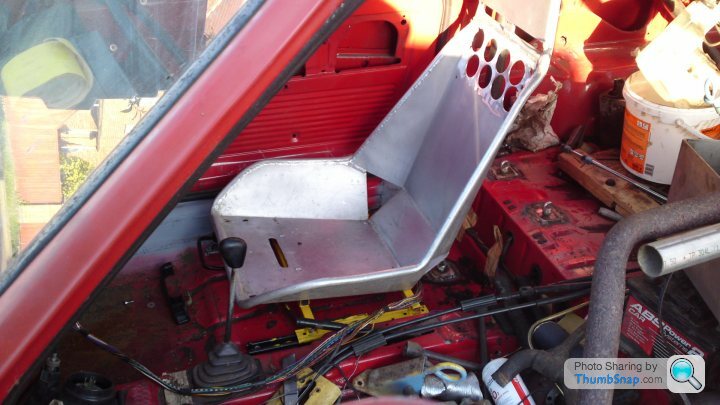
...the seat is now mounted and...
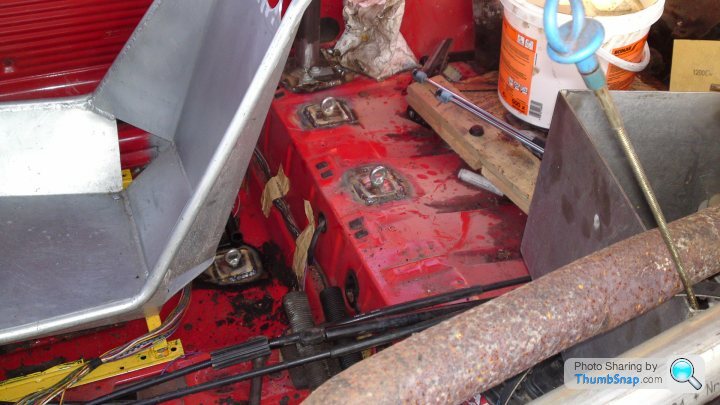
...welded in the first three harness anchors. Twenty four years of underseal and road muck smells great when you burn it off.
Back to work tomorrow.
Thanks to the vandalism the other week I needed to replace the window. I used the polycarbonate one from the Cinquecento trimmed down to fit the Panda and a little trial and error later...
...the passenger window I put the seal on the frame and stuck the rubbers to it. Not looking too great the drivers window I put the seal inside the rubbers and stuck the window in place that way. I'm using the original rubbers instead of pop rivets so you shouldn't be able to tell from a distance.
This may not look any different than previous photo's but...
...the seat is now mounted and...
...welded in the first three harness anchors. Twenty four years of underseal and road muck smells great when you burn it off.
Back to work tomorrow.
Gassing Station | Alfa Romeo, Fiat & Lancia | Top of Page | What's New | My Stuff