Body going back on LS1 Cerb tommorow
Discussion


Finally the chassis restoration is complete, suspension tuned up today so she's back on her wheels.
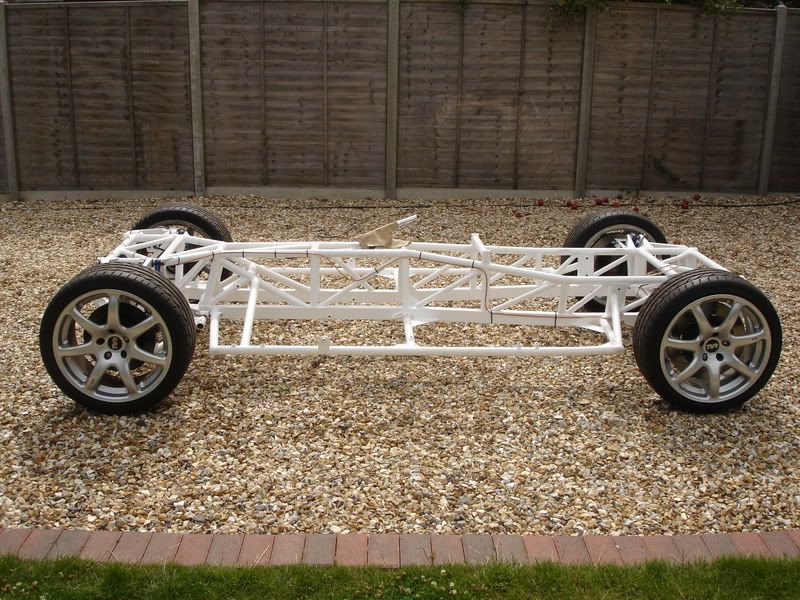
Check out those brake disc's 356mm, a leaving present from Craig before going to Dubai, I've got some 6 pot AP's to wrap around them, should stop as well as it should go
I blasted the chassis and then painted it in Bilt Hamber zinc primer, top coat is two pack poly urethane paint similar to that used on boats.
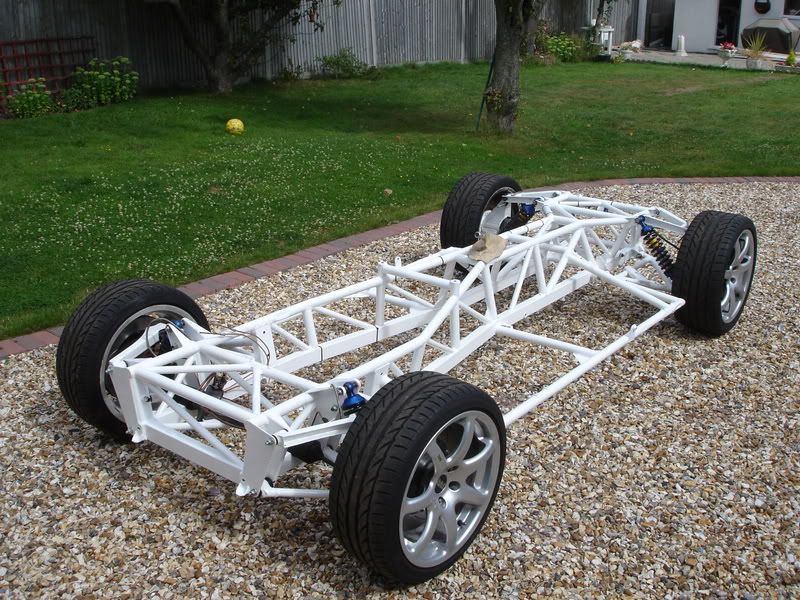
I've run the new brake lines and got the hand brake working but I ran out of time to fit the motor and drive train before putting the body back on.
I've got to put the diff back together with its new ratio and fit the new uprated driveshafts.
Hopefully get the motor back in by the end of the weekend, can't wait to fire up this baby.
Cheers,
Rich
Check out those brake disc's 356mm, a leaving present from Craig before going to Dubai, I've got some 6 pot AP's to wrap around them, should stop as well as it should go
I blasted the chassis and then painted it in Bilt Hamber zinc primer, top coat is two pack poly urethane paint similar to that used on boats.
I've run the new brake lines and got the hand brake working but I ran out of time to fit the motor and drive train before putting the body back on.
I've got to put the diff back together with its new ratio and fit the new uprated driveshafts.
Hopefully get the motor back in by the end of the weekend, can't wait to fire up this baby.
Cheers,
Rich


Its back on, Trevor is one piece again. Not too bad, lifted the back of the body with the engine crane and about 8 of us lifted the front and worked the chassis in. Sits a bit high but there's no engine etc and I set the springs as high as they would go. Time to get the spanners out again, now what did I do with all those bolts. 
Hiya Craig , good to see your're still lurking on the forum, you know you want to come back. Was thinking your plate would look good on mine, might get a small shot of NOS, just for chrage cooling obviously
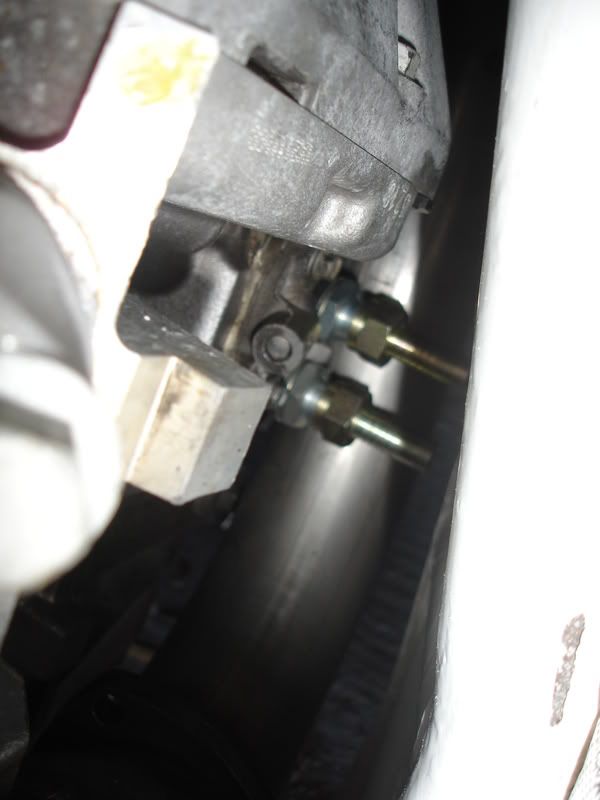
Hi Caduceus, I had to free up the rod I had in the end, it didn't match anything I could find. Its the same as Granada, Escort, Mondeo etc but the thread and overall length is an inch longer than the Ford item. Got a patent part technical dept on it and they couldn't match it.
More soon.
Rich.
Hiya Craig
, good to see your're still lurking on the forum, you know you want to come back. Was thinking your plate would look good on mine, might get a small shot of NOS, just for chrage cooling obviously Hi Caduceus, I had to free up the rod I had in the end, it didn't match anything I could find. Its the same as Granada, Escort, Mondeo etc but the thread and overall length is an inch longer than the Ford item. Got a patent part technical dept on it and they couldn't match it.
More soon.
Rich.
Got a bit of time this morning to fit the engine and try the supercharger with the body on. I was suprised the top engine cover fitted so well, I was trying to convince myself I needed a carbon one . The bonnet fits well with good clearance to the blower.
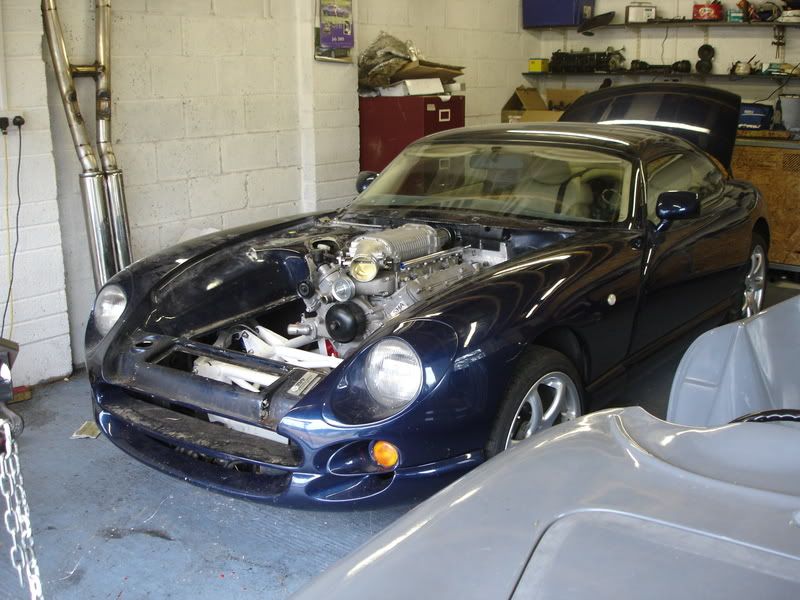
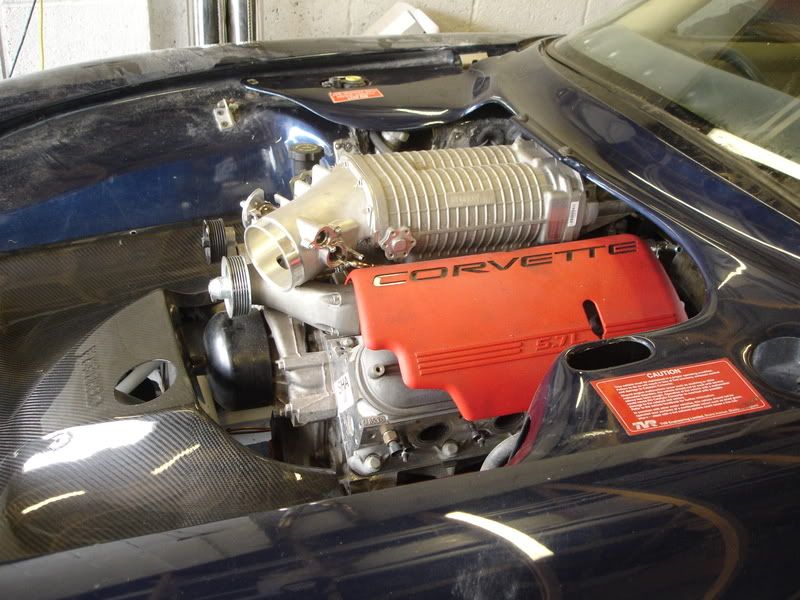
In the pic below you can just see where I had to cut into the fibreglass below the windscreen a bit worrying at first but it was very thin and is just the plenuem for the windscreen heater air. The blower pulley's clear the wiper mechanism so no big deal there.
Glad to say the gearstick sits in exactly the original position, can't wait to try out all 6 gears!!
Right time for and Top gear.
Rich.
. The bonnet fits well with good clearance to the blower.In the pic below you can just see where I had to cut into the fibreglass below the windscreen a bit worrying at first but it was very thin and is just the plenuem for the windscreen heater air. The blower pulley's clear the wiper mechanism so no big deal there.
Glad to say the gearstick sits in exactly the original position, can't wait to try out all 6 gears!!
Right time for
and Top gear.Rich.
diycerb said:
Glad to say the gearstick sits in exactly the original position
Excellent  Took me ages to get those measurements right!
Looks really nice Rich - I'm keen to see exactly how that exhaust works out around that huuuuuge
T56, and make sure you get some video of the first start-up!Omerta said:
diycerb said:
Glad to say the gearstick sits in exactly the original position
Excellent Took me ages to get those measurements right!Looks really nice Rich - I'm keen to see exactly how that exhaust works out around that huuuuuge
T56, and make sure you get some video of the first start-up!You can see the exhaust in one of the photo's above. Its twin 3" and you can see the two rececess I had to weld in to clear the rear casing. As you can see they're quiet short and protude about an inch so it shouldn't have an effect. The exhaust they use on supercharged monaros/holdens are twin 2.5" so I've got some to play with.
Do you need the inner engine covers Don? I'm having carbon ones made. Email me if you're interested. Postage might be a problem.
Rich.
How's it looking now Rich? My body will be going on next week:


This is as of today before the guide coat and last bit of filling and fairing to be done before undersealing and topcoating the engine bay in "Gulfblau". The engine & trans are now mated up with clutch, release bearing etc. installed, and hanging in the rolling chassis while we figure out mounts and exhaust routing.
Don
Brummmie said:
Omerta where did the front splitter come from? Brum.
Bought off a mate here who bought a couple of them years ago from TVR's Malaysian sub for his race Chimaera. The Cerb is slightly different shape so needed a bit of cutting and filling to fit, but now it's in it looks like it was made for it.

Hi Don,
Looking good, wish my body was in that state, basically thats exactly the same front end as mine is going to be. That front splitter looks exactly the same as the one CarbonAl has made for me, only mine is in Carbon, you'll be able to see the carbon as it will just be lacquered. Heres my mates he did a while ago not carbon though. Brum if you want one YHM.

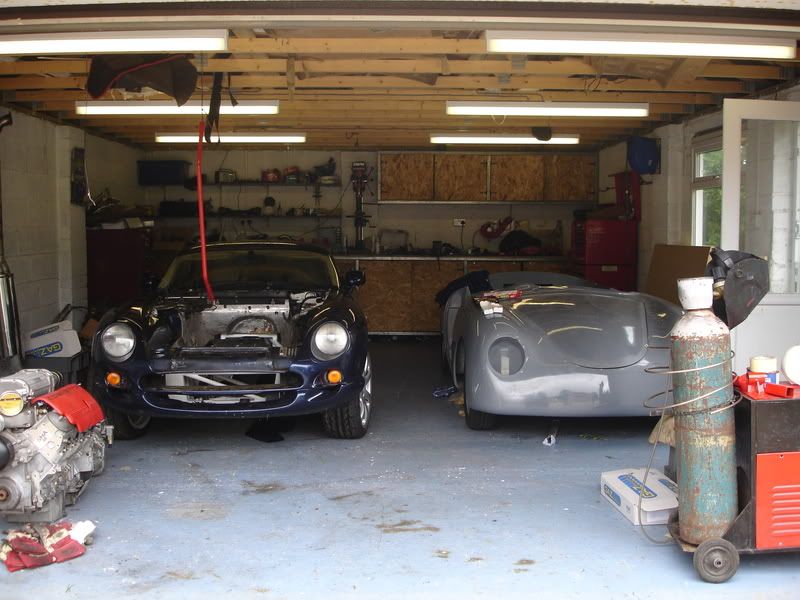
Well my progress has been a bit slow, we've started a house extension and the Porsche 356 replica has taken up a bit of time but here you go.
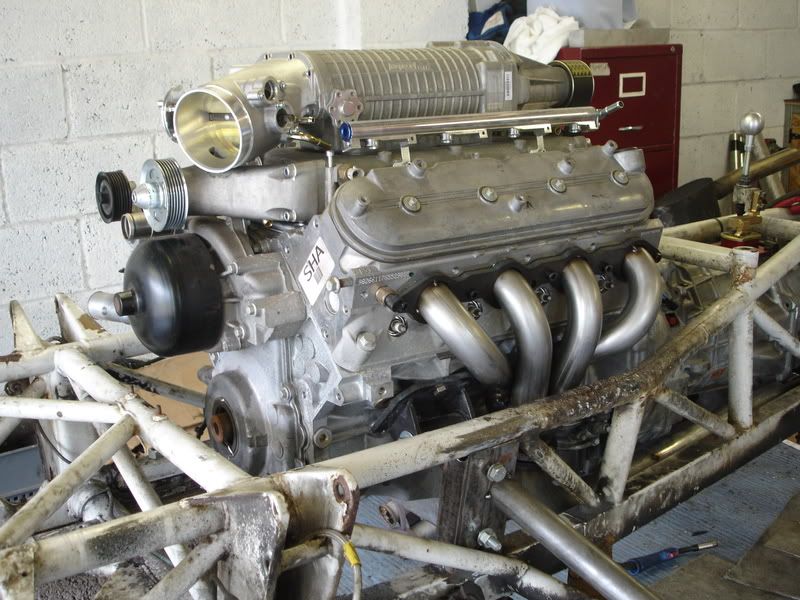
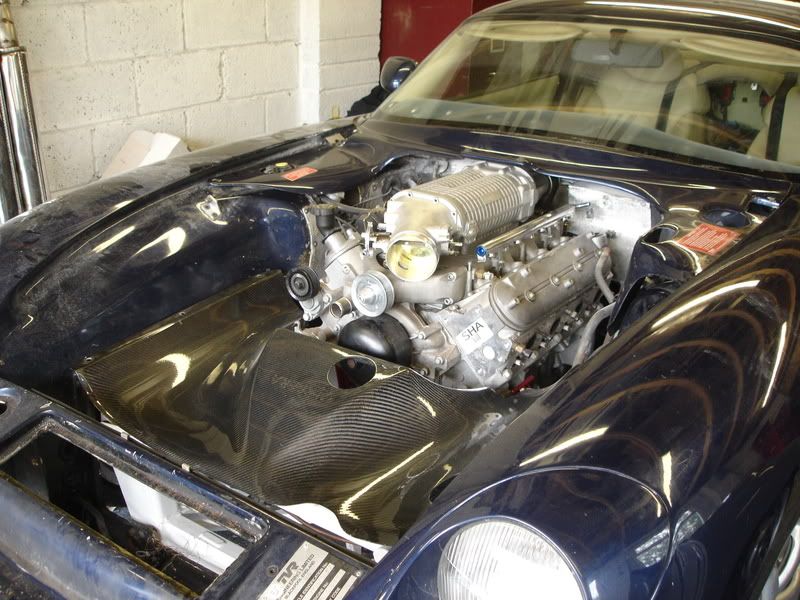
Engine and box are in for the last time, bugger getting them in with the front pulley and body on.
Exhaust fits nice just need to weld some brackets on, basically its going to be mounted on the lower chassis brace like a Chimera exhaust.
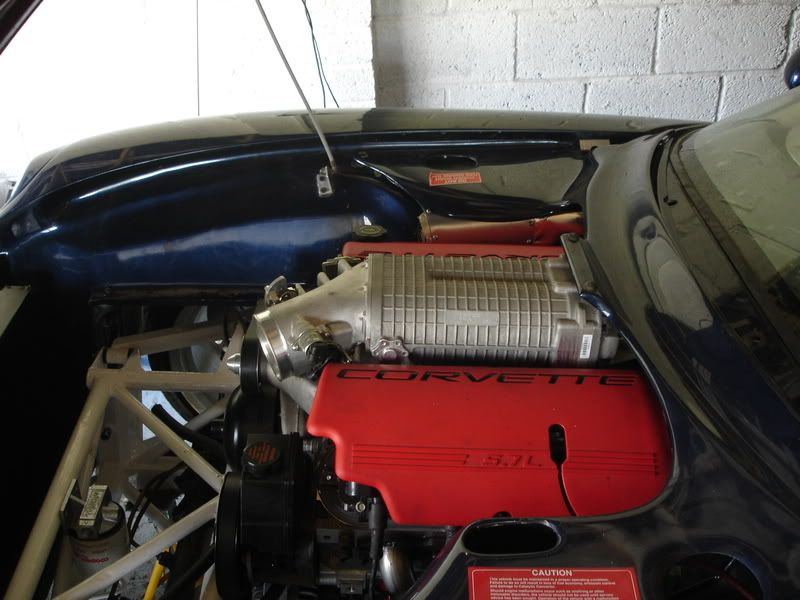
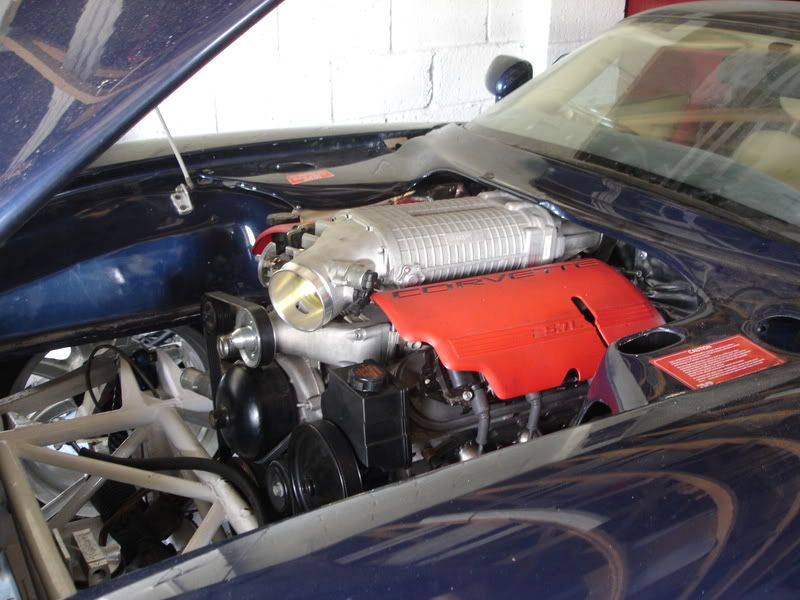
Alan is making me a Carbon top engine cover at the moment, the supercharger fits as if it was factory. I've removed the old brake and clutch masters cylinders and in there place will go the resevoir for the charge cooler system.

As you can see above the original power steering and alternator fit nicely on there original brackety.
Brum, the way my exhaust runs there was no way to even get a filter in the original location so I bought a remote takeoff plate and I'm using a remote filter housing in the top pic, similar to the original Cerb oil setup, except I've added an oil thermostat. Here's the takeoff plate.
Going to get Pirtek to make the oil hoses up.
Next step is bolt the body to the chassis, I keep forgetting about that step then sort out fuel, oil and water hoses and finish the brakes, just welded the plate in for the pedal box like yours but I've made mine adjustable, short arse you see.
All the best,
Rich.
Looking good, wish my body was in that state, basically thats exactly the same front end as mine is going to be. That front splitter looks exactly the same as the one CarbonAl has made for me, only mine is in Carbon, you'll be able to see the carbon as it will just be lacquered. Heres my mates he did a while ago not carbon though. Brum if you want one YHM.
Well my progress has been a bit slow, we've started a house extension and the Porsche 356 replica has taken up a bit of time but here you go.
Engine and box are in for the last time, bugger getting them in with the front pulley and body on.
Exhaust fits nice just need to weld some brackets on, basically its going to be mounted on the lower chassis brace like a Chimera exhaust.
Alan is making me a Carbon top engine cover at the moment, the supercharger fits as if it was factory. I've removed the old brake and clutch masters cylinders and in there place will go the resevoir for the charge cooler system.
As you can see above the original power steering and alternator fit nicely on there original brackety.
Brum, the way my exhaust runs there was no way to even get a filter in the original location so I bought a remote takeoff plate and I'm using a remote filter housing in the top pic, similar to the original Cerb oil setup, except I've added an oil thermostat. Here's the takeoff plate.
Going to get Pirtek to make the oil hoses up.
Next step is bolt the body to the chassis, I keep forgetting about that step
then sort out fuel, oil and water hoses and finish the brakes, just welded the plate in for the pedal box like yours but I've made mine adjustable, short arse you see.All the best,
Rich.
Gassing Station | Cerbera | Top of Page | What's New | My Stuff