Dash Refurb - almost there....
Discussion


For those interested, have almost finished - almost......
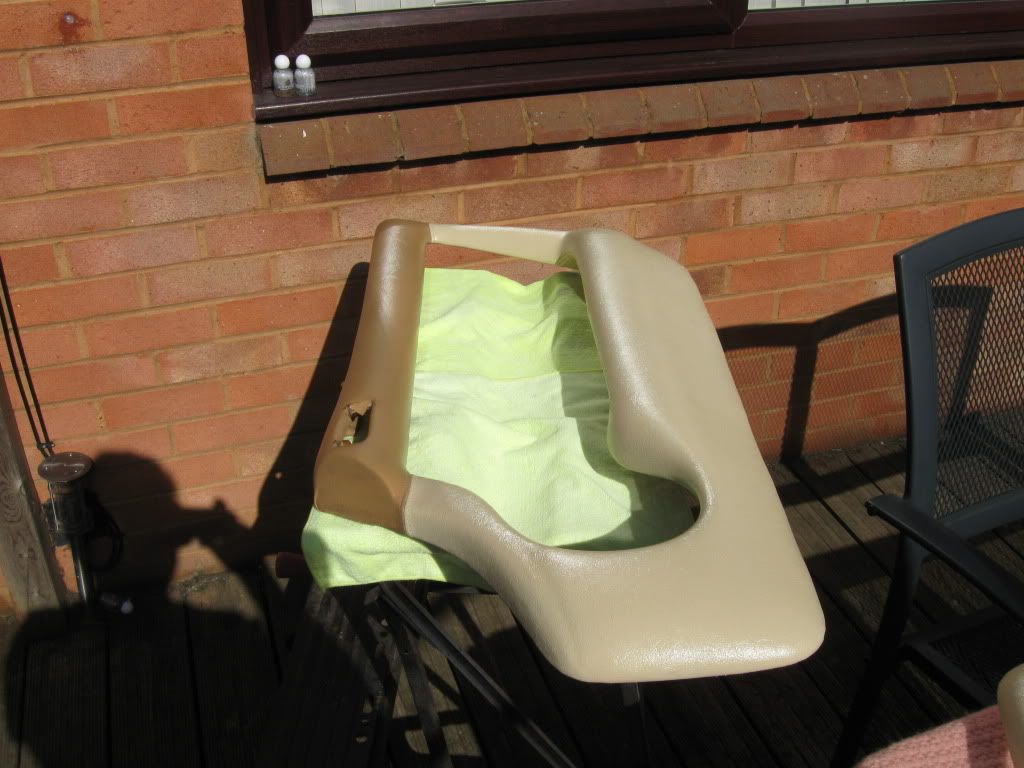
First off, decided to paint the dash the same colour as the car - took oodles of time with prep to get a good finish.
First, removed the cracking veneer (what a pain in the rectum)- then some filler primer..
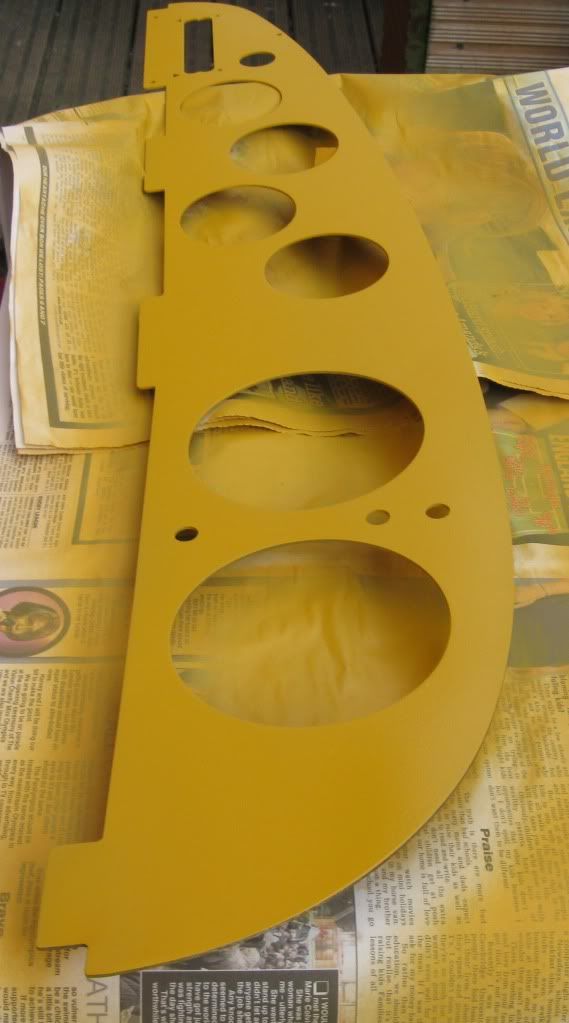
After a few coats of the colour I got matched at Halfrauds, had a quick peek to see what it looked like...
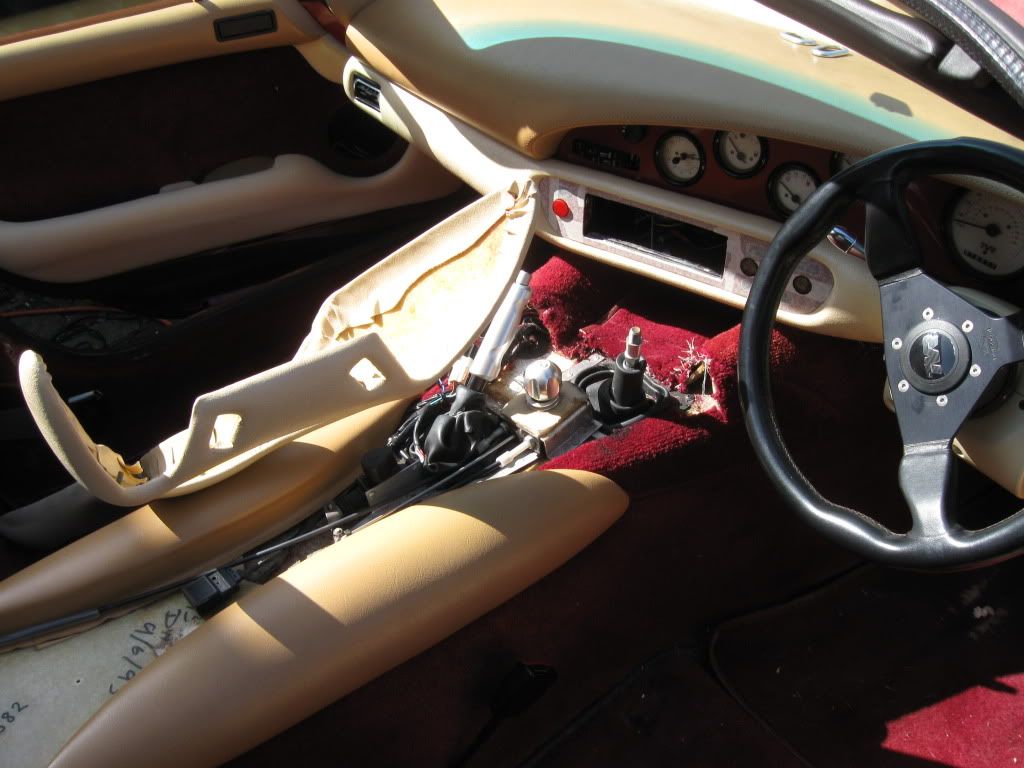
So, painted the bezels gloss black as they looked very tired...
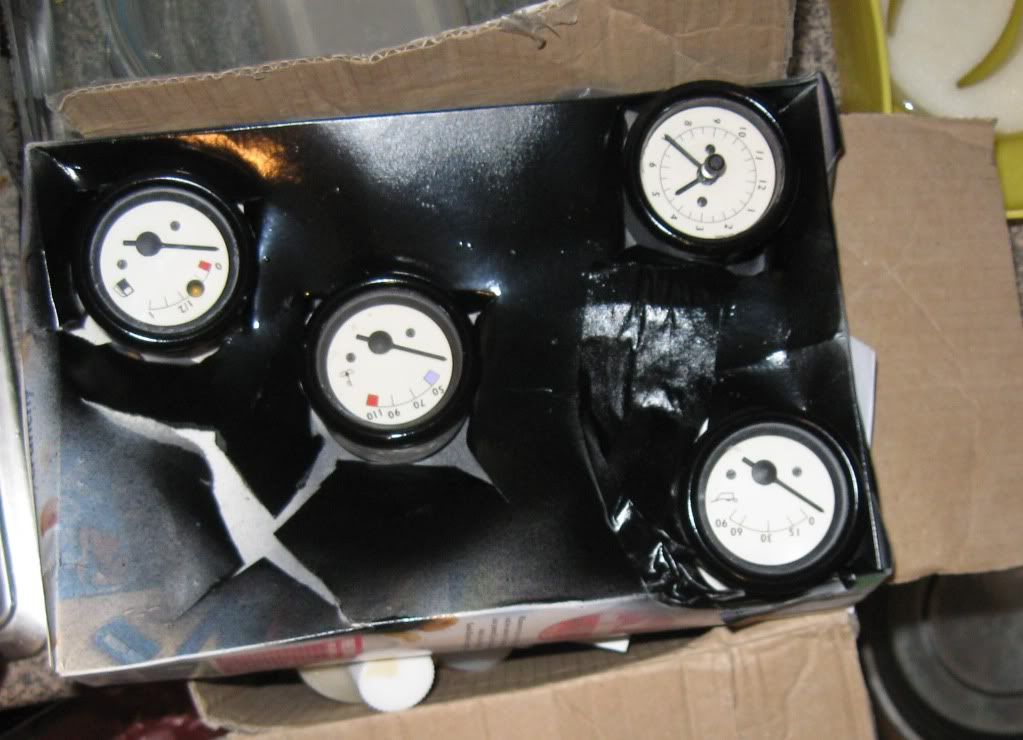
Next, installed the gauges and here was the result...
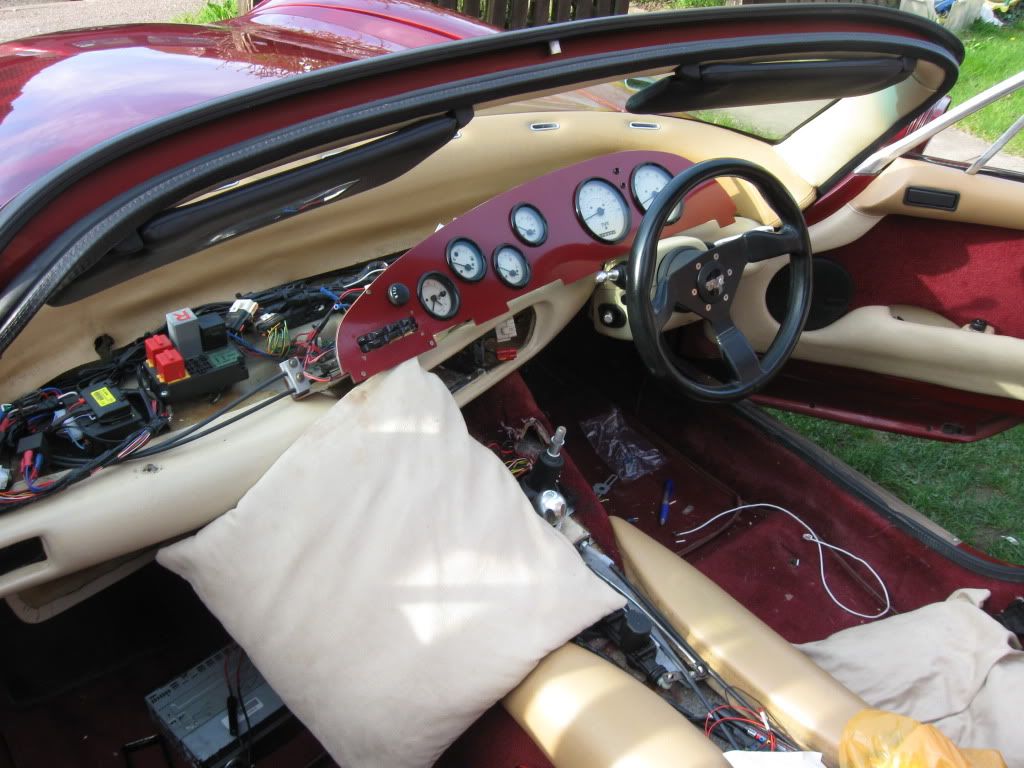
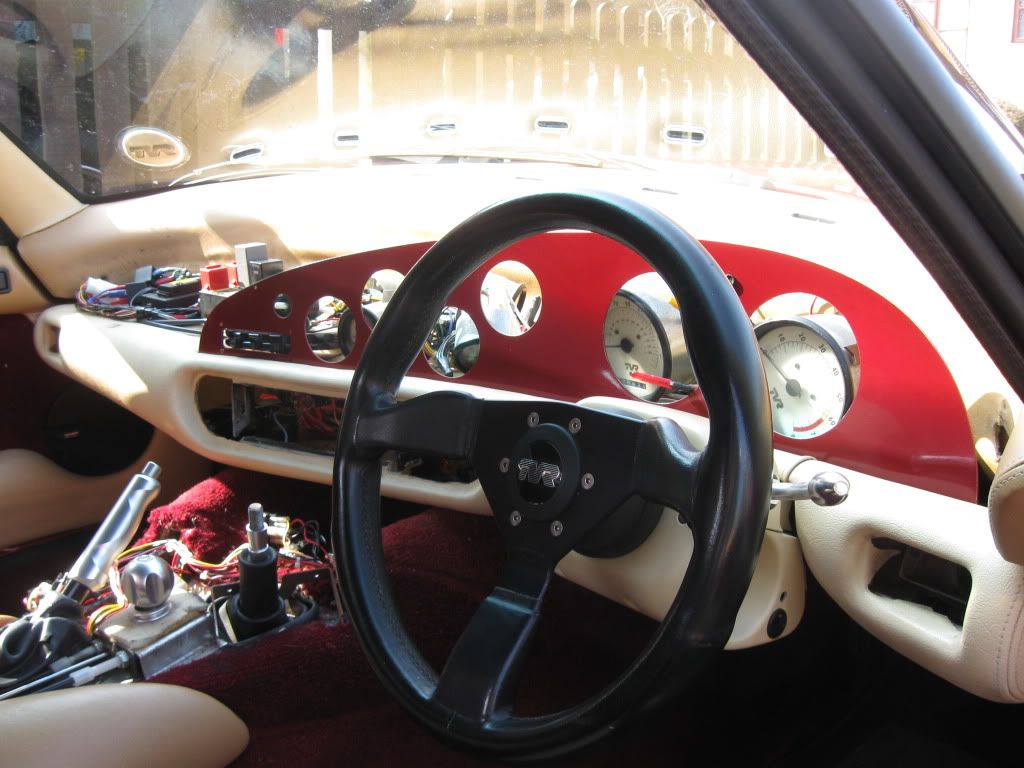
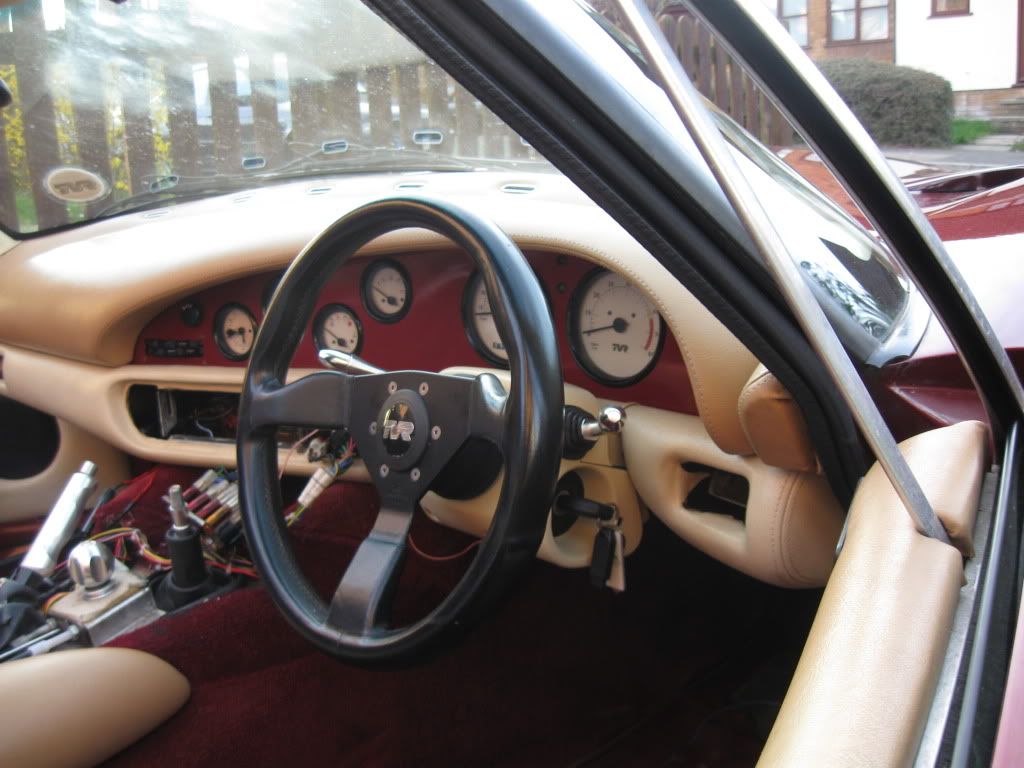
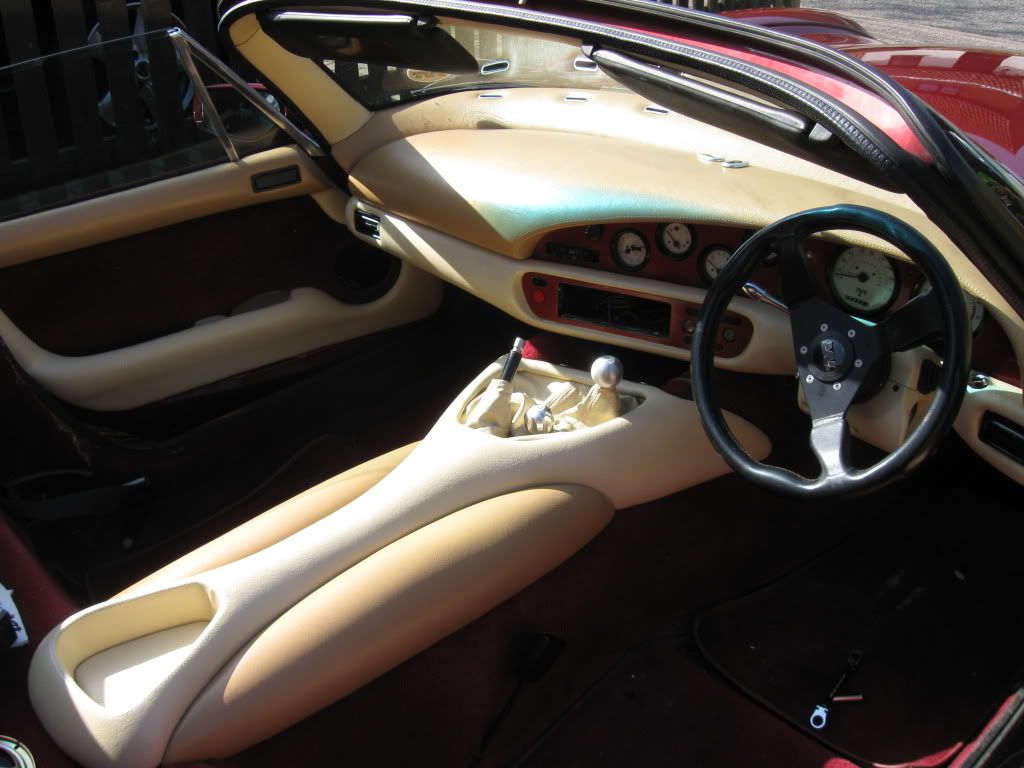
Finally, after the rewiring up all the gauges and installing the roll top, here is the final result...
Just the lower dash panel to do...run out of light and energy - afterall, had been at it for 7 hours today.
Nosh.
First off, decided to paint the dash the same colour as the car - took oodles of time with prep to get a good finish.
First, removed the cracking veneer (what a pain in the rectum)- then some filler primer..
After a few coats of the colour I got matched at Halfrauds, had a quick peek to see what it looked like...
So, painted the bezels gloss black as they looked very tired...
Next, installed the gauges and here was the result...
Finally, after the rewiring up all the gauges and installing the roll top, here is the final result...
Just the lower dash panel to do...run out of light and energy - afterall, had been at it for 7 hours today.
Nosh.
Great job. Had my car back this weekend after having the dash wooden veneer replaced with a leather dash the same colour as the car (chianti) plus the handbrake gearbox, door opening gaiters done too. Just the steering wheel to do. Will post some pics once the steering wheel is finished.
Great job. Had my car back this weekend after having the dash wooden veneer replaced with a leather dash the same colour as the car (chianti) plus the handbrake gearbox, door opening gaiters done too. Just the steering wheel to do. Will post some pics once the steering wheel is finished.
Thanks for the feedback guys 
Tried it out on an old peice of plastic - rubbed it down, cleaned it thoroughly, so the paint would would have something to key to. Sponged on some of colour, which looked completely naff, but once I did air brushing with the same colour it look great. Allowed to dry and then put on 3 coats of gloss finish.
Left it for a few days and it seemingly worked a treat - knocked it with keys, a few rubbings with the finger tips, and the finished remained really good.
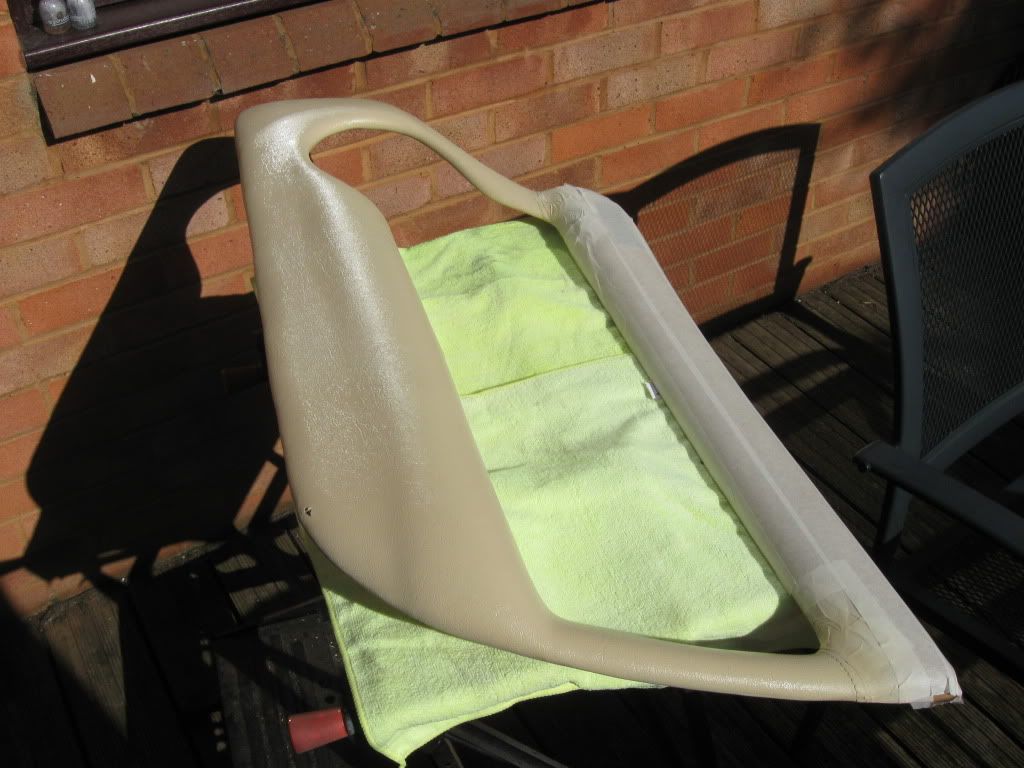
So, decided to do the cowl with the same stuff and the same process.
It got a few knocks yesterday and the finish was untouched.
The FC paint has gone a really long way - done the seats, centre console, gearstick gaiter and the middle dash part that sits beneath the roll top dash..
Nosh
portzi said:
Like it Nosh, what have you used on the steering column to cover the black plastic is it leather, and how have you attached it to the plastic, might have a go at mine
Mark
Mark (and AJ from a previous post) - I used the paint I got from Furniture Clinic kit when i did the seats - this meant I had a perfect colour match (I still had oodles left over).Mark
Tried it out on an old peice of plastic - rubbed it down, cleaned it thoroughly, so the paint would would have something to key to. Sponged on some of colour, which looked completely naff, but once I did air brushing with the same colour it look great. Allowed to dry and then put on 3 coats of gloss finish.
Left it for a few days and it seemingly worked a treat - knocked it with keys, a few rubbings with the finger tips, and the finished remained really good.
So, decided to do the cowl with the same stuff and the same process.
It got a few knocks yesterday and the finish was untouched.
The FC paint has gone a really long way - done the seats, centre console, gearstick gaiter and the middle dash part that sits beneath the roll top dash..
Nosh
Nosh said:
Mark (and AJ from a previous post) - I used the paint I got from Furniture Clinic kit when i did the seats - this meant I had a perfect colour match (I still had oodles left over).
Tried it out on an old peice of plastic - rubbed it down, cleaned it thoroughly, so the paint would would have something to key to. Sponged on some of colour, which looked completely naff, but once I did air brushing with the same colour it look great. Allowed to dry and then put on 3 coats of gloss finish.
Left it for a few days and it seemingly worked a treat - knocked it with keys, a few rubbings with the finger tips, and the finished remained really good.
So, decided to do the cowl with the same stuff and the same process.
It got a few knocks yesterday and the finish was untouched.
The FC paint has gone a really long way - done the seats, centre console, gearstick gaiter and the middle dash part that sits beneath the roll top dash..
Nosh
Nosh, Tried it out on an old peice of plastic - rubbed it down, cleaned it thoroughly, so the paint would would have something to key to. Sponged on some of colour, which looked completely naff, but once I did air brushing with the same colour it look great. Allowed to dry and then put on 3 coats of gloss finish.
Left it for a few days and it seemingly worked a treat - knocked it with keys, a few rubbings with the finger tips, and the finished remained really good.
So, decided to do the cowl with the same stuff and the same process.
It got a few knocks yesterday and the finish was untouched.
The FC paint has gone a really long way - done the seats, centre console, gearstick gaiter and the middle dash part that sits beneath the roll top dash..
Nosh
Is this the one you used ?
http://www.ebay.co.uk/itm/FURNITURE-CLINIC-LEATHER...
If so at that price i'm going to get all over it and give it all a nice sprucing up for summer !
AJ
AJV8 said:
Nosh,
Is this the one you used ?
http://www.ebay.co.uk/itm/FURNITURE-CLINIC-LEATHER...
If so at that price i'm going to get all over it and give it all a nice sprucing up for summer !
AJ
No - that is just a sall repair kit and balm!Is this the one you used ?
http://www.ebay.co.uk/itm/FURNITURE-CLINIC-LEATHER...
If so at that price i'm going to get all over it and give it all a nice sprucing up for summer !
AJ
You need to goto the FC site....
Nosh
Ropps said:
Great job. Had my car back this weekend after having the dash wooden veneer replaced with a leather dash the same colour as the car (chianti) plus the handbrake gearbox, door opening gaiters done too. Just the steering wheel to do. Will post some pics once the steering wheel is finished.
OOh I'd like to see some pics of that, Im tempted to recover mine in either colour matched leather or black alcantaraNosh said:
Mark (and AJ from a previous post) - I used the paint I got from Furniture Clinic kit when i did the seats - this meant I had a perfect colour match (I still had oodles left over).
Tried it out on an old peice of plastic - rubbed it down, cleaned it thoroughly, so the paint would would have something to key to. Sponged on some of colour, which looked completely naff, but once I did air brushing with the same colour it look great. Allowed to dry and then put on 3 coats of gloss finish.
Left it for a few days and it seemingly worked a treat - knocked it with keys, a few rubbings with the finger tips, and the finished remained really good.
So, decided to do the cowl with the same stuff and the same process.
It got a few knocks yesterday and the finish was untouched.
The FC paint has gone a really long way - done the seats, centre console, gearstick gaiter and the middle dash part that sits beneath the roll top dash..
Nosh
Excellent Nosh I have the F/C full kit it was about 80 quid all in dye gloss finish overcoat etc, with sprayer and 2 cans still have one left, what a great idea, did you just mask off the areas you dont want to spray. Good stuff that it covers black plastic.Tried it out on an old peice of plastic - rubbed it down, cleaned it thoroughly, so the paint would would have something to key to. Sponged on some of colour, which looked completely naff, but once I did air brushing with the same colour it look great. Allowed to dry and then put on 3 coats of gloss finish.
Left it for a few days and it seemingly worked a treat - knocked it with keys, a few rubbings with the finger tips, and the finished remained really good.
So, decided to do the cowl with the same stuff and the same process.
It got a few knocks yesterday and the finish was untouched.
The FC paint has gone a really long way - done the seats, centre console, gearstick gaiter and the middle dash part that sits beneath the roll top dash..
Nosh
Mark
portzi said:
Excellent Nosh I have the F/C full kit it was about 80 quid all in dye gloss finish overcoat etc, with sprayer and 2 cans still have one left, what a great idea, did you just mask off the areas you dont want to spray. Good stuff that it covers black plastic.
Mark
Mark,Mark
Everything was removed from the car, with the exception of the lower steering cowl (the alarm fitment meant I could not remove it) and (obviously) the lower part of the dashboard (that the radio panel fits into) that runs from door to door.
I removed the passenger door card tonight in order to lube the runners and lifting mechanism (slow windows) and have decided to refresh the lower door panels as well (they are the same colour as the seats etc).
If you decide to do any vinyl, just make sure you do NOT use the Leather Prep - all you need to do is rub the surface lightly with some 1200 or 2000 grit paper, clean with alchohol, sponge on two coats base colour and finish the final colour coat with the airbrush. I have put two coats of gloss coat after that on the areas that will get some 'wear'...
Good luck!
Nosh
Just a small update...
Managed to get the lower dash panel in yesterday - because it was from another car (I bought it from a breakers yard, purely for the brackets on the rear of it), the holes (natch) did not line up. So, drilled some new holes into the bracket within the 'car' and araldited 'captive' bolts on the other side. (I made a pledge I would just stick it on, per one of the previous owners).
This worked a treat (only one bolt is in at present).
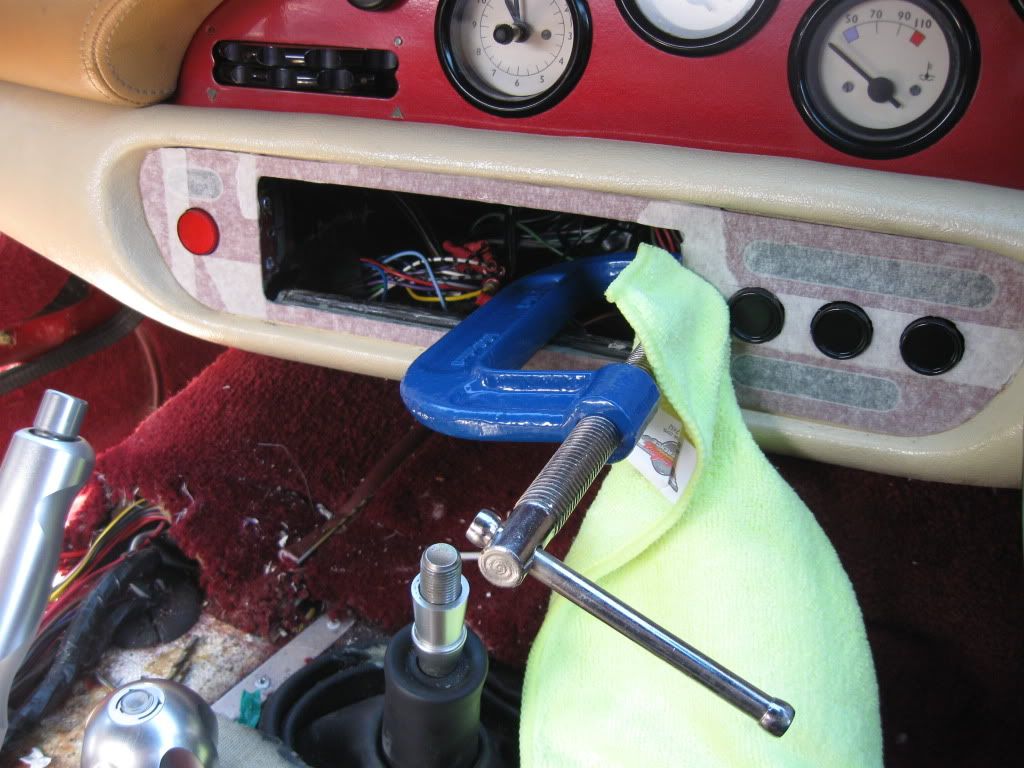
The light switch side was more difficult - again the 'captive bolt' method was used, but with all the jiggery pokery, the bracket came away from the dash - decided to dry fit the bracket to the housing and then align the dash panel into the hole - finally re-araldited the bracket to the back of the panel, held in with a G clamp (with the tiniests of nips to hold it in place).
The paintworks look crap as a layer of masking tape was applied to protect it.....
I had also taken off the door cards to speed up the windows (all move nicely now) - and decided to refresh the cards using the FC kit.
Finally, once the paint and gloss finishes were on, I cleaned the 'darker cream' top edge, scuffed with 2000 grit paper, cleaned again with alcohol clear and applied two gloss coats - both doors now look almost brand new.... (and the FC kit has gone a VERY long way... )
)
Nosh
Managed to get the lower dash panel in yesterday - because it was from another car (I bought it from a breakers yard, purely for the brackets on the rear of it), the holes (natch) did not line up. So, drilled some new holes into the bracket within the 'car' and araldited 'captive' bolts on the other side. (I made a pledge I would just stick it on, per one of the previous owners).
This worked a treat (only one bolt is in at present).
The light switch side was more difficult - again the 'captive bolt' method was used, but with all the jiggery pokery, the bracket came away from the dash - decided to dry fit the bracket to the housing and then align the dash panel into the hole - finally re-araldited the bracket to the back of the panel, held in with a G clamp (with the tiniests of nips to hold it in place).
The paintworks look crap as a layer of masking tape was applied to protect it.....
I had also taken off the door cards to speed up the windows (all move nicely now) - and decided to refresh the cards using the FC kit.
Finally, once the paint and gloss finishes were on, I cleaned the 'darker cream' top edge, scuffed with 2000 grit paper, cleaned again with alcohol clear and applied two gloss coats - both doors now look almost brand new.... (and the FC kit has gone a VERY long way...
)Nosh
I`ve got to take my hat off to you mate ! you have alot of energy ,every time i get in to the car the door cards centre consul and bottom dash area depresses me .I have the odd nick and graze ..
I had new seats re covered but they don`t quite match ..
Do they supply some type of fine filler ?
Now i have seen yours its given me inspiration to get on with it ..
This is what TVR is all about ,unfortunately i don`t have 4k plus to give Dc Trimmers..
Good work.
I had new seats re covered but they don`t quite match ..
Do they supply some type of fine filler ?
Now i have seen yours its given me inspiration to get on with it ..
This is what TVR is all about ,unfortunately i don`t have 4k plus to give Dc Trimmers..
Good work.
SILICONEKID340HP said:
I`ve got to take my hat off to you mate ! you have alot of energy.........
SNIP >>>>>>>>- not anymore.....done for today, but nice to have the seats (albeit loosely) in...
And (of course) pics.....
Starting to rebuild console - of course, the side (darker panels) were also cleaned and then gloss coated...
Console in, wires tucked away nicely and gaiter (also refreshed) installed..
One seat in....
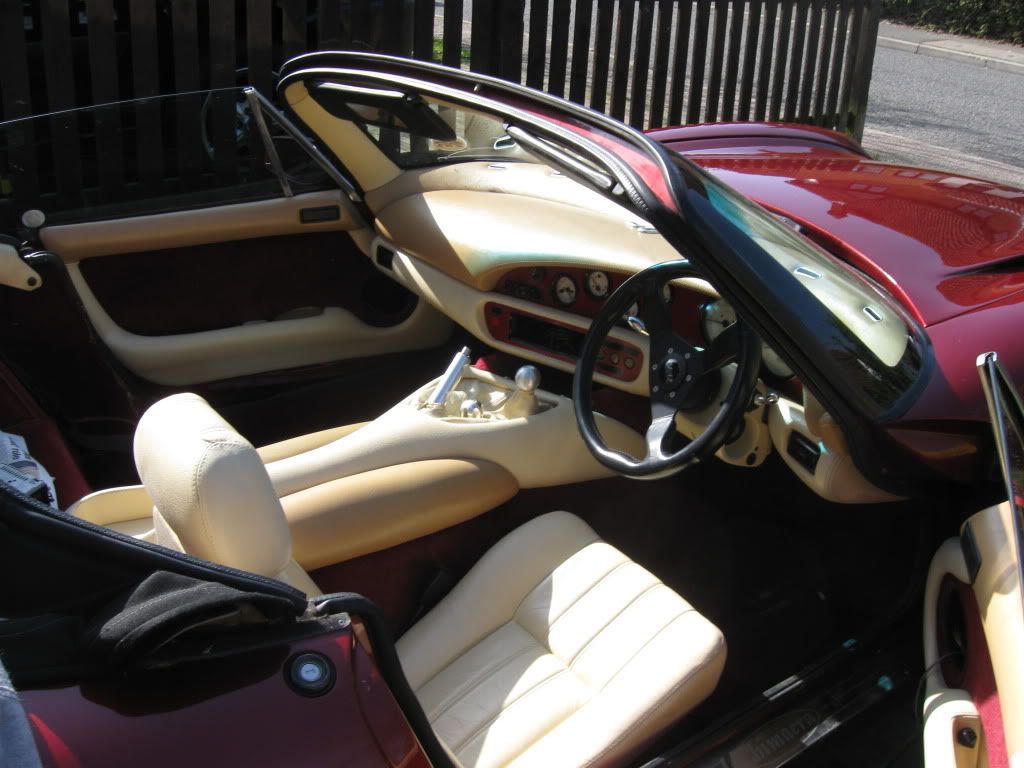
And how I left it 15 minutes ago - no more today.....
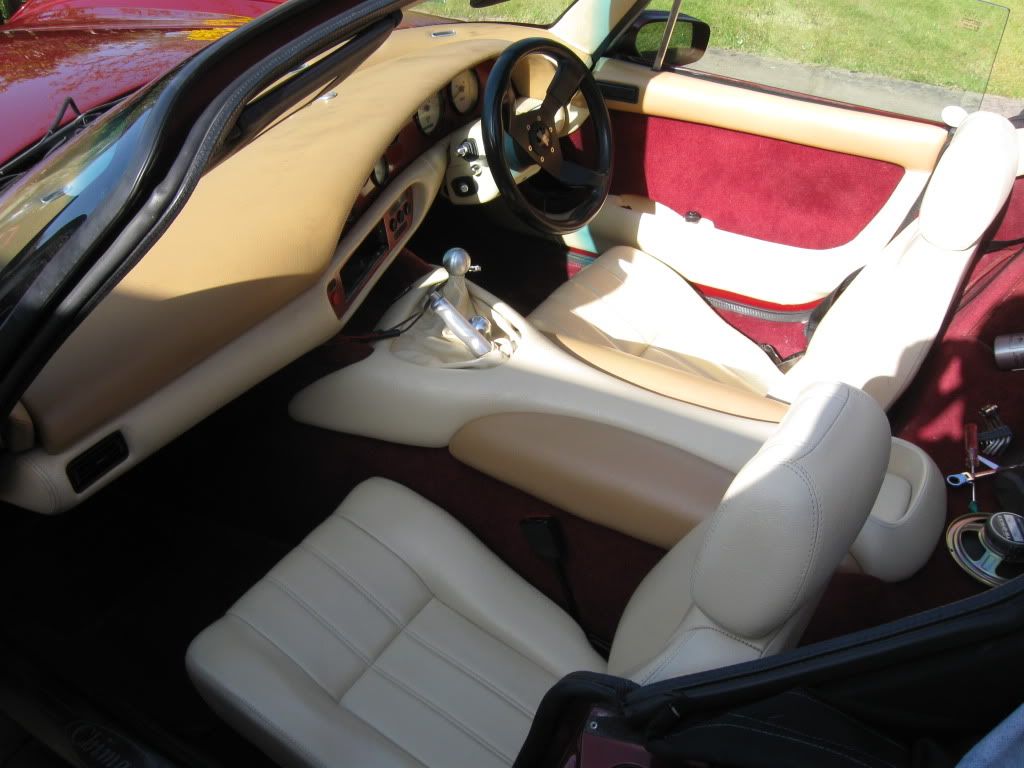
Nosh
Gassing Station | Chimaera | Top of Page | What's New | My Stuff