Another Dinky: A 238 Jaguar Type D racing car
Discussion


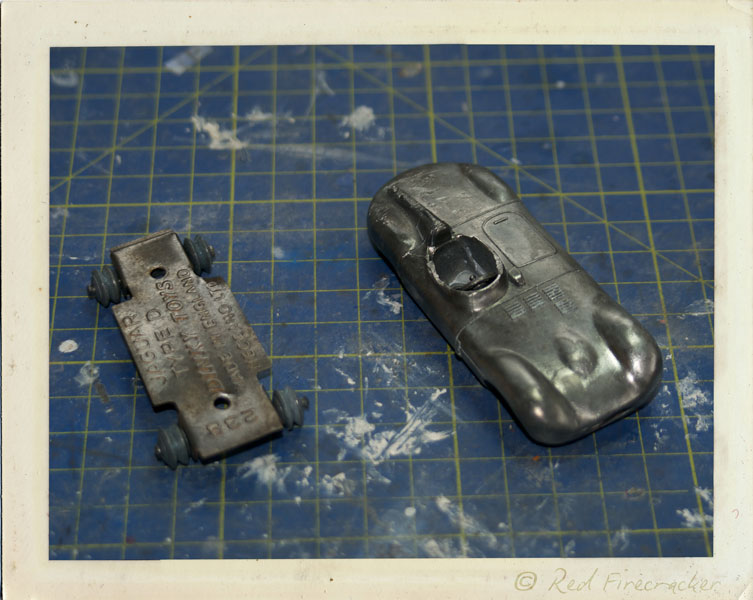
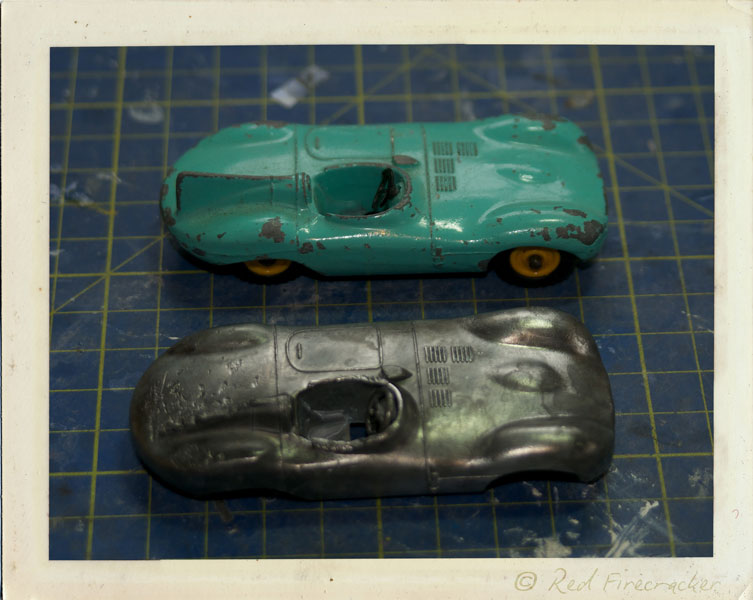
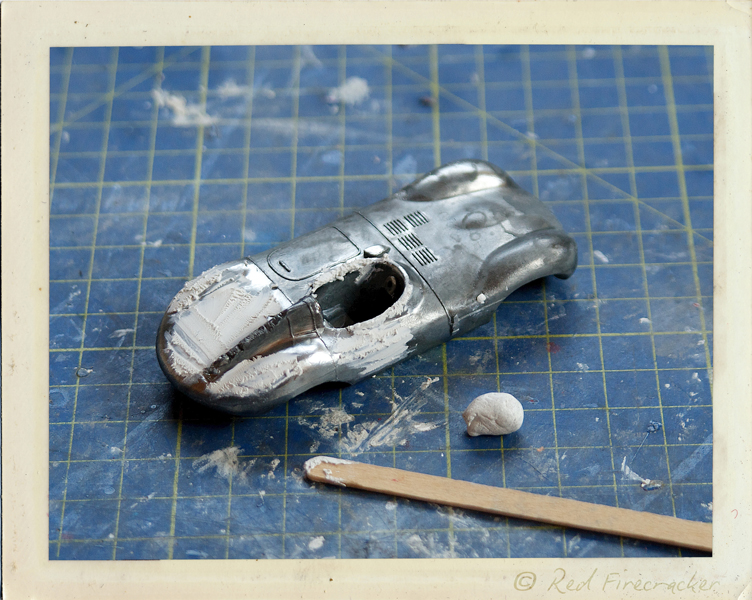
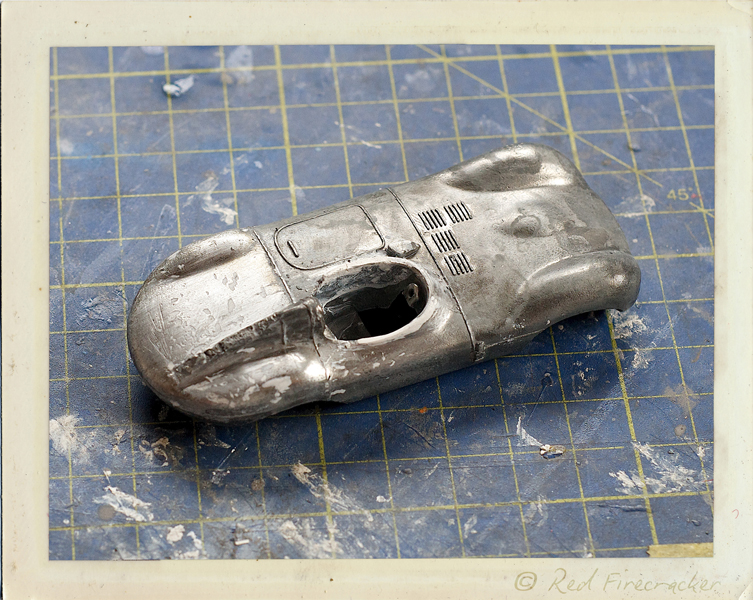
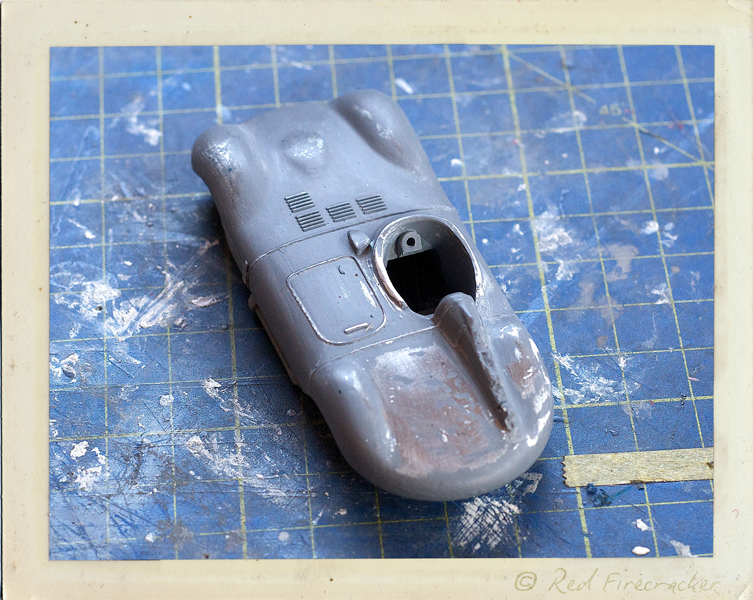
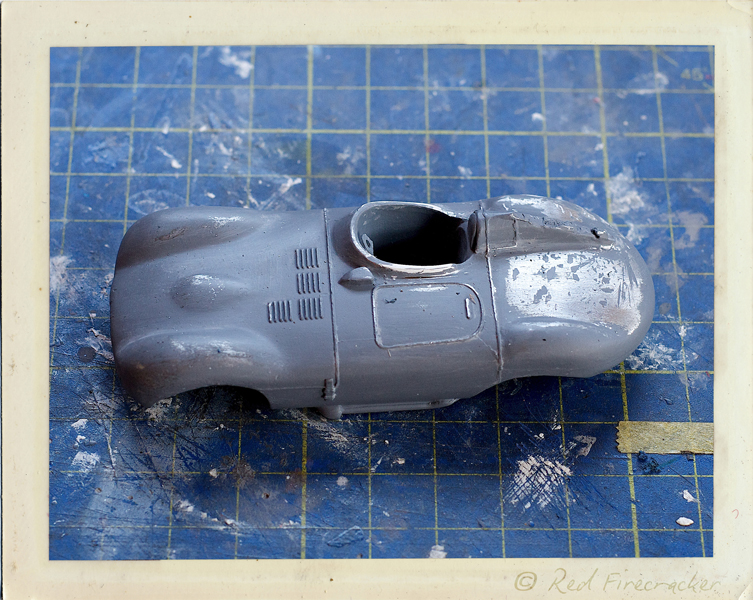
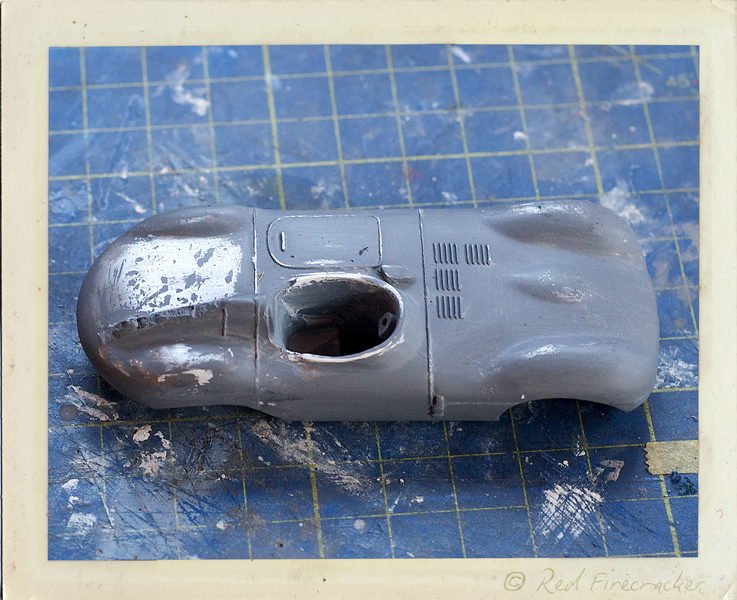
A client has been very kind and allowed me to detail the restoration of this model here, as I think you'll agree, it will be a bit challenging. The model is question is a Dinky 238 Jaguar Type D racing car. A lovely casting of a very very lovely car. As you can see, it's been in the wars a bit over its time. I haven't detailed the stripping down of the model this time as I'm sure we're all familiar with that process (and I forgot).
Dinky 238 Jaguar Type D Racing Car by Red Firecracker, on Flickr
Dinky 238 Jaguar Type D Racing Car by Red Firecracker, on Flickr
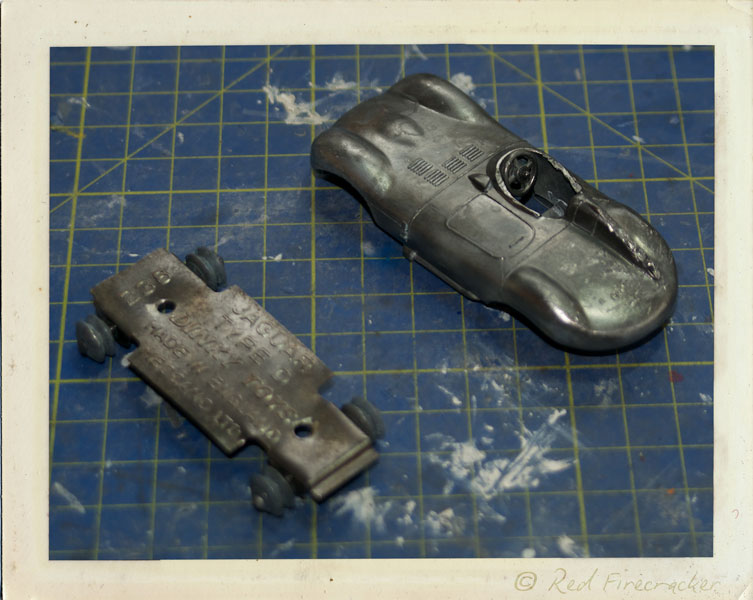
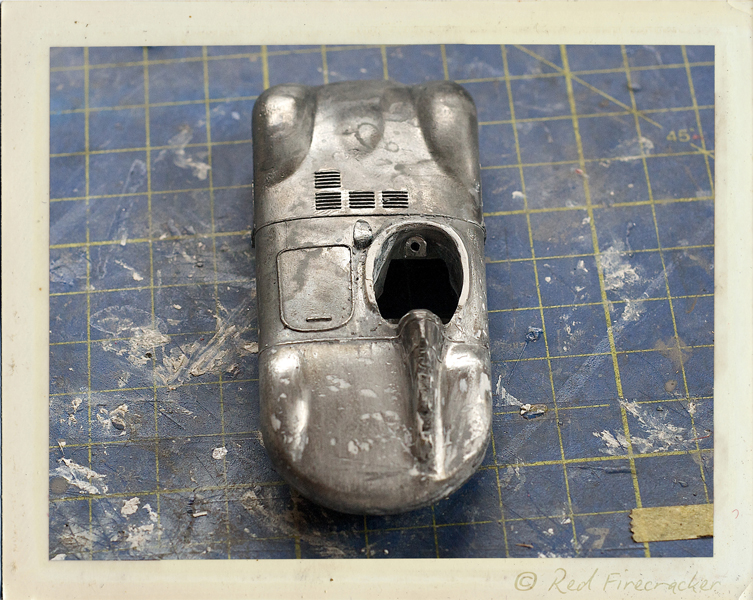
namely suffering damage to the fin and to the cockpit surround.
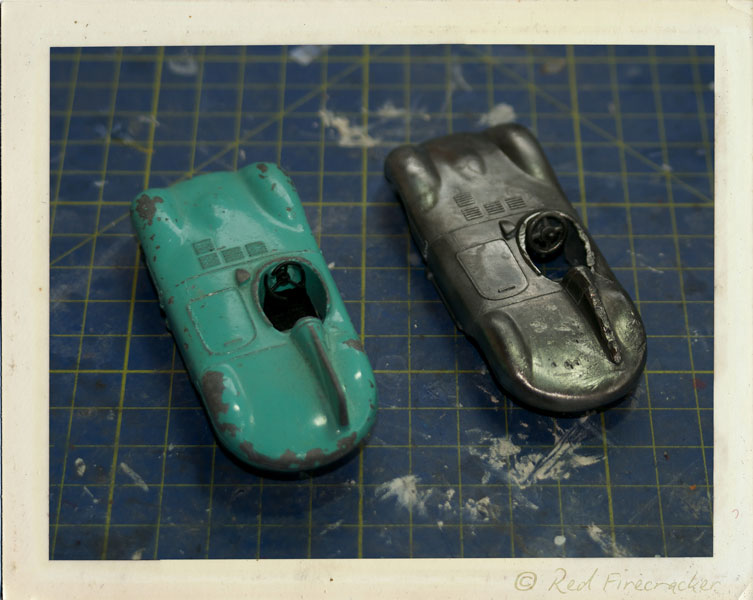
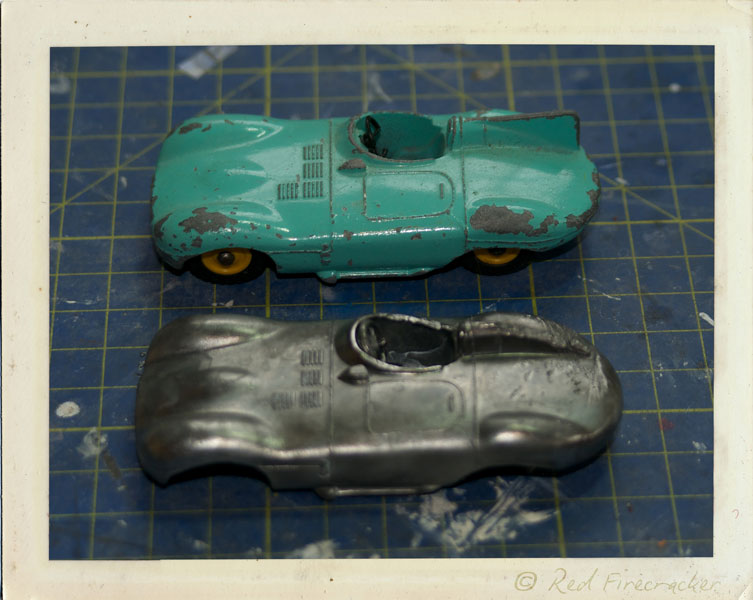
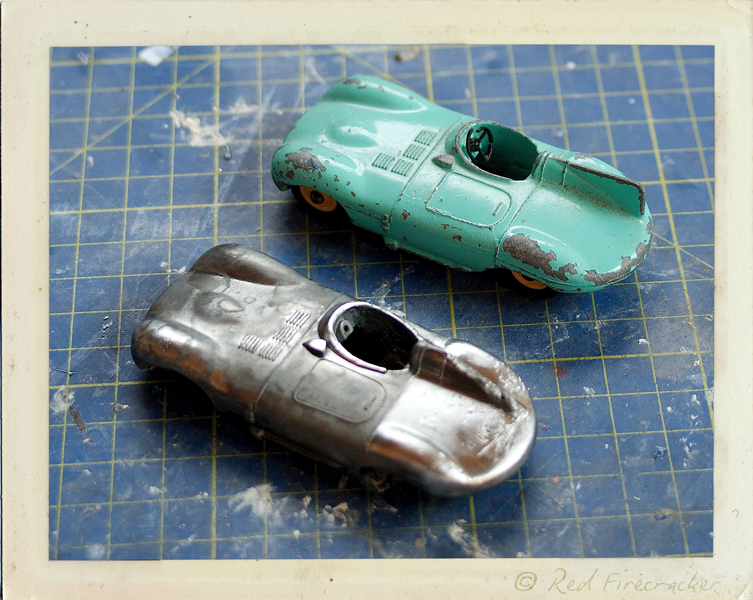
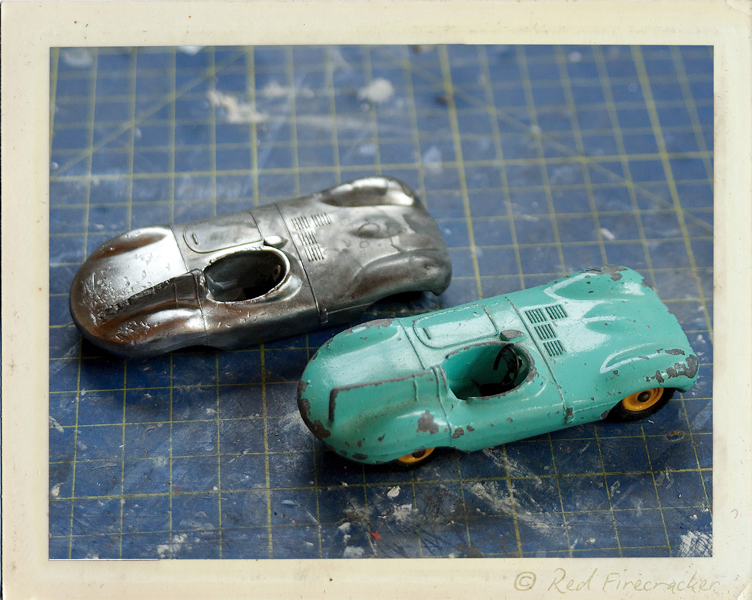
Here is the model next to an undamaged version;
Dinky 238 Jaguar Type D Racing Car by Red Firecracker, on Flickr
Dinky 238 Jaguar Type D Racing Car by Red Firecracker, on Flickr
Dinky 238 Jaguar Type D Racing Car by Red Firecracker, on Flickr
The work will obviously centre around reconstructing the cockpit surrounds and also the fin. There is also damage to the rear deck that will need filling. A driver will also need to take his place at the wheel.
Should be fun. This will be a bit slower than the recent others towards the end as I've not finished it yet.
Dinky 238 Jaguar Type D Racing Car by Red Firecracker, on Flickr
Dinky 238 Jaguar Type D Racing Car by Red Firecracker, on Flickr
namely suffering damage to the fin and to the cockpit surround.
Here is the model next to an undamaged version;
Dinky 238 Jaguar Type D Racing Car by Red Firecracker, on Flickr
Dinky 238 Jaguar Type D Racing Car by Red Firecracker, on Flickr
Dinky 238 Jaguar Type D Racing Car by Red Firecracker, on Flickr
The work will obviously centre around reconstructing the cockpit surrounds and also the fin. There is also damage to the rear deck that will need filling. A driver will also need to take his place at the wheel.
Should be fun. This will be a bit slower than the recent others towards the end as I've not finished it yet.
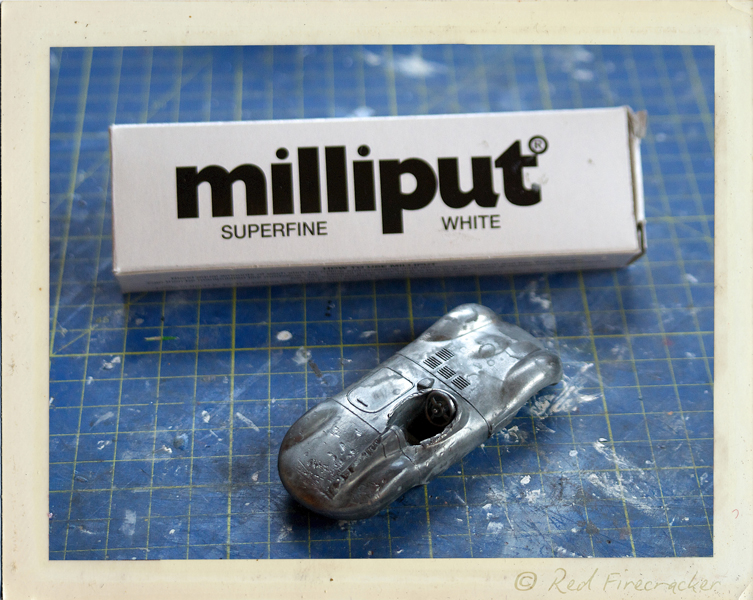
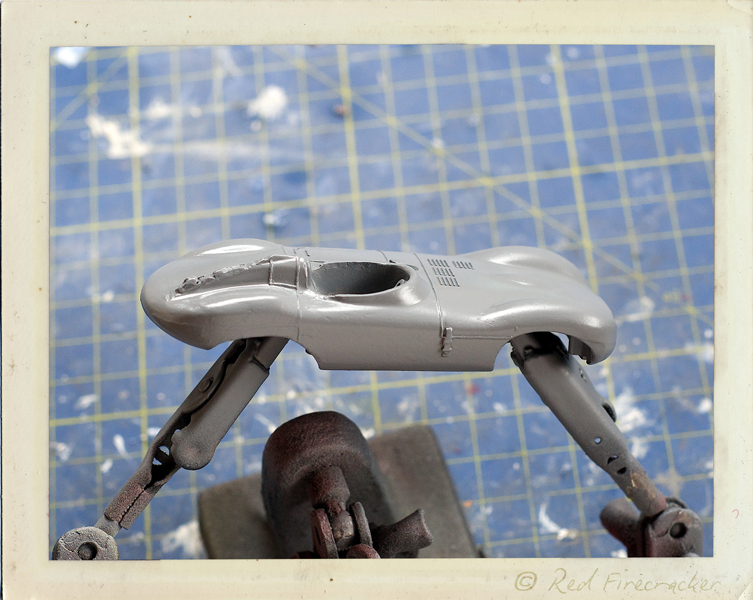
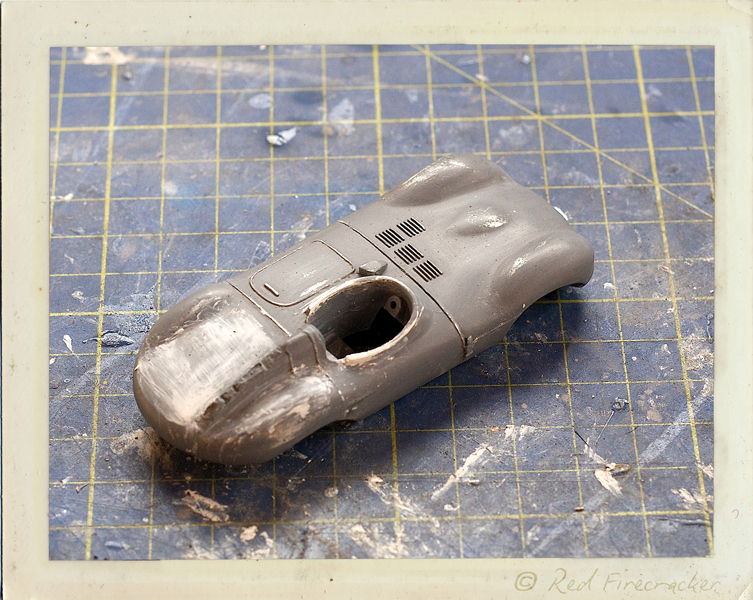
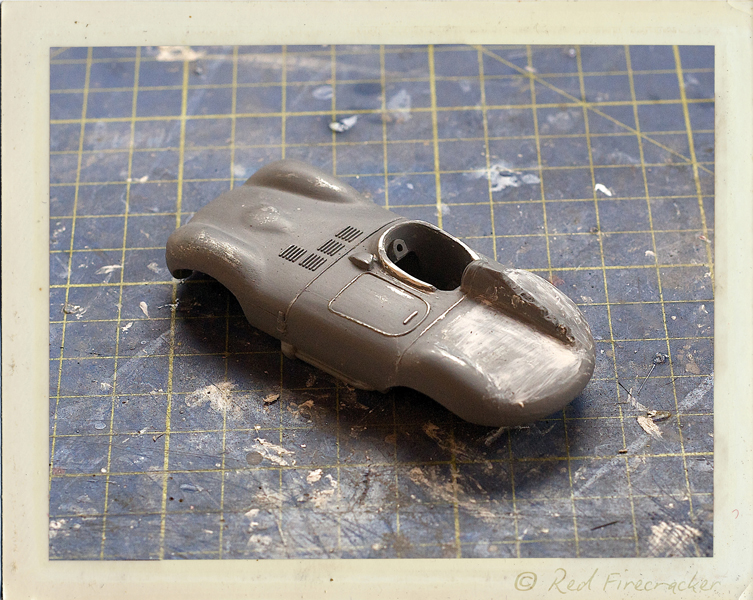
The first step was to deal with the crushed cockpit surround. The raised lips were chewed and bent inwards, so using a selection of needle files, minidrill attachments and a scalpel, I was able to smooth the inside and the upper edges;
Dinky 238 Jaguar Type D Racing Car by Red Firecracker, on Flickr
Dinky 238 Jaguar Type D Racing Car by Red Firecracker, on Flickr
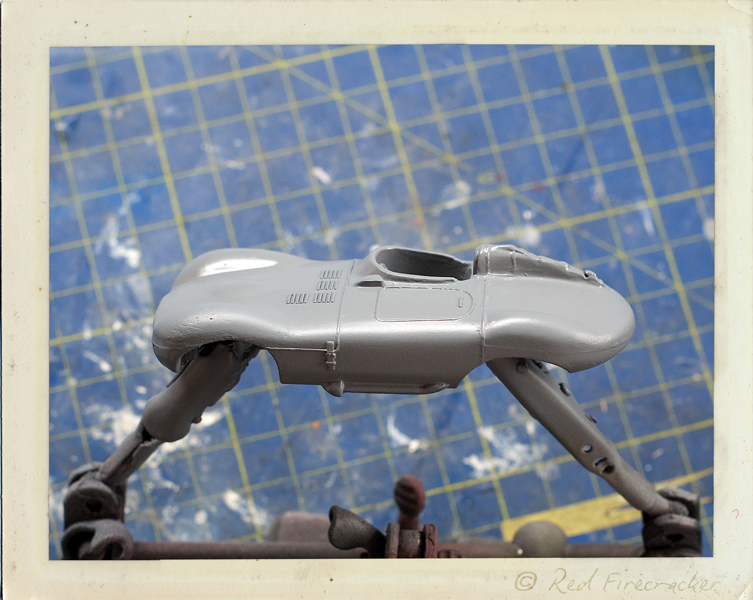
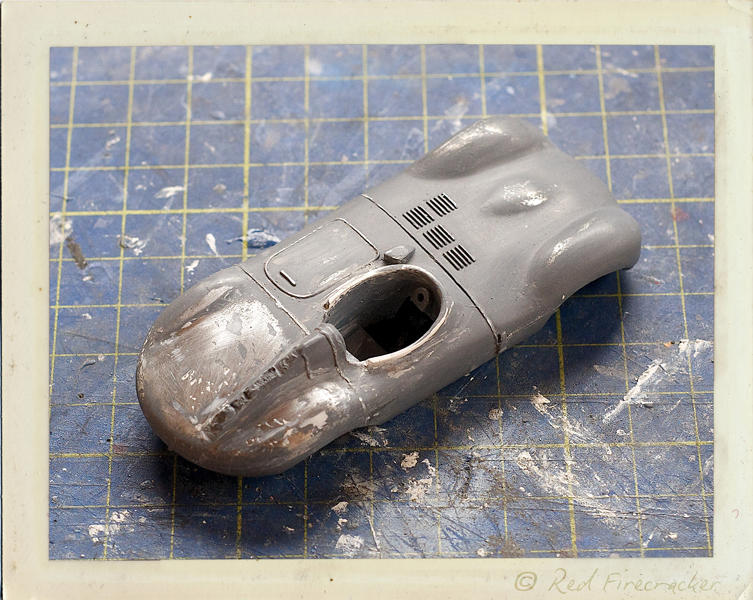
What I have also done, as displayed in the pictures above, is to wire brush the areas that I will be working on next, so make sure it is absolutely clean. The filler I am going to use is a two part epoxy called Milliput, specifically the fine white variety;
Dinky 238 Jaguar Type D Racing Car by Red Firecracker, on Flickr
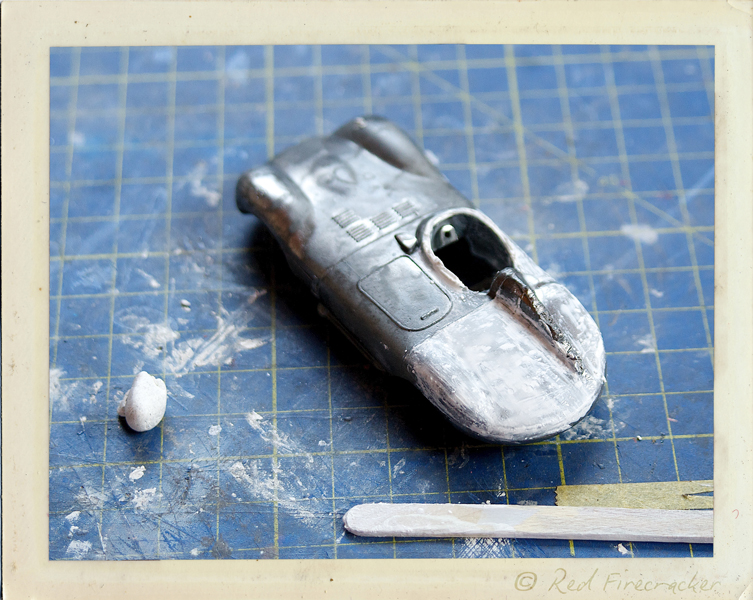
I am not concerned with the fin at this time, I just want to get a smooth finish on the other bodywork that has been assaulted. The great benefit of Milliput is that it can be smoothed with wet tools, so the first stage is to cover the areas with the mixed filler;
Dinky 238 Jaguar Type D Racing Car by Red Firecracker, on Flickr
As you can see, I have also built up the edges of the cockpit.
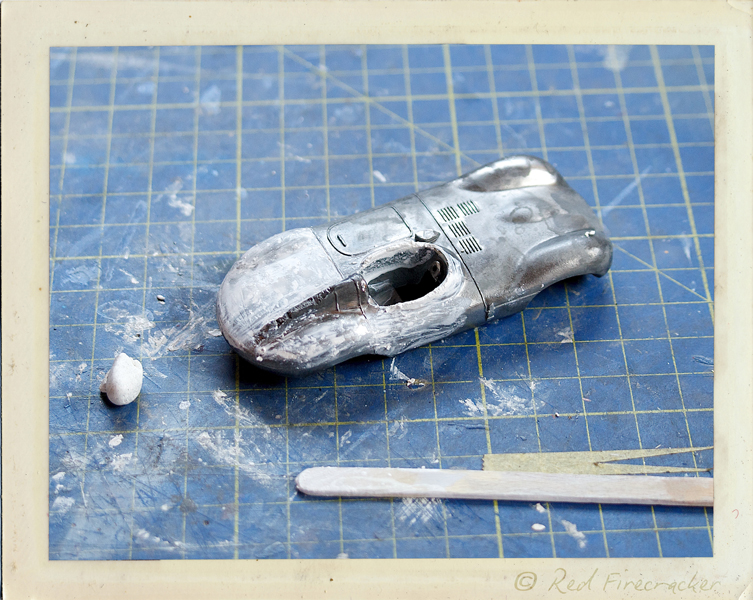
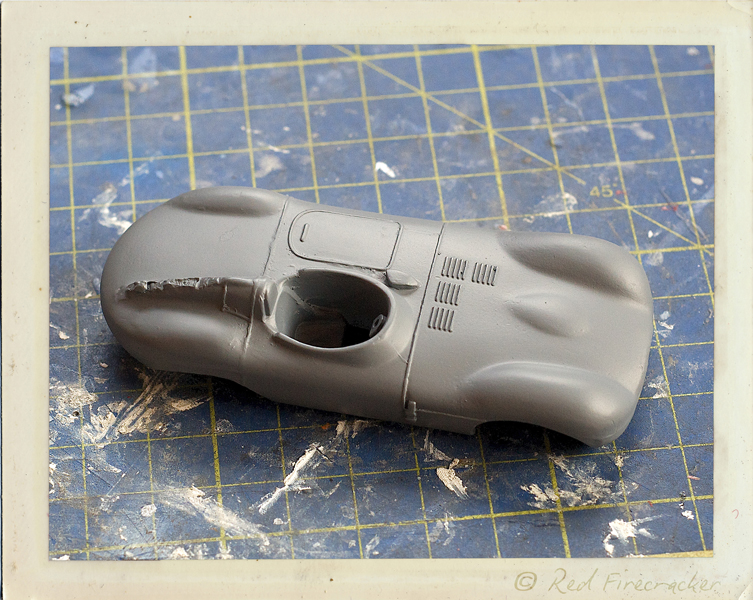
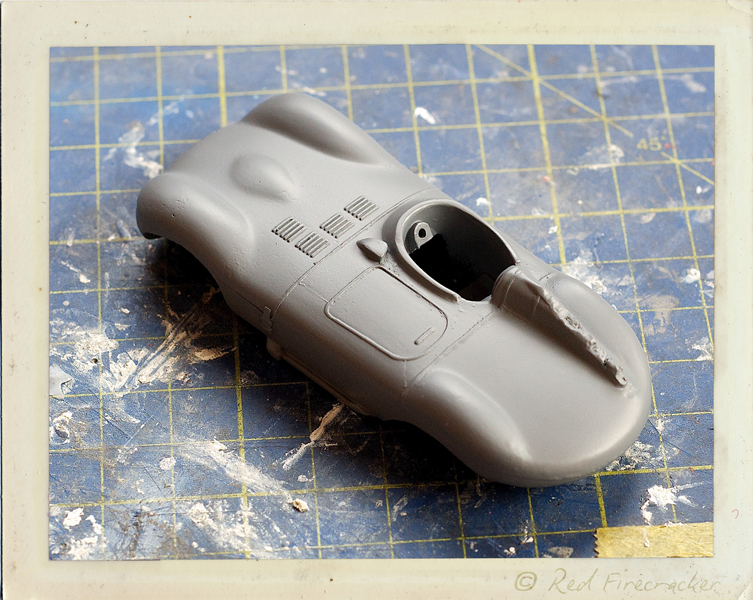
Once the areas are covered, I then took a wet stirring stick and smoothed over the filler, taking most of it away. You will need to remove the excess from your tool occasionally. When doing fine work, it is often possible to not need to sand the areas afterwards, but as this is quite a large flat area with heavy damage, I have left a bit more filler than usual so that I can sand back, prime and then see if a second application is required.
Dinky 238 Jaguar Type D Racing Car by Red Firecracker, on Flickr
Dinky 238 Jaguar Type D Racing Car by Red Firecracker, on Flickr
You will notice in the pictures that I have not thrown away the remaining filler. I always keep this so that I can tell when it has fully gone off, rather than touching the model. Once it is dry, I will then wet sand the areas and apply a coat of primer. After I am happy with this work, I can then start on the fin.
Dinky 238 Jaguar Type D Racing Car by Red Firecracker, on Flickr
Dinky 238 Jaguar Type D Racing Car by Red Firecracker, on Flickr
What I have also done, as displayed in the pictures above, is to wire brush the areas that I will be working on next, so make sure it is absolutely clean. The filler I am going to use is a two part epoxy called Milliput, specifically the fine white variety;
Dinky 238 Jaguar Type D Racing Car by Red Firecracker, on Flickr
I am not concerned with the fin at this time, I just want to get a smooth finish on the other bodywork that has been assaulted. The great benefit of Milliput is that it can be smoothed with wet tools, so the first stage is to cover the areas with the mixed filler;
Dinky 238 Jaguar Type D Racing Car by Red Firecracker, on Flickr
As you can see, I have also built up the edges of the cockpit.
Once the areas are covered, I then took a wet stirring stick and smoothed over the filler, taking most of it away. You will need to remove the excess from your tool occasionally. When doing fine work, it is often possible to not need to sand the areas afterwards, but as this is quite a large flat area with heavy damage, I have left a bit more filler than usual so that I can sand back, prime and then see if a second application is required.
Dinky 238 Jaguar Type D Racing Car by Red Firecracker, on Flickr
Dinky 238 Jaguar Type D Racing Car by Red Firecracker, on Flickr
You will notice in the pictures that I have not thrown away the remaining filler. I always keep this so that I can tell when it has fully gone off, rather than touching the model. Once it is dry, I will then wet sand the areas and apply a coat of primer. After I am happy with this work, I can then start on the fin.

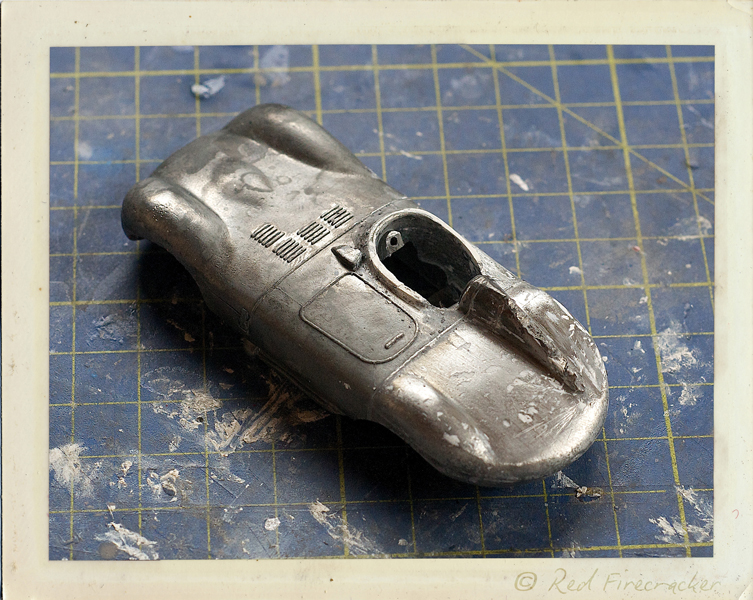
The Milliput has been sanded back and as expected (as it was a bit rough to show the entire process to good effect) there are a few bits that are going to require additional attention.
Here are three views of the sanded body;
Dinky 238 Jaguar Type D Racing Car by @RedFirecracker, on Flickr
Dinky 238 Jaguar Type D Racing Car by @RedFirecracker, on Flickr
Dinky 238 Jaguar Type D Racing Car by @RedFirecracker, on Flickr
Next step is to put on a coat of primer, which will show where more work is required;

Dinky 238 Jaguar Type D Racing Car by @RedFirecracker, on Flickr
I've lightened the picture above to try and show the bits on the back that still have dips. The primer is still wet, so contrast is not brilliant but it will become more apparent once I sand back this coat of primer.
Here are views of the two sides, showing the repaired cockpit, which again will require some final fettling;
Dinky 238 Jaguar Type D Racing Car by @RedFirecracker, on Flickr
Dinky 238 Jaguar Type D Racing Car by @RedFirecracker, on Flickr
Not bad for a first go over, and as I say, it was a bit rougher than normal so that I can show the full process rather than doing it very well first time and then skipping the unnecessary steps.
Here are three views of the sanded body;
Dinky 238 Jaguar Type D Racing Car by @RedFirecracker, on Flickr
Dinky 238 Jaguar Type D Racing Car by @RedFirecracker, on Flickr
Dinky 238 Jaguar Type D Racing Car by @RedFirecracker, on Flickr
Next step is to put on a coat of primer, which will show where more work is required;
Dinky 238 Jaguar Type D Racing Car by @RedFirecracker, on Flickr
I've lightened the picture above to try and show the bits on the back that still have dips. The primer is still wet, so contrast is not brilliant but it will become more apparent once I sand back this coat of primer.
Here are views of the two sides, showing the repaired cockpit, which again will require some final fettling;
Dinky 238 Jaguar Type D Racing Car by @RedFirecracker, on Flickr
Dinky 238 Jaguar Type D Racing Car by @RedFirecracker, on Flickr
Not bad for a first go over, and as I say, it was a bit rougher than normal so that I can show the full process rather than doing it very well first time and then skipping the unnecessary steps.
 (couldn't be much worse though, to be fair!)
The D Type has now had the first coat of primer sanded back. The areas that have not felt the wet and dry are still in primer so those are the areas that need further attention;
Dinky 238 Jaguar Type D Racing Car by @RedFirecracker, on Flickr
Dinky 238 Jaguar Type D Racing Car by @RedFirecracker, on Flickr
Dinky 238 Jaguar Type D Racing Car by @RedFirecracker, on Flickr
Dinky 238 Jaguar Type D Racing Car by @RedFirecracker, on Flickr
Dinky 238 Jaguar Type D Racing Car by @RedFirecracker, on Flickr
Dinky 238 Jaguar Type D Racing Car by @RedFirecracker, on Flickr
Red Firecracker said:
More to life than money, especially if the item you're working with holds some intrinsic emotional value that goes beyond the realms of a mere currency transaction.
I understand that - my usual reason when asked why I spent so much time restoring my Dinky aircraft was that Dinky wont be making any more; once a model has gone it will never be replaced.Globs said:
So how are you going to build up that metal on the car? Will it solder?
Coming up in the update after this one. It is possible to solder, but the castings are so 'dirty' and low melt that you can run into problems very quickly.Here is the casting with a very thin (hopefully) final layer of Milliput applied;
Dinky 238 Jaguar Type D Racing Car by @RedFirecracker, on Flickr
Dinky 238 Jaguar Type D Racing Car by @RedFirecracker, on Flickr
Once dry, this was sanded back as per previously. As you can see, as well as some of the dips still showing grey primer, some show white filler, which proves that a further coat was required;
Dinky 238 Jaguar Type D Racing Car by @RedFirecracker, on Flickr

Dinky 238 Jaguar Type D Racing Car by @RedFirecracker, on Flickr
Once cleaned, time to apply the primer. As you can see, the extra work on the filler was very worthwhile and the rear end is now nice and smooth;
Dinky 238 Jaguar Type D Racing Car by @RedFirecracker, on Flickr
Dinky 238 Jaguar Type D Racing Car by @RedFirecracker, on Flickr
Gassing Station | Scale Models | Top of Page | What's New | My Stuff