Nut and Bolt rebuild - sensible mods
Discussion


I didn't want you to think that I had become bored of this project, it's just I have been really busy on my garden re-modelling project (groan) as well as preparing the Green Meanie for summer, such that I can start a long(ish) journey without thinking it will break down after 5 miles - I think I am there.
I have started drilling the chassis, preparing it for galvanizing:

I'm using a 5mm cobalt drill (much tougher than your cheap and nasty drills you can buy in bulk but not that expensive either)
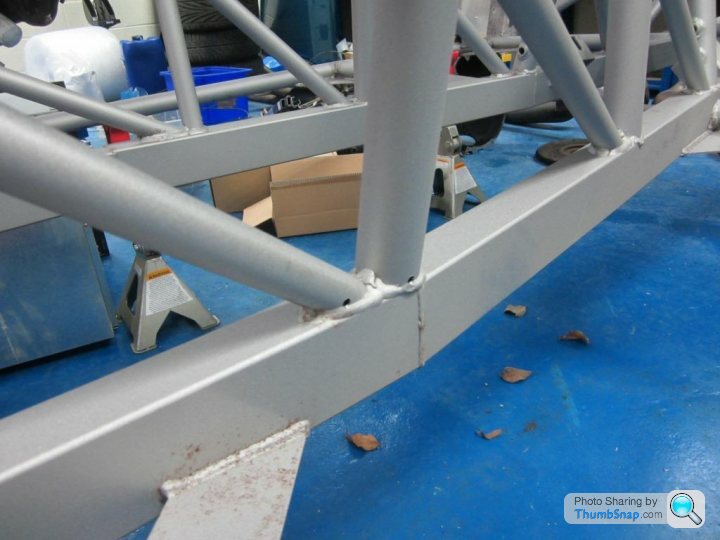
I am drilling as close to the welds as possible, as advised by a structural engineer to minimise any effect on structural integrity.

I have been advised by the galvanizers that the chassis will be dipped, tipped over to one side by approximately 30 degrees, therefore the drain holes should all be one side, with the air hole on the opposite side of the tube at the other end, the idea being that when dipped the chassis will be coated as quickly as possible inside and out, minimising the chances of unequal heating and possible distortion and the maximum amount of molten zinc will drain out as the chassi is lifted from the zinc bath.
I have assumed the chassis will be dipped nearside down. The galvanizers have advised that the drain hole should be 8mm minimum and the air hole 5mm minimum, however I am keeping to 5mm for now and will argue the toss later.
I have started drilling the chassis, preparing it for galvanizing:
I'm using a 5mm cobalt drill (much tougher than your cheap and nasty drills you can buy in bulk but not that expensive either)
I am drilling as close to the welds as possible, as advised by a structural engineer to minimise any effect on structural integrity.
I have been advised by the galvanizers that the chassis will be dipped, tipped over to one side by approximately 30 degrees, therefore the drain holes should all be one side, with the air hole on the opposite side of the tube at the other end, the idea being that when dipped the chassis will be coated as quickly as possible inside and out, minimising the chances of unequal heating and possible distortion and the maximum amount of molten zinc will drain out as the chassi is lifted from the zinc bath.
I have assumed the chassis will be dipped nearside down. The galvanizers have advised that the drain hole should be 8mm minimum and the air hole 5mm minimum, however I am keeping to 5mm for now and will argue the toss later.
Pete Mac said:
I have been advised by the galvanizers that the chassis will be dipped, tipped over to one side by approximately 30 degrees, therefore the drain holes should all be one side, with the air hole on the opposite side of the tube at the other end, the idea being that when dipped the chassis will be coated as quickly as possible inside and out, minimising the chances of unequal heating and possible distortion and the maximum amount of molten zinc will drain out as the chassis is lifted from the zinc bath.
I have assumed the chassis will be dipped nearside down. The galvanizers have advised that the drain hole should be 8mm minimum and the air hole 5mm minimum, however I am keeping to 5mm for now and will argue the toss later.
Hi Pete,I have assumed the chassis will be dipped nearside down. The galvanizers have advised that the drain hole should be 8mm minimum and the air hole 5mm minimum, however I am keeping to 5mm for now and will argue the toss later.
It's a really interesting approach and, like many others, I can't wait to see the results. I hope it works perfectly as it really seems the best solution. I wonder if you have a way to weigh the chassis before and after? When I've seen this done before (only on telly so might have been editing) the zinc seemed to start setting quite fast after removing the item from the tank. If this is the case, the larger 8mm holes might be pretty important for draining rate and ensuring you get back close to the original weight. The risk being, creating a chassis that's heavier on the nearside if the drain isn't quite fast enough and the zinc sets inside. Naive thoughts I'm sure, but worth considering in advance.
Good luck with it all,
Simon
PS Will you still see the chassis number and build date through the galv? They're quite difficult to see through my new powdercoat.
cavebloke said:
Hi Pete,
It's a really interesting approach and, like many others, I can't wait to see the results. I hope it works perfectly as it really seems the best solution. I wonder if you have a way to weigh the chassis before and after? When I've seen this done before (only on telly so might have been editing) the zinc seemed to start setting quite fast after removing the item from the tank. If this is the case, the larger 8mm holes might be pretty important for draining rate and ensuring you get back close to the original weight. The risk being, creating a chassis that's heavier on the nearside if the drain isn't quite fast enough and the zinc sets inside. Naive thoughts I'm sure, but worth considering in advance.
Good luck with it all,
Simon
PS Will you still see the chassis number and build date through the galv? They're quite difficult to see through my new powdercoat.
Exactly as advised, the zinc sets quickly and may block the 5mm holes before it all runs out, as advised by the galvanizers. I think I will open the 5mm holes to 8mm but can't bring myself to do it right now and I will only do it in a final consultation with the galvanizers.It's a really interesting approach and, like many others, I can't wait to see the results. I hope it works perfectly as it really seems the best solution. I wonder if you have a way to weigh the chassis before and after? When I've seen this done before (only on telly so might have been editing) the zinc seemed to start setting quite fast after removing the item from the tank. If this is the case, the larger 8mm holes might be pretty important for draining rate and ensuring you get back close to the original weight. The risk being, creating a chassis that's heavier on the nearside if the drain isn't quite fast enough and the zinc sets inside. Naive thoughts I'm sure, but worth considering in advance.
Good luck with it all,
Simon
PS Will you still see the chassis number and build date through the galv? They're quite difficult to see through my new powdercoat.
Not sure about the chassis number and build date. I will also be covering the galv but this is purely decorative so not sure whether to powder coat or spray (pluses and minuses to both). Pete
Pete Mac said:
Exactly as advised, the zinc sets quickly and may block the 5mm holes before it all runs out, as advised by the galvanizers. I think I will open the 5mm holes to 8mm but can't bring myself to do it right now and I will only do it in a final consultation with the galvanizers.
Not sure about the chassis number and build date. I will also be covering the galv but this is purely decorative so not sure whether to powder coat or spray (pluses and minuses to both). Pete
Pete what's happening out there? Come back quick, all is forgiven!!Not sure about the chassis number and build date. I will also be covering the galv but this is purely decorative so not sure whether to powder coat or spray (pluses and minuses to both). Pete
John, thanks for your interest. Unfortunately the garden project has overwhelmed me and 'nut and bolt rebuild' is on hold until the autumn as I only have so much time (25 hrs in the day, 8 days in the week) and if I don't get the garden finished then Mrs Mac may well decide to go and find a better man.
I know you will hate me for this but the following are a few snaps of the current 'project':
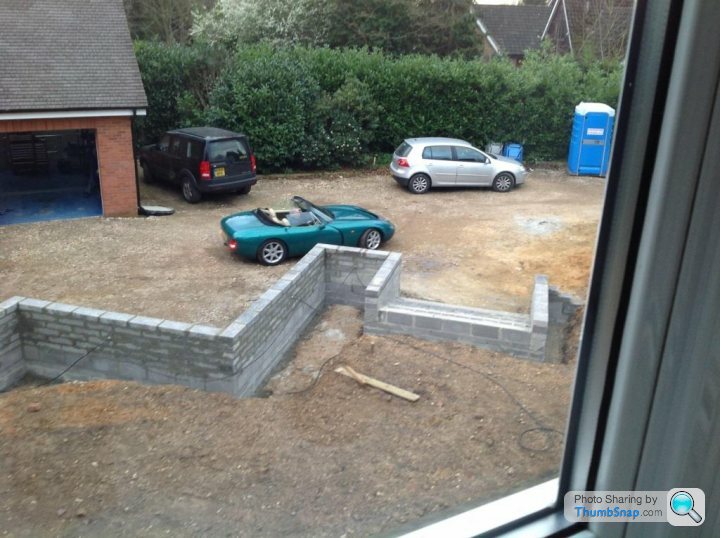
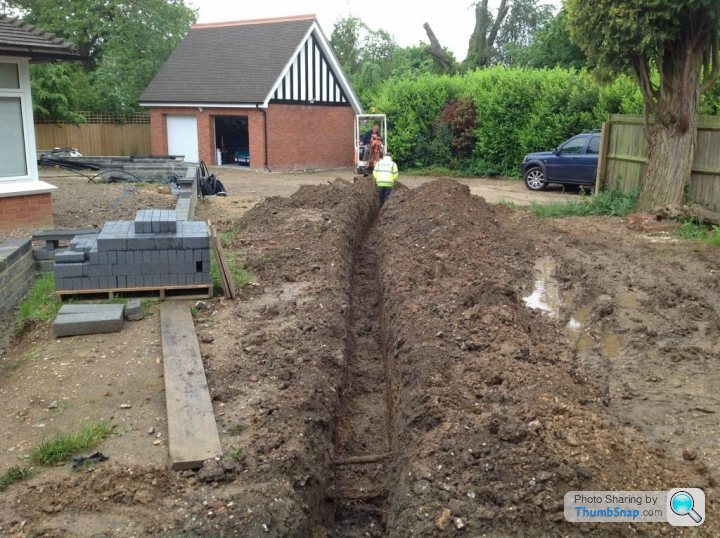
Believe you me I have not lost interest in the rebuild and running new services around the garden will enable me to run a v. large power feed to the garage (16 mm2), which will enable me to power a 'meaty' compressor for sandblasting as well as my MIG welder. The current feed is just not man enough.
Anyway watch this space and I will be back up and running on the rebuild.
Pete
I know you will hate me for this but the following are a few snaps of the current 'project':
Believe you me I have not lost interest in the rebuild and running new services around the garden will enable me to run a v. large power feed to the garage (16 mm2), which will enable me to power a 'meaty' compressor for sandblasting as well as my MIG welder. The current feed is just not man enough.
Anyway watch this space and I will be back up and running on the rebuild.
Pete
cindydog3 said:
Yep. Know that situation all too well! We all have our cross to bear! At least you managed to squeeze the green meanie into the shot.
P.s. Tidy looking portaloo you have there!
Couldn't do a shot without a TVR in there...!P.s. Tidy looking portaloo you have there!
Portaloo is surprisingly useful!
Back in Kazakhstan now to earn the money for the next round of the projects so no progress for the next 5 weeks but probably considerably more comments from me.
Pete
Pete Mac said:
I didn't want you to think that I had become bored of this project, it's just I have been really busy on my garden re-modelling project (groan) as well as preparing the Green Meanie for summer, such that I can start a long(ish) journey without thinking it will break down after 5 miles - I think I am there.
I have started drilling the chassis, preparing it for galvanizing:
I'm using a 5mm cobalt drill (much tougher than your cheap and nasty drills you can buy in bulk but not that expensive either)
I am drilling as close to the welds as possible, as advised by a structural engineer to minimise any effect on structural integrity.
I have been advised by the galvanizers that the chassis will be dipped, tipped over to one side by approximately 30 degrees, therefore the drain holes should all be one side, with the air hole on the opposite side of the tube at the other end, the idea being that when dipped the chassis will be coated as quickly as possible inside and out, minimising the chances of unequal heating and possible distortion and the maximum amount of molten zinc will drain out as the chassi is lifted from the zinc bath.
I have assumed the chassis will be dipped nearside down. The galvanizers have advised that the drain hole should be 8mm minimum and the air hole 5mm minimum, however I am keeping to 5mm for now and will argue the toss later.
Pete, your chassis looks great already from the pics! Why the urge to drill holes and have it galvanized? If you want it galvanised ready to apply a coat of good quality paint, have you heard or considered 'Hot Zinc Spray'? You do not need to drill holes, it is applied in a chamber and is a spray of hot molten zinc! We have had many assemblies hot zinc spryed for our trucks. It produces a nice fine finish, not the 'craggy' look of dipped galvanizing. If properly prepared (grit blasted), hot zinc sprayed, etch primed then a full coat of two pack, it will outlast us! All the best, PeteI have started drilling the chassis, preparing it for galvanizing:
I'm using a 5mm cobalt drill (much tougher than your cheap and nasty drills you can buy in bulk but not that expensive either)
I am drilling as close to the welds as possible, as advised by a structural engineer to minimise any effect on structural integrity.
I have been advised by the galvanizers that the chassis will be dipped, tipped over to one side by approximately 30 degrees, therefore the drain holes should all be one side, with the air hole on the opposite side of the tube at the other end, the idea being that when dipped the chassis will be coated as quickly as possible inside and out, minimising the chances of unequal heating and possible distortion and the maximum amount of molten zinc will drain out as the chassi is lifted from the zinc bath.
I have assumed the chassis will be dipped nearside down. The galvanizers have advised that the drain hole should be 8mm minimum and the air hole 5mm minimum, however I am keeping to 5mm for now and will argue the toss later.
You probably thought I had given up, well after a bit of a break I've very willingly eased myself back into it. Put a thumping great 16mm2 feed to garage to enable me to run a big compressor for blasting as well as welding.
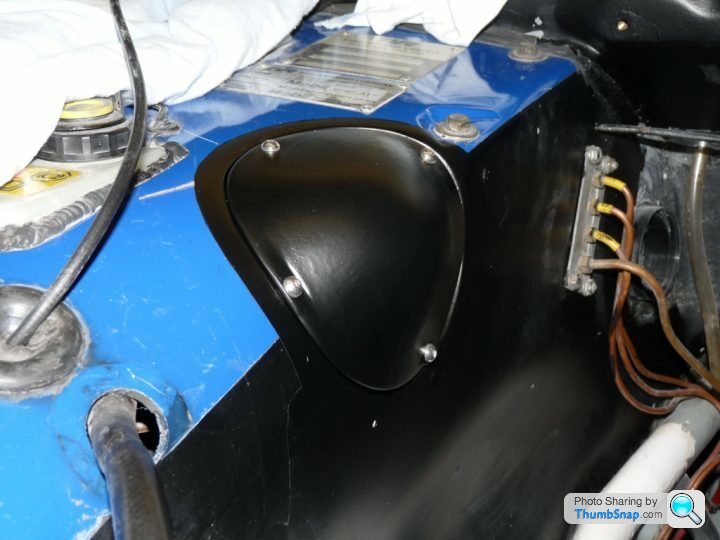
Thought I would ease myself in gently. I have a thing about the silicone smears under the bonnet so thought I would start on hatches for clutch master cylinder, fuse box and lights:

I plan to take moulds off these once I have got the required finish and then produce new ones (for others as well once I have proved I can do it). I plan to fix using stainless rivnuts and stainless button screws:
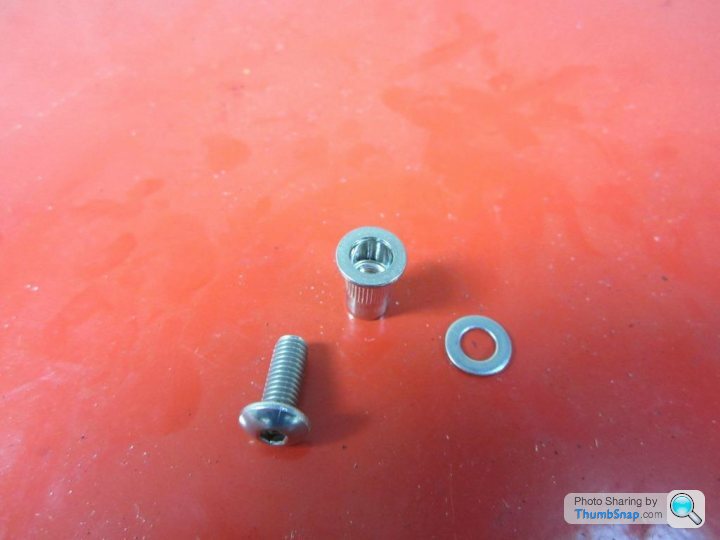
In order to not crush the GRP covers I plan to cut off a flush rivnut and use the top part as a sleeve, benefit is it is splined so it should fix into the GRP cover. I've been discussing with PeteGriff how to produce these in quantity if others want to take advantage of the future moulds.
I also want to make up a cover for the brake master cylinder:

Has anybody else done it already? If so I would much appreciate a moulding from that cover. If not, anybody have any good ideas how to make up a buck to take a mould from - 3D Printer perhaps.
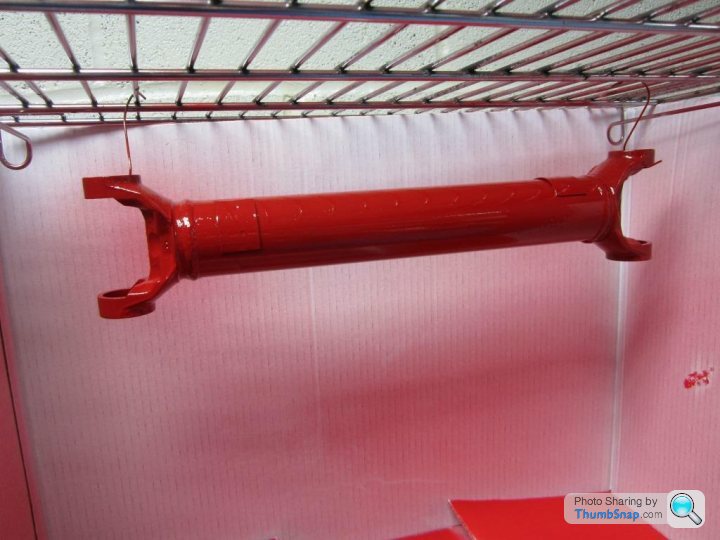
Thought I would try my hand at powder coating using my £6.98 oven acquired from Fleabay:

Where better to start then the prop-shaft:

My first ever powder coated component... It wasn't hard.
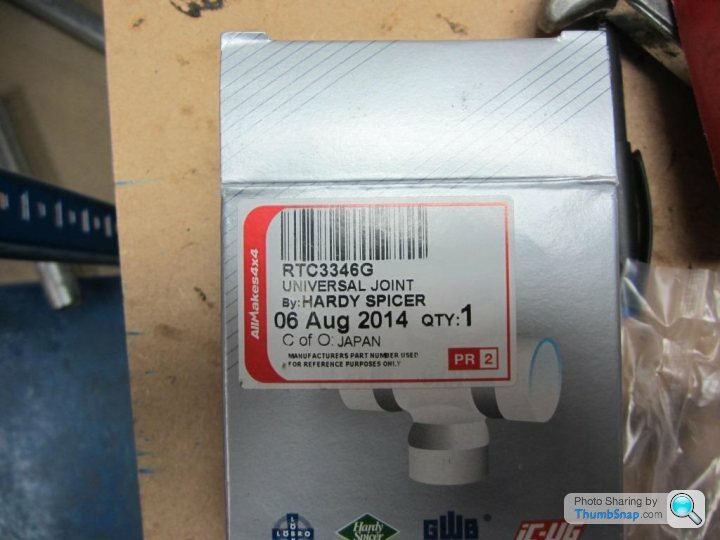
New UJs:

I used these from LR Direct. £10.21 each. Why, because they are the same as I took off.
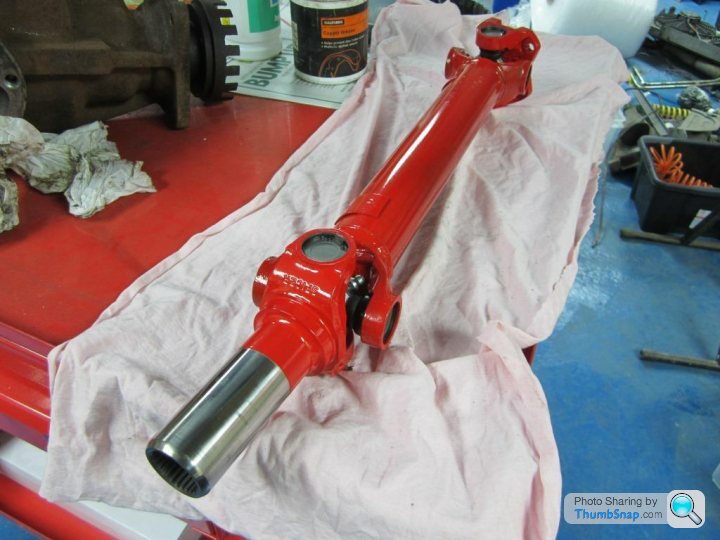
Here is the final bearing cap going on:

And the final product:
Purists won't like the colour, however I have decided to have a bit of fun. Things that rotate, prop-shaft and drive shafts in red, suspension in blue. Chassis, not sure yet....!
Now I can use the welder I need to get back to the chassis and weld up those brackets for the seats and the battery and get it off to the galvanizer. Pete
Thought I would ease myself in gently. I have a thing about the silicone smears under the bonnet so thought I would start on hatches for clutch master cylinder, fuse box and lights:
I plan to take moulds off these once I have got the required finish and then produce new ones (for others as well once I have proved I can do it). I plan to fix using stainless rivnuts and stainless button screws:
In order to not crush the GRP covers I plan to cut off a flush rivnut and use the top part as a sleeve, benefit is it is splined so it should fix into the GRP cover. I've been discussing with PeteGriff how to produce these in quantity if others want to take advantage of the future moulds.
I also want to make up a cover for the brake master cylinder:
Has anybody else done it already? If so I would much appreciate a moulding from that cover. If not, anybody have any good ideas how to make up a buck to take a mould from - 3D Printer perhaps.
Thought I would try my hand at powder coating using my £6.98 oven acquired from Fleabay:
Where better to start then the prop-shaft:
My first ever powder coated component... It wasn't hard.
New UJs:
I used these from LR Direct. £10.21 each. Why, because they are the same as I took off.
Here is the final bearing cap going on:
And the final product:
Purists won't like the colour, however I have decided to have a bit of fun. Things that rotate, prop-shaft and drive shafts in red, suspension in blue. Chassis, not sure yet....!
Now I can use the welder I need to get back to the chassis and weld up those brackets for the seats and the battery and get it off to the galvanizer. Pete
Pete you are having fun!! Looks like your feminine side is coming out with all these bright colours!
I like you powder coating exploits using that 2nd hand oven. Just to help, you need to achieve at least 192C for the powder (which are polyester based) to melt and flow. It also pays to apply a pre coat to assist the bonding, usually a phosphate dip is used.
The sealant application in your Griff does seem to have been previously done by a monkey, I can see why you want to make some nice covers.
By the way, how far away are you with the massive TVR workshop and garage project?
Best regards, Pete
PeteGriff said:
Pete you are having fun!! Looks like your feminine side is coming out with all these bright colours!
I like you powder coating exploits using that 2nd hand oven. Just to help, you need to achieve at least 192C for the powder (which are polyester based) to melt and flow. It also pays to apply a pre coat to assist the bonding, usually a phosphate dip is used.
The sealant application in your Griff does seem to have been previously done by a monkey, I can see why you want to make some nice covers.
By the way, how far away are you with the massive TVR workshop and garage project?
Best regards, Pete
Hi Pete, yes, must be my feminine side.....I like you powder coating exploits using that 2nd hand oven. Just to help, you need to achieve at least 192C for the powder (which are polyester based) to melt and flow. It also pays to apply a pre coat to assist the bonding, usually a phosphate dip is used.
The sealant application in your Griff does seem to have been previously done by a monkey, I can see why you want to make some nice covers.
By the way, how far away are you with the massive TVR workshop and garage project?
Best regards, Pete
I hadn't considered pre-dipping or spraying, is that zinc phosphate paint or what? I've just blasted and then cleaned/de-greased using acetone.
Oven works fine. Crank it up high until the powder melts then down to 180C for ten minutes to harden the coating as per suppliers instructions. Powder is cheap as chips, £15 per kilo and a kilo goes a long way. Anybody in Berkshire area wants to have a go my doors are open.
I'm not sure what to do about that cover but I know it looks a mess right now as it does on a lot of Griffs. Perhaps if I use some sort of resin mould around the shape and then get the resin block machined so I know it fits over the master cylinder. The bonnet sits fairly close to the top of the master cylinder though.
TVR workshop and garage are fine, it's the garden that needs finishing. Be in touch. Pete
Pete Mac said:
I'm not sure what to do about that cover but I know it looks a mess right now as it does on a lot of Griffs. Perhaps if I use some sort of resin mould around the shape and then get the resin block machined so I know it fits over the master cylinder. The bonnet sits fairly close to the top of the master cylinder though.
Hi Pete, just been thinking (like I do). The answer may be NOT to try and cover the cap and wiring! What about making a neat cover to just go over the fluid reservoir covering the unsightly sealant etc. You could just take the cap off, fit the low profile cover on then refit cap. If necessary replace the cap with new. Would tidy everything up and alleviate the worry about bonnet clearance. It could if you wanted be made out of polished aluminium, or plastic. In fact I like the idea so much I might look into it as well! Just a thought. Regards, PeteI've done bolt on / clamp down covers before. The Griff is a bit tight over the brake fluid cap but just fits as long as you don't make it too thick.
I wouldn't use rivnuts though, my preferred fixing method is to lay a layer of closed foam under the cover and drill through the lot, then push a bolt up from underneath (pick the hole locations carefully) and trap it with a half nut into the foam. Its then like a stud and you can just press the covers onto the studs & clamp them down.
I wouldn't use rivnuts though, my preferred fixing method is to lay a layer of closed foam under the cover and drill through the lot, then push a bolt up from underneath (pick the hole locations carefully) and trap it with a half nut into the foam. Its then like a stud and you can just press the covers onto the studs & clamp them down.
Pete Mac said:
Does anyone know if all the tubes are internally connected ie would that hole drilled in the pic allow fluid access to the rectangular bottom rail, and onwards to the rest of the chassis and outriggers? Your post suggests it is all linked? I have a perfect chassis on my new Griff and I'd like to fill it with gloop/oil/anti-rust-yoghurt or similar. Sticking one side of the car in the air and pumping gloop in at the high side through similar 5mm holes may well work?
Gordon Ramsay said:

Quinny said:
Snot mine
Mine's like this

Quinny, I've been searching for hours for that photo of your car - I couldn't find the thread but I remembered it from a couple of years back. I was planning to plagiarise your clutch master cylinder cover. You don't happen to have a mould or a spare I could take a mould from do you? Mine's like this
Other thread is this one:
http://www.pistonheads.com/gassing/topic.asp?h=0&a...
It's Marty V8's car
Pete
Edited by Pete Mac on Friday 24th October 05:27
Gassing Station | Griffith | Top of Page | What's New | My Stuff