1:72 Tornado GR4, Dambusters70th Anniversary
Discussion


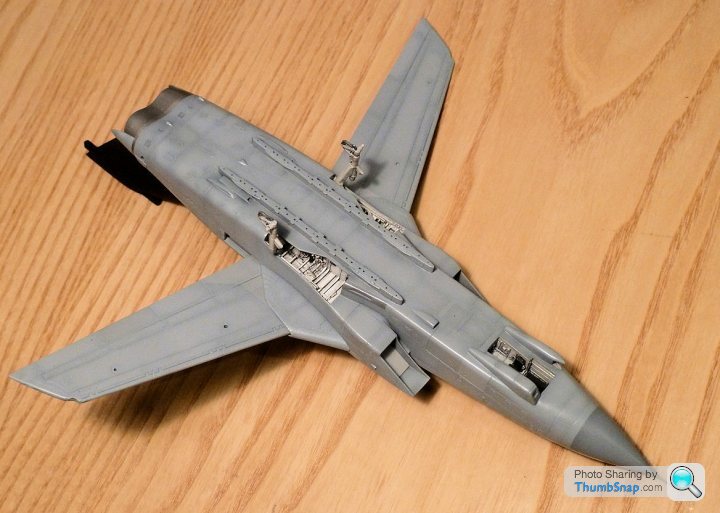
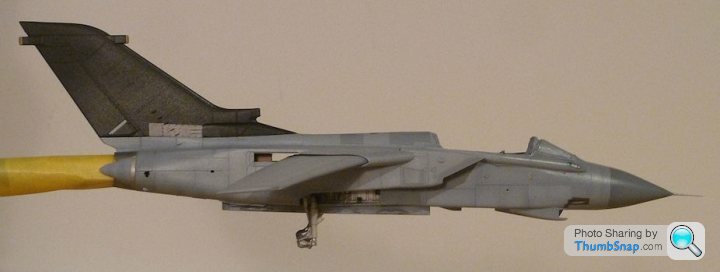
Close of play tonight and the main paint is done. The black looks very black, but it is slightly preshaded with light grey. It won't show up on the photos though. I gave it a thin coat of Klear becasue the finish was getting damaged with so much handling. Next steps are detail airbrushing of the refuelling nozzle, gun port area, APU exhausts and a few other minor parts on the fuselage:

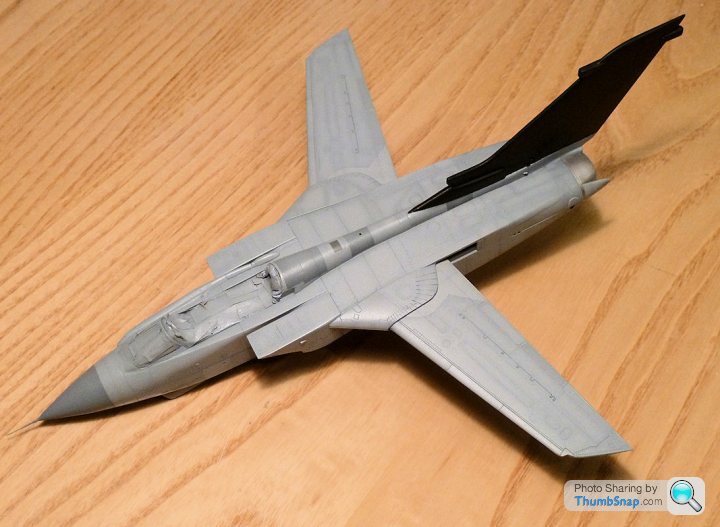
Bit of detail airbrushing tonight. ECM covers on the top of the fin, and the silver/grey covers on the rudder:
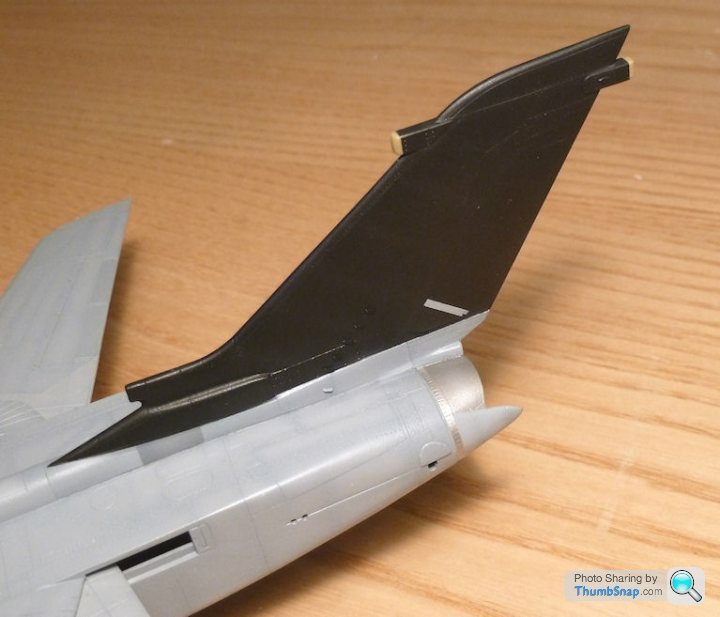
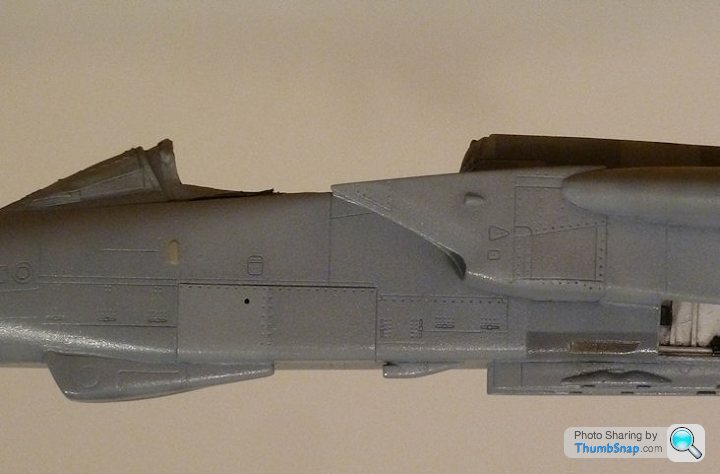
The IFR nozzle appears to have a green anodised portion, so I used Tamiya clear green over Vallejo aluminium. It will look better once it's got a dark wash around it all. Also painted the small rectangular panels under the canopy buff/grey. Not sure what they are:

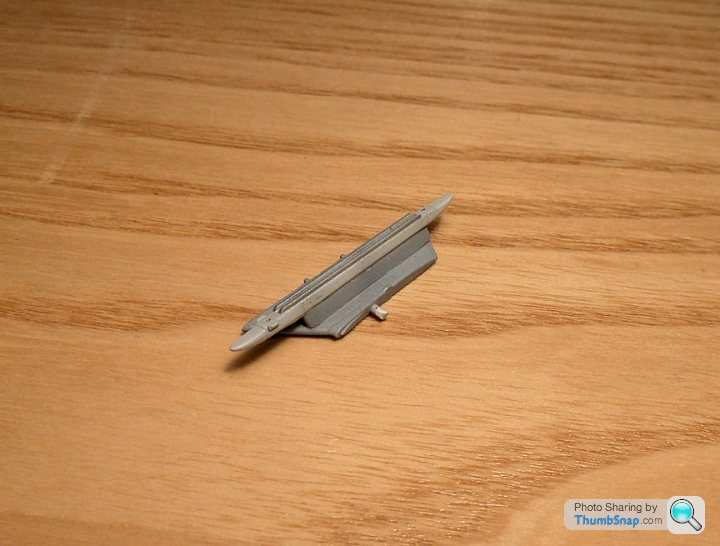
Also leading edge strips on the tailerons:
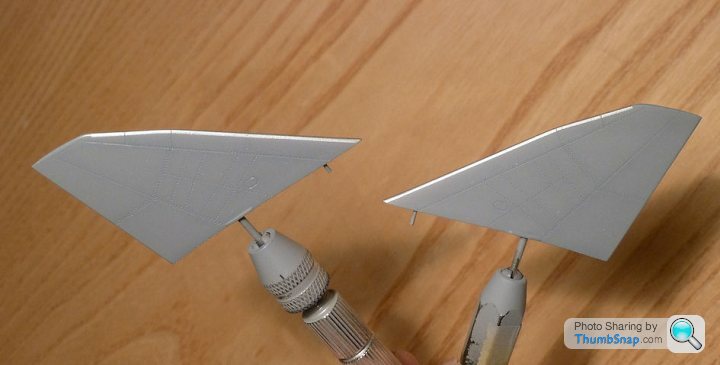
and finally the missile rail on the inner port wing pylon was painted white grey, and the rails in steel:
The IFR nozzle appears to have a green anodised portion, so I used Tamiya clear green over Vallejo aluminium. It will look better once it's got a dark wash around it all. Also painted the small rectangular panels under the canopy buff/grey. Not sure what they are:
Also leading edge strips on the tailerons:
and finally the missile rail on the inner port wing pylon was painted white grey, and the rails in steel:
Yertis said:
Those pin-chucks – where did you get them? I've been looking online but could only find cheap chinese items. Lost mine years ago and only now realise how useful they are.
I think I got them from Antics in Sheffield. The best is the large one - the chuck reduces to pretty much zero, whereas the other one has intercangable jaws which is pain in the arse dismantling it, then trying to figure out which you need. I invariably get the wrong one.dr_gn said:
I think I got them from Antics in Sheffield. The best is the large one - the chuck reduces to pretty much zero, whereas the other one has intercangable jaws which is pain in the arse dismantling it, then trying to figure out which you need. I invariably get the wrong one.
Thanks for that – I'll pop down to Antics in Bristol tomorrow and see what they have to offer. Bizarrely never considered them for tools...I've got double ended pin vice from Hobbycraft. That solves the issue of changable chucks but it does mean that if you apply pressure with you palm whilst drilling holes you tend to unscrew the end you're not using which isn't ideal either.
I must admit it had never occurred to me to use them to hold parts for painting until I read this thread
I must admit it had never occurred to me to use them to hold parts for painting until I read this thread

OK, so here's the big screw-up:
the exhaust duct on the side of the fin isn't long enough on the Revell kit. It should extend to about half the length of the airbrake panel (to where the masking tape is approx), but it's modelled too far forward. I realised this early on, but didn't realise the full consequences. The main decal fits, but I had to extend the steel coloured panel back a bit to compensate for the duct length error, but now I just realised the wave graphic is way too long for the duct, and ends up partly on the silver panel:
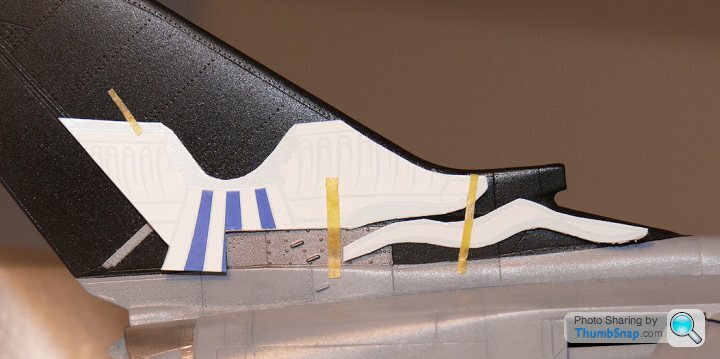
Dammit.
The options are:
1) Paint the steel panel black behind where the duct ends, to the vertical masking tape (not ideal)
2) Extend the duct and blend somehow (risky at this stage)
3) Shorten the "wave" decal (this still leaves the 'dam' decal misplaced slightly)
4) Other options I've not thought of yet - Anyone?
Obviously, I wish i'd have noticed this inaccuracy with the kit earlier.
The Airfix fin is similar, but appears to have had an additional block of plastic shoved behind the duct to make the length look right, even though the profile is wrong.
I'm a bit stuck as to what to do next.
the exhaust duct on the side of the fin isn't long enough on the Revell kit. It should extend to about half the length of the airbrake panel (to where the masking tape is approx), but it's modelled too far forward. I realised this early on, but didn't realise the full consequences. The main decal fits, but I had to extend the steel coloured panel back a bit to compensate for the duct length error, but now I just realised the wave graphic is way too long for the duct, and ends up partly on the silver panel:
Dammit.
The options are:
1) Paint the steel panel black behind where the duct ends, to the vertical masking tape (not ideal)
2) Extend the duct and blend somehow (risky at this stage)
3) Shorten the "wave" decal (this still leaves the 'dam' decal misplaced slightly)
4) Other options I've not thought of yet - Anyone?
Obviously, I wish i'd have noticed this inaccuracy with the kit earlier.
The Airfix fin is similar, but appears to have had an additional block of plastic shoved behind the duct to make the length look right, even though the profile is wrong.
I'm a bit stuck as to what to do next.
Skii said:
Option 2.
Mask the fuselage to protect the paintwork, re-spray the fin. s t happens, you are more than capable of fixing it.
Otherwise it'll tick you off every time you look at the finished model.
Yeah, I guess.Mask the fuselage to protect the paintwork, re-spray the fin. s
t happens, you are more than capable of fixing it.Otherwise it'll tick you off every time you look at the finished model.
I've got a spare fin from another kit. I could cut the duct and add it to the back of the original. Trouble is it is quite a complex shape (not parallel) with tapers and slight undercuts at the base. Oh well.
Made up some duct extensions from a scrap fin. The top blend radius and the interface with the original duct need a good seeing to with Milliput - that will sort the minor mismatch with the steel colourd panel that can be seen in the photo. At least the decals are now a perfect fit, and I suppose the model is a bit more accutate than it was. Time will tell if the surgery is obvious when the paint is re-done. I think it will be OK.

I'm going to use the kit canopy, at least for starters. I sprayed one of my spares grey in anticipation of having to cut it up for crach moulding new glazing, but I've chickened out for now. Anyway, I annealed the Aires p/e mirrors and internal framework and used that canopy as a buck for bending into shape ready to fit inside the real one:
I'm going to use the kit canopy, at least for starters. I sprayed one of my spares grey in anticipation of having to cut it up for crach moulding new glazing, but I've chickened out for now. Anyway, I annealed the Aires p/e mirrors and internal framework and used that canopy as a buck for bending into shape ready to fit inside the real one:
Looking at images of the real thing, I think I'd do Option 1. The duct looks to finish further back to me anyway...
http://s9.photobucket.com/user/TVM-Scarlet/media/2...
https://www.google.co.uk/search?q=dambusters+torna...
http://www.airforcesmonthly.com/central/images/art...
I'd also think this would be the easiest thing to try to see how it looks?
http://s9.photobucket.com/user/TVM-Scarlet/media/2...
https://www.google.co.uk/search?q=dambusters+torna...
http://www.airforcesmonthly.com/central/images/art...
I'd also think this would be the easiest thing to try to see how it looks?
Murph7355 said:
Looking at images of the real thing, I think I'd do Option 1. The duct looks to finish further back to me anyway...
http://s9.photobucket.com/user/TVM-Scarlet/media/2...
https://www.google.co.uk/search?q=dambusters+torna...
http://www.airforcesmonthly.com/central/images/art...
I'd also think this would be the easiest thing to try to see how it looks?
It's a little bit late now...http://s9.photobucket.com/user/TVM-Scarlet/media/2...
https://www.google.co.uk/search?q=dambusters+torna...
http://www.airforcesmonthly.com/central/images/art...
I'd also think this would be the easiest thing to try to see how it looks?
dr_gn said:
Murph7355 said:
Looking at images of the real thing, I think I'd do Option 1. The duct looks to finish further back to me anyway...
http://s9.photobucket.com/user/TVM-Scarlet/media/2...
https://www.google.co.uk/search?q=dambusters+torna...
http://www.airforcesmonthly.com/central/images/art...
I'd also think this would be the easiest thing to try to see how it looks?
It's a little bit late now...http://s9.photobucket.com/user/TVM-Scarlet/media/2...
https://www.google.co.uk/search?q=dambusters+torna...
http://www.airforcesmonthly.com/central/images/art...
I'd also think this would be the easiest thing to try to see how it looks?
Why are you focused on this tiny details when your exhausts are clearly wrong compared to those photos in the links?
Minor detail overshadowing major detail?
Just asking.......

Hi dr_gn, looking at some of the pics of the aircraft (as above) what I see is that the line of strakes seem to be too far forward on the model. They're correctly located on the third panel in from the back, but the second panel is too long on the model. Extending the exhaust is going to exacerbate the visual effect by placing the strakes forward of central on the brown panel. Could you leave the exhaust and hand-paint the white wavy line?
ETA: Ah, a second "too late now".
Edited by sad61t on Friday 30th January 15:30
dr_gn said:
They probably look wrong because theyre not fitted yet. The jet pipes and exhausts are separate assemblies that fit into the two holes at the rear. All there is at the moment are the thrust reverser buckets and two open holes.
That makes sense and my intention was by no means to be rude.Still looks bloody brilliant to me!
sad61t said:
Hi dr_gn, looking at some of the pics of the aircraft (as above) what I see is that the line of strakes seem to be too far forward on the model. They're correctly located on the third panel in from the back, but the second panel is too long on the model. Extending the exhaust is going to exacerbate the visual effect by placing the strakes forward of central on the brown panel. Could you leave the exhaust and hand-paint the white wavy line?
ETA: Ah, a second "too late now".
Edited by sad61t on Friday 30th January 15:30
Thanks for the comment - it's a good reference image too.
Gassing Station | Scale Models | Top of Page | What's New | My Stuff