Restoring TVR Vixen S3 RDO I 06J
Discussion


Hello, I need some advise.
As you can read in other discussions I am preparing the body.
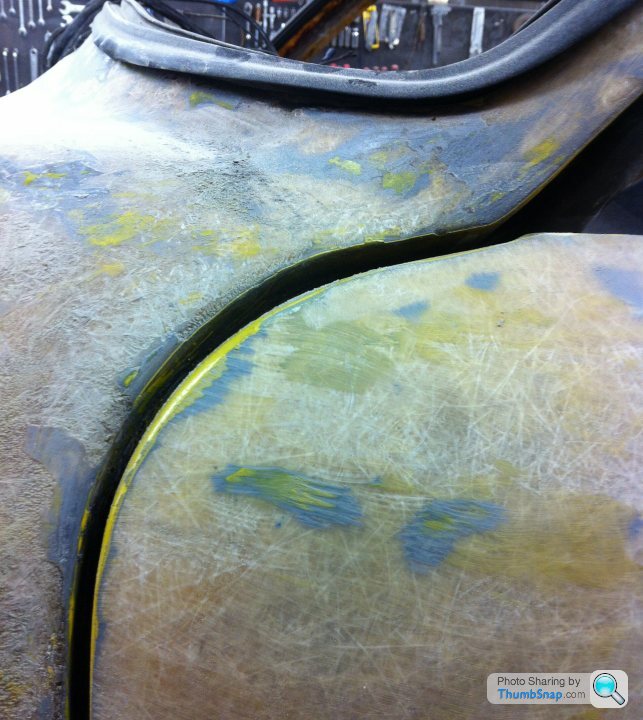
After trial fitting the doors I found the gap on the top front corner to big.
See pic.
What do you think. Can I enlarge the doorskin so become a smaller gap without a problem after painting?
I have already done so on the 2 bottom corners on the lock side and the result was fine (in my opinion).
Also made the holes for the doorhandles smaller because they were too big and water could come in easily. That's why the steel gutters in the doors were rotten away.
Hans
As you can read in other discussions I am preparing the body.
After trial fitting the doors I found the gap on the top front corner to big.
See pic.
What do you think. Can I enlarge the doorskin so become a smaller gap without a problem after painting?
I have already done so on the 2 bottom corners on the lock side and the result was fine (in my opinion).
Also made the holes for the doorhandles smaller because they were too big and water could come in easily. That's why the steel gutters in the doors were rotten away.
Hans
Enlarging the door skin slightly looks the right approach to me Hans. You can only tell if it will effect closing, by trial and error. I don't think it will by the looks of it.
I think that the trays in the door between the two sides of the frame rust away because the water gets past the door glass seal and runs down onto them, at least, it looks that way on my S1, what a mess!
I was considering replacing what is left with stainless when I rebuild the doors. The seal is quite crude on mine and as it gets old, it stops being flexible and doesn't seal properly anymore. That said, I doubt many 60s cars had a much better arrangement!
Thanx David for the reaction.
I have made the gutter from alu profiles so no problem with steel/alu windowframe corrosion.
And finding a better water seal between glass and frame is another item to be solved.
My TR 250 had no problem with the rain dripping in the doors so I will look in that direction.
Have any other restorer tackled that detail?
Hans
It's hard to say looking at the picture if the gaps may be better adjusted by simply repositioning the door slightly also from what I can see I would have thought that it would be much better and stronger to build up the body a mm or two rather than a door edge as this would be much stronger and less likely to chip. Also you will build up quite a lot with filler primer paint and lacquer on both the door and body so you may well be a lot closer now than you think.
Chris
Chris
Good advice Chris,
I fiddled a bid or better a lot and found a better position of the door.
But still the door gaps front and rear are to big so extra work.
Left door fits worse than the right one, however doorcorner R-side hits underside A-pillar.
Another strange thing is the top hinges, they are bolted to the car with 1 bolt (also 1 hole in body), but there are 2 holes in the hinge?
Is this weight saving?
Keeps me from the street.
Hans
Hans, perpahs it's more easy to reduce the hole rather than enlarging the door. It will be quite easy to put a couple of layers fiberglass in front of the door and make that strong and blend into the design. enlarging the door (in a strong way) will require one of the following two operations:

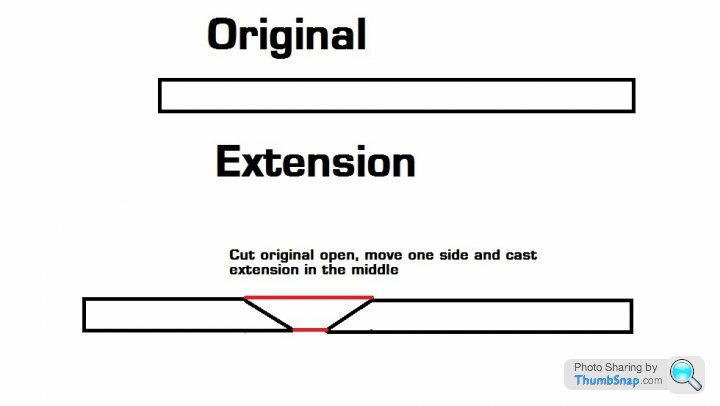
2'nd option is far the most easy to make:
2'nd option is far the most easy to make:
Hi there,
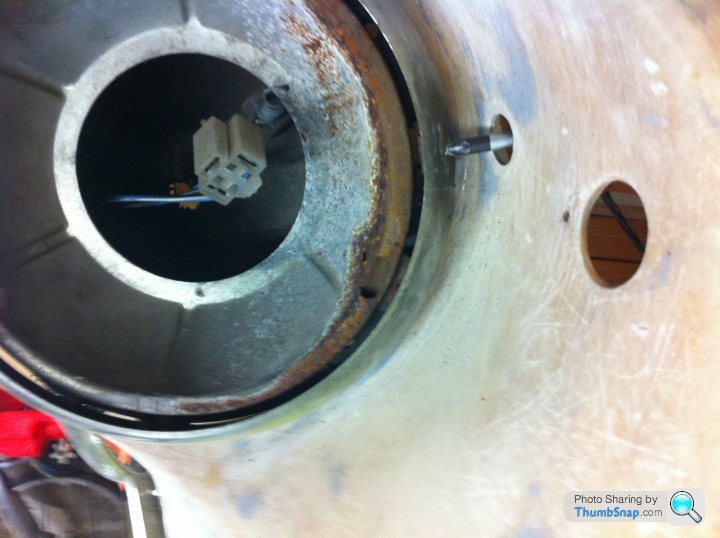
Preping the body I find some original holes of which I have some queries
At the back I have pinholes for badges, but it is not clear for what. I have put a nail in them for indication see pic.
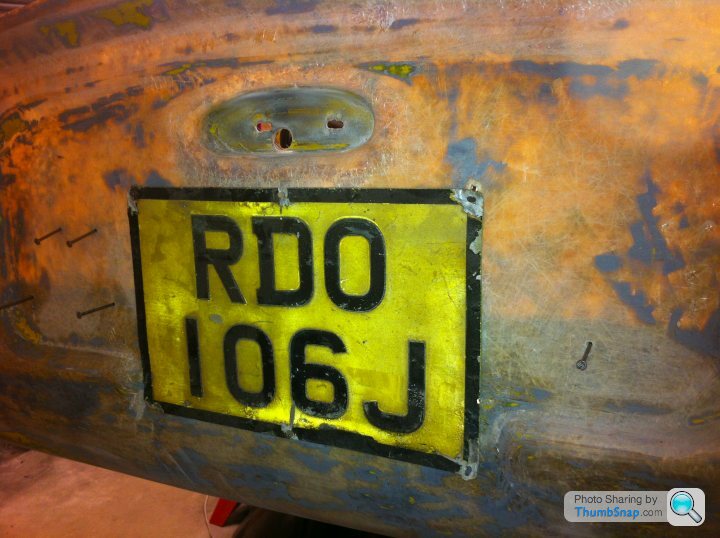
I found 1 hole on the right site. For what badge?
I found 2 times 2 paired holes at the left. For what?
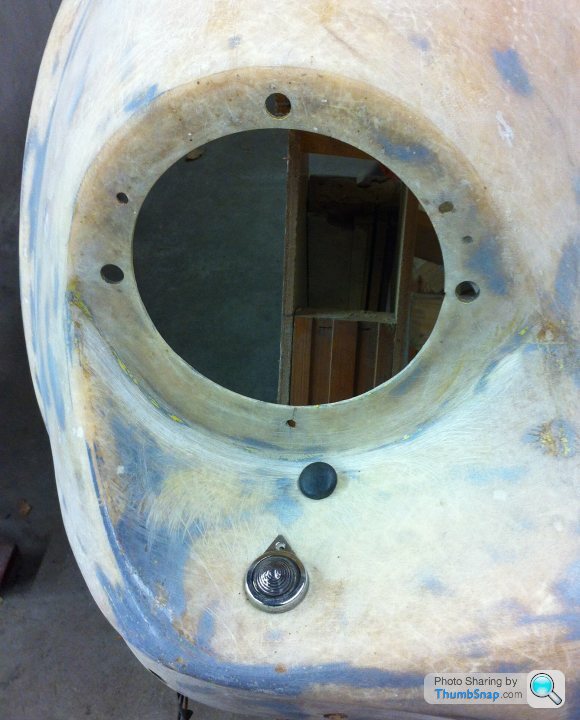
In the nose cone I see to small holes in front of main lights. One for (small) light and the other for ?????. I have a rubber stop to close it but as it not of any use I want to fill it.
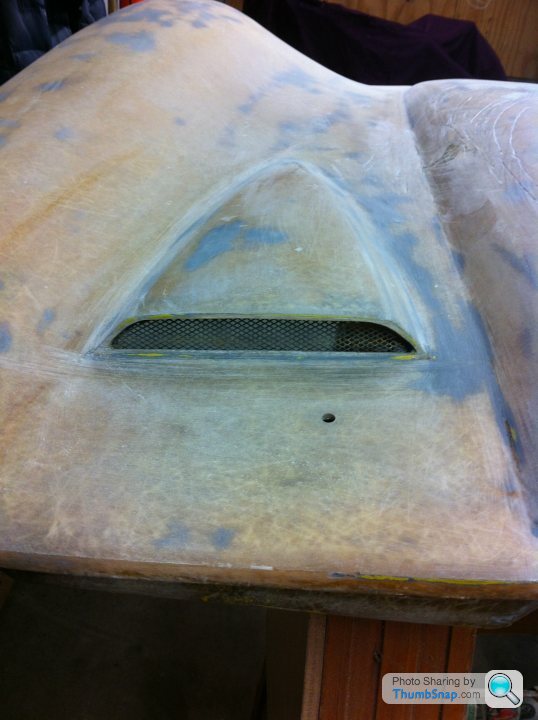
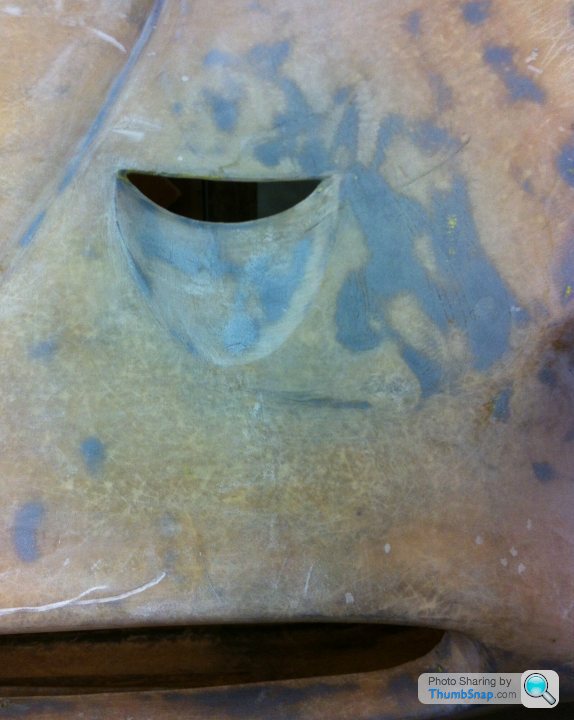
Then the ventilation openings.
Which one is original covered with mesh? I do see different options.
Realistic the smaller openings do not need any mesh, but on mine the ones facing backwards have mesh and the forwarding ones nut???
Curious what your reactions will be.
Hans
Preping the body I find some original holes of which I have some queries
At the back I have pinholes for badges, but it is not clear for what. I have put a nail in them for indication see pic.
I found 1 hole on the right site. For what badge?
I found 2 times 2 paired holes at the left. For what?
In the nose cone I see to small holes in front of main lights. One for (small) light and the other for ?????. I have a rubber stop to close it but as it not of any use I want to fill it.
Then the ventilation openings.
Which one is original covered with mesh? I do see different options.
Realistic the smaller openings do not need any mesh, but on mine the ones facing backwards have mesh and the forwarding ones nut???
Curious what your reactions will be.
Hans

It is pointless taking old photos of bastardised cars as a reference. The photos on the thread about "Dashboards" are the most pointless cut and paste, Wikipedia, Google things I have seen and that is saying something. If you dont know there is no glory in pretending you do.
The rubber grommet was original fitment.
The mesh in the grill opening is there primarily to protect the radiator but on Vixens also was to mount the Sparto indicators on and of course the numberplate letters. A couple of years ago Smithy65 who has one of the most original Vixens bought a huge sheet of the original diamond pattern mesh to maintain his cars originality. It cost him a small fortune and I am sure he would gladly sell you an appropriate sized piece. If you are going to fit it you must do it before painting because too strong a resin/hardener mix get REALLY hot and will blister the paint.
Sorry it was Smithy63
Edited by thegamekeeper on Thursday 6th March 19:01
Edited by thegamekeeper on Thursday 6th March 19:09
I also wondered about the purpose of the rubber grommet. I guessed it's for accessing the screw for the headlamp chrome rim which has now been confirmed.
I also noticed in photos that some cars have something in front of the grommet. I could never clearly see what it was supposed to be until now.
Did some of the later Vixens have the sidelight build into the headlight unit as mine does?
Great thread. I'm learning lots. I might even attempt a smiley
Chris
Oke Fellows,
Lots of info.
I subtracted the following;
engine cover; no mesh but for the radiator, fill the hole near headlamp. And yes leaf the holes for the window washer.
at the back; I do not see the light. And yes the shell has been (mis)used by others.
but the holes are not for the reverse light because than you need 3 holes (extra for cable which is not inside the car). I also have a license plate light with revers light.
so filling all the small holes and stick on the badges. (shame for such a cheap badging. I am used to Triumph bling bling)
So back to the garage, some holes to fill this weekend.


Hans
Lots of info.
I subtracted the following;
engine cover; no mesh but for the radiator, fill the hole near headlamp. And yes leaf the holes for the window washer.
at the back; I do not see the light. And yes the shell has been (mis)used by others.
but the holes are not for the reverse light because than you need 3 holes (extra for cable which is not inside the car). I also have a license plate light with revers light.
so filling all the small holes and stick on the badges. (shame for such a cheap badging. I am used to Triumph bling bling)
So back to the garage, some holes to fill this weekend.
Hans

Cerberus90 said:
I believe the hole on the bonnet near the lights, which you've got the rubber bung in, is there to allow you to put a screwdriver through from the other side to screw on the headlamp rim.
Hi Thomas,I checked your remark with the original headlamp and you are right.
See pic.
The later headlamp rim models do not have the extra fixing, they are just clamped.
Learned another thing.
Hans
Gassing Station | TVR Classics | Top of Page | What's New | My Stuff