Another body off!
Discussion


There has been a bit of a delay since my last update as I've been busy with the rear suspension modifications...
First we tried this...

Which is actually worse than the standard tie bar as the 45 degree bar is trying to operate in a different arc which meant it changes in length by approx 4mm as the suspension went through it's operating range.. f k - back to the drawing board or fag packet as it was in my case.
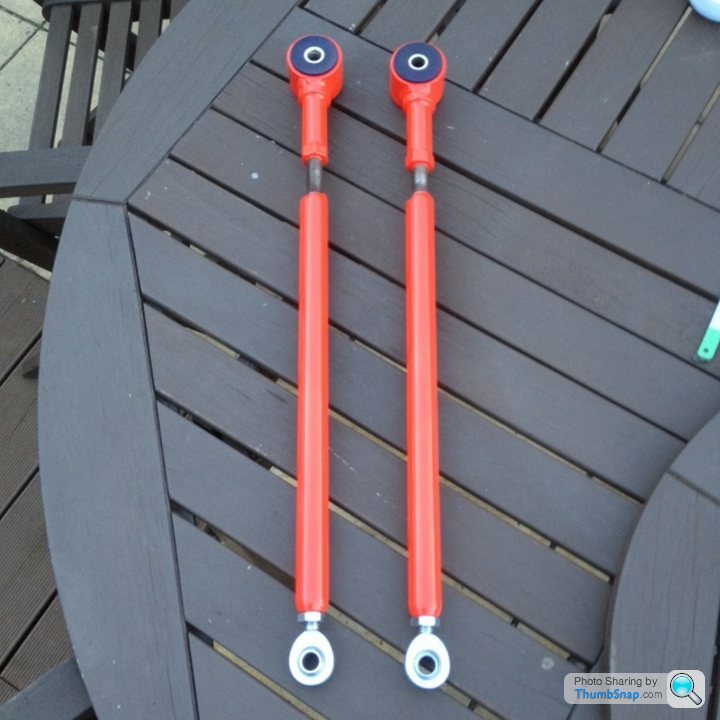
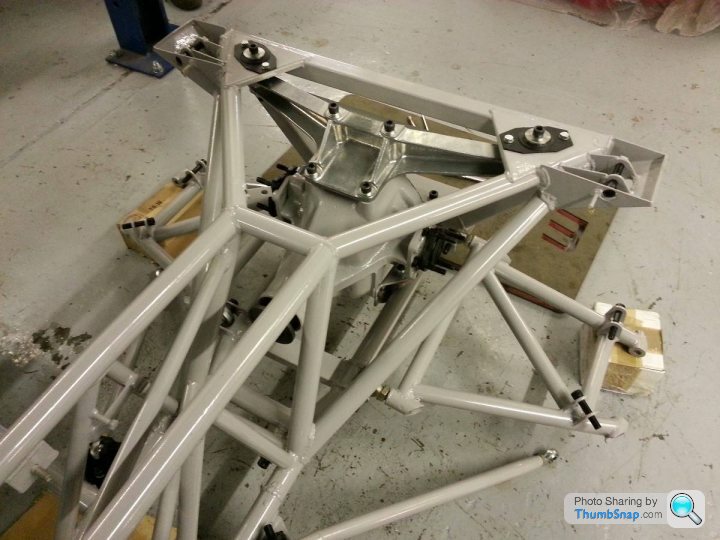
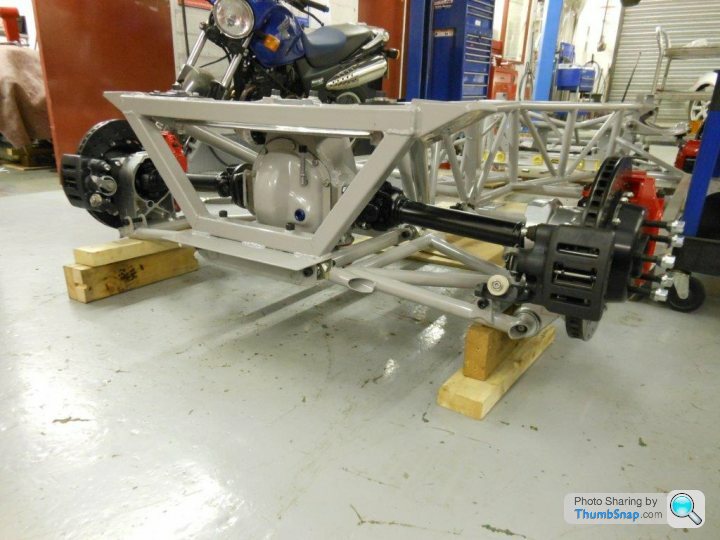
Having a few hours to while away on a flight I got my note book out and came up with this, basically it forms a compression strut from the A frame back to the chassis but as the pivot is in the same plane as the wishbone pivot it runs in the same arc.

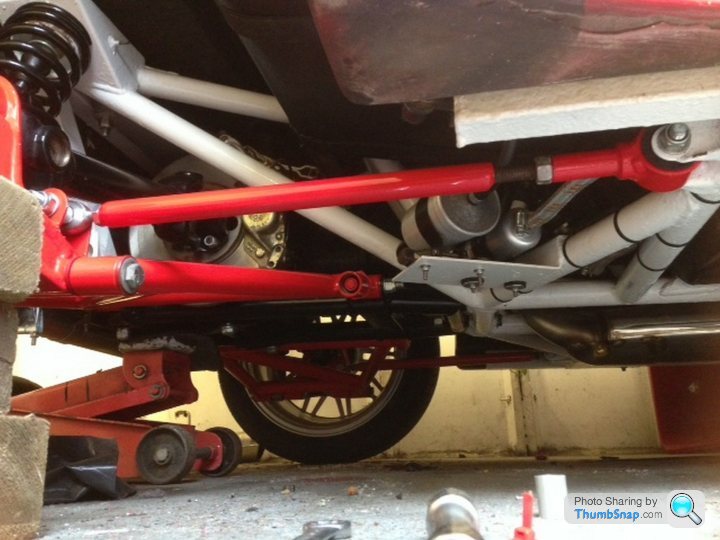
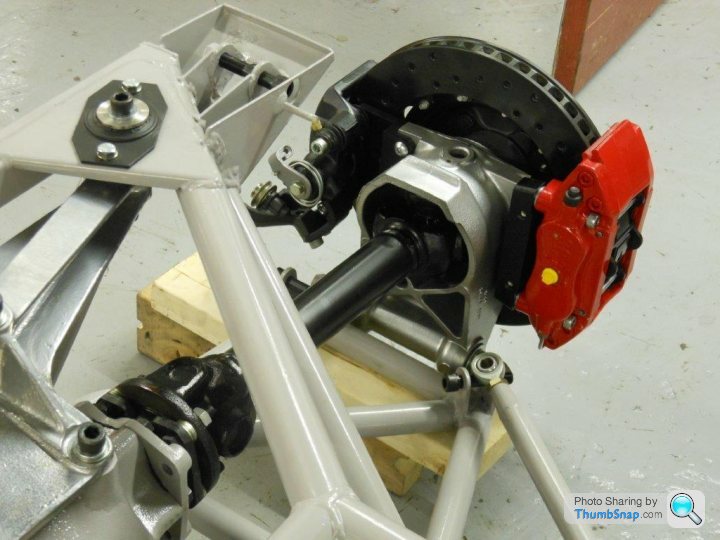
Then after a bit of cutting, grinding etc...

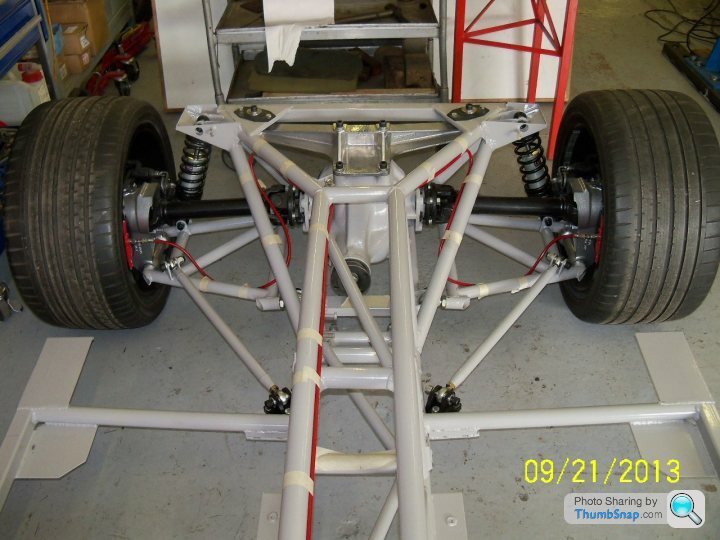
NB : Comedy spare wheel is being used to check for play in "that bloody wheelbearing"
First we tried this...
Which is actually worse than the standard tie bar as the 45 degree bar is trying to operate in a different arc which meant it changes in length by approx 4mm as the suspension went through it's operating range.. f
k - back to the drawing board or fag packet as it was in my case.Having a few hours to while away on a flight I got my note book out and came up with this, basically it forms a compression strut from the A frame back to the chassis but as the pivot is in the same plane as the wishbone pivot it runs in the same arc.
Then after a bit of cutting, grinding etc...
NB : Comedy spare wheel is being used to check for play in "that bloody wheelbearing"
What are you trying to achieve here - reduction in the toe-in caused by the tie bar under suspension compression?
I think your solution might reduce this but at the expense of the "tieing" effect as your reaction bar isn't as near the hub. Maybe that is countered by the lack of rubber bushes?
I think your solution might reduce this but at the expense of the "tieing" effect as your reaction bar isn't as near the hub. Maybe that is countered by the lack of rubber bushes?
Hi Adam.
I'm trying to come up with something that doesn't tear itself to bits !
Previously the tie bars had solid nylon bushes fitted which resulted in the chassis mounting holes being elongated and the washers I welded over the holes also becoming elongated. So clearly the big rubber bush is needed to give compliance as the tie bar is operating in an arc while the upright is moving vertically, which begs a question as to if it needs that much compliance what is actually doing - other than rattling about under my arse !
I did consider the effect of the stock bar to counter act the rotational forces on the hub but looking at the geometry the bar was actually too low to make a huge amount of difference and my Mk1 modification rendered this useless anyway so as you suggest with the A frame Polybushed there is very little movement so the Mk2 option simply extends the wishbone.
I also noted Transmitter Man did an similar mod on his SEAC along with the Jag uprights and outboard brakes, maybe it doesn't work, nothing ventured nothing gained !!
Interesting - yeah the SH tie bars add some spherical bearings but I haven't fitted these yet so I don't know if they would suffer the same fate.
Maybe another approach could be to extend forward the innermost front-back pipe on the A frame with a bar that heads towards that corner where your new mount is. Then put a spherical bearing there, which would allow the bar to rotate but not to waggle from side to side. This would tend to resist the same forces. Dunno if it would resist them enough though to make a difference!
I'll try to draw something on a fag packet and scan it in later...
beacon said:
Are you guys still wax-oiling even after the poshta paint jobs or are you just rocking with the finish ????

No wax oil on mine yet...but I haven't taken it out since November 
Taking it out tomorrow though as its MOT time!
I'll take a PIC when its on the ramps to see how its looking after a year

Edited by matt-man on Thursday 5th March 23:37
Simon.
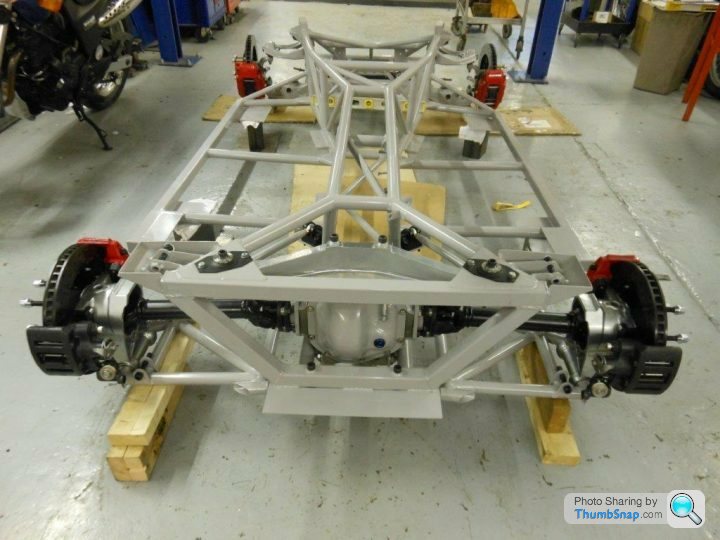
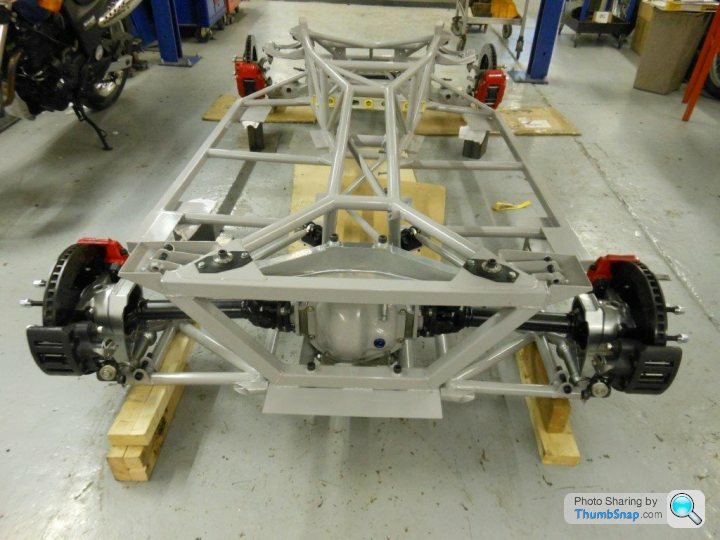
I think Henry has similar to mine however when the guys at Jennings Engineering got around to mine I asked them to start with a blank sheet of paper as they were starting with a bare chassis and incorporating other mod's as you are aware.
I'm no engineer so the pic's probably speak a few hundred words;
I seem to remember the guys saying this was same or similar to what Lotus used in their designs.
As I have posted previously you all would be shocked at the amount of chassis flex in the stock design, even with one without tin-worm so I would suggest this area is seriously looked at in any full resto even if you don't go crazy with expensive and time consuming suspension or other chassis related upgrades.
Just my 2p.


Phil
420 SEAC
I think Henry has similar to mine however when the guys at Jennings Engineering got around to mine I asked them to start with a blank sheet of paper as they were starting with a bare chassis and incorporating other mod's as you are aware.
I'm no engineer so the pic's probably speak a few hundred words;
I seem to remember the guys saying this was same or similar to what Lotus used in their designs.
As I have posted previously you all would be shocked at the amount of chassis flex in the stock design, even with one without tin-worm so I would suggest this area is seriously looked at in any full resto even if you don't go crazy with expensive and time consuming suspension or other chassis related upgrades.
Just my 2p.
Phil
420 SEAC
Cheers Phil,
Obviously I stole the concept from your car and I had wondered why there hadn't been an update for a while, I can't go back to the stock option anyway as the brackets went when I replaced the out riggers so the mk2 design has been honed and looks viable, over the operating range of the rear suspension the compression strut length Change is negligible so it won't tear itself to bits. I also have the option of replacing the outermost spherical bearing with a polybushed just in case it does need a bit more compliance.
I've just bought a house (with space for a 30m2 garage) so I have to get the wedge back together before we move as it's currently taking up my dad's garage, drive and a lock up so development will stop as we concentrate on getting her back together again.
Can I ask what length shocks you went for??
KKson said:
Mine is almost as clean......
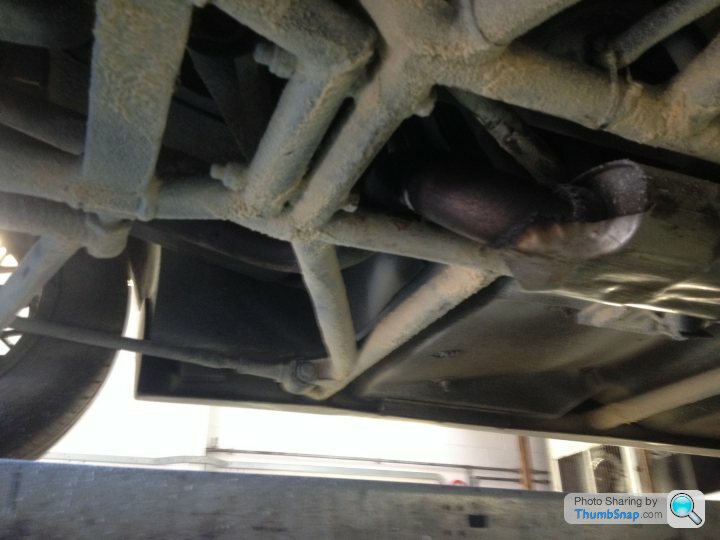
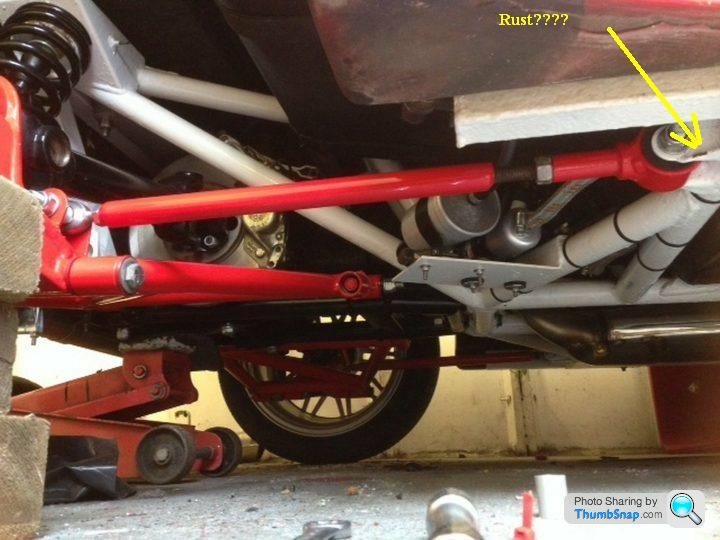
If I can borrow your oic for illustration, those who are grovelling under their cars believeing that all's well in the metalwork department might want to take a good - and I do mean good - look at the area around the diff cradle forward mountings:
I thought my chassis was pukka until I spotted a tiny line in the paint, almost like you'd traced the tip of a scalpel around it. With the paint stripped off there was a crack that ran around the cross-rail and round the welded-in tube through which the diff bolt passes.
I don't know whether it was weld stress-related, inmpact damage or brought on by enthusiastic cornering, but it needed welding!
There wasn't a gap as such, the other tubes were keeping everything in place but it still had no right being there.
Could be a one-off, could be they all do that sir, but worth looking out for.
Gassing Station | Wedges | Top of Page | What's New | My Stuff