Honda VRX400 1995 "barn find" restoration
Discussion


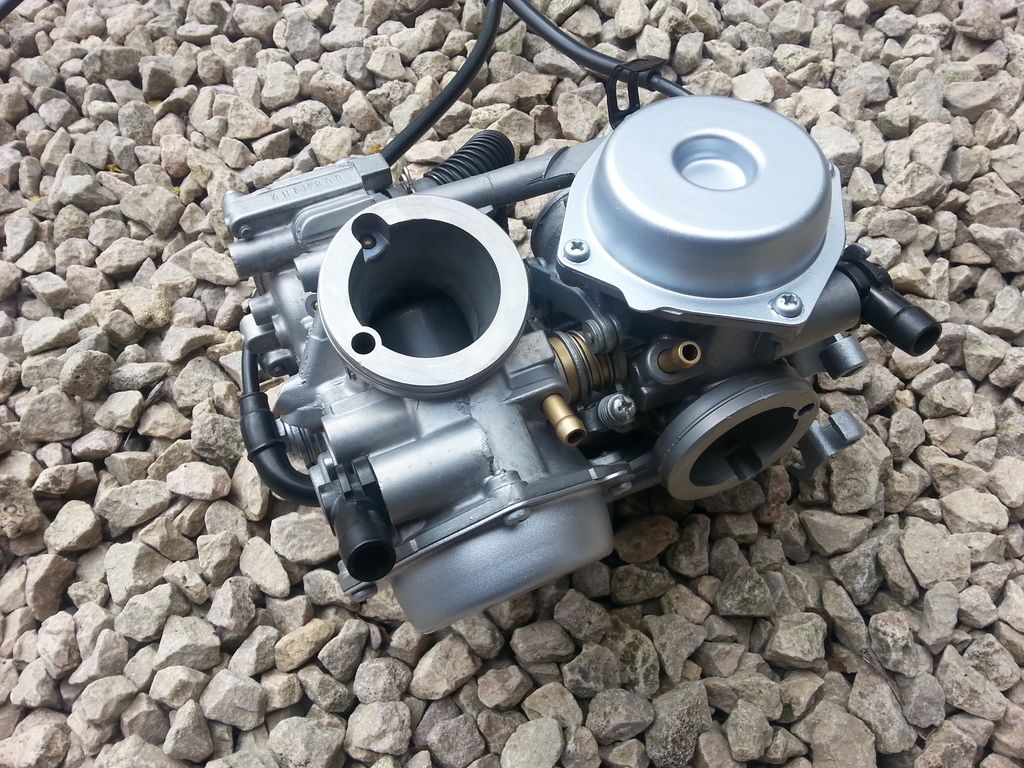
Picked up the carbs from being media blasted and ultrasonically cleaned yesterday, all for £45

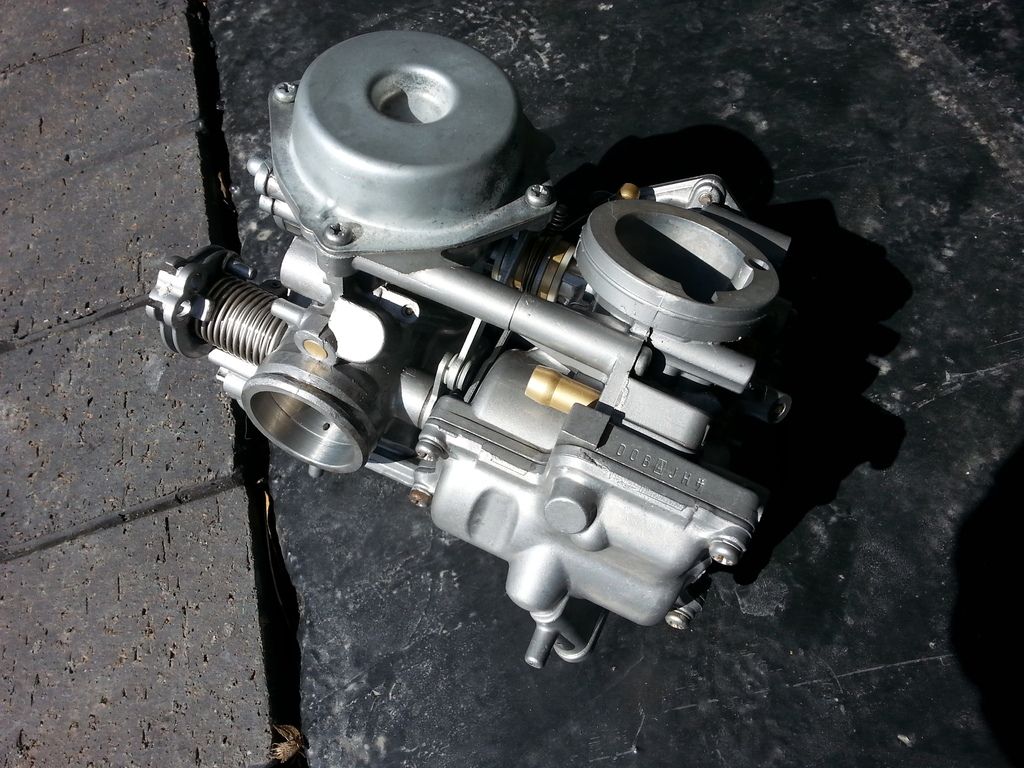
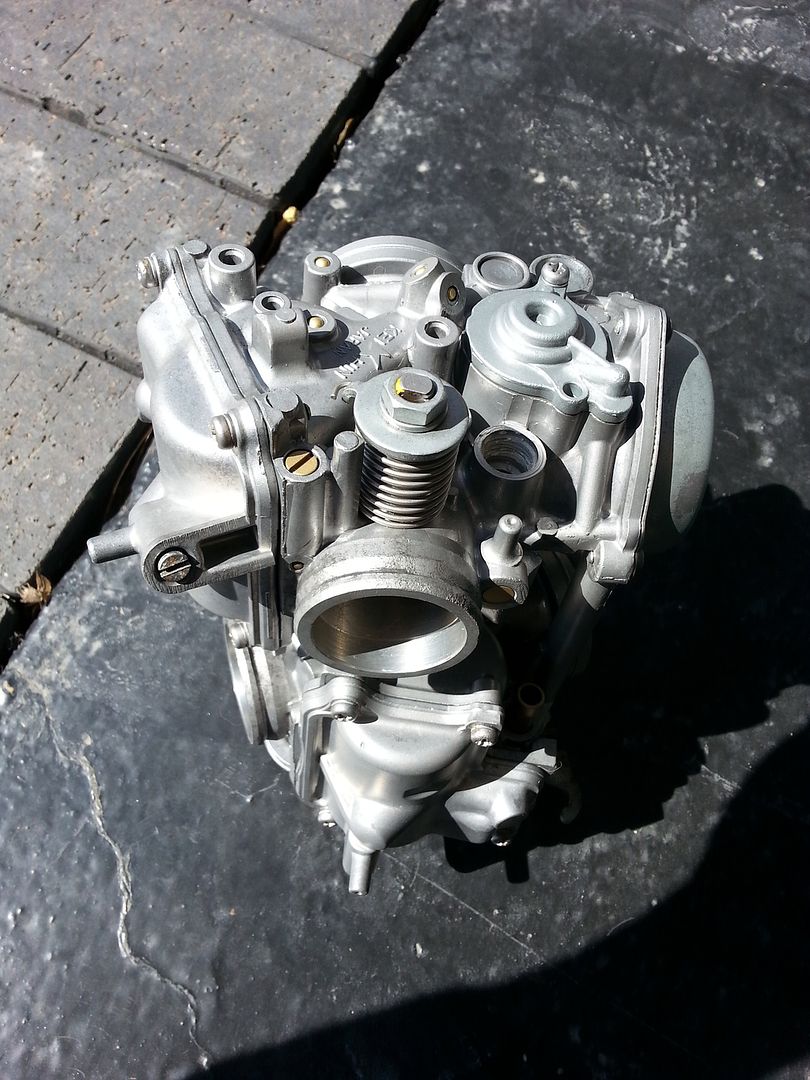
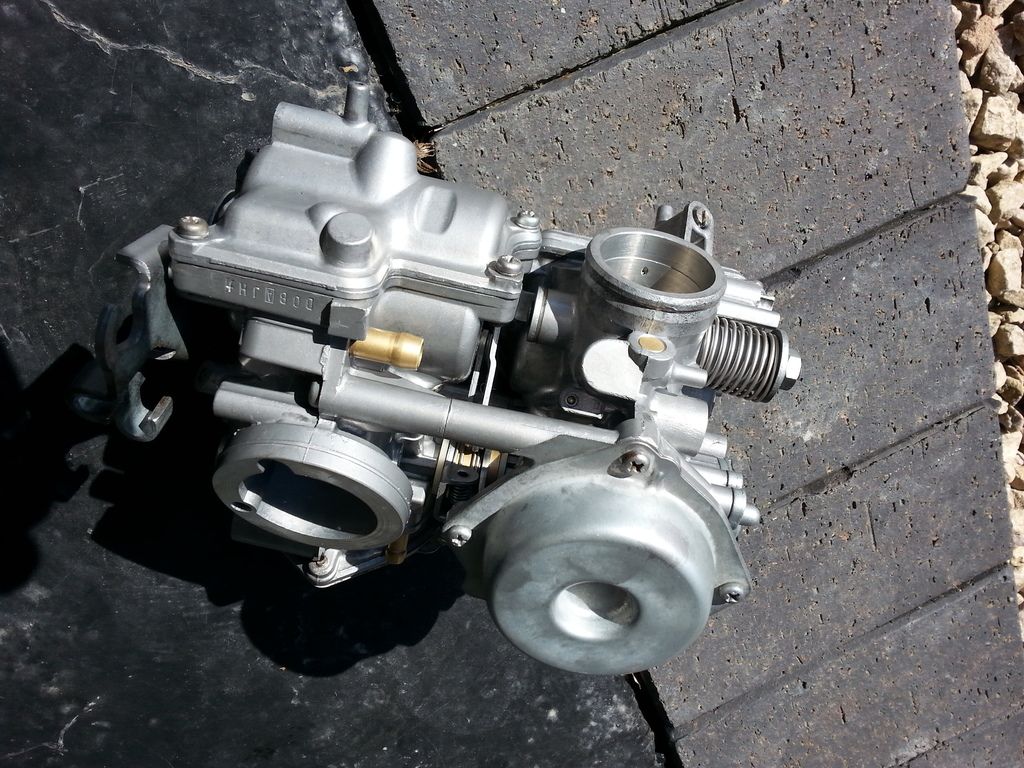
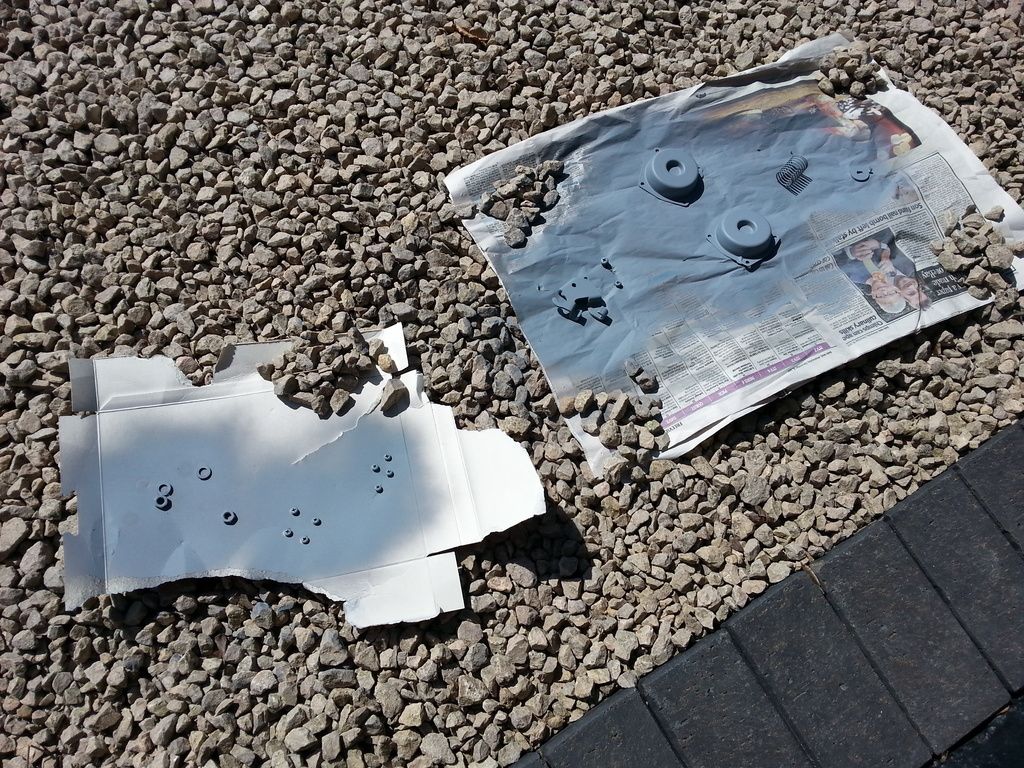
Priming then painting the various bits and bobs on the carb that are made of steel.
Time to reassemble. Will this carb ever work again ? Wish me luck ...


Priming then painting the various bits and bobs on the carb that are made of steel.

Time to reassemble. Will this carb ever work again ? Wish me luck ...

Edited by evil len on Sunday 19th April 13:46
Well bugger me, I'm stunned !
Remember I said there was a general corrosion over the whole bike from its 5 years in storage, including the plastic bits ? And that polish etc wouldn't bring it off ? Well, after a lot of searching I managed to find someone who could spray chrome paint on plastic components, I just had to prep the items first myself.
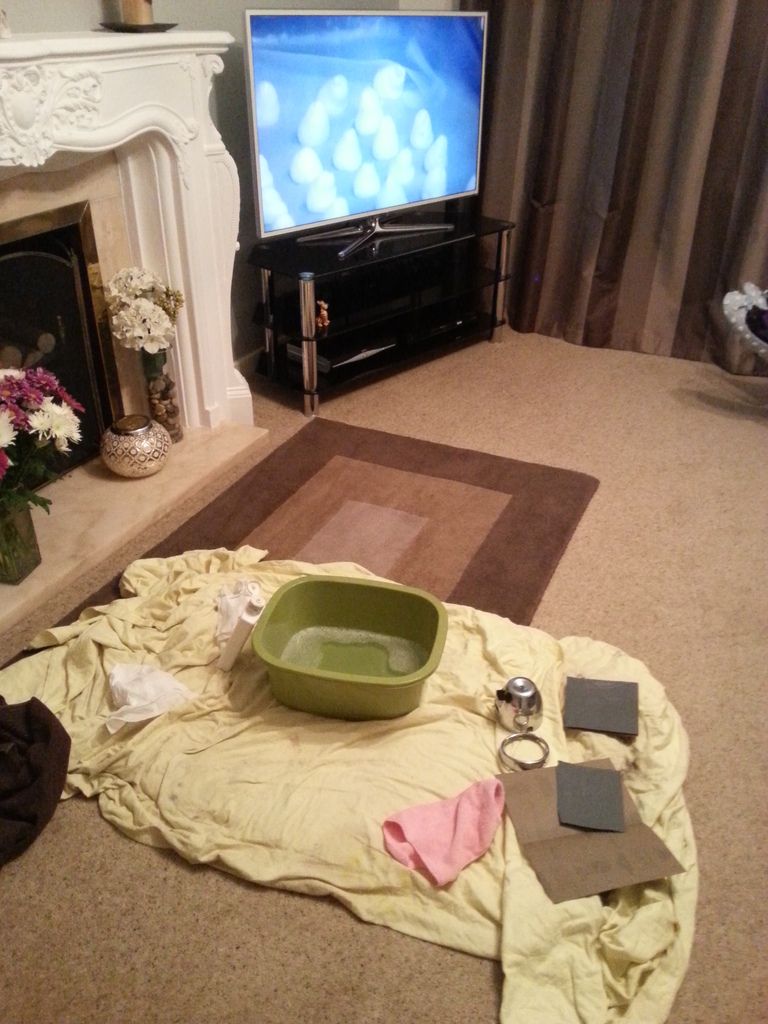
So tonight I sat down in front of the TV whilst the missus was watching Masterchef, and and thought I'd start rubbing the plastic items back ready for priming. Starting with the old edict of start with the gentlest first, I set off with wet and dry (warm water, dash of washing up liquid to stop clogging) and 1200 grit.
Much to my utter amazement, it's actually brought the tarnishing off, revealing the good condition original chrome paint under ! A quick polish up with car polish, and ... ta da ! No need for painting, saved myself a hundred quid or so !

Did I say I've got a very understanding wife ? ;-)
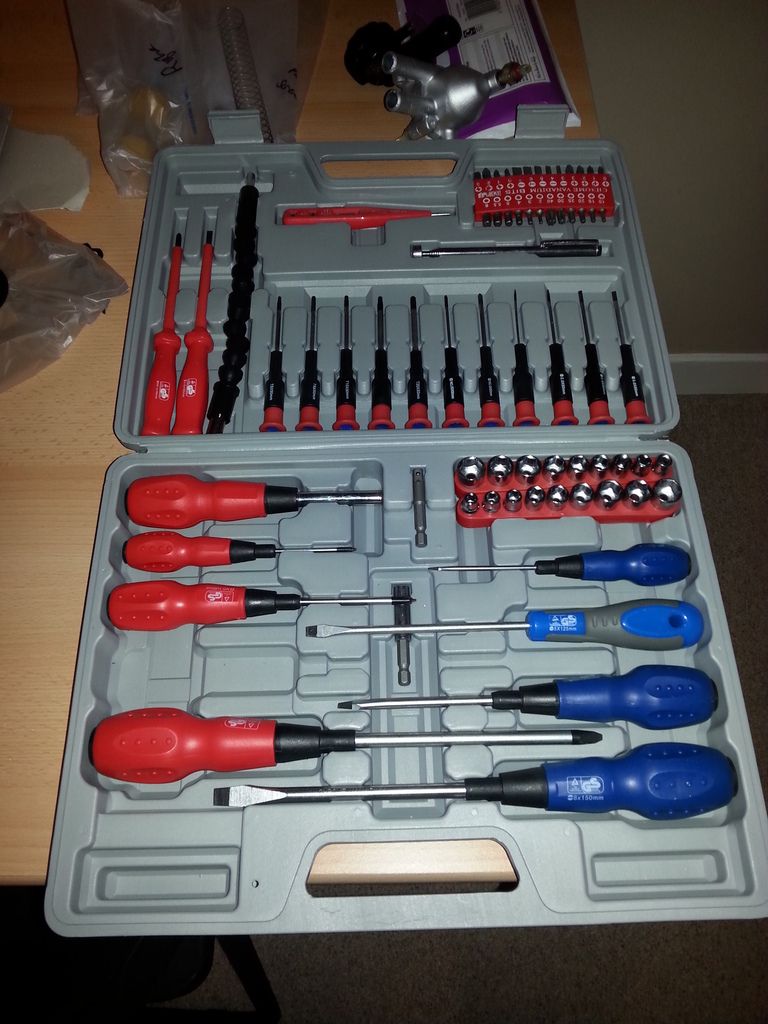
Podman, this is about 1/5 of my screwdriver collection ...
Remember I said there was a general corrosion over the whole bike from its 5 years in storage, including the plastic bits ? And that polish etc wouldn't bring it off ? Well, after a lot of searching I managed to find someone who could spray chrome paint on plastic components, I just had to prep the items first myself.
So tonight I sat down in front of the TV whilst the missus was watching Masterchef, and and thought I'd start rubbing the plastic items back ready for priming. Starting with the old edict of start with the gentlest first, I set off with wet and dry (warm water, dash of washing up liquid to stop clogging) and 1200 grit.
Much to my utter amazement, it's actually brought the tarnishing off, revealing the good condition original chrome paint under ! A quick polish up with car polish, and ... ta da ! No need for painting, saved myself a hundred quid or so !


Did I say I've got a very understanding wife ? ;-)

Podman, this is about 1/5 of my screwdriver collection ...

I'm not having a fun time with the carbs. Almost wish I'd not had them media blasted, as I'm finding thin media all over the inside of the carb. I've used 2 cans of carb cleaner and 2 cans of air-in-a-can up so far, trying to get this kak out of all the dozens of little run ways. Had it back together and back apart again once already, as I cleaned one little hole out, and it blew fine oxide all over the inside, jamming up the piston. Even at one point ran the carb under the bath tap ! Just trying to clean it up. Poor. Think I'm getting there now though. Unfortunately I've had to re-paint all the steel items, as the carb cleaner stripped the paint off. Sigh.
Also, another poor supplier ... if you recall I sent 2 lots of chrome off, one to a local place and one to another place. Both said 6 weeks delivery. The local place returned truly stunning chrome in about 4 weeks. So far, the other place haven't done anything, it's 13 weeks on, and I've been pestering them for 3 weeks now for an ETA ...
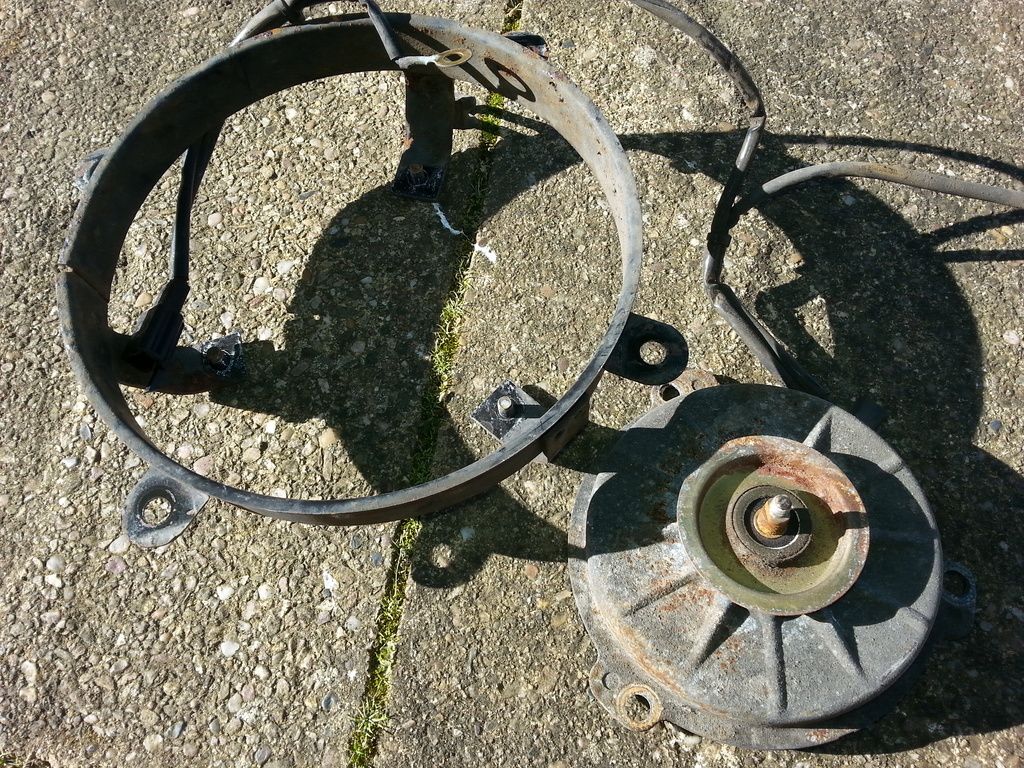
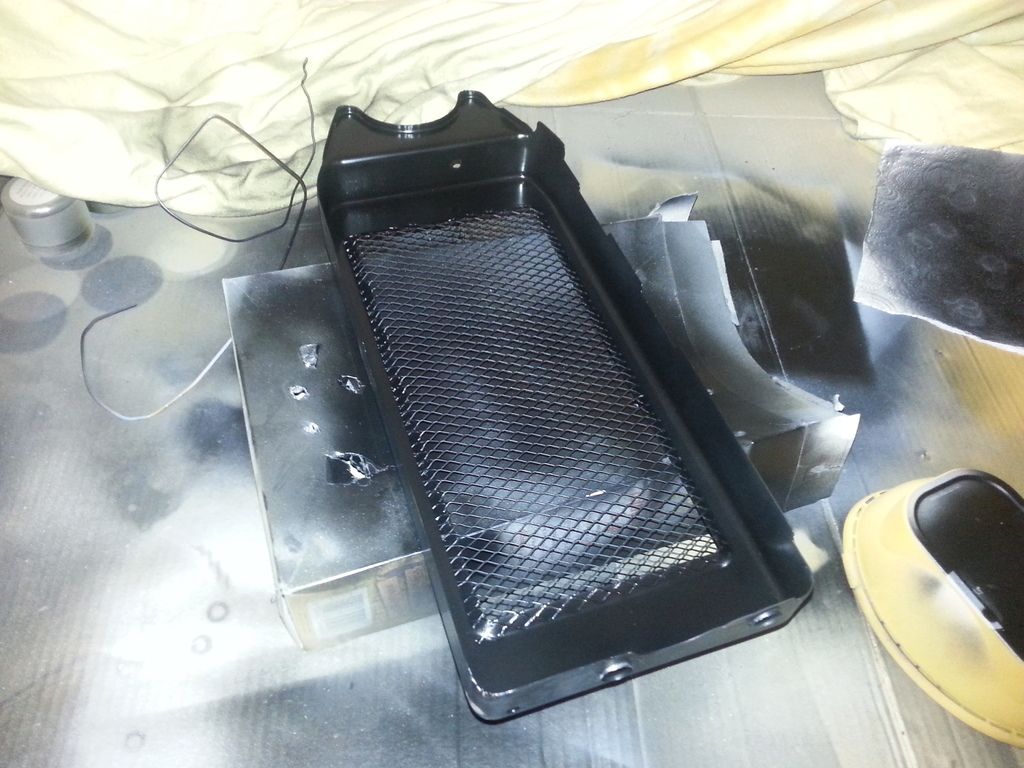
The radiator surround was badly corroded, ditto the bracket for the clocks. Derusted and degreased both of them, now giving generous coats of filler primer. These will both take some work to get looking good.
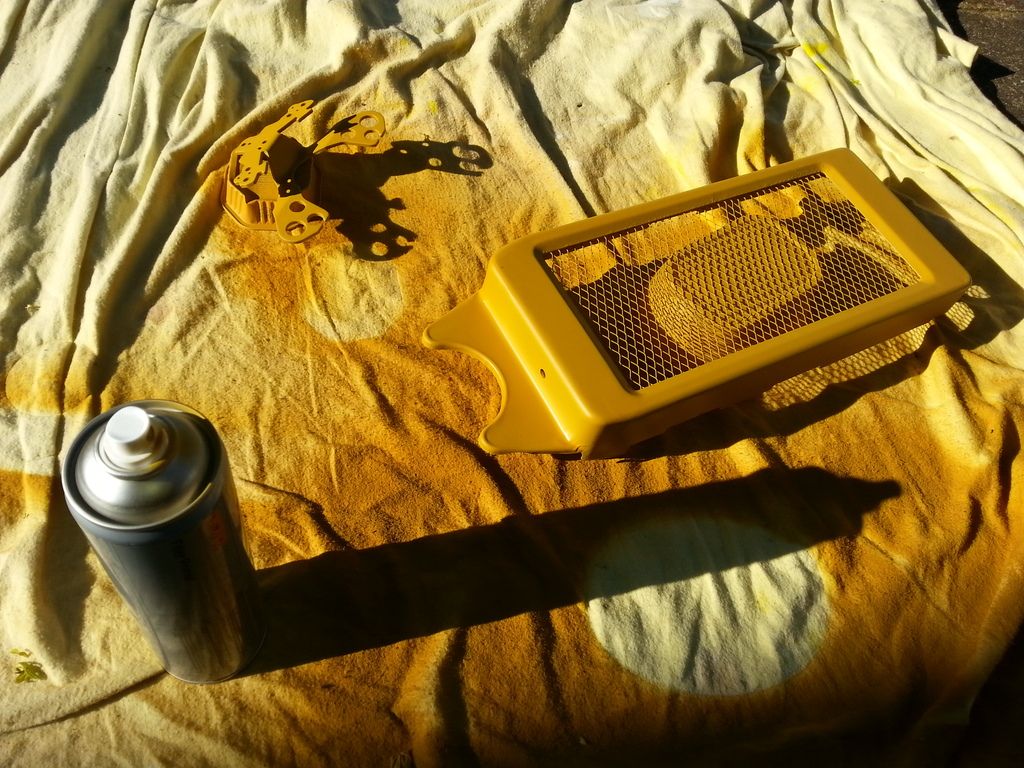
The fan and its shroud will need similar levels of work.
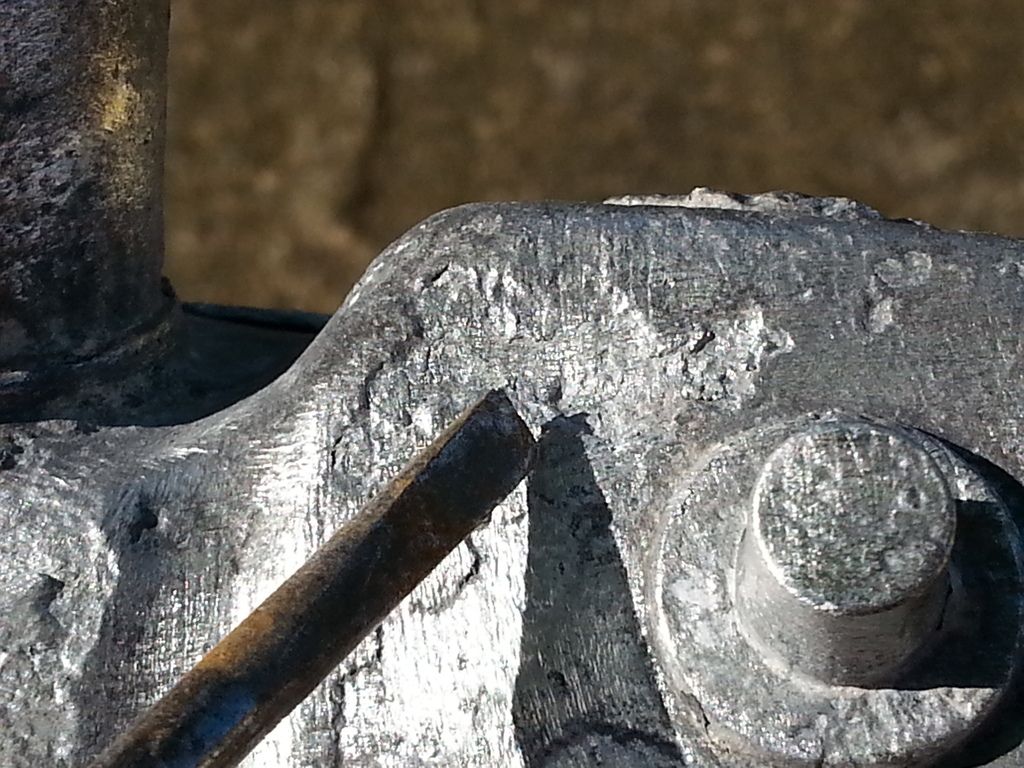
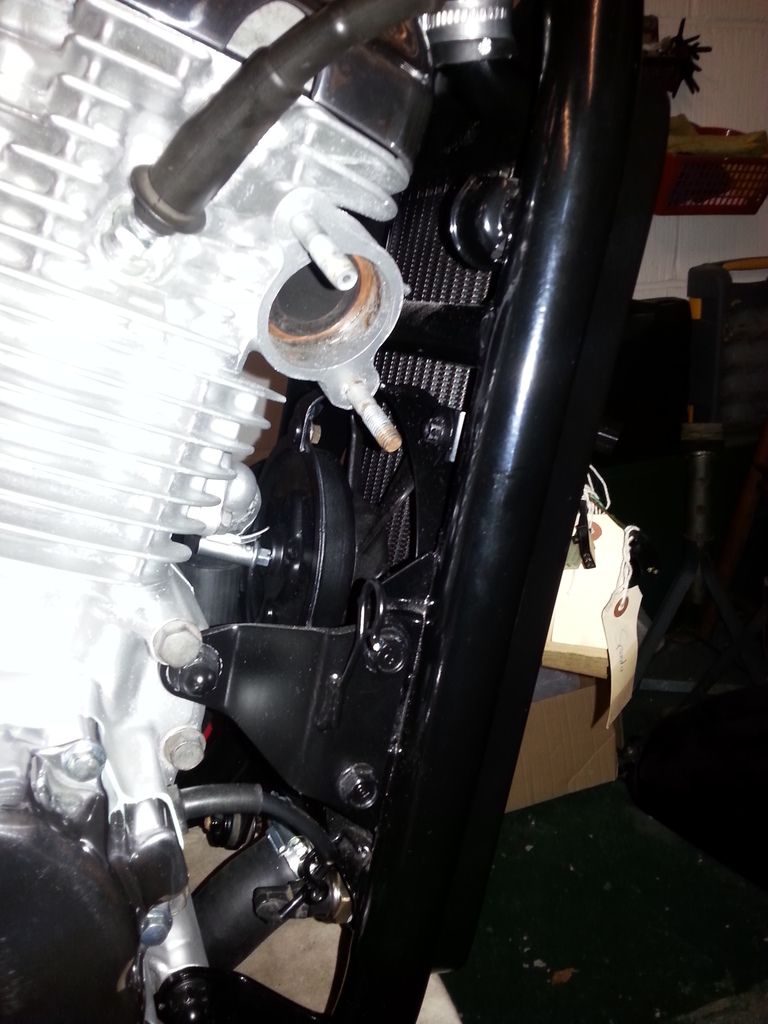
Took the remainder of the paint/oxidisation off, and the radiator has had it.
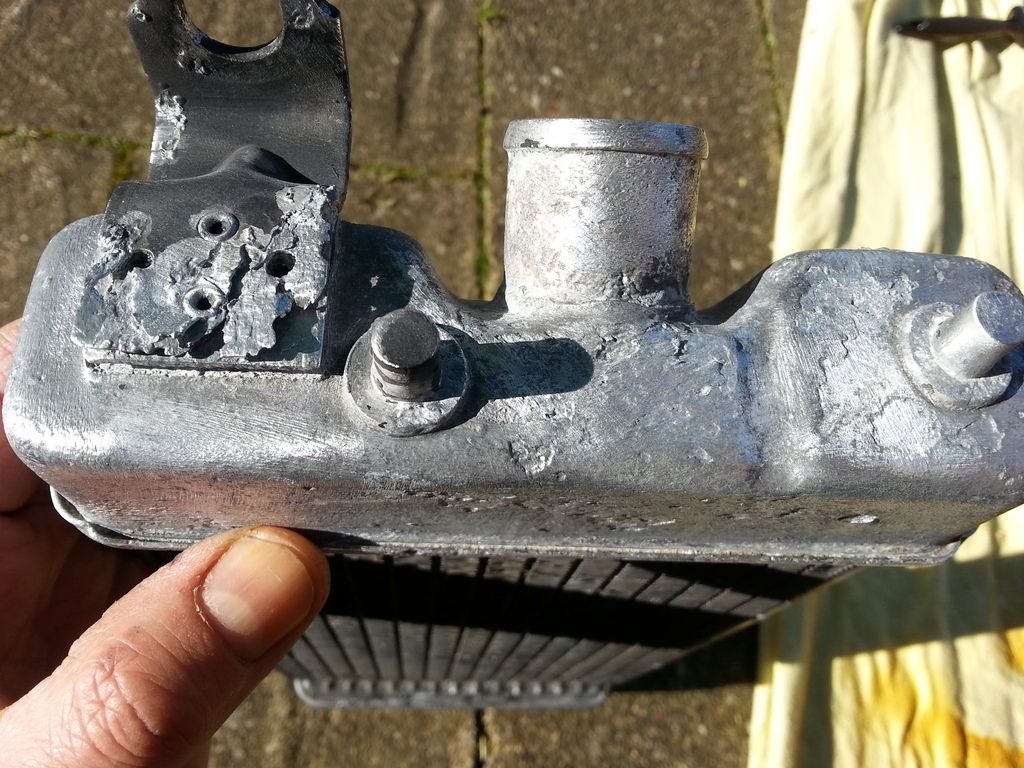
Trying to find out how thick the remaining metal was, managed to push a pinhole with a small screwdriver. I just don't trust it, so ordered a new one (the Japanese seem to work Sundays !). £350 I wasn't budgeting for ...
Also, another poor supplier ... if you recall I sent 2 lots of chrome off, one to a local place and one to another place. Both said 6 weeks delivery. The local place returned truly stunning chrome in about 4 weeks. So far, the other place haven't done anything, it's 13 weeks on, and I've been pestering them for 3 weeks now for an ETA ...
The radiator surround was badly corroded, ditto the bracket for the clocks. Derusted and degreased both of them, now giving generous coats of filler primer. These will both take some work to get looking good.

The fan and its shroud will need similar levels of work.

Took the remainder of the paint/oxidisation off, and the radiator has had it.

Trying to find out how thick the remaining metal was, managed to push a pinhole with a small screwdriver. I just don't trust it, so ordered a new one (the Japanese seem to work Sundays !). £350 I wasn't budgeting for ...

PP ... now, my mate said the other day "don't rush the last 20%". Personally I think I'm only 45-50% of the way through the rebuild, there's just so much left to do ! But yes, as it happens, enjoying doing this so much there'll definitely be another resto following this one. Either a 1960's Brit or a 1970's Japanese (found a Z1000 J that needed restoring tucked away on a farm, but he wouldn't sell it).
Ordered the radiator, and should be getting the last of the chrome back on Wednesday.
Spend so far (excl the radiator, which will be about £350 ish) is :
Bike : £220
Parts : £583
Chrome : £792
Tools : £211
External Services : £410
TOTAL : £2,216
Still to come :
Wheels rebuild and tyres (est 8-900)
Paintjob (est 600-800 ?)
Rear dampers (est 3-400)
Seat recover (possibly in leather) (est 3-400 ?)
Radiator (est 350)
Brake overhall, new disks
Polishing of remaining alloy parts
Assembly of front forks
Assembly of handlebars/control area
Remainder of electrics, e.g. lights
Outstanding assembly of random bits
... and getting the darn thing up and running again !!!
So there's probably another 2.5k of spend to come. Bang goes my original budget of 3k
Actually I'm slightly surprised your current total isn't a bit higher after all the expensive chroming you had done.
I would hope a seat recover would a fair bit lower than your estimate, and a set of Hagon rear shocks are between £146 and £260, depending on options such as stainless shrouds.
I would hope a seat recover would a fair bit lower than your estimate, and a set of Hagon rear shocks are between £146 and £260, depending on options such as stainless shrouds.
Aye, I think you're right about the shocks ... Hagon Classic 1's are about £180
The chrome is only for the RE-chroming of old parts. Any new chrome purchased is within 'parts' (handlebars, headlight, etc)
Must admit the difference in quality between manufacturer chrome and quality aftermarket rechroming is stunning ...
The chrome is only for the RE-chroming of old parts. Any new chrome purchased is within 'parts' (handlebars, headlight, etc)
Must admit the difference in quality between manufacturer chrome and quality aftermarket rechroming is stunning ...
Had a good productive day today. Should have been doing other things, but kind of got carried away. Had fun though.
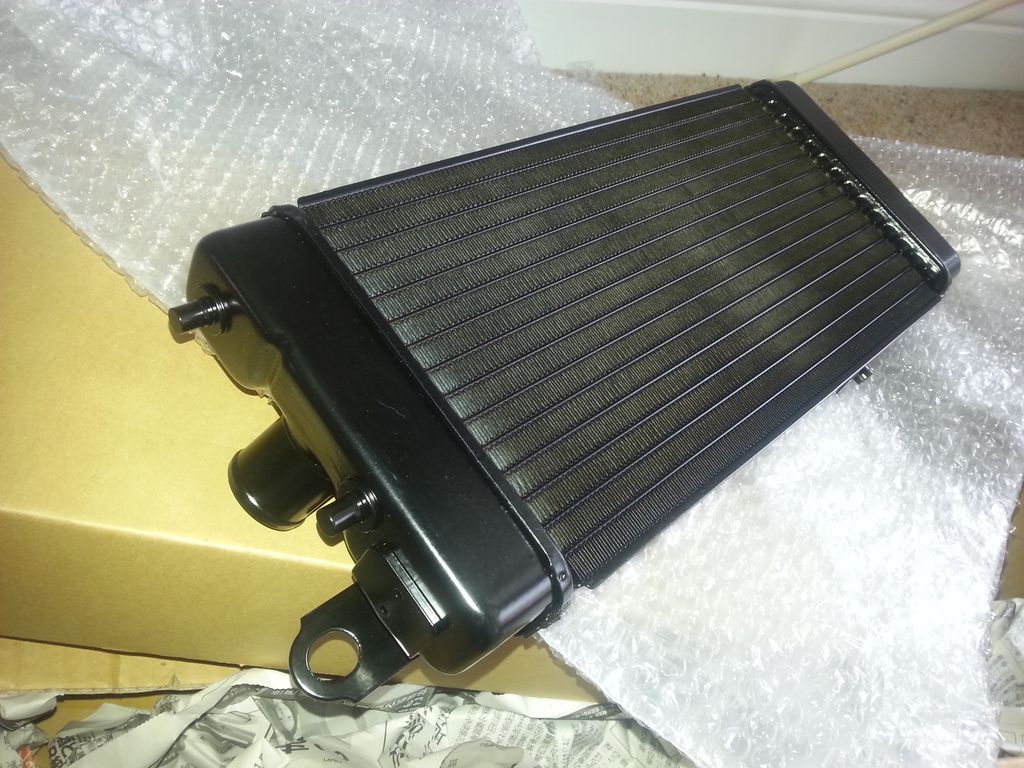
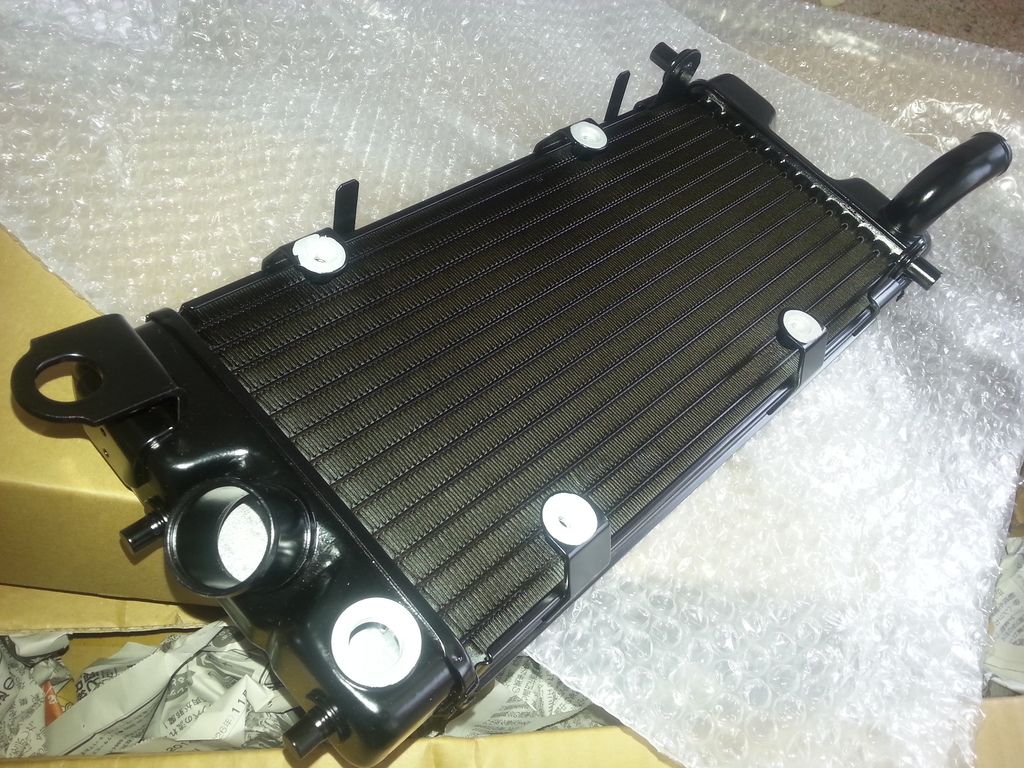
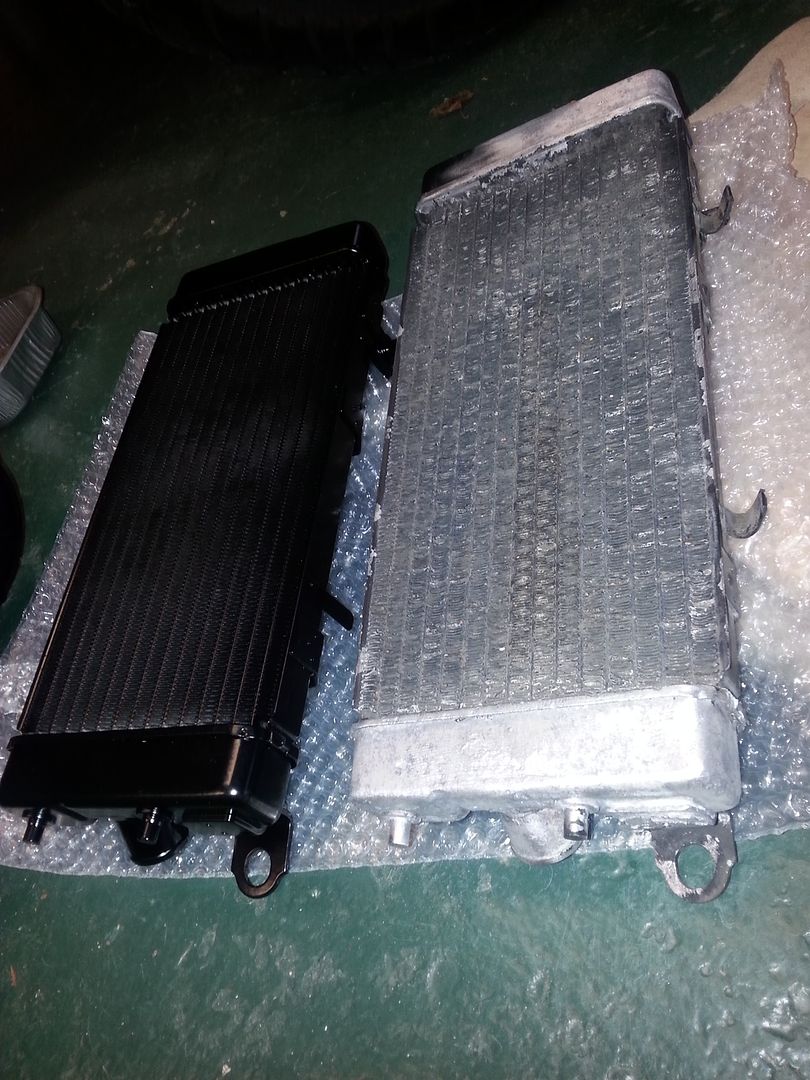
New radiator arrived from Japan yesterday ...
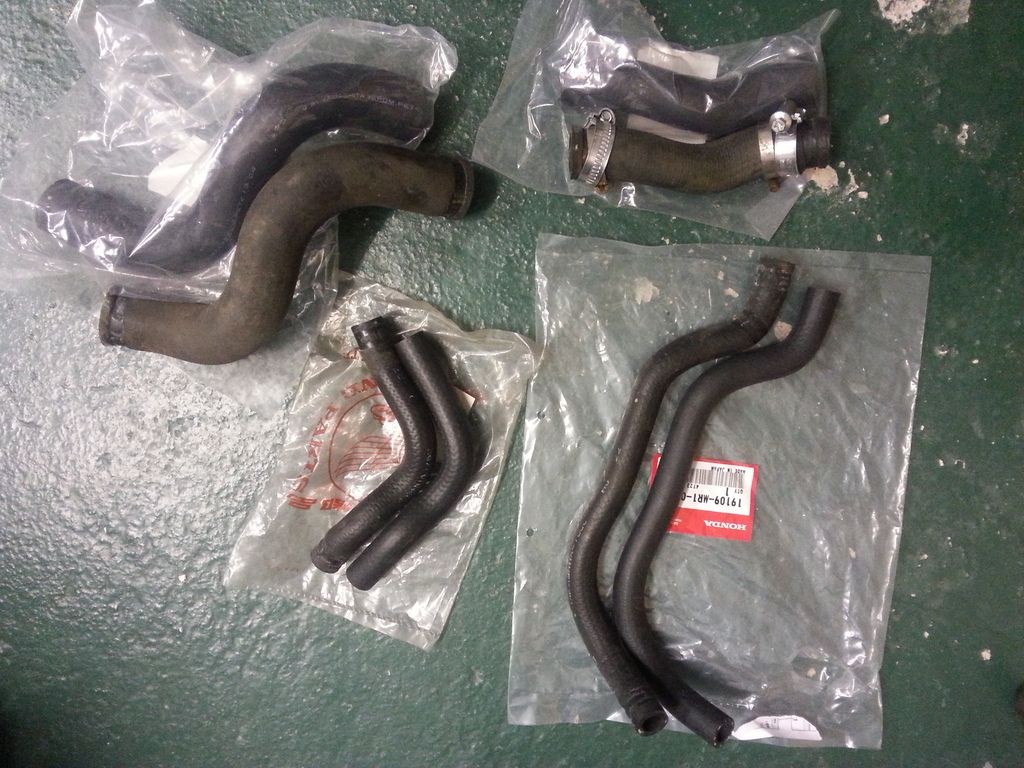
Here's the water hoses, old and new
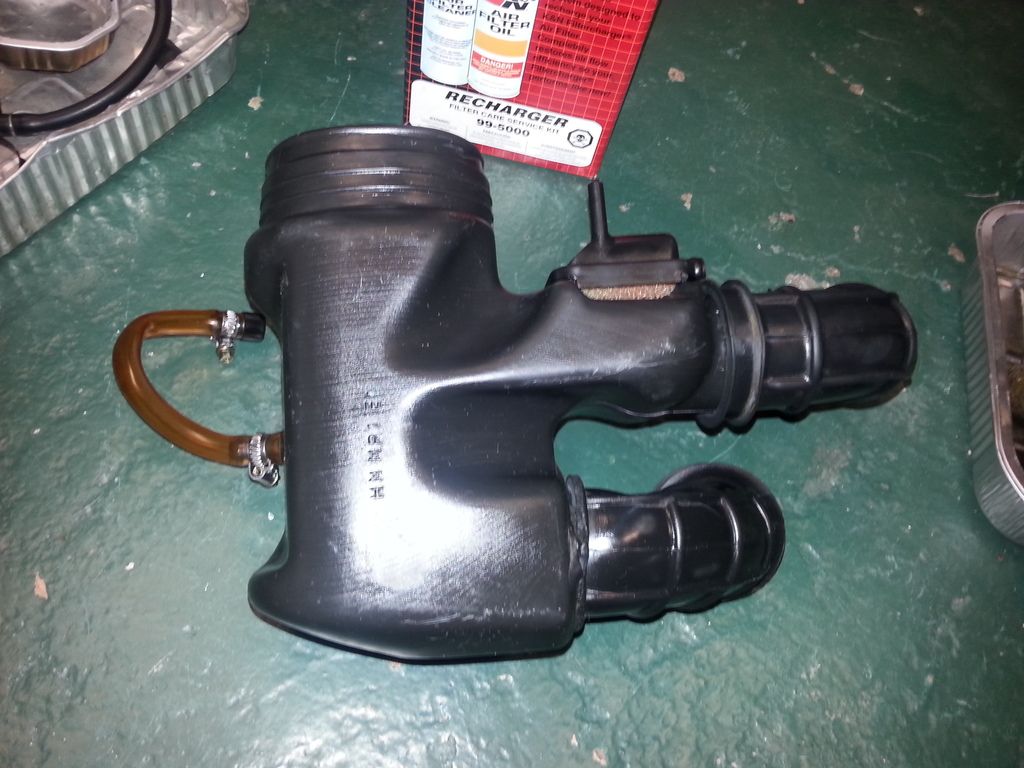
Been cleaning up one of the (several ?!?) air boxes. Tip : to clean the inside of hoses like this one (that you can see through) I find leaving them full of a mild bleach solution works.
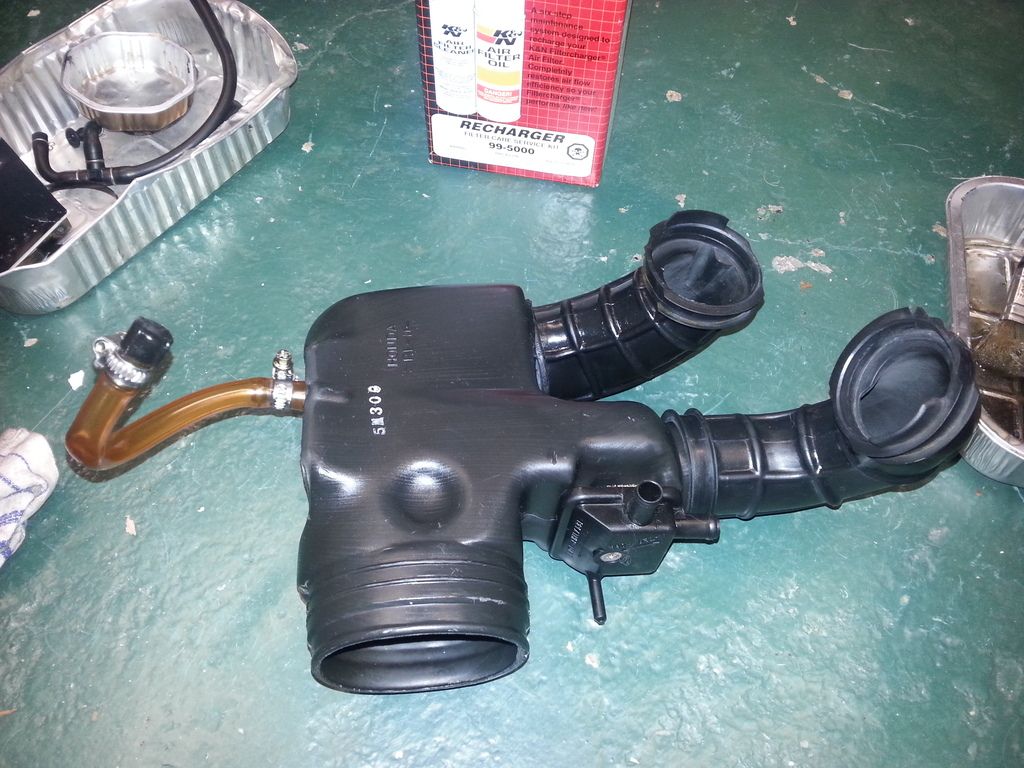
In that "panel" there was an air filter element that just fell apart when I touched it. Replaced it with a new one I made from filter material, plus a K&M oiler kit that I've had kicking round for about 10 years ... finally found a use for it !
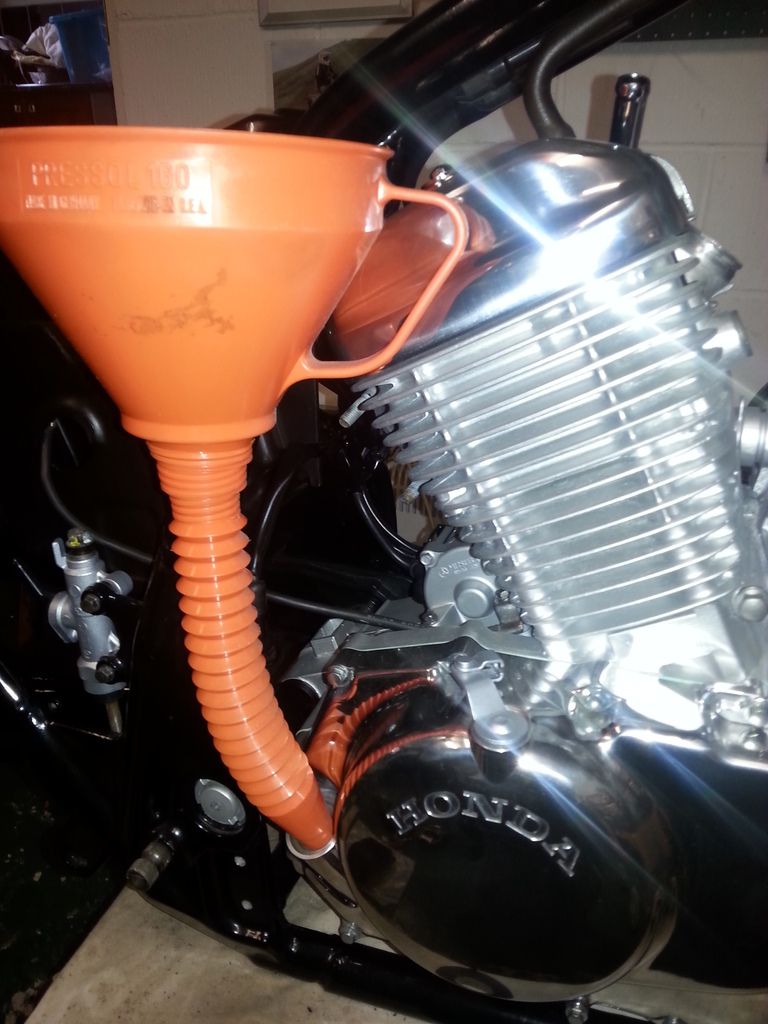
Filled up with 2.8l of fresh oil. So far, can't see anywhere where it's leaking out (famous last words ...)
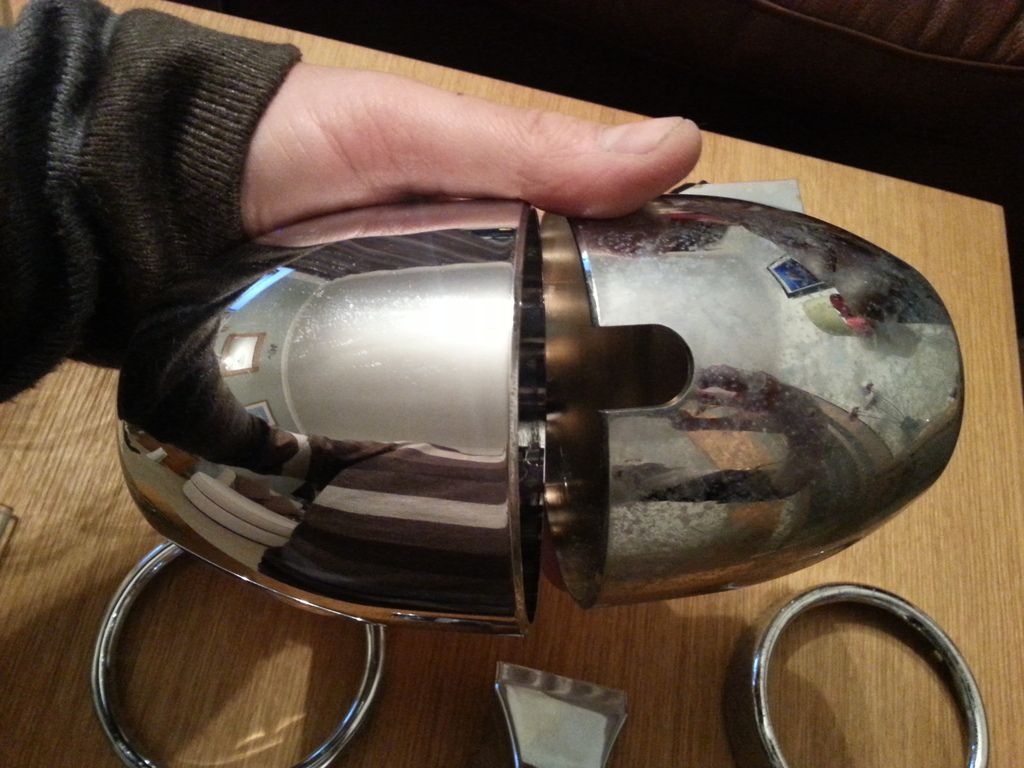
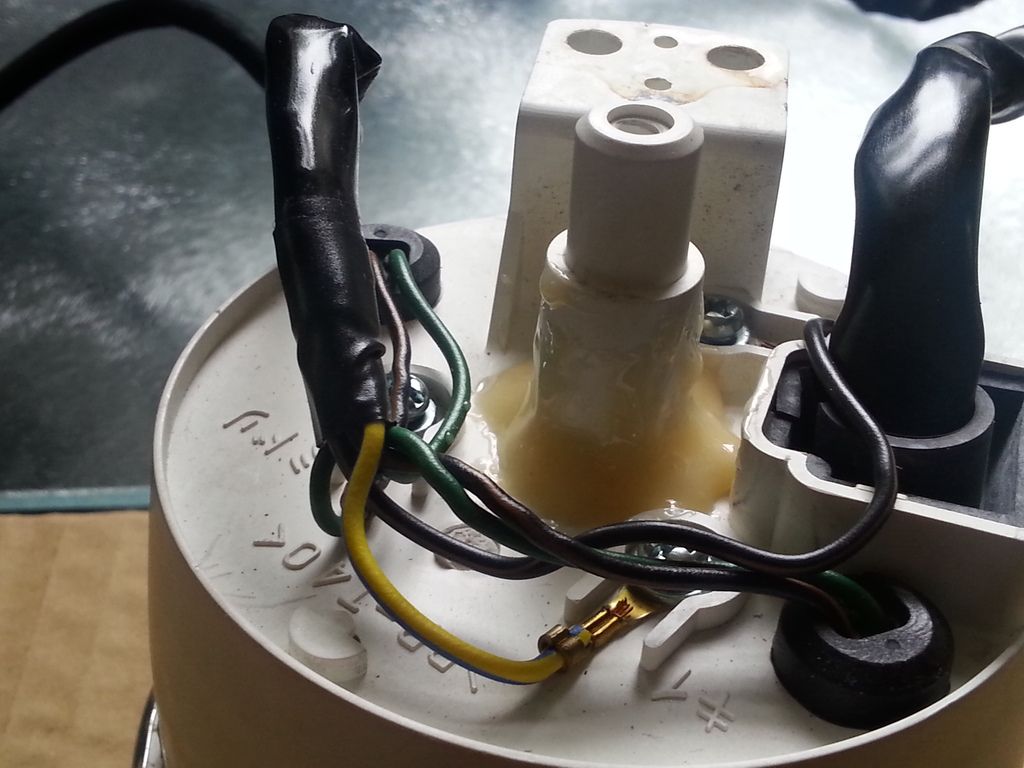
I'm a dozy ham fisted twonk. Whilst trial fitting the tacho back together I dropped it, and broke the bit of plastic that the rear dome screws on to. Nob.
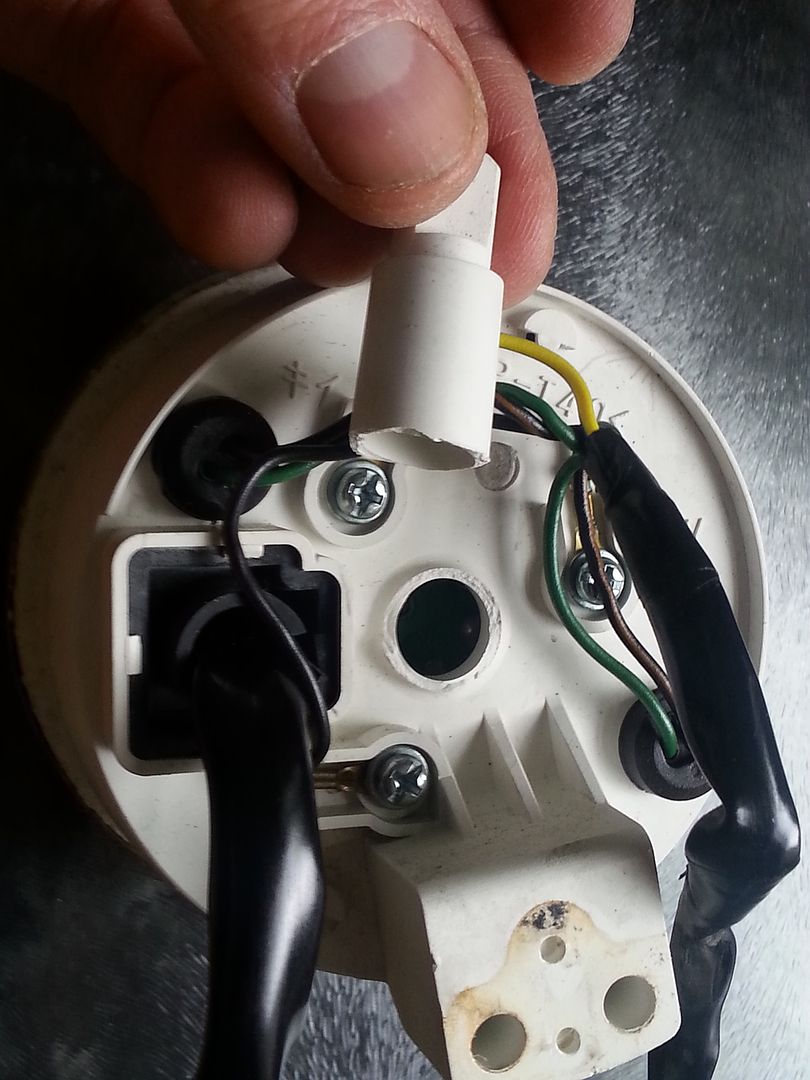
Aradite to the rescue ...
Think I definitely made the right choice ref the radiator.
Installed the thermostat / filler housing and two of its water pipes. I was a bit premature with those, and had to take them off again later to fit the carbs, as you'll see later. Tip : with new hoses, if you are having trouble getting them on, lubricate with a TINY bit of washing up liquid.
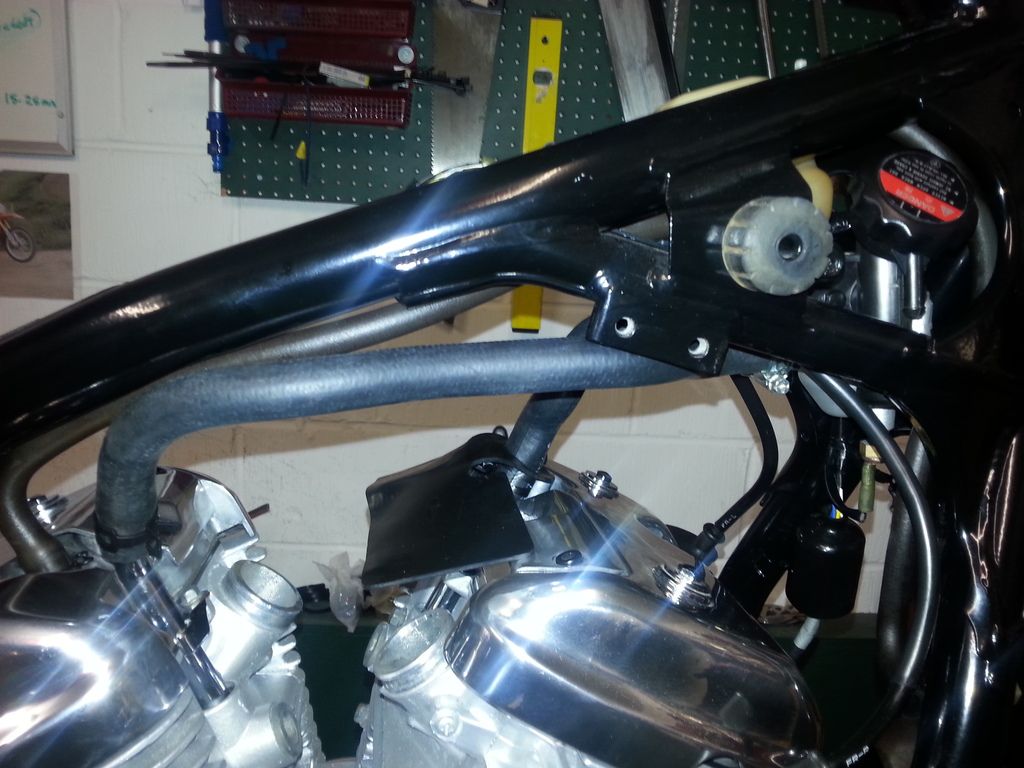
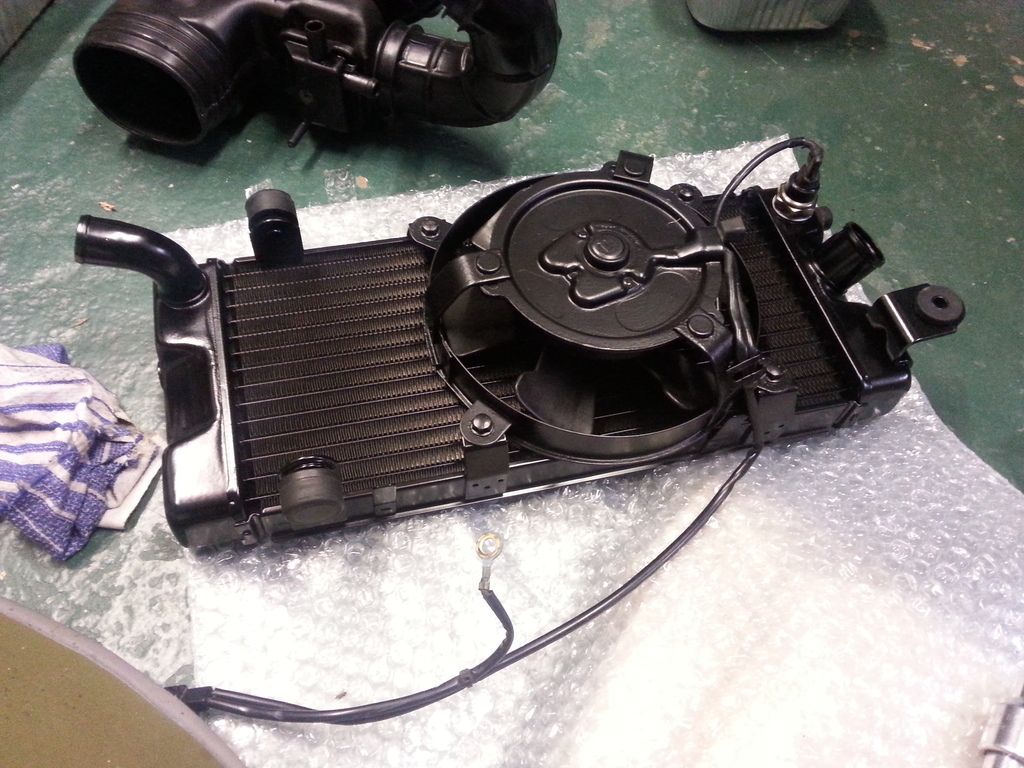
Built the radiator back up, along with the reconditioned fan and mount and all the various bits and bobs that I've been cleaning up and painting over recent weeks.
Still painting up the radiator surround, before I can fit it. Being finikety with this ... it was very badly corroded. Have used masses of filler primer and emery on this, and it's still work in progress and doing my nut in a bit ...
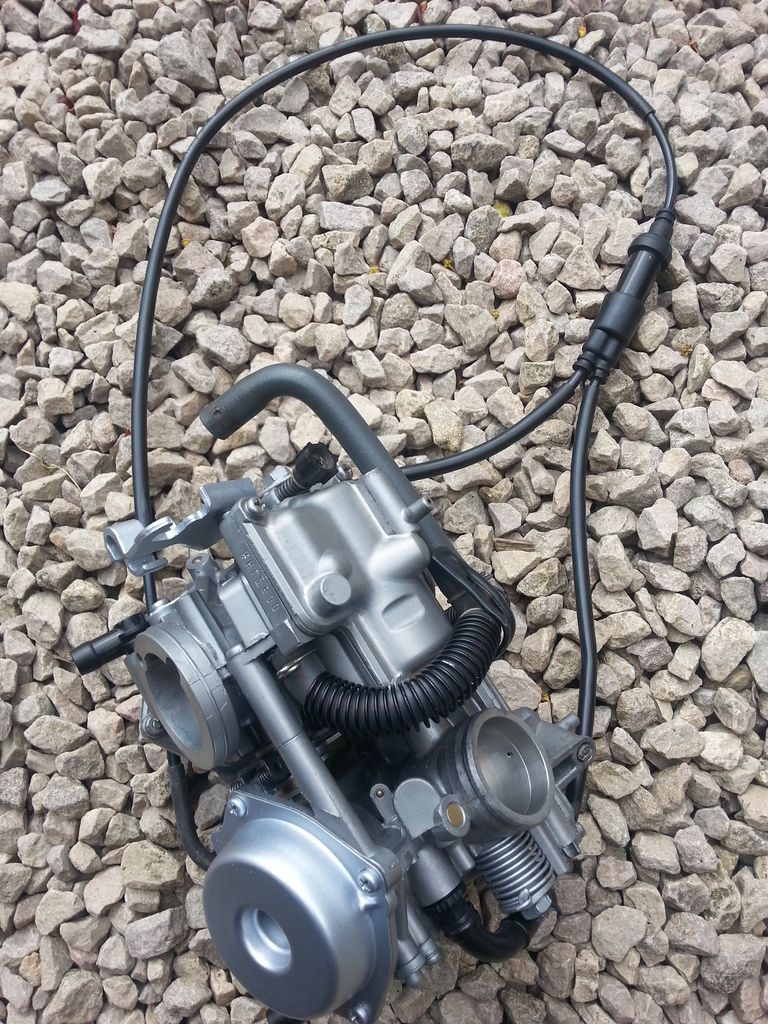
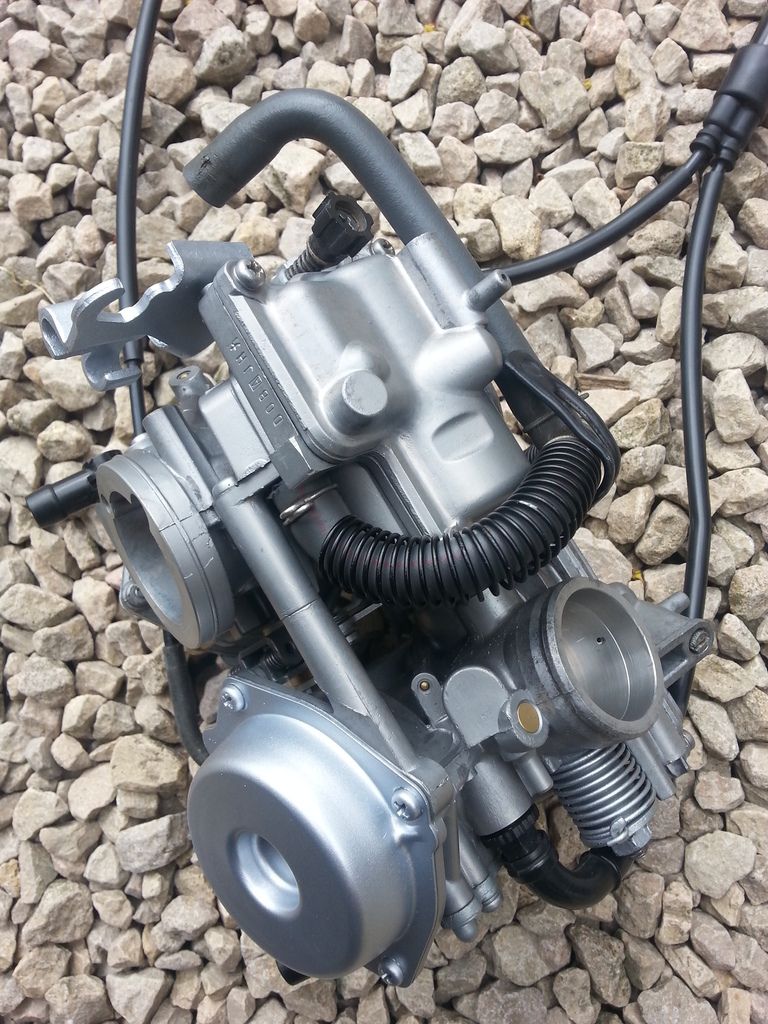
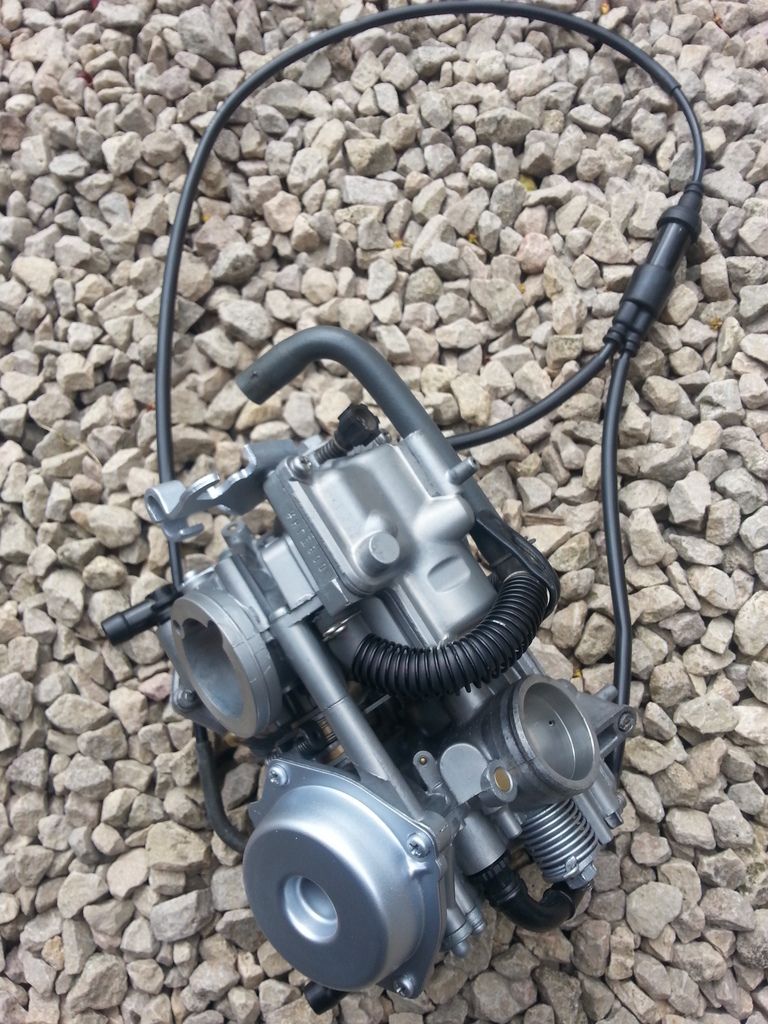
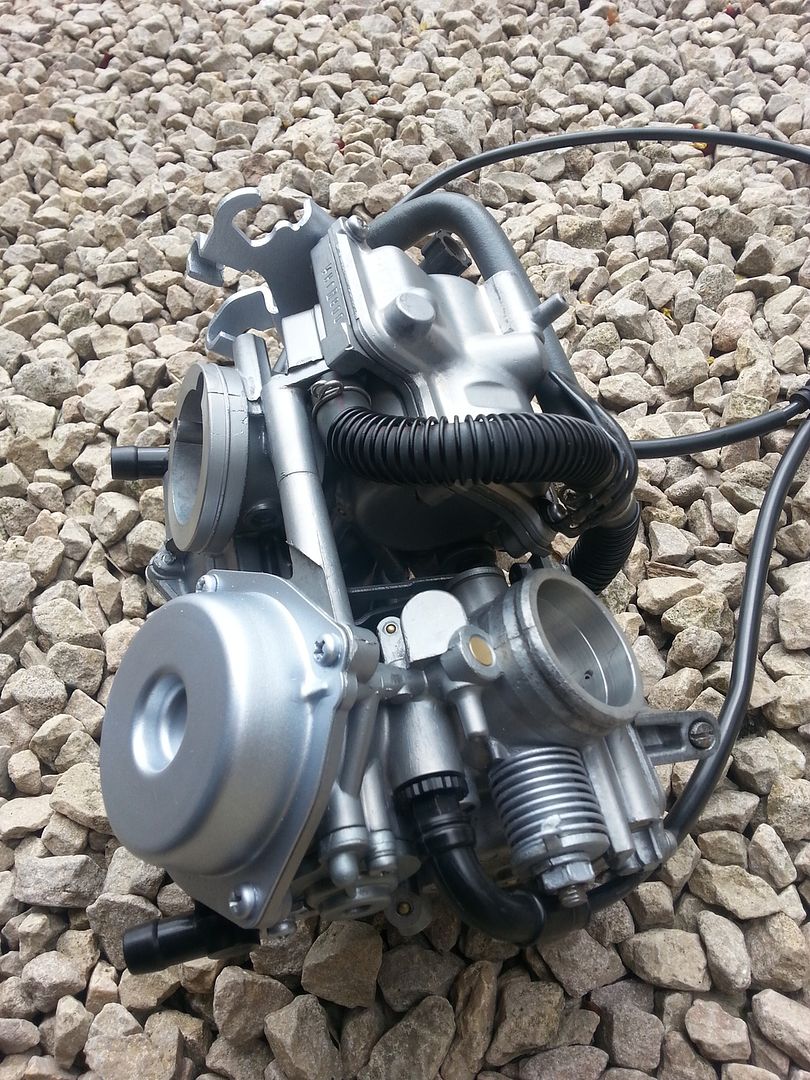
And ... the carbs are rebuilt !
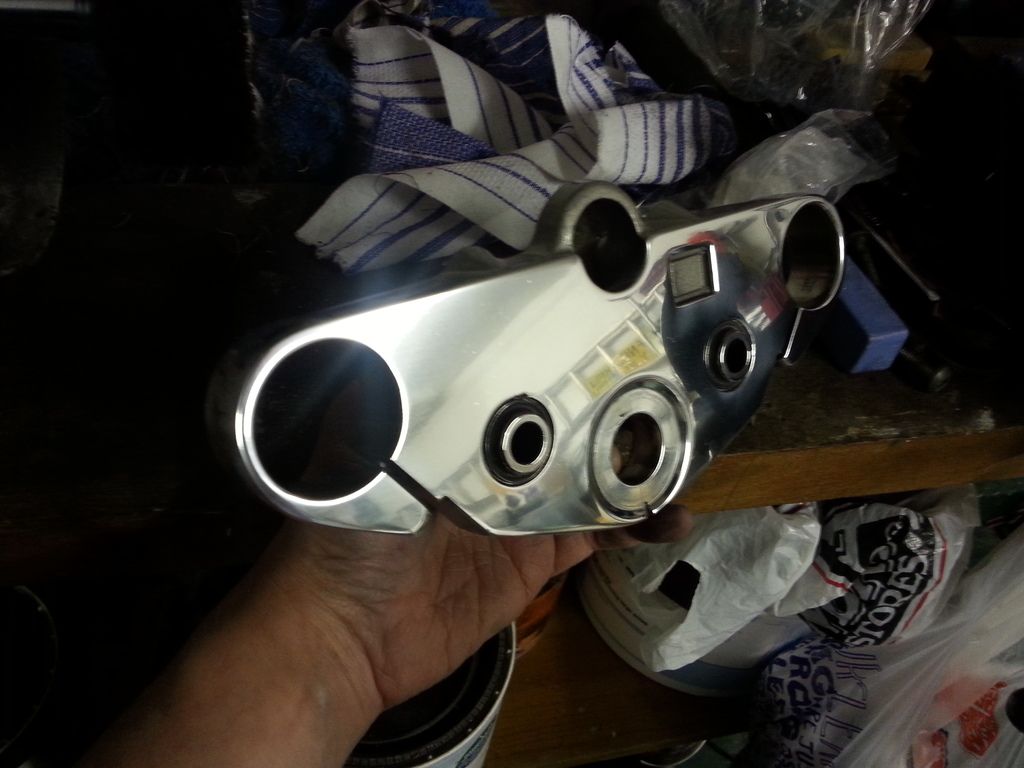
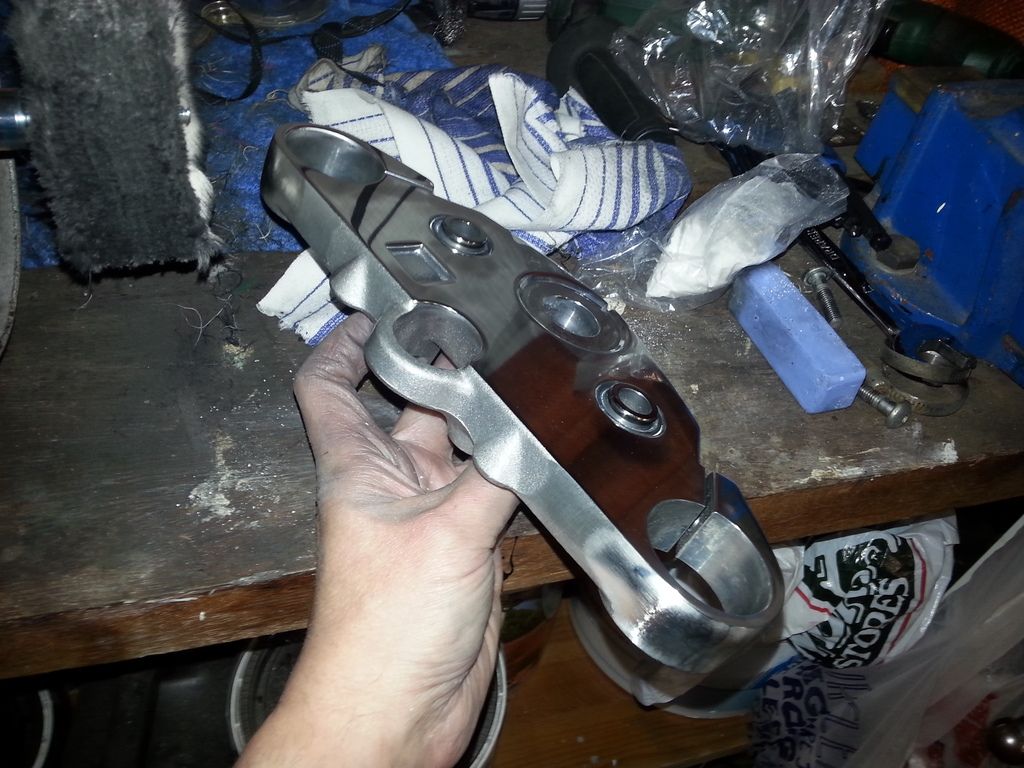
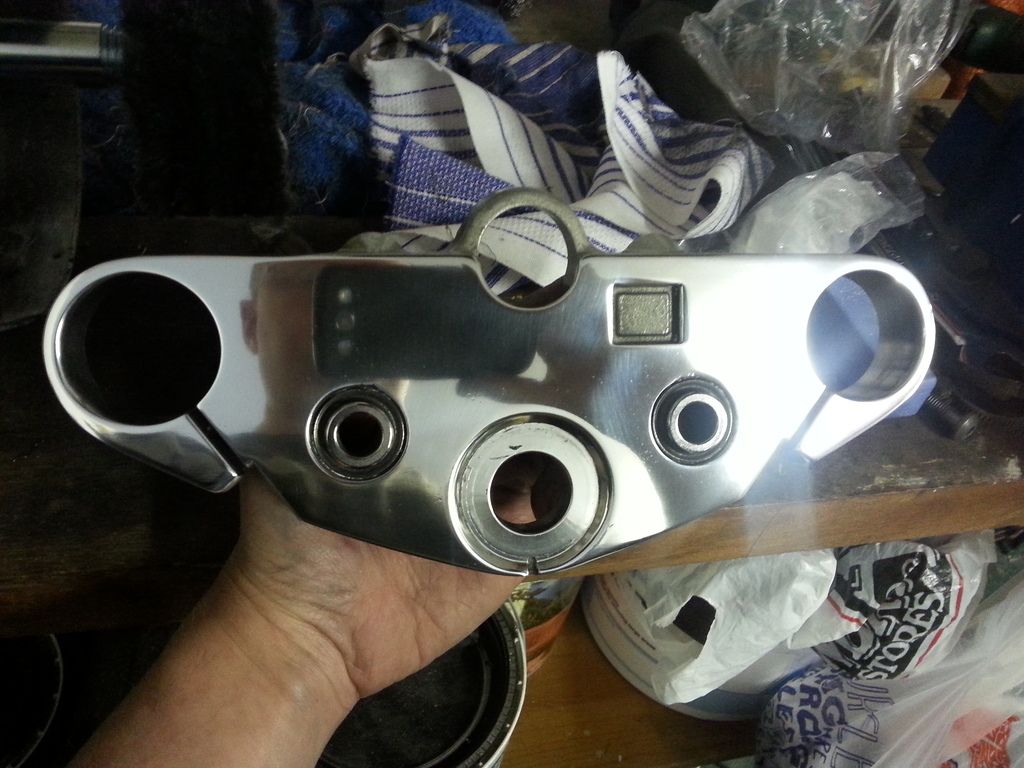
The top yoke is alloy, and coated with a mixture of silver paint and lacquer. The paint was in good condition, but I stripped the lacquer off. The area around the ignition was badly marked with dents from the key flapping around. I've spent about 4 hours on this yoke today and I'm bloody fed up of it ! Lots and lots of time with emery cloth. Originally tried to replicate the brushed effect on the top using emery, but after several goes I wasn't happy with it at all, so have reverted to polishing it. Fairly happy with this result, you can JUST see tiny marks from the key. Think I'll have another hour in it tomorrow but I'm fed up of looking at it today. I've just come in, looked in the mirror, and realised my face is jet black from the polisher ...
New carb rubber mounts in place ...
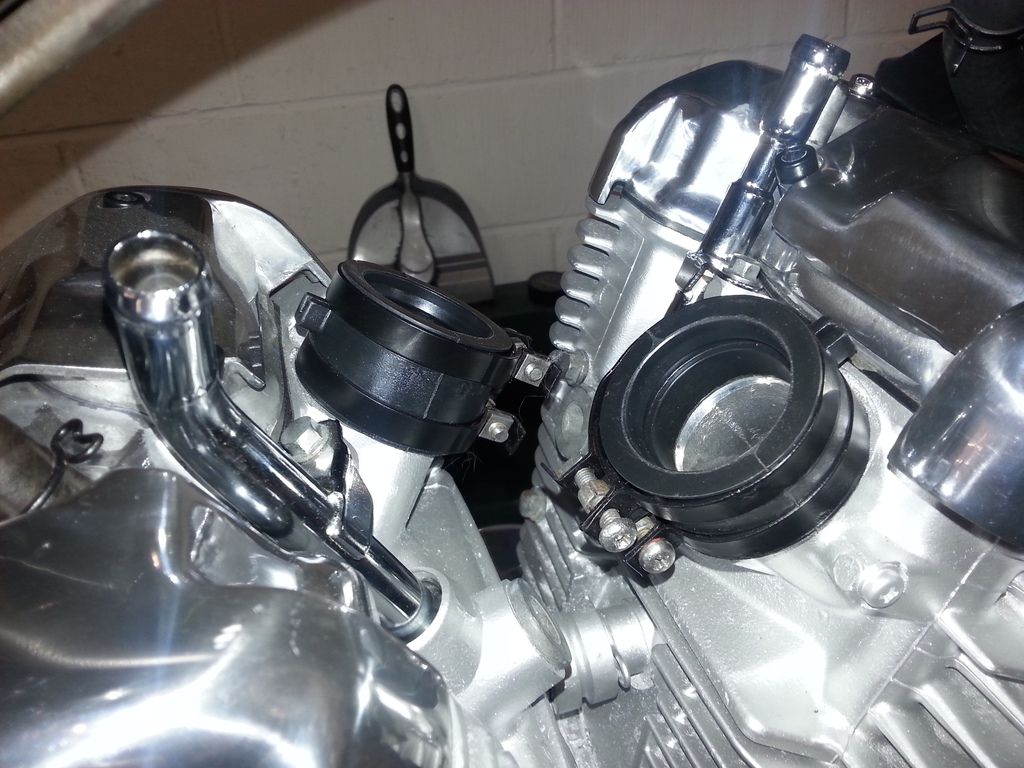
Go IN you absolute b d !! The carb was hateful, and just didn't want to go back on.
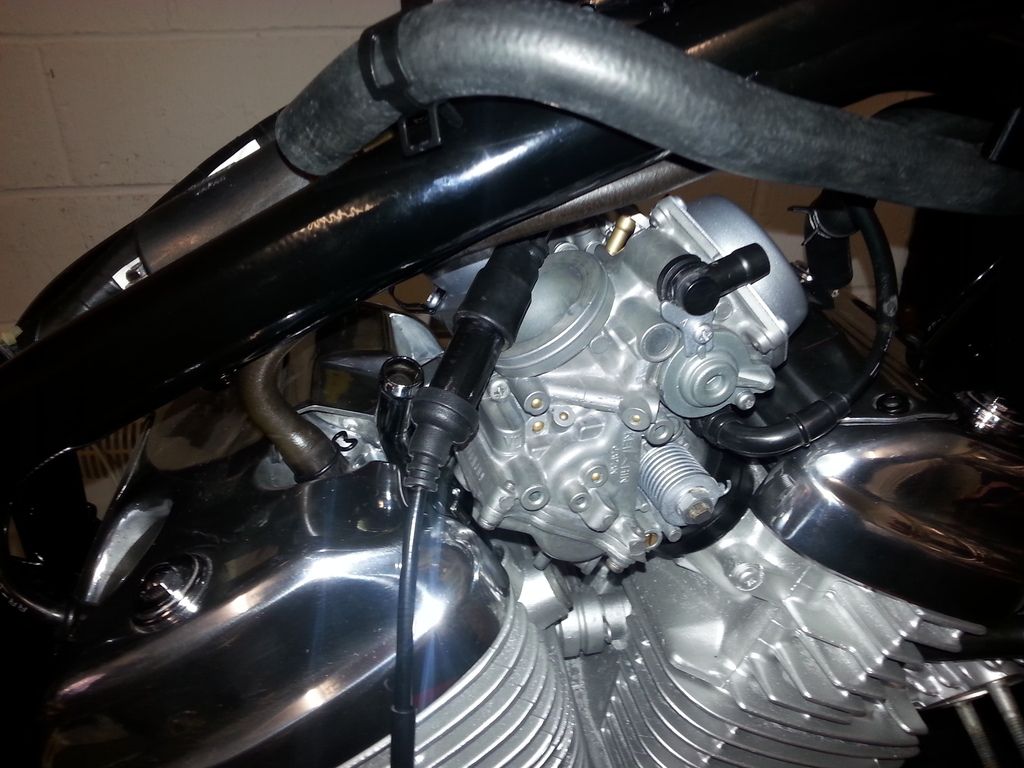
But I got there !
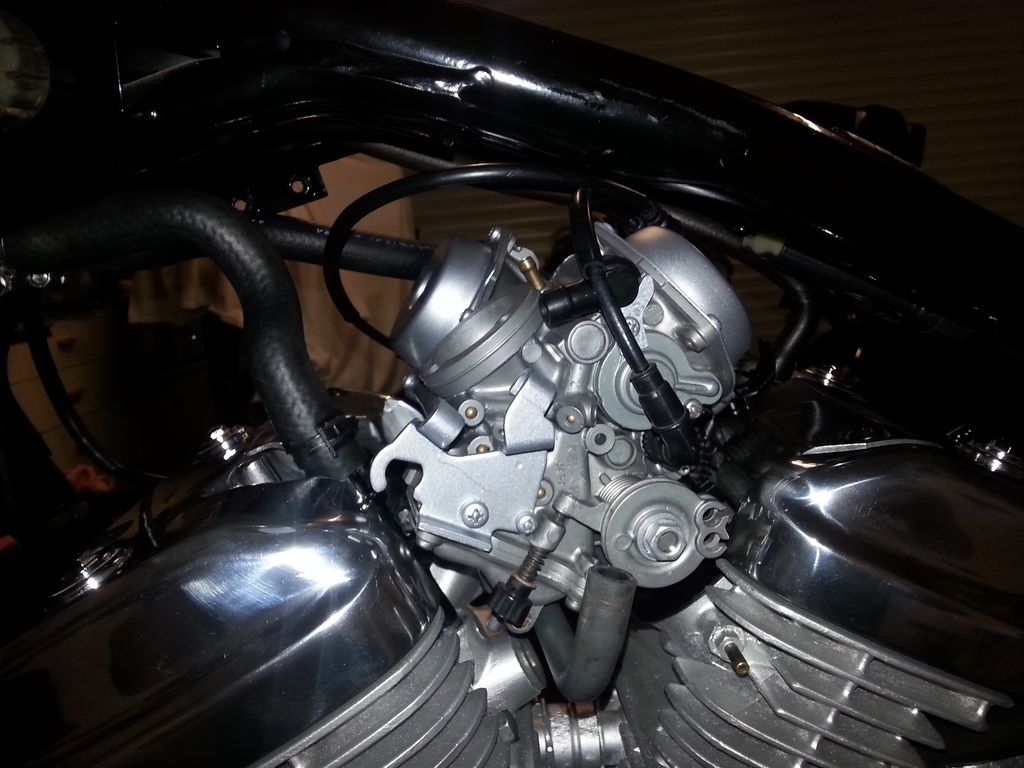
I'm not convinced I've got the choke cables on the right way round, or routed it the right way. Will have to revisit that ...
New radiator arrived from Japan yesterday ...


Here's the water hoses, old and new

Been cleaning up one of the (several ?!?) air boxes. Tip : to clean the inside of hoses like this one (that you can see through) I find leaving them full of a mild bleach solution works.

In that "panel" there was an air filter element that just fell apart when I touched it. Replaced it with a new one I made from filter material, plus a K&M oiler kit that I've had kicking round for about 10 years ... finally found a use for it !

Filled up with 2.8l of fresh oil. So far, can't see anywhere where it's leaking out (famous last words ...)

I'm a dozy ham fisted twonk. Whilst trial fitting the tacho back together I dropped it, and broke the bit of plastic that the rear dome screws on to. Nob.

Aradite to the rescue ...

Think I definitely made the right choice ref the radiator.

Installed the thermostat / filler housing and two of its water pipes. I was a bit premature with those, and had to take them off again later to fit the carbs, as you'll see later. Tip : with new hoses, if you are having trouble getting them on, lubricate with a TINY bit of washing up liquid.

Built the radiator back up, along with the reconditioned fan and mount and all the various bits and bobs that I've been cleaning up and painting over recent weeks.

Still painting up the radiator surround, before I can fit it. Being finikety with this ... it was very badly corroded. Have used masses of filler primer and emery on this, and it's still work in progress and doing my nut in a bit ...

And ... the carbs are rebuilt !


The top yoke is alloy, and coated with a mixture of silver paint and lacquer. The paint was in good condition, but I stripped the lacquer off. The area around the ignition was badly marked with dents from the key flapping around. I've spent about 4 hours on this yoke today and I'm bloody fed up of it ! Lots and lots of time with emery cloth. Originally tried to replicate the brushed effect on the top using emery, but after several goes I wasn't happy with it at all, so have reverted to polishing it. Fairly happy with this result, you can JUST see tiny marks from the key. Think I'll have another hour in it tomorrow but I'm fed up of looking at it today. I've just come in, looked in the mirror, and realised my face is jet black from the polisher ...


New carb rubber mounts in place ...

Go IN you absolute b
d !! The carb was hateful, and just didn't want to go back on.
But I got there !

I'm not convinced I've got the choke cables on the right way round, or routed it the right way. Will have to revisit that ...
Jazoli, thank you !
Mr2Mike, a good tip, however the problem I was having here is that as you can see on the 2nd photo of the yoke, the two mounting tubes for the handle bar stems sit proud of the upper surface of the yoke (and are bonded in, so not removable) ... this means you can't get a smooth, single long "brush" across the top surface.
Sushi, LOL glad you enjoyed
Episode 8 (from previous weekend) : https://www.youtube.com/watch?v=OGeVQjYAEcs
Radiator is in and fully plumbed up. I need to check, but I think that's the cooling system complete and water tight (hopefully, haha !)
Rad surround completed.

I cannot tell you how much time, paint and emery went into this surround until I was happy with it. So many coats of paint rubbed back. I thought I'd cracked it yesterday with a final, perfect coat ... I lifted it up and took it out of the garage door into the strong daylight just to check, and a 2mm spit of rain dropped on it ...
Repainted it today. Damn you OCD, damn you all to hell ...

Mr2Mike, a good tip, however the problem I was having here is that as you can see on the 2nd photo of the yoke, the two mounting tubes for the handle bar stems sit proud of the upper surface of the yoke (and are bonded in, so not removable) ... this means you can't get a smooth, single long "brush" across the top surface.
Sushi, LOL glad you enjoyed
Episode 8 (from previous weekend) : https://www.youtube.com/watch?v=OGeVQjYAEcs
Radiator is in and fully plumbed up. I need to check, but I think that's the cooling system complete and water tight (hopefully, haha !)

Rad surround completed.

I cannot tell you how much time, paint and emery went into this surround until I was happy with it. So many coats of paint rubbed back. I thought I'd cracked it yesterday with a final, perfect coat ... I lifted it up and took it out of the garage door into the strong daylight just to check, and a 2mm spit of rain dropped on it ...
Repainted it today. Damn you OCD, damn you all to hell ...

Sushifiend said:
Quiet day at work, and I've read the whole thread from start to finish. This stuff is more addictive than Breaking Bad!
SF
Unlike Breaking Bad, I didn't wait until the whole thing was over before starting to watch. Now I'm going to have to wait patiently for new episodes. Nevertheless, good work Evil Len!SF
Gassing Station | Biker Banter | Top of Page | What's New | My Stuff