Honda VRX400 1995 "barn find" restoration
Discussion


Thought it was time to get the wheels in. Took off both brake disks. This is the knackered rear.
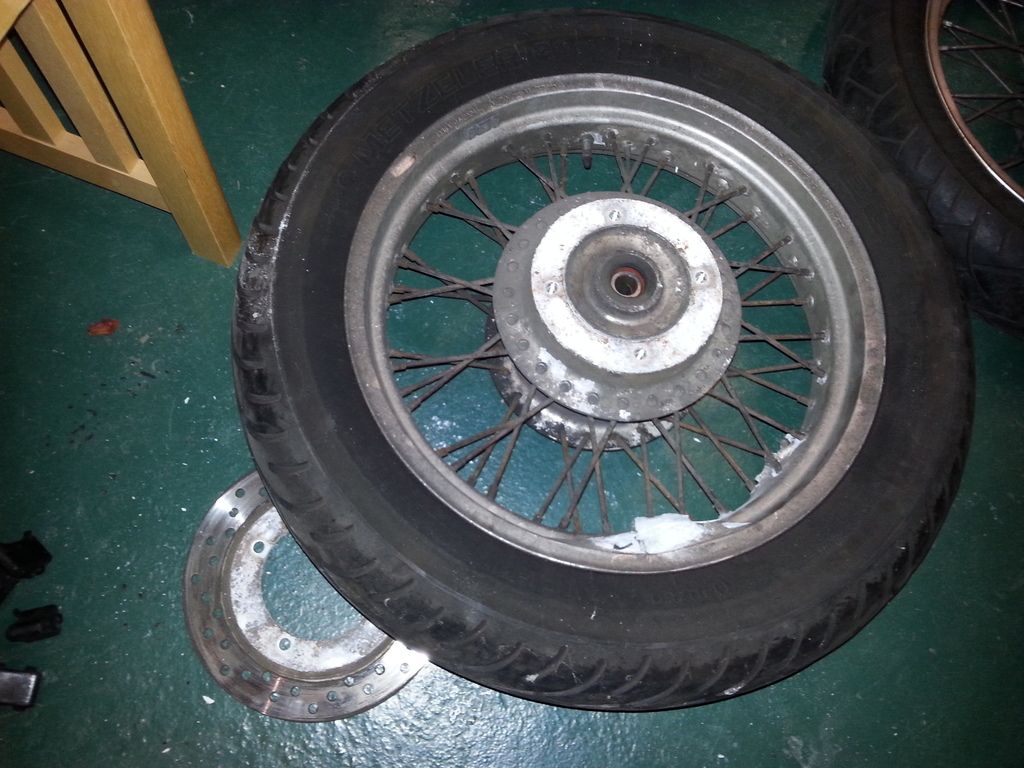
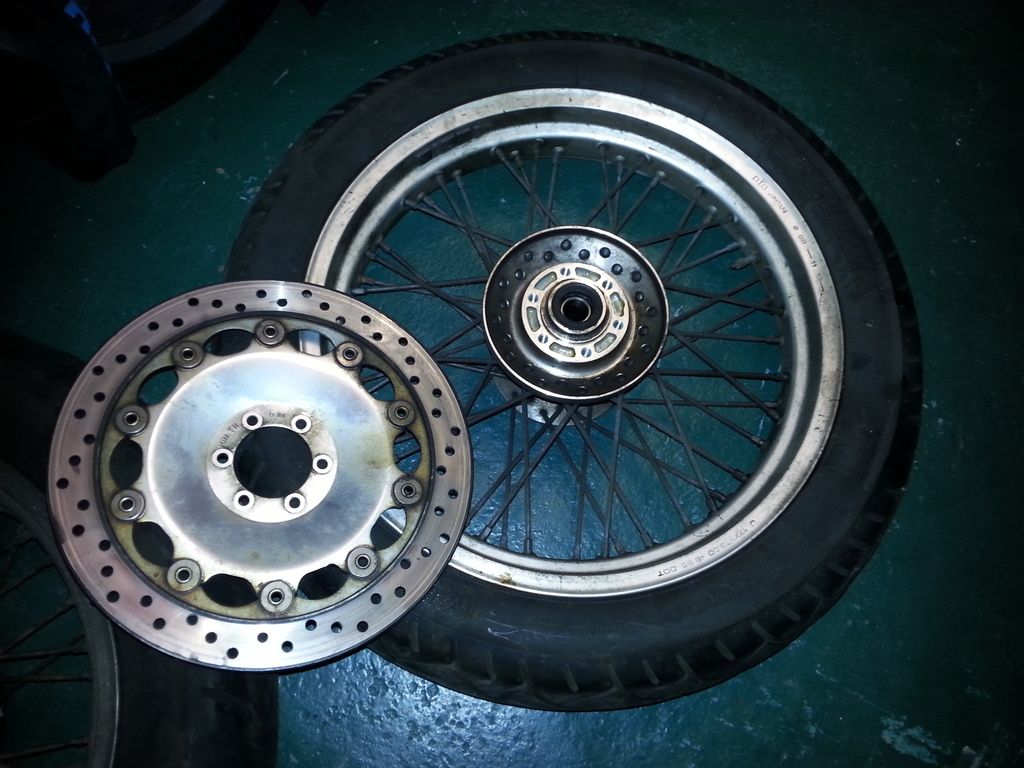
And the better front. Don't know whether to reuse the brake disks, they look in pretty good condition (the front certainly). Might see how much new ones are, might be a daft economy.
Removed the old sprocket. Out fell the cush drive (stupid photobucket rotating my pictures again, grrr).

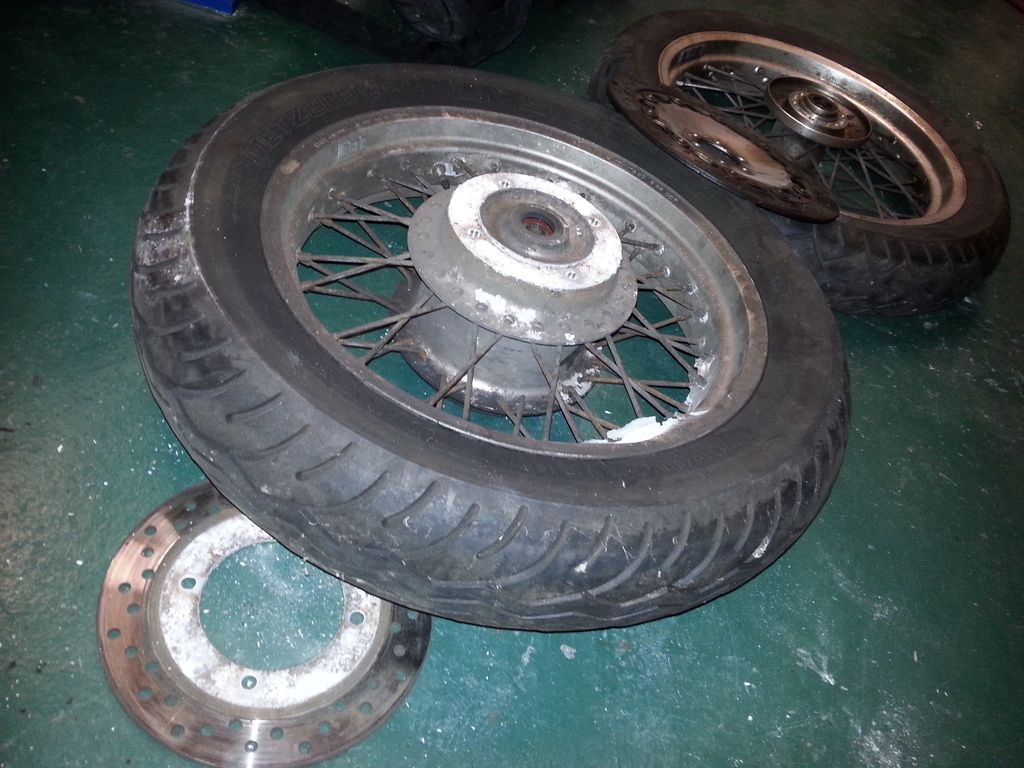
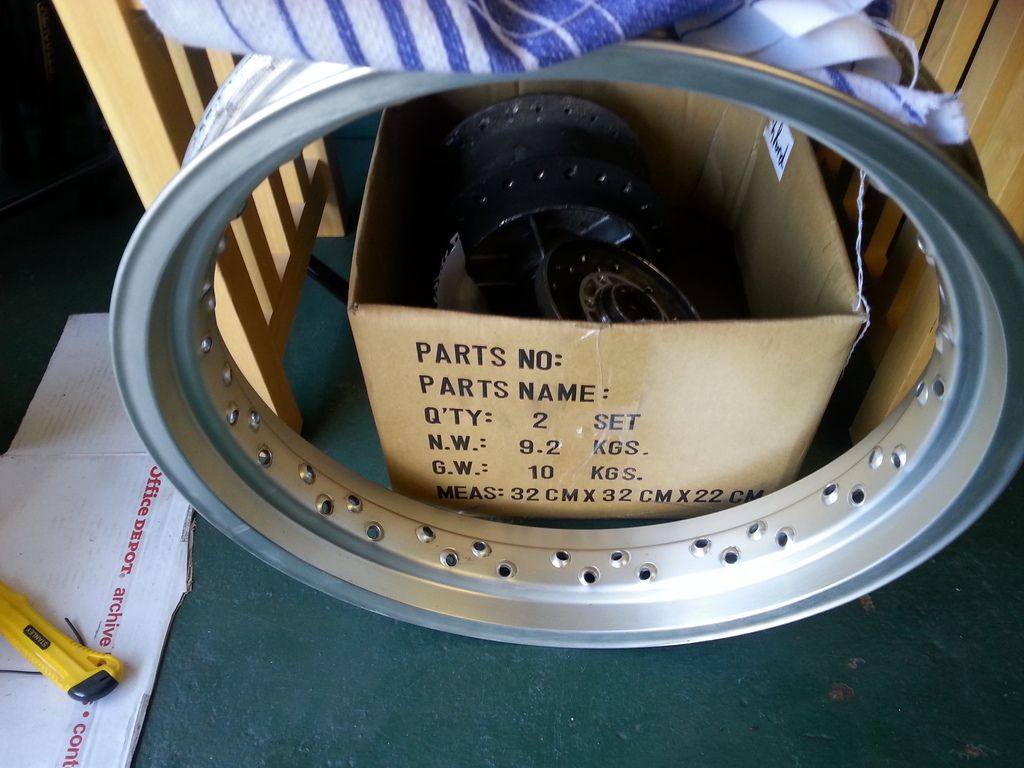
Took them to Central Wheels in Coalshill on Saturday. Here's where the bad news comes in. After some consultation, seems these are a b d size with 48 spokes (lots) ... they don't have and can't get the rims ! So I'm currently investigating either a) getting hold of a s/h rear rim from Japan (wouldn't like to think of the shipping cost of that !) or b) talking to Devon Rims to see if they can custom build me two rims (£££ probably). Watch this space ...
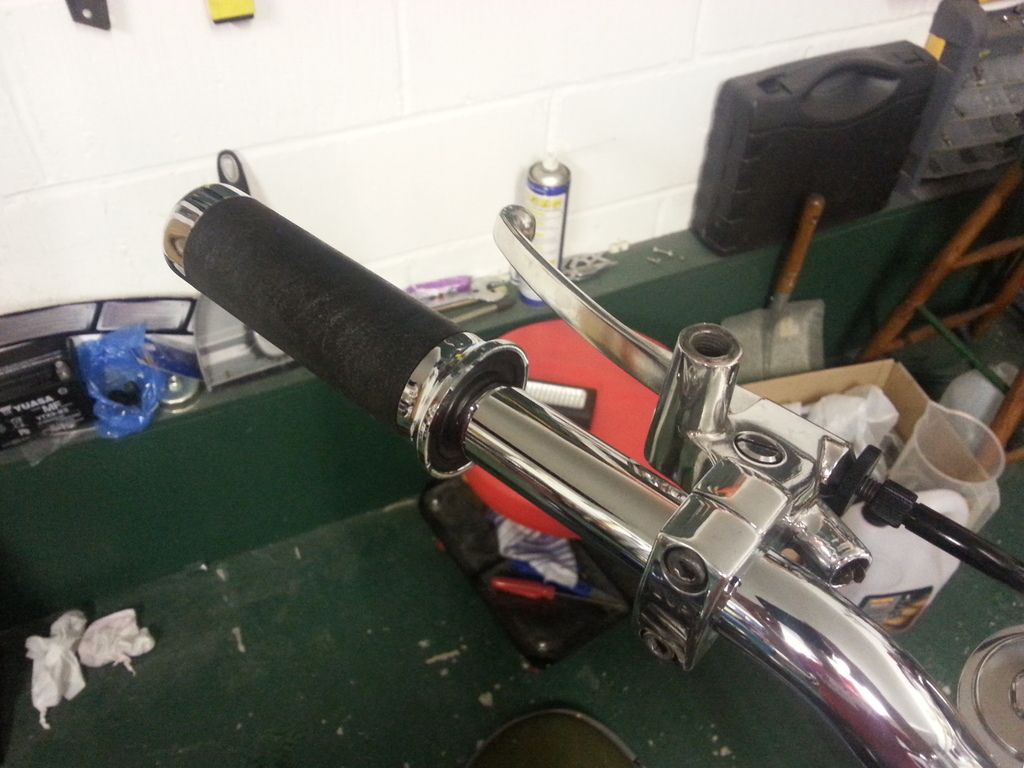
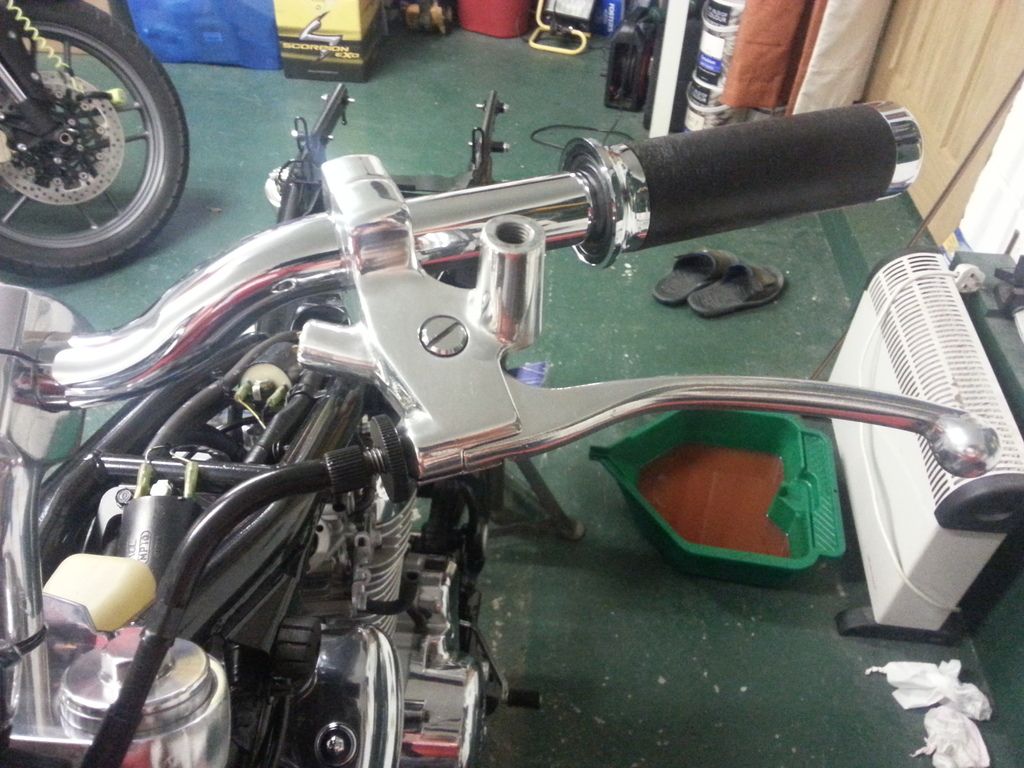
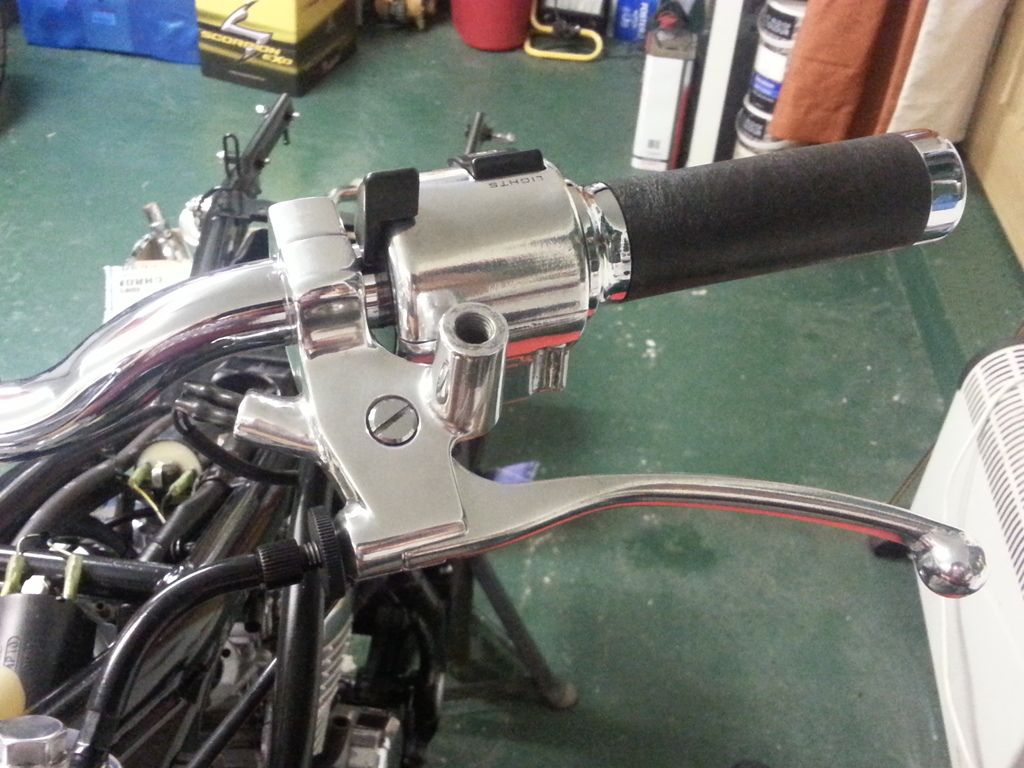
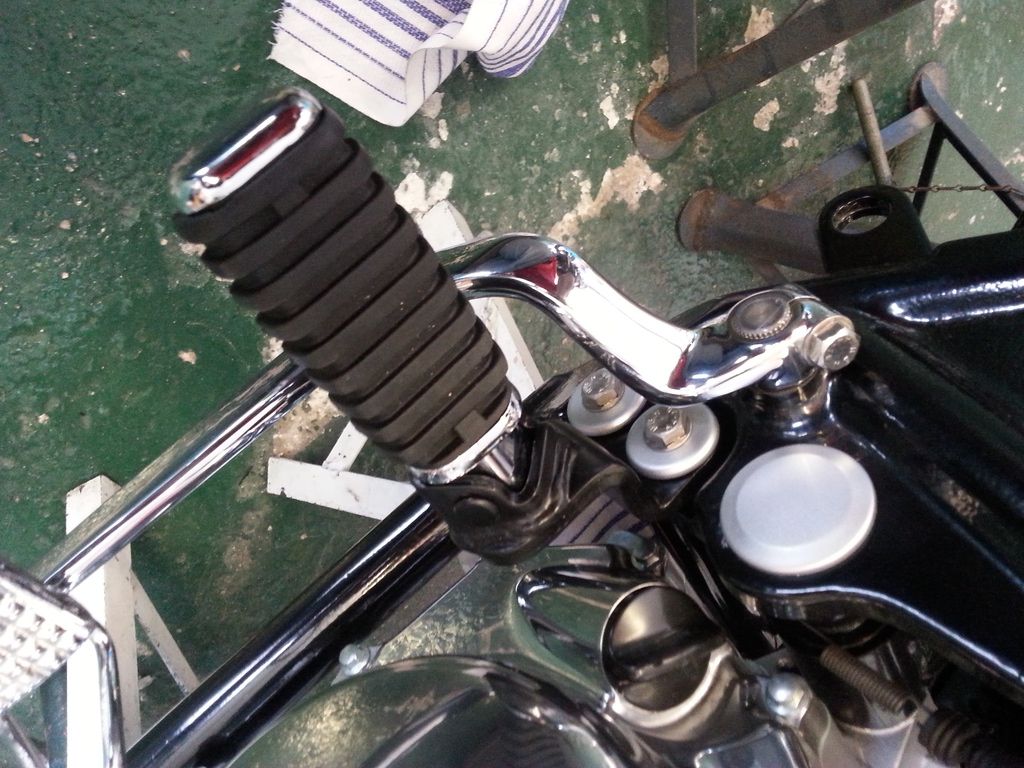
Polished up the clutch lever assembly ... another job that fell into the "this took way longer than it should have" category. Was a while before I was happy with the finish. New lever, cleaned/painted all the small parts, and reassembled with a bit of grease on the pivot. Fitted the new cable which I've had a while ...
... and the other end. I can now operate the clutch
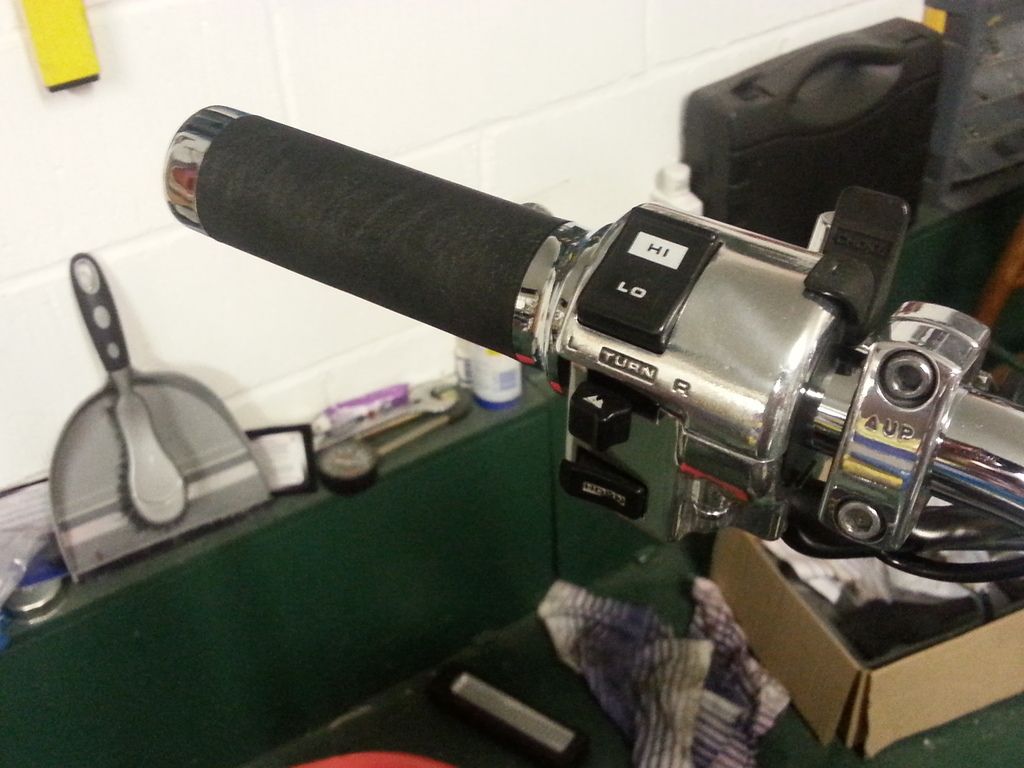
The gap between the grip and the clutch lever is where a switch mounting goes by the way. Those are the correct style grips for the bike.
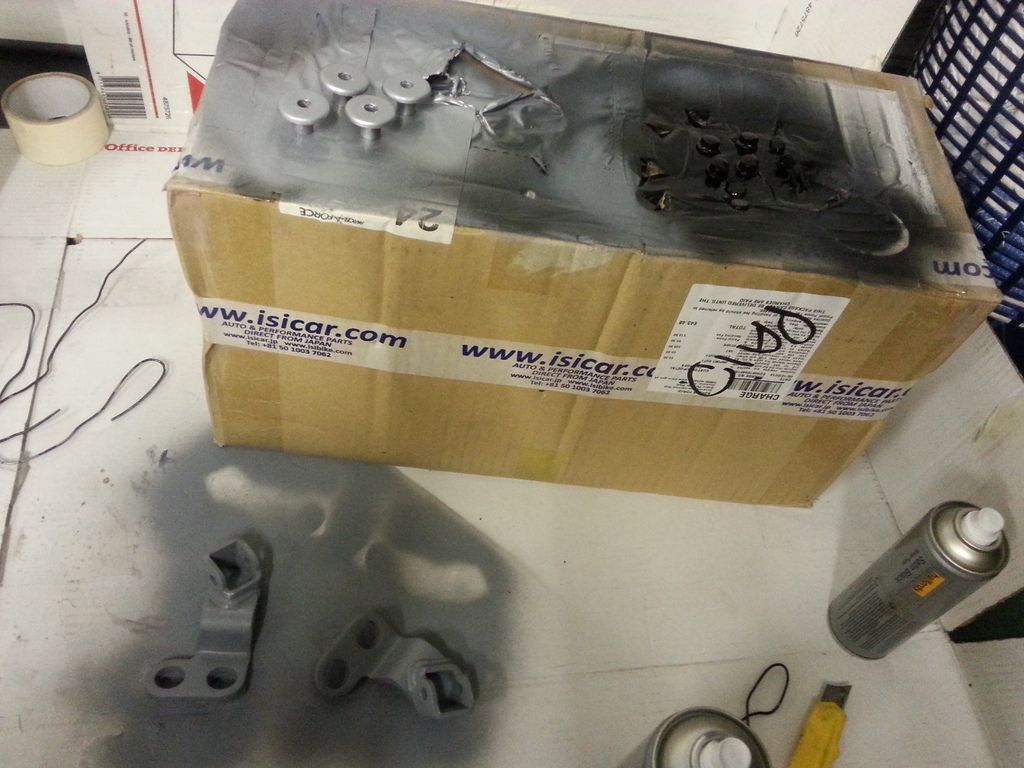
Cleaning up the footpegs. I need to put on at least the right side, as it needs to go on before the exhaust does. Fresh out of the rust killer dip (one bracket still in there, stewing) these will need rubbing down, priming and painting.

And the better front. Don't know whether to reuse the brake disks, they look in pretty good condition (the front certainly). Might see how much new ones are, might be a daft economy.


Removed the old sprocket. Out fell the cush drive (stupid photobucket rotating my pictures again, grrr).

Took them to Central Wheels in Coalshill on Saturday. Here's where the bad news comes in. After some consultation, seems these are a b
d size with 48 spokes (lots) ... they don't have and can't get the rims ! So I'm currently investigating either a) getting hold of a s/h rear rim from Japan (wouldn't like to think of the shipping cost of that !) or b) talking to Devon Rims to see if they can custom build me two rims (£££ probably). Watch this space ...Polished up the clutch lever assembly ... another job that fell into the "this took way longer than it should have" category. Was a while before I was happy with the finish. New lever, cleaned/painted all the small parts, and reassembled with a bit of grease on the pivot. Fitted the new cable which I've had a while ...

... and the other end. I can now operate the clutch

The gap between the grip and the clutch lever is where a switch mounting goes by the way. Those are the correct style grips for the bike.

Cleaning up the footpegs. I need to put on at least the right side, as it needs to go on before the exhaust does. Fresh out of the rust killer dip (one bracket still in there, stewing) these will need rubbing down, priming and painting.

So, latest is that Devon Rims can do the 3.5 rear, but can't do the 3.0 front. And each rim would cost £300 even if they could ! So I'm in the process of buying a s/hand whole wheel from Japan, that will cost me £40 for the wheel and £100 to ship ! (plus landing taxes) Then I'm going to clean/polish up both rims, if needs be get them re-anodised, and use the best rear hub out of the two.
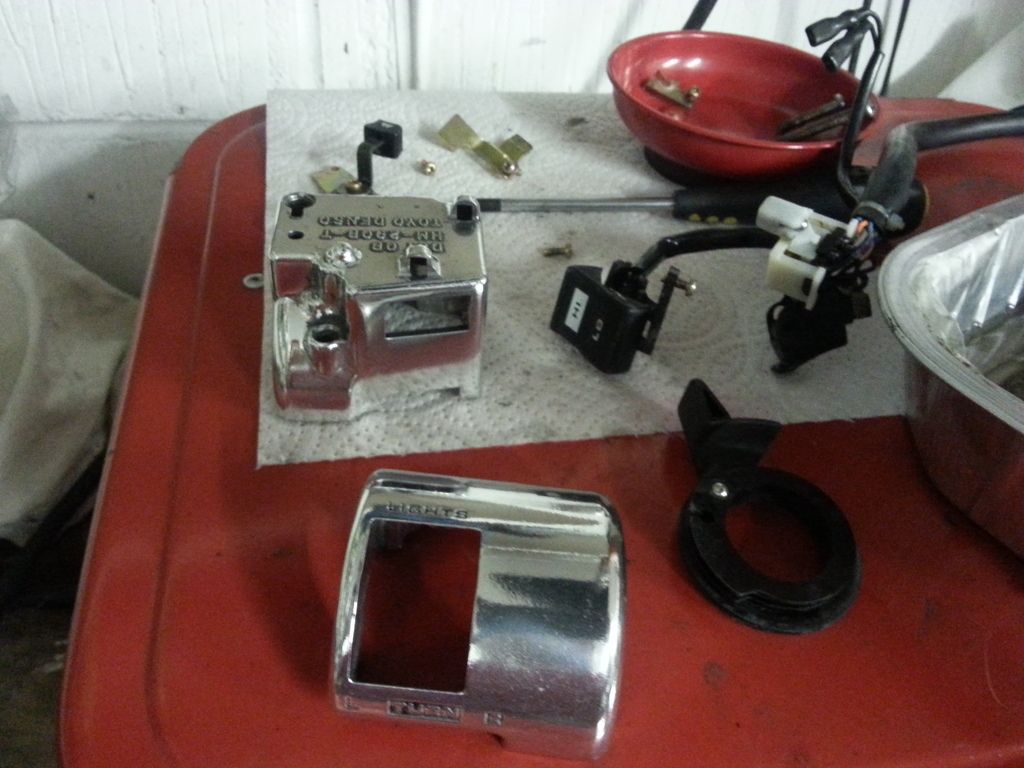
Taking apart and cleaning up the left hand switch gear (which has the choke on) ... dull housing, and full of crap ...
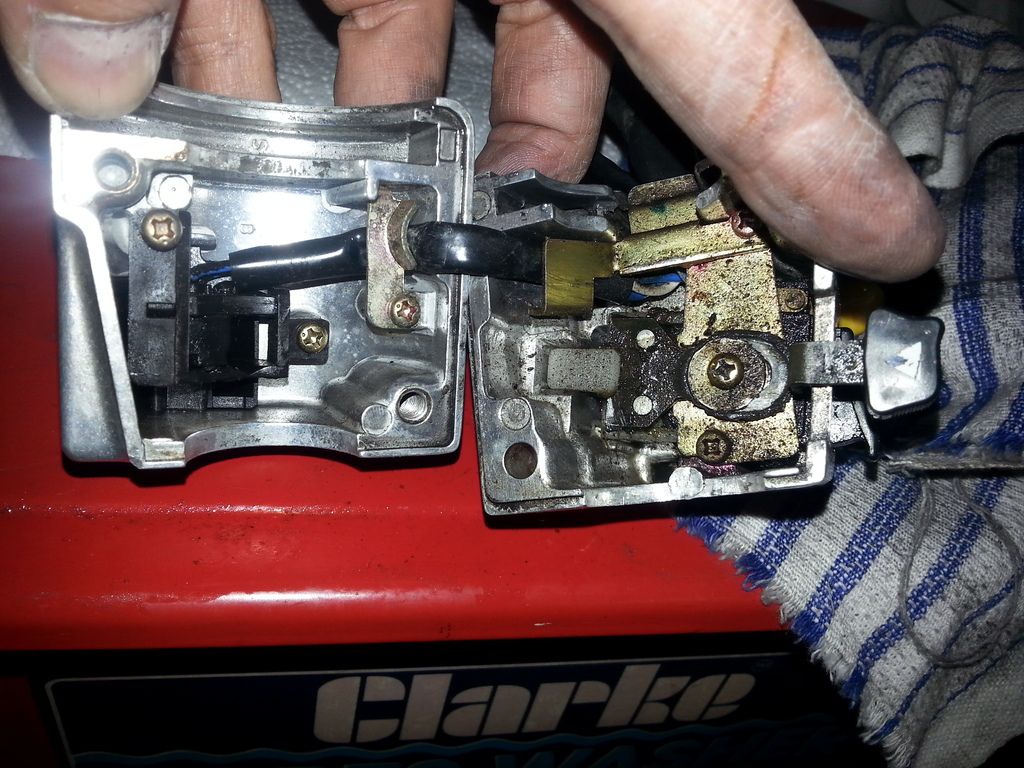
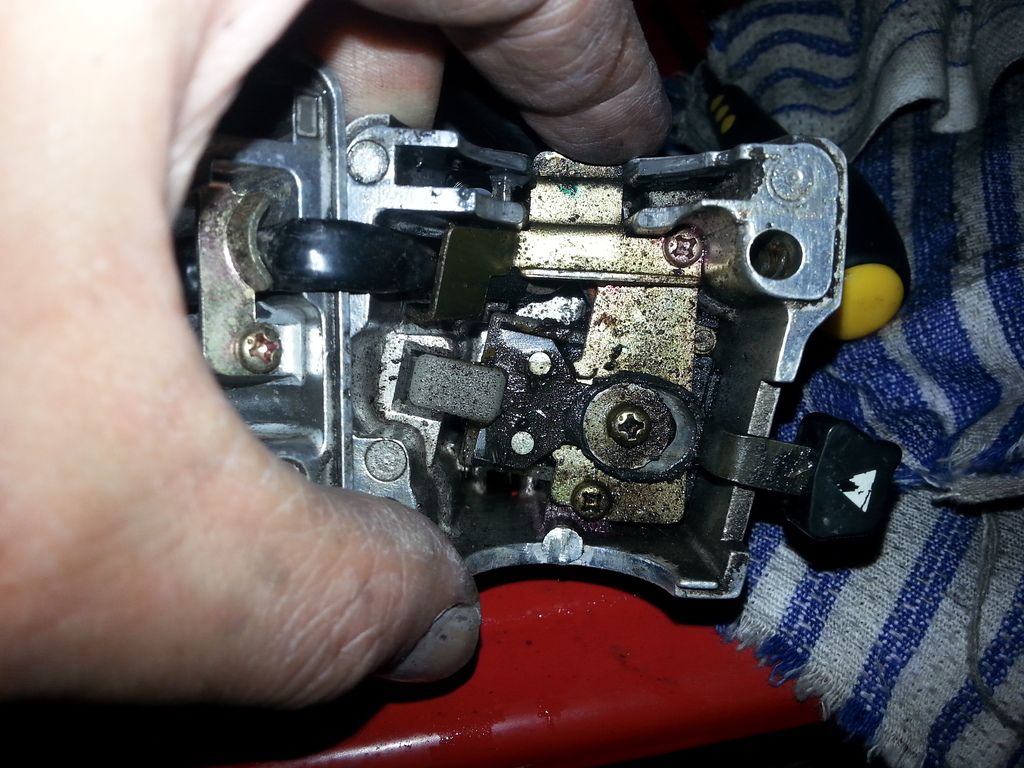
All disassembled so I can do this properly ... cleaned everything out with white spirit, polished up the alloy casings, and cleaned all the electrical switches with contact cleaner. The above photos were taken so I could remember how it all goes back together ! (small fiddly screws)
Rust killed and painting up the footrests
In other news I've (hopefully) fixed the coolant leak ... turns out the lower water pump bolt doubles as the coolant drain, and I hadn't sealed it properly. Refilled, and managed to over fill, meaning I lobbed coolant all down the side of the engine, radiator, frame etc. Pillock. All cleaned up now though. This all took a fair amount of time, and I have nothing to show you photo wise !
Taking apart and cleaning up the left hand switch gear (which has the choke on) ... dull housing, and full of crap ...


All disassembled so I can do this properly ... cleaned everything out with white spirit, polished up the alloy casings, and cleaned all the electrical switches with contact cleaner. The above photos were taken so I could remember how it all goes back together ! (small fiddly screws)

Rust killed and painting up the footrests

In other news I've (hopefully) fixed the coolant leak ... turns out the lower water pump bolt doubles as the coolant drain, and I hadn't sealed it properly. Refilled, and managed to over fill, meaning I lobbed coolant all down the side of the engine, radiator, frame etc. Pillock. All cleaned up now though. This all took a fair amount of time, and I have nothing to show you photo wise !
evil len said:
So, latest is that Devon Rims can do the 3.5 rear, but can't do the 3.0 front. And each rim would cost £300 even if they could ! So I'm in the process of buying a s/hand whole wheel from Japan, that will cost me £40 for the wheel and £100 to ship ! (plus landing taxes) Then I'm going to clean/polish up both rims, if needs be get them re-anodised, and use the best rear hub out of the two.
...sounds like a very good plan....lovely work as always mate, the devil is in the detail as they say.Yes, it's all about the bass detail.
This bike has been fking me right off tonight ... all I seem to have done is take off things I've already put on !
Put the left switch gear back together. I then noticed that this cable needs to go UNDER the copper bracket/cable guide, so had to take it apart again. Looks better though doesn't it ? I now know how an indicator switch works.
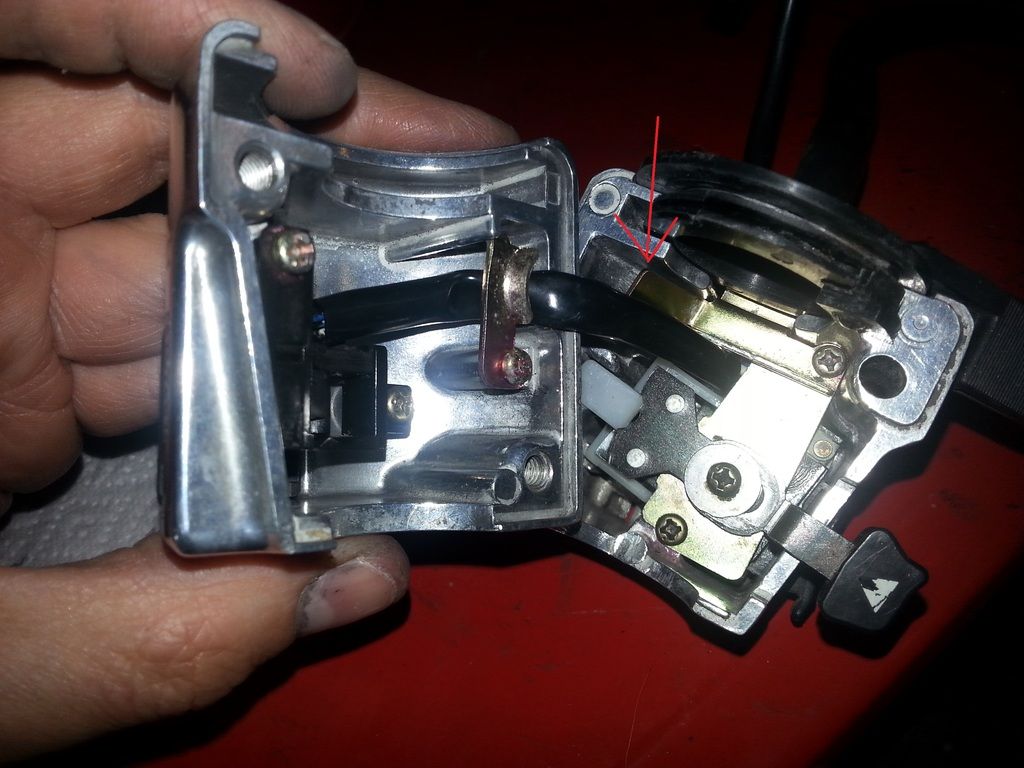
Attached the choke cable to the rotary thumb control ... then noticed that this is circular ... I should have put it on the handlebars BEFORE the hand grip. Tried to remove the hand grip, no chance ! It's well and truly stuck on now. So I had to remove the clutch lever housing and take off the handlebars, and thread the left switch gear on from the right of the handlebars, then reattach the handlebars and clutch lever.
It was only when taking this shot that I realised I'd crossed the clutch and choke control cables ! So off came the clutch housing again to untangle them. Cock buggering bks, on off on off this is getting tiresome now !
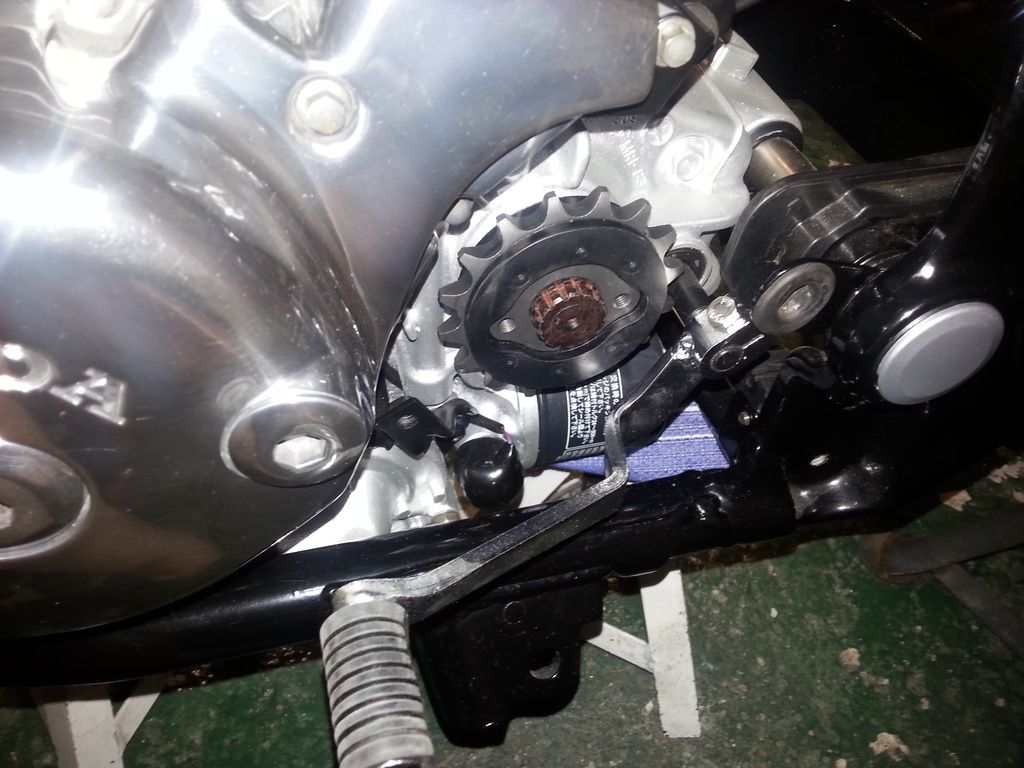
Front sprocket and some fuel lines arrived today. To get the sprocket on, I had to remove the gear lever ... then put it back on again. Sigh.
Must dig out the retaining bracket and bolts (and clean, derust, paint)
But in good news, connected the battery and the horn and clock backlight work !
This bike has been f
king me right off tonight ... all I seem to have done is take off things I've already put on !Put the left switch gear back together. I then noticed that this cable needs to go UNDER the copper bracket/cable guide, so had to take it apart again. Looks better though doesn't it ? I now know how an indicator switch works.

Attached the choke cable to the rotary thumb control ... then noticed that this is circular ... I should have put it on the handlebars BEFORE the hand grip. Tried to remove the hand grip, no chance ! It's well and truly stuck on now. So I had to remove the clutch lever housing and take off the handlebars, and thread the left switch gear on from the right of the handlebars, then reattach the handlebars and clutch lever.


It was only when taking this shot that I realised I'd crossed the clutch and choke control cables ! So off came the clutch housing again to untangle them. Cock buggering b
ks, on off on off this is getting tiresome now !
Front sprocket and some fuel lines arrived today. To get the sprocket on, I had to remove the gear lever ... then put it back on again. Sigh.
Must dig out the retaining bracket and bolts (and clean, derust, paint)

But in good news, connected the battery and the horn and clock backlight work !
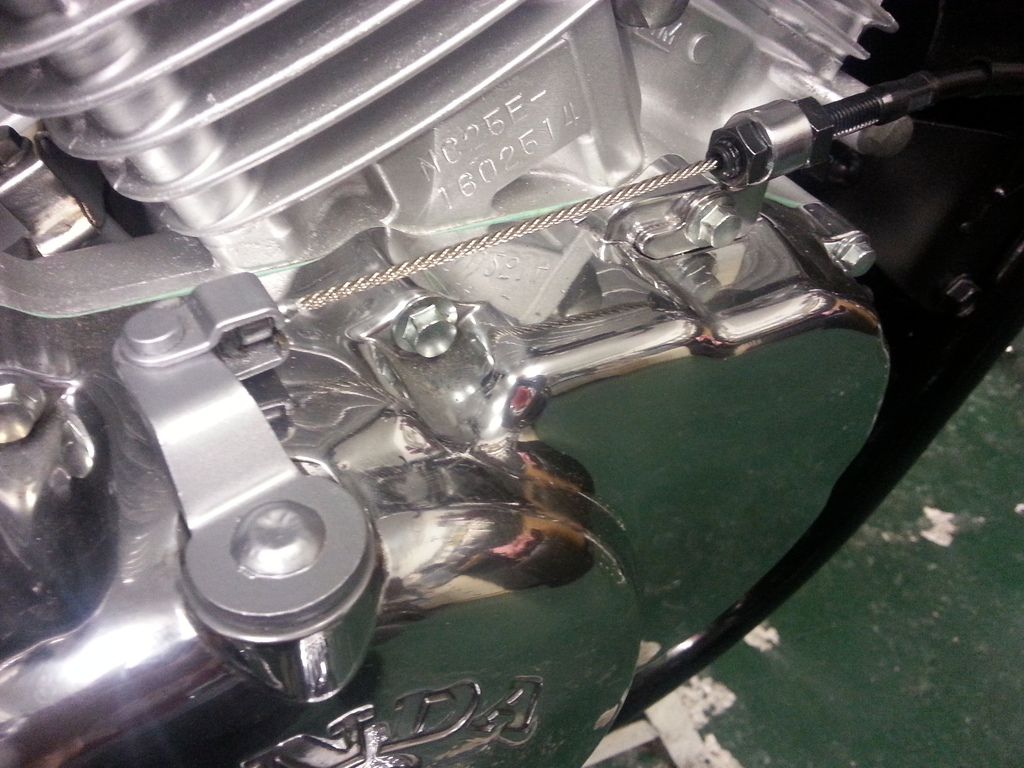
HELP ! CAN ANYONE READ JAPANESE ?
I'm trying to figure out what this rubber hose is .. I *THINK* it just vents to the atmosphere, but as this is the carb I want to be sure (I don't want it spitting fuel everywhere !) Can anyone tell me if this just does vent to atmos or can read this text ? Ta in advance ...
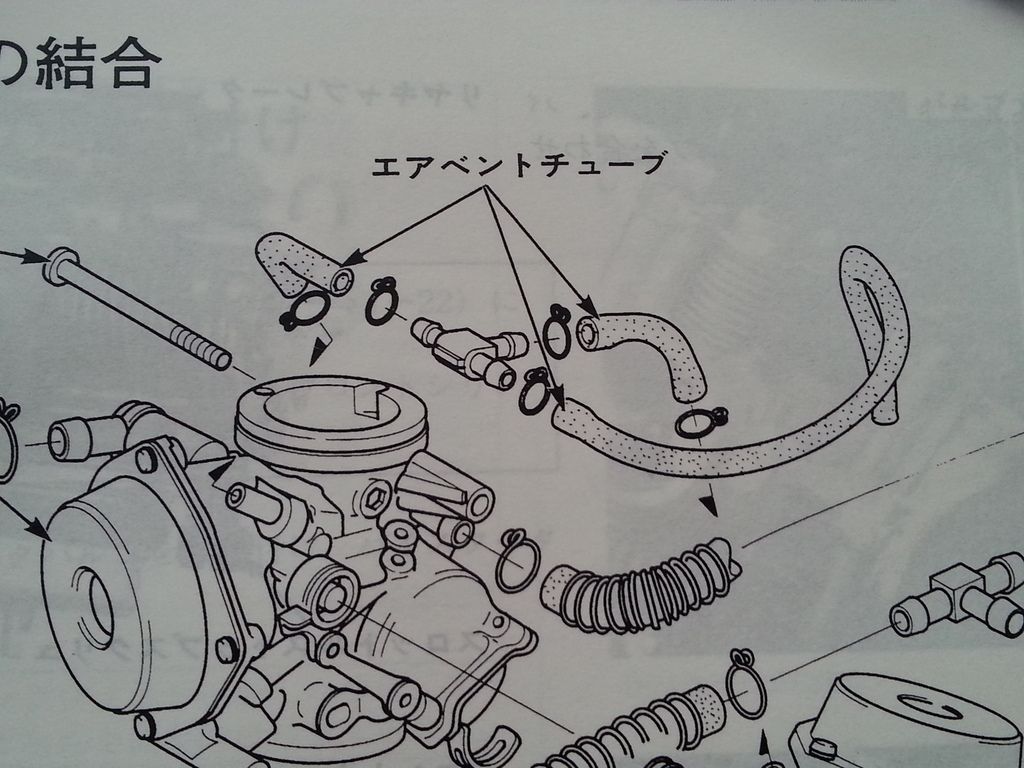
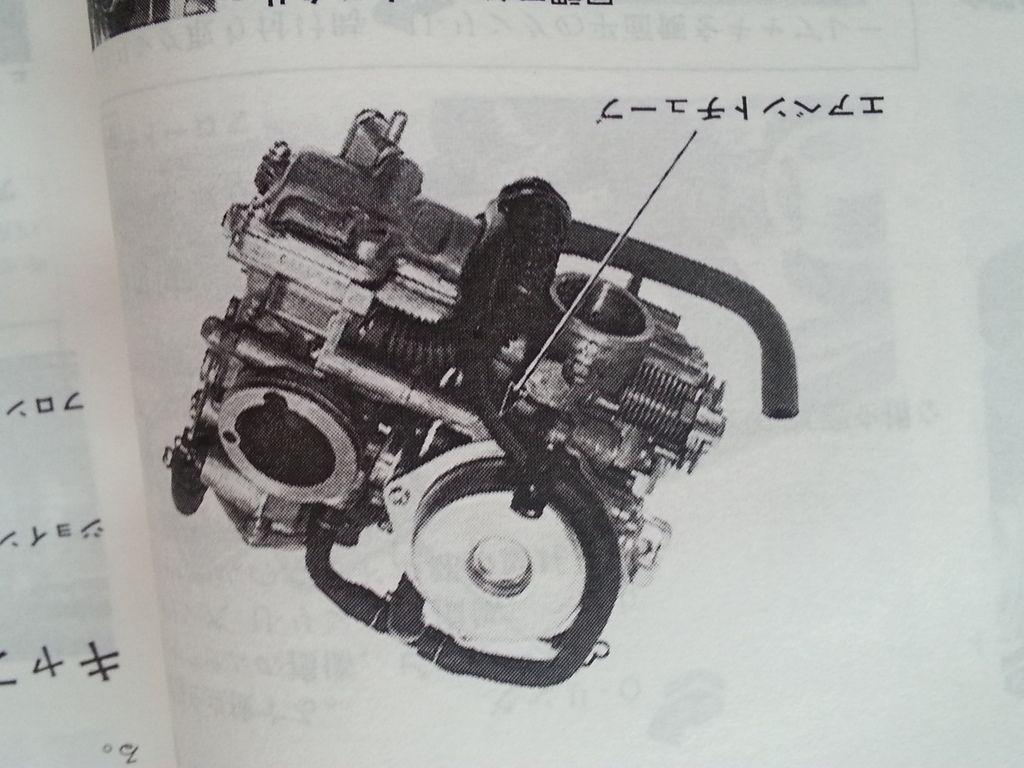

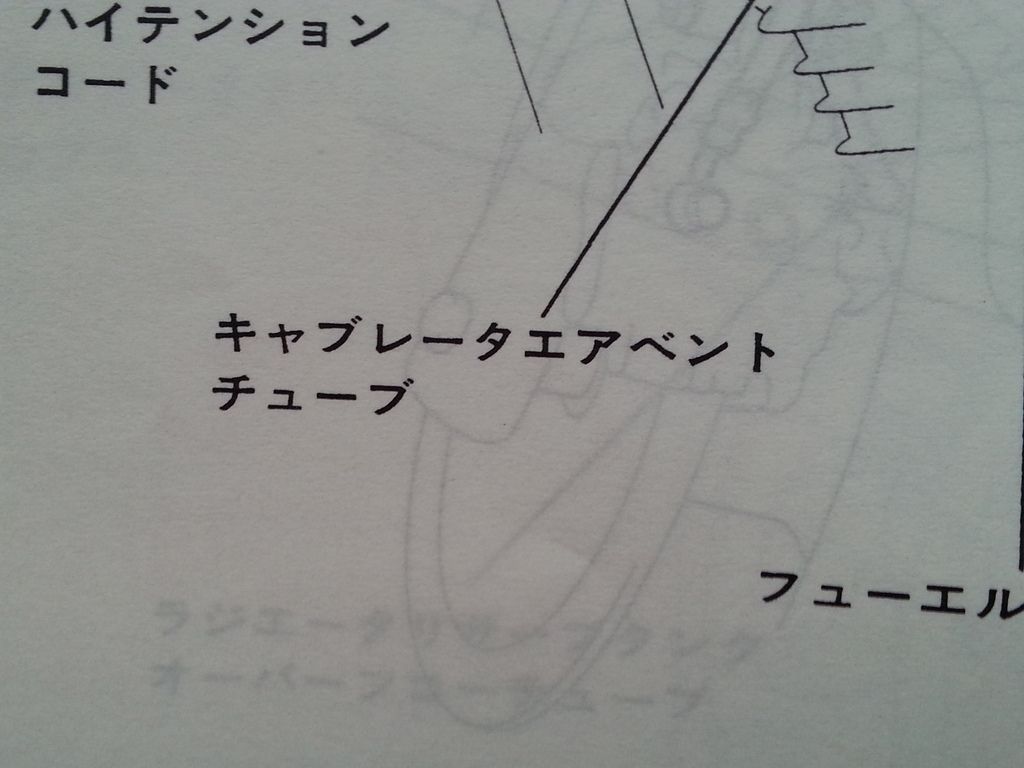
I'm trying to figure out what this rubber hose is .. I *THINK* it just vents to the atmosphere, but as this is the carb I want to be sure (I don't want it spitting fuel everywhere !) Can anyone tell me if this just does vent to atmos or can read this text ? Ta in advance ...


Edited by evil len on Sunday 5th July 21:31


Have bought in an online auction this rear wheel, just got to wait for it to arrive. Hope the rim is an as good condition as the photo shows. £50 for the wheel ... £100 to ship it !
(while the link lasts ... http://auctions.isibike.com/?aId=x369503424)
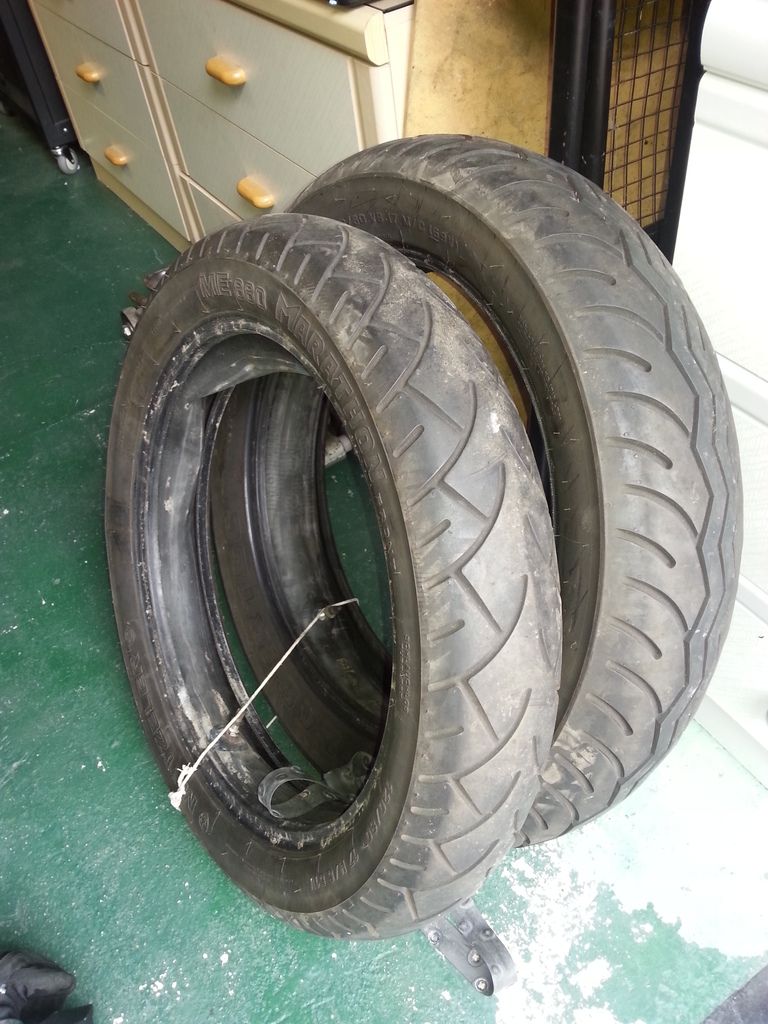
Got the wheels temporarily back from Central Wheel, they've removed the tyres and cut the spokes for me. Interestingly, the damage to the rear wheel didn't go all the way through the rim, so my idea of it hitting a pothole and breaking the wheel is wrong. Wonder if it was sat in water for a while, causing it to delaminate. Central Wheels say I could re-use these tyres, but for the £200 it will cost for new ones I don't think I'll risk it (they've been sat for at least 5 years remember)
This is the front rim. Not actually in all that bad condition ...
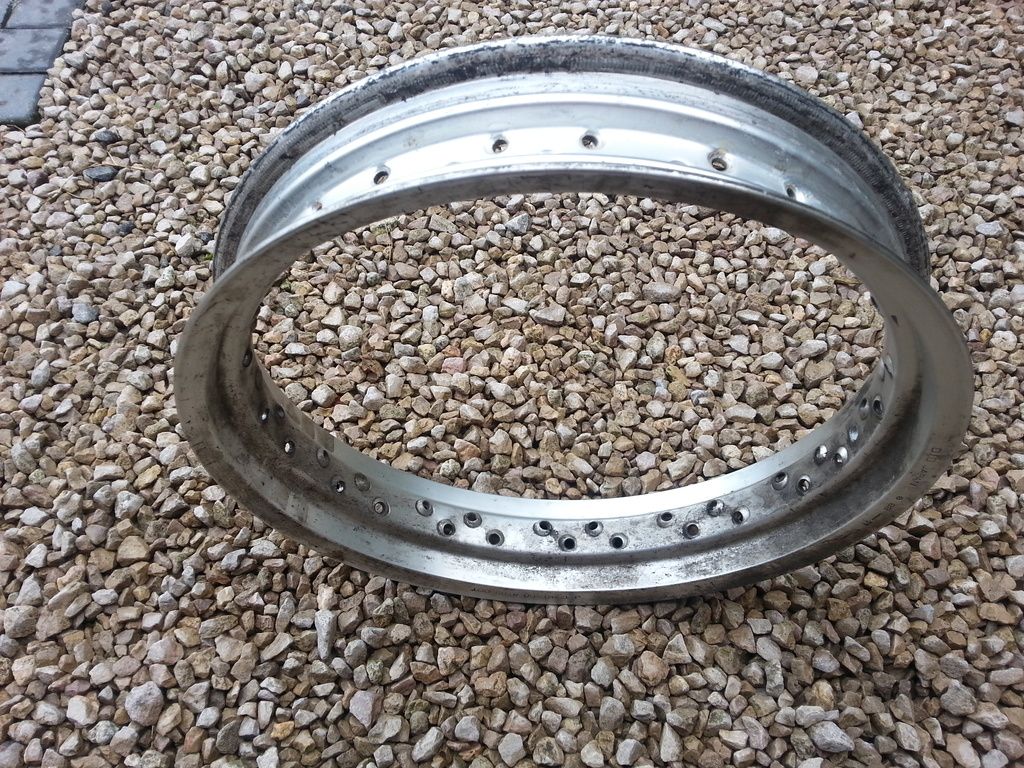
... especially when you give it a bit of a wipe over with white spirits.

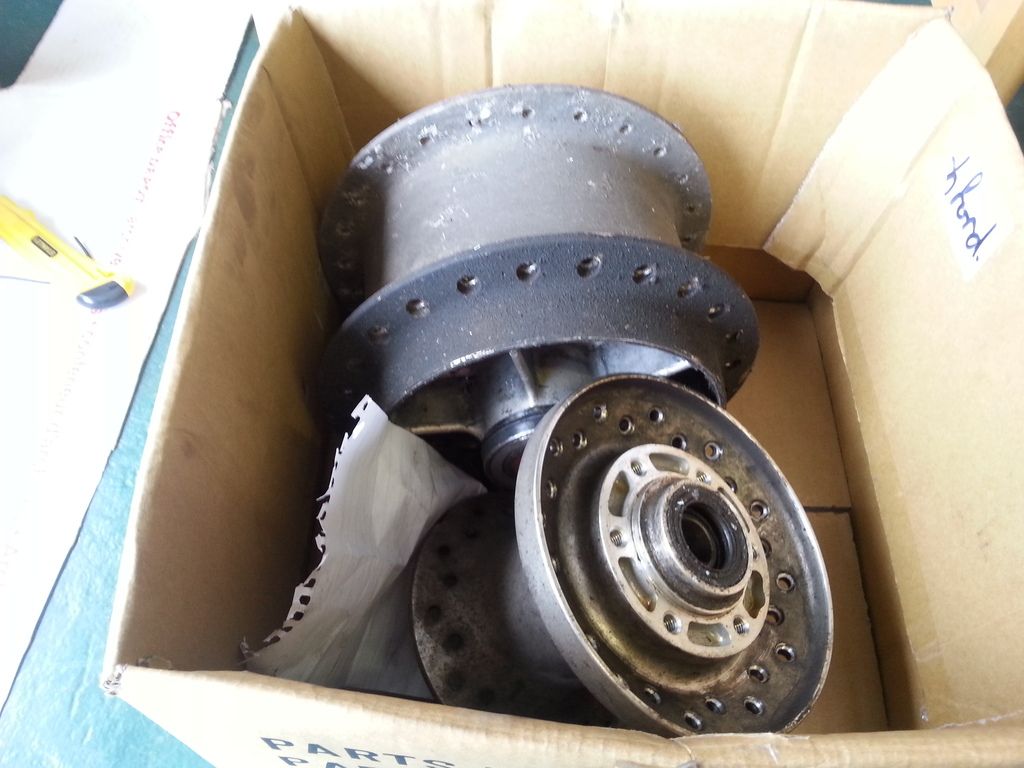
Here's both hubs. If the rear from Japan is in better condition when it arrives, I'll use that instead.
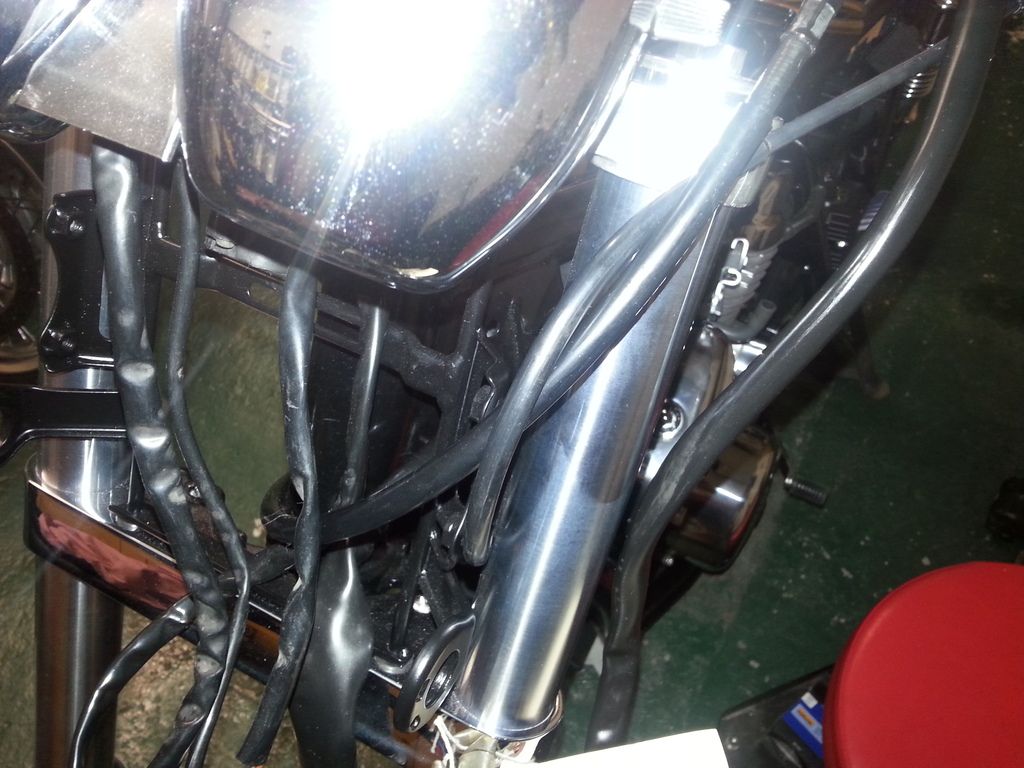
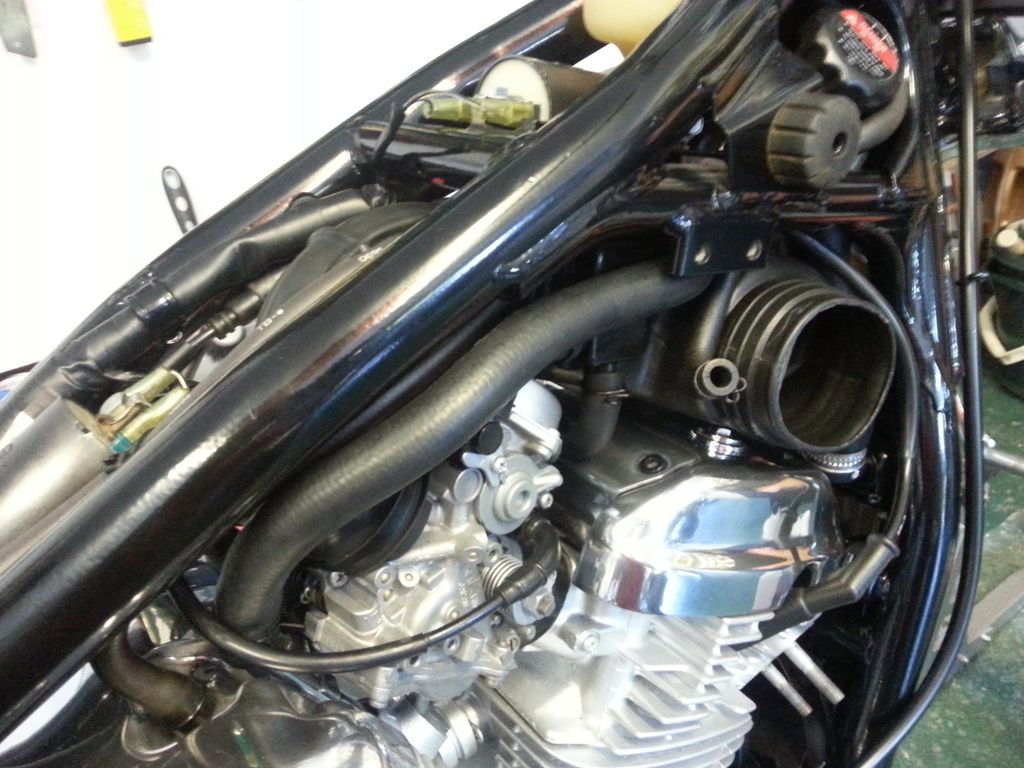
Fitted the air box. Fiddly wee bd, REALLY hard to fit the two pipes to the carb intakes, of which you can see one of here (the 'ribbed' tube top left, going down to the inlet (it's kinda banana shaped))
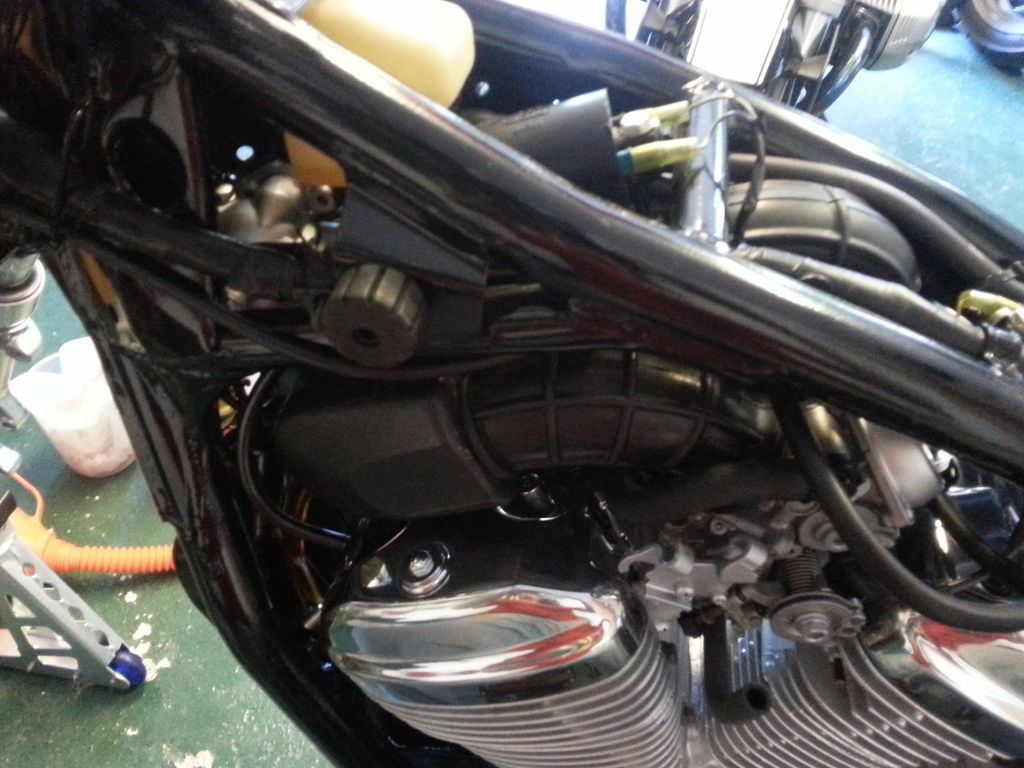
Here's the airbox from the other side (just below the tank mounting rubber) and you can see both ribbed ("for her pleasure") air tubes. The tube bottom right is the aforementioned air vent ...
The front rim did clean up pretty well, but it's not quite good enough to use in the flesh (the photo flatters). Saw what Central Wheel can do in terms of powder coating and it's impressive, so I'll probably go for that ... satin silver ... though they had some customer wheels in, with rims and hubs in gloss black with "black chrome" spokes, VERY nice ... very tempting ...
(while the link lasts ... http://auctions.isibike.com/?aId=x369503424)
Got the wheels temporarily back from Central Wheel, they've removed the tyres and cut the spokes for me. Interestingly, the damage to the rear wheel didn't go all the way through the rim, so my idea of it hitting a pothole and breaking the wheel is wrong. Wonder if it was sat in water for a while, causing it to delaminate. Central Wheels say I could re-use these tyres, but for the £200 it will cost for new ones I don't think I'll risk it (they've been sat for at least 5 years remember)

This is the front rim. Not actually in all that bad condition ...

... especially when you give it a bit of a wipe over with white spirits.

Here's both hubs. If the rear from Japan is in better condition when it arrives, I'll use that instead.

Fitted the air box. Fiddly wee b
d, REALLY hard to fit the two pipes to the carb intakes, of which you can see one of here (the 'ribbed' tube top left, going down to the inlet (it's kinda banana shaped))
Here's the airbox from the other side (just below the tank mounting rubber) and you can see both ribbed ("for her pleasure") air tubes. The tube bottom right is the aforementioned air vent ...

The front rim did clean up pretty well, but it's not quite good enough to use in the flesh (the photo flatters). Saw what Central Wheel can do in terms of powder coating and it's impressive, so I'll probably go for that ... satin silver ... though they had some customer wheels in, with rims and hubs in gloss black with "black chrome" spokes, VERY nice ... very tempting ...

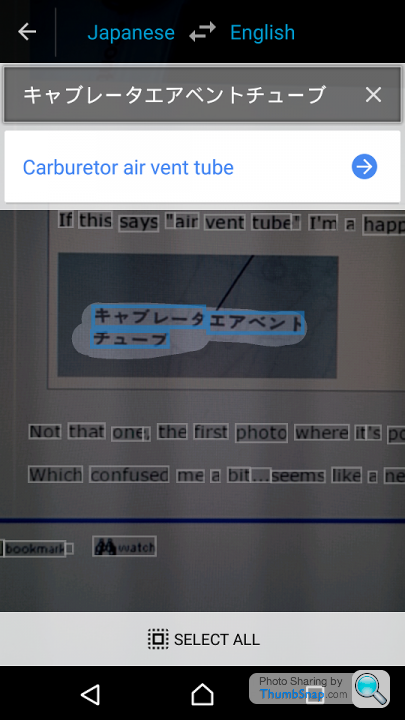
Well I'll be, I didn't even know such things existed ! Have downloaded an app, thanks Sushifiend that'll make things easier !
Footrests ... these took WAY longer than they should have. Cleaning up, derusting and painting wasn't the hard part, just something I'm getting used to doing now (over, and over, and over again on different parts). Reassembly was a female dog though. Like most footrests, they hinge up out of harms way.
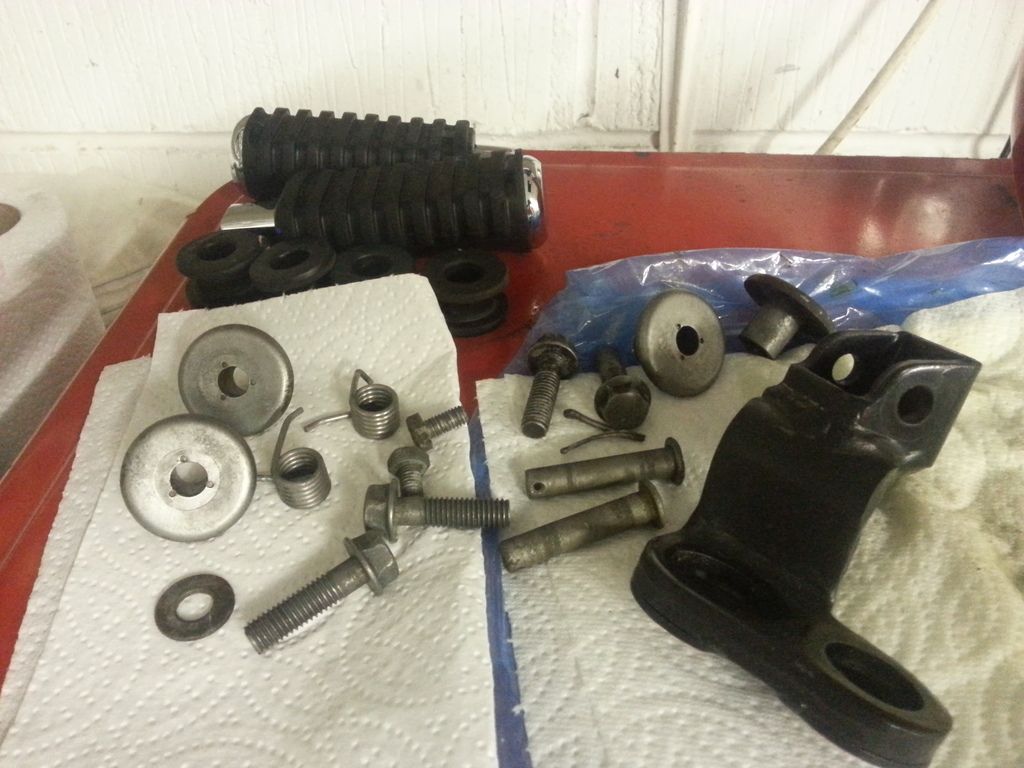
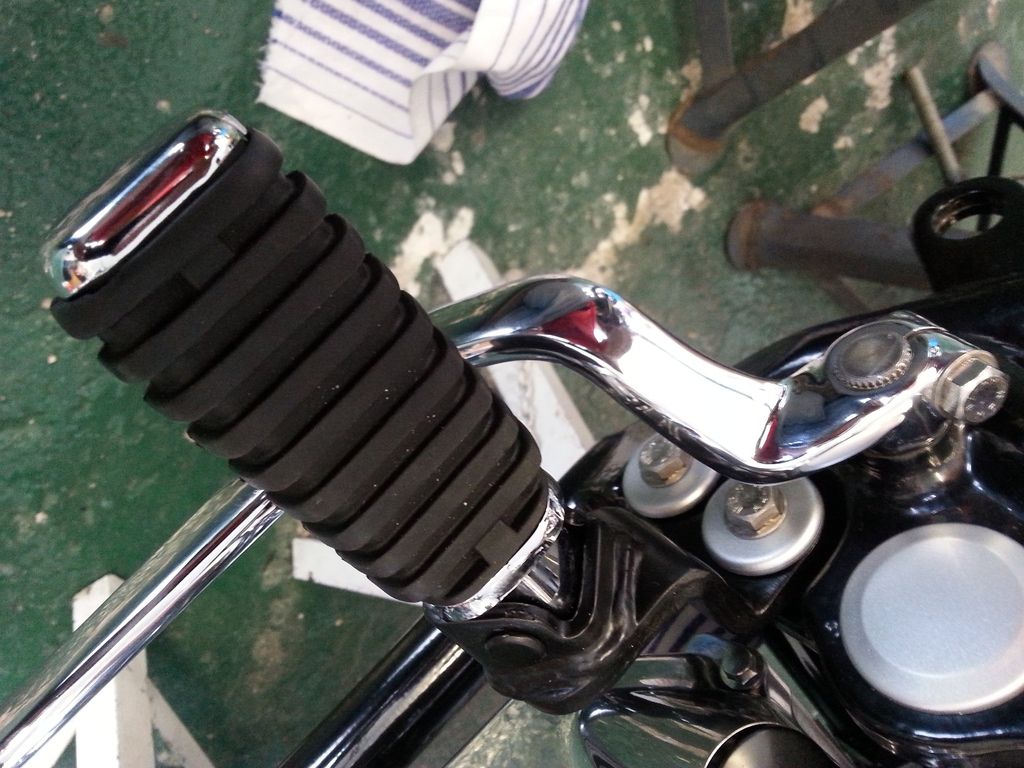
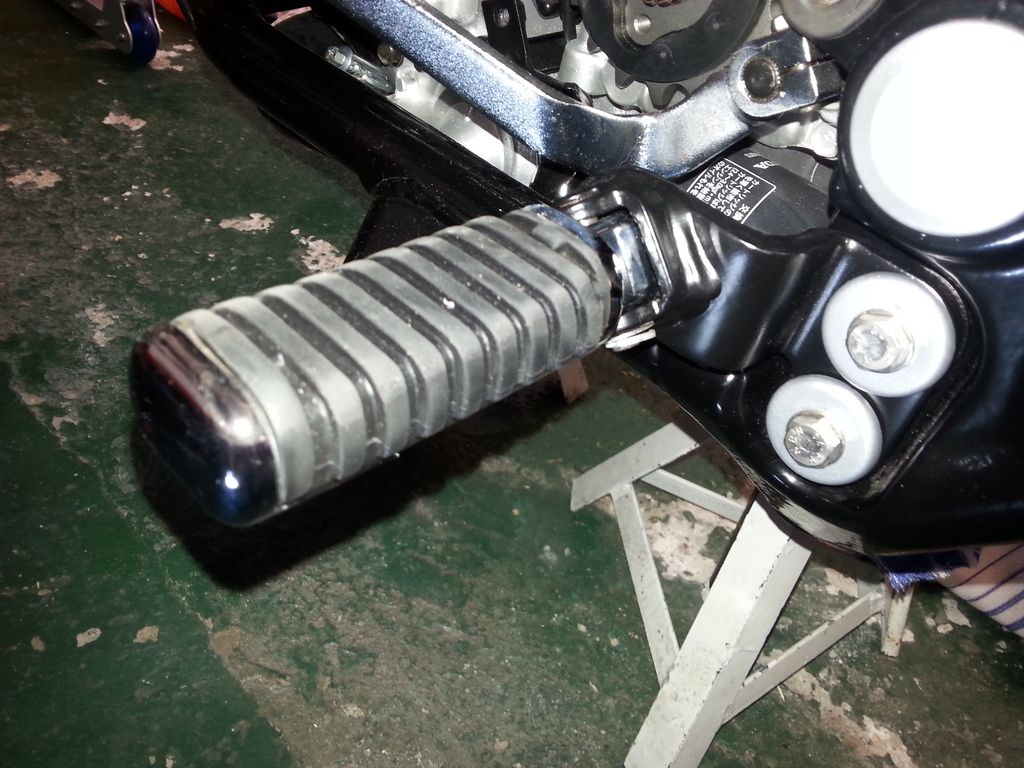
There's a pivot pin, which holds the bracket and the chromed foot rest together. Buried in the middle of all that (and "inside" the footrest part) is a coiled spring, with two different ends ... here's a 'before' shot I took upon disassembly so you can see what I mean.
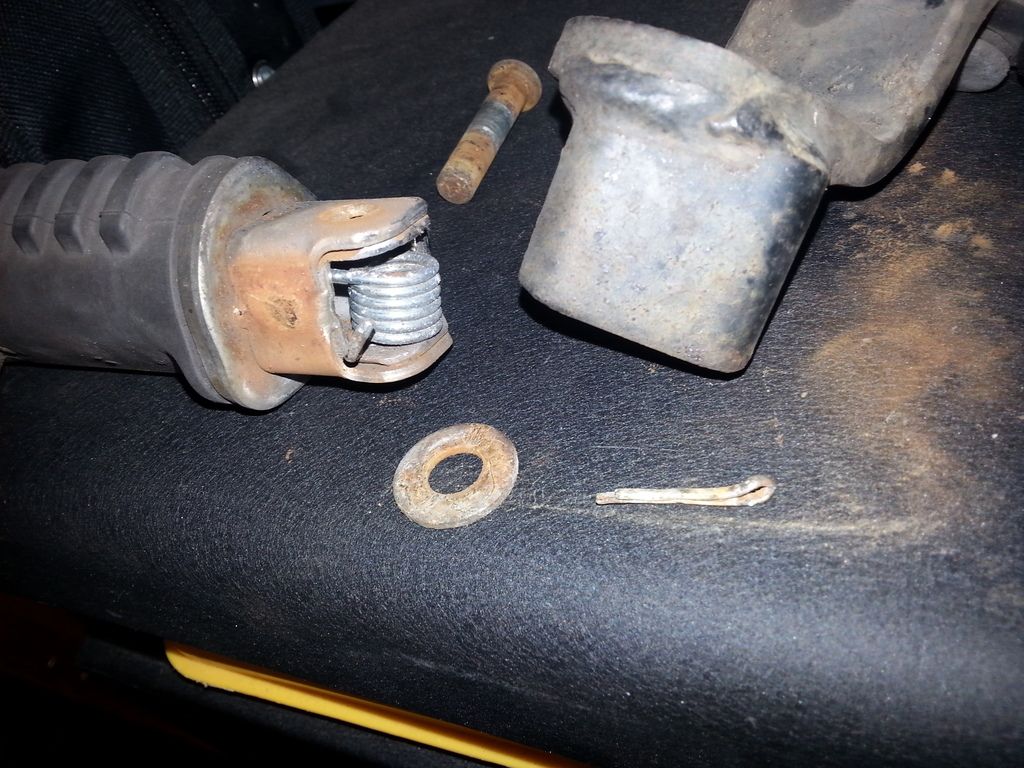
Well ... what an absolute ducker to put back together ! I must have done this 20-30 time in total. Getting the spring the right way round (my 'before' shot wasn't quite useful enough to figure out how the spring went) and it actually working so it pushed the footrest back down was impossible. So many times I put it together, lifted it up ... and it jammed solid. Or just wouldn't push up. Or just wouldn't go together. I ended up damaging the paint of the bracket several times, meaning I had to repaint it.
But here's the final article. Disproportionate time consumed for a 'simple' part.
Footrests ... these took WAY longer than they should have. Cleaning up, derusting and painting wasn't the hard part, just something I'm getting used to doing now (over, and over, and over again on different parts). Reassembly was a female dog though. Like most footrests, they hinge up out of harms way.
There's a pivot pin, which holds the bracket and the chromed foot rest together. Buried in the middle of all that (and "inside" the footrest part) is a coiled spring, with two different ends ... here's a 'before' shot I took upon disassembly so you can see what I mean.

Well ... what an absolute ducker to put back together ! I must have done this 20-30 time in total. Getting the spring the right way round (my 'before' shot wasn't quite useful enough to figure out how the spring went) and it actually working so it pushed the footrest back down was impossible. So many times I put it together, lifted it up ... and it jammed solid. Or just wouldn't push up. Or just wouldn't go together. I ended up damaging the paint of the bracket several times, meaning I had to repaint it.
But here's the final article. Disproportionate time consumed for a 'simple' part.


Gassing Station | Biker Banter | Top of Page | What's New | My Stuff