Replacing part of wiring loom?
Discussion


I've got a minor rodent problem - the little ***ts have been having a go at the wiring loom on my pickup. Most annoyingly they've been munching right near the bulkhead, so there's no room to pull wires either way to fix them.
So is there an easy solution for splicing in a bit of new loom? I need plugs at either end, have to get them through a small hole in the bulkhead and don't want a huge bunch of individual plugs to manage. There are a dozen or so wires in the loom (nothing too high powered) and space is very tight.
Anyone got any suggestions?
Plugs? Why would you want plugs in your wiring loom?
Surely the easiest way is to get into your local breakers & cut out a couple of foot section from a similar position in a similar car, grap either a handful of crimps, or better still a soldering iron & then just take your time & replace them one at a time.
Surely the easiest way is to get into your local breakers & cut out a couple of foot section from a similar position in a similar car, grap either a handful of crimps, or better still a soldering iron & then just take your time & replace them one at a time.
If you go to your local Maplins, get some heat shrink to finish the whole thing off and make it neat. They will also sell you wire by the meter in different colours if you don't have a scrappy nearby.
It sounds fiddly but theres no way round that.
It sounds fiddly but theres no way round that.
Edited by PositronicRay on Saturday 22 November 07:36
"So is there an easy solution for splicing in a bit of new loom"
Unfortunately there is no easy solution but the repair that is needed is not as difficult as you may think
Below is a step by step guide for carrying out a wiring harness repair - Have pen and paper at hand for recording the wire colours, size and destination
1) Gain access to the underbonnet wiring harness from the Bulkhead grommet to the front of your vehicle and remove 60 Centimeters of the tape that holds it together
2) Cut one damaged wire at the 60 Centimeter point nearest to the front of your vehicle - Now one by one cut every other damaged wire at 5 centimeter intervals so that you end up with 12 wires that are all different lengths - This procedure is carried out so that you have staggered joints rather than 12 joints in one place
3) Buy the correct cable to match what you have cut out (2 Meters of each colour should be plenty) and also buy Heatshrink Sleeving that ommits a resin based sealant when heating it up to shrink it, the sealant in the Heatshrink will stop any water getting into your joints (1 Meter should be plenty)
4) Gain access to the wiring harness inside your vehicle (Dont say you cant - What goes in must come out)
Untape the harness to as far back as you can and pull the 12 cut wires back into the vehicle - "Well done"
5) In the same way as you staggered the cuts under the bonnet - Stagger cut the 12 wires inside the vehicle in places that you will be able to solder joints (Dont cut in places that a soldering iron wont reach or fit), If you are having difficulty with 12 staggered cuts inside your vehicle you can cut 2 or 3 wires in the same place as long as you keep the joints well away from eachother when taping the wiring harness back up
OK THATS THE HARD PART OVER
6) Bare back the ends of the 12 cut wires under the bonnet by 1/1.5 Centimeters and bare back the ends of your new wires by 1/1.5 Centimeters (You can bare back more if it makes it easier for you)
Wrap the bared back ends of the wires together (Make sure to use correct size and colour)
7) Solder the 12 wrapped joints with a good hot soldering iron and make sure the solder runs, dont worry about melting some insulation at the joints
8) Cut 12 x 4 Centimeter lengths of Heatshrink Sleeving and use it to insulate the joints making sure that the adhesive has melted and sealed the soldered joints
9) Pull the new wires through the Bulkhead Grommet into the vehicle and tape up the repaired underbonnet harness as close as you can up to the Grommet
10) Inside the vehicle bare back the ends of the staggered wires in the same way as you did earlier under the bonnet, now allowing for enough length of wire to reach and join your cut wires, cut the new wires inside the vehicle and bare the ends back.
11) THIS IS VERY IMPORTANT - Before wrapping the bared ends of wire together inside the vehicle colour to colour size to size - CUT 12 x 4 CENTIMETER LENGTHS OF HEATSHRINK SLEEVING AND PLACE THAT HEATSHRINK OVER THE WIRES TO BE JOINED IN A FASHION THAT WILL ENSURE THE SLEEVING DOESNT SHRINK WHEN SOLDERING THE WRAPPED JOINTS (Keep The Sleeving Away From The Solder Area As Best As You Can)
12) Solder the above joints in the same way as under the bonnet and Heatshrink them, tape up the harness as best you can
THINGS TO BE AWARE OF
1) If you are finding it difficult to wrap 1/1.5 bared back ends together you can bare back more wire to make life easier as you have 4 Centimeter lengths of Heatshrink Sleeving (Enough to cover any length of joint)
2) Practice soldering before the real thing, the iron must be as hot as possible and dont use thick solder, use thin solder with flux inside it as it runs better and makes a better joint, thick solder takes too much heat out of the soldering iron
3) Be careful when heating the Heatshrink Sleeving as you dont want to damage anything with the heat, I advise you to make a small heat shield to stop any heat travelling and damaging wiring or anything else in the vehicle
4) Dont worry about the job, be confident and enjoy doing it - The job is easier than what it looks
I hope this helps
I will check back soon, ask if you are not sure of anything
All the best
Signing out
The One And Only Doctor Volt
A good guide DV, thanks. 
Would you always solder rather than crimp?
I recently crimped some wiring and then used heat shrink and self amalgamating tape to finish. The reason being that the wiring would be need to be flexible (a four core cable to a wheel hub) I was concerned that soldered joints may fail with the constant movement?
The joint does seems good and waterproof.
Edited by PositronicRay on Saturday 22 November 14:44
Positronicray
No I wouldnt always solder, the reason I advised soldering is because I posted the above in not knowing Tunas ammount of knowledge and didnt want to get into checking current draws for each circuit that has damaged wiring and what could be crimped and what should be soldered
Crimping sensor wiring is ok and even better when Heatshrink with adhesive inside is used, self amalgamating tape is not needed if the correct Heatshrink is used, when I repair sensor wires I use Adhesive Heatshrink on every crimped or soldered joint and then I use a larger Adhesive Heatshrink over the whole lot of heatshrunk wires, in doing this there is no flex on the repair area
Cheers
Doctor Volt
Doctor Volt said:
Positronicray
No I wouldnt always solder, the reason I advised soldering is because I posted the above in not knowing Tunas ammount of knowledge and didnt want to get into checking current draws for each circuit that has damaged wiring and what could be crimped and what should be soldered
Crimping sensor wiring is ok and even better when Heatshrink with adhesive inside is used, self amalgamating tape is not needed if the correct Heatshrink is used, when I repair sensor wires I use Adhesive Heatshrink on every crimped or soldered joint and then I use a larger Adhesive Heatshrink over the whole lot of heatshrunk wires, in doing this there is no flex on the repair area
Cheers
Doctor Volt
Thank's I didn't know about adhesive heatshrink and heatshrink butt connectors. I'll these next time. No I wouldnt always solder, the reason I advised soldering is because I posted the above in not knowing Tunas ammount of knowledge and didnt want to get into checking current draws for each circuit that has damaged wiring and what could be crimped and what should be soldered
Crimping sensor wiring is ok and even better when Heatshrink with adhesive inside is used, self amalgamating tape is not needed if the correct Heatshrink is used, when I repair sensor wires I use Adhesive Heatshrink on every crimped or soldered joint and then I use a larger Adhesive Heatshrink over the whole lot of heatshrunk wires, in doing this there is no flex on the repair area
Cheers
Doctor Volt

PositronicRay Wrote
"Thank's I didn't know about adhesive heatshrink and heatshrink butt connectors. I'll these next time."
Posi I didnt mention heatshrink butt connectors - Where did you get that from?
Heatshrink Butt Connectors were developed by the devil himself
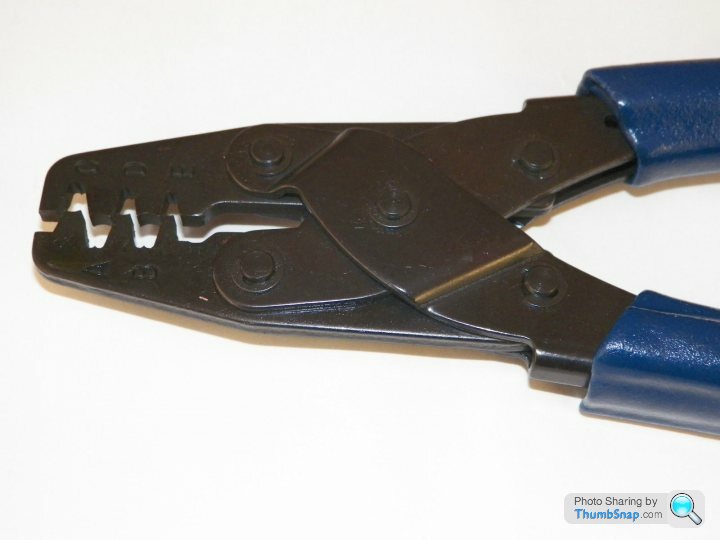
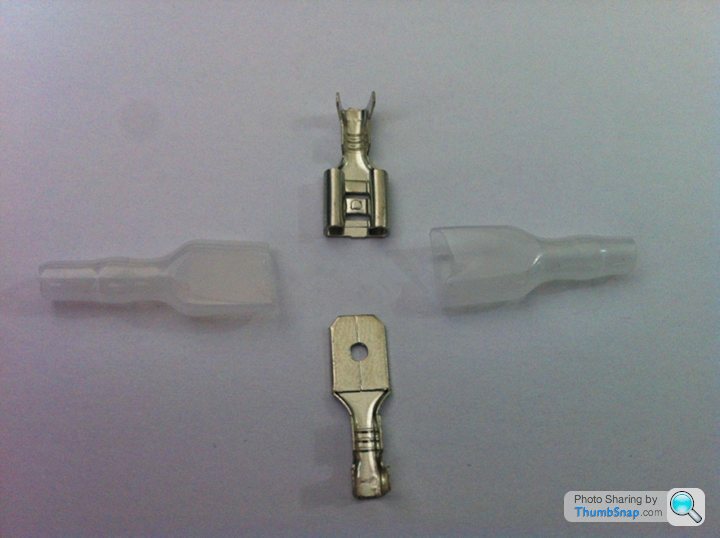
The best crimped joints are made by using the folding part of professional crimp terminals, do you know the terminals I mean, the ones with a U Shape that a wire is placed into and then that U Shape is folded with professional crimping pliers that have a choice of sized crimp to fold, these terminals come in all shapes and sizes including Eye, Lucar and Spade, what you do is cut the Eye, Lucar or Spade off the terminal and you are left with just the crimpable U Shape that is then used to make a very good Butt Joint and they can also be soldered later if needed
Heatshrink Butt Connectors are and always will be a crush joint rather than a fold joint and I could but better not shock the world in mentioning some companies that use them
"Thank's I didn't know about adhesive heatshrink and heatshrink butt connectors. I'll these next time."
Posi I didnt mention heatshrink butt connectors - Where did you get that from?
Heatshrink Butt Connectors were developed by the devil himself
The best crimped joints are made by using the folding part of professional crimp terminals, do you know the terminals I mean, the ones with a U Shape that a wire is placed into and then that U Shape is folded with professional crimping pliers that have a choice of sized crimp to fold, these terminals come in all shapes and sizes including Eye, Lucar and Spade, what you do is cut the Eye, Lucar or Spade off the terminal and you are left with just the crimpable U Shape that is then used to make a very good Butt Joint and they can also be soldered later if needed
Heatshrink Butt Connectors are and always will be a crush joint rather than a fold joint and I could but better not shock the world in mentioning some companies that use them
 (just seemed a good idea to me)


I learn something every day, this is the good thing about Forums
Do you see how I cut terminals back to be left with that U Shape for crimping
In the back of my mind something is telling me that U Shape only terminals could be purchased but my mind isnt getting me far enough back to remember, I am pretty sure I was given some special U Shape only crimp terminals in the past, unfortunately for me and a few friends I gave all my business equipment away before moving house
Gassing Station | Home Mechanics | Top of Page | What's New | My Stuff