S1 door adjustment
Discussion


I would like to repair my drooping doors. I've read previous PH posts but still I have a few questions:
Someone apparently has removed the doors at some point- probably when the car was restored and repainted. All three bolts have a 13 mm head - I believe I've read it originally was 17 mm. Also, there are about a dozen washers on the center bolt indicating someone wanted to prevent the bolt from breaking through the bottom of the door but didn't bother cutting the bolt to length. This causes me to think someone would have replaced the nylon bushings at that time. Before I remove the center bolts - which came loose without any issue - I want to confirm that the door should be closed to maintain its close-to-correct position. I can check the bushing but I wonder if the issue might not be the bushing, and would shimming the outside bolts between the plate and the door skin be an appropriate strategy for removing the droop? The doors are not loose but just rubbing on the bottom (and wearing the fiberglass and sill). Larry
Someone apparently has removed the doors at some point- probably when the car was restored and repainted. All three bolts have a 13 mm head - I believe I've read it originally was 17 mm. Also, there are about a dozen washers on the center bolt indicating someone wanted to prevent the bolt from breaking through the bottom of the door but didn't bother cutting the bolt to length. This causes me to think someone would have replaced the nylon bushings at that time. Before I remove the center bolts - which came loose without any issue - I want to confirm that the door should be closed to maintain its close-to-correct position. I can check the bushing but I wonder if the issue might not be the bushing, and would shimming the outside bolts between the plate and the door skin be an appropriate strategy for removing the droop? The doors are not loose but just rubbing on the bottom (and wearing the fiberglass and sill). Larry
Let me see if I can confuse you a little more....
Firstly I can't explain why the centre bolt(S) is (are) 13mm spanner size unless it (they) is (are) 10mm bolt(S) with smaller than "standard" head(S).
These bolts, for example, are 10mm but with a 15mm head
My understanding is, and I've had my doors off so this isn't complete guess work, that the door in effect hangs from the top pivot bolt, the bottom bolt just keeping things aligned.
The two pivot bolts tighten onto the shank of the bolt, so if shank is too short bolt will tighten how a bolt normally tightens, onto its head, and door will be very tight. I'd guess the shank on your dodgey bolts is too long so they have been packed with washers, not a problem as long as there are the right amount, imho.
Personally I would take 'em right off, clean up/free off as required and refit.
1. seeing it all in front of you will help understand exactly how they work and how alignment is adjusted.
2. Re-aligning the doors isn't too difficult, they're a cr#p fit at the best of times
3. while doors are off check the courtesy light switches, pain to get at with doors on
4. replace the perished door checks (lumps of sticky back foam)
Just read Barry's post, looks like S1 is all 8mm bolts?
Thank you. I think I follow ...
I have loosened the three bottom bolts and the door now pivots up and down easily. If I placed a shim between the door skin and the rear bolt, I expect that would align the door. Or ... if I raise the door to the correct (higher) position and tighten all three bolts without using a shim, would it remain in the correct position? Or fall back to its drooping position?
The foam is like new ... happily someone replaced that earlier.
I found the best way is to locate and fit the 6 bolts hinge bolts into their threaded bobbins no more than 3 or 4 turns by hand while the door is in the almost fully open position and held up with a trolley jack. Place a sheet over the door opening for protection, then carefully close the door onto its latch and ensure the gaps are even (if not then adjust the latch). With the door shut it is easy to use an air driven wrench to tighten the hinge bolts. Note it may be necessary to have a washer placed between the hinge and the body bobbin. If you haven't an air driven wrench it is well worth borrowing one or befriending some-one with one as it saves hours and sore back/arms/knuckles.

robinlarry said:
Thanks to all ... door one complete. One down. One to go.
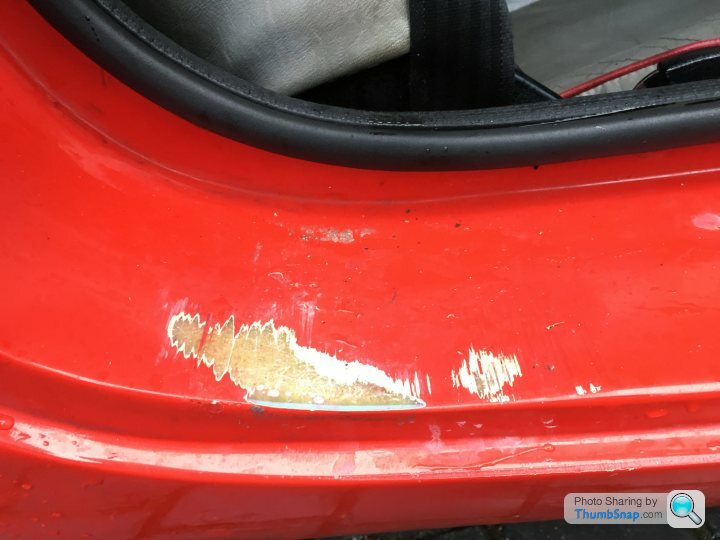
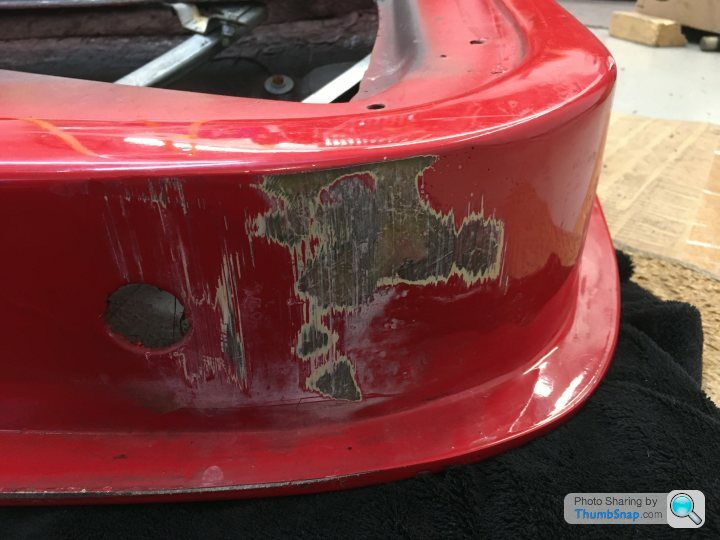
Well done Robinlarry, its one of the first jobs I did on the drivers door, i found the lower hinge pin to be the issue and it was solid in tbe bobbin so I had to cut the head and carefully drill out the old bobbin and then resin in the new 10mm bobbin,my bolt was a little long so I fitted another nut rather than washers. I wedged some card temporarily under the door latch end with the hinge bolts slightly loose and then tightened with the door closed...its been good since. Made the bottom corner of the door much more flush as well.Continuing this thread, I recently became the owner of a 1987 S1 and finally got some time to fix up the immediate problems, starting with the drivers door. This had dropped significantly and had been scuffing against the sill for what looks like many years.
After removing the door trim and window frame to access the hinges (Thanks Magpies) - I found that the lower nylon bobbin had an oval centre hole with an 8mm bolt and the upper one was very oval and the 10mm bolt that rattled in the bobbin. So, I bought new nylon bushes, drilled and tapped the lower bobbin to 10mm x 1.5 and drilled and tapped the upper bobbin to take a 10mm x 1.5 helicoil. Now the bush carriers have been cleaned up and painted, and the whole lot reassembled with stainless fastenings, there is no slop in the hinges. Good stuff. Only problem is that door still scuffs on the sill even at maximum adjustment.
I'm told the body had been lifted about 20 years ago to repaint the outriggers.
Q. Is there such as saggy body syndrome?
S1 bobbins should be M8, later cars had the M10 ones.
possibly the top one has been replaced (only M10 available or to hand?) and it has been set into the body tub in the wrong position hence why you can't get correct adjustment?
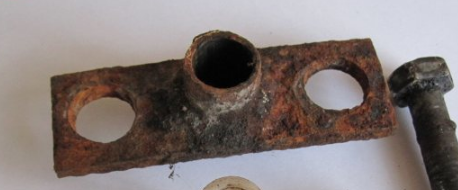
Could the bracket be modified to give more adjustment in the right direction?
phillpot said:
S1 bobbins should be M8, later cars had the M10 ones.
possibly the top one has been replaced (only M10 available or to hand?) and it has been set into the body tub in the wrong position hence why you can't get correct adjustment?
Could the bracket be modified to give more adjustment in the right direction?
I had to elongate the two holes to allow better adjustment.possibly the top one has been replaced (only M10 available or to hand?) and it has been set into the body tub in the wrong position hence why you can't get correct adjustment?
Could the bracket be modified to give more adjustment in the right direction?
The longest job in the world.
I can't see any disturbance in the bodyshell where the top bobbin is fitted, so it really looks like it was 8mm at the bottom and 10 at the top.
Anyway, after replacing all fixings with stainless versions and now bobbins, adjusting the door catch on the bode (had to drill out the exisitn screws of course) I now have both doors working beautifully with no drop, and window runners replaced
Thanks for all your help
They were both 8mm sleeves when new, but they have not been available for some time. I reengineered mine to 10mm and used marine stainless socket head screws to make it easier to work on. I did however find, as Magpies above, that I had to slot the mounting plates a couple of mm to get enough adjustment.
Gassing Station | S Series | Top of Page | What's New | My Stuff