Aaron radiator - 2003 mk2 Tamora
Discussion


Right, it was today's intention to get the radiator swapped, some mesh installed and the ACT stainless steel coolant pipes installed.
Cutting to the case, I didn't get it finished.
It became apparent that bits needed renewal. I need a couple of mounting bobins, some new bolts and a short section of hose so just got to dry fit stuff.
Then Aaron alloy rad fitted the car with no mods or altering. Mount pegs fit straight and the bobin holes lined up. The fans fitted but the mounting holes were out although some one had already modded the fan frame once already. Also the TVR rad uses machine screws to fit the fans and the Aaron rad needs screw threads.
I jacked the front of the car up and supported it on axle stands. This could be done on ramps but I have some work to do on the spot lights too so having the wheels off was needed.
To fit the lower stainless steel pipe to the side of the block needs the undertray removed so bare this in mind if you're going to do the same.
The upper pipe is a bit tricky. There is very little space between inlet at the back of the thermostat and the pipe.
I also found what the driver's side front wheel was catching on when on full lock. The headlamp cover was sticking out too far into the wheelarch. Looks like too much sealant. Bit of panel repair required.
Got some black mesh cut and shaped to infill the radiator grill.
Final job was to drop the airbox down a bit to miss the wiper mech arm.
Looks like I'm going to need a couple of weekends to finish off which is a shame.
Next weekend I'll aim to repair the headlight cover and refit. Then bond in the mesh.
Confidence is easy, competence is another matter.
Right, ordered some A2 stainless steel bobbins to fix the radiator. I'll add some rubber washers to avoid galvanic corrosion between the mounts and the alloy rad.
Also ordered some A2 pan head self tapping screws in various sizes to mount the fans and the various panels I've removed.
Just need to measure up for the mikalor clamps to replace the jubilee clips that have slightly damaged the hoses (don't tel Dom ).
).
Looking forward to getting stuck in on Saturday.
Right, ordered some A2 stainless steel bobbins to fix the radiator. I'll add some rubber washers to avoid galvanic corrosion between the mounts and the alloy rad.
Also ordered some A2 pan head self tapping screws in various sizes to mount the fans and the various panels I've removed.
Just need to measure up for the mikalor clamps to replace the jubilee clips that have slightly damaged the hoses (don't tel Dom
).Looking forward to getting stuck in on Saturday.
Forgot about this thread.
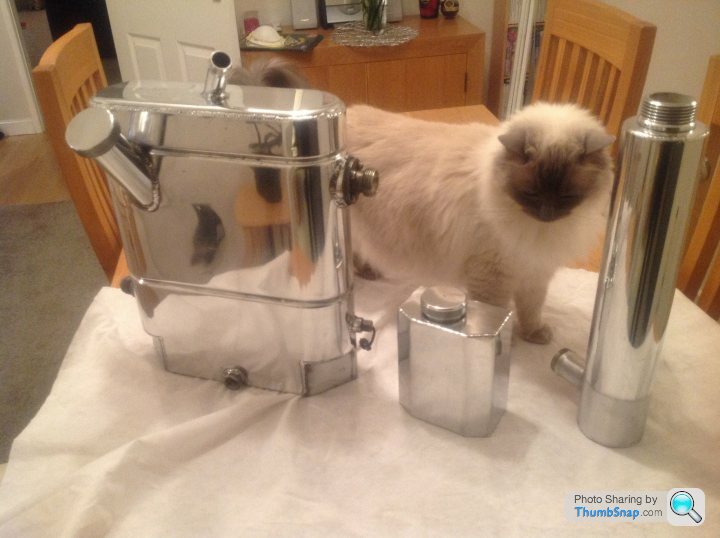
All in and running fine - other than the swirlpot cap breaking. Note, Tamy only has a swirlpot, not the additional remote resevoir.
I only needed to remove the GRP undertray to swap the rad over. Working off axle stands the old rad came out easy enough and the new one went in.
Boobins were fine.
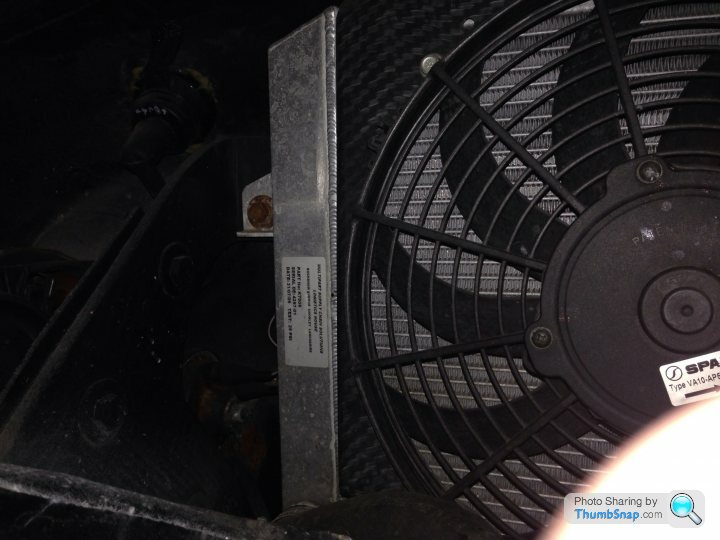
Used number 12 - or 12-guage - self tapping stainless screws, 1/2 inch long, to secure the fans/cowlings. Wrapped the threads in a little PTFE tape first to help keep the screws in place. The screws had number 3 pozi-drive head so had to buy a suitable screwdriver (£1.50 in toolstation). A couple of the holes in one of the cowlings didn't line up by a couple of millimeters so a quick dremmeling of the holes were required.
The bleed screw is in a stupid position and you'll need a stubby screwdriver to use it (toolstation £2.00). I haven't needed to though. Filled the system. Burbed it by squeezing the lower hose that goes in to the block. Started the engine with the pressure cap off. Filled it up as the engine ran. Fitted the pressure cap. rtan it for 5-minutes. Engine off. Cap off (carefully). Topped up. Felt the radiator - even temp across the whole of it. Cap on. Ran engine until the fans came on. Fans went off. Turned off engine.
Left it a week. Checked hoses for leaks. Cap off and checked level. Slight top up. Ran engine up to temp. Fans on and off a few times. All is dandy. Then cap releases a load of water. I think I over filled her. Got a spare cap just in case so will run her up again Saturday and see what happens.
Very happy with the rad.
All in and running fine - other than the swirlpot cap breaking. Note, Tamy only has a swirlpot, not the additional remote resevoir.
I only needed to remove the GRP undertray to swap the rad over. Working off axle stands the old rad came out easy enough and the new one went in.
Boobins were fine.
Used number 12 - or 12-guage - self tapping stainless screws, 1/2 inch long, to secure the fans/cowlings. Wrapped the threads in a little PTFE tape first to help keep the screws in place. The screws had number 3 pozi-drive head so had to buy a suitable screwdriver (£1.50 in toolstation). A couple of the holes in one of the cowlings didn't line up by a couple of millimeters so a quick dremmeling of the holes were required.
The bleed screw is in a stupid position and you'll need a stubby screwdriver to use it (toolstation £2.00). I haven't needed to though. Filled the system. Burbed it by squeezing the lower hose that goes in to the block. Started the engine with the pressure cap off. Filled it up as the engine ran. Fitted the pressure cap. rtan it for 5-minutes. Engine off. Cap off (carefully). Topped up. Felt the radiator - even temp across the whole of it. Cap on. Ran engine until the fans came on. Fans went off. Turned off engine.
Left it a week. Checked hoses for leaks. Cap off and checked level. Slight top up. Ran engine up to temp. Fans on and off a few times. All is dandy. Then cap releases a load of water. I think I over filled her. Got a spare cap just in case so will run her up again Saturday and see what happens.
Very happy with the rad.


To clarify things a bit.
On Tamy;
Radiator with plastic end caps / sections. The fans are mounted on carbon fibre [looking] cowls that are mounted to the side of the radiator core with bolts and clips.
The Aaron radiator comes with mounting points for the cowls the same as the original item [in Tamy]. I swapped from bolts to pan head screws (ie from machine thread to a screw thread) as the screw thread works better with the clips. I don't understand why TVR didn't use screw threads in the first place as they are quicker and easier to fit.
I used stainless steel screws and wrapped the thread in some PTFE tape to act as a binder and give some seperation between materials.
mk1fan said:
To clarify things a bit.
On Tamy;
Radiator with plastic end caps / sections. The fans are mounted on carbon fibre [looking] cowls that are mounted to the side of the radiator core with bolts and clips.
The Aaron radiator comes with mounting points for the cowls the same as the original item [in Tamy]. I swapped from bolts to pan head screws (ie from machine thread to a screw thread) as the screw thread works better with the clips. I don't understand why TVR didn't use screw threads in the first place as they are quicker and easier to fit.
I used stainless steel screws and wrapped the thread in some PTFE tape to act as a binder and give some seperation between materials.
Hi,On Tamy;
Radiator with plastic end caps / sections. The fans are mounted on carbon fibre [looking] cowls that are mounted to the side of the radiator core with bolts and clips.
The Aaron radiator comes with mounting points for the cowls the same as the original item [in Tamy]. I swapped from bolts to pan head screws (ie from machine thread to a screw thread) as the screw thread works better with the clips. I don't understand why TVR didn't use screw threads in the first place as they are quicker and easier to fit.
I used stainless steel screws and wrapped the thread in some PTFE tape to act as a binder and give some seperation between materials.
Does yours look a bit like this then?
Desiato said:
 excellent thanks, will be getting it ordered
http://www.actproducts.co.uk/wp-content/uploads/20...
Gassing Station | Tamora, T350 & Sagaris | Top of Page | What's New | My Stuff