My head job :)
Discussion


I've been asked by a couple of people to chuck a thread up about the cylinder head work I'm doing.
I'm not sure if it's in the right place, but hey ho.
So to start- the objective here is to remove all the casting marks, lumps and bumps, to tidy the valve seats, enlarge the the inlet mani where the throttle body joins to create anti reversion and port match the exhaust mani. And to change the valve stem seals (cars burning oil through them)
Once that's done, 80 grit at slow rpm the inlet to aid atomization and 600, or even 800 grit the exhaust. By hand if need be :s
There is a heap of further work I could do, radiusing, dimple the top of the intake, enlarging the throat slightly and work around the guide, but I don't have access to a flow bench any more, so I'll leave that for now. That and I value my b ks. The last head I went to town on it took me around 35 hours. The wife would be having words!
Anyway, to start.
Strip down the head. I clearly label each valve, spring, retainer and collets in a bag. In theory putting the valves back in the same place stops the need for lapping. But I've had problems before, so I'll lap them anyway.
Socket and hammer is to free off the retainer/collet before using the spring compressor!
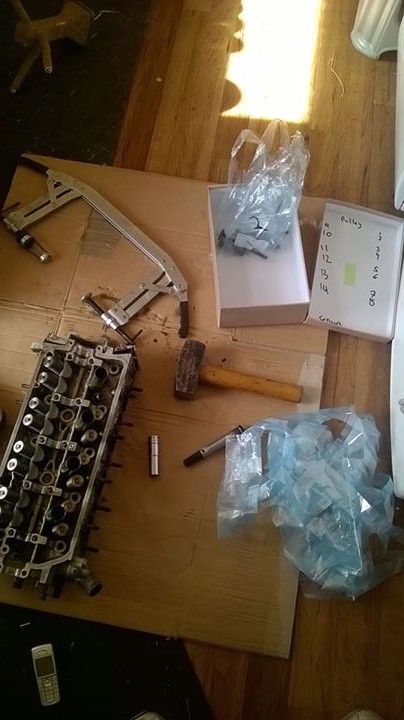
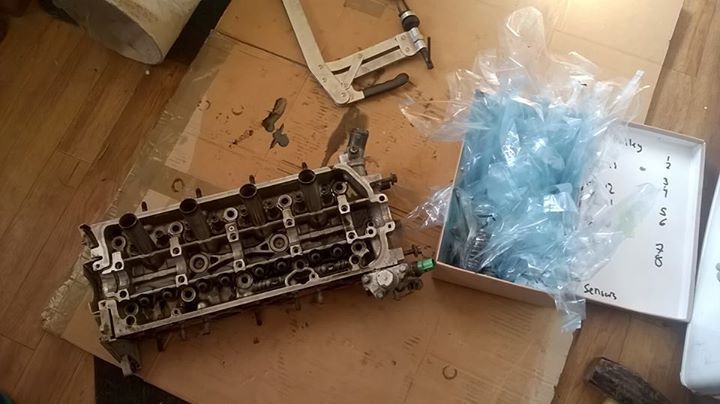
All stripped down and parts boxed up.
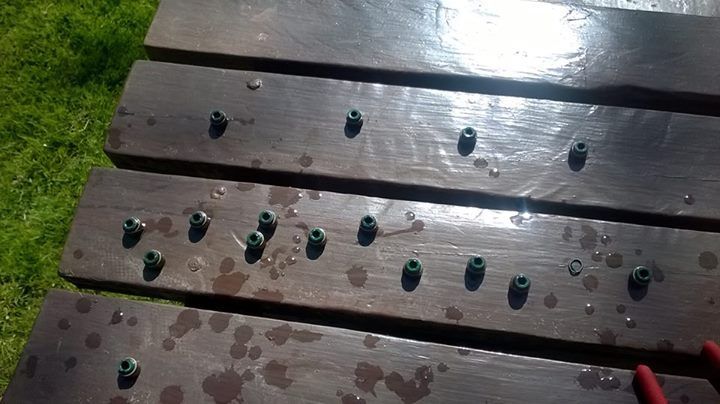
Valve stem seals removed. No wonder it smoked. Some helmet (not me!) has used the same seals for inlet and exhaust. They should be different!
All set up and ready to go!
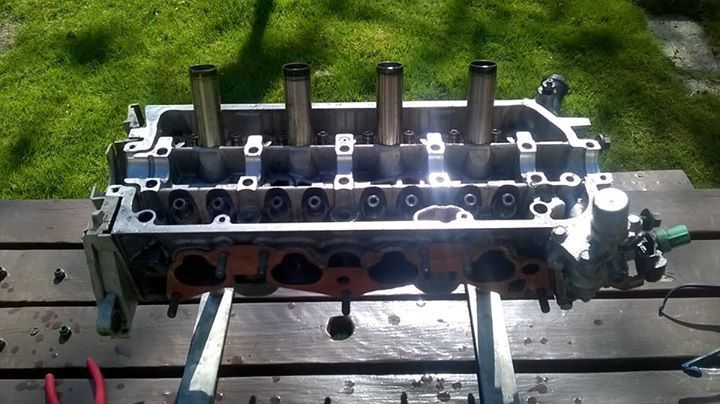
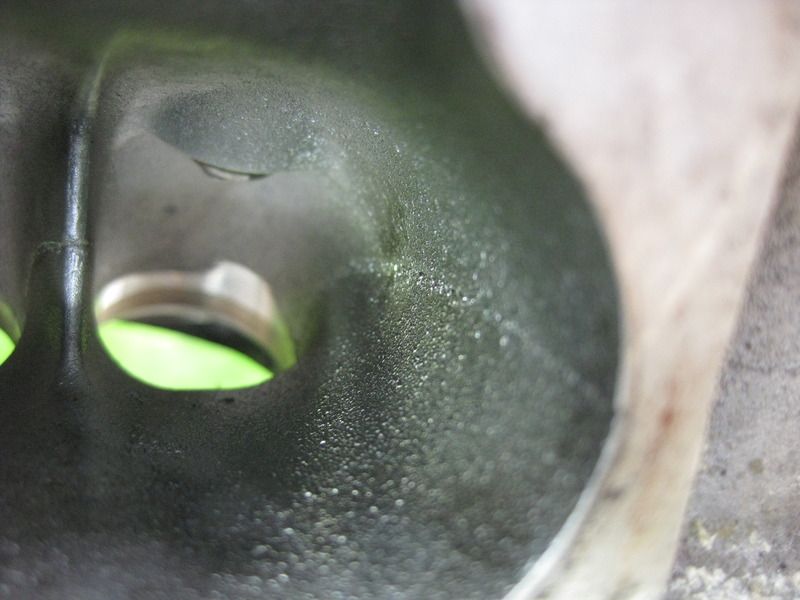
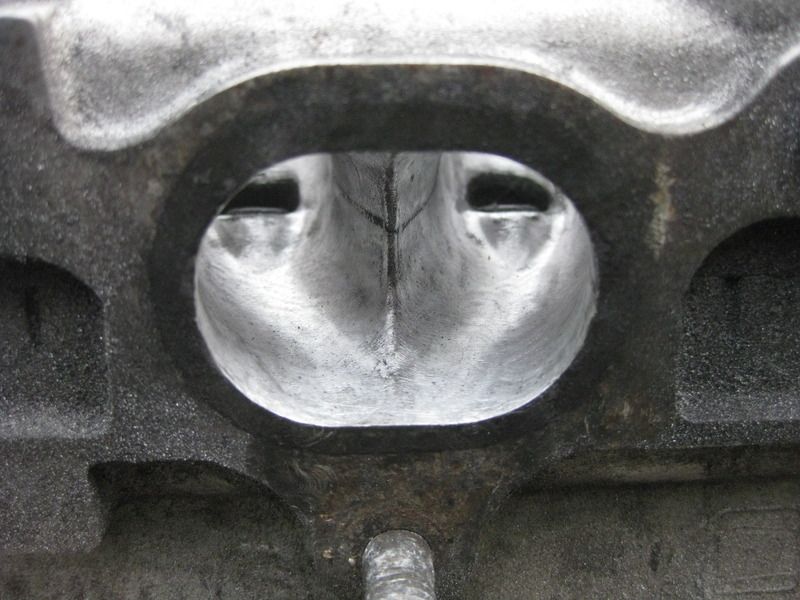
Here's a close up of some of the casting marks I'm aiming to remove. This is why any cylinder head can benefit from a simple clean up. I've see much worse too!
And now onwards with the fun bit. I start with 80 grit sanding wheels on the intake, just taking my time to ensure I don't remove too much metal. You don't want to remove much at all from the floor, raise the roof if need be. But anyway, I'm not enlarging here.
Mid way through one inlet...
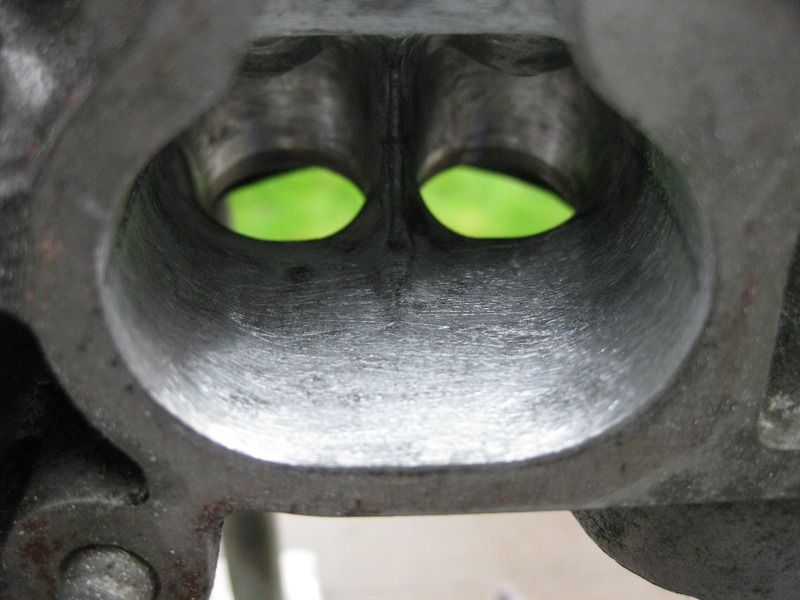
Finished inlet- well, needs a final finish, but 85% there.
Exhaust after a 180 grit wheel. Polish to follow
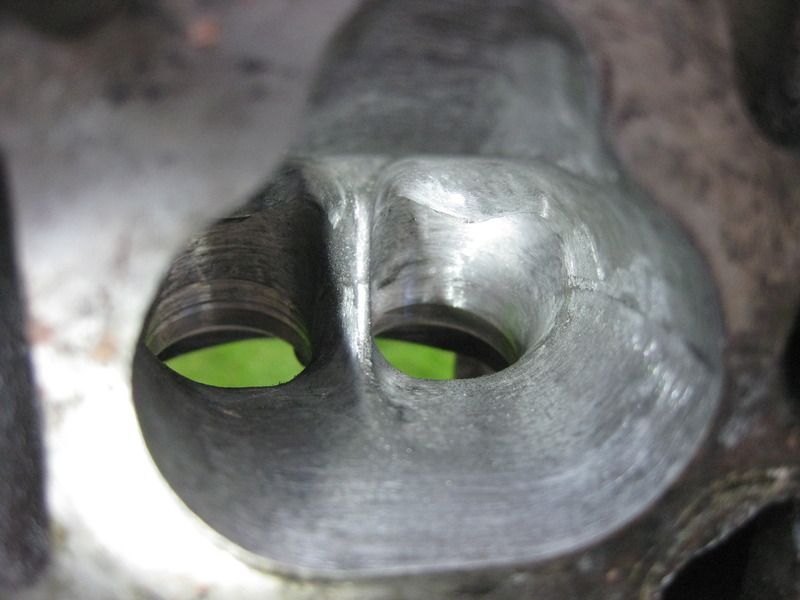
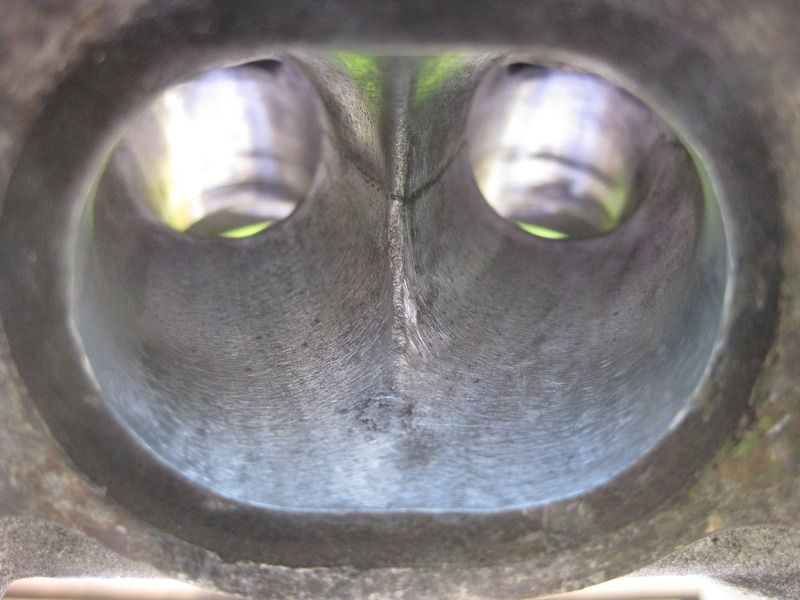
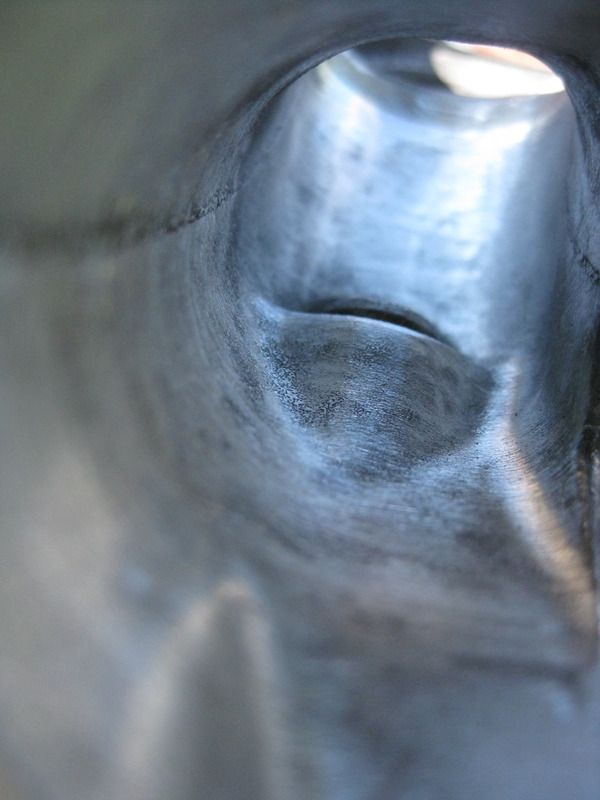
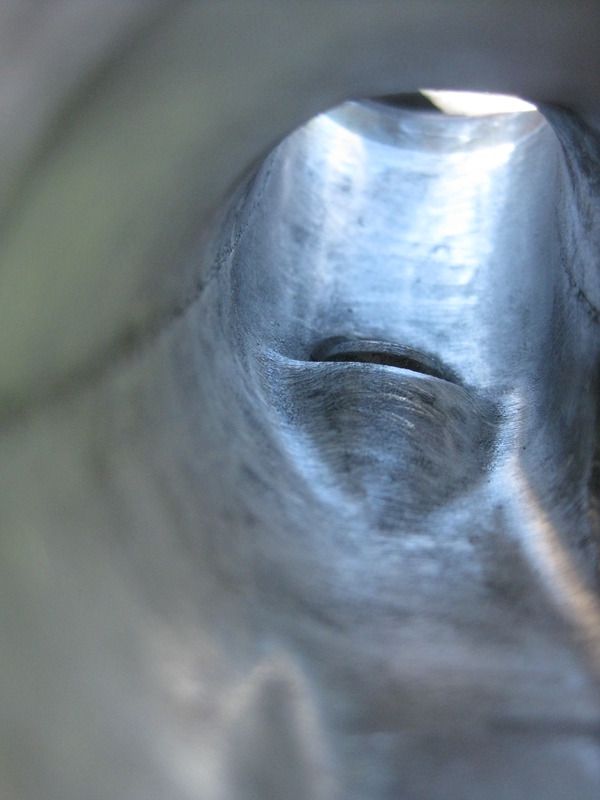
Now, to tidy the valve seat. It was hard for me to photo as my camera is rubbish, but basically, this involves smoothing the bottom of the valve seat into the chamber.
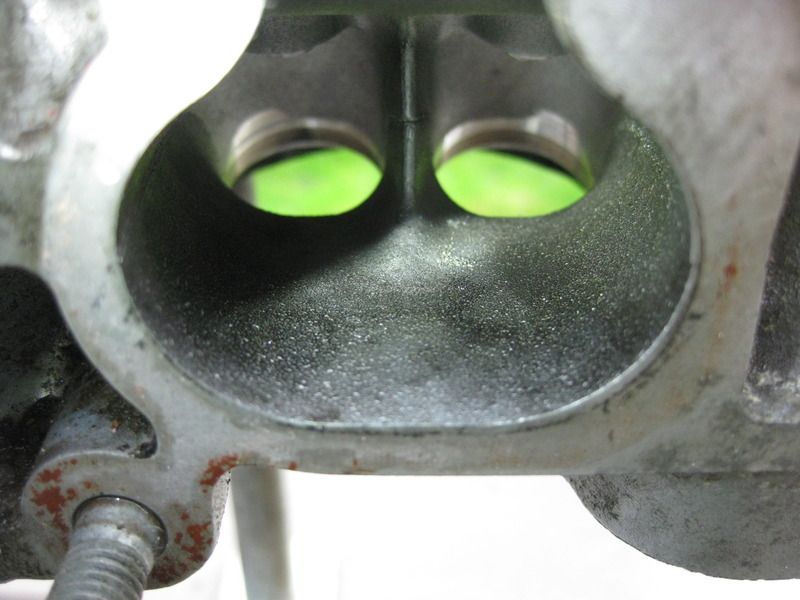
In this pic, you can clearly see the seats at the far opening. The darker 'ring'. On the left hand one, you can see the line where is joins. This creates resistance (basically). And the right one is smoothed in.
Some are worse than others and therefore need more work. But this time, only a couple were real bad.
Well, that's it for yesterdays installment.
If people are interested, I'll carry on updating as I go
I'm not sure if it's in the right place, but hey ho.
So to start- the objective here is to remove all the casting marks, lumps and bumps, to tidy the valve seats, enlarge the the inlet mani where the throttle body joins to create anti reversion and port match the exhaust mani. And to change the valve stem seals (cars burning oil through them)
Once that's done, 80 grit at slow rpm the inlet to aid atomization and 600, or even 800 grit the exhaust. By hand if need be :s
There is a heap of further work I could do, radiusing, dimple the top of the intake, enlarging the throat slightly and work around the guide, but I don't have access to a flow bench any more, so I'll leave that for now. That and I value my b
ks. The last head I went to town on it took me around 35 hours. The wife would be having words!Anyway, to start.
Strip down the head. I clearly label each valve, spring, retainer and collets in a bag. In theory putting the valves back in the same place stops the need for lapping. But I've had problems before, so I'll lap them anyway.
Socket and hammer is to free off the retainer/collet before using the spring compressor!

All stripped down and parts boxed up.

Valve stem seals removed. No wonder it smoked. Some helmet (not me!) has used the same seals for inlet and exhaust. They should be different!

All set up and ready to go!

Here's a close up of some of the casting marks I'm aiming to remove. This is why any cylinder head can benefit from a simple clean up. I've see much worse too!


And now onwards with the fun bit. I start with 80 grit sanding wheels on the intake, just taking my time to ensure I don't remove too much metal. You don't want to remove much at all from the floor, raise the roof if need be. But anyway, I'm not enlarging here.
Mid way through one inlet...

Finished inlet- well, needs a final finish, but 85% there.

Exhaust after a 180 grit wheel. Polish to follow

Now, to tidy the valve seat. It was hard for me to photo as my camera is rubbish, but basically, this involves smoothing the bottom of the valve seat into the chamber.
In this pic, you can clearly see the seats at the far opening. The darker 'ring'. On the left hand one, you can see the line where is joins. This creates resistance (basically). And the right one is smoothed in.
Some are worse than others and therefore need more work. But this time, only a couple were real bad.
Well, that's it for yesterdays installment.
If people are interested, I'll carry on updating as I go
Edited by Lawbags on Tuesday 21st April 18:04
Edited by Lawbags on Wednesday 13th January 05:22
Edited by Lawbags on Wednesday 13th January 05:25


I got cracking today.
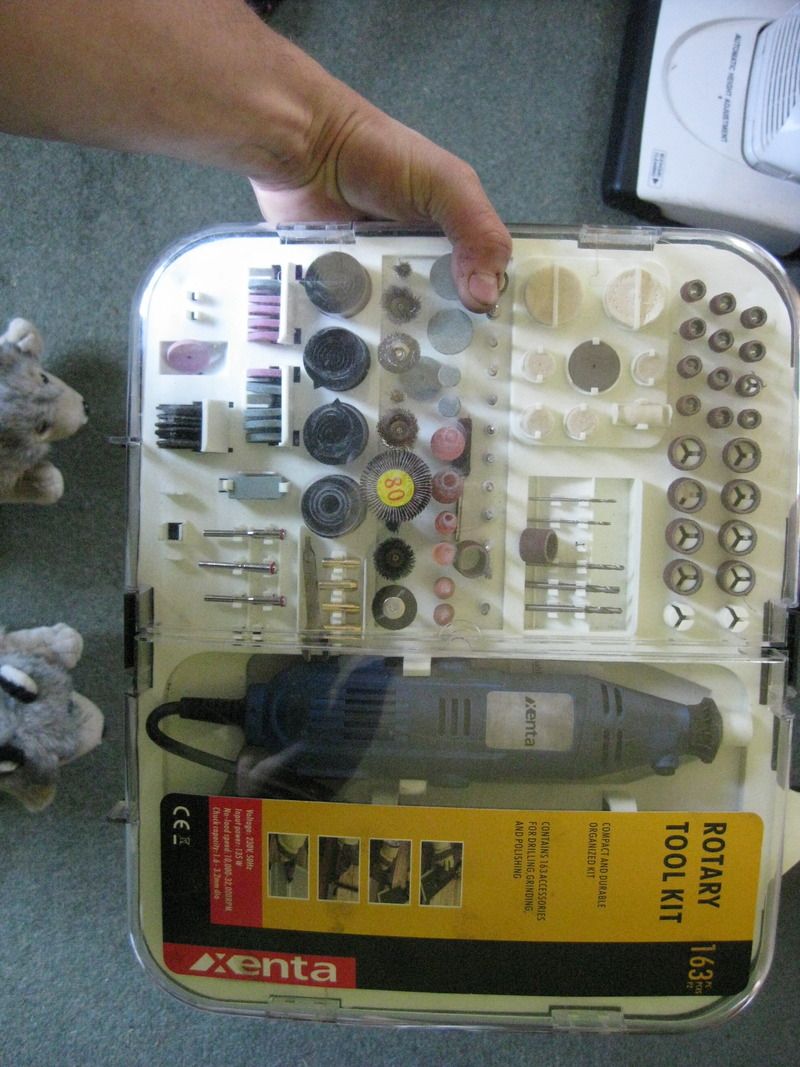
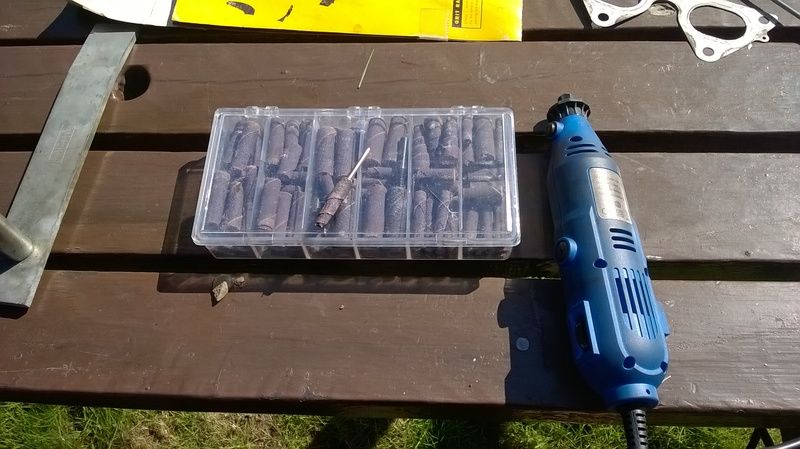
To start, here's the tools I use. It's just a small die grinder that I bought from Ebuyer for 30quid I think it was. The sanding wheels come in various grit (grits, griti???), but for this, all I use is the 80 grit for the intake and 80 first, then 180, then 600 wet and dry on the exhaust.
It does have variable speed and I find this useful. Starting fairly fast to get all the lumps etc off then slow down for the finer detail.
If you're going to enlarge the ports, then internal calipers are a must, but this time I'm not.
Anyway, on with the head.
I started on the exhaust today. I was pretty happy with my work the other day, just needed a once over, then I began to polish.
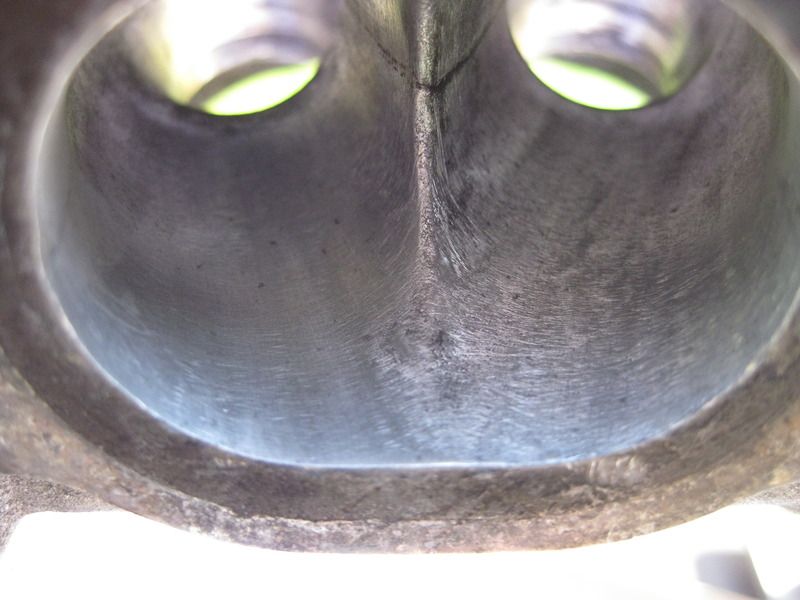
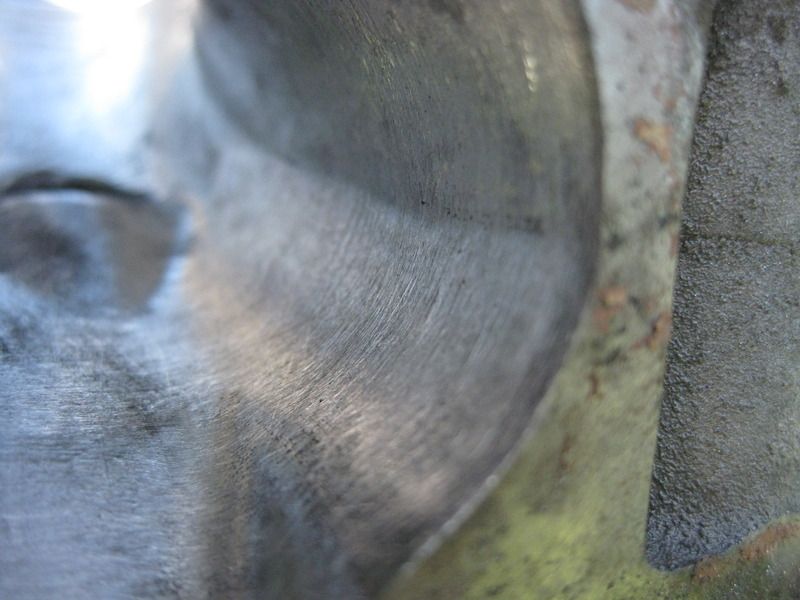
Here is one of the exhausts after the once over and before polish.
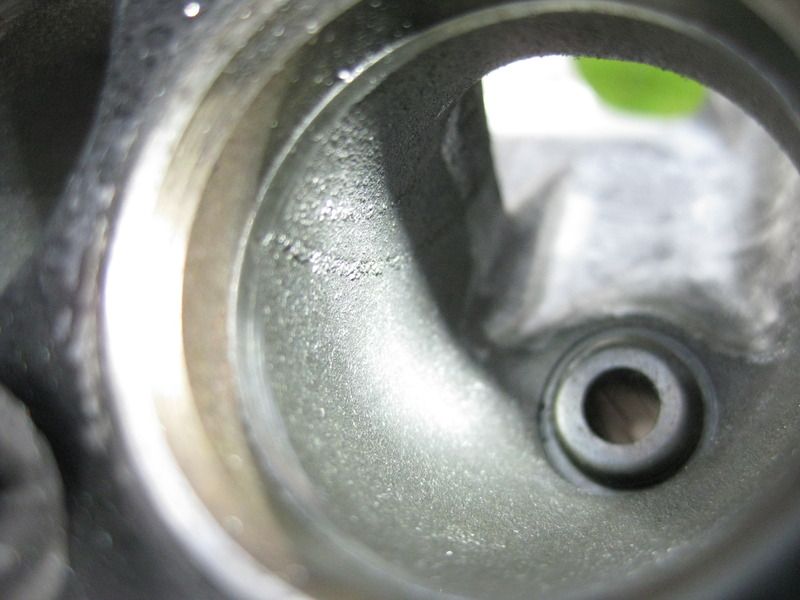
This is after 180 grit. I've done the left hand side, the right is from the initial 80 grit.
As you go finer, you see little blemishes that you missed. Back to the 80 grit. Now this is where the dangerous game starts. You can go on for ever. A little bit here, a little bit there. But I've done enough to know when to stop. And that's usually after the second 80 grit.
Bits like this. The join. Its perfectly smooth to touch, just pokes out slightly. Now there are no burrs, edges etc to worry about, so I'm leaving it as it is. Don't forget, what you do on one, you must do on the others!
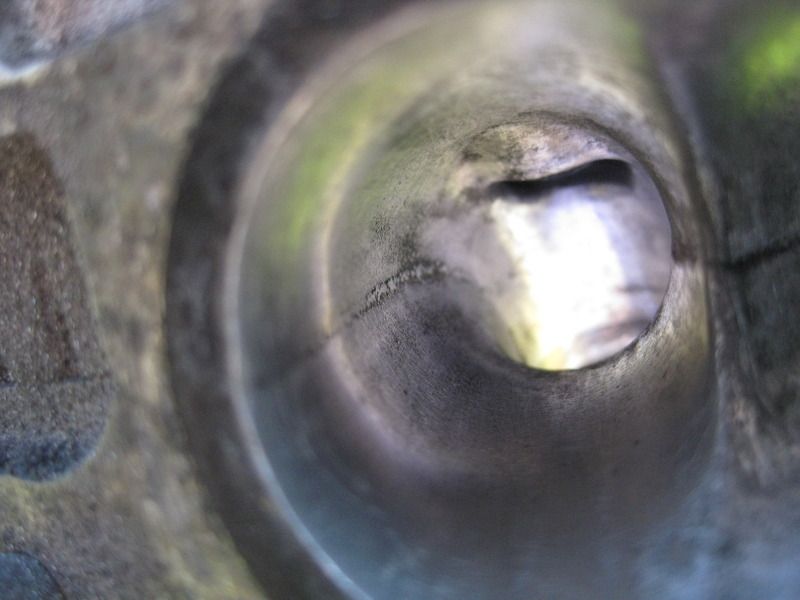
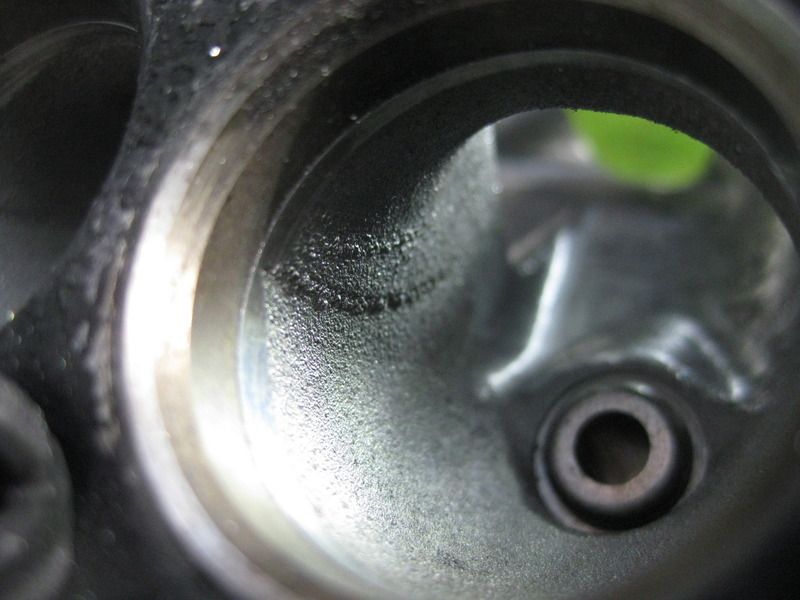
Here's another example of a missed bit on the valve guide. You can see the dimples here.
And then once I've gone over them (the black bits are dust)
Then over to the inlet.
There is huge debate about these. Smooth to allow the mixture in faster, rough to aid atomization, rough roof, smooth floor...it's endless. If you want to waste a few hours, read into it.
For me, I 80 grit the lot.
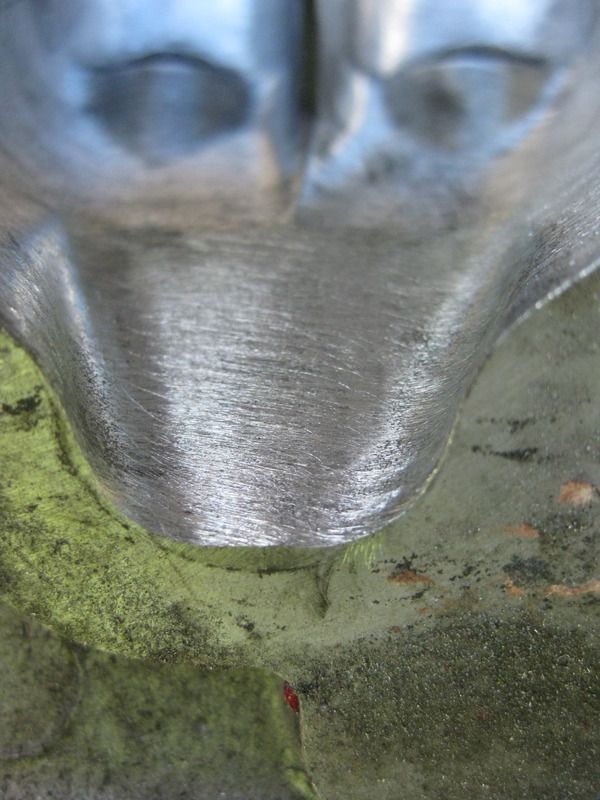
This is the sort of finish you want. You don't want to see the direction you run the grinder.
The only other thing I've done to this inlet is by hand, really go for it with 80 grit, so get some deeper roughness (if that makes sense) to aid atomization. Hard to see, but here's a pic anyway.
That's the head done.
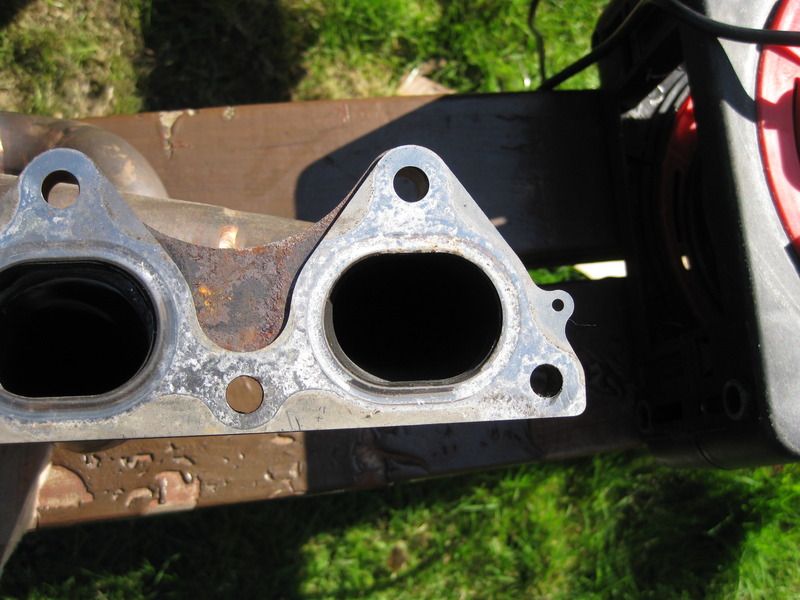
I moved onto the exhaust. Most manifolds are slightly smaller than the port, so it's hugely beneficial to port match. Again, there's loads of debate about exact matching, or oversizing to aid anti reversion. Normally I'd go a mm or 2 bigger.
I offered up the gasket and its an exact match. Looking at the mani, I didn't think there was enough to make it a mm bigger, so left it as it was.
I did the same with the inlet, but it turns out, the previous owner has done this already.
So that's the work done.
All that's left is to take the head to the machine shop for a clean.
Any questions, ask away
To start, here's the tools I use. It's just a small die grinder that I bought from Ebuyer for 30quid I think it was. The sanding wheels come in various grit (grits, griti???), but for this, all I use is the 80 grit for the intake and 80 first, then 180, then 600 wet and dry on the exhaust.
It does have variable speed and I find this useful. Starting fairly fast to get all the lumps etc off then slow down for the finer detail.
If you're going to enlarge the ports, then internal calipers are a must, but this time I'm not.


Anyway, on with the head.
I started on the exhaust today. I was pretty happy with my work the other day, just needed a once over, then I began to polish.
Here is one of the exhausts after the once over and before polish.

This is after 180 grit. I've done the left hand side, the right is from the initial 80 grit.

As you go finer, you see little blemishes that you missed. Back to the 80 grit. Now this is where the dangerous game starts. You can go on for ever. A little bit here, a little bit there. But I've done enough to know when to stop. And that's usually after the second 80 grit.
Bits like this. The join. Its perfectly smooth to touch, just pokes out slightly. Now there are no burrs, edges etc to worry about, so I'm leaving it as it is. Don't forget, what you do on one, you must do on the others!

Here's another example of a missed bit on the valve guide. You can see the dimples here.

And then once I've gone over them (the black bits are dust)

Then over to the inlet.
There is huge debate about these. Smooth to allow the mixture in faster, rough to aid atomization, rough roof, smooth floor...it's endless. If you want to waste a few hours, read into it.
For me, I 80 grit the lot.
This is the sort of finish you want. You don't want to see the direction you run the grinder.

The only other thing I've done to this inlet is by hand, really go for it with 80 grit, so get some deeper roughness (if that makes sense) to aid atomization. Hard to see, but here's a pic anyway.

That's the head done.
I moved onto the exhaust. Most manifolds are slightly smaller than the port, so it's hugely beneficial to port match. Again, there's loads of debate about exact matching, or oversizing to aid anti reversion. Normally I'd go a mm or 2 bigger.
I offered up the gasket and its an exact match. Looking at the mani, I didn't think there was enough to make it a mm bigger, so left it as it was.

I did the same with the inlet, but it turns out, the previous owner has done this already.
So that's the work done.
All that's left is to take the head to the machine shop for a clean.
Any questions, ask away
Edited by Lawbags on Tuesday 21st April 18:03
Edited by Lawbags on Tuesday 21st April 18:05
Edited by Lawbags on Tuesday 21st April 18:06
Nice work. Time consuming but rewarding no doubt, if doing for yourself that is
I have something similar I need to do to an exhaust manifold. I have the dremel already but I'm curious to know where those longer sanding disks are from? The one's on the picture with them and the dremel on the brown table.
Humour
I have something similar I need to do to an exhaust manifold. I have the dremel already but I'm curious to know where those longer sanding disks are from? The one's on the picture with them and the dremel on the brown table.
Humour
The engines a D16 Civic engine, although not much is left standard on it any more.
The gains. Well, my engines boosted and got a lairy cam. So it will reduce lag, it allows the mixture into the chamber easier and also gives better atomization, meaning you can run more ignition, and ultimately, more power.
On an naturally aspirated engine,huge benefits are gained still. Mainly because the engine has to 'suck' the mixture in, it makes that much easier and therefore means you can get more in.
As for what gains can be had. On a bone stock engine, without having it mapped/tuned, 5-10 horsepower maybe. Add some breathing mods and have a good tune, and you could possibly see 20-25.
Of you add a cam too, then even more. Infact its pretty pointless fitting a cam witout any work in n/a form.
Whats the point in altering the valve duration if the ports are all lumpy and bumpy and wont allow the correct amount of mixture in and out.
Obviously a lot of it depends on other mods, engine size etc. But if you have the head off for whatever reason, go for it.
I'd forgotten I wrote this.
A bit of an update really. Since the head was all put back on, I've had a noticeable change in the lag. The turbo spools a fair bit faster, making it much more progressive. Before, the turbo spooled, the cam cut in and VTEC hit all in one go making it a bit savage and lighting it up all the way through 3rd and into 4th sometimes if I didn't modulate the throttle.
Now, wheelspin is greatly reduced making it drive like a different car.
I'll be getting back on the dyno soon, so results will speak for themselves.
Gassing Station | Readers' Cars | Top of Page | What's New | My Stuff