Restoration starts again....!
Discussion


glenrobbo said:
That's a very neat solution Tel, I like it a lot! 
Do you have any dimensions / drawings of your handiwork to share?
Do you fancy doing a batch of those angle brackets?
And where did you source the struts?
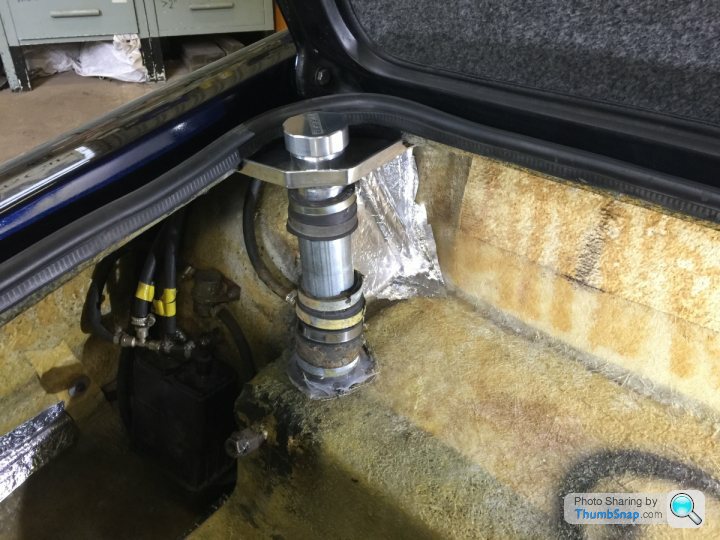
Can't take all the credit Glen, I simply used a bit of everyone else's ideas off this forum.. Mike (Philpot) helped me source the struts and gave me the correct lengths and pressure, they work a treat. The brackets I simply used what I had to hand, I'd already bought the rose joints to replace the original hinges but decided they could be used with the mods. The original bonnet plates, I ground off the small tube, re-drilled and welded a 12mm bolt through. These are then re-positioned back on the bonnet woodwork which is then drilled and bolted in place with a couple of 10mm bolts. For the main brackets I simply found a few bits of 1/4" bar I had in the unit and took my welder to it. I used a piece of 1/2" steel water pipe and welded a M12 nut on the end to mount the rose joint, this can give front-back adjustment but it won't be easy as it will need to be disconnected from the bonnet pivot to adjust, but once it's done it's done. The job is also made a lot easier as I have the use of the ramp which helps so much with access. I didn't have to take the bonnet off the car at all..Do you have any dimensions / drawings of your handiwork to share?
Do you fancy doing a batch of those angle brackets?
And where did you source the struts?
There's no problem making a few up for people but I would imagine the angle of the front hinge mounts vary car to car. That said, I'm sure there'd be enough 'play' in the bolt mounts to get the extension rod in the correct place.. I was also very lucky in that the plywood inner panels on my bonnet are in really good shape, as they'd need to be re-drilled quite close to the original holes, (not easy and I had to use a right angled drill attachment). I'll do a fag packet sketch of the dimensions when I'm next working on the car - tomorrow hopefully..

Edited by tel595 on Sunday 18th October 11:32
magpies said:
That is probably the simplest and easiest 'wide open' solution I've seen = certainly better than mine
The only ? is whether the original slotted section is strong enough for the extra torque being applied - easy enough to keep an eye on though.
I did think that too Mike. There's a bit of distance from the original box section (which is paper thin) to the end pivot now. I've tried to keep the bracket as strong as possible around the chassis mount, and I did a load test by hanging me off the end of the it while the car was in the air on the ramp - didn't move (surprisingly - I know)... It's all bolted up tight and there's no real flex noticed to be fair. We'll see what vibration and heavy loads will do in the future I guess... The only ? is whether the original slotted section is strong enough for the extra torque being applied - easy enough to keep an eye on though.

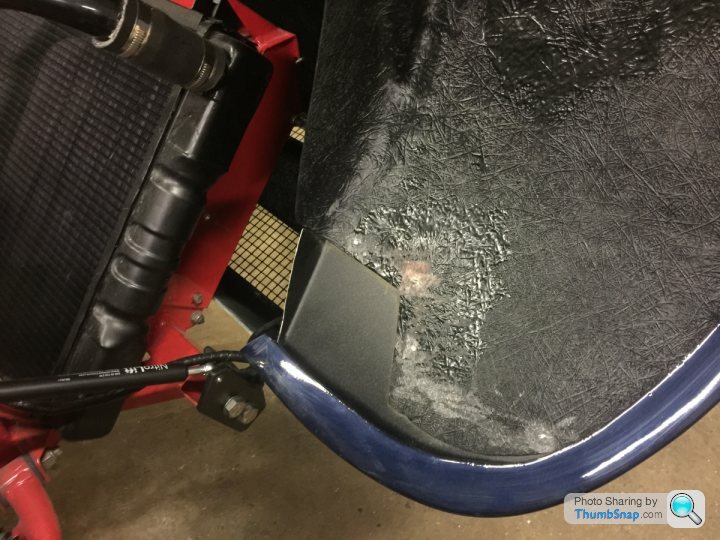
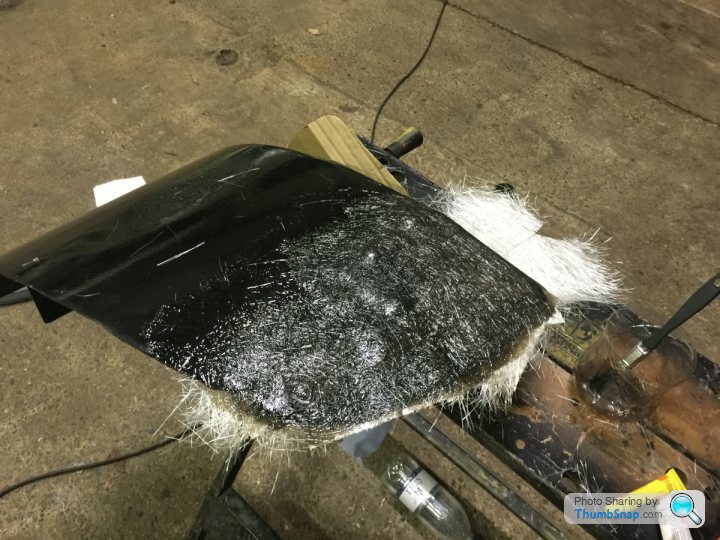
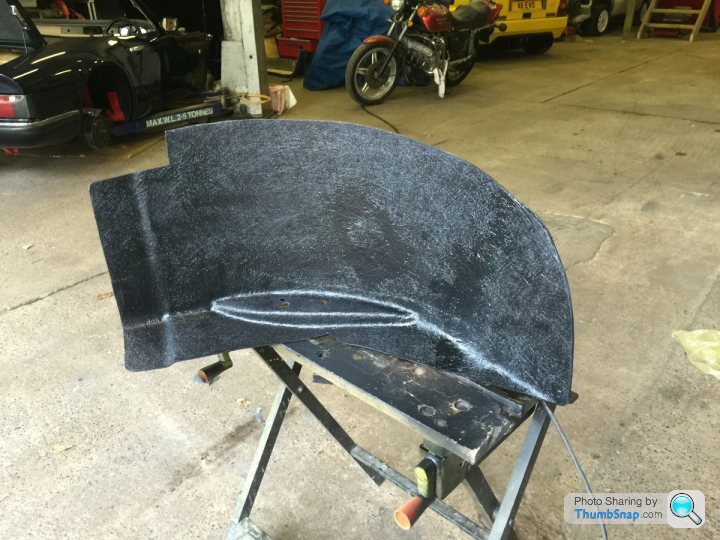
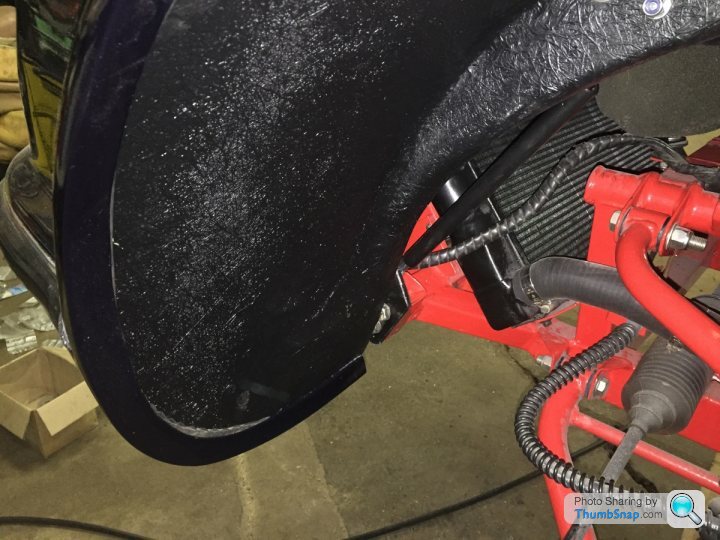
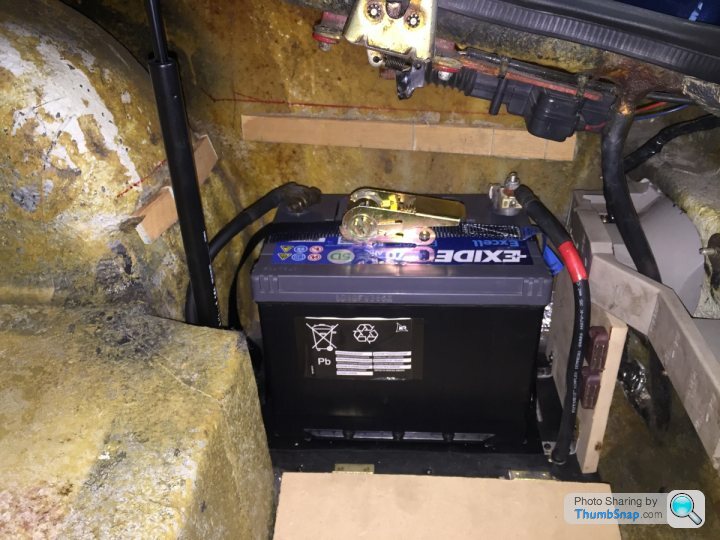
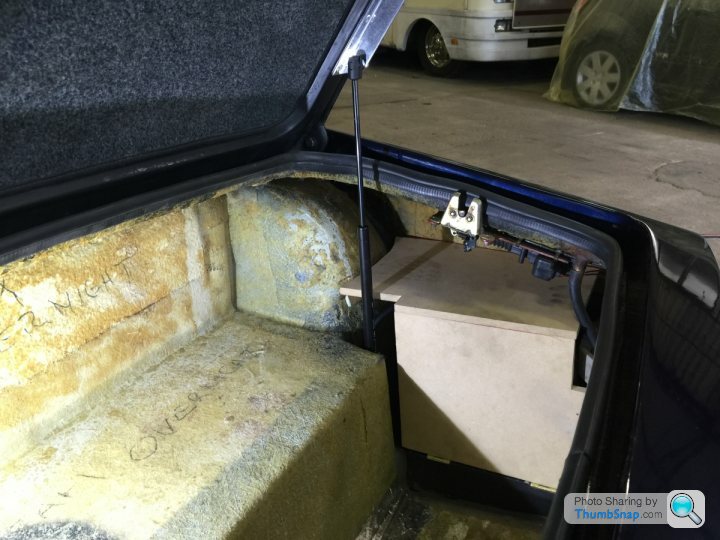
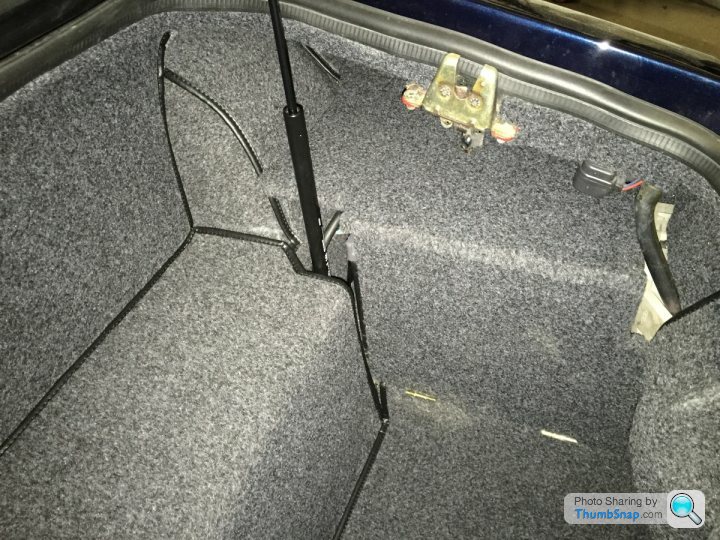
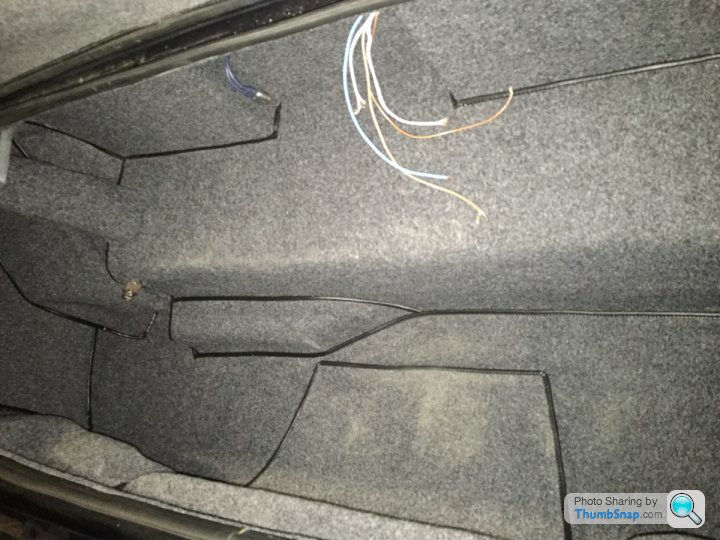
Been a busy boy this weekend.. Finished a few more jobs, most time consuming being the filling in of the inner front splash guards. Thought this would be a good idea as the bonnet is now hinged in a different location. Also finished off the battery relocation to the boot, fitted a new boot strut and polished the ally bracket. Fitted the relocated fuel filler in the boot and connected back to the fuel tank (Philpot rip-off I know). What else? Put new rubber o-rings on the door mirrors (big job)..


Edited by tel595 on Monday 26th October 02:02
Edited by tel595 on Monday 26th October 02:03
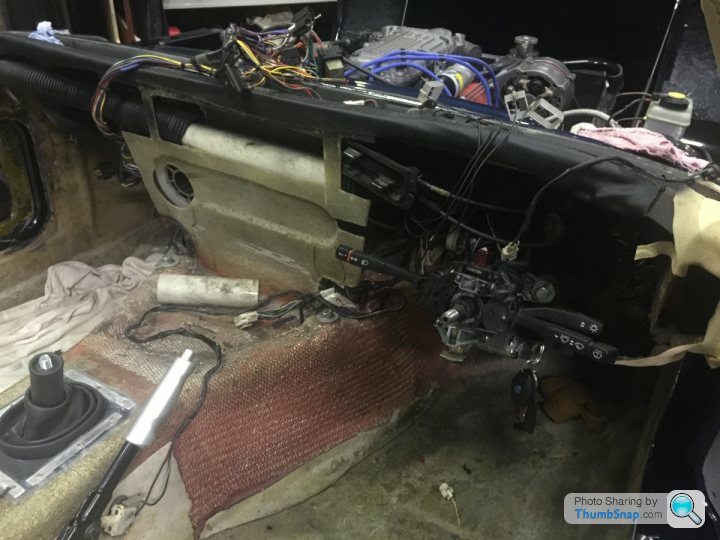
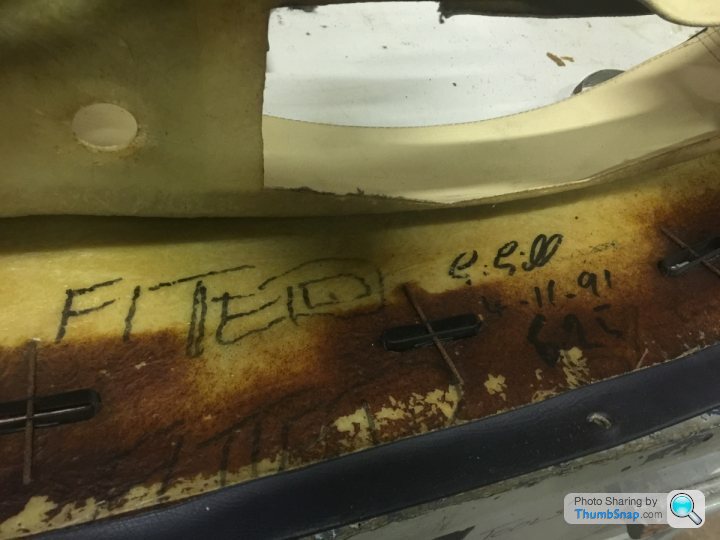
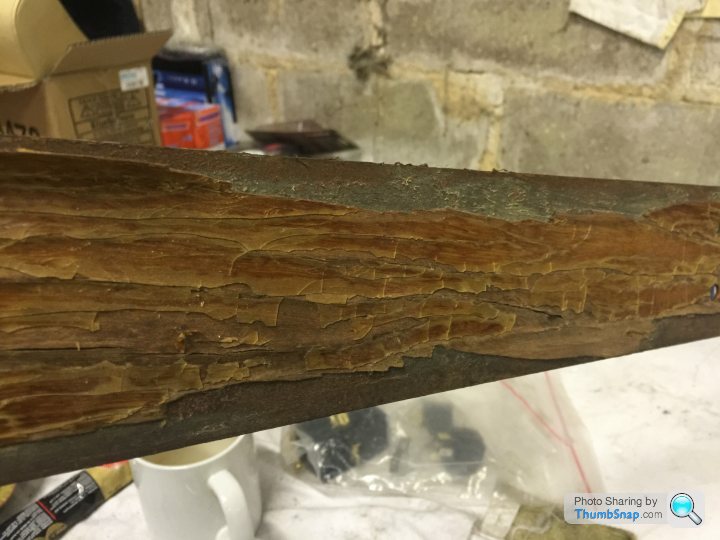
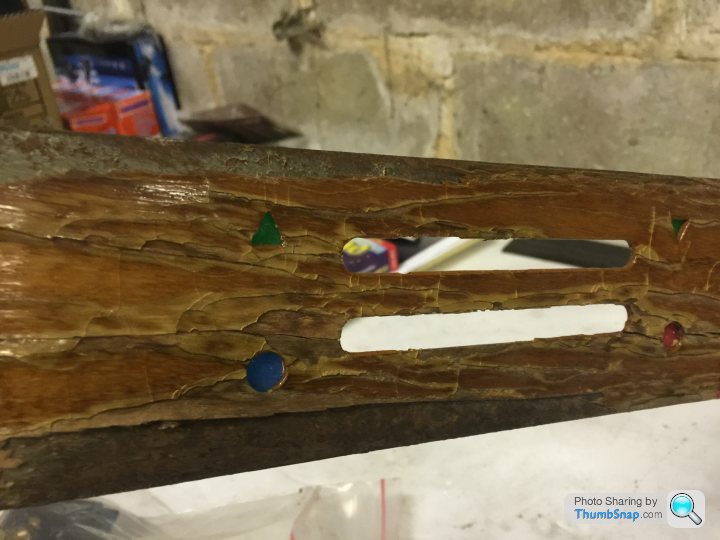
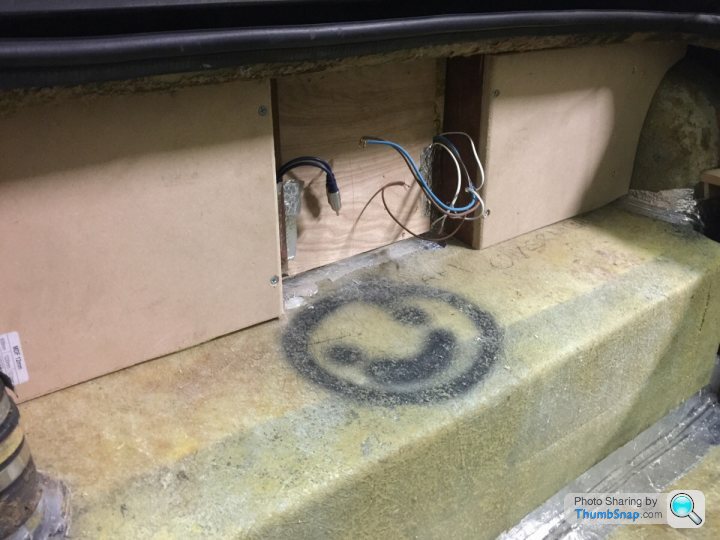
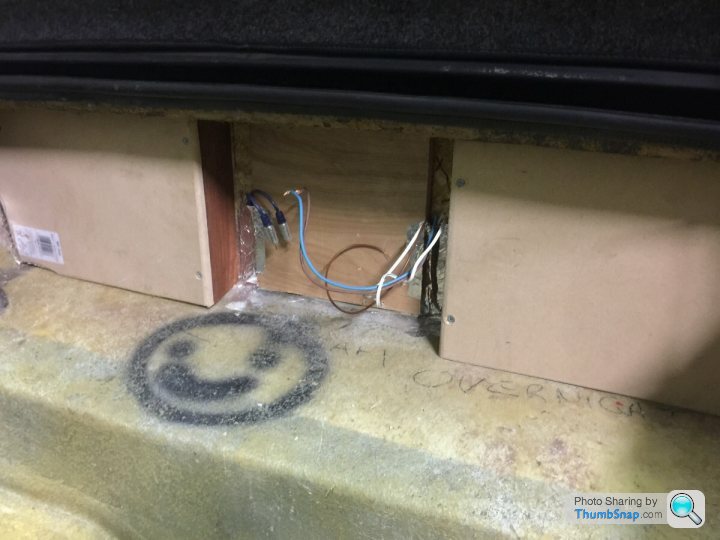
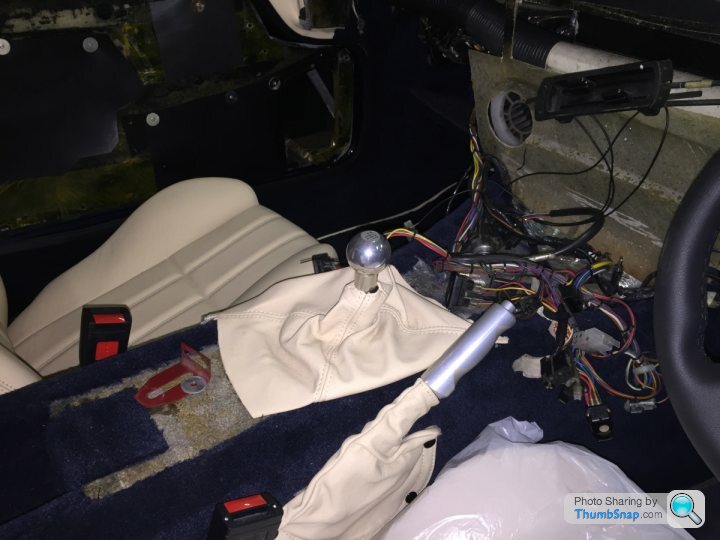
So... To make it easier to get to the bonnet release cable, I've removed the dash. Pretty easy really as only one screw into the upper bulkhead was in but that had to be drilled out! I can now remove and refurbish all the instruments too. I love finding all the hand written dates and notes underneath the panels.
I've removed the cable and think I can re-use the outer sleeve and just replace the 1.5mm inner. I've ordered a length of cable with a pear nipple one end and a new solder-on nipple for the other, I'm sure it'll be an interesting task..
I've removed the cable and think I can re-use the outer sleeve and just replace the 1.5mm inner. I've ordered a length of cable with a pear nipple one end and a new solder-on nipple for the other, I'm sure it'll be an interesting task..
v8s4me said:
As you have all that out why not remove the heater and make sure that it all works as it should?
Wise words.there is a flap that moves sending hot air to screen or interior, problem is it's a cr*p fit so when set to interior air still gets around it to take the path of least resistance... out of the screen vents.
And a spot of oil on the fan motor bearings!
Fuel filler looks neat, but no spill tray? Be very careful when filling.
Forgot, you're rather partial to the smell and taste of petrol
As you have all that out why not remove the heater and make sure that it all works as it should? You'll kick yourself if you find there is a problem after you put it all back together.
[/quote]
The heater will be out at the weekend Joe, full health check and lubrication will be administered...
[/quote]
The heater will be out at the weekend Joe, full health check and lubrication will be administered...
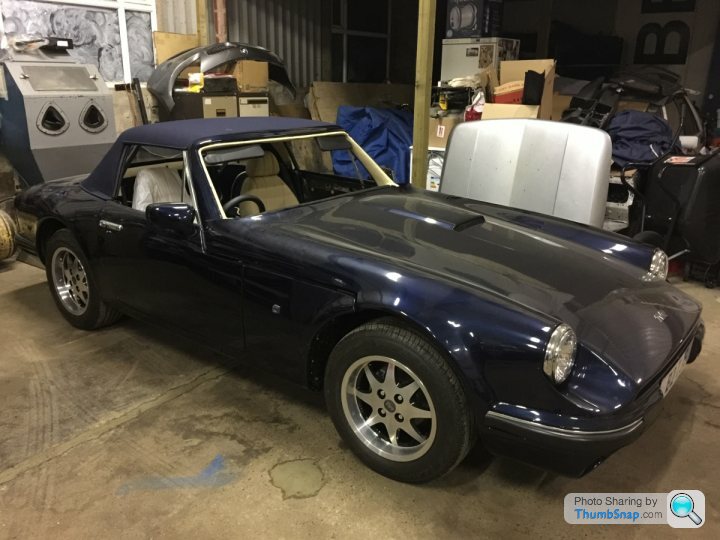
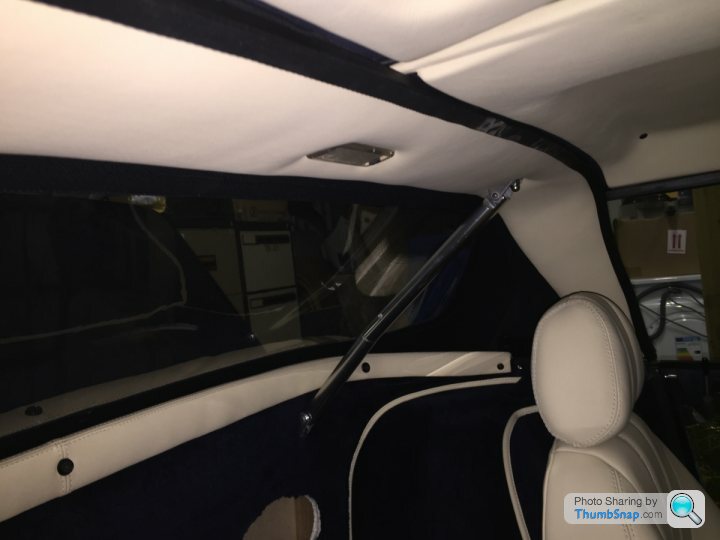
Getting close to being re-trimmed now, so all the detail stuff being done at the moment, you know, the stuff that takes ages and looks like you've done nothing..!!!!
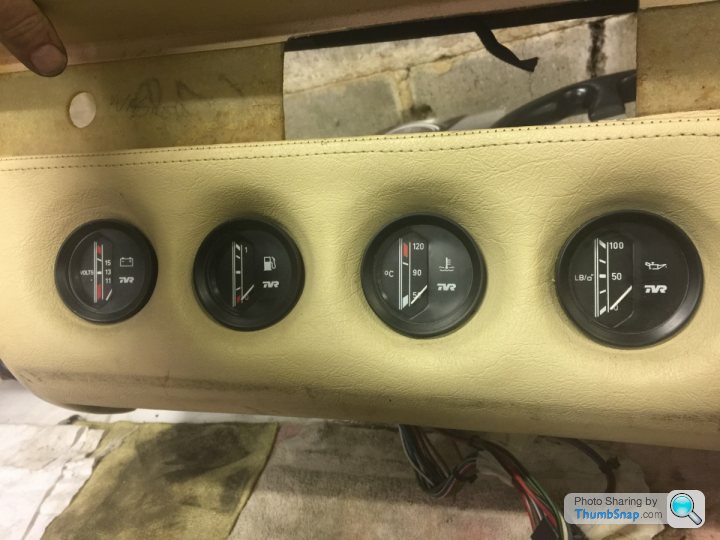
Took all the instruments apart to try and make them look decent, the dash was in a terrible state as the car had been left outside prior to me buying it. Quite happy with the results but I think I'll leave the dash to the trimmer. Was going to tackle it but running out of time.
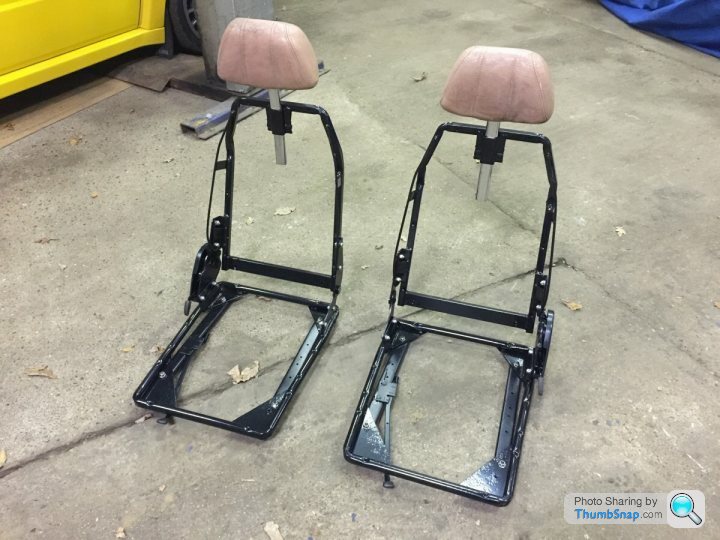
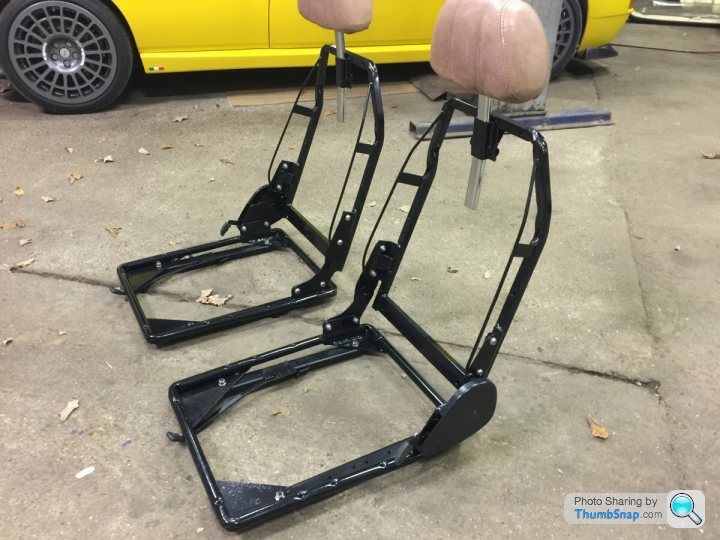
Bonnet cable repaired and working (b..stard job), but I need to re-align the bonnet slightly. Just got seat frames to reassemble after I've painted them (Chimaera seats) and replace the rubber sheet flaps on the doors and we're there..
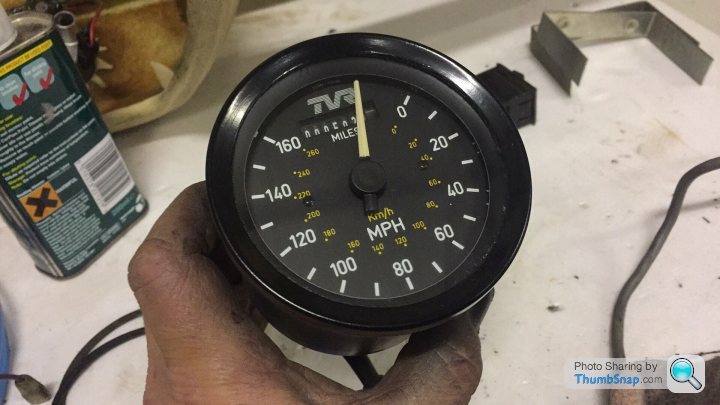
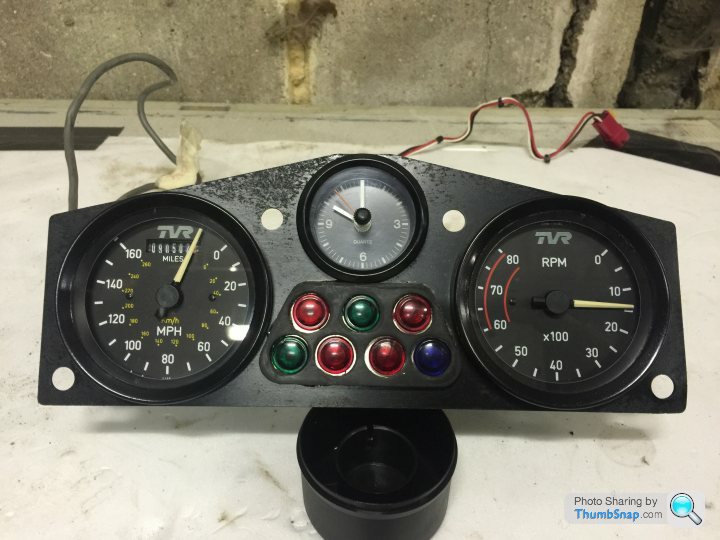
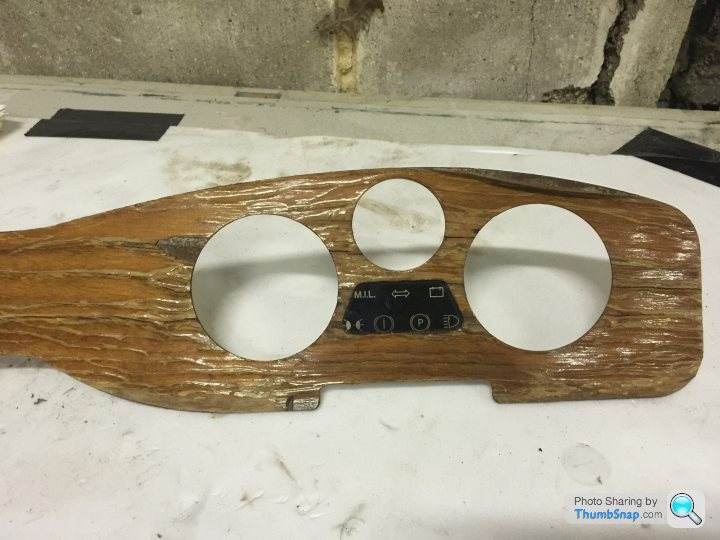
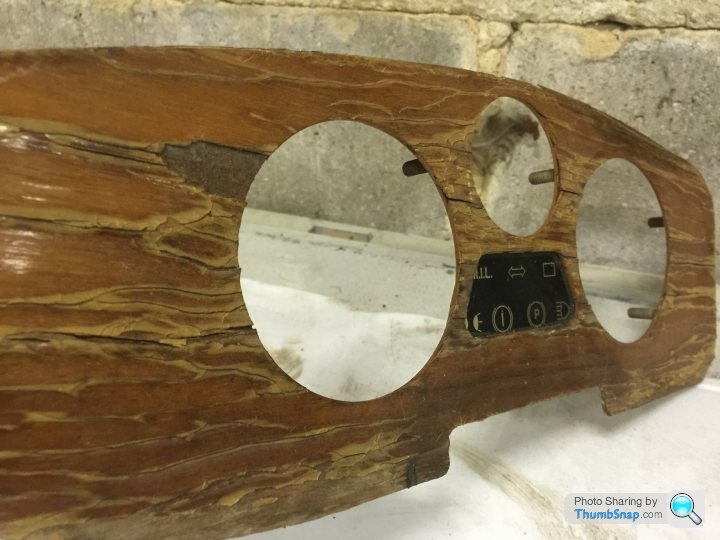
Took all the instruments apart to try and make them look decent, the dash was in a terrible state as the car had been left outside prior to me buying it. Quite happy with the results but I think I'll leave the dash to the trimmer. Was going to tackle it but running out of time.
Bonnet cable repaired and working (b..stard job), but I need to re-align the bonnet slightly. Just got seat frames to reassemble after I've painted them (Chimaera seats) and replace the rubber sheet flaps on the doors and we're there..

Finally got the S to the trimmers last Monday, but it wasn't without any drama (there's always something with me).. I spent all of last Saturday finishing off and checking I'd done everything ok, was walking out the door of my unit and thought, "I'll just check the bonnet release again'"and........ the nipple came off the end of the cable!!!!!! Aaaahhhhhhhhhh!!!!!!!!
So, out with the sockets, into the foot wells upside down, and out with the catches. I soldered the nipple back onto the cable but was too knackered to refit the catches and thought I'd get in early Monday morning and do it.. After 6 hours on Monday I finally got the bonnet releasing but it's still not 100%. I tried everything and the bonnet just wouldn't release correctly. I now think the bonnet that's on the car has been damaged/repaired in the past and it's just a b d one! I will beat it though..
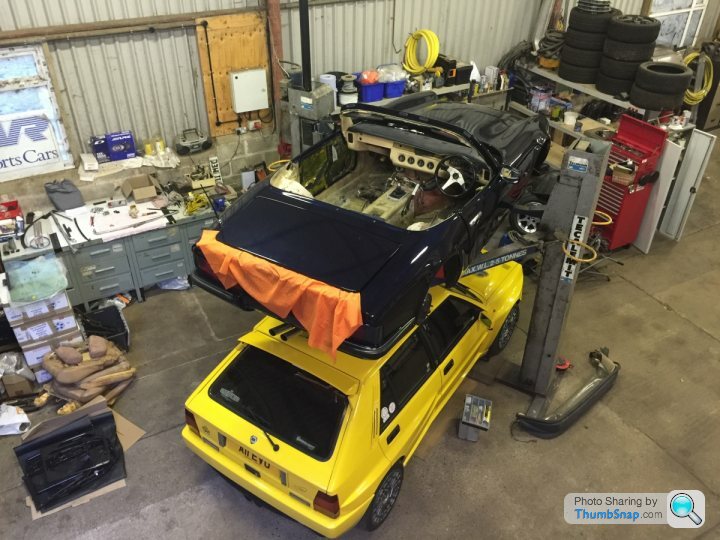
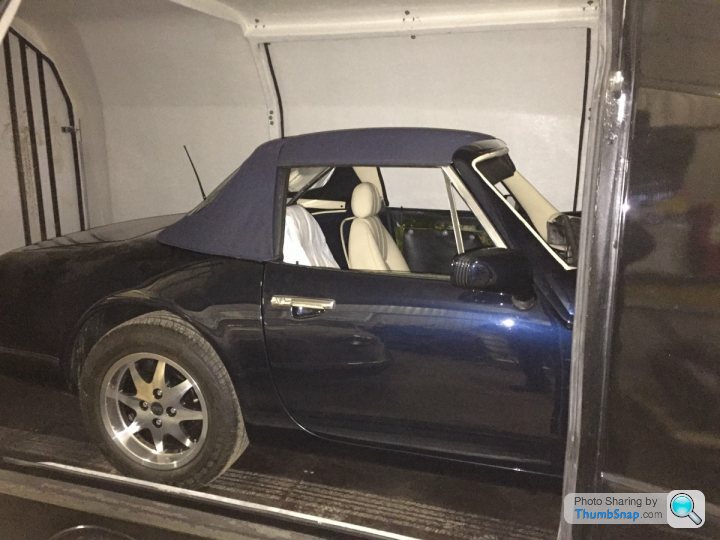
Anyway, we loaded it up onto the trailer, threw all the bits and pieces into the back of the van and zoomed over to Milton Keynes. Unloaded and left the car with Dave to work his magic.
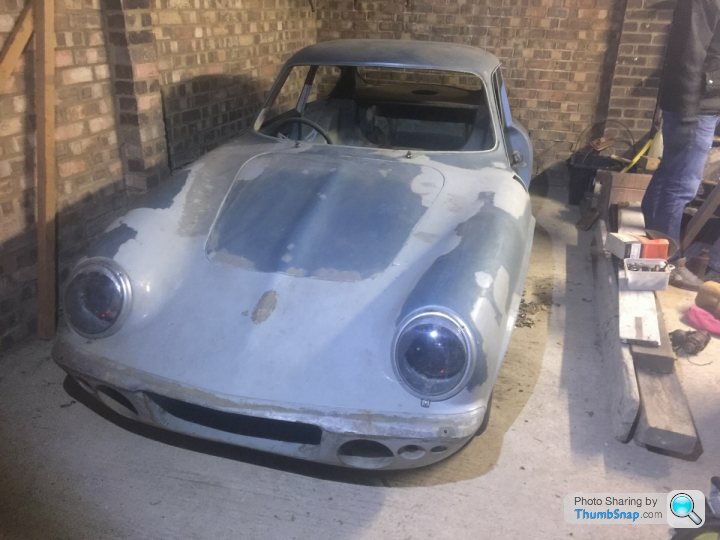
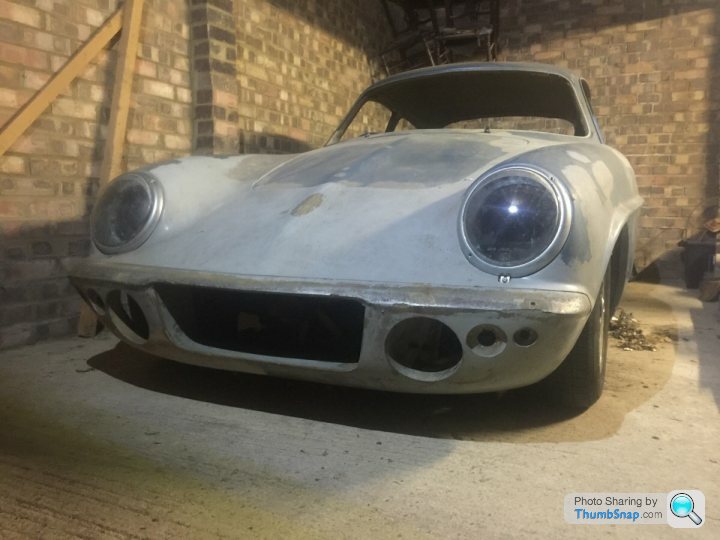
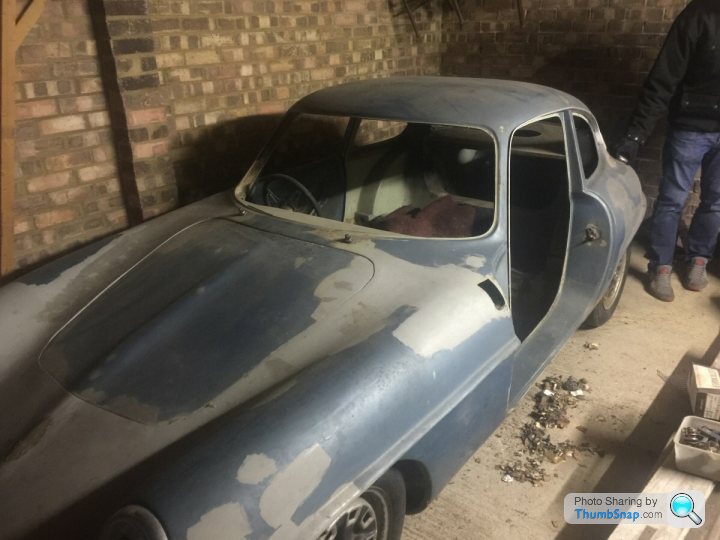
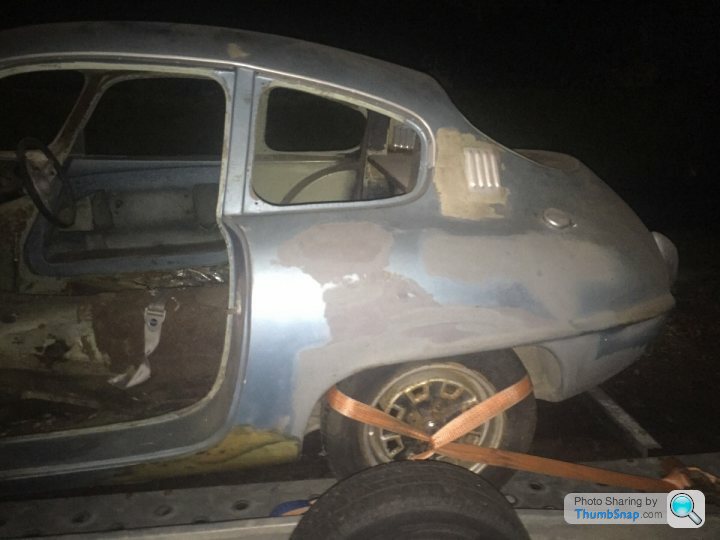
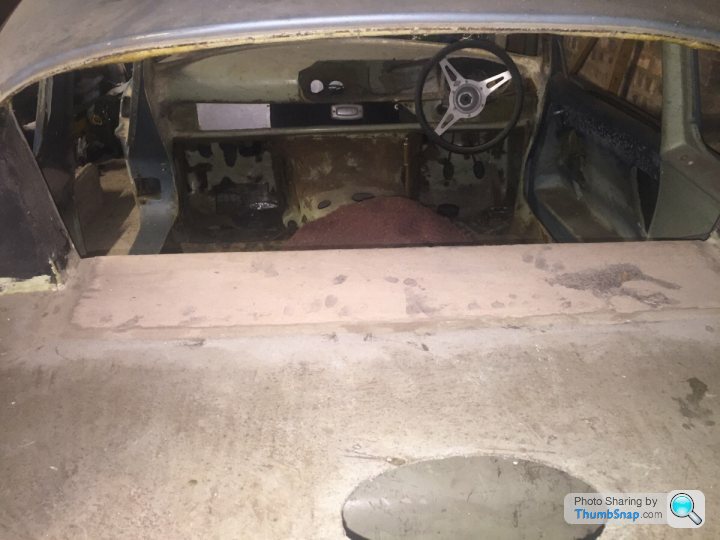
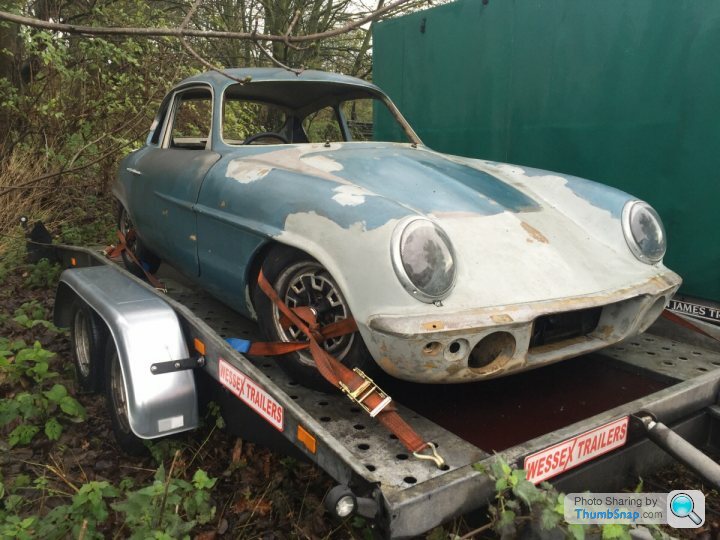
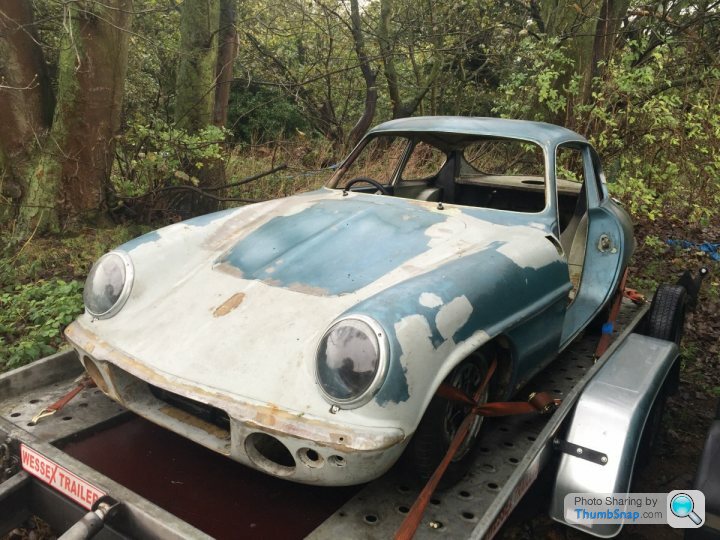
On the way back, I stopped off at Baldock to collect a car I've agreed to help restore as my next project. Quite an interesting little car, a 1962 Rochdale Olympic phase one. It's been in the garage, unmoved since the early'70's.! I'll probably post up its restoration progress on the Classic Fibreglass forum.. Enjoy the pics..

So, out with the sockets, into the foot wells upside down, and out with the catches. I soldered the nipple back onto the cable but was too knackered to refit the catches and thought I'd get in early Monday morning and do it.. After 6 hours on Monday I finally got the bonnet releasing but it's still not 100%. I tried everything and the bonnet just wouldn't release correctly. I now think the bonnet that's on the car has been damaged/repaired in the past and it's just a b
d one! I will beat it though..Anyway, we loaded it up onto the trailer, threw all the bits and pieces into the back of the van and zoomed over to Milton Keynes. Unloaded and left the car with Dave to work his magic.
On the way back, I stopped off at Baldock to collect a car I've agreed to help restore as my next project. Quite an interesting little car, a 1962 Rochdale Olympic phase one. It's been in the garage, unmoved since the early'70's.! I'll probably post up its restoration progress on the Classic Fibreglass forum.. Enjoy the pics..


Gassing Station | S Series | Top of Page | What's New | My Stuff