350i radiator removal
Discussion


Well the 350i rad has been weeping for a few months so today I had a few spare hours to pull it out.
Order of work was:
1. Remove bonnet
2. Remove bottom radiator hose and drain system
3. Disconnect all jubilee clips and remove hoses. A few of the clips were rusted tight so junior hacksaw was required.
4. Disconnect the electrical connections to the fan and otter switch.
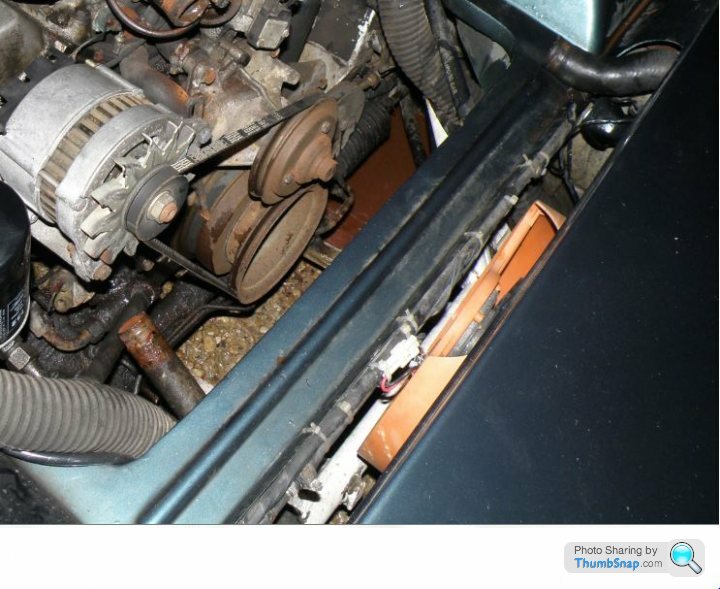
Next bit is the interesting bit. Measuring the width of the radiator it should slide out through the slot just behind the front panel - you can see the orange rad fan through the slot in picture below:
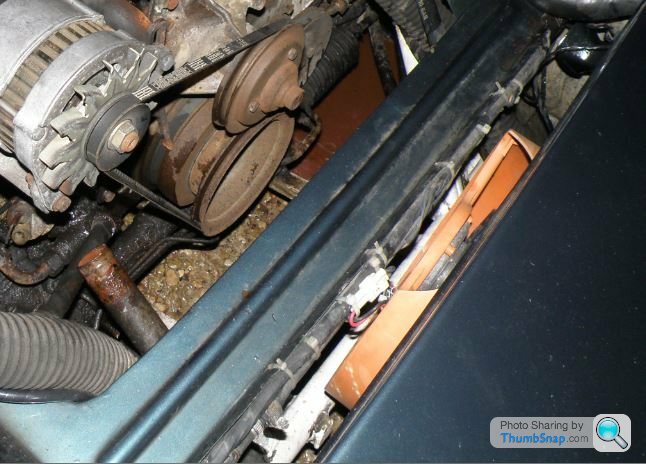
5. I soaked all the various bolts etc and then started with the cooling fan which unbolted easily (three M10 bolts) and managed to pull that up and through the slot.
6. Getting at the two top radiator retaining bolts was a pain, and a bloody knuckle experience. The top is held in by two M13 bolts BUT where the bolts go through the rad each is then sleeved with a steel bit of pipe to hold the rad in the right location and then the back nuts are several inches further under the front panel. I did try raising the light pods ( Mr Zigaziga top tip) and it did give an extra few millimeters to get my fat hands in to get a spanner on the back nut. After a decent amount of blood I did get both bolts undone and the rad was free to move about - BUT with the main cowl on it was about a millimeter too wide to get through the slot plus the two horns were in the way so,
7. Horns removed.
8. More blood and skin lost on removing the radiator cowl. I could lean the rad forward to get at the three M10 set screws and with some deft spanner wriggling I managed to remove the three bottom screws and then slid the cowling out of the top slot.
Home and dry I thought until I tried to get the rad up through the slot - but the M13 bolts and their seized metal sleeves stopped progress.
So tomorrow it will be a garden glove and hacksaw blade to carefully cut through the M13 bolts in-situ and then the rad should come out.
Frustrating but nearly there. I'll report back tomorrow but at least I haven't had to butcher any bodywork, so far.......
Order of work was:
1. Remove bonnet
2. Remove bottom radiator hose and drain system
3. Disconnect all jubilee clips and remove hoses. A few of the clips were rusted tight so junior hacksaw was required.
4. Disconnect the electrical connections to the fan and otter switch.
Next bit is the interesting bit. Measuring the width of the radiator it should slide out through the slot just behind the front panel - you can see the orange rad fan through the slot in picture below:
5. I soaked all the various bolts etc and then started with the cooling fan which unbolted easily (three M10 bolts) and managed to pull that up and through the slot.
6. Getting at the two top radiator retaining bolts was a pain, and a bloody knuckle experience. The top is held in by two M13 bolts BUT where the bolts go through the rad each is then sleeved with a steel bit of pipe to hold the rad in the right location and then the back nuts are several inches further under the front panel. I did try raising the light pods ( Mr Zigaziga top tip) and it did give an extra few millimeters to get my fat hands in to get a spanner on the back nut. After a decent amount of blood I did get both bolts undone and the rad was free to move about - BUT with the main cowl on it was about a millimeter too wide to get through the slot plus the two horns were in the way so,
7. Horns removed.
8. More blood and skin lost on removing the radiator cowl. I could lean the rad forward to get at the three M10 set screws and with some deft spanner wriggling I managed to remove the three bottom screws and then slid the cowling out of the top slot.
Home and dry I thought until I tried to get the rad up through the slot - but the M13 bolts and their seized metal sleeves stopped progress.
So tomorrow it will be a garden glove and hacksaw blade to carefully cut through the M13 bolts in-situ and then the rad should come out.
Frustrating but nearly there. I'll report back tomorrow but at least I haven't had to butcher any bodywork, so far.......
I don't think there is an easy way to do this; but I found removing the front spoiler and dropping it out of the bottom of the car is the 'easiest' way in the long run. You have to remove the headlamps and light pods to get decent access to the spoiler mounting nuts/bolts (which will probably be rusted solid but can be drilled/cut/wrenched off), but once the spoiler is off you can remove the radiator relatively easily. Also once the light pods are out you can get access to the otter switch and the bolts that hold the radiator supports without losing too much blood.
Hi Keith...Thats why we had to cut a piece off the spoiler..Ideally the spoiler being removed is the best way but you will most likely have to get a blade in there and as said hacksaw the bolts off...I would of done this if we had more time..But decided that i could re-glass the piece of spoiler on at a later date..
The cowling was removed prior to the rad coming out and was modified slightly as re-fitting would of posed a whole new problem..Not being able to fit the rad with the cowling fitted so thats why it was removed...Slots cut to the holes made it easier to re-fit...The cowling was last out but first in.
However removing the rad with the cowling may be possible with the spoiler removed....I should imagine its a right palaver doing it on your own....On axles stands...Watch the weight of the rad as well when its free..Its surprising how heavy they are...Its one of those PITA jobs that once done is very satisfying....Good luck mate...Ziga
Mine came out similar to yours in the 400SX - upwards. But I had to cut a little bit of fibreglass out, about 2 inches by 1 inch.
Upwards has the advantage that the car stays on the ground.
Zig did you replace the bit you cut out with an aly plate? If not, is the cooling worse/better/don't know?
Upwards has the advantage that the car stays on the ground.
Zig did you replace the bit you cut out with an aly plate? If not, is the cooling worse/better/don't know?
adam quantrill said:
Zig did you replace the bit you cut out with an aly plate? If not, is the cooling worse/better/don't know?
Hi Adam...It was put back with some bolts..Although i think Paul had been drinking..

It can be glassed back in underneath and the holes filled...Im going to sort the lacquer and the scabby boot out at some point anyway ...Plus it was the only option at the time.
The cooling is pretty much the same in fact the only thing that made a huge difference was an air intake from the spoiler to the filter...I have noticed a quarter drop on the temp gauge on a run which helps the engine bay to be that bit cooler when i come off a motorway.
Im going to fit a collared plate either side and fit another to the O/S.

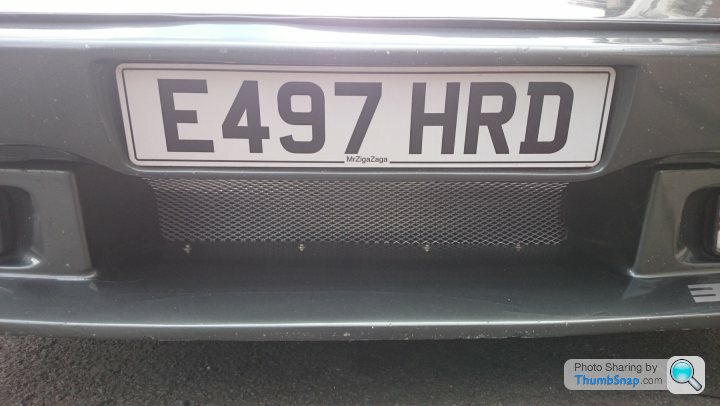
Its a bit low and does scrap over speed humps...The section of fibreglass on the bottom of the hose is the piece we cut.


Just got to watch that mice or rats don't climb up it...

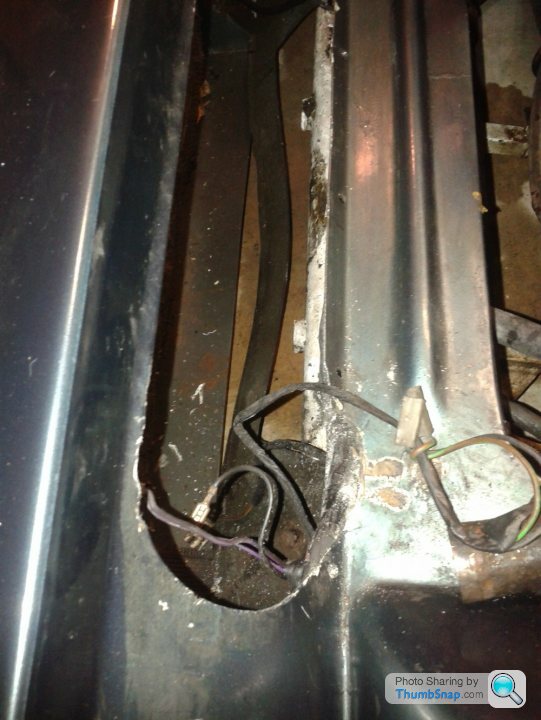
Right got mine out through the top. Only took 30 minutes to carefully hacksaw through the rusty bolts. Issue was then trying to fit the rad bottom hose section through the top slot, until I noticed a handy cut out on the near side of the slot where the top radiator hose normally sits. I'm presuming that someone in the past had the same issue and trimmed the panel to suit or are all panels the same??
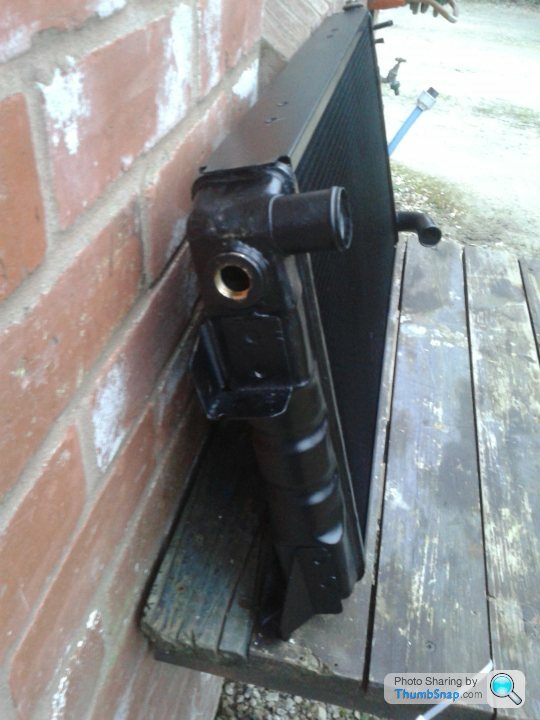
Anyway as you can see the leak is the bottom corner next to the bottom hose connection. I reckon with some careful fiddling I can get it all back in the same way without having to take the bottom front panel off. What's a bit of skin and blood between friends...


Anyway as you can see the leak is the bottom corner next to the bottom hose connection. I reckon with some careful fiddling I can get it all back in the same way without having to take the bottom front panel off. What's a bit of skin and blood between friends...

I did this job years ago and can honestly say it was the biggest pain in the arse job I have ever had to do on the car. Mine defo could not come out from above had to remove spoiler to do it that way. Then last year my fan needed replacing and that had to come out from below as well but without taking spoiler off. Both jobs scratched my arms that much I actually thought they were made of fibreglass!
I did this job years ago and can honestly say it was the biggest pain in the arse job I have ever had to do on the car. Mine defo could not come out from above had to remove spoiler to do it that way. Then last year my fan needed replacing and that had to come out from below as well but without taking spoiler off. Both jobs scratched my arms that much I actually thought they were made of fibreglass!
So dropped off the 350i radiator yesterday (Thursday) morning at 8.00am and collected it this afternoon, 21 hours later. £240 included VAT for a totally re-cored, refurbished and pressure tested radiator. This is the second radiator Hereford Radiators have sorted for me and their service, quality and customer care is fantastic. Long live small local companies I say.
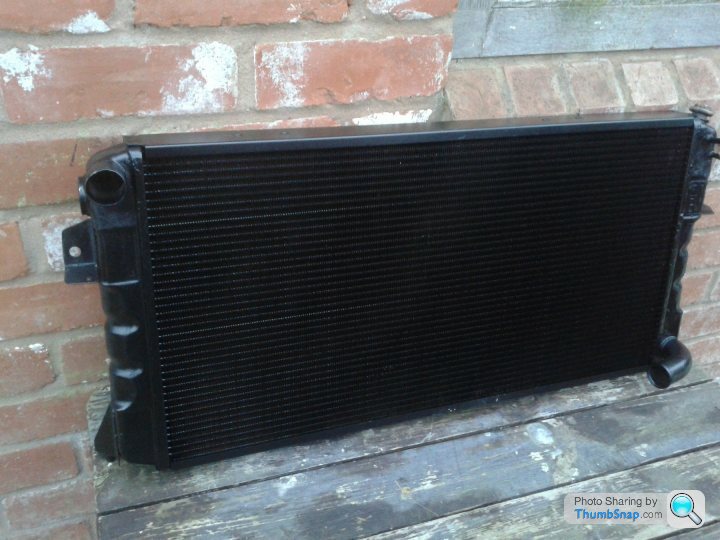
M22 boss added to replace otter switch with pukka fan switch
M22 boss added to replace otter switch with pukka fan switch
mrzigazaga said:
It can be glassed back in underneath and the holes filled...Im going to sort the lacquer and the scabby boot out at some point anyway ...Plus it was the only option at the time.
The cooling is pretty much the same in fact the only thing that made a huge difference was an air intake from the spoiler to the filter...I have noticed a quarter drop on the temp gauge on a run which helps the engine bay to be that bit cooler when i come off a motorway.
Im going to fit a collared plate either side and fit another to the O/S.
Its a bit low and does scrap over speed humps...The section of fibreglass on the bottom of the hose is the piece we cut.
Just got to watch that mice or rats don't climb up it...
Could you just position it to the side so it isn't as low?The cooling is pretty much the same in fact the only thing that made a huge difference was an air intake from the spoiler to the filter...I have noticed a quarter drop on the temp gauge on a run which helps the engine bay to be that bit cooler when i come off a motorway.
Im going to fit a collared plate either side and fit another to the O/S.
Its a bit low and does scrap over speed humps...The section of fibreglass on the bottom of the hose is the piece we cut.
Just got to watch that mice or rats don't climb up it...

This is interesting! Im doing the rad on mine as its shot, had to remove the splitter and everything to get the thing out! Was this rad a common part on the wedges? A TVR special or nicked of a range rover etc? Mine looks similar to yours. It definitely has the 4 top mount threads too. Have you got any pics of your fan cowling if you don't mine sharing?
Rob
Rob
TVRTRICEY said:
This is interesting! Im doing the rad on mine as its shot, had to remove the splitter and everything to get the thing out! Was this rad a common part on the wedges? A TVR special or nicked of a range rover etc? Mine looks similar to yours. It definitely has the 4 top mount threads too. Have you got any pics of your fan cowling if you don't mine sharing?
Rob
Ah, now if you'd asked 2 hours ago I could have taken a photo of it out. Spent the evening getting it all back together and it's all now back in bar the top radiator hose which I've left off for now as I'm tidying the inner top panel so primed that up as last job of the evening.Rob
The radiator cowl looks a little like the one below however it has two letter box sized vertical slots either side of the fan with a heavy strip of rubber hanging down to cover each hole. The rubber is fastened to the top by an aluminium plate held on by three pop rivets. I'll get as photo over the weekend.

I've got a single fan unit that then bolts to the black cowl and is held on with three small bolts. Photo shows the fan peaking out. The bonnet was removed to improve access.
Let me know if there are any other bits you want photos of.
Anyway just goes to show that the radiator can be removed from the top, if you've got time, patience and you're not put off by the sight of your own bloody knuckles!
The rads were the early classic range rover V8 and had a modified top O/S outlet...They are also the same rads that were fitted to the early Griffs...
http://www.pistonheads.com/gassing/topic.asp?h=0&a...
http://www.pistonheads.com/gassing/topic.asp?h=0&a...
KKson said:
So dropped off the 350i radiator yesterday (Thursday) morning at 8.00am and collected it this afternoon, 21 hours later. £240 included VAT for a totally re-cored, refurbished and pressure tested radiator. This is the second radiator Hereford Radiators have sorted for me and their service, quality and customer care is fantastic. Long live small local companies I say.
M22 boss added to replace otter switch with pukka fan switch
Hi Keith, I've used Hereford Radiators twice and most recently 2yrs ago to recore my 350 Rad, but prices must be on the up as I'm sure they charged me £150 all in, but maybe the older cars have slightly different radiators?M22 boss added to replace otter switch with pukka fan switch
Catch up soon
Roger
Gassing Station | Wedges | Top of Page | What's New | My Stuff