Numpty blue sky Q
Discussion


Taking advantage of the nice weather this afternoon and having got the camera out to have a play with my new battery grip and remote, I thought I'd take a few snaps of the new house.
I've noticed that when taking photographs even slightly towards the sun, the sky comes out grey and naff on the pictures whereas taking the shots with the sun behind it's a nice blue.
Would I be right in thinking that a polarised filter on the lens rather than the UV filter I've got in place in case of damage would bring the blue back, or am I barking up entirely the wrong tree? If not, is there any way to still get the nice blue skies on the shot? If a polarised filter will help, I assume it blocks slightly more light than a UV filter so might not be quite the best option for a general all purpose, leave it on the lens all the time in case it gets scratched filter, correct?
Cheers Simpo.
Examples:
Toward the sun

Away from the sun

Any ideas?
Edited to add: I know the pictures themselves are naff, just illustrates the point. I've noticed the same effect when taking pics of Red Kites down at Stokenchurch.Also, looking at them again, I think you might be right Simpo and it's just the amount of light blowing out the sky.
>> Edited by anonymous-user on Thursday 21st April 21:28
Examples:
Toward the sun
Away from the sun
Any ideas?
Edited to add: I know the pictures themselves are naff, just illustrates the point.
I've noticed the same effect when taking pics of Red Kites down at Stokenchurch.Also, looking at them again, I think you might be right Simpo and it's just the amount of light blowing out the sky. >> Edited by anonymous-user on Thursday 21st April 21:28
Yep! It's a big problem. Trouble is, you can either expose for the sky or the building, but not both.
There are several ways round the problem.
1) Underexpose your shots. That will keep the blue sky but make the building dark. However, you can recover the shadow detail later in PhotoShop or similar.
2) Using a tripod, bracket your shots so that one has the correct sky and one the correct building. Then composite them together.
3) Use a graduated neutral density filter to make the sky roughly as dark as the building.
Suddenly you realise how clever the Mark One Eyeball is
It is just plain over-exposure in the sky. You could try a polarising filter but i'm not sure it would work (or very well at least). I know it is cheating but I would be tempted to stick the camera on a tripod and take 2 shots from the same poistion, one exposed for the house and one for the sky then use photoshop to merge them together.
Alternatively you could always set the exposure to an intermediate value producing some blue in the sky that could be amplified under editing and still collecting enough image data from the house to brighten it up somewhat in Photoshop.
Alternatively you could always set the exposure to an intermediate value producing some blue in the sky that could be amplified under editing and still collecting enough image data from the house to brighten it up somewhat in Photoshop.
As Mr Simpo says
Easiest is the ND grad filter, and it has the ability to be used diagonally (which whould have helped your shot)... and, although not into the sun, helped retain all the detail in this:
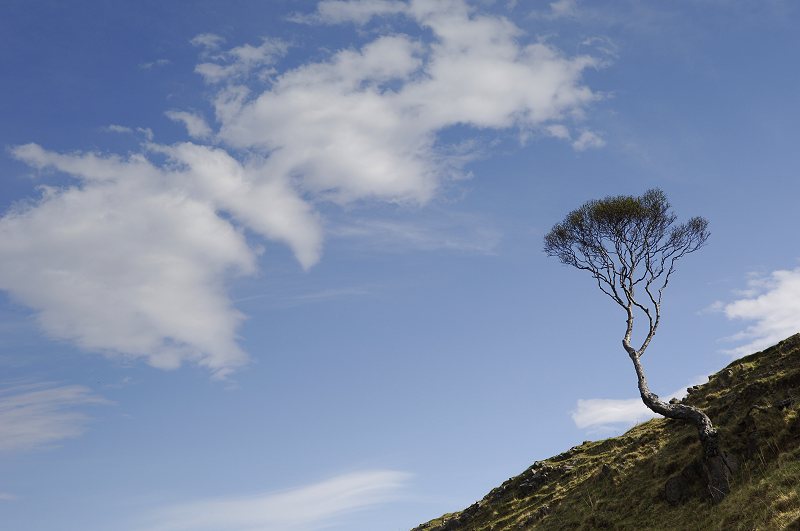
The cokin filter, holder and a bit to fix the holder to your lens will cost about £20.
Steve
>> Edited by GetCarter on Friday 22 April 07:24
Easiest is the ND grad filter, and it has the ability to be used diagonally (which whould have helped your shot)... and, although not into the sun, helped retain all the detail in this:
The cokin filter, holder and a bit to fix the holder to your lens will cost about £20.
Steve
>> Edited by GetCarter on Friday 22 April 07:24

simpo two said:
Suddenly you realise how clever the Mark One Eyeball is
Yep - the dynamic range (the difference between the magnitude of light and dark we can resolve) is an amazing 30,000:1, and if you take into account what we can achieve when moving from fully adapted dark vision to full "white out" (e.g. 100% snow coverage with no sun), then it's an amazing 1,000,000,000:1!!!!

Ay typical camera will be in the range of 250:1 to 450:1, about 100 times worse!
There are only two ways around this.
1) Take two pictures and combine.
Firstly take the sky correctly. I use "spot" metering, and set the meter point to be top middle on the camera. Remember a point in the scene that matches up with the viewfinder marks to aid alignment for the second shot.

2) Keep the camera the same (you don't need a tripod as you can sort out any 'skews' later in photoshop, but it does help) and move the spot metering point onto the foreground

Now, combine them in photoshop - I usually paint a mask and then use layers to combine - and you get this

The second way is to use a grad filter.
The above was done without any tripod. Easy!
J
>> Edited by joust on Saturday 23 April 22:13
 i think
In that one it's easy.
Put the first image under the second image in layers
Then, use the magic wand to select the sky in the second image. As it's so "whited" out it's easy to get it all.
Extend it by 3-5 pixels
Inverse the selection
Feather by double the pixels you extended it by
Combine the layers
Simple
For any "touching up" I move into mask editing mode and do it there.
J
 Cheers!
RossC said:You can do exactly the same in PS Elements - I often use it (I have elements and CS) as it's sometimes "quicker".
I'm going to have to get myself a manual/idiots guide to PS Elements that Canon supplied with th camera. You guys could be talking Mandarin for all i know at them moment....
RossC said:www.dummies.com/WileyCDA/DummiesTitle/productCd-0764570625.html
So....any recommendations ? dummies guide ???
RC
www.photoshopsupport.com/
www.arraich.com/elements/pse_basics1.htm
Or just type in "photoshop elements begineers guide" into MSN search, google etc.
J
Gassing Station | Photography & Video | Top of Page | What's New | My Stuff