Peugeot 205 8v turbo conversion
Discussion


I'v noticed alot of people have recently been posting up alot of questions regarding the 2.0 8v turbo engine conversion into a 205. Seeing as there isn't alot of information out there (and the fact 205drivers isn't accepting new members for whatever reason) i have posted up my old project diary to try and help you all out.
Please bear in mind that i have simply cut and pasted this off another forum and its about 18months old. If you have any questions either post them up in the thread or email me and i'l try and help you out as best i can. Stu
I'll start here:
.....Unsure for a week or two which route to take a 2.0 8v turbo from a Xantia Activa turned up (Thanks to Mikey G) for not alot of money. That was quickly snapped up :happy55:
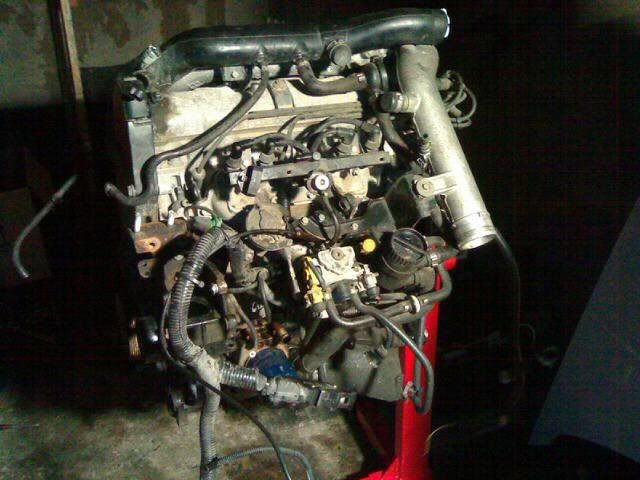
So out with the old (well, what was left of it lol)
Not taking any chances second time around the new engine was totally stripped and rebuilt. A few pics from various stages:
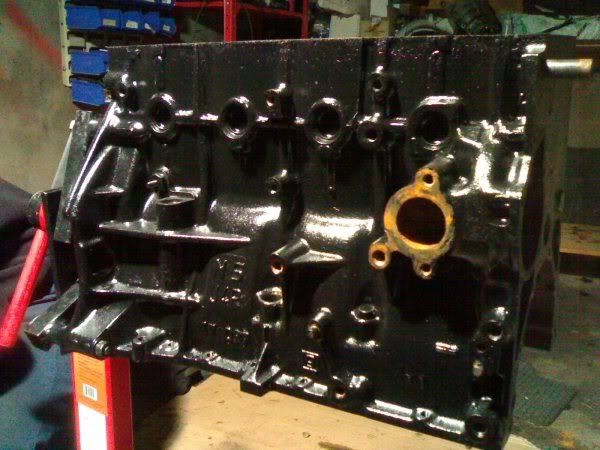
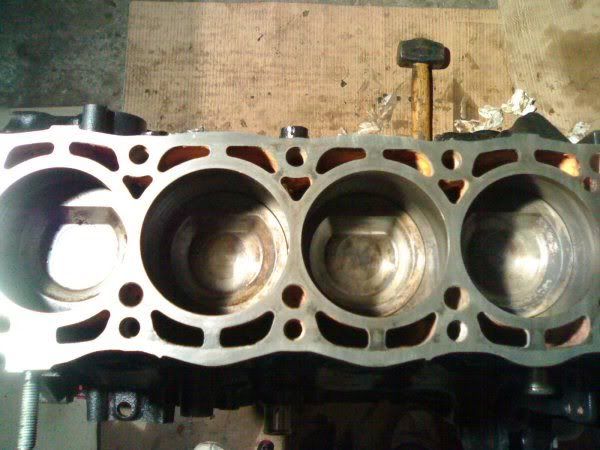
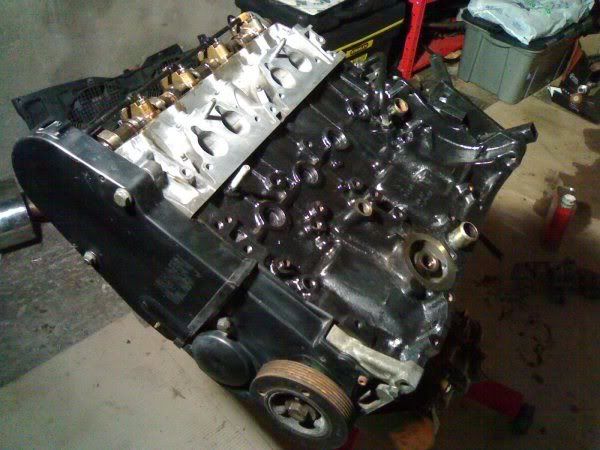
Whilst the block was bare i took the chance to GUNK it and give it a lick of black engine enamel:
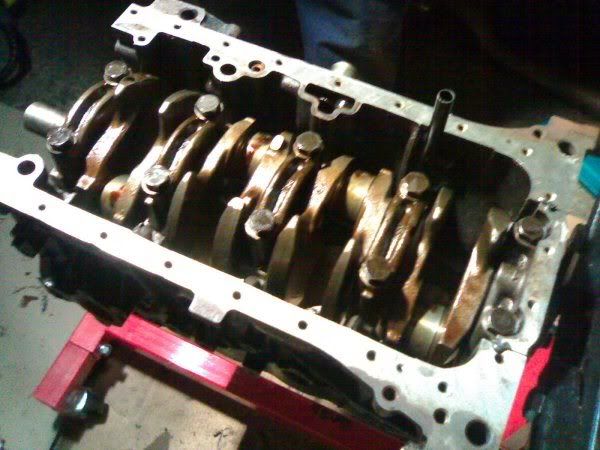
Back in go the pistons, rods and crankshaft:
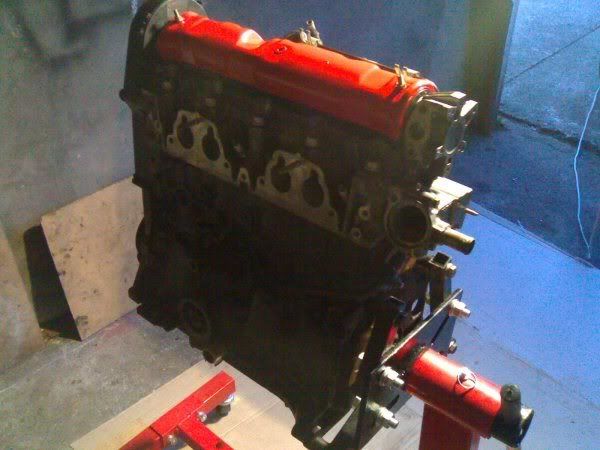
Now the head and block are re-united it can be timed up:
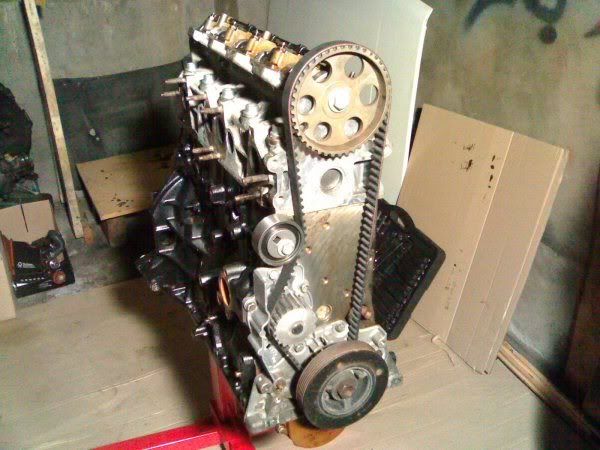
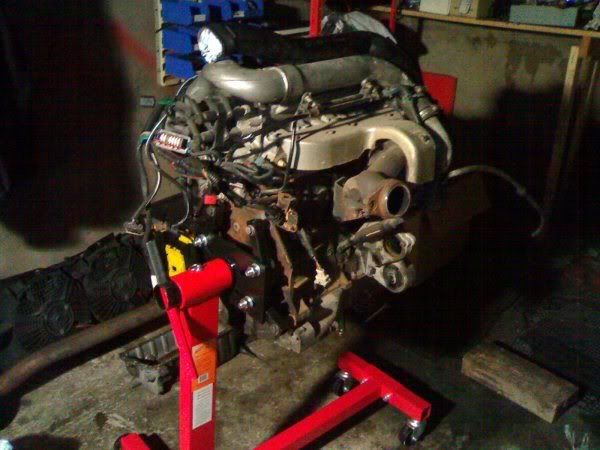
It begins looks like an engine again:
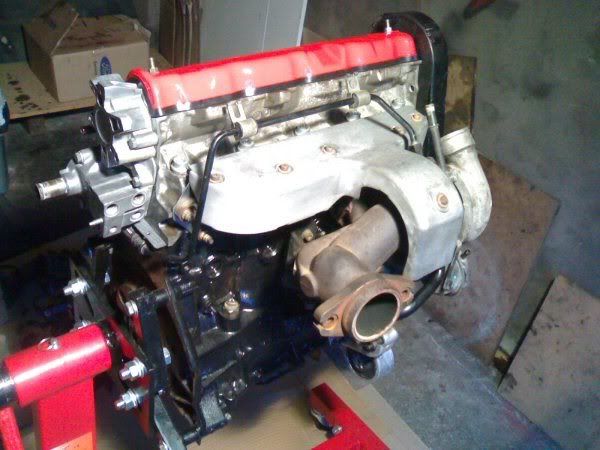
Bolting the turbo back on:
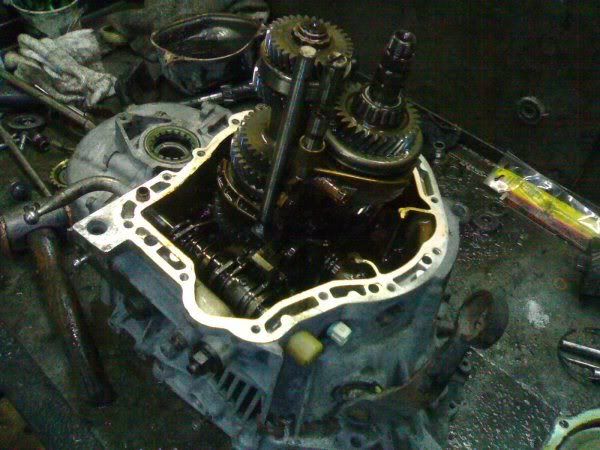
With the new more torquey engine, i decided that a 1.9 gearbox would be better suited to the job, my previous gearbox would keep the engine revving too high and out of the power band. After a quick swap with Tombo i had the box i wanted, just to be sure i took it to the local gearbox centre and had them strip, inspect and rebuild it:
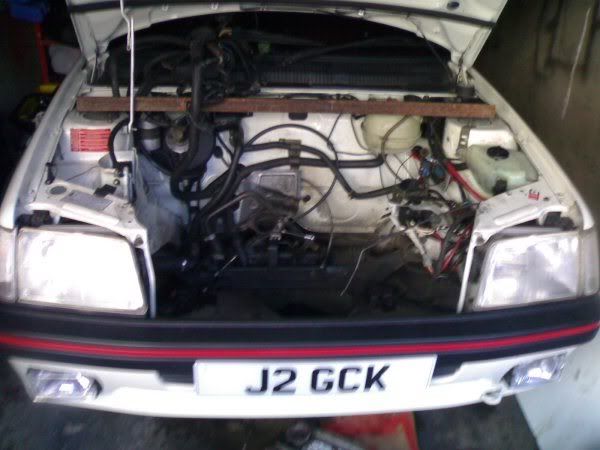
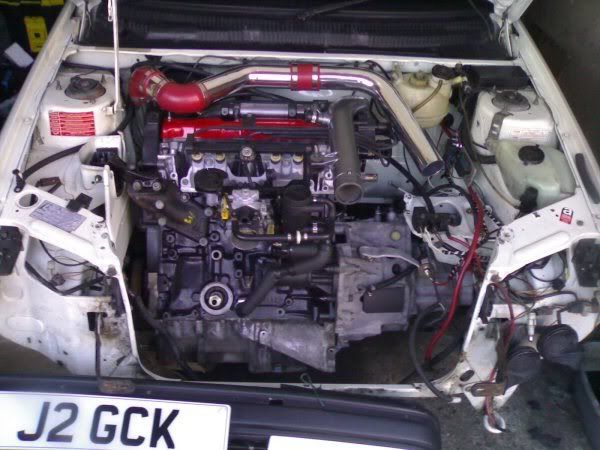
With the gearbox back and fitted to the engine , all was fitted into the car:
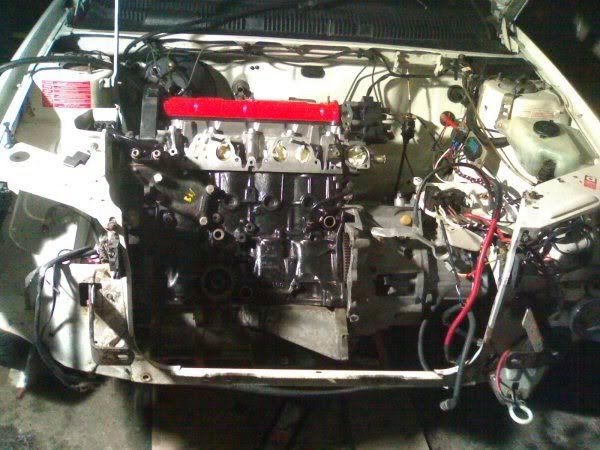
But it was a VERY VERY tight fit, some modifications would need to be made!!
Space between turbo and brake servo:
Space between downpipe and bulkhead:
So.... the lower engine mount was cut and welded with an increased length of 20mm. By pushing the engine forward at the bottom it tilted it downwards at the back, giving valuable millimteres of extra clearance. Combined with a brake servo from an XS i now had lots of room to play with :happy65: :
Whilst checking clearances the gear linkages needed to be modified to clear the turbo. The 'L' linkage that controls forward to rearward movement of the gear lever was re-drilled, cut and bent. Not only did it clear the turbo, but with my adjustable linkage rods i now had a gear selection that was tighter than a bankrupt scottishman :happy55:

Even in its finished form it is very tight down the back. So with safety in mind i have heat wrapped all the fuel lines and oil/water pipes that run near the turbo and the exhaust downpipe (no pics of this):
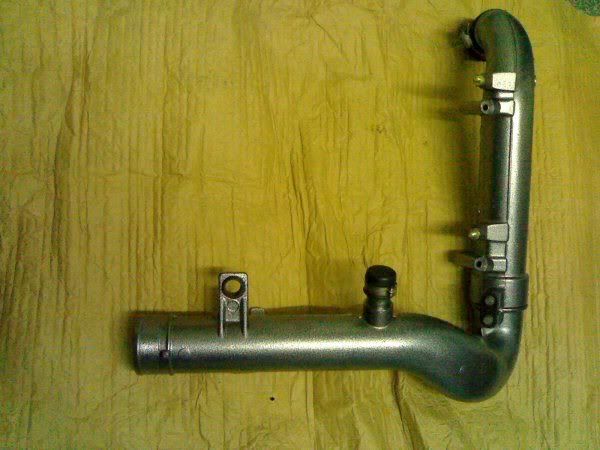
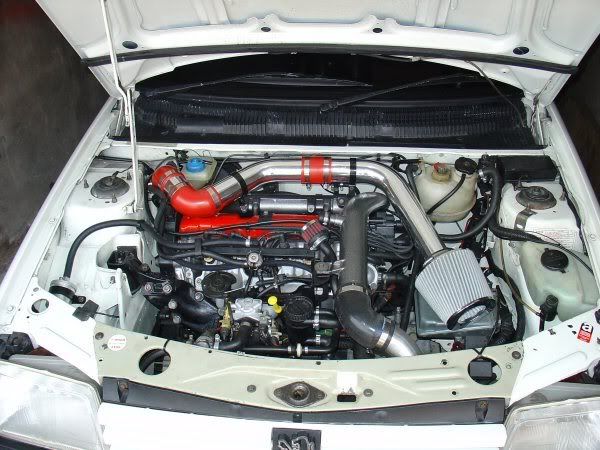
Next up i decided to look at the airfilter and boost pipes to and from the turbo. The main boost cross over-pipe that i had sent off for powder coating returned looking better than i'd have imagined, painted an unusual silver/black speckle combo (not my idea but it does look great in the flesh), so that was fitted:
After looking at the route of the standard Xantia turbo inlet pipework it was obvious that it would foul the master cylinder and would not fit. But i wanted to try and retain the intended position of the filter, afterall its in a nice cool position as far away from the turbo as can be. So i bought some 'bling' alloy tubing off ebay and set about making up my own pipework.
Not too much left to do now then :happy45: i had a busy few weeks ahead getting the rest of the bits ready to be fitted:
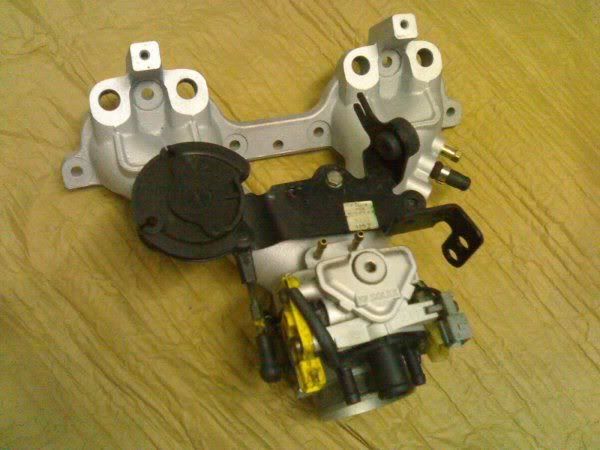
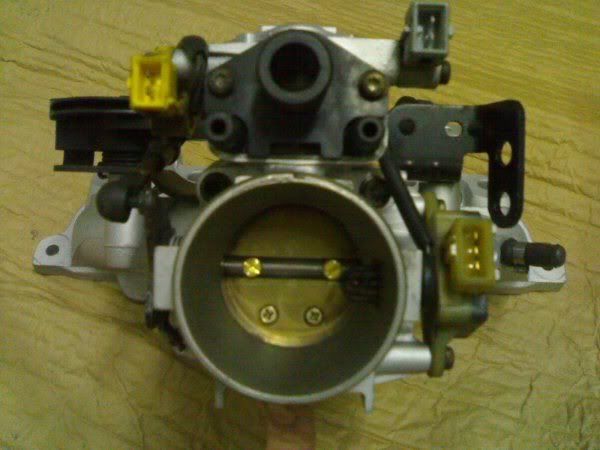
Inlet manifold totally stripped and cleaned inside & out:
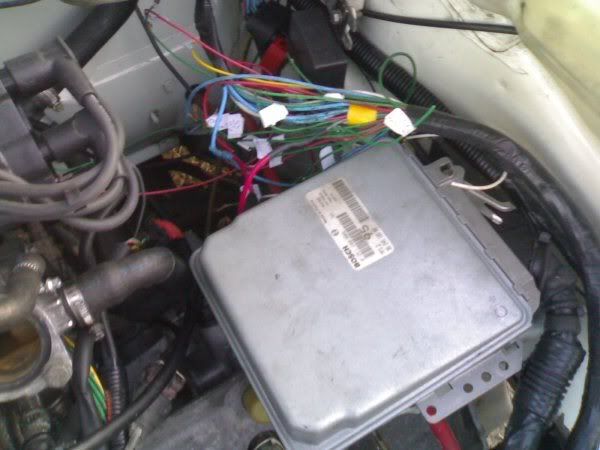
Most of the wiring was installed and the ECU trial fitted (later to be bolted down on the battery tray using a custom made bracket):
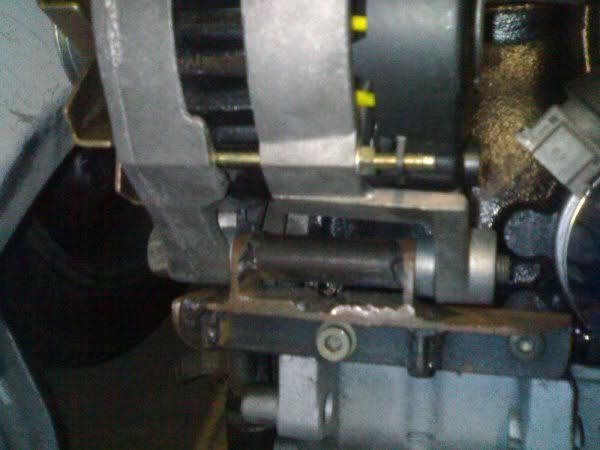
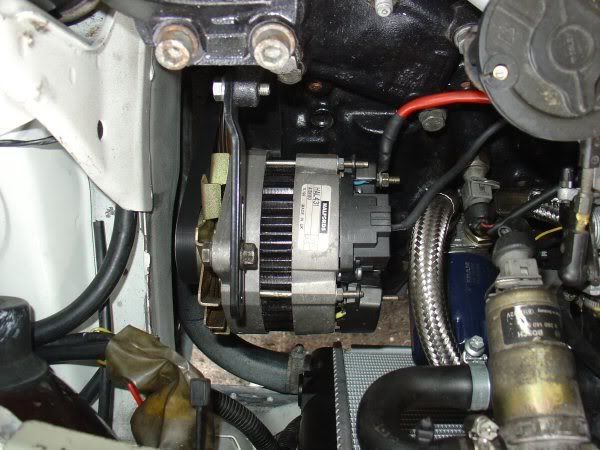
New alternator fitted using a custom made mount:
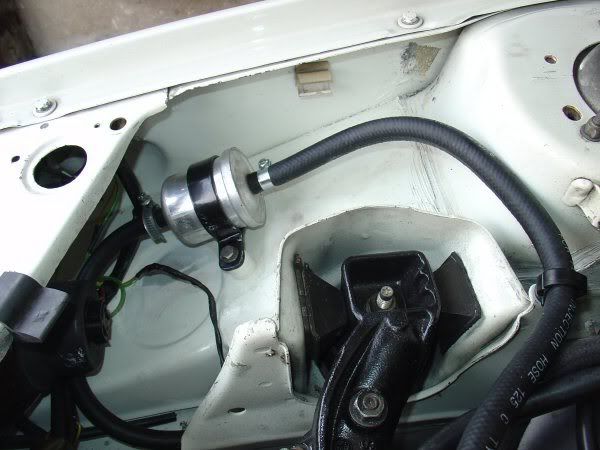
New, smaller fuel filter (306 gti6) fitted into the O/S front wing:
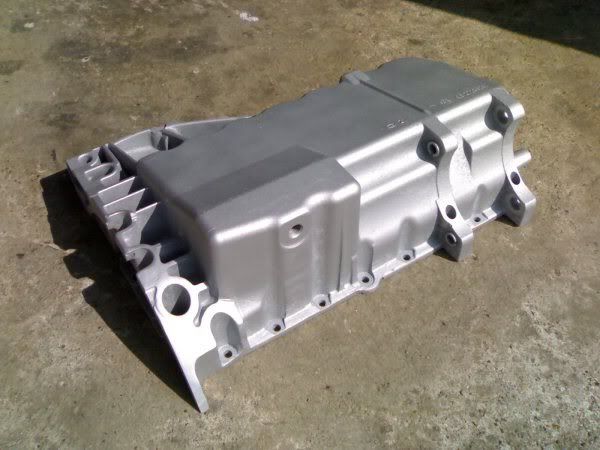
Next up involved alot of grinding. The standard sump had extra 'wings' front and rear to bolt to the larger gearbox the Xantia had, these were not required anymore and in fact fouled against my intended radiator location. Off came the front 'wing' and a lick of paint applied:
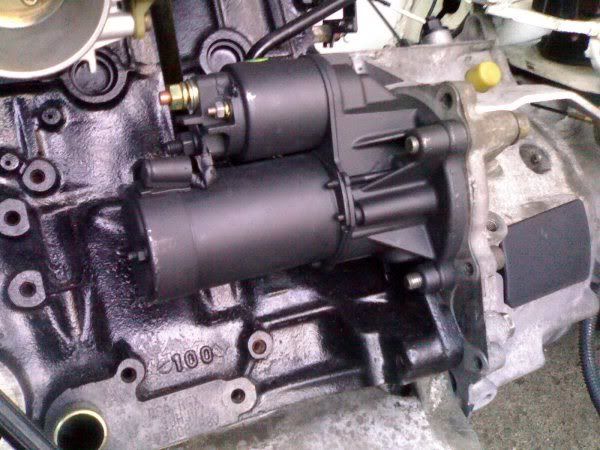
I also fitted a new starter motor whilst it was easily accessible:
On went the inlet manifold:
Next up i needed to figure out a suitable radiator, intercooler, oil cooler combination for the front. I eventually bought a custom made alloy intercooler, an alloy radiator and fitted the Mocal oil cooler i had already used on the Mi16:
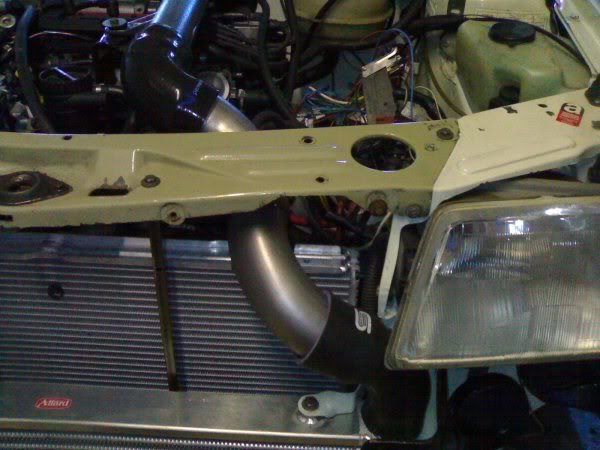
Whilst welding the brackets for the intercooler i also modified the front panel slightly to clear the boost hoses and made new brackets for the radiator to drop into (The fan cowling held it in originally but i was no longer using this) and had the entire front panel rust treated and re-painted:
Brackets for intercooler:
Front panel cut and welded:
Respray:

On went the intercooler:
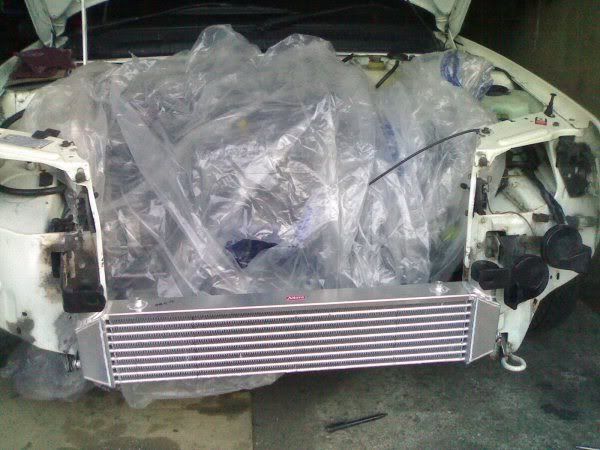
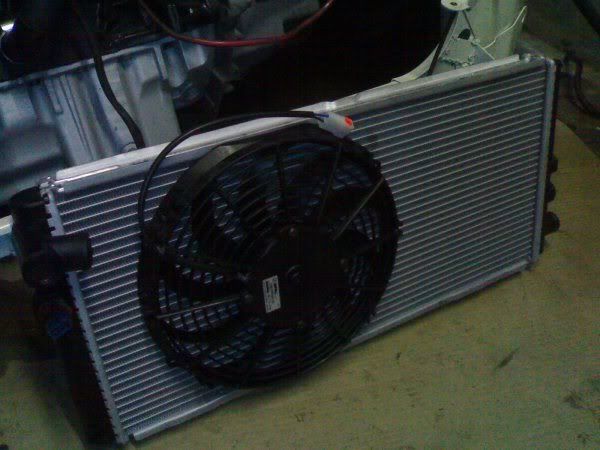
Next up i fitted my new 11" slimline fan, this was fitted to the rear of the radiator and would suck. Not enough room for a blow in front. Then the radiator (a new alloy item i had purchased, much lighter than a standard rad) was fitted and plumbed in:
The fan:
With the fan shroud no longer supporting the weight of the slam panel it proved difficult to close the bonnet as there was nothing to take the weight of the push needed to engage the latch as the panel would bend. This was sorted by fabricating 2 uprights, these go from the lower cross member to the slam panel. They also proved very usefull for securing the radiator and oil cooler:
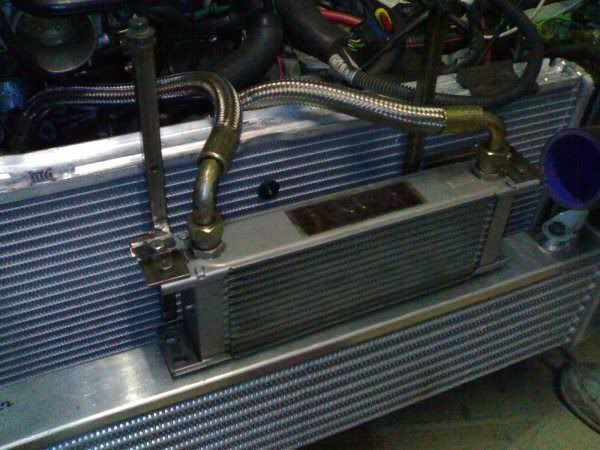
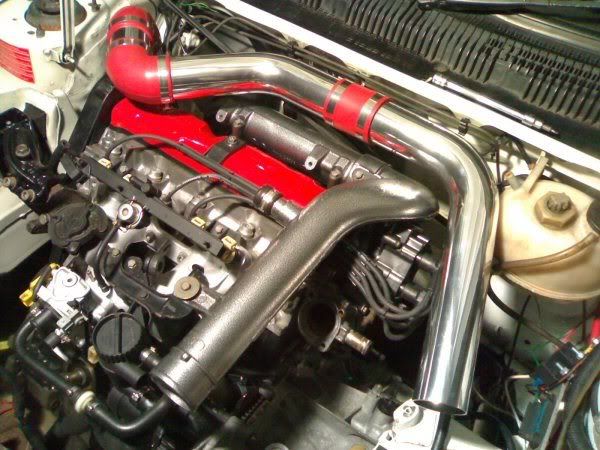
With the radiator and intercooler in position i could finally sort my boost pipes. The idea being to keep the route as short as possible to keep lag to a minimum. I purchased some stainless steel pipe that was pre-bent, cut them and then welded them to form an S bend that would clear the top of the radiator (no oil cooler in this pic but it does fit in there, sumhow lol):
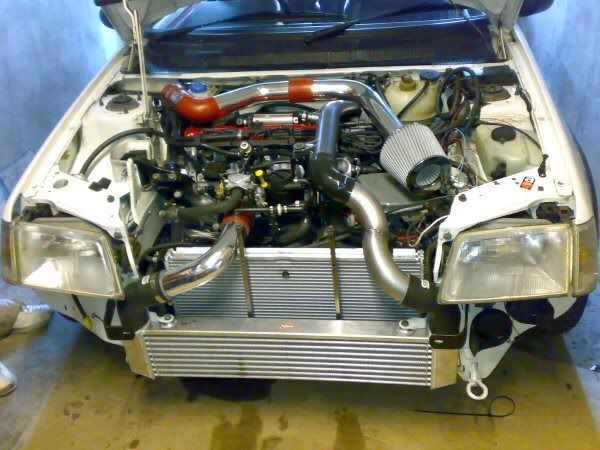
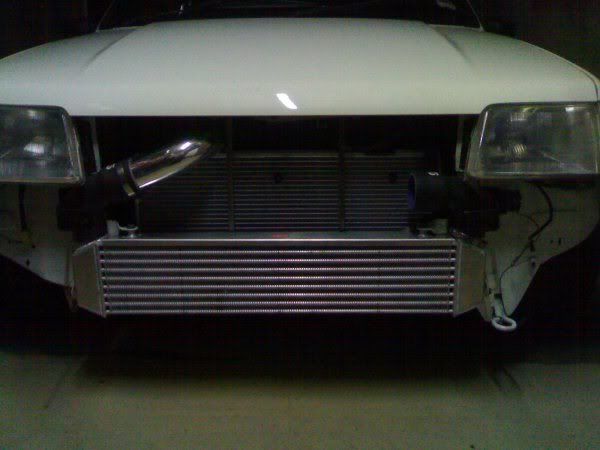
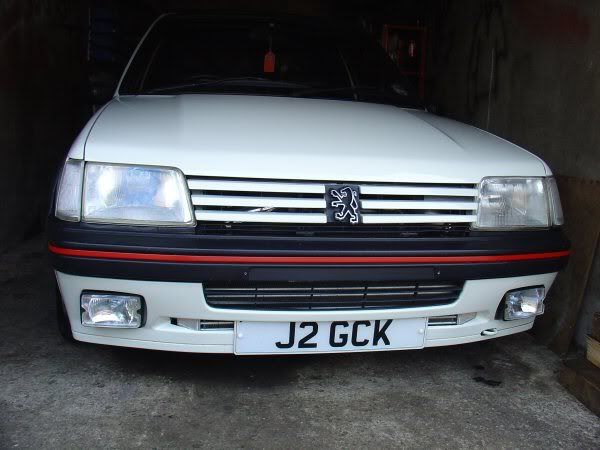
The car was almost complete now. Just a case of removing the brackets i had made for powdercoating i could fully re-assemble the rest of the car. I obviously had to modify my front bumper to accept the intercooler without sacrficing airflow. However i didnt want to advertise the car as being a turbo, this is the best i could manage:
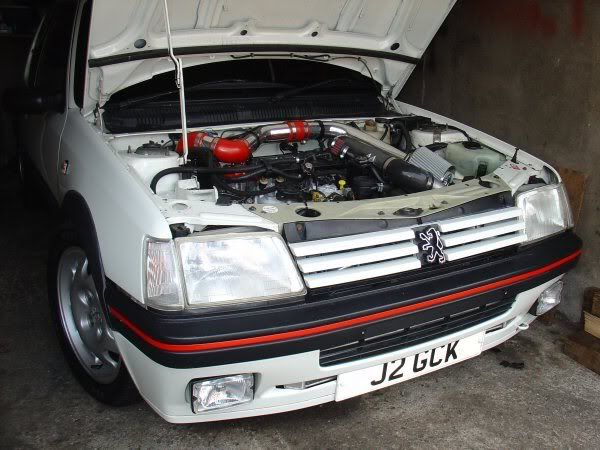
Well i guess thats it for now. Still a few things i need to do to get it exactly how i want it, but i'm very happy with the results :happy14:
Here are a few more completed pics:
And just to confuse and suprise people :whistling:
Here is a short video of the engine running and boosting, it was not at its completed stage at this point:
[url=http://smg.photobucket.com/albums/v642/discostu_205/Turbo%20Conversion/?action=view¤t=turbo.flv]http://smg.photobucket.com/albums/v642/dis...rrent=turbo.flv[/url]
Please bear in mind that i have simply cut and pasted this off another forum and its about 18months old. If you have any questions either post them up in the thread or email me and i'l try and help you out as best i can. Stu
I'll start here:
.....Unsure for a week or two which route to take a 2.0 8v turbo from a Xantia Activa turned up (Thanks to Mikey G) for not alot of money. That was quickly snapped up :happy55:
So out with the old (well, what was left of it lol)
Not taking any chances second time around the new engine was totally stripped and rebuilt. A few pics from various stages:
Whilst the block was bare i took the chance to GUNK it and give it a lick of black engine enamel:
Back in go the pistons, rods and crankshaft:
Now the head and block are re-united it can be timed up:
It begins looks like an engine again:
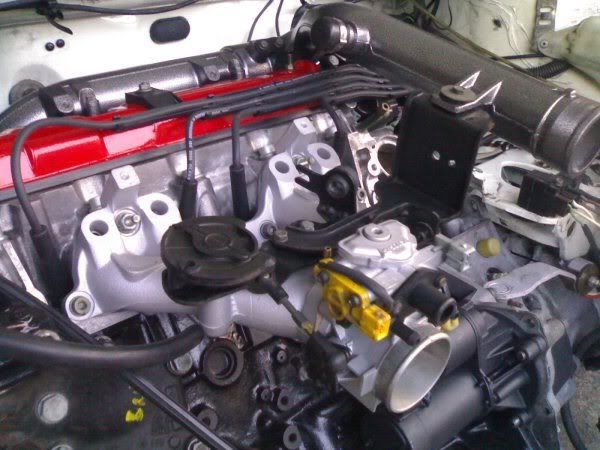
Bolting the turbo back on:
With the new more torquey engine, i decided that a 1.9 gearbox would be better suited to the job, my previous gearbox would keep the engine revving too high and out of the power band. After a quick swap with Tombo i had the box i wanted, just to be sure i took it to the local gearbox centre and had them strip, inspect and rebuild it:
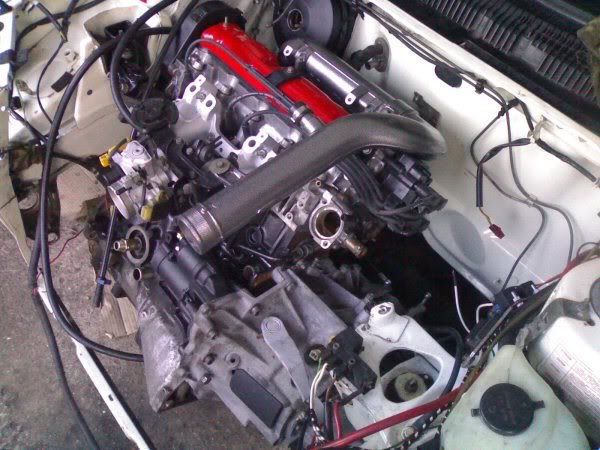
With the gearbox back and fitted to the engine , all was fitted into the car:
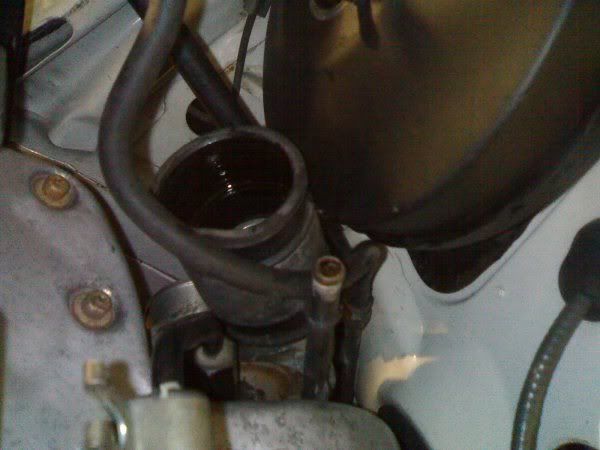
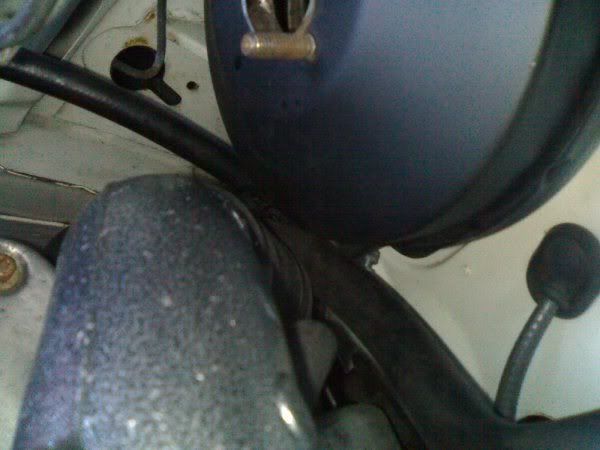
But it was a VERY VERY tight fit, some modifications would need to be made!!
Space between turbo and brake servo:
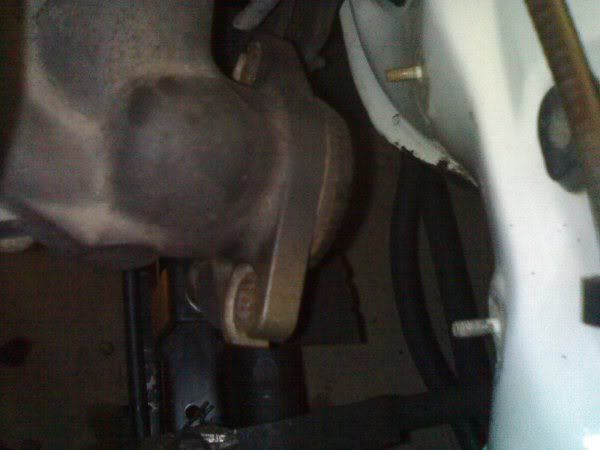
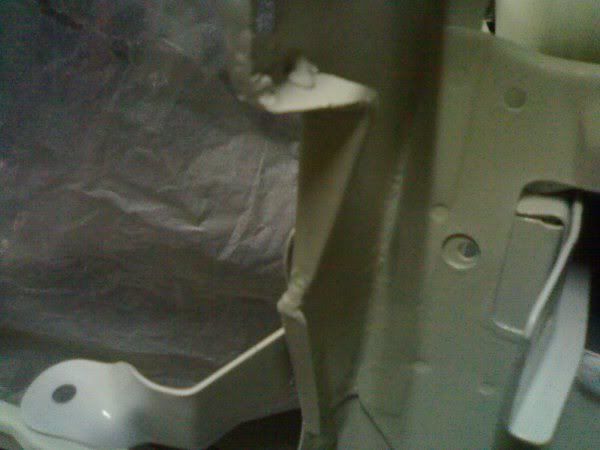
Space between downpipe and bulkhead:
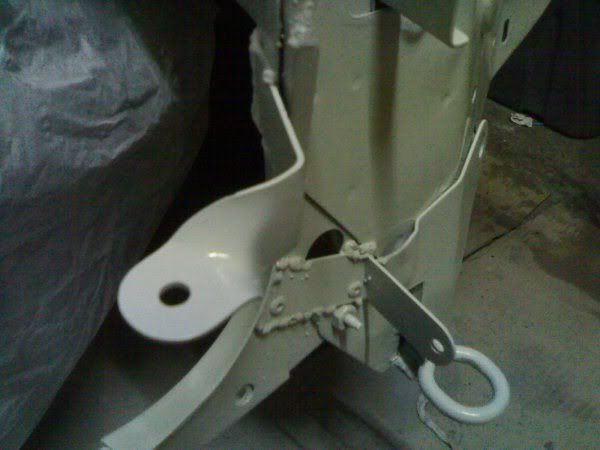
So.... the lower engine mount was cut and welded with an increased length of 20mm. By pushing the engine forward at the bottom it tilted it downwards at the back, giving valuable millimteres of extra clearance. Combined with a brake servo from an XS i now had lots of room to play with :happy65: :
Whilst checking clearances the gear linkages needed to be modified to clear the turbo. The 'L' linkage that controls forward to rearward movement of the gear lever was re-drilled, cut and bent. Not only did it clear the turbo, but with my adjustable linkage rods i now had a gear selection that was tighter than a bankrupt scottishman :happy55:
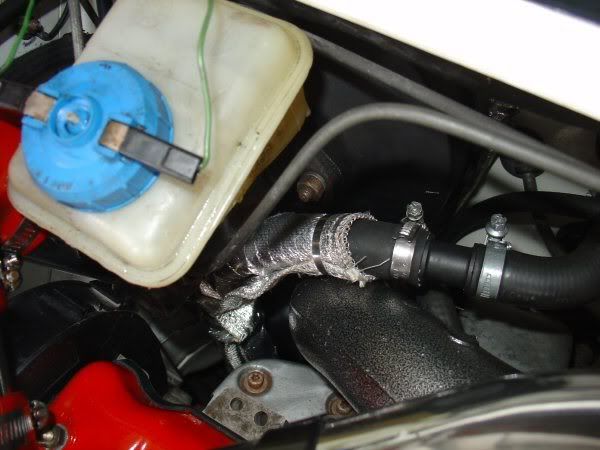
Even in its finished form it is very tight down the back. So with safety in mind i have heat wrapped all the fuel lines and oil/water pipes that run near the turbo and the exhaust downpipe (no pics of this):
Next up i decided to look at the airfilter and boost pipes to and from the turbo. The main boost cross over-pipe that i had sent off for powder coating returned looking better than i'd have imagined, painted an unusual silver/black speckle combo (not my idea but it does look great in the flesh), so that was fitted:
After looking at the route of the standard Xantia turbo inlet pipework it was obvious that it would foul the master cylinder and would not fit. But i wanted to try and retain the intended position of the filter, afterall its in a nice cool position as far away from the turbo as can be. So i bought some 'bling' alloy tubing off ebay and set about making up my own pipework.
Not too much left to do now then :happy45: i had a busy few weeks ahead getting the rest of the bits ready to be fitted:
Inlet manifold totally stripped and cleaned inside & out:
Most of the wiring was installed and the ECU trial fitted (later to be bolted down on the battery tray using a custom made bracket):
New alternator fitted using a custom made mount:
New, smaller fuel filter (306 gti6) fitted into the O/S front wing:
Next up involved alot of grinding. The standard sump had extra 'wings' front and rear to bolt to the larger gearbox the Xantia had, these were not required anymore and in fact fouled against my intended radiator location. Off came the front 'wing' and a lick of paint applied:
I also fitted a new starter motor whilst it was easily accessible:
On went the inlet manifold:
Next up i needed to figure out a suitable radiator, intercooler, oil cooler combination for the front. I eventually bought a custom made alloy intercooler, an alloy radiator and fitted the Mocal oil cooler i had already used on the Mi16:
Whilst welding the brackets for the intercooler i also modified the front panel slightly to clear the boost hoses and made new brackets for the radiator to drop into (The fan cowling held it in originally but i was no longer using this) and had the entire front panel rust treated and re-painted:
Brackets for intercooler:
Front panel cut and welded:
Respray:
On went the intercooler:
Next up i fitted my new 11" slimline fan, this was fitted to the rear of the radiator and would suck. Not enough room for a blow in front. Then the radiator (a new alloy item i had purchased, much lighter than a standard rad) was fitted and plumbed in:
The fan:
With the fan shroud no longer supporting the weight of the slam panel it proved difficult to close the bonnet as there was nothing to take the weight of the push needed to engage the latch as the panel would bend. This was sorted by fabricating 2 uprights, these go from the lower cross member to the slam panel. They also proved very usefull for securing the radiator and oil cooler:
With the radiator and intercooler in position i could finally sort my boost pipes. The idea being to keep the route as short as possible to keep lag to a minimum. I purchased some stainless steel pipe that was pre-bent, cut them and then welded them to form an S bend that would clear the top of the radiator (no oil cooler in this pic but it does fit in there, sumhow lol):
The car was almost complete now. Just a case of removing the brackets i had made for powdercoating i could fully re-assemble the rest of the car. I obviously had to modify my front bumper to accept the intercooler without sacrficing airflow. However i didnt want to advertise the car as being a turbo, this is the best i could manage:
Well i guess thats it for now. Still a few things i need to do to get it exactly how i want it, but i'm very happy with the results :happy14:
Here are a few more completed pics:
And just to confuse and suprise people :whistling:
Here is a short video of the engine running and boosting, it was not at its completed stage at this point:
[url=http://smg.photobucket.com/albums/v642/discostu_205/Turbo%20Conversion/?action=view¤t=turbo.flv]http://smg.photobucket.com/albums/v642/dis...rrent=turbo.flv[/url]

I used to have an Activa, which these lumps were fitted in. One day a friend and I wound the boost out on the bleed valve I had fitted, and went down the road. No word of a lie, it was rocket ship fast, until there was a massive clunk at about 4k, almost like the car wanted to stall. I didn't try it again.
Gassing Station | French Bred | Top of Page | What's New | My Stuff