996 Turbo - Rear Bumper Removal - DIY w/pics
Discussion


As a follow up to the DIY for the front bumper removal I posted a while back and since it’s such a $hitty day outside I thought I’d dig out a few of the 000’s of pics I’ve managed to stash away and post the DIY for the rear bumper removal. As many will know this is the starting point for so many jobs such as replacing intercoolers (DIY to follow, very simple!), to allow easy access for exhaust removal/replacement, various heatshields, spark plugs and turbo swap.
So, for anyone who may find it useful...
996 Turbo – Rear Bumper Removal
Tools you will need:-
Torx TX25 Bit
Torx TX30 Bit
Philips PH2 Screwdriver
10mm Socket
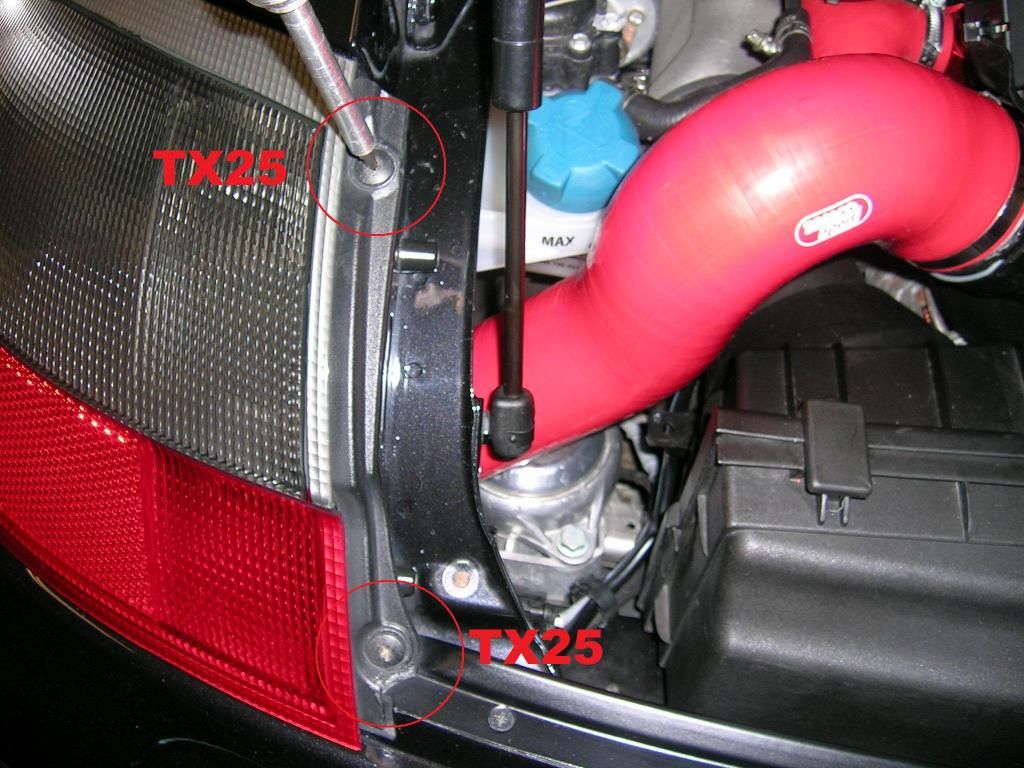
It’s not necessary to stick to any particular order but I generally start with the cleaner bits, so, first take out both rear light units by removing the two TX25 screws and pulling the light directly towards the rear of the car.
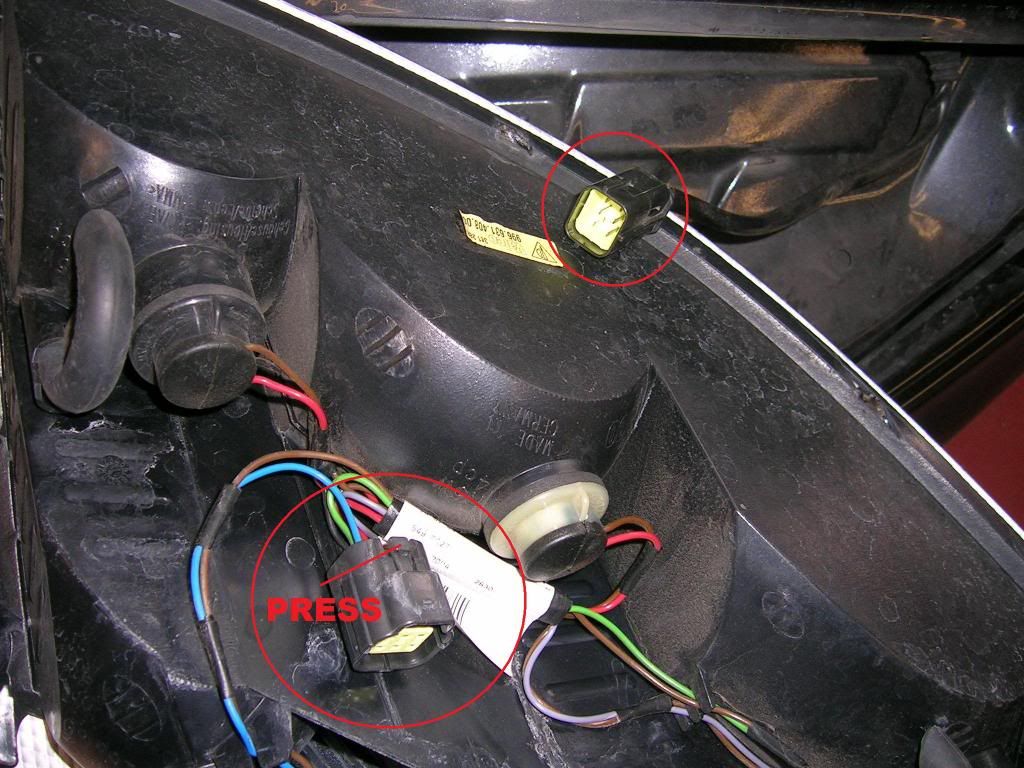
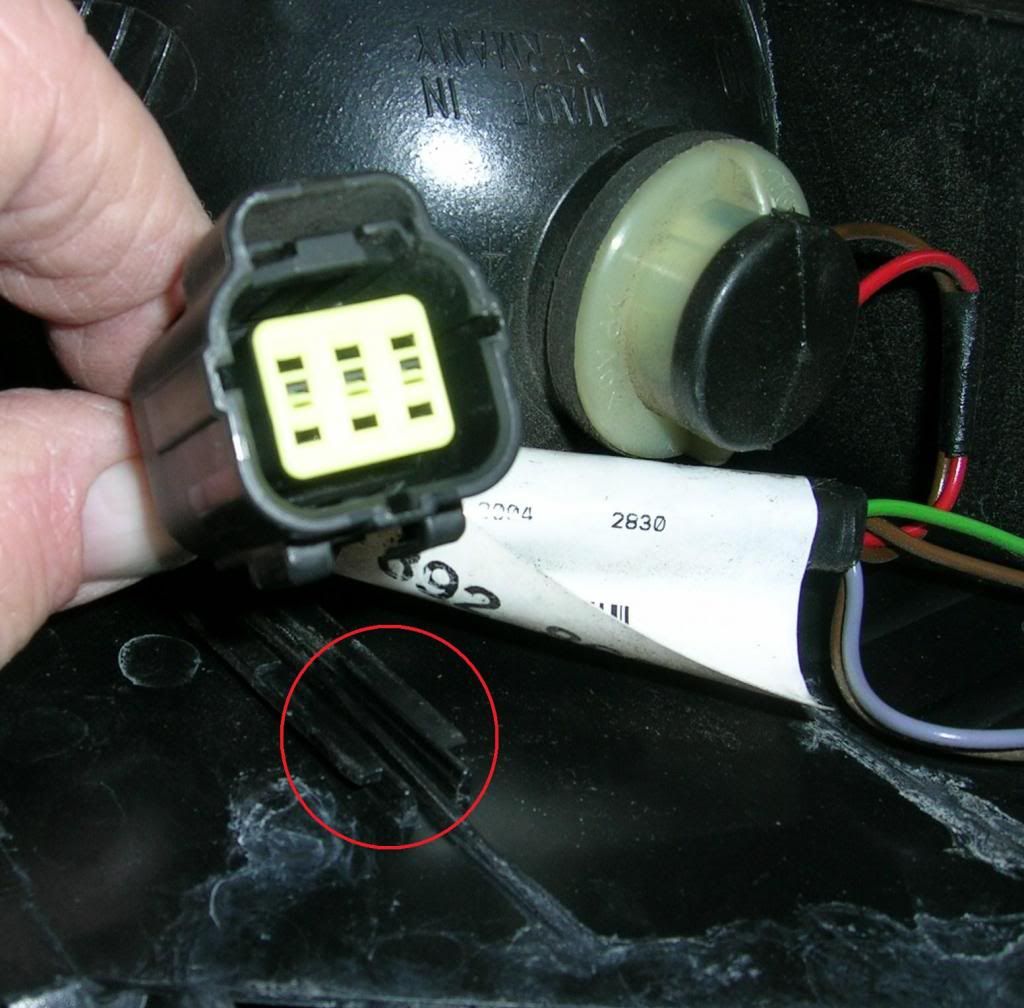
Disconnect the plug by squeezing the plastic lug on the socket side and pulling apart, it is possible to slide the socket part free of location in the rail on the light to allow better access for releasing the plug.
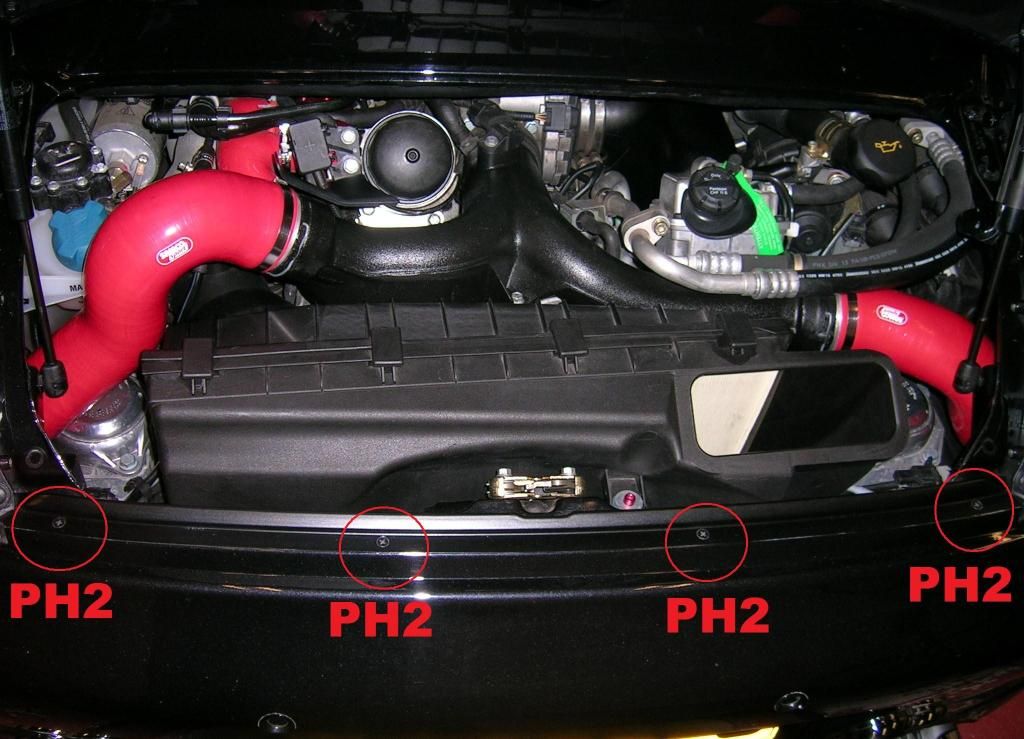
Next, remove the four PH2 screws from the top of the bumper which will allow the metal trim strip to be lifted free.
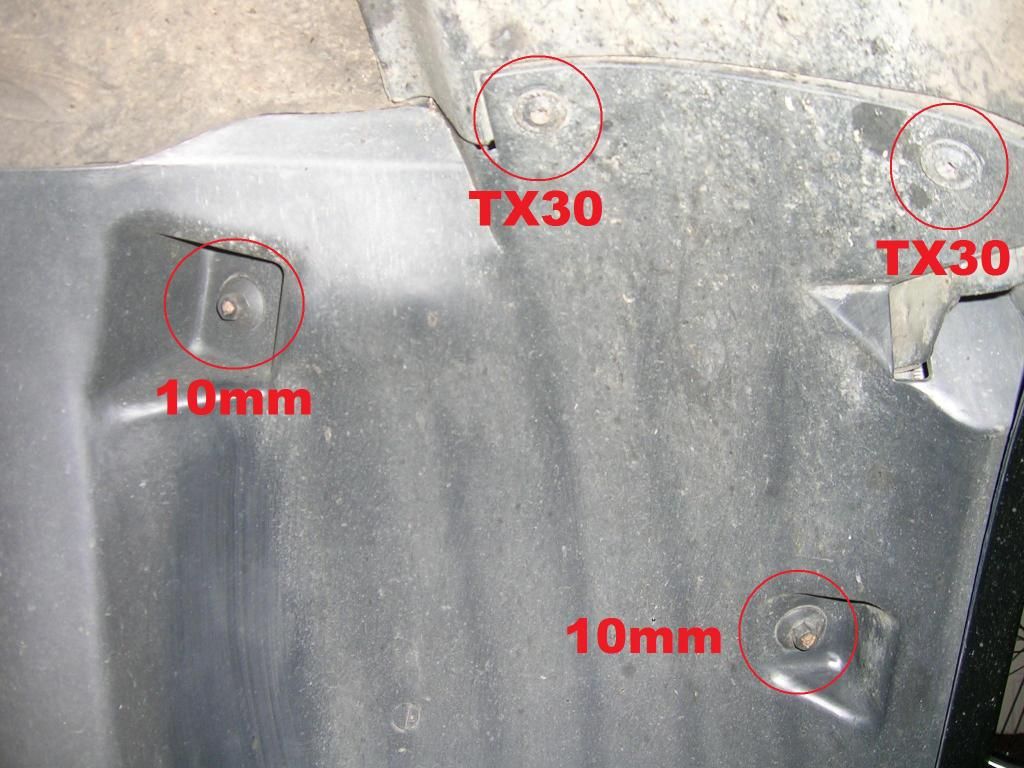
Then remove four TX30 screws and the two 10mm plastic nuts holding the rear section of the rear wheel arch liner in place.
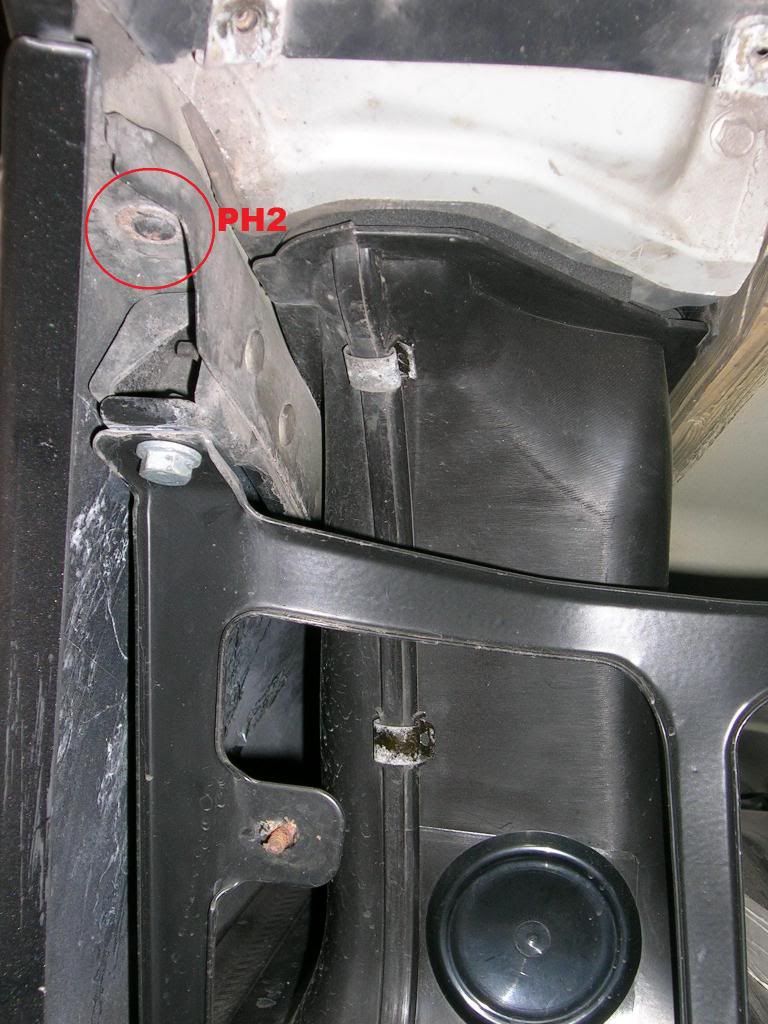
This allows access to remove the PH2 screw and washer that fastens vertically upwards into the bumper.
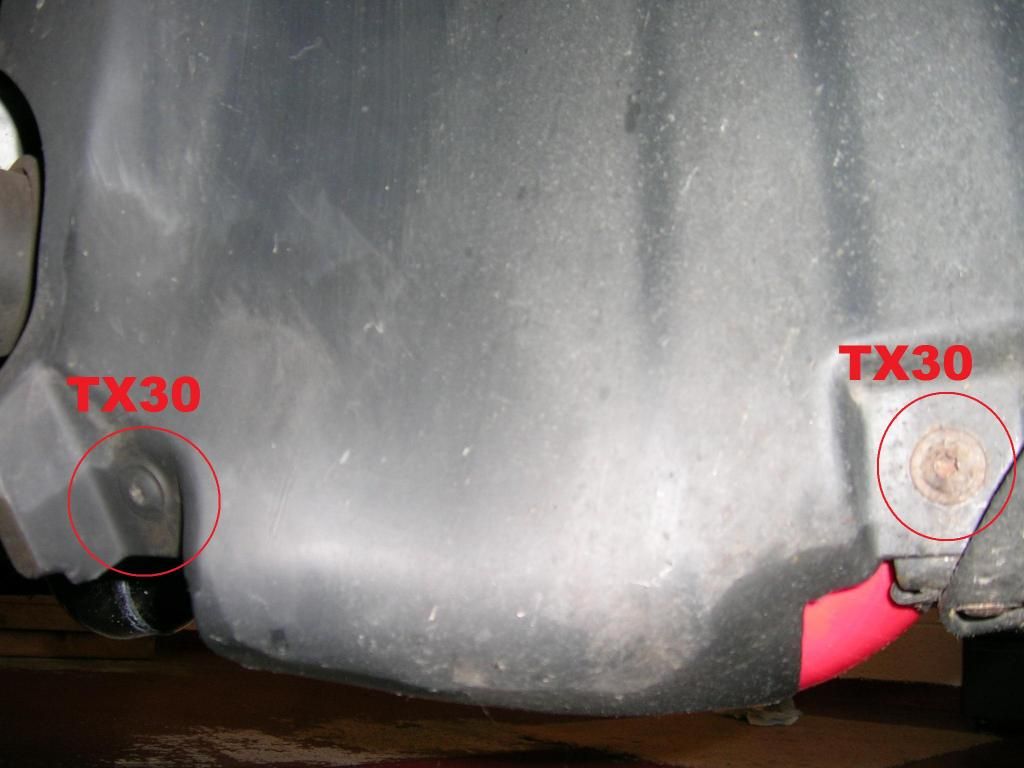
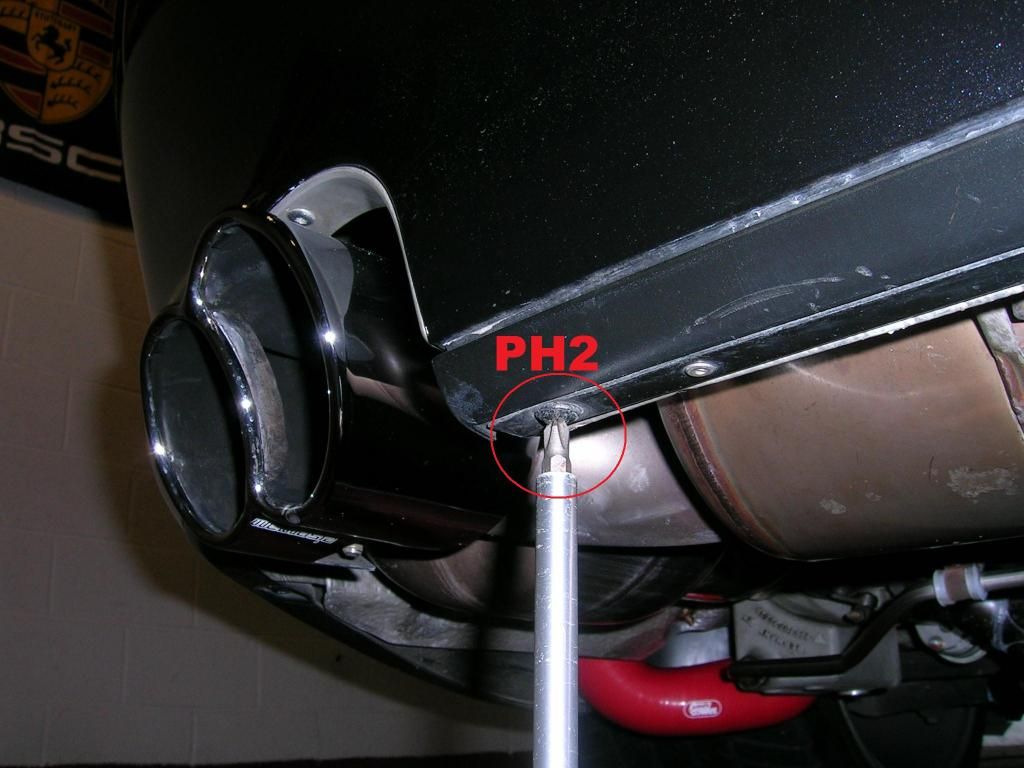
Now, from underneath remove the two TX30 screws along each side and the two PH2 screws from the rear section.

You are now ready to slide the bumper away from the car. Once again, with the help of a glamorous assistant flex the ends of the bumper slightly outwards free of their position and slide it to the rear just enough to allow access to the multi-pin plug in the centre. Disconnect the plug by squeezing the lug on the socket side and pulling apart.
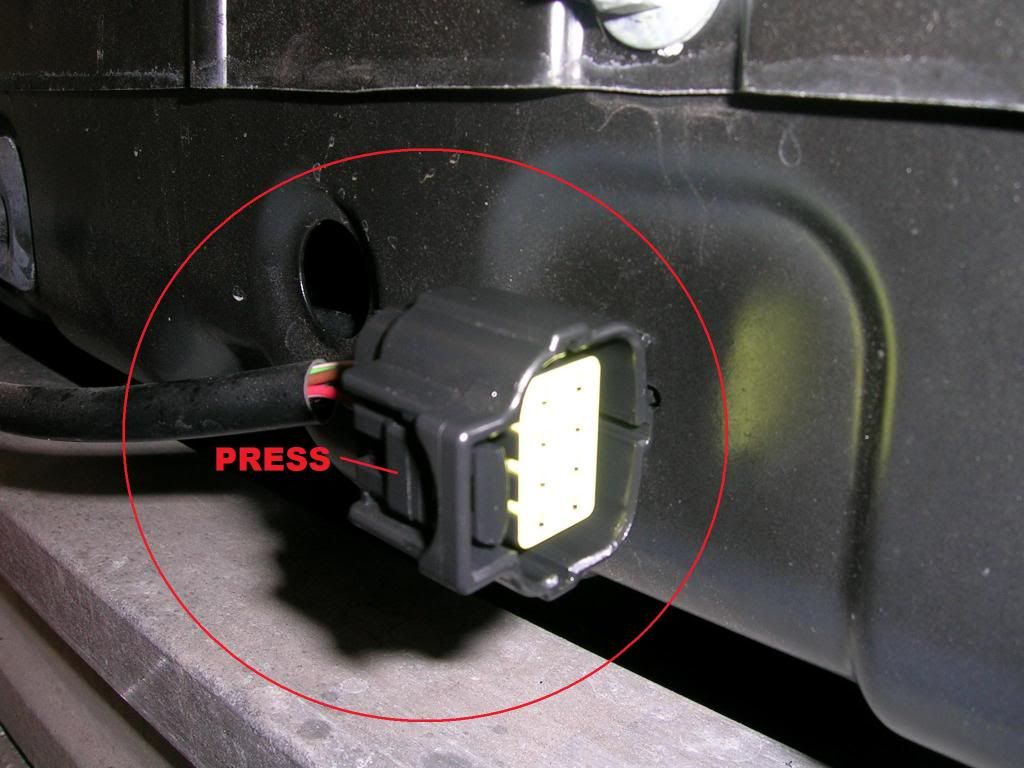
Once plug is disconnected, bumper can be removed clear of car.
Job Done!

Once again, refitting is the reverse of removal!
Have fun.
So, for anyone who may find it useful...
996 Turbo – Rear Bumper Removal
Tools you will need:-
Torx TX25 Bit
Torx TX30 Bit
Philips PH2 Screwdriver
10mm Socket
It’s not necessary to stick to any particular order but I generally start with the cleaner bits, so, first take out both rear light units by removing the two TX25 screws and pulling the light directly towards the rear of the car.
Disconnect the plug by squeezing the plastic lug on the socket side and pulling apart, it is possible to slide the socket part free of location in the rail on the light to allow better access for releasing the plug.
Next, remove the four PH2 screws from the top of the bumper which will allow the metal trim strip to be lifted free.
Then remove four TX30 screws and the two 10mm plastic nuts holding the rear section of the rear wheel arch liner in place.
This allows access to remove the PH2 screw and washer that fastens vertically upwards into the bumper.
Now, from underneath remove the two TX30 screws along each side and the two PH2 screws from the rear section.
You are now ready to slide the bumper away from the car. Once again, with the help of a glamorous assistant flex the ends of the bumper slightly outwards free of their position and slide it to the rear just enough to allow access to the multi-pin plug in the centre. Disconnect the plug by squeezing the lug on the socket side and pulling apart.
Once plug is disconnected, bumper can be removed clear of car.
Job Done!
Once again, refitting is the reverse of removal!
Have fun.
Edited by EvoSlayer on Saturday 28th August 18:28
Edited by EvoSlayer on Monday 1st April 13:12

shortlad said:
Brilliant.... Don't need it now but I just know I will at some point.
Thanks for going to the effort of posting this.
Has anyone done the same thing for the front? I'm thinking of doing after market grills on the front to reduce the exposure of the various rads.
Tadaa...Thanks for going to the effort of posting this.
Has anyone done the same thing for the front? I'm thinking of doing after market grills on the front to reduce the exposure of the various rads.
http://www.pistonheads.com/gassing/topic.asp?h=0&a...
EvoSlayer said:
You're a star of epic proportions 
Gassing Station | Porsche General | Top of Page | What's New | My Stuff