Modelling tips
Discussion


As I threatened in one of the recent GB threads, I've decided to create a "Modelling Tips" thread. :P
It seemed logical to me to have a one stop shop for advice for all types of modelling questions; one in which hopefully the more talented members can assist the less capable of us by passing on their tips and techniques. In some cases, this might simply be a link to a Youtube video or another website where the answer is already given in great detail.
Either way, I hope this takes off and also helps prevent the forum from getting cluttered up by lots of individual advice threads.
If the mods see fit to sticky this thread, or even turn it into a Wiki (I've never created a Wiki before, and was rather reluctant to start now) that would be great.
Good idea.
Painting canopies:
Learn to mask carefully with masking tape. This can be made easier and better by trimming the tape lengthways with a steel rule on a cutting mat first. This thinner strip will be easier to bend round the curves and the cut edge will be straighter and less likely to bleed. After applying burnish down the edge with the end of a blunt cocktail stick to again make sure no paint bleeds under the tape.
For your first coat of paint use black or what ever colour should appear on the inside, then apply the outward camo colours ontop.
Believe me, the more you do it the easier it gets and you will be impressed with the better finish if you take the time and effort.
Painting wheels:
Paint the centres first.
Then use a very diluted mix of your tyre colour and using a very fine pointed brush just touch the crease where the wheel joins the tyre so the paint spreads using capillary action. Touch a few times round the outside till the crease is filled in. Then you will find it easier to paint the rest of the tyre not having to go too close to the wheel centre.
Again the more you do it the easier it gets.
Hope those help.
Red Firecracker said:
Good idea. Might be worth creating it as a Wiki rather than a plain thread though?
Marshdweller said:
If the mods see fit to sticky this thread, or even turn it into a Wiki (I've never created a Wiki before, and was rather reluctant to start now) that would be great.


I'll give it a go, but be warned, I might make a mess of the forum if it all goes horribly wrong...
Could someone answer a canopy question that isn't answered in the wiki please? I got some paint where I shouldn't have ( I'm still new t painting canopies) now it wouldn't wipe off so I dabbed a tiny bit of cloth on some white spirit to get rid of it. I have done this before and it worked, it worked again but this time the canopy has become blurry. I'm guessing it's taken the finish off the plastic. Is there a way to correct my silly mitake?
I will post pictures of the finished plane when I sort this out.
Cheers
George
I will post pictures of the finished plane when I sort this out.
Cheers
George
Get hold of some polishing mesh type cloths which go in progressive stages from 3,600 to 12,000. Start polishing with the lower numbered mesh and gradually work the canopy using higher and higher numbered cloths. Initially, the canopy will look even more foggy but as you work through the numbers, the clarity will reappear.
To finish off the job, dip the canopy in some Johnson's Klear. Leave the canopy to dry for 24 hours and he-presto - you will have a beautifully restored canopy.
To finish off the job, dip the canopy in some Johnson's Klear. Leave the canopy to dry for 24 hours and he-presto - you will have a beautifully restored canopy.
Eric Mc said:
Get hold of some polishing mesh type cloths which go in progressive stages from 3,600 to 12,000. Start polishing with the lower numbered mesh and gradually work the canopy using higher and higher numbered cloths. Initially, the canopy will look even more foggy but as you work through the numbers, the clarity will reappear.
To finish off the job, dip the canopy in some Johnson's Klear. Leave the canopy to dry for 24 hours and he-presto - you will have a beautifully restored canopy.
If you have to you can polish the canopy after using an abrasive (I'm old fashioned and use 1200 grit wet'n'dry TBH) with toothpaste on a piece of soft cotton fabric. It will bring a truly clear finish to the canopy, which if you are lucky enough to own a bottle of Klear can then be made almost miraculously transparent.To finish off the job, dip the canopy in some Johnson's Klear. Leave the canopy to dry for 24 hours and he-presto - you will have a beautifully restored canopy.
If you do get a smear of paint where you don't want it, let the paint dry and then scrape it away from the unwanted clear bit with a very sharp modelling knife tip. Use it very lightly just lifting paint not plastic and you can often get away with a firm rub over with a ('nother) piece of cotton cloth. It is amazing just how well a simple remedy like that can clean stuff off for you rather than getting involved with harsh chemical stuff.
Thanks very much for the info guys, I have got wet'n'dry in the loft so I shall give that method a go. I'm pretty sure I have some Klear too but if I don't is this easily available at a model shop?
Edited to say the Klear I found is actually Clear 35 which I'm guessing is basically a finish to go over paint work, you can see how much of a novice I am.
Edited to say the Klear I found is actually Clear 35 which I'm guessing is basically a finish to go over paint work, you can see how much of a novice I am.
Edited by Z06George on Friday 8th April 12:46
Z06George said:
Thanks very much for the info guys, I have got wet'n'dry in the loft so I shall give that method a go. I'm pretty sure I have some Klear too but if I don't is this easily available at a model shop?
Edited to say the Klear I found is actually Clear 35 which I'm guessing is basically a finish to go over paint work, you can see how much of a novice I am.
I'd try Brasso for starters - no point using anything more abrasive is it's just a minor discolouration.Edited to say the Klear I found is actually Clear 35 which I'm guessing is basically a finish to go over paint work, you can see how much of a novice I am.
Edited by Z06George on Friday 8th April 12:46
Can't Wiki it as i'm not that clever, however have made sticky.
Just been written off for another month after being knocked off motorbike so to keep my brain active I have just ordered this, I have wanted to build a truck for a while, if all goes well will invest in a trailer for it.

My question is, tips for an easy way to spray the bulk of the cab ? Other than spraying lexan Tamiya shells I have never painted anything this big, always been smaller planes etc...
Just been written off for another month after being knocked off motorbike so to keep my brain active I have just ordered this, I have wanted to build a truck for a while, if all goes well will invest in a trailer for it.
My question is, tips for an easy way to spray the bulk of the cab ? Other than spraying lexan Tamiya shells I have never painted anything this big, always been smaller planes etc...
Tuscan Rat said:
Can't Wiki it as i'm not that clever, however have made sticky.
Just been written off for another month after being knocked off motorbike so to keep my brain active I have just ordered this, I have wanted to build a truck for a while, if all goes well will invest in a trailer for it.
My question is, tips for an easy way to spray the bulk of the cab ? Other than spraying lexan Tamiya shells I have never painted anything this big, always been smaller planes etc...
If you haven't got an airbrush, Halfords Plastic Primer spray can followed by the appropriate spray can colour on top, possibly followed by clear spray lacquer is probably your best option.Just been written off for another month after being knocked off motorbike so to keep my brain active I have just ordered this, I have wanted to build a truck for a while, if all goes well will invest in a trailer for it.
My question is, tips for an easy way to spray the bulk of the cab ? Other than spraying lexan Tamiya shells I have never painted anything this big, always been smaller planes etc...

Alex@POD said:
What's the best way to avoid an orange peel effect when spraying a clear coat?
I've tried rubbing it down, but it takes the shine away... then another coat brings back the peel...
Use T-Cut or this:I've tried rubbing it down, but it takes the shine away... then another coat brings back the peel...
Edited by Alex@POD on Sunday 23 October 18:23
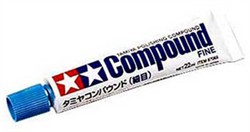
Followed by Autoglym polish or similar.
Avoiding the orange peel in the first place depends on lots of things like paint thinning, distance of airbrush from surface, how fast you move the airbrush, ambient temp/humidity etc etc. I've never been able to avoid it, so resort to the T-cut/car polish method. Worked fine on the S2000 though, and that's what I'll be doing with the latest Jaguar.
Gassing Station | Scale Models | Top of Page | What's New | My Stuff