Modelling tips
Discussion


No you need the opposite!
Couple of coats of gloss clear before applying decals (Halfords do a good one in an aerosol can). Then make sure you use plenty of decal solution to make the decals conform to the surface. a hair dryer helps too. when the decal has dried, couple more coats of gloss clear.
If a gloss finish is required, you're now done - unless you want a high gloss, in which case it might need a further polish. If you want a satin or matt finish, then a coat or two of the appropriate satin or matt clear will be needed.
If the decals are getting on a bit, be warned that they sometimes crack or split, either when soaking them or while you're trying to apply them. It might be better to be safe than sorry - if in any doubt, give them a coat of clear before you start.
If it's a case of the decals "silvering", unless you can get some Klear to capillary under the edge of the carrier film, I doubt there is an easy way of doing it. Overcoating won't solve anything because its air trapped under the decal that causes the effect. If the film has yellowed, the only thing you can do is overpaint the edges with base colour.
Of course you could try softening the decals with Microsol, and try to remove them, then apply new ones. This is risky though, because if they only partially come off you're left with an even bigger problem.
Of course you could try softening the decals with Microsol, and try to remove them, then apply new ones. This is risky though, because if they only partially come off you're left with an even bigger problem.
Thanks Doc (that's how your username reads to me  ) - can I ask another one about paint?
I've ordered a nice case for the Bentley and so it looks like I'm about to embark on a refurbishment of the model. I have decided to repaint the chassis, bonnet and tank in a darker green and want to use spirit based enamel which I will brush on. It was originally painted in Humbrol and i) I wondered if Humbrol Gloss was any good these days and ii) I'd like a dark green I can use straight from the tin but having found this colour matcher on line http://scalemodeldb.com/paint it seems there's only Humbrol Brunswick Green (what it is now) and Revell Sea Green, and that's it! Maybe I'll have to get a tin and pour and mix the desired colour and keep it safe for the duration. Thoughts?
p.s. I'll get some pics up as soon as I start on the re-build...

) - can I ask another one about paint?I've ordered a nice case for the Bentley and so it looks like I'm about to embark on a refurbishment of the model.
I have decided to repaint the chassis, bonnet and tank in a darker green and want to use spirit based enamel which I will brush on. It was originally painted in Humbrol and i) I wondered if Humbrol Gloss was any good these days and ii) I'd like a dark green I can use straight from the tin but having found this colour matcher on line http://scalemodeldb.com/paint it seems there's only Humbrol Brunswick Green (what it is now) and Revell Sea Green, and that's it! Maybe I'll have to get a tin and pour and mix the desired colour and keep it safe for the duration. Thoughts? p.s. I'll get some pics up as soon as I start on the re-build...
Edited by RichB on Sunday 25th January 21:52
IMO Humbrol paints aren't as good as they were. I remember I painted my Heller Bentley in Brunswick Green, and I though it looked fine, but that was decades ago. How about:
1) Buying a can of Humbrol Brunswick Green spray can and testing it on, say, on the underside of the bonnet.
or,
2) Buy a Humbrol tin and try it. If it's only a one-off model job, and you're not detail painting anything, I'd also consider buying a very cheap single action aibrush:
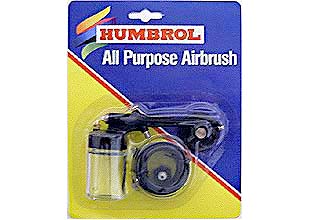
About £15 plus a can of air. I've no idea whether it would give decent results, but I'd assume it would be better than brush painting on the larger parts at least.
or
3) You could also consider trying Halfords acrylic spray cans, but again you'd have to experiment to make sure the finish and colour was right, and that you weren't getting any reaction with the old paint.
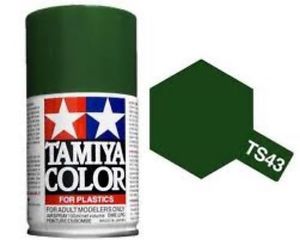
ETA, Tamiya also do a Racing green spray can:
1) Buying a can of Humbrol Brunswick Green spray can and testing it on, say, on the underside of the bonnet.
or,
2) Buy a Humbrol tin and try it. If it's only a one-off model job, and you're not detail painting anything, I'd also consider buying a very cheap single action aibrush:
About £15 plus a can of air. I've no idea whether it would give decent results, but I'd assume it would be better than brush painting on the larger parts at least.
or
3) You could also consider trying Halfords acrylic spray cans, but again you'd have to experiment to make sure the finish and colour was right, and that you weren't getting any reaction with the old paint.
ETA, Tamiya also do a Racing green spray can:
Could somebody please help me out with my Airfix 1/72 scale Mosquito ?
I have managed to totally ruin the paint job by using ink to pre-shade and ,no matter what I do ,it bleeds through the paint after spraying .
I have tried the "oven cleaner " method but this will not remove the Vallejo/Humbrol acrylic I've been using .
Internet searches give me a few different methods including oven cleaner and Dettol but I would prefer a method someone on here has actually used .
Thanks.
Evangelion said:
No you need the opposite!
Couple of coats of gloss clear before applying decals (Halfords do a good one in an aerosol can). Then make sure you use plenty of decal solution to make the decals conform to the surface. a hair dryer helps too. when the decal has dried, couple more coats of gloss clear.
If a gloss finish is required, you're now done - unless you want a high gloss, in which case it might need a further polish. If you want a satin or matt finish, then a coat or two of the appropriate satin or matt clear will be needed.
If the decals are getting on a bit, be warned that they sometimes crack or split, either when soaking them or while you're trying to apply them. It might be better to be safe than sorry - if in any doubt, give them a coat of clear before you start.
I was wondering about varnishing as I'd read up that you need to attach decals to a gloss surface and that explains it perfectly.Couple of coats of gloss clear before applying decals (Halfords do a good one in an aerosol can). Then make sure you use plenty of decal solution to make the decals conform to the surface. a hair dryer helps too. when the decal has dried, couple more coats of gloss clear.
If a gloss finish is required, you're now done - unless you want a high gloss, in which case it might need a further polish. If you want a satin or matt finish, then a coat or two of the appropriate satin or matt clear will be needed.
If the decals are getting on a bit, be warned that they sometimes crack or split, either when soaking them or while you're trying to apply them. It might be better to be safe than sorry - if in any doubt, give them a coat of clear before you start.
Do you just gloss varnish the areas where you want the decals or the whole model (if you're going to apply satin or matt varnish afterwards)?
spitfire-ian said:
Evangelion said:
No you need the opposite!
Couple of coats of gloss clear before applying decals (Halfords do a good one in an aerosol can). Then make sure you use plenty of decal solution to make the decals conform to the surface. a hair dryer helps too. when the decal has dried, couple more coats of gloss clear.
If a gloss finish is required, you're now done - unless you want a high gloss, in which case it might need a further polish. If you want a satin or matt finish, then a coat or two of the appropriate satin or matt clear will be needed.
If the decals are getting on a bit, be warned that they sometimes crack or split, either when soaking them or while you're trying to apply them. It might be better to be safe than sorry - if in any doubt, give them a coat of clear before you start.
I was wondering about varnishing as I'd read up that you need to attach decals to a gloss surface and that explains it perfectly.Couple of coats of gloss clear before applying decals (Halfords do a good one in an aerosol can). Then make sure you use plenty of decal solution to make the decals conform to the surface. a hair dryer helps too. when the decal has dried, couple more coats of gloss clear.
If a gloss finish is required, you're now done - unless you want a high gloss, in which case it might need a further polish. If you want a satin or matt finish, then a coat or two of the appropriate satin or matt clear will be needed.
If the decals are getting on a bit, be warned that they sometimes crack or split, either when soaking them or while you're trying to apply them. It might be better to be safe than sorry - if in any doubt, give them a coat of clear before you start.
Do you just gloss varnish the areas where you want the decals or the whole model (if you're going to apply satin or matt varnish afterwards)?
I find that on a very matt finish, two coats of Klear over the whole model is enough to seal the porosity of the paint. This gives a satin effect to the surface. I then apply the decal onto a wetted patch of the model surface (use a tiny drop of detergent in the water to break surface tension. Then when the decal is in place, lift a corner with a scalpel blade and wick a drop of Klear underneath it. This has the effect of both eliminating silvering and sticking the decal in place. You can then overcoat with a layer of Klear mixed with Microsol.
Klear (or most clear coatings) will darken the base finish, so it's a good idea do coat the whole model.
A couple of questions if I may.
I would like to build a model narrowboat that I can make radio controlled. They look a simple enough shape for an absolute beginner like me, and I think I have a grasp on how to tackle most of the build but a few areas I have no idea!
I planed to use 3mm ply, is this suitable if I want it to actually float? Will it bend adequately to shape the hull and stern?
What will I need to glue it with? and then coat the hull with to make it water tight?
Any tips on forming the bow would also be very much appreciated!
2thumbs said:
A couple of questions if I may.
I would like to build a model narrowboat that I can make radio controlled. They look a simple enough shape for an absolute beginner like me, and I think I have a grasp on how to tackle most of the build but a few areas I have no idea!
I planed to use 3mm ply, is this suitable if I want it to actually float? Will it bend adequately to shape the hull and stern?
What will I need to glue it with? and then coat the hull with to make it water tight?
Any tips on forming the bow would also be very much appreciated!
I've made a couple and will go grab a few pictures shortly which may be of help.I would like to build a model narrowboat that I can make radio controlled. They look a simple enough shape for an absolute beginner like me, and I think I have a grasp on how to tackle most of the build but a few areas I have no idea!
I planed to use 3mm ply, is this suitable if I want it to actually float? Will it bend adequately to shape the hull and stern?
What will I need to glue it with? and then coat the hull with to make it water tight?
Any tips on forming the bow would also be very much appreciated!
Not the best models in the world as I made them years ago.
Easiest way to build them is to treat them as a box with shaped ends. I made the ends by glueing layers together then shaping them. However I'm just about to build another one and will attempt to make it a little more traditional.


Easiest way to build them is to treat them as a box with shaped ends. I made the ends by glueing layers together then shaping them. However I'm just about to build another one and will attempt to make it a little more traditional.
Edited by spitfire-ian on Sunday 17th May 12:01
2thumbs said:
Thanks Ian I would be happy if mine Turn's out as well as those! They look great.
Are they made of ply? What glue did you use?
They look like they are blacked with actual narrowboat blacking, I like that
Thanks, they're not the best as I built 2 in my teens and the other about 15 odd years ago.Are they made of ply? What glue did you use?
They look like they are blacked with actual narrowboat blacking, I like that
Anyway, the one I took the pictures of is the last one I did and if I remember correctly it was ply I used (I seem to recall going out and buying a big sheet). The bow and rear swim were made of thick pices of MDF roughly shaped and glued on top of each other then shaped to form the required look.
As for glue, I'm sure it was just waterproof PVA.
The paint was just external satin black I think although the red-oxide for the hold was proper metal red-oxide primer.
Construction wise, I seem to have fitted the front bulkhead and the engine room bulkhead to the base first as they were fixed points I could then make the rest around.
I've now got a set of plans from 1936 which I intend to make another one from as in my head I think I know better than teenage me
I have a bit of a rookie question.
Something I have always struggled with is bonding two painted parts or sub assemblies together. When I do it the glue always dissolves the paint on contact and frankly causes messy results. Many potentially good models have been ruined for me at this stage.
To overcome this I try not to paint contact areas between parts, put this still doesn't really give me what I want.
Last night I was watching a build video on YouTube and the guy was basically throwing painted parts together without a single issue.
What am I doing wrong??
Help and advice will be gratefully recieved.
robemcdonald said:
I have a bit of a rookie question.
Something I have always struggled with is bonding two painted parts or sub assemblies together. When I do it the glue always dissolves the paint on contact and frankly causes messy results. Many potentially good models have been ruined for me at this stage.
To overcome this I try not to paint contact areas between parts, put this still doesn't really give me what I want.
Last night I was watching a build video on YouTube and the guy was basically throwing painted parts together without a single issue.
What am I doing wrong??
Help and advice will be gratefully recieved.
Polystyrene cement works by dissolving the plastic on both parts and melding them together. If you intorduce a barrier, such as Something I have always struggled with is bonding two painted parts or sub assemblies together. When I do it the glue always dissolves the paint on contact and frankly causes messy results. Many potentially good models have been ruined for me at this stage.
To overcome this I try not to paint contact areas between parts, put this still doesn't really give me what I want.
Last night I was watching a build video on YouTube and the guy was basically throwing painted parts together without a single issue.
What am I doing wrong??
Help and advice will be gratefully recieved.
paint, the joint wont be as strong, and the paint around the join will be damaged by any excess glue.
Simply remove any paint from surfaces to be bonded, or, for non-structural parts, use PVA which works by forming a film between surfaces and wont damage paint.
Can you link to the video you mention?
dr_gn said:
robemcdonald said:
I have a bit of a rookie question.
Something I have always struggled with is bonding two painted parts or sub assemblies together. When I do it the glue always dissolves the paint on contact and frankly causes messy results. Many potentially good models have been ruined for me at this stage.
To overcome this I try not to paint contact areas between parts, put this still doesn't really give me what I want.
Last night I was watching a build video on YouTube and the guy was basically throwing painted parts together without a single issue.
What am I doing wrong??
Help and advice will be gratefully recieved.
Polystyrene cement works by dissolving the plastic on both parts and melding them together. If you intorduce a barrier, such as Something I have always struggled with is bonding two painted parts or sub assemblies together. When I do it the glue always dissolves the paint on contact and frankly causes messy results. Many potentially good models have been ruined for me at this stage.
To overcome this I try not to paint contact areas between parts, put this still doesn't really give me what I want.
Last night I was watching a build video on YouTube and the guy was basically throwing painted parts together without a single issue.
What am I doing wrong??
Help and advice will be gratefully recieved.
paint, the joint wont be as strong, and the paint around the join will be damaged by any excess glue.
Simply remove any paint from surfaces to be bonded, or, for non-structural parts, use PVA which works by forming a film between surfaces and wont damage paint.
Can you link to the video you mention?
https://youtu.be/TptEhGTQ9bE
robemcdonald said:
dr_gn said:
robemcdonald said:
I have a bit of a rookie question.
Something I have always struggled with is bonding two painted parts or sub assemblies together. When I do it the glue always dissolves the paint on contact and frankly causes messy results. Many potentially good models have been ruined for me at this stage.
To overcome this I try not to paint contact areas between parts, put this still doesn't really give me what I want.
Last night I was watching a build video on YouTube and the guy was basically throwing painted parts together without a single issue.
What am I doing wrong??
Help and advice will be gratefully recieved.
Polystyrene cement works by dissolving the plastic on both parts and melding them together. If you intorduce a barrier, such as Something I have always struggled with is bonding two painted parts or sub assemblies together. When I do it the glue always dissolves the paint on contact and frankly causes messy results. Many potentially good models have been ruined for me at this stage.
To overcome this I try not to paint contact areas between parts, put this still doesn't really give me what I want.
Last night I was watching a build video on YouTube and the guy was basically throwing painted parts together without a single issue.
What am I doing wrong??
Help and advice will be gratefully recieved.
paint, the joint wont be as strong, and the paint around the join will be damaged by any excess glue.
Simply remove any paint from surfaces to be bonded, or, for non-structural parts, use PVA which works by forming a film between surfaces and wont damage paint.
Can you link to the video you mention?
https://youtu.be/TptEhGTQ9bE
Think I'd still be tempted to scrape the paint away from areas to be glued. Better still, not to paint them in the first place. If you're spraying, just use a bit of masking tape - Tamiya do a good one that isn't too sticky, thus minimising risk of damage.
(If you watch the video, you'll see that those parts of the floor where the seats are to go are devoid of paint.)
(If you watch the video, you'll see that those parts of the floor where the seats are to go are devoid of paint.)
Gassing Station | Scale Models | Top of Page | What's New | My Stuff