72 Mustang Mach1 restoration
Discussion


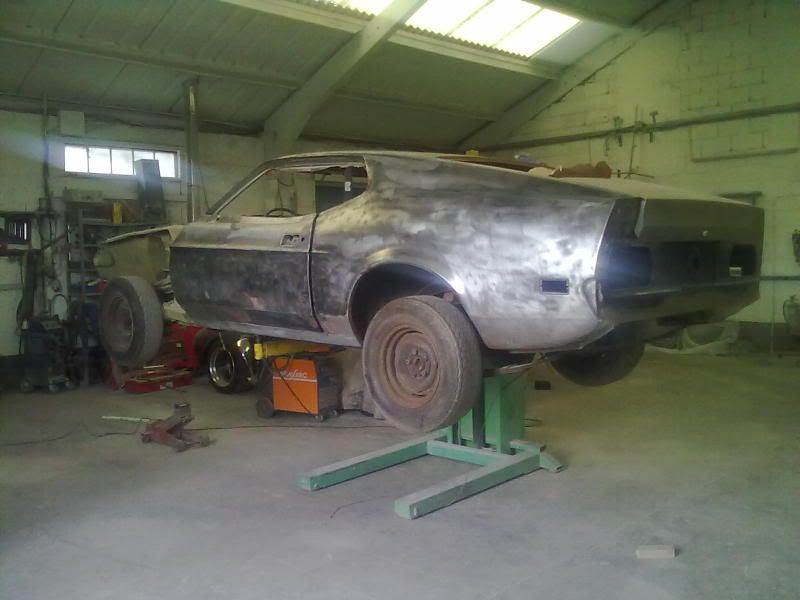
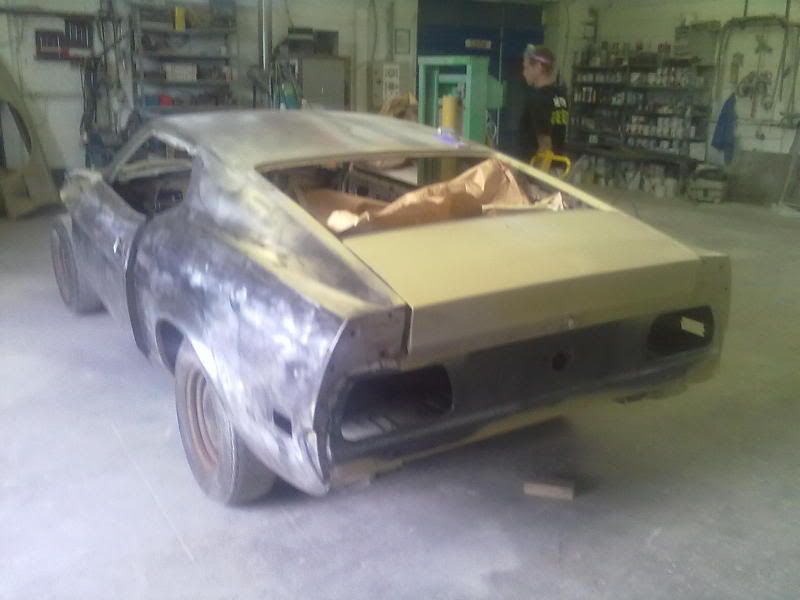
Take one 40 year old Mustang that's been stood in an outhouse for the last 23 years. Body is solid, other than fading, pitted paint. Everything that should work, doesn't! Standing for so long has left every motor and switch siezed.
One good thing about this 50,000 plus miles car is the fantastic shape the body panels are in, The doors haven't dropped and clunk shut like they should do.
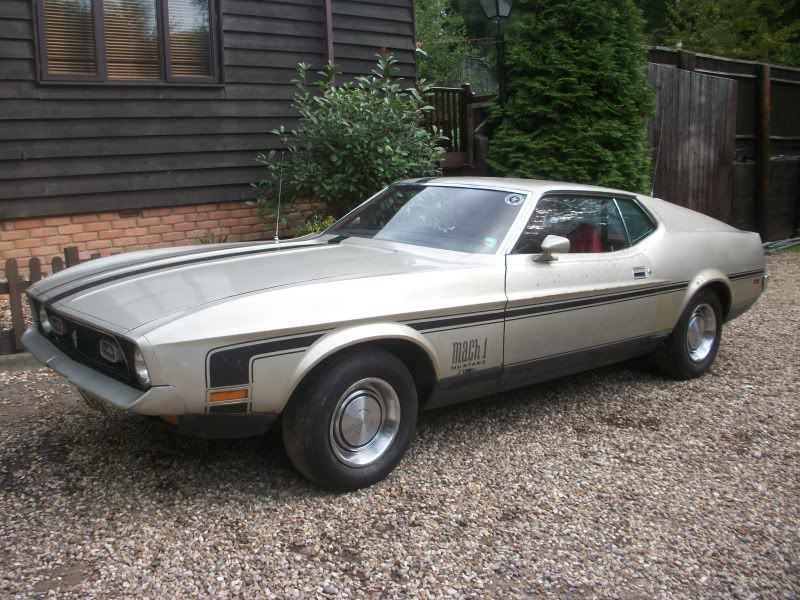
Have just completed my first step in restoring a 72 Mach1, which has been sat for two to three decades. Work is meant to start in the next couple of weeks at the engine and body shop, who are going to kick start the restoration so it's roadworthy by the spring. In the meantime I'm doing other bits, first task was the carb and as the car is going to be restored totally stock I wanted the best job possible.
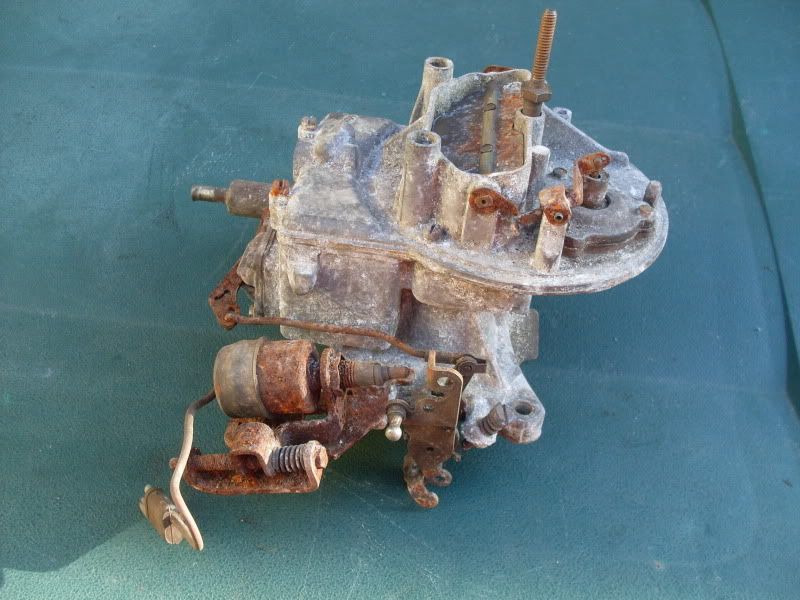
I sent the carb to 'Pony Carburetors' in the U.S. where they restored and rebuilt it before running it on a similar engine to finish tuning. They then cleaned it and packed it back to me with other parts like filters, gaskets and DVD on how to install.
Here's a before and after,

One good thing about this 50,000 plus miles car is the fantastic shape the body panels are in, The doors haven't dropped and clunk shut like they should do.
Have just completed my first step in restoring a 72 Mach1, which has been sat for two to three decades. Work is meant to start in the next couple of weeks at the engine and body shop, who are going to kick start the restoration so it's roadworthy by the spring. In the meantime I'm doing other bits, first task was the carb and as the car is going to be restored totally stock I wanted the best job possible.
I sent the carb to 'Pony Carburetors' in the U.S. where they restored and rebuilt it before running it on a similar engine to finish tuning. They then cleaned it and packed it back to me with other parts like filters, gaskets and DVD on how to install.
Here's a before and after,
Edited by ZR1cliff on Friday 21st September 19:18
Kevin VRs said:
Very impressive. Good luck with the restoration.
Thanks, if it performs as good as it looks I'll be more than happy. The 302 will be rebuilt and freshened up so the carb should make it run nice, along with one of the only non items, electrnic ignition to make it more efficient.uk66fastback said:
Any pics of the car at all?
Any problem with me posting your pics on the MOCGB site? that's an incredible before and after and shows what can be done restoring original parts ...
Are you okay with saying what the cost of the work was?
I've put a car photo on the show us your mustang thread recently. No problems with you sticking the carb ones on the MOCGB, was going to do it myself when I found time.Any problem with me posting your pics on the MOCGB site? that's an incredible before and after and shows what can be done restoring original parts ...
Are you okay with saying what the cost of the work was?
As for the carb - 71 to 73's are becoming thin on the ground and the ones that are around have the vast majority modified, so I want the restoration to be as stock as possible, except for a few additions to improve efficiency. Hence why I went with restoring the carb with Pony carbs.
They've had loads of experience and have ironed out flat spots etc and this should improve fuel delivery. I could have got an inlet manifold and new carb cheaper, however this would have moved away from how I want the car to run.
bikerkeith said:
I also used Pony Carbs for my 69 302, excellent result, solved the stalling problems caused by previous owner mucking about with the carb. Highly recommended.
That's reassuring to hear. I'm very impressed with it visually and if it runs as good and efficiently as it looks it will be money well spent.I'm not in it for mpg, however if I can improve the running and smoothness of the 302 by taking special car of fuel and spark delivery it will be a bonus.
I have to use up the equivilant of 3 weeks holiday before April so have decided to take 2 days a week and get stuck in down at the garage doing the restoration work. Works well for both parties, them as I get to do all the dirty jobs and me as I can help progress.
So far it's strip the whole front end out and strip down the engine ready for cleaning, machining and the rebuild.
Doing all this also allows me to make a list of parts needed - I must have jumbo load on the way over.
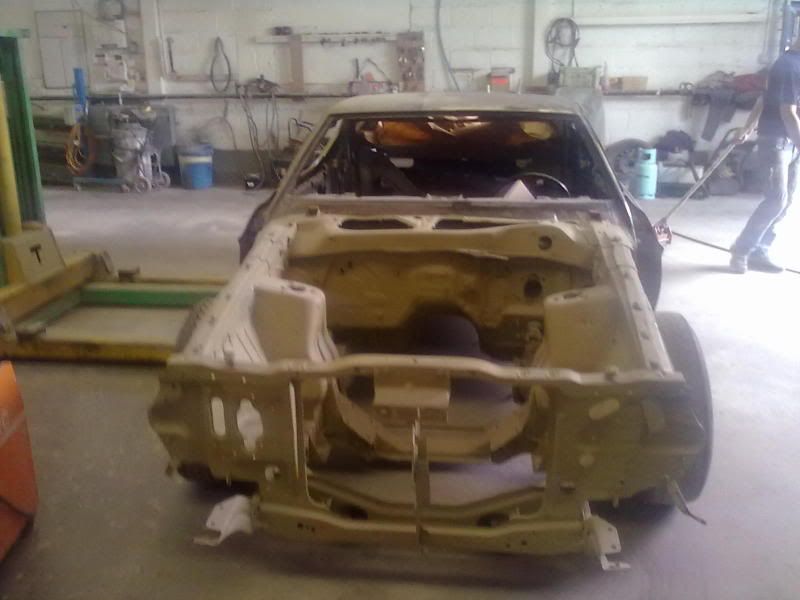
Last week we trailored the car down to the shot blasters, where they blasted the whole front clip back to bare metal. The car was trailored straight back and recieved a coat of undercoat.
Various parts have also been shot blasted, including the wings (great to say all parts blasted were totally solid) All parts are now undercaoted.
Also have spent two full days scraping and cleaning off the underside, which thankfully revealed solid metal. This will be treated with a sealer and protected layer next week. The engine bay will also recieve its top coats hopefuly.
Will try and get some pics at some time.
So far it's strip the whole front end out and strip down the engine ready for cleaning, machining and the rebuild.
Doing all this also allows me to make a list of parts needed - I must have jumbo load on the way over.
Last week we trailored the car down to the shot blasters, where they blasted the whole front clip back to bare metal. The car was trailored straight back and recieved a coat of undercoat.
Various parts have also been shot blasted, including the wings (great to say all parts blasted were totally solid) All parts are now undercaoted.
Also have spent two full days scraping and cleaning off the underside, which thankfully revealed solid metal. This will be treated with a sealer and protected layer next week. The engine bay will also recieve its top coats hopefuly.
Will try and get some pics at some time.
jellison said:
If only you could have bought my Shelby 715 Holley a few months back. 100% restored, but think my father sold it (so much that I'll never use!).
Not sure if would have fitted on my 2 barrel inlet, although I'm happy with the stock route I've taken for now. Will be fitting an LT5 and 6 speed a couple of years after running the 302.There's an engine builder, just across from the company who are doing the mustang paint job, who build V8's for heritage racing. They're doing the machining on my 302 and every time I walk in there they have all manner of inlet manifolds, including 8 webber types.
The LT5 is chevy, as far as it goes into a chevy. Other than that it is Lotus designed and put together by a marine engine builder. The ZF gearbox German.
The idea of fitting an LT5 is more about drivability, I'm not too worried about the power, more the Gran touring feel of it. Something I like about my ZR-1 when it's warmed up and running just below the power band - is it's so smooth and efficient. When my ZR-1 was standard it returned up to 34 to the gallon on run.
I've got a spare LT5 short block and have been buying in heads and parts the last 6 months so I can build it up ready.
The main problems I'll have to overcome are ;
1/ mating up the LT5 engine loom with the stock Mustang loom.
2/ cable speedo to sensor type.
3/ Mechanical to hydraulic clutch.
4/ Carb to Injection.
Edited by ZR1cliff on Friday 1st June 18:00
Further update on the bodywork ;
Engine bay after blasting and painting.
Each panel is being stripped, then clean with an acid process before covering again in paint. The sheet metal has stood up well to the last 40 years. Here a rear panel, half the roof and a door are being taken back to bare metal.
The only panel that took a hit from the tin worm was the rear light panel. A new one has been fitted.
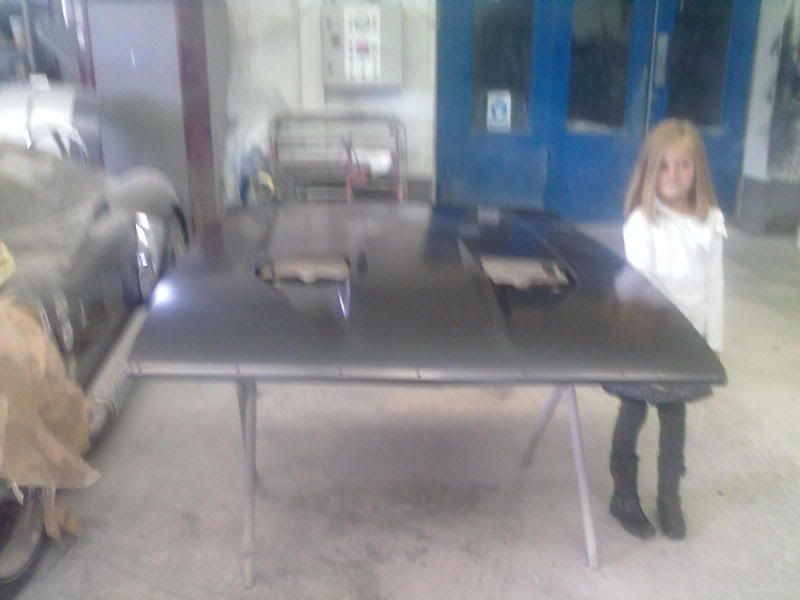
New bonnet arrived today and has been inspected by my inquisitive little helper.
Engine bay after blasting and painting.
Each panel is being stripped, then clean with an acid process before covering again in paint. The sheet metal has stood up well to the last 40 years. Here a rear panel, half the roof and a door are being taken back to bare metal.
The only panel that took a hit from the tin worm was the rear light panel. A new one has been fitted.
New bonnet arrived today and has been inspected by my inquisitive little helper.
Latest updates, working on whatever comes next on the 'parts to be done' shelf. My method in my madness is hitting what ever takes my fancy, wether it's exterior, interior, or whatever and gradually all jobs should come together. 
One little job was the centre consul that was cracked. The ashtray and carrier stiff and rusty.
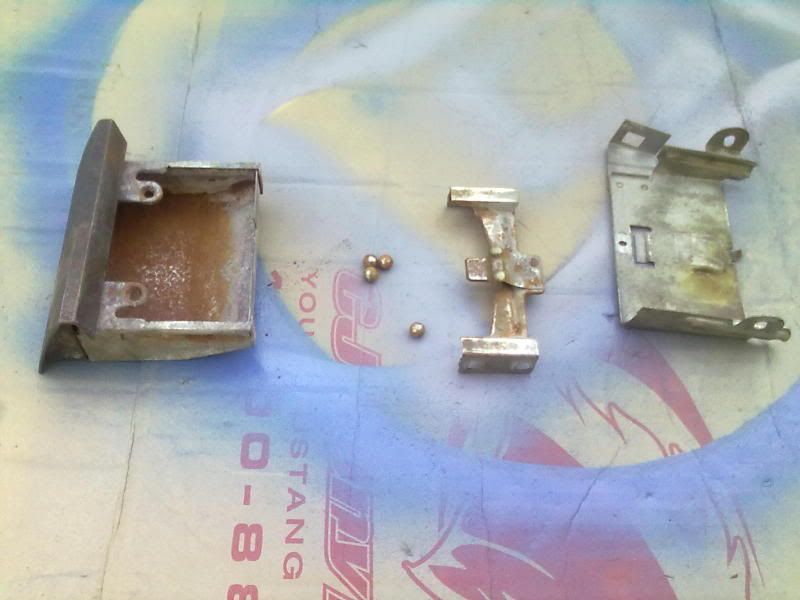
A few hours of working with a thin wire brush on an electric drill, painting the carrier and ashtray silver. Then a fine sand down on another consul I found through ebay. Coating with plastic primer and final painting in matt black. Greasing up the ball bearings and it's job done.
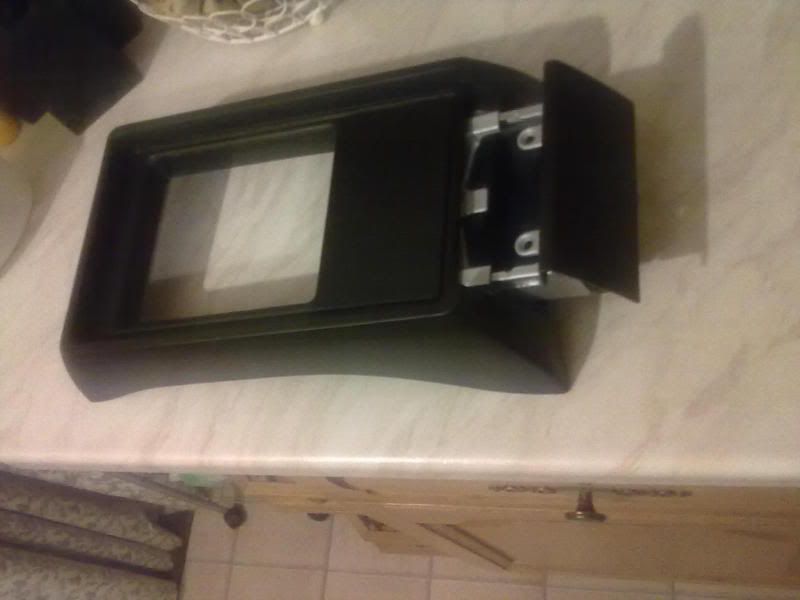
One little job was the centre consul that was cracked. The ashtray and carrier stiff and rusty.
A few hours of working with a thin wire brush on an electric drill, painting the carrier and ashtray silver. Then a fine sand down on another consul I found through ebay. Coating with plastic primer and final painting in matt black. Greasing up the ball bearings and it's job done.

The boring part of a resto, cleaning up old rusty bolts...loads of them!
I've been using white vinegar and a wire brush, soaking them for a day or two then putting my elbow into it. Might go over them once more to get a better finish.
These are only a few of them - but it's a start.
Befores on the right, after treatment in the tub.
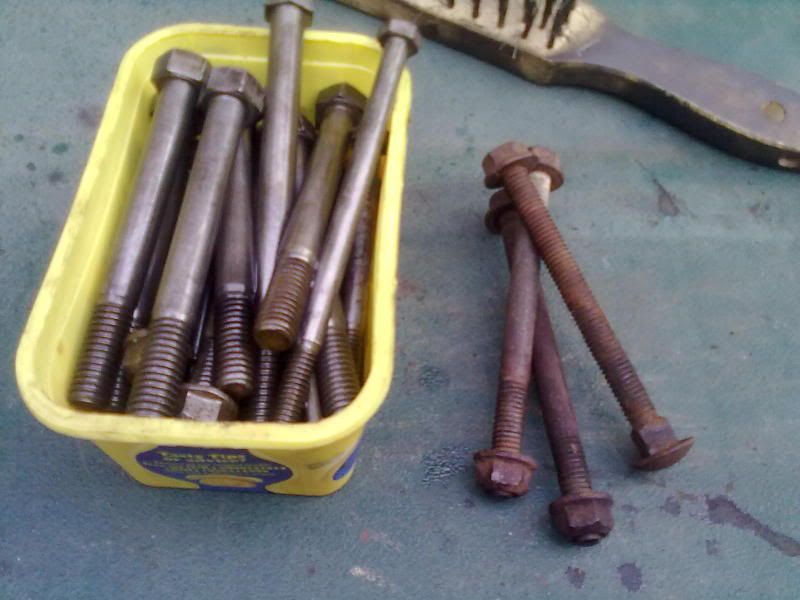
I've been using white vinegar and a wire brush, soaking them for a day or two then putting my elbow into it. Might go over them once more to get a better finish.
These are only a few of them - but it's a start.
Befores on the right, after treatment in the tub.
Edited by ZR1cliff on Sunday 7th October 20:59
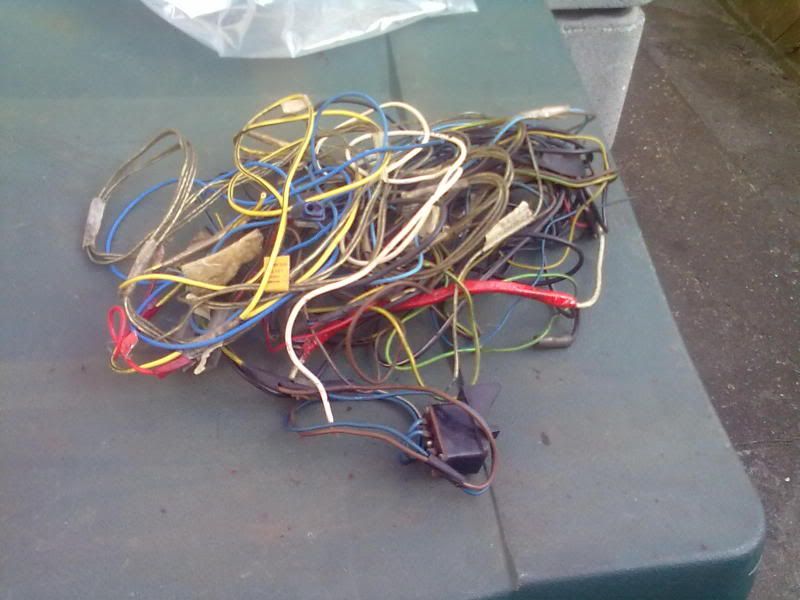
One of the most irritating things that can go wrong with a car is the electrics. At 40 years old and been standing for decades with all possible rodents getting in under the dash I decided the loom needed looking at.
This was sent off to the States and a major overhaul with http://midlife66.com/harnesses/ who specialise in Fords and Mustang wiring looms. They cut out all add ons which allows you to start with a clean slate, electrically, once again. Shipping there and back took around a month and total cost was just shy of 300 quid.
Parts of the loom were in seperate bags with their own itemised installation instructions
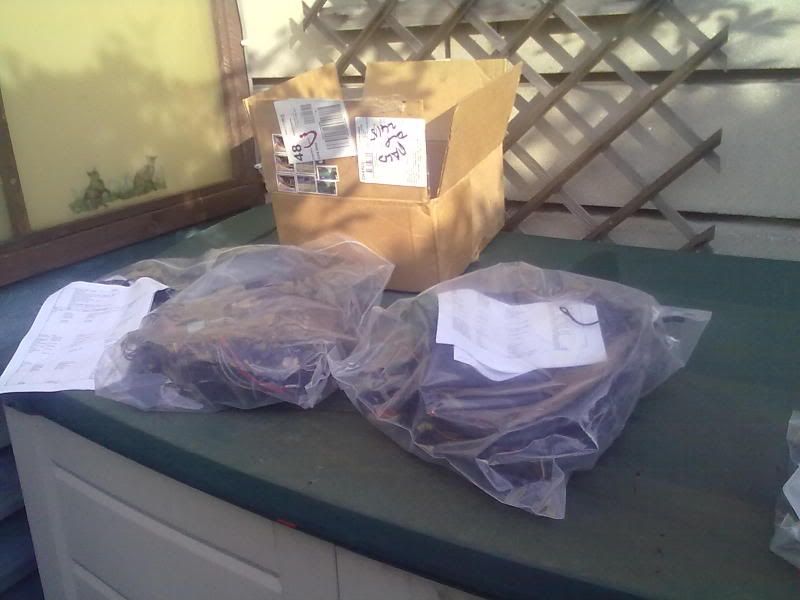
Also returned was all the cut out 'add ons' with naff DIY connectors.
This was sent off to the States and a major overhaul with http://midlife66.com/harnesses/ who specialise in Fords and Mustang wiring looms. They cut out all add ons which allows you to start with a clean slate, electrically, once again. Shipping there and back took around a month and total cost was just shy of 300 quid.
Parts of the loom were in seperate bags with their own itemised installation instructions
Also returned was all the cut out 'add ons' with naff DIY connectors.
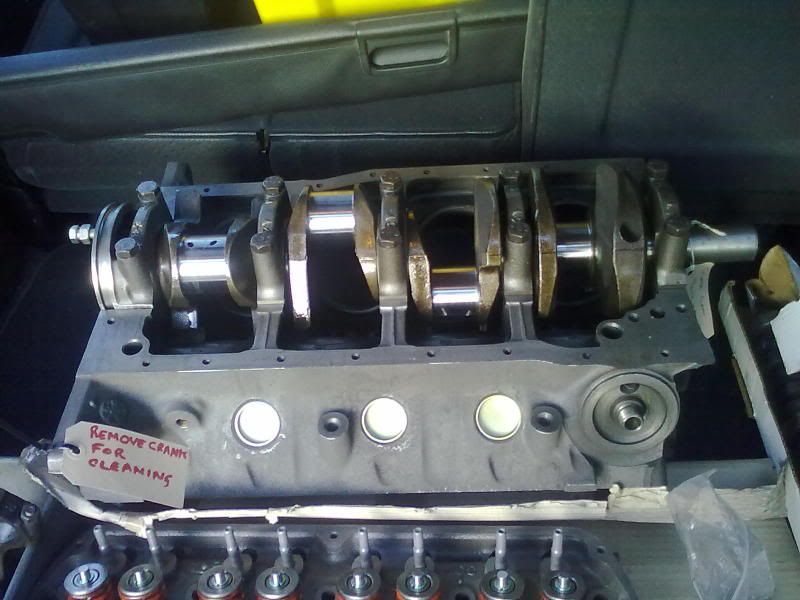
Picked up the engine tonight from the engineers. A 302 2V, that's only done just over 50.000 miles, had sat for the best part of a quarter of a century. Block and heads were cleaned and pressure tested. It also required a crank polish, bores honed and new cam bearings. The block was also checked for crank alignment. Heads were dismantled and overhauled which included a lead free conversion.

Edited by ZR1cliff on Tuesday 25th September 19:59
Dr G said:
Might seem unnecessary to some but I bet you that will save a hundred headaches at reassembly and greatly improve the reliability of the finished car.
Keep us updated, following with interest
Will do Dr G.Keep us updated, following with interest
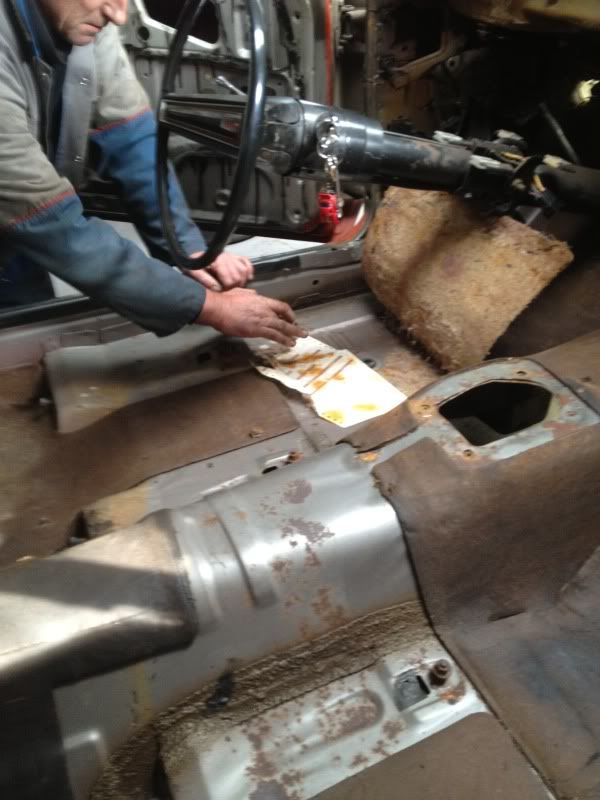
Although the bodywork was ok, strangely anything electrical or mechanical had sweated and siezed. Even the light switch rod snapped in half when it was pulled. Needless to say I was concerned at what state the loom wires were in.
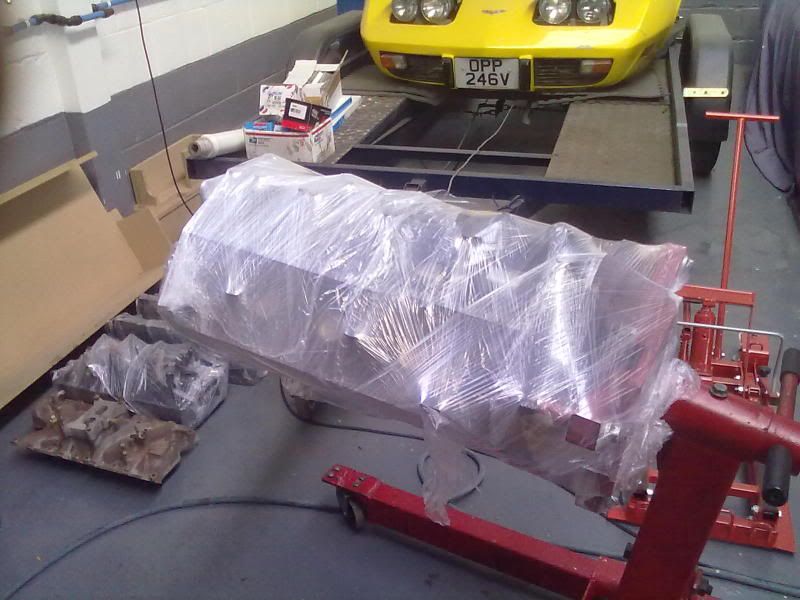
Engine and heads are in the workshop, as of today and wrapped up waiting while all the other parts are delivered. Should be starting assembly in the next couple of weeks after another good clean.
Another handy little tool is this internal coil spring compressor. This came with simple instructions and a can of common sense. Wasn't big money and should make the job of instaling the new suspension a lot easier.

Another handy little tool is this internal coil spring compressor. This came with simple instructions and a can of common sense. Wasn't big money and should make the job of instaling the new suspension a lot easier.
Feel like I'm right in the thick of it now, after going down the bodyshop today. They're getting stuck into the shell now, straitening panels and should be soon hanging all the panels.
Work is starting on the engine soon, as already mentioned, so I've been ordering more parts and taking them down to the build shop. I use CJ Pony parts for body and hard to get items and use Real Steel for all my engine parts. Both have been very good in their service. I ordered some engine parts from RS yesterday lunch time and they were being delivered to me late this morning.
I've been very surprised at how easy it was to get parts that I thought would be a struggle to locate, but RS have come up trumps almost every time, with the parts on the shelf.
One of the difficulties I'm having is matching up the ford engine blue. I bought some from ebay, thinking it was the later Ford engine blue, however when I matched it against the old engine parts and the new blue 'powered by ford' rocker covers it was too light. I have got hold of some paint that is a good match and when the engine is built and painted, all shoud be corrected.
Some parts having been through a cleaning and painting process on the back bench. Reclaimed original bolts in a tub soaking in lube. The original air cleaner after having the dents in the snorkel straightened, then cleaned, undercoated and painted. Will wait to see how the colour matches with the engine before putting the factory Sticker on. The clutch equaliser bar cleaned and painted, awaiting bushings and springs ordered from CJ pony parts.
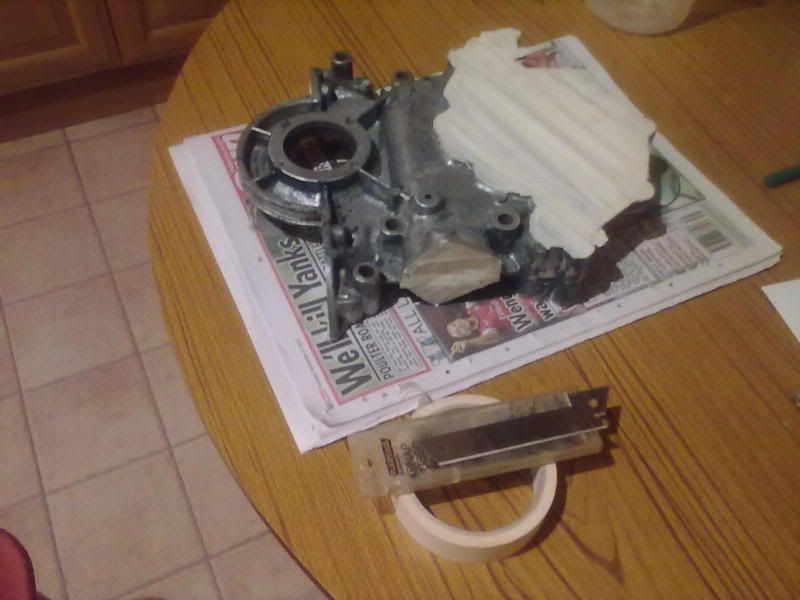
Also been cleaning up parts like this front cover.
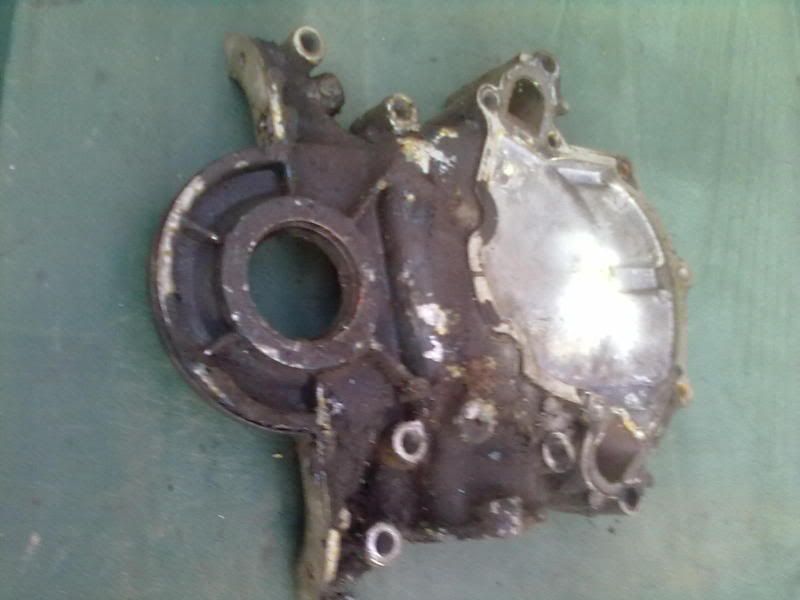
Cleaning the inside with engine cleaner.
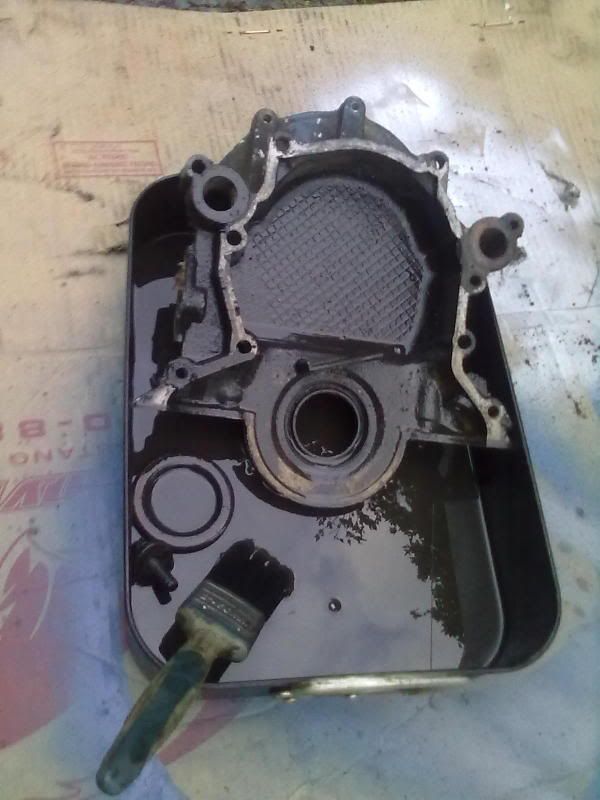
And masking up gasket surfaces before undercoating and top coat.
Work is starting on the engine soon, as already mentioned, so I've been ordering more parts and taking them down to the build shop. I use CJ Pony parts for body and hard to get items and use Real Steel for all my engine parts. Both have been very good in their service. I ordered some engine parts from RS yesterday lunch time and they were being delivered to me late this morning.
I've been very surprised at how easy it was to get parts that I thought would be a struggle to locate, but RS have come up trumps almost every time, with the parts on the shelf.
One of the difficulties I'm having is matching up the ford engine blue. I bought some from ebay, thinking it was the later Ford engine blue, however when I matched it against the old engine parts and the new blue 'powered by ford' rocker covers it was too light. I have got hold of some paint that is a good match and when the engine is built and painted, all shoud be corrected.
Some parts having been through a cleaning and painting process on the back bench. Reclaimed original bolts in a tub soaking in lube. The original air cleaner after having the dents in the snorkel straightened, then cleaned, undercoated and painted. Will wait to see how the colour matches with the engine before putting the factory Sticker on. The clutch equaliser bar cleaned and painted, awaiting bushings and springs ordered from CJ pony parts.
Also been cleaning up parts like this front cover.
Cleaning the inside with engine cleaner.
And masking up gasket surfaces before undercoating and top coat.
Gassing Station | Mustangs | Top of Page | What's New | My Stuff