The body off has begun
Discussion


Only managed to start today - I haven't been well over Christmas (you don't need the details!).
Will post some pictures later. I think the basics have been covered a number of times so I don't intend to do it again, but if there is anything peculiar to the V8S that anyone needs pictures of let me know.
Have removed & labelled all engine wiring, working my way around other bits now.
Chris
Will post some pictures later. I think the basics have been covered a number of times so I don't intend to do it again, but if there is anything peculiar to the V8S that anyone needs pictures of let me know.
Have removed & labelled all engine wiring, working my way around other bits now.
Chris
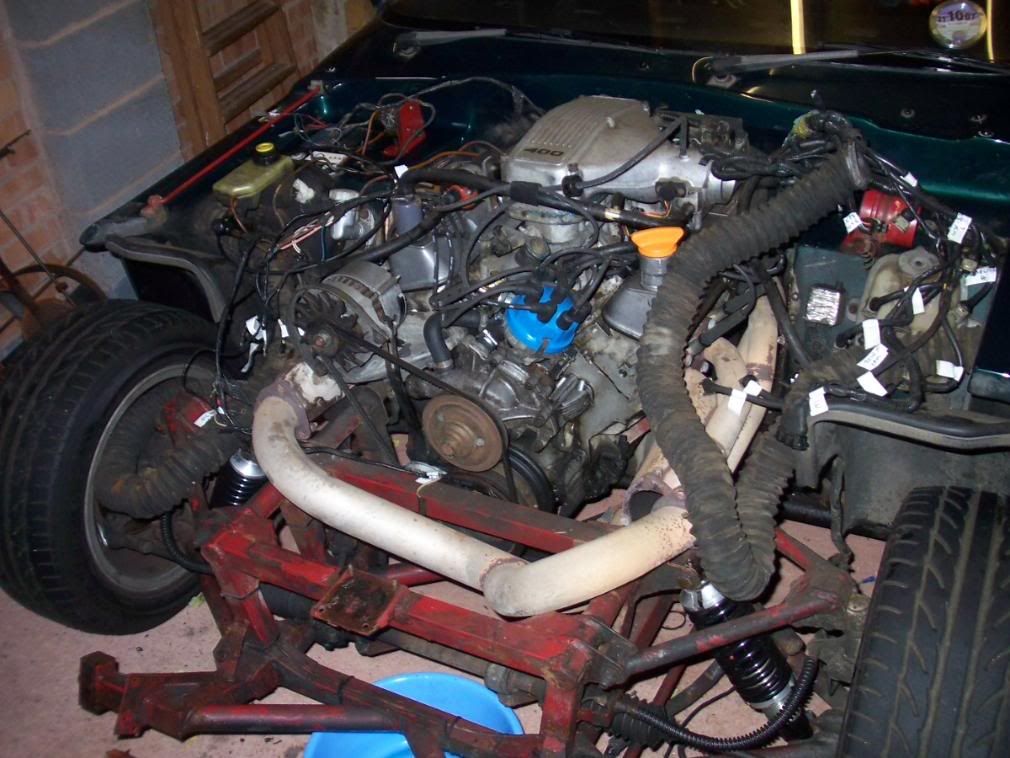
Spent most of today in the garage, I didn't realise there was so much wiring on the engine.
Most difficult bit so far has been getting the speedo electrical cable free - it seems to come out under the centre console roughly under the radio I think, problem is it goes through the body on the drivers side, but the speedo connection is on the passenger side, so it runs across the top of the chassis then down the other side to the gearbox sender. It is cable tied the the chassis members down to the sender, and I spent over an hour dropping the exhaust just so I could cut 2 cable ties. Better than ripping the wires out I guess.
Starter wires are a pig too.
I have to take my hat off to TVR - we often refer to them as a bunch of cowboys - but there is so little clearance between all the various components (about 5mm in quite a few areas) - it is testament to their engineering that they managed to make it all fit together.
Finally a tip - if you're doing it indoors and your battery is in the boot with electrical boot release - disconnect the battery, remove it from the boot then push the boot catch closed with a screwdriver with the boot lid up - then you can't close it and lock yourself out of it.
I've taken quite a lot of photos but they are mainly for my benefit at the moment.
If the amount of oil under the car is anything to go by the chassis should be mint!
Chris
OK the story so far.
Front end of car
Bonnet is off.
I have removed & labelled all the engine wiring (& produced a schematic which is posted elsewhere).
I managed to snap the terminals off the brake fluid level sensor - then thought about it & realised I didn't even need to disconnect it, as the master cylinder will stay with the body. Doh!
Haven't disconnected small earth at the nearside rear of the block - I either need to remove the exhaust (bloody joint isn't letting go) or lift the body slightly then undo it.
Cooling system drained (OK I've taken the radiator bottom hose off & put a bucket underneath)
Brake & clutch hydraulics disconnected, then reconnected as hydraulic fluid was going everywhere.
At least they are cracked off ready.
Accelerator cable disconnected at engine end.
Under car
Disconnected exhaust from manifolds & dropped exhaust.
Cut cable ties holding speedo sender cable (there are only two and you can't get to them with the exhaust on).
Disconnected speedo sender cable from gearbox.
Rear of car
Disconnected & labelled fuel tank sender & fuel pump wiring.
Drained tank & removed fuel pump (hose passes through tank cradle & fibre glass body so had to be done)
Inside car
Removed gear lever gaiter & second rubber gaiter underneath & disconnected reverse light wires.
Inside boot
Cut battery connectors off (soldered on) & pulled cables out of boot.
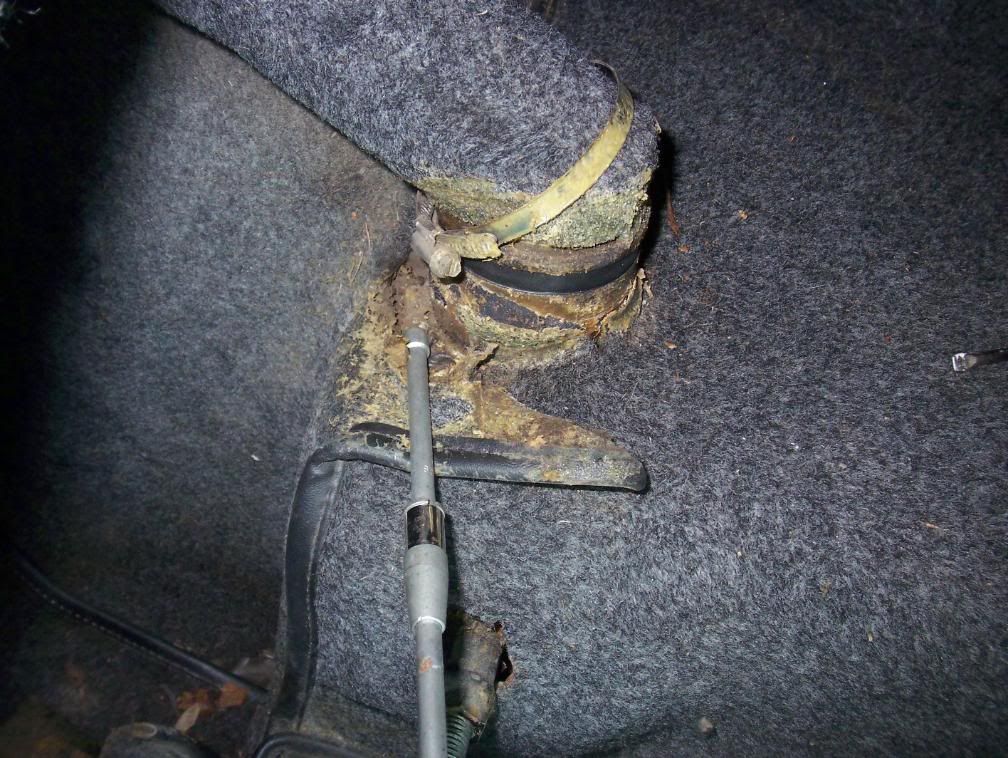
Slackened off jubilee clips top and bottom on rubber hose between filler neck & tank.
How do I disconnect this? Pull like hell / prise away with screwdriver?
Pic below
Tune in soon for the next exciting installment.....
Haven't disconnected steering / handbrake or removed seats / body fixing bolts yet, or anything else that I've forgot.
If anyone wants to look at the photos I've taken they are here.
http://s181.photobucket.com/albums/x311/chrisbark/...
There is no explanation of whats what - they are purely for my benefit at the moment.
Chris
Front end of car
Bonnet is off.
I have removed & labelled all the engine wiring (& produced a schematic which is posted elsewhere).
I managed to snap the terminals off the brake fluid level sensor - then thought about it & realised I didn't even need to disconnect it, as the master cylinder will stay with the body. Doh!
Haven't disconnected small earth at the nearside rear of the block - I either need to remove the exhaust (bloody joint isn't letting go) or lift the body slightly then undo it.
Cooling system drained (OK I've taken the radiator bottom hose off & put a bucket underneath)
Brake & clutch hydraulics disconnected, then reconnected as hydraulic fluid was going everywhere.
At least they are cracked off ready.
Accelerator cable disconnected at engine end.
Under car
Disconnected exhaust from manifolds & dropped exhaust.
Cut cable ties holding speedo sender cable (there are only two and you can't get to them with the exhaust on).
Disconnected speedo sender cable from gearbox.
Rear of car
Disconnected & labelled fuel tank sender & fuel pump wiring.
Drained tank & removed fuel pump (hose passes through tank cradle & fibre glass body so had to be done)
Inside car
Removed gear lever gaiter & second rubber gaiter underneath & disconnected reverse light wires.
Inside boot
Cut battery connectors off (soldered on) & pulled cables out of boot.
Slackened off jubilee clips top and bottom on rubber hose between filler neck & tank.
How do I disconnect this? Pull like hell / prise away with screwdriver?
Pic below
Tune in soon for the next exciting installment.....
Haven't disconnected steering / handbrake or removed seats / body fixing bolts yet, or anything else that I've forgot.
If anyone wants to look at the photos I've taken they are here.
http://s181.photobucket.com/albums/x311/chrisbark/...
There is no explanation of whats what - they are purely for my benefit at the moment.
Chris
Edited by Barkychoc on Tuesday 1st January 20:13
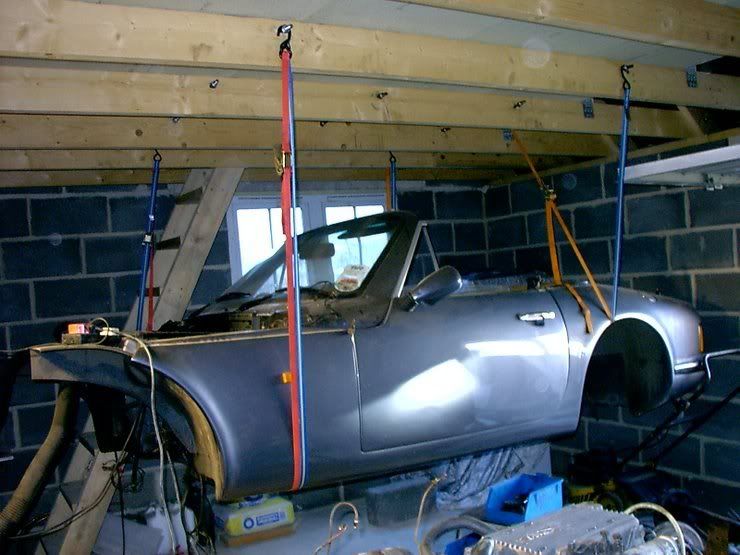
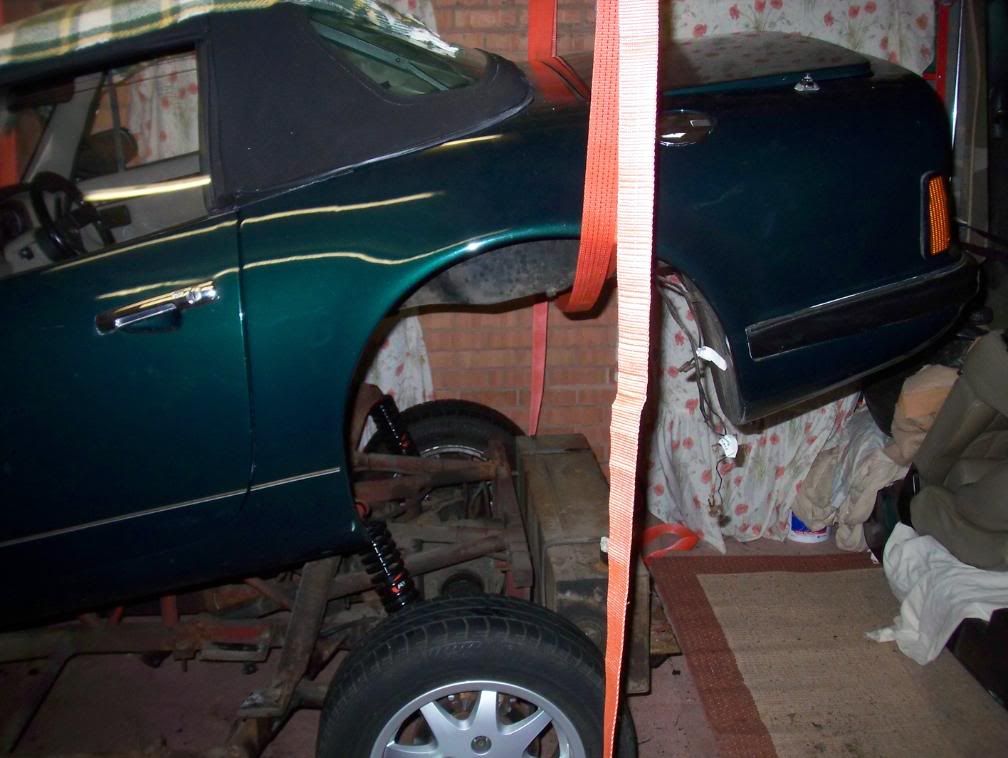
Actually I have a cunning plan - I discussed the body off with Ray S at the Rutland Rumble last october and he told me how he did his with straps which is what I intend to do - you can jack it up a bit at a time with total control.
I've got to remove the seats and undo the bolts holding the body on - though from an email conversation I've had with Steve (SEB400) the body won't come off with the exhaust manifolds on - so as I intend to remove the engine and gearbox I may have to do that first before the body is removed.
Ray's body off using straps is here
link
Chris
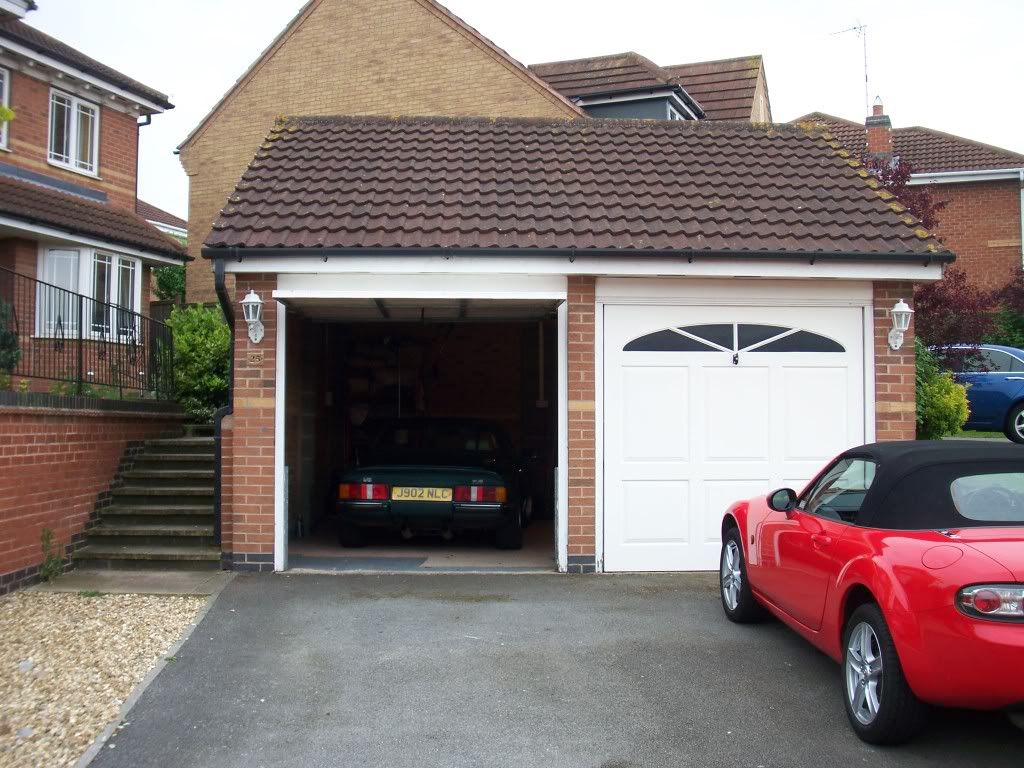
The problem I have is that the body and chassis have to live in the garage during the refurb - hence the plan to hoist it up using straps so its hanging from the roof.
I have a double garage, a drive for our two 'normal' cars and no other space - the house is at a higher level than the garage up some steps so I have nowhere outside to put the body.
OK it could go on the drive - but trust me that isn't going to happen (I am not even going to ask SWMBO).
The pic below may give you an idea of how much space I've got (I'm not that sad - I had to send this pic to the insurance to show them it in the garage).
I have the height and also have 9 x 5 ton straps that are 9 metres long.
Ray convinced me it worked well when he did his, so thats plan A at the moment.
The plan is to hoist the body off (with the car reversed in) then move the chassis across the front behind the 2 garage doors to work on it. (There is no dividing wall in the garage).
I've got a bit to do yet, not least removing the engine & box, and I'm not rushing as I don't want to start getting pished off with it. Hopefully will get a few more hours in at the weekend.
I'm going to see if I can blag an engine crane through the hire company we use alot at work.
Chris
Edited by Barkychoc on Thursday 3rd January 23:08
Well a bit more progress this afternoon.
I finally got the flexible coupling free from the top of the fuel tank - I undid the jubilee clip higher up the pipe to allow some movement as previously suggested by Mark (mep12345).
I've taken the seats out and I have removed all the body mounting bolts.
Steve (seb400) your drawing was ace - made it much easier. Steve has produced a PDF drawing of the body bolt locations which was really useful - it meant I could just tick them off as I did them.
I had one additional bolt which was at the back through the tank cradle - the bolt head was in the body cavity where the fuel pump lives under the boot - I thought it was going to be a real pig as access wasn't very easy - anyway one good yank to loosen the bolt off and it snapped straight off - the only one of the day.
The steel cradle under the aluminium trim at the back looks very rusty - and I'm going to need a new aluminium trim as its very tired - any suggestions / can someone make me one? (I'll pay / donate to charity / whatever)
Still left to do is disconnecting the handbrake (leaving till last), steering and clutch / brake pipes (I have already slackened them off once). Oh and the boot strut which I believe catches on the tank.
Slightly worrying is that the outboard passenger seat belt mounting bolt (not the reel, the one at the bottom) only had about 4mm of thread engaged - it seems that bolt was a bit short. I'll know if there is something amiss when the body comes off.
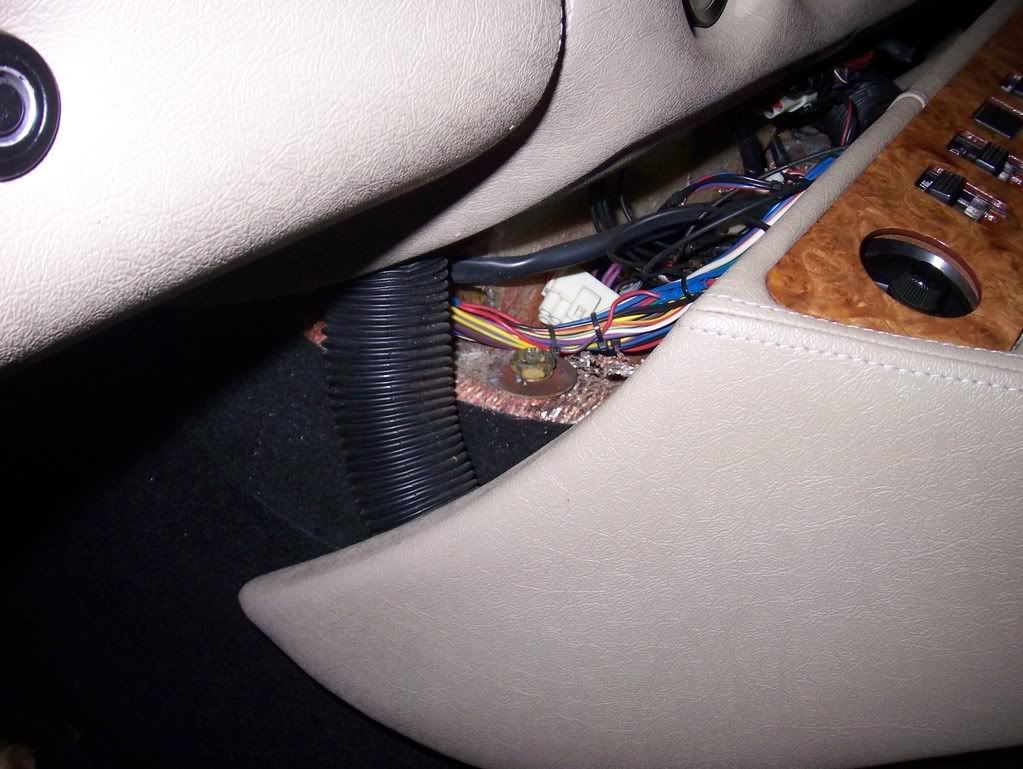
I managed to get a good pic of where the bolts are under the centre console (if you have them).
Didn't take any other pics as not a very exciting day really.
I finally got the flexible coupling free from the top of the fuel tank - I undid the jubilee clip higher up the pipe to allow some movement as previously suggested by Mark (mep12345).
I've taken the seats out and I have removed all the body mounting bolts.
Steve (seb400) your drawing was ace - made it much easier. Steve has produced a PDF drawing of the body bolt locations which was really useful - it meant I could just tick them off as I did them.
I had one additional bolt which was at the back through the tank cradle - the bolt head was in the body cavity where the fuel pump lives under the boot - I thought it was going to be a real pig as access wasn't very easy - anyway one good yank to loosen the bolt off and it snapped straight off - the only one of the day.
The steel cradle under the aluminium trim at the back looks very rusty - and I'm going to need a new aluminium trim as its very tired - any suggestions / can someone make me one? (I'll pay / donate to charity / whatever)
Still left to do is disconnecting the handbrake (leaving till last), steering and clutch / brake pipes (I have already slackened them off once). Oh and the boot strut which I believe catches on the tank.
Slightly worrying is that the outboard passenger seat belt mounting bolt (not the reel, the one at the bottom) only had about 4mm of thread engaged - it seems that bolt was a bit short. I'll know if there is something amiss when the body comes off.
I managed to get a good pic of where the bolts are under the centre console (if you have them).
Didn't take any other pics as not a very exciting day really.
Edited by Barkychoc on Sunday 6th January 18:59
Neil - what a great garage.
I don't have as much height as you as I have horizontal rafters in the garage.
I'm planning to do something along the lines of what Ray S did, pic below.
I've got 9 x new 5 ton 50mm lorry ratchet straps, and I planned to hoist it up with those, Ray said it worked really well and you can do a slow controlled lift. If it doesn't work I'll think of a plan B.
Edited by Barkychoc on Sunday 6th January 22:25
I've got some brand new 5 ton jobbies, very heavy duty so they should do it.
As an update - not much progress this weekend.
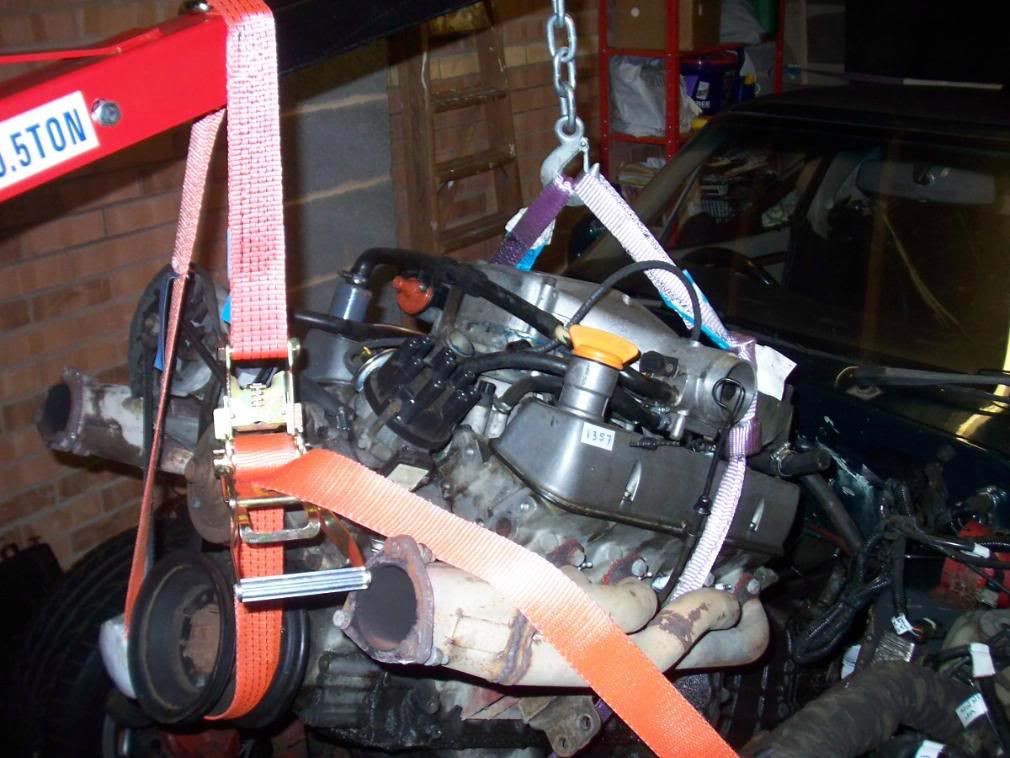
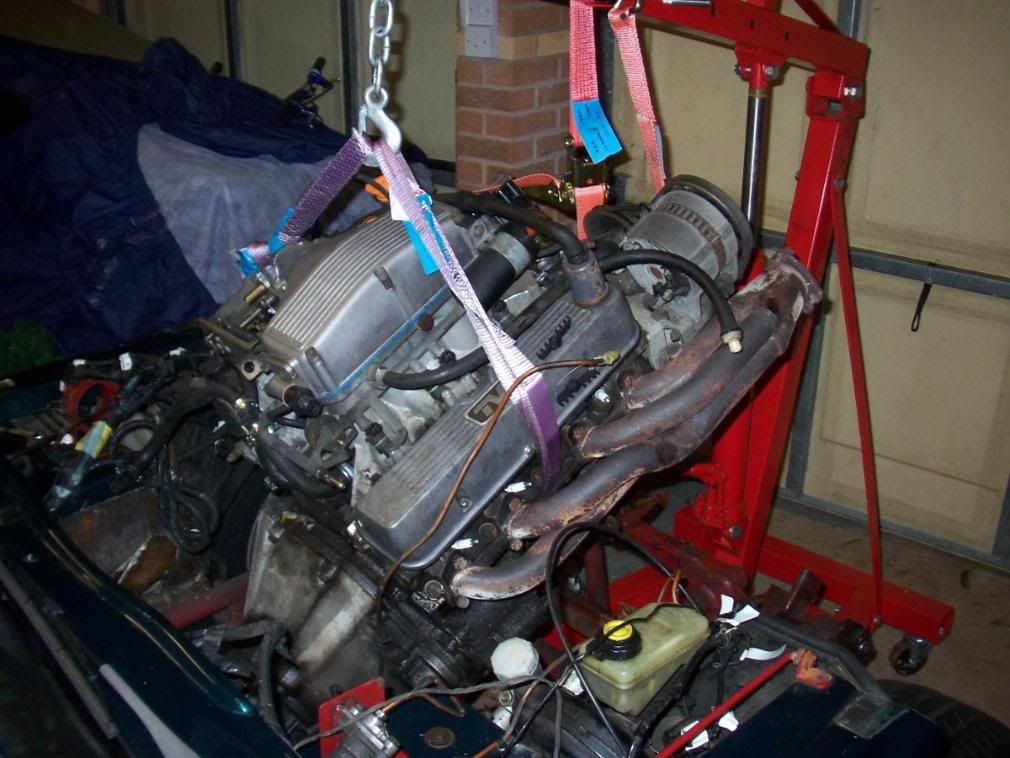
Removed radiator & housing, then spent some time reassembling the secondhand engine crane I've bought as the I bought it off had assembled it incorrectly. It all seems complete anyway, and ready to go now.
Going to try and get a couple of evenings in this week.
Engine & gearbox are ready to come out, and body is pretty much there too so without too much effort hopefully I'll have some significant progress in the next week or so.
As an update - not much progress this weekend.
Removed radiator & housing, then spent some time reassembling the secondhand engine crane I've bought as the
I bought it off had assembled it incorrectly. It all seems complete anyway, and ready to go now.Going to try and get a couple of evenings in this week.
Engine & gearbox are ready to come out, and body is pretty much there too so without too much effort hopefully I'll have some significant progress in the next week or so.
ketvrin said:
Come on Chris... you know how we (I) like pictures... wheres your website recording every point along the way ? if not a website, use Myphotoalbum or photobucket or similar...
K
I've heard about you, the internet and pictures....... K
I'll post loads when the body is off, at the moment pics are just for my benefit to record how it goes back together.
Edited by Barkychoc on Monday 14th January 16:54
OK back to the plot (cos I can't think of anything clever to say to that Kevin  ).
).
I thought I'd better get in the garage tonight to have a bit of a push to move things along.
I've removed the exhaust Y piece at the front, cross member in front of the engine and one propshaft bolt - jeez what a pig they are. Imperial too, 9/16af.
Oh and the car is on axle stands now with the engine crane placed ready for blast off.
The garage is getting a bit congested now I've started removing bits, which is really starting to irritate me now as well
Chris
).I thought I'd better get in the garage tonight to have a bit of a push to move things along.
I've removed the
exhaust Y piece at the front, cross member in front of the engine and one propshaft bolt - jeez what a pig they are. Imperial too, 9/16af. Oh and the car is on axle stands now with the engine crane placed ready for blast off.
The garage is getting a bit congested now I've started removing bits, which is really starting to irritate me now as well
Chris
More progress today, had a good day.
This first picture is actually from a while ago.
The orange ratchet strap at the front I used to adjust the angle - it needed to be a bit steeper for the gearbox to clear the chassis with the engine coming over the anti roll bar.

This first picture is actually from a while ago.
The orange ratchet strap at the front I used to adjust the angle - it needed to be a bit steeper for the gearbox to clear the chassis with the engine coming over the anti roll bar.
Edited by Barkychoc on Sunday 20th January 22:45
petclub said:
It's good to see it coming on well Chris.
If you get her ready for June, I can put in a good word with the organiser of SCH if you like
If you get her ready for June, I can put in a good word with the organiser of SCH if you like
TVRleigh_BBWR said:
Hi Could you post up some pic's of your engine mount points.
as need to do a chassis mod, to fit a Rv8 into a S1.5 Chassis.
I have a 400SE so know how they are mounted, but the more options the better.
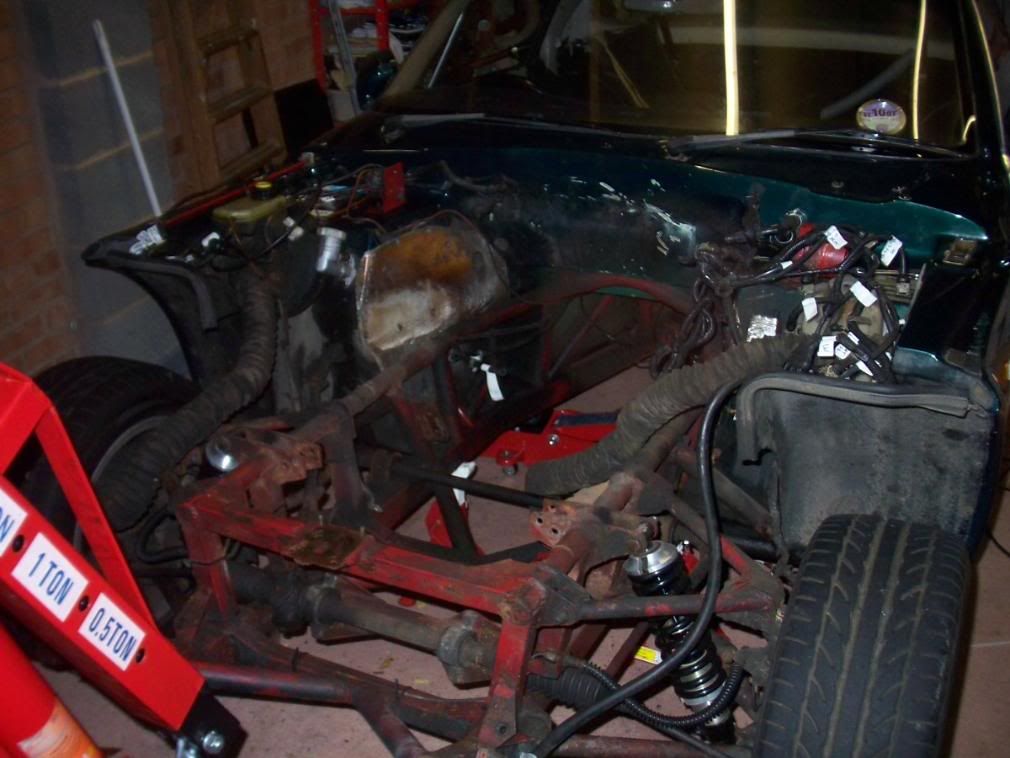
I managed to get my body off with the help of a few others today.
so its the next job to be done.
Thanks
Leigh
Thanks Dave - that would be good as need to do a chassis mod, to fit a Rv8 into a S1.5 Chassis.
I have a 400SE so know how they are mounted, but the more options the better.
I managed to get my body off with the help of a few others today.
so its the next job to be done.
Thanks
Leigh

Leigh I'll take pics of the engine mounts tomorrow
Chris
Edited by Barkychoc on Saturday 19th January 23:32
Things have moved on a bit today...... 
I also want to thanks Ray S for the body lift idea using straps - if you can do it this way let me tell you it is dead easy - I did the entire body lift on my own today in about an hour.

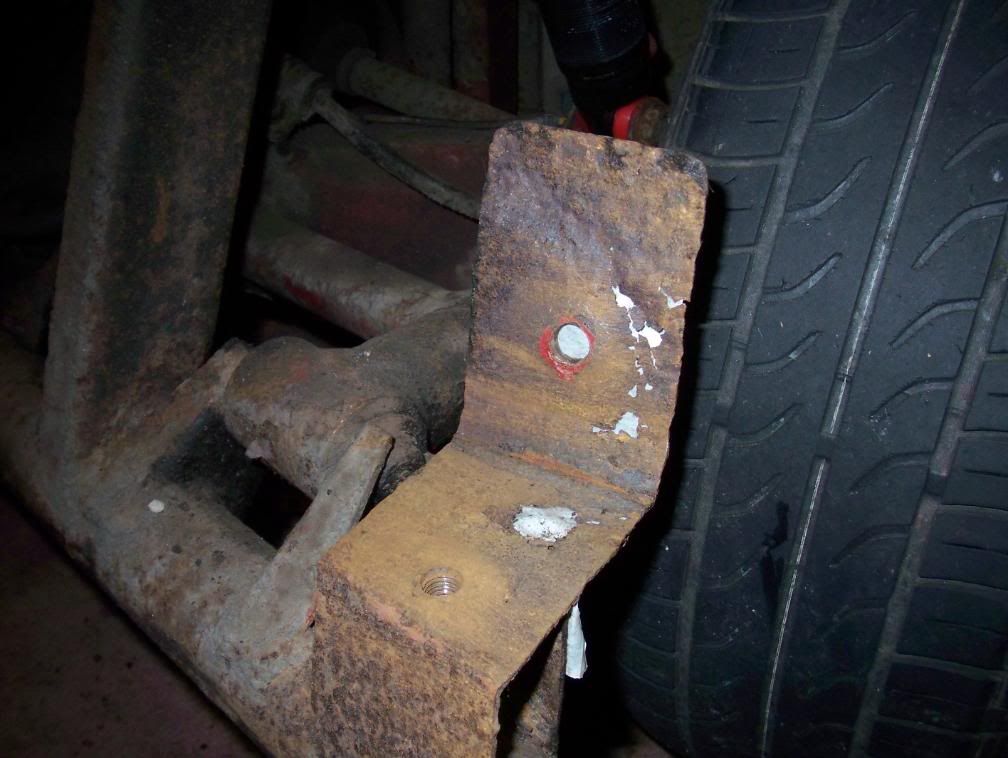
This is dodgy seat belt mount can't really see at this angle
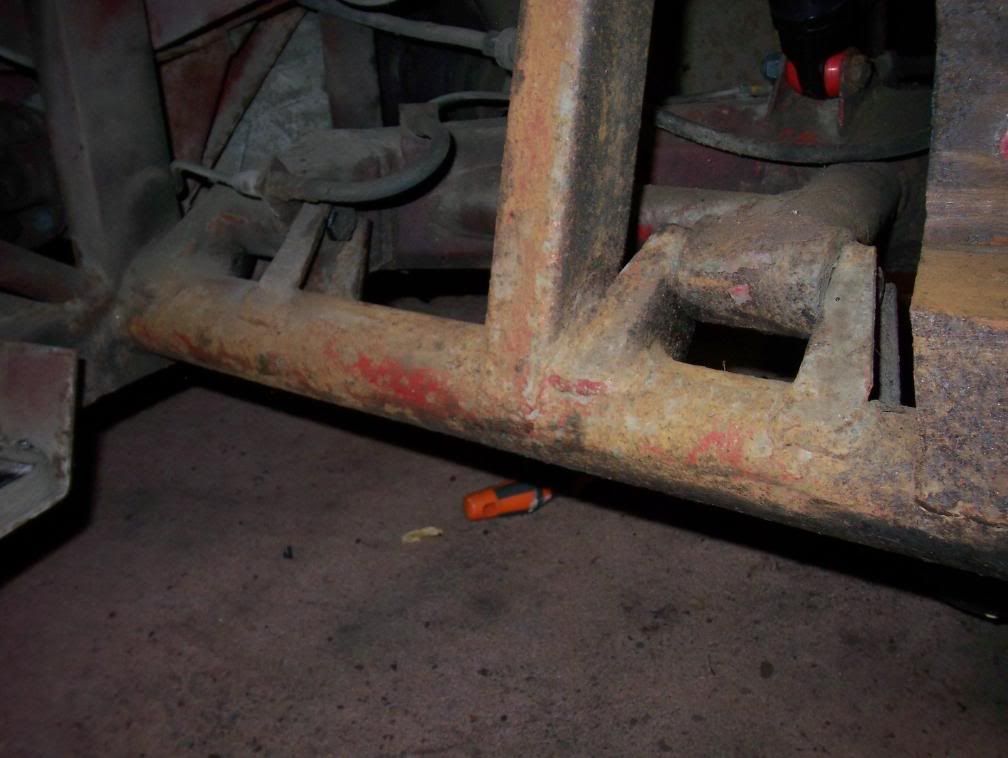
General rear shot
The good news is that so far I haven't been managed to make any holes in the outriggers, though they are a bit scabby.
The seat belt mounts are shot at the back - sorry no photos yet wifey was taking the pics today while I did the effing and jeffing.
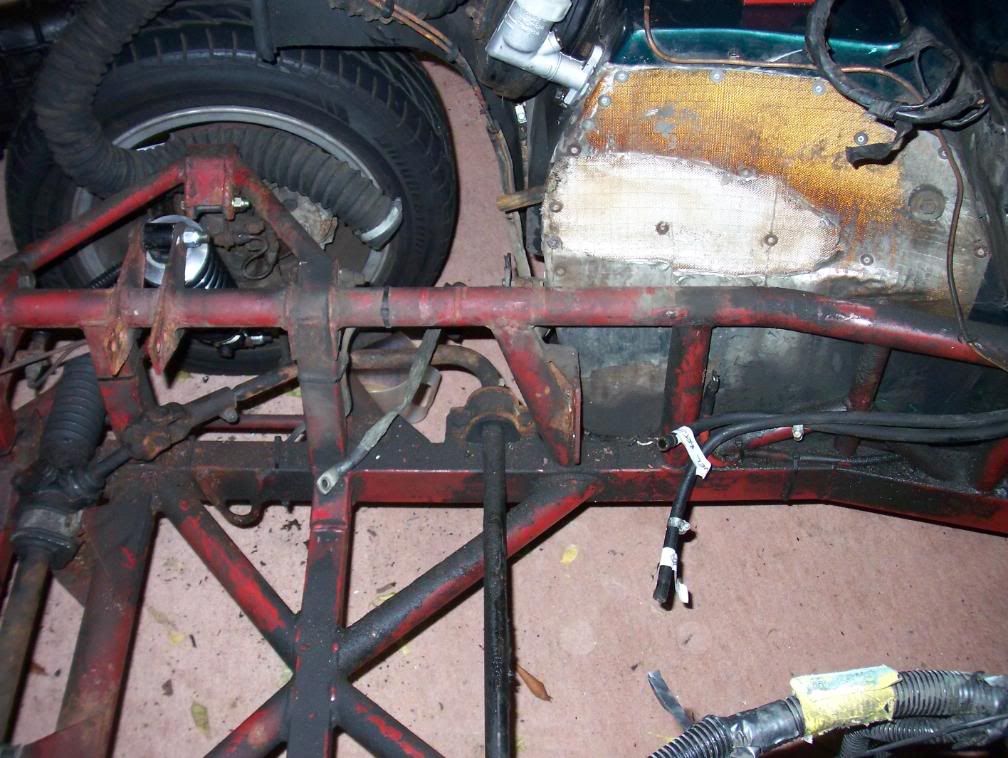
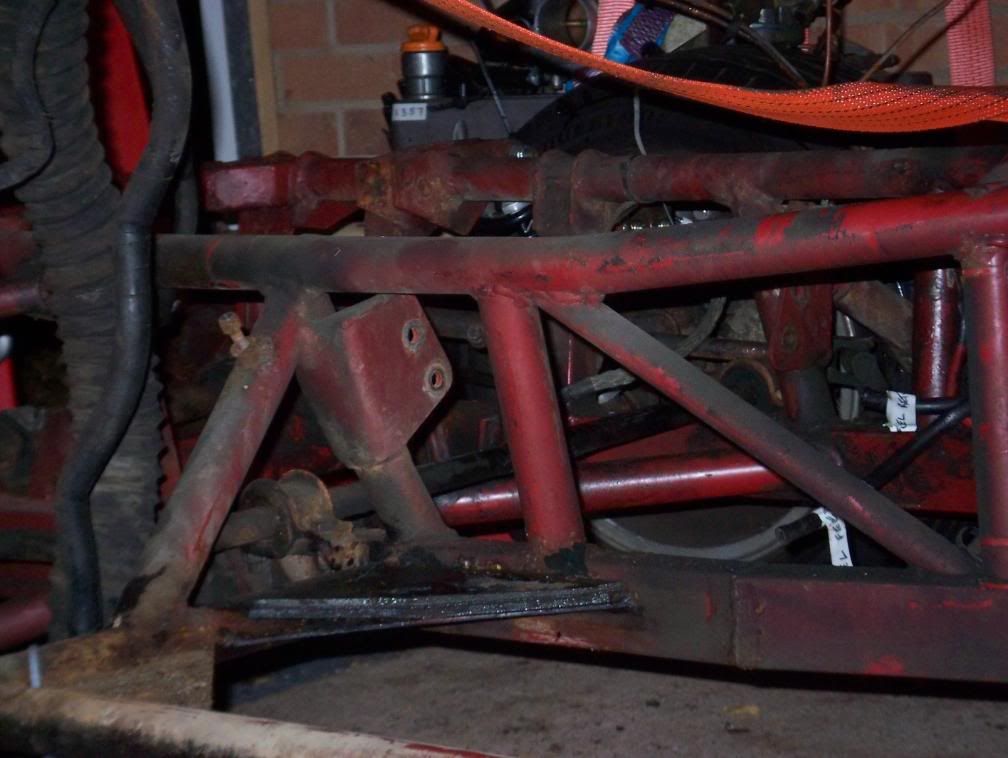
Leigh here's pictures of the engine mounts, the engine is very very tight you are going to have to get them bang on.
If you want some measurements let me know, I'll do my best.

If you want to have a nosey through the photos so far I think this link will work.
http://s181.photobucket.com/albums/x311/chrisbark/...
My wife took the ones with me in - I didn't know till we got in the house that she also took some video
I also want to thanks Ray S for the body lift idea using straps - if you can do it this way let me tell you it is dead easy - I did the entire body lift on my own today in about an hour.
This is dodgy seat belt mount can't really see at this angle
General rear shot
The good news is that so far I haven't been managed to make any holes in the outriggers, though they are a bit scabby.
The seat belt mounts are shot at the back - sorry no photos yet wifey was taking the pics today while I did the effing and jeffing.
Leigh here's pictures of the engine mounts, the engine is very very tight you are going to have to get them bang on.
If you want some measurements let me know, I'll do my best.
If you want to have a nosey through the photos so far I think this link will work.
http://s181.photobucket.com/albums/x311/chrisbark/...
My wife took the ones with me in - I didn't know till we got in the house that she also took some video
Edited by Barkychoc on Sunday 20th January 22:45
Edited by Barkychoc on Sunday 20th January 23:00
Edited by Barkychoc on Sunday 20th January 23:06
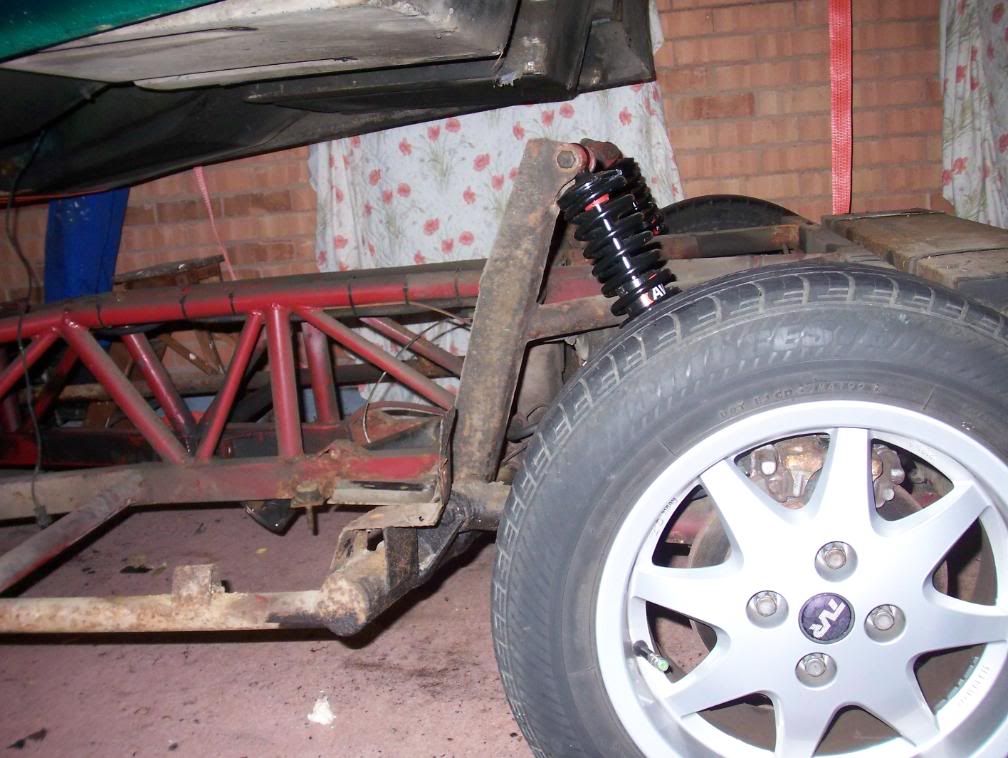
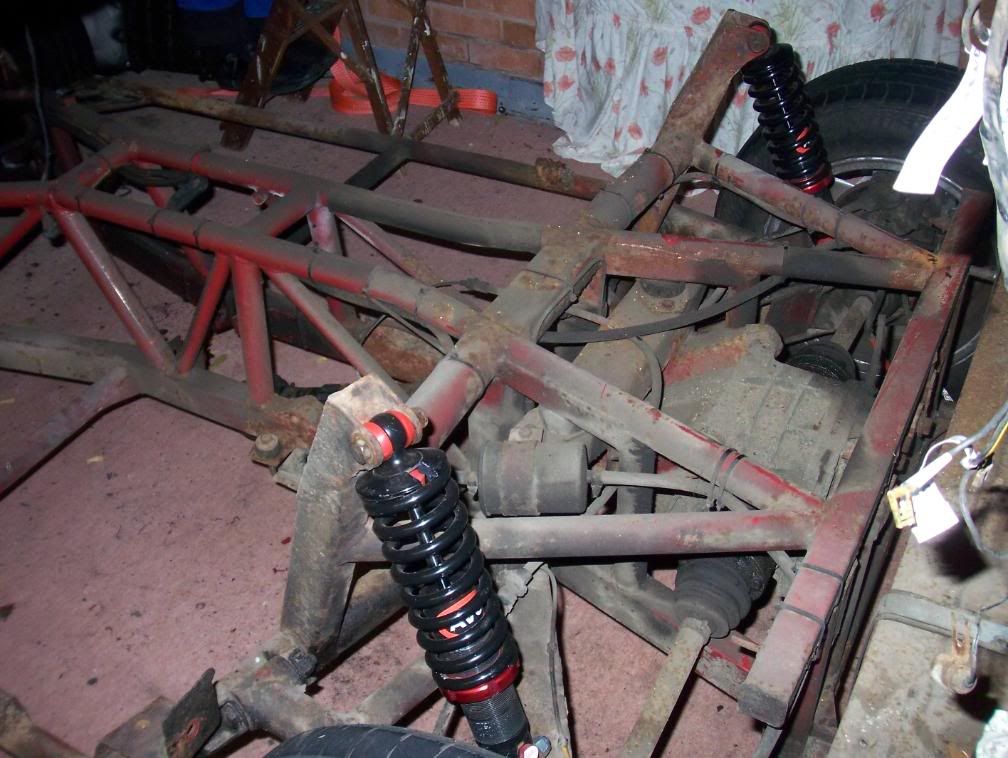
I had a quick look last night and the chassis didn't look too bad.
One tip I'll remember for next time ( ) is to disconnect & move the anti roll bar forwards (not sure it will come out) - the engine is very difficult to get out with it in place as the sump is tight up against it (and from what you guys have said on here it sounds like the V6 is similar.)
Chris
One tip I'll remember for next time (
) is to disconnect & move the anti roll bar forwards (not sure it will come out) - the engine is very difficult to get out with it in place as the sump is tight up against it (and from what you guys have said on here it sounds like the V6 is similar.)Chris
Edited by Barkychoc on Monday 21st January 16:12
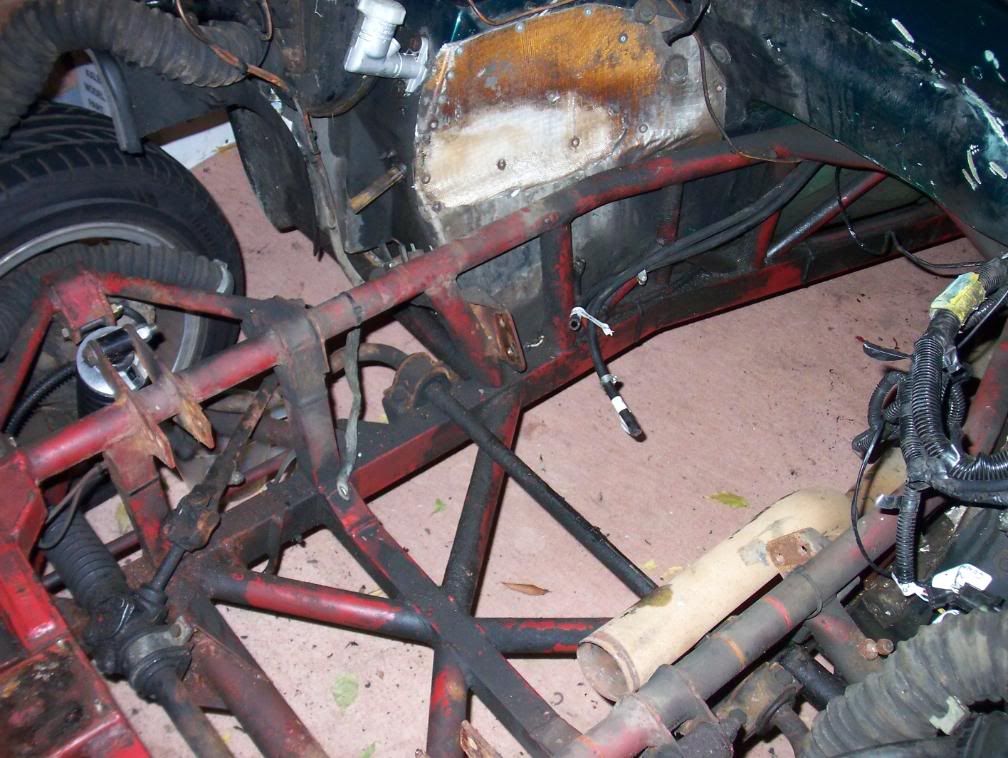
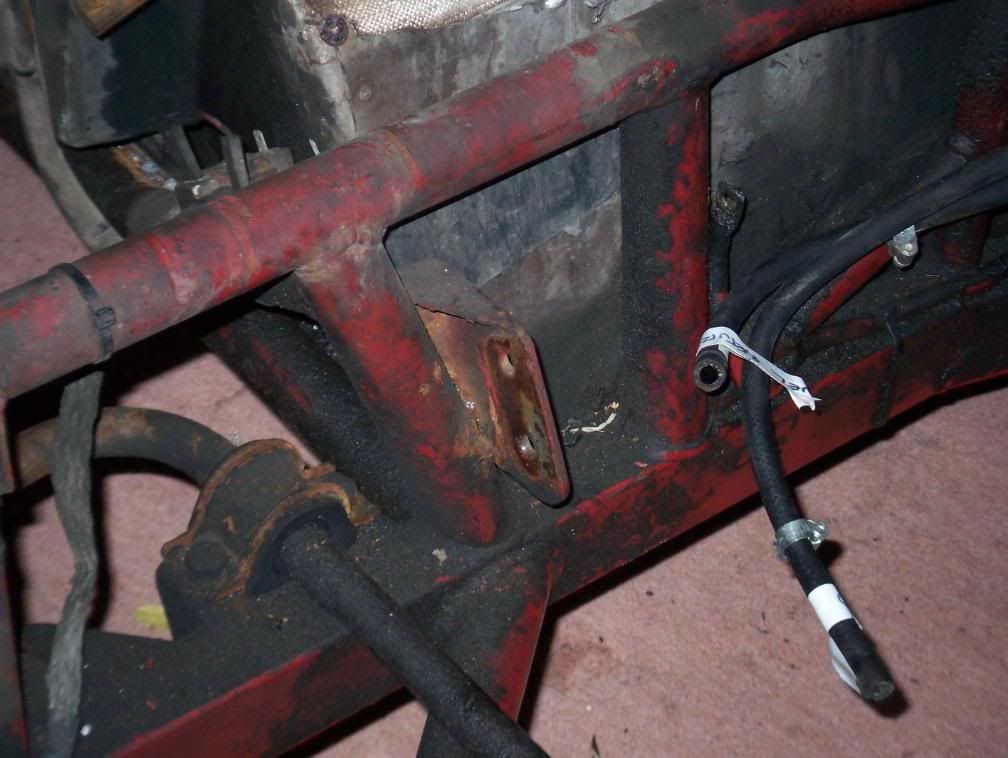
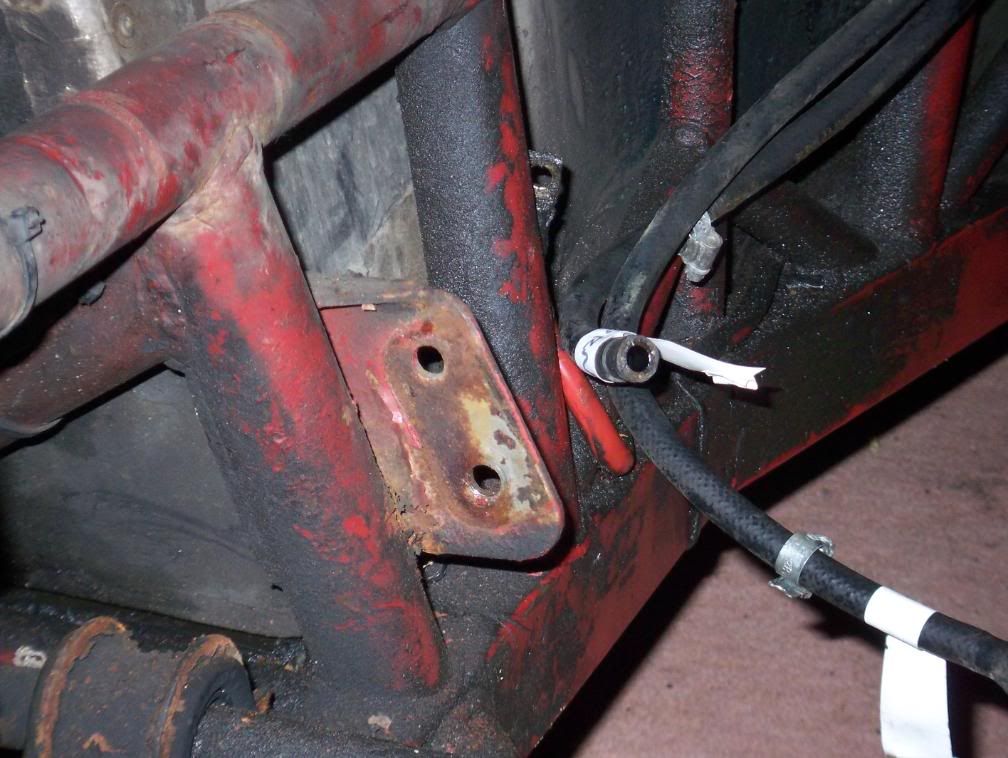
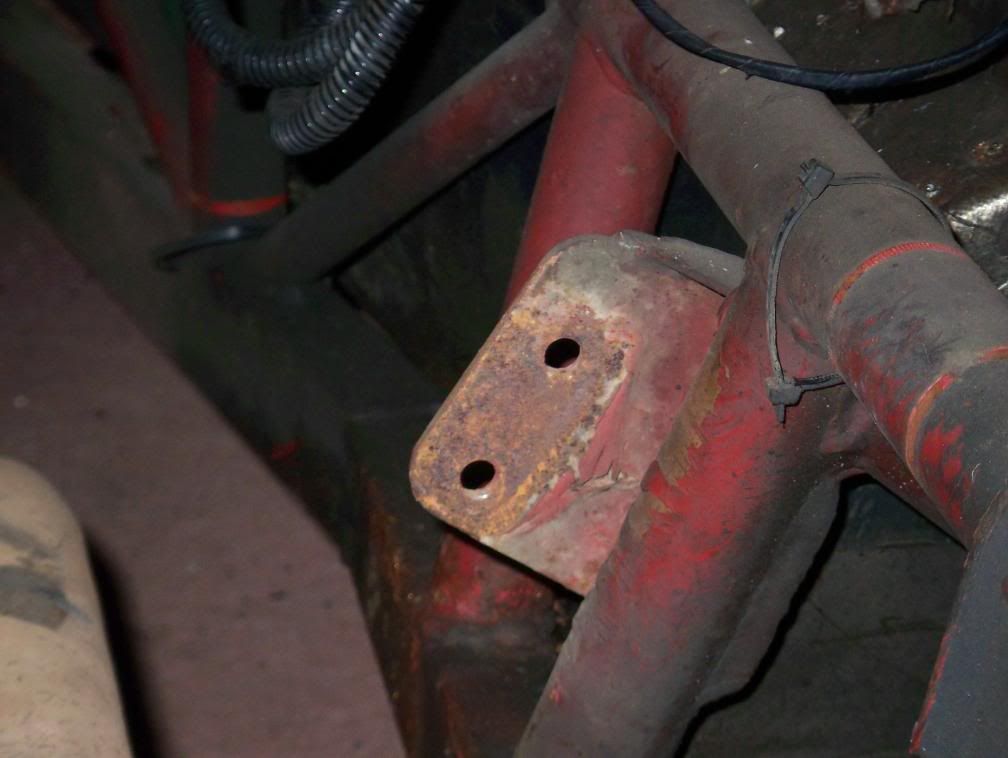
OK folks I know you like pictures.
Been biffing away at the chassis with a claw hammer - haven't found any issues with outriggers.
Near side front
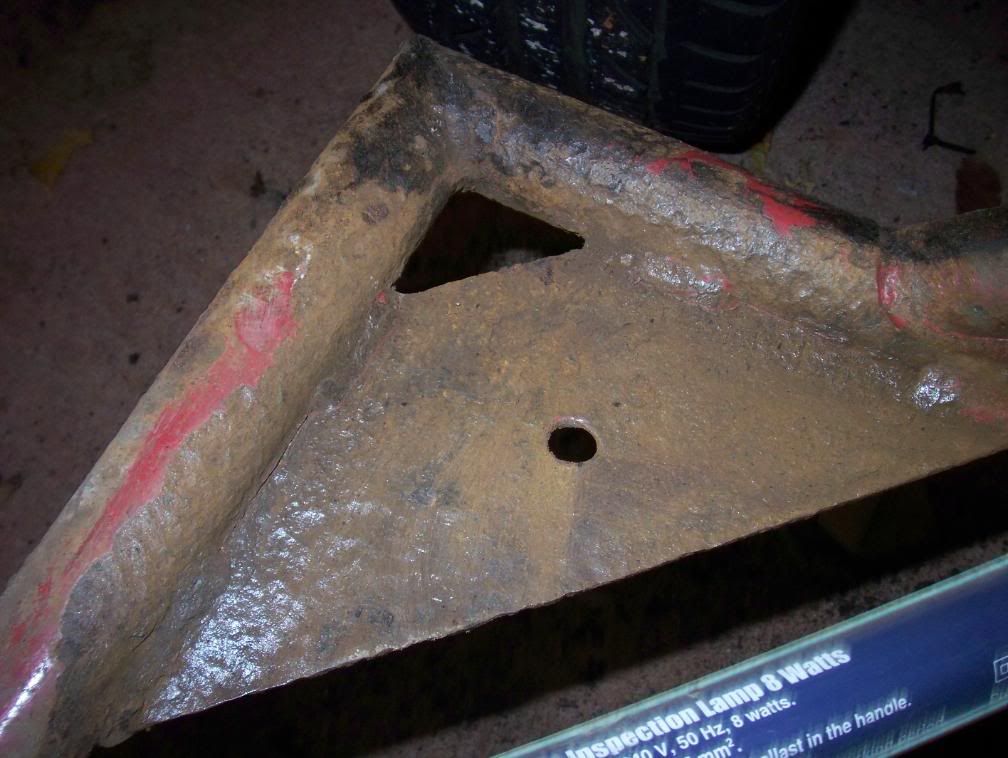
Near side rear seat belt mount - masking tape behind to show holes
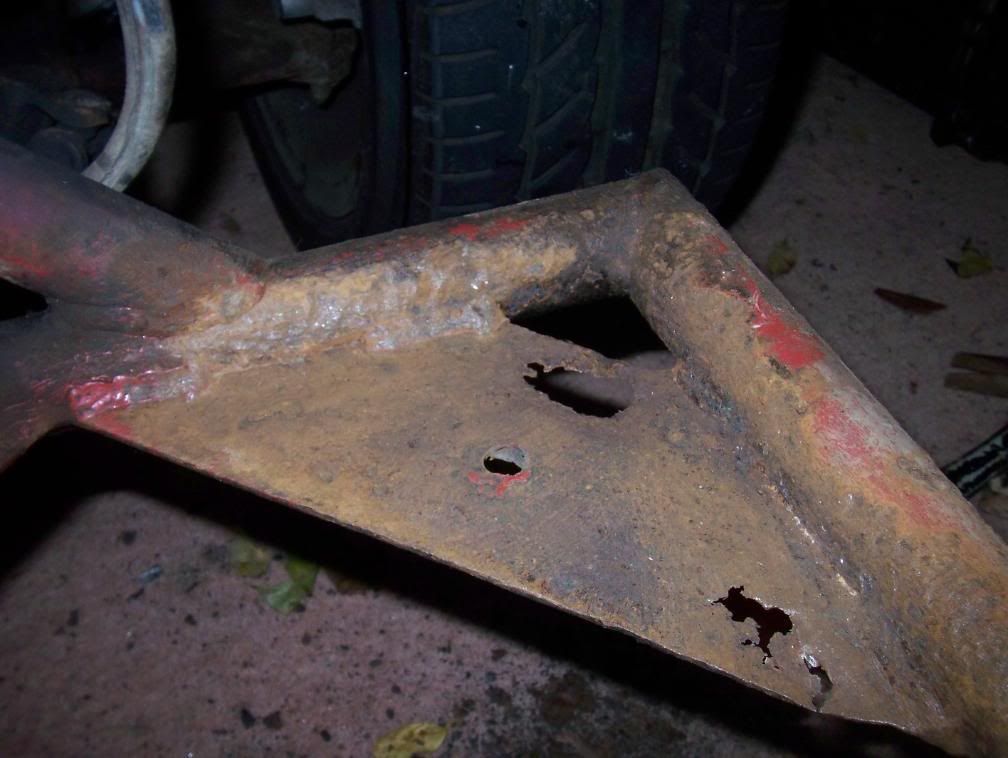
Nearside trailing arm mount 'bar'
Rear of fuel tank cradle looks scabby
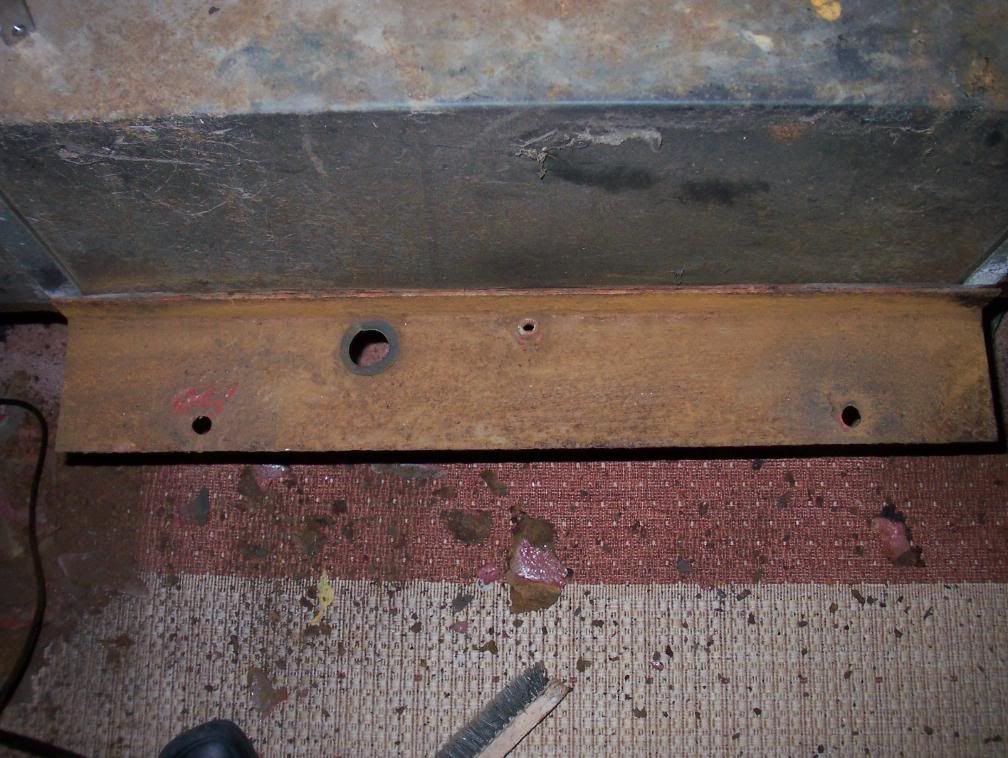
But a quick wire brush later
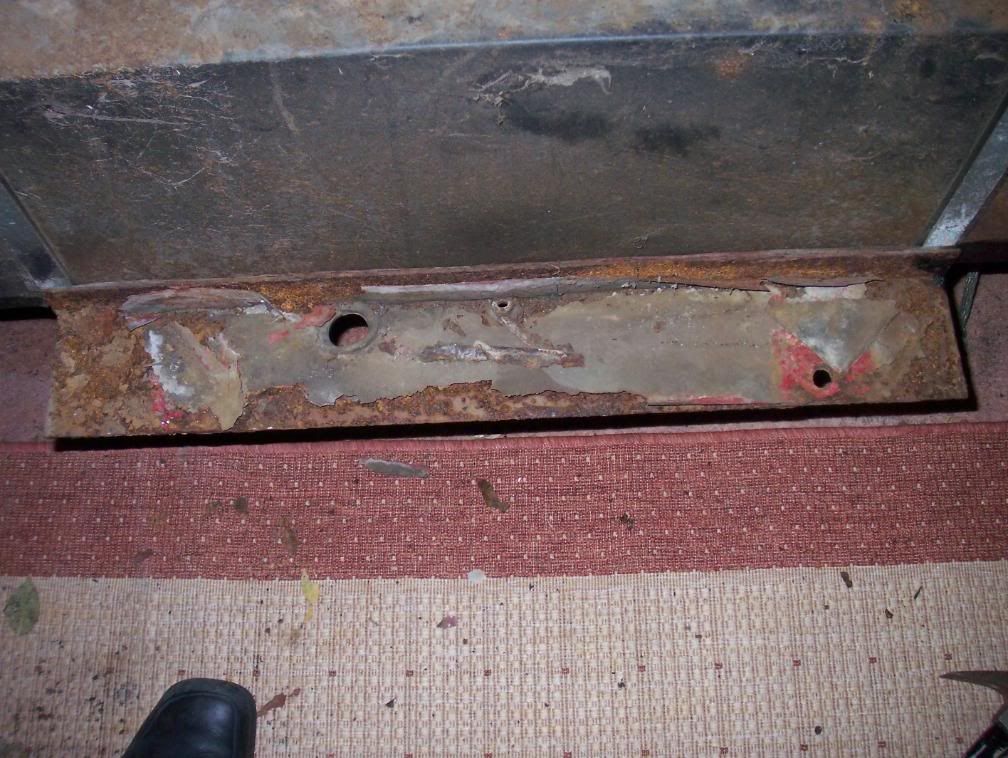
Offside rear seatbelt mount - worst bit found so far
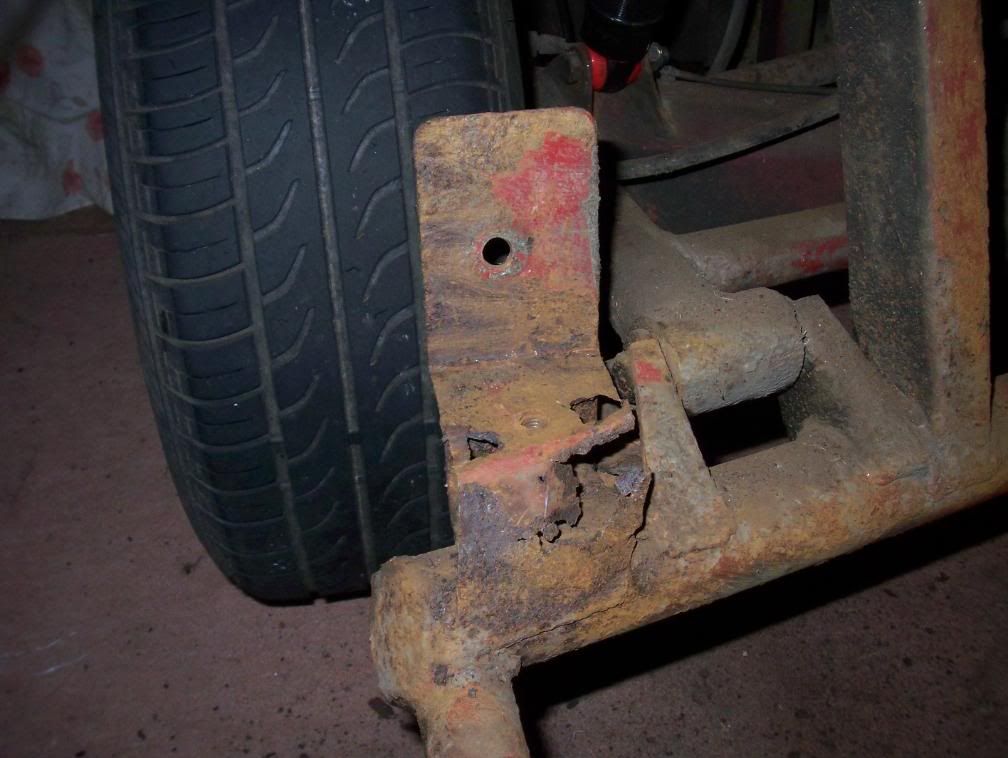
Nearside front
I have beaten the hell out of the outriggers and I can't find any rot.
Even so I still feel I've done the chassis refurb at the right time - its clear trouble was in store.
Chris
Been biffing away at the chassis with a claw hammer - haven't found any issues with outriggers.
Near side front
Near side rear seat belt mount - masking tape behind to show holes
Nearside trailing arm mount 'bar'
Rear of fuel tank cradle looks scabby
But a quick wire brush later
Offside rear seatbelt mount - worst bit found so far
Nearside front
I have beaten the hell out of the outriggers and I can't find any rot.
Even so I still feel I've done the chassis refurb at the right time - its clear trouble was in store.
Chris
Edited by Barkychoc on Monday 21st January 21:39
Gassing Station | S Series | Top of Page | What's New | My Stuff