more chassis (and suspension) prawn - Tamora
Discussion


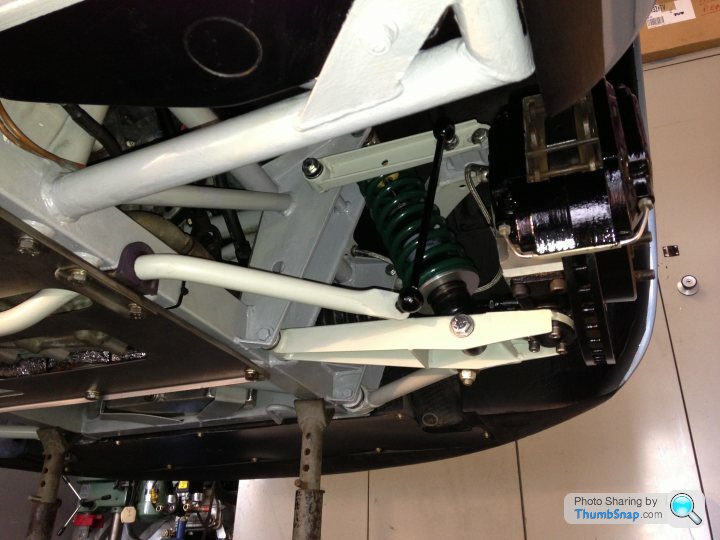
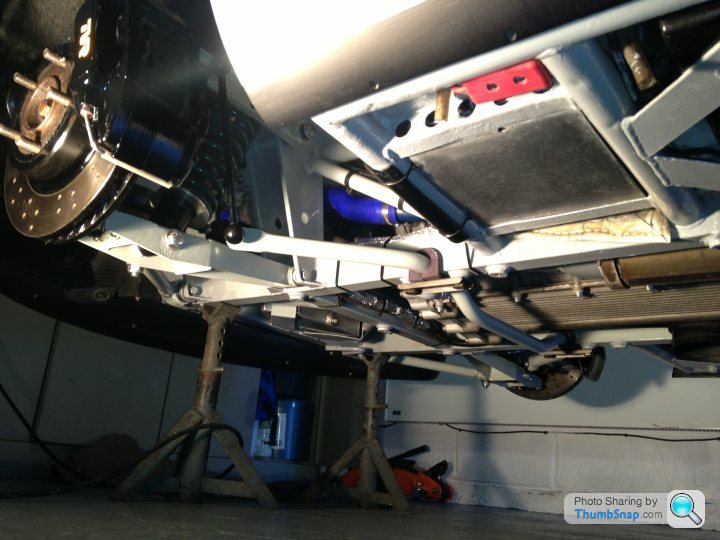
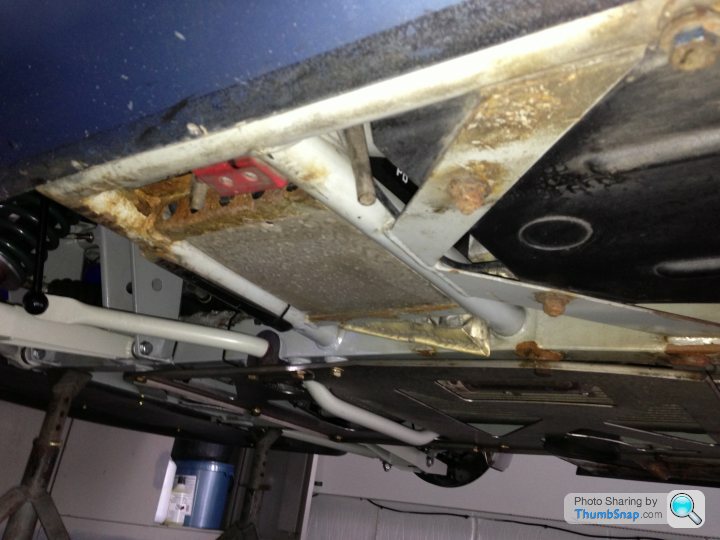
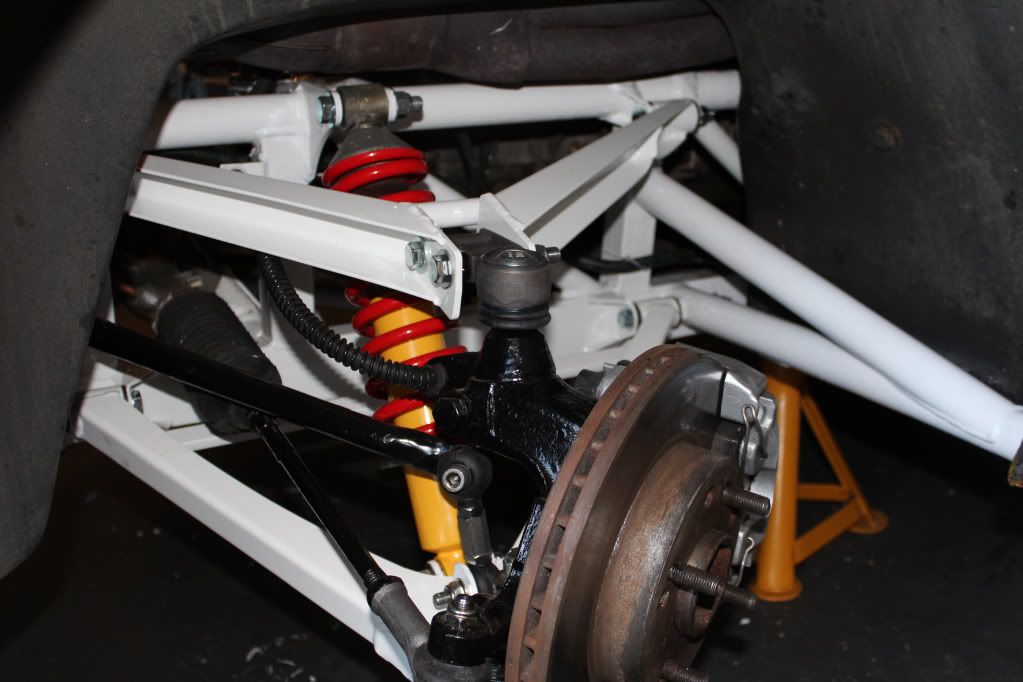
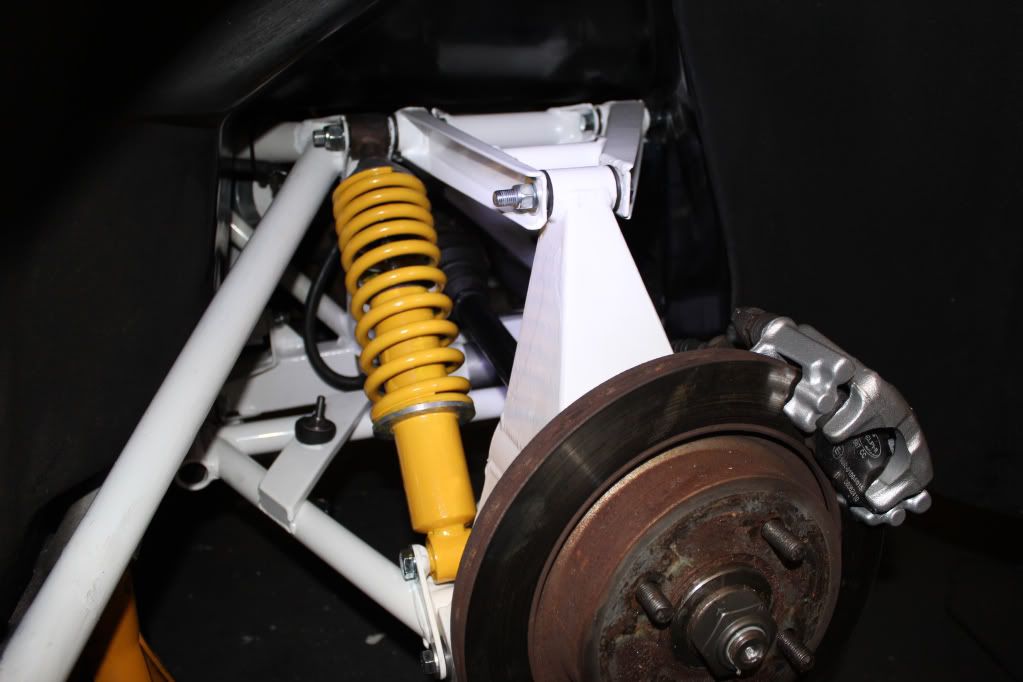
Had the suspension (springs, dampers, bushes, etc) replaced on my Tamora over the winter at HHC and since I got the car back I've been busy scraping, cleaning, treating and painting the chassis and am quite pleased with the overall results.
Anybody else out there been busy over the winter? What you been up to?
Just need the weather to improve and the salt off the road and its off we go!
Anybody else out there been busy over the winter? What you been up to?
Just need the weather to improve and the salt off the road and its off we go!
Edited by peteA on Wednesday 3rd April 13:39
Edited by peteA on Wednesday 3rd April 13:40
TVR Beaver said:
Get some foam under thoes stands!! 
what did you paint it with?.. looking good
Ha...I had paint at the ready when I dropped it off the stands to touch up the marks left by the axle stands. I have perfected my chassis treatment process following various chassis painting exploits on my previous Chimaera, Cerbera, Griff 500 and now Tamora. I tried POR15 and was quite impressed but it was bloody messy to use and I didn't think it was much better than smoothrite? Time will tell I guess but I intend to keep on top of things each year so touching up here and there wont be a problem.what did you paint it with?.. looking good
I sand back to bare metal and treat with kurust, then add hamerite primer and finally a top coat or two of smoothrite - a blend of black and white to try and match the original light grey.
I'm not a fan of caking the car in waxoyl but I have sprayed it into the nasty places that are head to get at and attract water eg tops if the outriggers, etc.
Hard work lying on your back on freezing cold garage floor for weeks but as I say quite pleased with the end result.
it started off like this, not too bad...
Damn the photo upload!
Edited by peteA on Wednesday 3rd April 15:48
zed4 said:
Looks great. Did you paint all of that with the body on? Car as it stands in the pictures?
Mine has been painted with POR15/Hammerite/waxoyled I believe so it's solid, but not pretty! I'd love a shiny white chassis one day.
The project for this winter is the interior. New carpets and recondition the seats.
Yep, body on and the car up on 4 axle stands...hard work but worth it in the end. Suspension wishbones, ARB's, etc removed though when the car was up at HHC.Mine has been painted with POR15/Hammerite/waxoyled I believe so it's solid, but not pretty! I'd love a shiny white chassis one day.
The project for this winter is the interior. New carpets and recondition the seats.
POR15 'AND' Hamerite - that should do it!!!!
zed4 said:
Yeah, the chassis is pretty well protected on my car! It's had new outriggers and then coated in the stuff. I'm tempted to sand back the visible bits of the chassis and wishbones in the wheel arches and pretty them up a bit. Also the cross members which are visible in the engine bay as they're still white, but flaky on mine.
How do you think Smoothrite compares with powder coating when painting removable items such as the wishbones and ARB?
The removable bits were shot blasted, treated, zinc coated and finally plastic coated...think there were about 10 parts and came in at just under £200. I tried to match the chassis colour from a standard RAL chart but they are a bit lighter.How do you think Smoothrite compares with powder coating when painting removable items such as the wishbones and ARB?
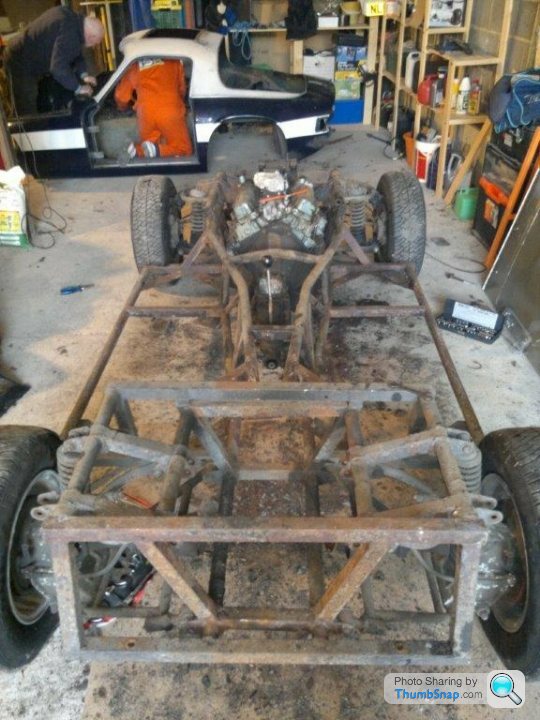
The solid parts of the chassis were painted - when the suspension was removed at HHC they kindly allowed me to work on the car (again on axle stands) before it was refitted as well as cleaning up / painting all the ancillaries. When I got it home it was jacked up on axle stands to tackle the main chassis.
A bit time consuming and painful - had to go to hospital to have some metal removed from my eye! - but worth it when it all comes together...?
[quote=EvoOlli]Pete, you're not alone....I know how it feels under the car on the cold garage floor..but the result compensates for the suffering....
Awesome looking Sag! ...and top work too. As you say it's satisfying when it's all done and somehow makes driving even more enjoyable knowing its all sorted and as good as it can be if you know what I mean...? If that makes sense
Awesome looking Sag! ...and top work too. As you say it's satisfying when it's all done and somehow makes driving even more enjoyable knowing its all sorted and as good as it can be if you know what I mean...? If that makes sense

EvoOlli said:
Graham, you are the most crazy of us all...
That is indeed stunning....and why I stated my efforts were not up to 'Varley-esqe' comparison!In fact, now that I finished the work I set out to its the diff, diff mounting brackets and drive shafts that are letting mine down! Having removed, refurbed and replaced the diff on my Cerb in the past I'll be damned if I'm taking it out just to paint it!


Gassing Station | General TVR Stuff & Gossip | Top of Page | What's New | My Stuff