Griff/Chim PAS rack removal guide
Discussion


TVR Griffith PAS Rack removal guide.
Time taken: Two hours.
Tools required:
Metric ring and open ended spanners
5/8 open ended spanner
Hammer
Mallet
Large flat screwdriver
Ball joint splitter
Jack
Axle stands
Socket set with universal joint
Oil drain tray
Method:
First loosen the front wheel nuts and jack the front end as high as you can. I find the front crossmember is good for this. If you can’t quite get the jack under drive the car onto two blocks of wood.
Once the car is jacked up and securely supported on axle stands you can remove the front wheels and place them under the car for additional safety.
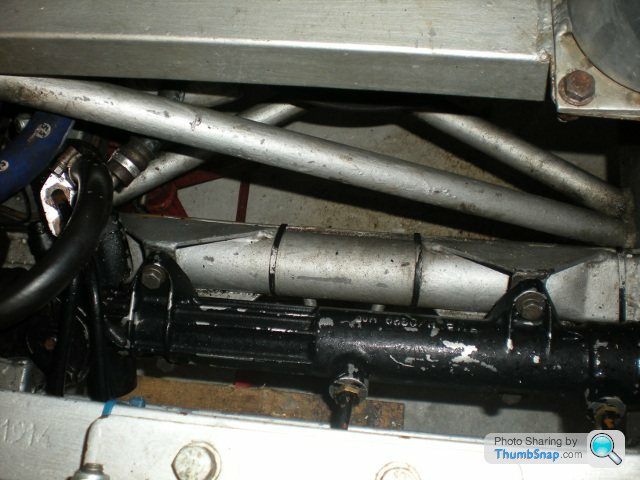
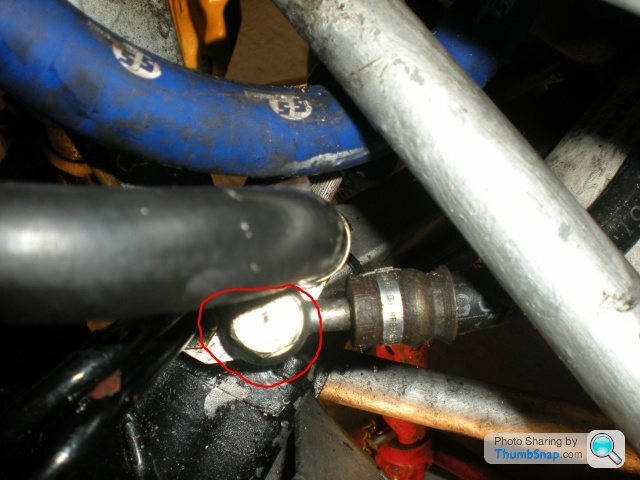
The first step is to remove the exhaust ‘Y’ piece to give you access to the rack. You will need to undo the two M6 nuts on the band clamps (circled) and then tap the clamps open with a hammer and flat screwdriver. They may be a little tight if they haven’t been undone for a while and I’d recommend wire brushing the threads if they’re dirty/rusty as the clamps are expensive.
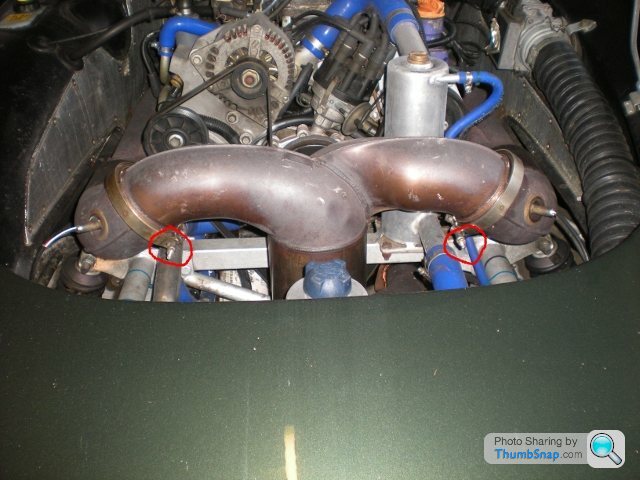
Next you need to remove the two M8 nuts (circled) holding the exhaust clamp in place and remove the bolt (arrowed) which secures the front of the exhaust to the engine.
Liberally spray WD40 around the exhaust joint, it makes removing the Y piece much easier.
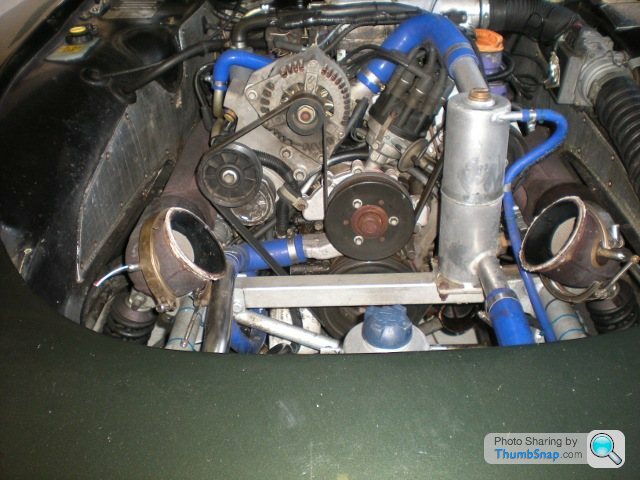
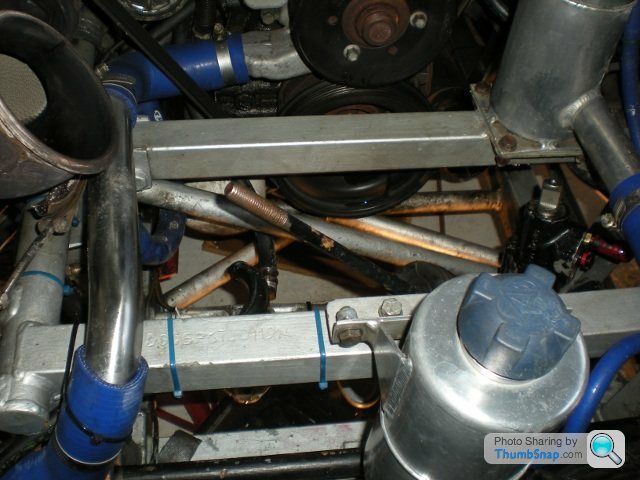
Removal is just a case of wriggling it from above until it finally gives in. It takes a lot of wriggling! Once the Y piece is free you can get access to the rack fairly easily as can be seen in the pics below.
Loosen the nuts securing the track rod ends. I tend to measure/count the threads before I remove the lock nuts to get the geometry good enough to drive for alignment when the car is rebuilt.
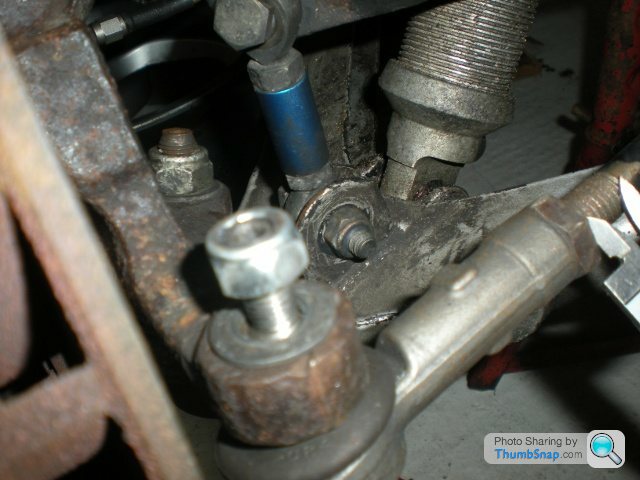
I use an old fashioned fork splitter to undo the track rods.
When you’re working inside the offside arch loosen and remove the three M8 nuts and bolts that secure the steering UJs to the rack, but don’t try to split them as yet. They’ll just pull apart when you come to remove the rack.
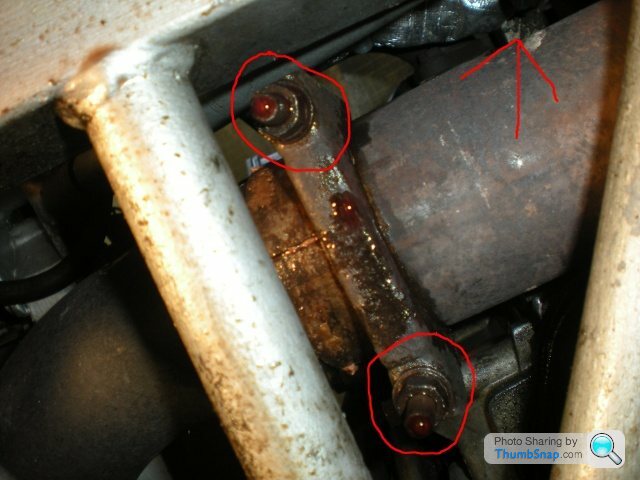
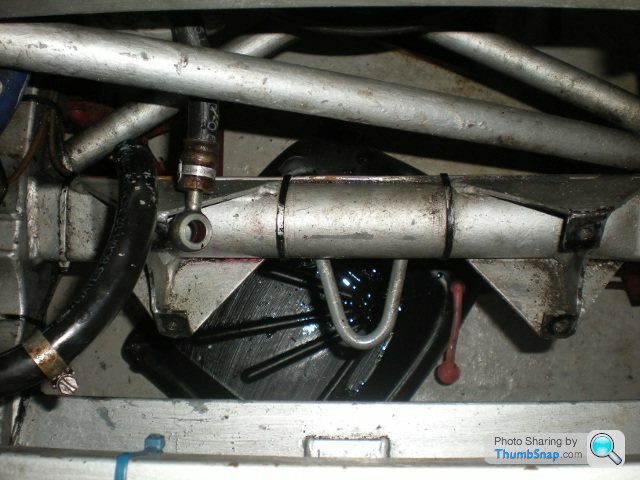
Drain the PAS fluid. You can remove a fair bit from the reservoir with a syringe/turkey baster but some will inevitably need draining from below. Undo the jubilee clip that secures the low pressure pipe to the rack (circled), pull off the pipe and drain into a catch tray from below.
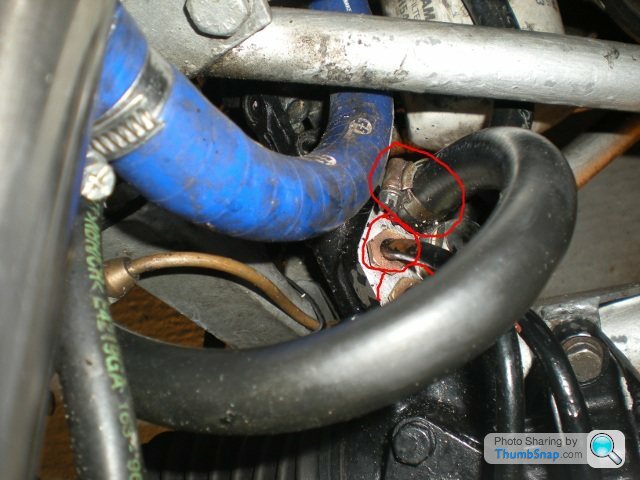
You can loosen and remove the high pressure pipe while it’s draining. Also undo the unions on the two external feed pipes and remove them, this makes getting the rack out much easier. It is possible to remove the rack with them attached but it takes much longer.
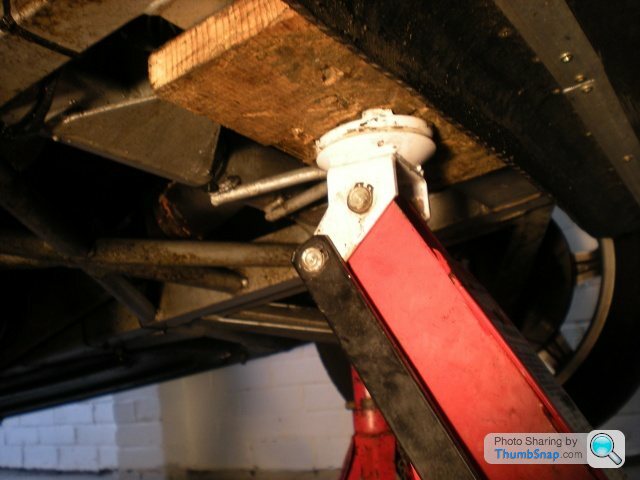
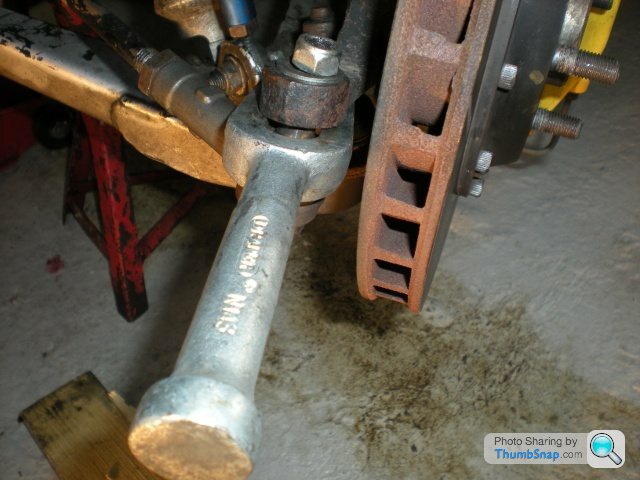
The rack is now ready to be unbolted and removed from the car. Undo the four M8 bolts that hold the rack to the chassis and rotate it forward to disengage the lower UJ. Once the rack is free slide it into the near side wheel arch.
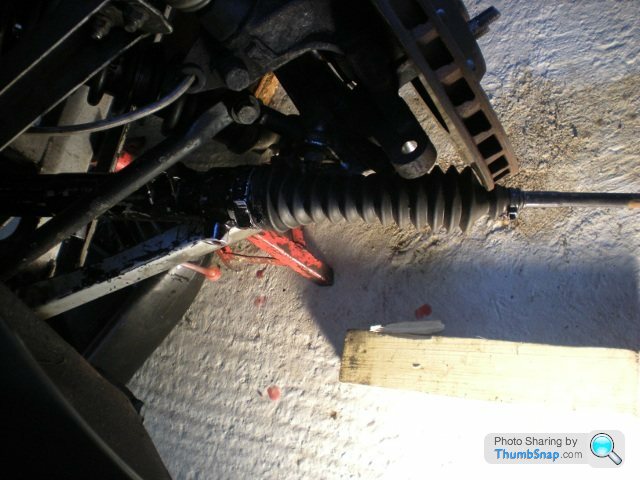
With the rack in this position angle the offside track rod upwards and then remove the rack vertically through the chassis rails.
The rack removed:
Finally reassemble the external oil lines and insert bungs to prevent the ingress of dirt and fluid leakage during transit.
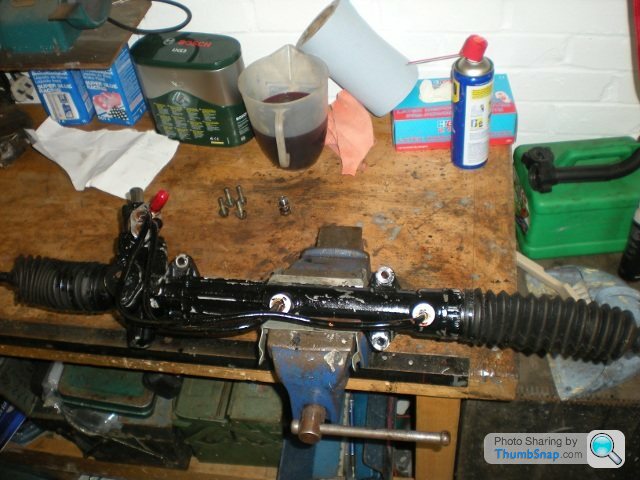
Unless you specifically ask them not to, most places will paint your lovely aluminium rack black!
Disclaimer:
If you're not 100% confident in your abilities do not attempt to work on your own vehicle. Your health and safety is your own responsibility, this guide has been published to assist competent home mechanics understand what's involved.
Time taken: Two hours.
Tools required:
Metric ring and open ended spanners
5/8 open ended spanner
Hammer
Mallet
Large flat screwdriver
Ball joint splitter
Jack
Axle stands
Socket set with universal joint
Oil drain tray
Method:
First loosen the front wheel nuts and jack the front end as high as you can. I find the front crossmember is good for this. If you can’t quite get the jack under drive the car onto two blocks of wood.

Once the car is jacked up and securely supported on axle stands you can remove the front wheels and place them under the car for additional safety.
The first step is to remove the exhaust ‘Y’ piece to give you access to the rack. You will need to undo the two M6 nuts on the band clamps (circled) and then tap the clamps open with a hammer and flat screwdriver. They may be a little tight if they haven’t been undone for a while and I’d recommend wire brushing the threads if they’re dirty/rusty as the clamps are expensive.

Next you need to remove the two M8 nuts (circled) holding the exhaust clamp in place and remove the bolt (arrowed) which secures the front of the exhaust to the engine.

Liberally spray WD40 around the exhaust joint, it makes removing the Y piece much easier.
Removal is just a case of wriggling it from above until it finally gives in. It takes a lot of wriggling! Once the Y piece is free you can get access to the rack fairly easily as can be seen in the pics below.


Loosen the nuts securing the track rod ends. I tend to measure/count the threads before I remove the lock nuts to get the geometry good enough to drive for alignment when the car is rebuilt.

I use an old fashioned fork splitter to undo the track rods.

When you’re working inside the offside arch loosen and remove the three M8 nuts and bolts that secure the steering UJs to the rack, but don’t try to split them as yet. They’ll just pull apart when you come to remove the rack.
Drain the PAS fluid. You can remove a fair bit from the reservoir with a syringe/turkey baster but some will inevitably need draining from below. Undo the jubilee clip that secures the low pressure pipe to the rack (circled), pull off the pipe and drain into a catch tray from below.

You can loosen and remove the high pressure pipe while it’s draining. Also undo the unions on the two external feed pipes and remove them, this makes getting the rack out much easier. It is possible to remove the rack with them attached but it takes much longer.

The rack is now ready to be unbolted and removed from the car. Undo the four M8 bolts that hold the rack to the chassis and rotate it forward to disengage the lower UJ. Once the rack is free slide it into the near side wheel arch.

With the rack in this position angle the offside track rod upwards and then remove the rack vertically through the chassis rails.

The rack removed:

Finally reassemble the external oil lines and insert bungs to prevent the ingress of dirt and fluid leakage during transit.

Unless you specifically ask them not to, most places will paint your lovely aluminium rack black!
Disclaimer:
If you're not 100% confident in your abilities do not attempt to work on your own vehicle. Your health and safety is your own responsibility, this guide has been published to assist competent home mechanics understand what's involved.
Edited by BliarOut on Friday 22 January 09:40
Good point about the painting, I've added a note about it 
I've had the rack out enough times now and done it in enough different ways to say the above route is probably the quickest and the most likely to get your rack out without running into other problems. If I'm writing it up as a guide I want to be sure what I say works for all cars.
You *can* get the rack out with the external lines attached, but it takes longer to get it lined up and rotated so that it comes out than it does to remove the lines in the first place.
You *can* get the rack out by removing the pinion assembly but you may drop the bearings in dirt or lose them when you dismantle it, plus you'll lose any warranty on your rack when you strip it to reinstall it.
I would say the above technique is the safest bet if you don't have your own method to work to.
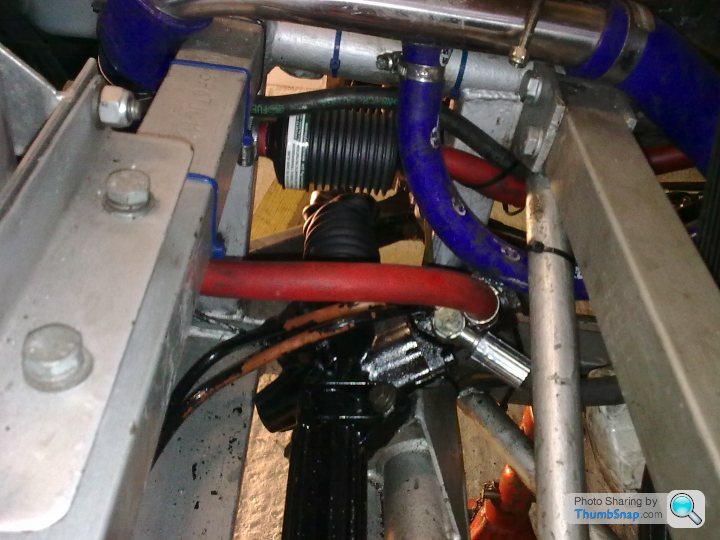
And here are a couple of pics of my cunning yet devilishly simple mod, an inline filter in the return pipe designed specifically for ATF/ATQ. Hopefully that'll allow the rack to stay put a bit longer than the current seasonal rebuilds 
ETA: My rack has also been modified internally with an additional oil seal where the end cap fits. There will be other internal mods available shortly too, but I've been asked not to say what they are for the time being.
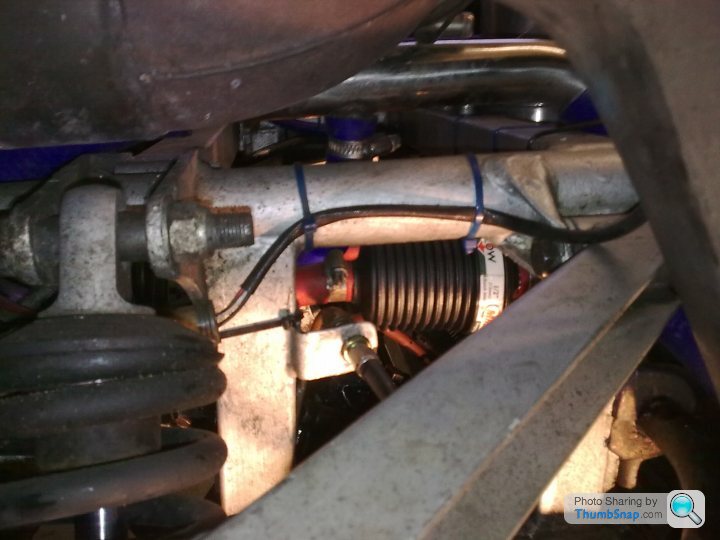
ETA: My rack has also been modified internally with an additional oil seal where the end cap fits. There will be other internal mods available shortly too, but I've been asked not to say what they are for the time being.


Edited by BliarOut on Wednesday 27th January 17:37
Mine's good, but I've cycled further than I have driven of late
I'd say if your rack is good but you haven't replaced the flexible pipes then I'd be inclined to do them and fit the filter as you do it to improve the longevity.
Apparently part of the reason for the failures is the pipes break down internally with age and then the detritus and hot micro swarf from the pump gets continually pumped around until they finally let go.
Gassing Station | General TVR Stuff & Gossip | Top of Page | What's New | My Stuff