The Restoration - part 2
Discussion


For those of you who enjoyed the thread on the restoration of my Sprint Speciale a while back, I am pleased to announce the sequel. A deal was done this week for a 1961 Maserati 3500GT. Once Paul at DTR Sports has collected the car and got it on site, work will begin. I'll get some photos up as soon as we have the car!
OK, the car is now with Paul at DTR. He has posted up a few pics on his website (link below). I'll post a more comprehensive set as soon as I get down there with my camera.
http://www.dtrsports.com/projects/project_details....
http://www.dtrsports.com/projects/project_details....
That is the $64,000 question! It was originally a light metallic blue called Azzurro Vincennes, with cream leather. I would like to go back to the original specification, but I need to see another car in that colour first. The few I have seen in pictures, rather than in the metal, suggest it may not be the best colour for these cars.
Thanks Paul. That Flaminia was the first thing I saw when I found out the original colour of the car searched "Azzurro Vincennes" on Google! It really is a lovely thing, and the paint/interior combination is (I think) exactly how my car would have looked when it was new.
I can find three different codes for Azzurro Vincennes, because it seems to have been produced by three different manufacturers. I need to get to the bottom of which one, exactly, was used on my car. I think it was the Max Meyer one, but I need to confirm that.
It doesn't look as good here, but that could be the photo of course:
http://www.reinecke1902.ch/Maserati107/Colours/Sei...
So, here we go.
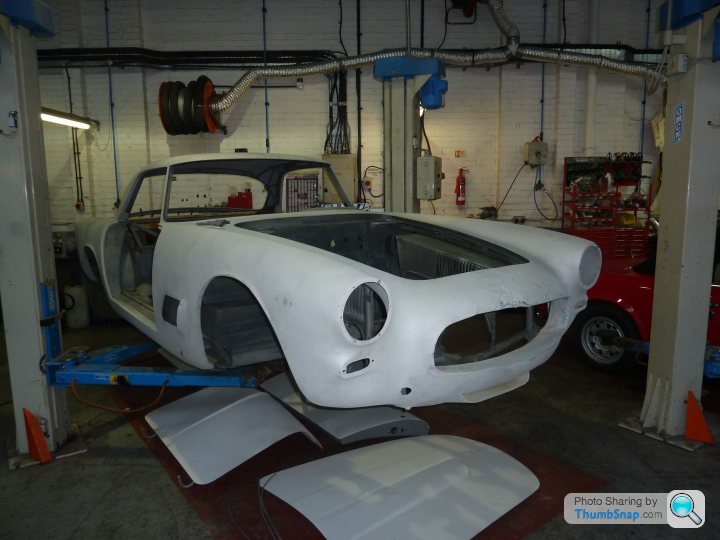
I went to DTR this morning for the first look at the car since Paul picked it up and took it to his garage. If you look at it from a distance, it doesn't look too bad:
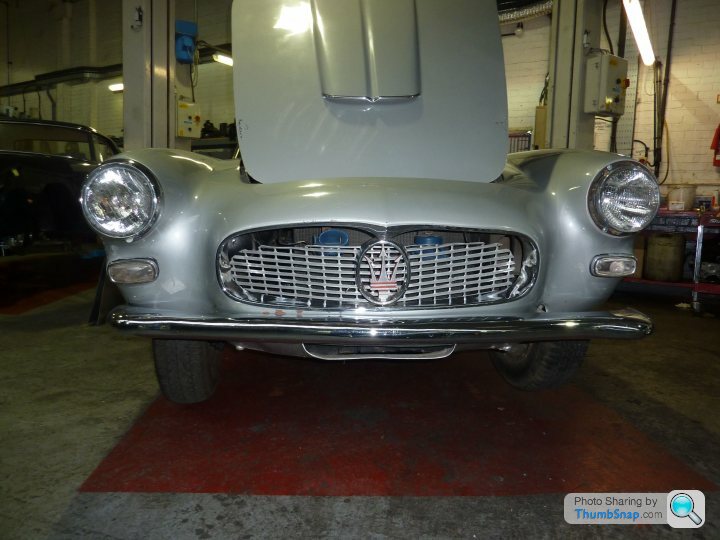
First, the good news. The car is very nearly complete, so all the (ruinously expensive) little bits and pieces shouldn't cause too much heartache.
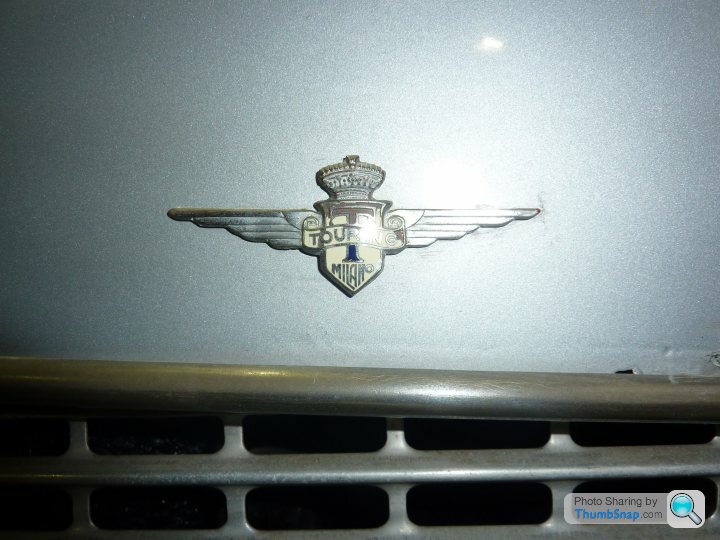
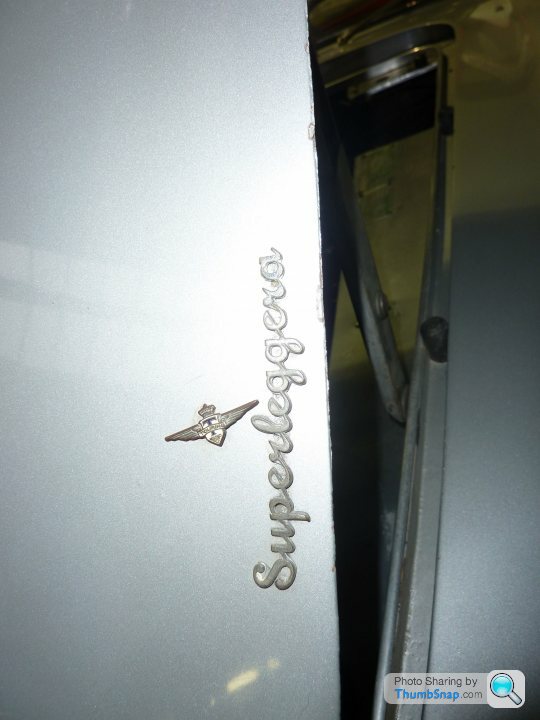
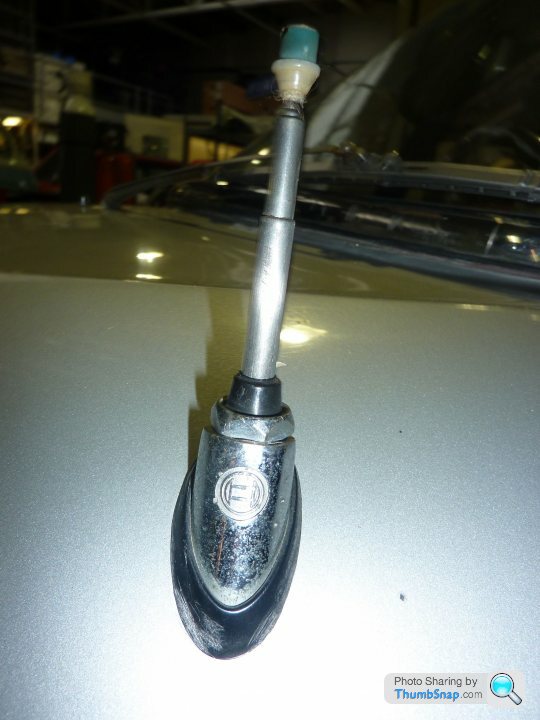
There is a nice selection of little badges:
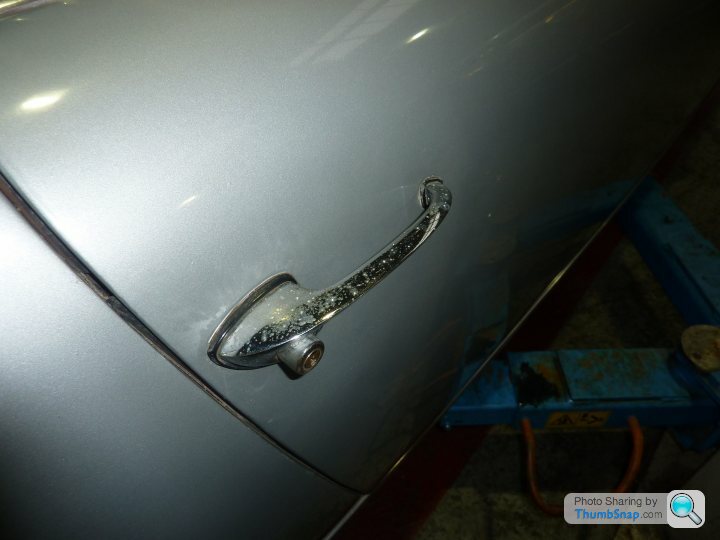
The original door handles are there, as is the aerial. I am told that these aerials are very difficult to get hold of now.
It also has a rear view mirror. I never realised how useful a rear view mirror is until I started driving the Sprint Speciale which doesn't have one (I couldn't bear to spoil the lines). Although as this car is LHD, I guess it's just going to give me a nice view of whoever is on the pavement..
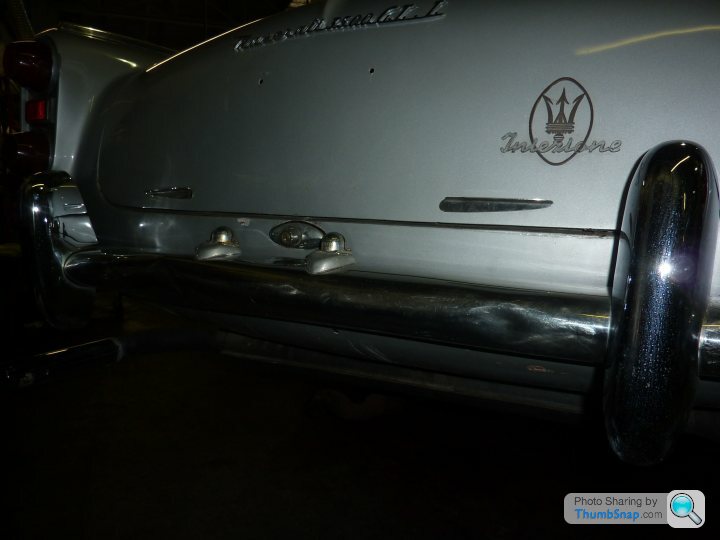
As a kid, in the 80's I thought that fuel injection was a new fangled thing, basically invented by VW when they launched the GTi. I mean if any of the "car park boys" had an XR3 and rather than an XR3i, he needed to change the badge to hide his shame. Funny to see that the Italians were plastering "injection" badges on their cars in 1961!
More to come..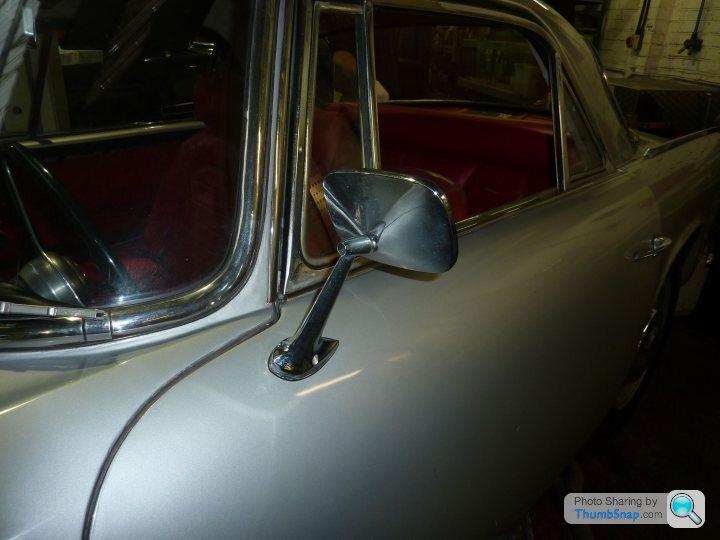
I went to DTR this morning for the first look at the car since Paul picked it up and took it to his garage. If you look at it from a distance, it doesn't look too bad:
First, the good news. The car is very nearly complete, so all the (ruinously expensive) little bits and pieces shouldn't cause too much heartache.
There is a nice selection of little badges:
The original door handles are there, as is the aerial. I am told that these aerials are very difficult to get hold of now.
It also has a rear view mirror. I never realised how useful a rear view mirror is until I started driving the Sprint Speciale which doesn't have one (I couldn't bear to spoil the lines). Although as this car is LHD, I guess it's just going to give me a nice view of whoever is on the pavement..
As a kid, in the 80's I thought that fuel injection was a new fangled thing, basically invented by VW when they launched the GTi. I mean if any of the "car park boys" had an XR3 and rather than an XR3i, he needed to change the badge to hide his shame. Funny to see that the Italians were plastering "injection" badges on their cars in 1961!
More to come..
Edited by SprintSpeciale on Friday 25th October 17:14
OK, now that I have confirmed that I remember how to post photos, I'll stop messing around and put up some stuff that folks might be interested in.
The "iniezione" badge does mean, of course, that the hateful Lucas FI system lives under the bonnet.
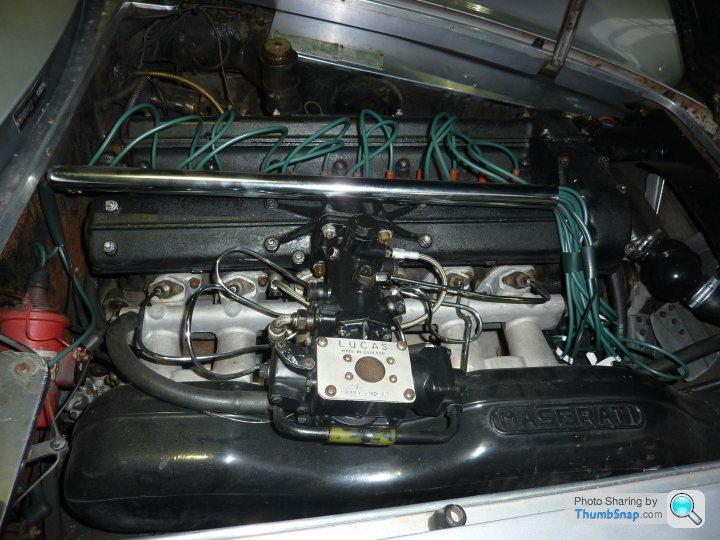
The plan is to return the car to its original specification, so we won't be ripping this out and replacing it with carbs (unless I am bankrupted by the attempt to get it running properly). I suggested to Paul that we might ship it out to an outfit in Belgium that specialises in overhauling these systems, but Paul is confident that he can get it done locally. There is the expertise, apparently, which I suppose reflects the fact that the system is basically the same as that used by Triumph.
Talking about original spec, these pictures of the interior show the colour of the dash which reflects the car's original paint colour of Azzurro Vincennes (with a Max Meyer paint code).
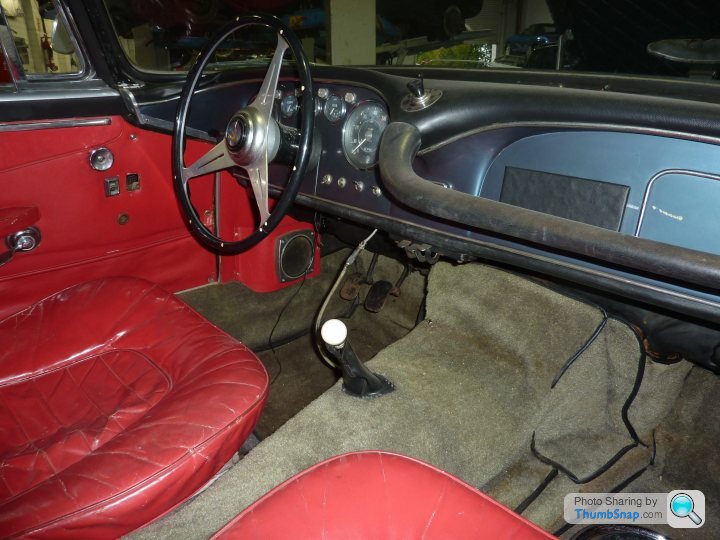
Something tells me that the gear knob may not be original..
The leather interior appears to be original, but the leather has been dyed red. In the bottom left hand part of this picture, the original (cream) leather colour can be seen where the red dye has been scraped off. The combination of red leather, blue dash and green (?) carpet is particularly interesting.
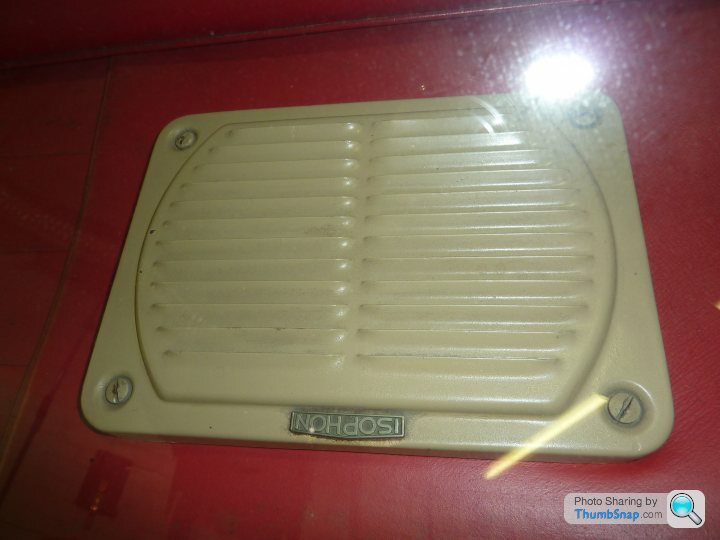
I need to check whether this Isophon speaker on the rear shelf is original. It looks terrible against the red leather, but presumably the colour is pretty close to the original colour of the leather, and it would have looked much less obtrusive. If anyone has any knowledge on that point, please post a comment!
I'll save this down. More to come.
The "iniezione" badge does mean, of course, that the hateful Lucas FI system lives under the bonnet.
The plan is to return the car to its original specification, so we won't be ripping this out and replacing it with carbs (unless I am bankrupted by the attempt to get it running properly). I suggested to Paul that we might ship it out to an outfit in Belgium that specialises in overhauling these systems, but Paul is confident that he can get it done locally. There is the expertise, apparently, which I suppose reflects the fact that the system is basically the same as that used by Triumph.
Talking about original spec, these pictures of the interior show the colour of the dash which reflects the car's original paint colour of Azzurro Vincennes (with a Max Meyer paint code).
Something tells me that the gear knob may not be original..
The leather interior appears to be original, but the leather has been dyed red. In the bottom left hand part of this picture, the original (cream) leather colour can be seen where the red dye has been scraped off. The combination of red leather, blue dash and green (?) carpet is particularly interesting.
I need to check whether this Isophon speaker on the rear shelf is original. It looks terrible against the red leather, but presumably the colour is pretty close to the original colour of the leather, and it would have looked much less obtrusive. If anyone has any knowledge on that point, please post a comment!
I'll save this down. More to come.
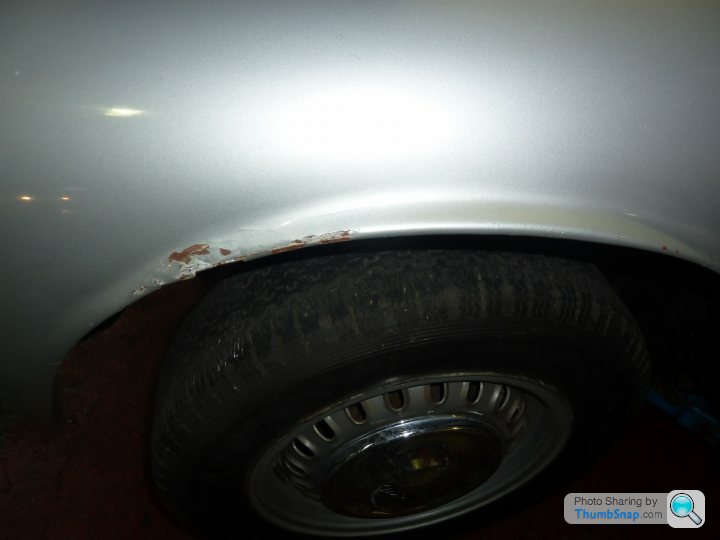
So far, so not very scary. A few more pictures to suggest it isn't too bad:
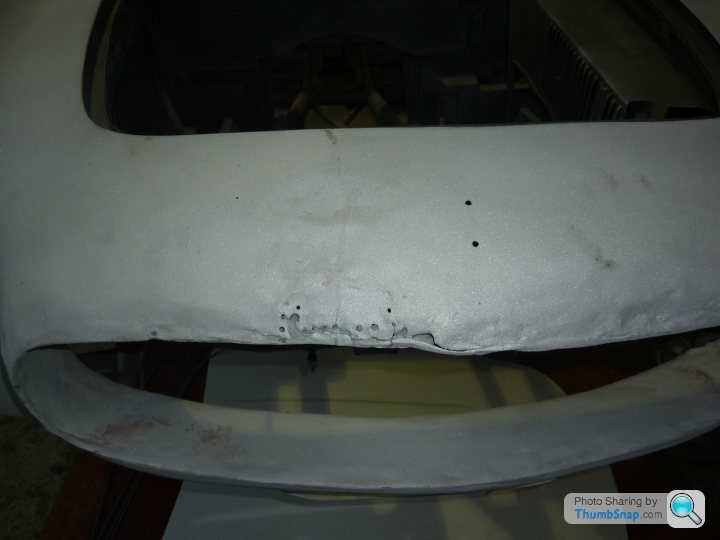
The rear bumper and valance suggest that it has had a scrape (or two)

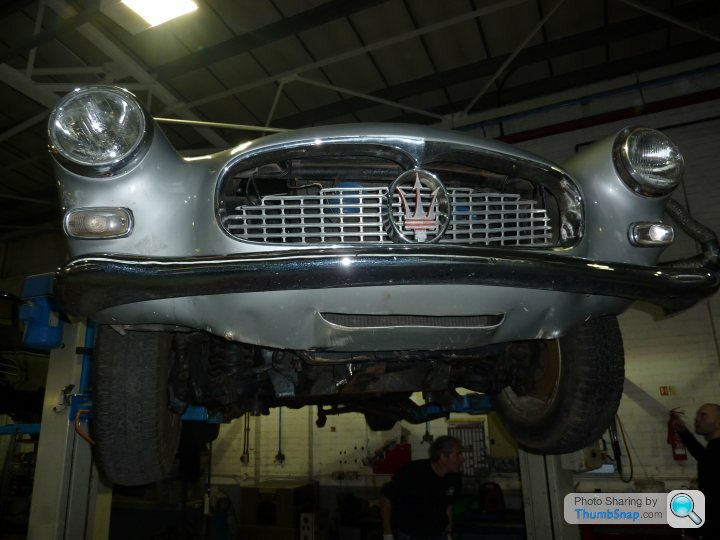
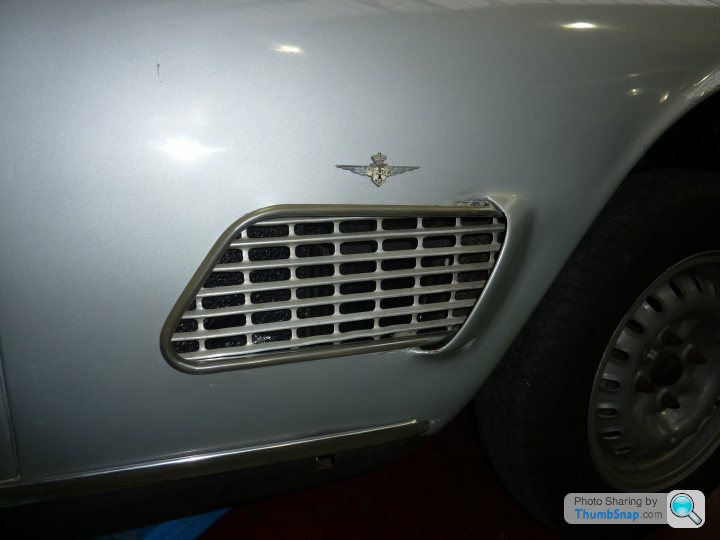
A bit tatty around the front vents
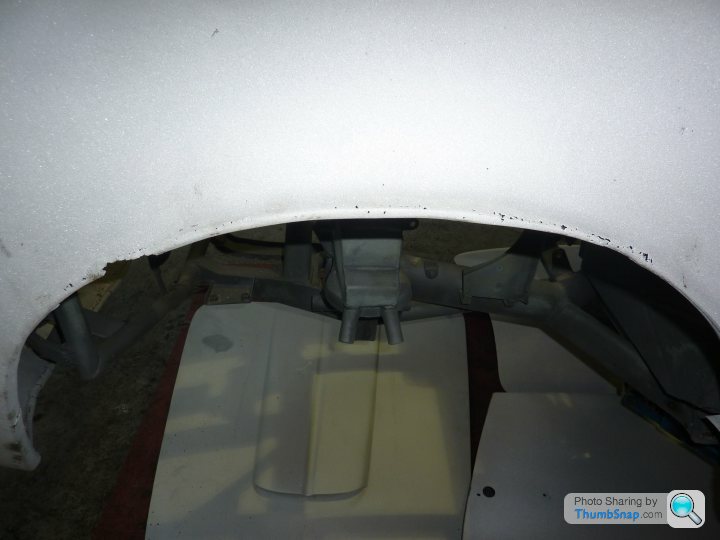
But, what's it like underneath....
Well, for a start, the front anti-roll bar is missing - although, helpfully, it is in the boot, in 2 pieces.
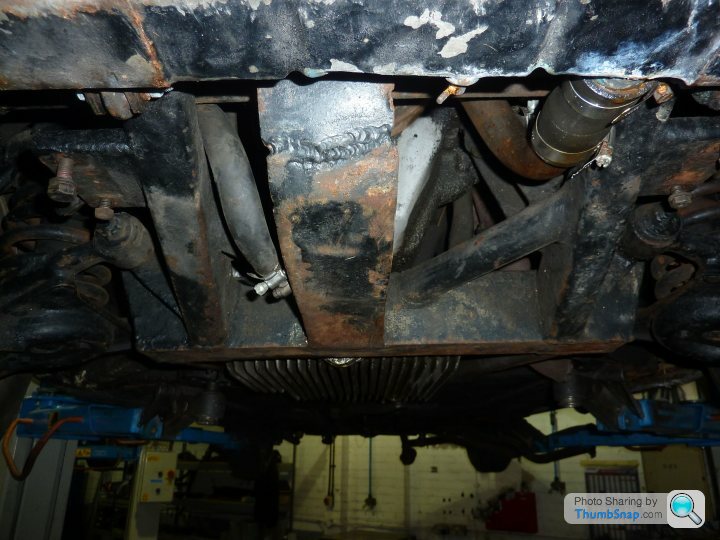
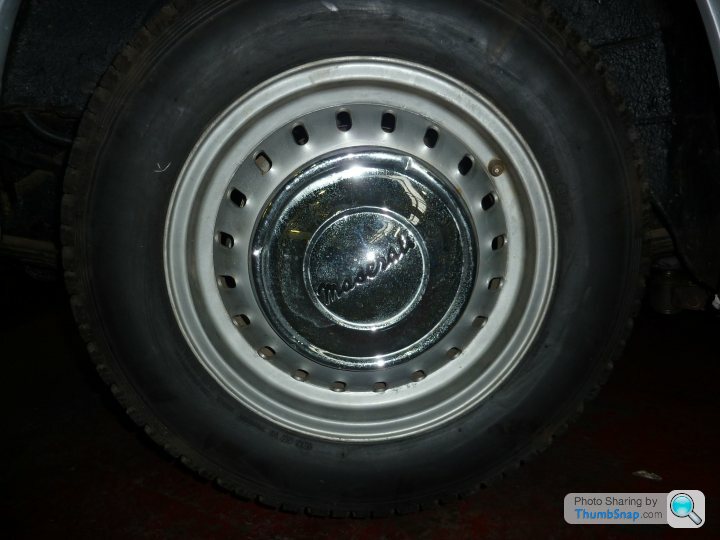
Front suspension looks complete

Although it looks like there is a guard of some sort missing, which should stop crud from the front wheel being thrown up into the engine bay

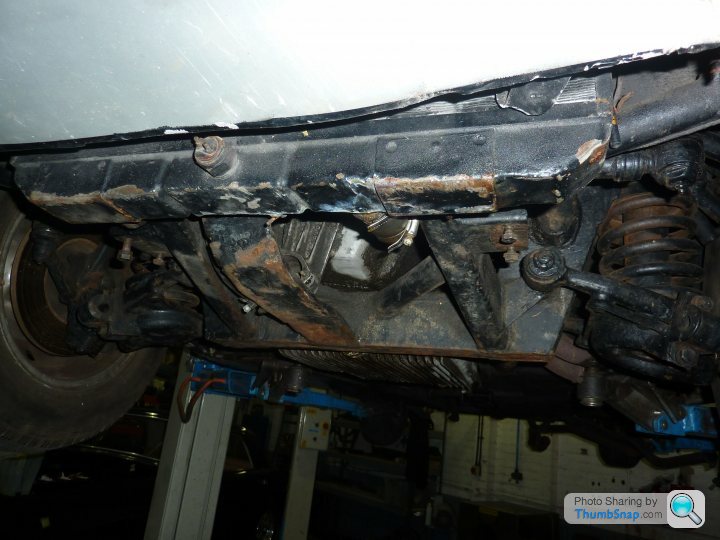
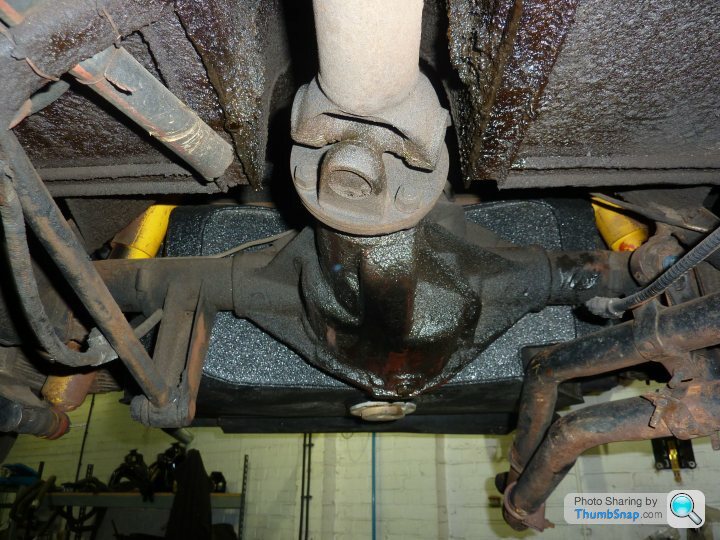
Underseal appears to have been brushed on fairly thickly at some points
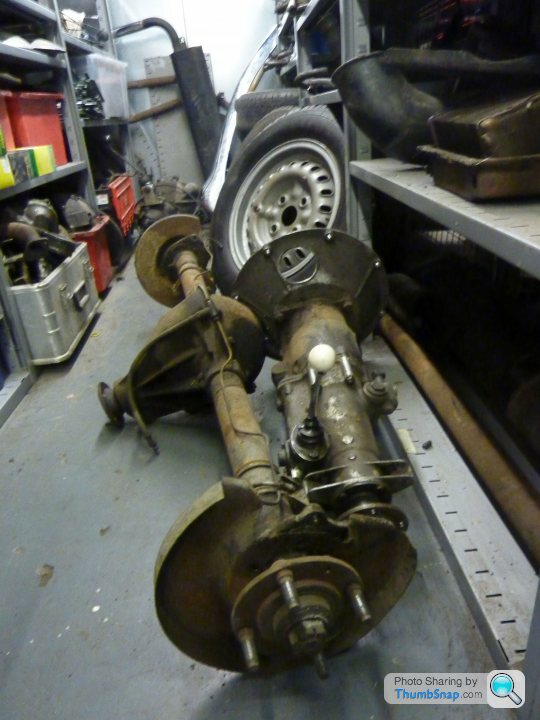
The rear suspension is not quite a double wishbone set up..
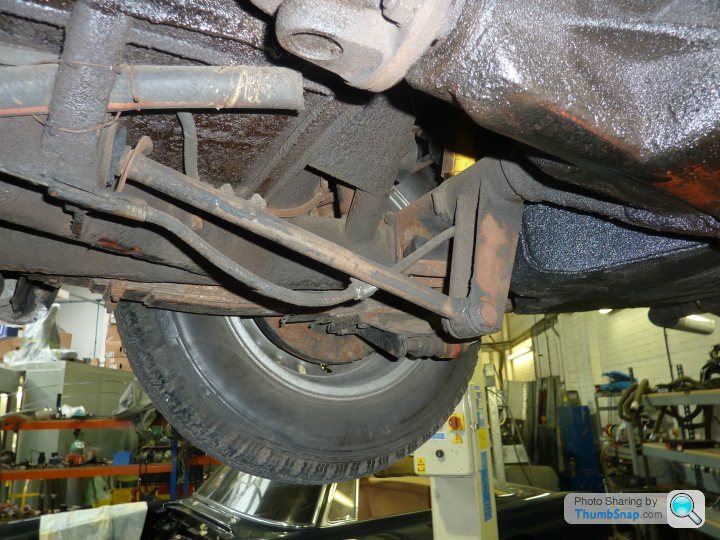
And now go back and look at that photo again, and this time admire the fantastic 250 PF in the background..
A final couple of "happy photos" before we get to the horrible truth.
The rear bumper and valance suggest that it has had a scrape (or two)
A bit tatty around the front vents
But, what's it like underneath....
Well, for a start, the front anti-roll bar is missing - although, helpfully, it is in the boot, in 2 pieces.
Front suspension looks complete
Although it looks like there is a guard of some sort missing, which should stop crud from the front wheel being thrown up into the engine bay
Underseal appears to have been brushed on fairly thickly at some points
The rear suspension is not quite a double wishbone set up..
And now go back and look at that photo again, and this time admire the fantastic 250 PF in the background..
A final couple of "happy photos" before we get to the horrible truth.
Edited by SprintSpeciale on Friday 25th October 17:16
Now, we all know that the Superleggera construction method was, in its day, fantastic. I mean it was used for the DB4 and DB5. It must be awesome, right?
Well, there do seem to be a few issues. As I was saying to one of my friends today, I now understand how the "super light" effect was achieved. There are aluminium panels stretched over a steel tubular frame. As the years go by, the steel tubular frame rusts away, and the car gets lighter as it gets older. Super.
Here are some interesting "rust bubbles" in an aluminium panel (Bottom picture - I have cocked up the picture insertion)
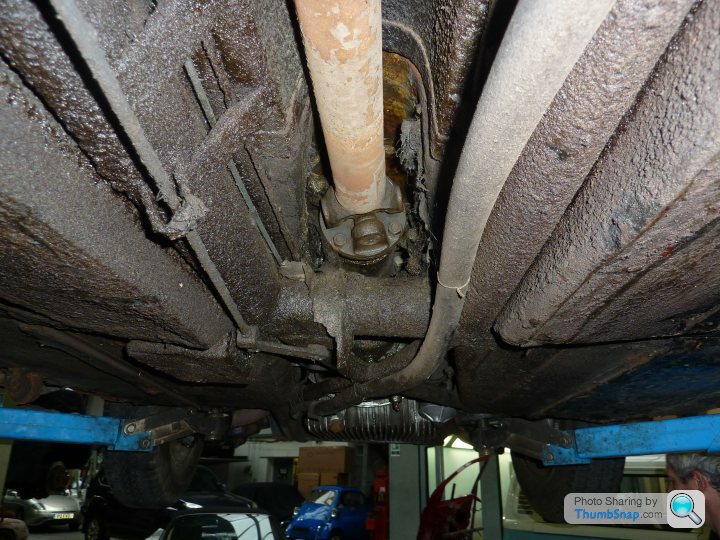
This is the result of the steel below having gone rotten and it has caused the aluminium to bubble up like this. The panel needs to be replaced. The next couple of pictures - which show the channel that the exhaust runs through (basically through the sill on the driver's side) demonstrate how bad things are
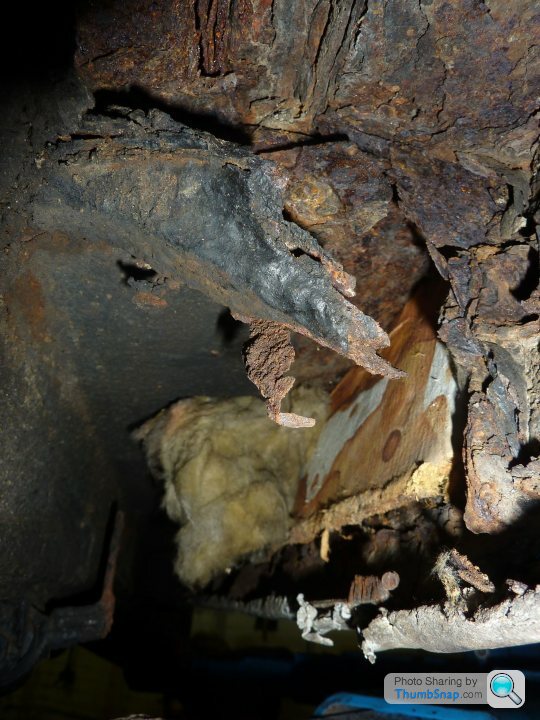
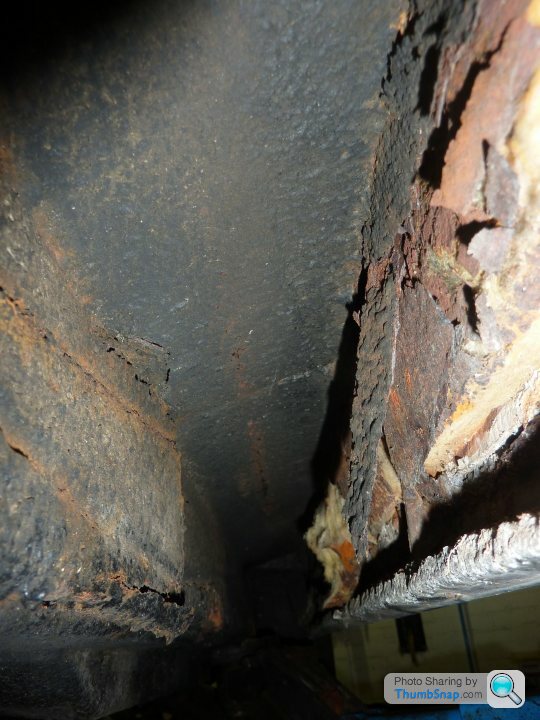
The combination of rust and galvanic corrosion mean that the steel frame and large parts of the aluminium panels are both shot. There is going to be a lot of work to sort through that!
Now that I have seen the car in all its glory, Paul is going to strip it ready for media blasting and phosphate coating. Once it comes back from that, hopefully before Christmas, he and I will sit down and assess how much panel work there really is and what the full extent of the work will be. The going in assumption is that this project will be an 18 month endeavour, but I am more concerned with getting the car perfect than finishing it in a set timetable, so it may be some time before there are any pictures of shiny bits!
That's it for now. I now know what The Surveyor felt like when he embarked on his Mexico odyssey.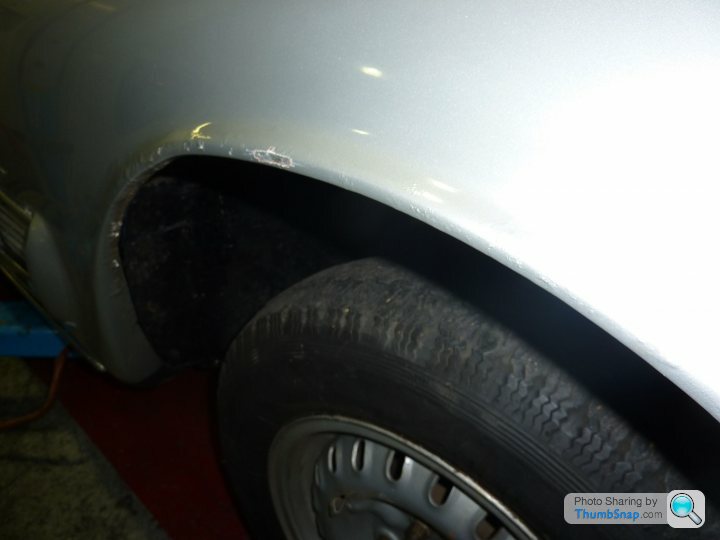
Well, there do seem to be a few issues. As I was saying to one of my friends today, I now understand how the "super light" effect was achieved. There are aluminium panels stretched over a steel tubular frame. As the years go by, the steel tubular frame rusts away, and the car gets lighter as it gets older. Super.
Here are some interesting "rust bubbles" in an aluminium panel (Bottom picture - I have cocked up the picture insertion)
This is the result of the steel below having gone rotten and it has caused the aluminium to bubble up like this. The panel needs to be replaced. The next couple of pictures - which show the channel that the exhaust runs through (basically through the sill on the driver's side) demonstrate how bad things are
The combination of rust and galvanic corrosion mean that the steel frame and large parts of the aluminium panels are both shot. There is going to be a lot of work to sort through that!
Now that I have seen the car in all its glory, Paul is going to strip it ready for media blasting and phosphate coating. Once it comes back from that, hopefully before Christmas, he and I will sit down and assess how much panel work there really is and what the full extent of the work will be. The going in assumption is that this project will be an 18 month endeavour, but I am more concerned with getting the car perfect than finishing it in a set timetable, so it may be some time before there are any pictures of shiny bits!
That's it for now. I now know what The Surveyor felt like when he embarked on his Mexico odyssey.
I am sorry that there haven't been any updates for a while. The car has been off for media blasting and should be back at DTR by the weekend. I am going there on Saturday to see what we are up against. This is the worst time, I think. The initial excitement of sourcing and buying the car has passed, and the enthusiasm for the new project is about to bump up against the reality of what the passing of 50 years means for the superleggera bodywork..
I'll post pictures on the weekend.
I'll post pictures on the weekend.
I am just back from the garage. and the scale of the task is now clear. The full work plan is set out below. I know that a picture paints a thousand words, so I will post some photos later (when I have had a little lie down in a dark room to gather my strength).
Assessment and Restoration Program for 1961 Maserati 3500 GTI
Chassis number AM1O1 1988
Bodywork
Following full inspection after blasting of bodyshell and phosphate coating of
all steel parts.
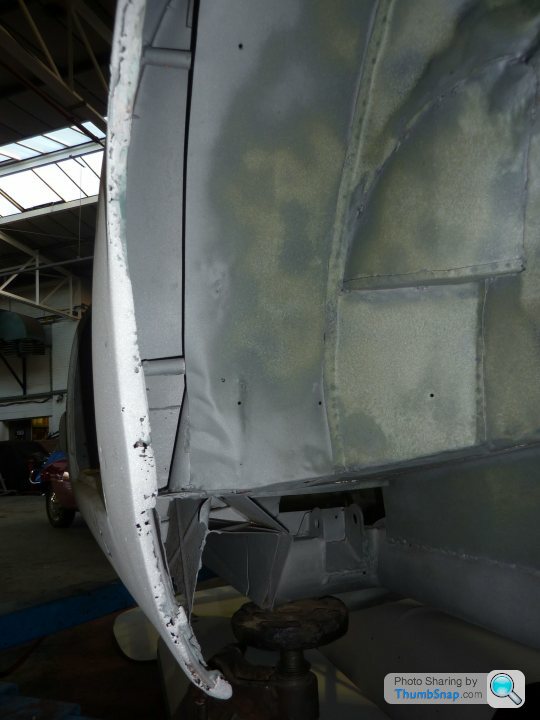
Measure, assess and fabricate new aluminium nose section. This is required
following poor repairs to cosmetic impact in the past. Nose has been drilled and
pulled and is heavily misshapen. This is required prior to cutting away affected
metal. It is recommended that a new stainless steel grill is made prior to
establishment of new nose panel/sections as front is not true or symmetrical.
Remove aluminium sills after measurement for access to heavily corroded and
damaged inner sill sections.
Remake 1.6mm sections and ‘backbone’ of inner sills (4 sections per side). Cut
away and remove all corroded steel.
Seam weld new inner sills to original patterns and fabricate outer new
aluminium sills, seam weld (Tig) as required and level.
Remove all floors. Fabricate new floor sections (corroded and badly dented)
with original ‘sandwich’ heat dissipation material.
Remove rear valences (centre and both sides). Fabricate new aluminium centre
valence and both rear wing bottoms.
Remake ‘space frame’ which is missing and corroded where present in steel.
Remake inner nearside and offside boot floors as required (steel).
Fabricate and remake front and rear wing! wheel arch sections. Remake and
replace wire formers to front and rear wheel arches (missing or corroded).
Rebuild nearside and offside door frames in steel and, repair aluminium skins as
required and re-shape.
Remake front tubular sections to bumper supports as missing/ damaged.
Remake front centre chassis panel (damaged).
Fabricate all front engine bay sections for heat/ sound prevention as per original
factory specification (modem internal insulators to be used).
Fabricate nearside inner sill heat dissipation system for exhaust.
Remake front to rear tubular sections for wiring conduction/ heater for rear of
the car — fit to inner sills.
Level/planish all outer body panels as required.
Etch prime entire bodyshell and underneath. Seam seal all under sections for
Texture (3M) rubber coating to provide modern protection whilst retaining
original appearance.
Prepare and prime outer bodyshell. Level by hand and re- prime as required.
Apply base coat and 4/5 further coats (typical total of 10 coats to be applied in
total). Finish body to ‘show standard’.
Approximate 600 hours sheet metal/fabrication and 300 hours body preparation,
sealing and painting 300 hours.
Total bodywork 900 hours.
Mechanical
Strip engine and carry out full inspection of all internals.
Rebuild engine including re-grind/ polish of crankshaft with all new bearings.
Re-bore with all new pistons to be fitted.
Rebuild of cylinder head (assuming serviceable condition). New valve guides
with new unleaded valve seats to be fitted.
All new valves to be fitted. Camshafts have been assessed (concern of fuel
pump drive gear on inlet camshaft) exhaust appears serviceable.
Rebuild of all ancillaries including starter motor, dynamo and waterpump
(replacement where not serviceable)
Full detail and blast preparation / repaint to original specification of all engine
parts to ‘as new’ condition/ appearance.
Strip and overhaul of gearbox + full reseal, all parts as required.
Re-build of entire braking system including full rebuild of all brake calipers,
replacement of pads, and discs (or re-engineering of original discs if required).
Replacement of all pipework and hydraulic system including master cylinder (or
re build if not available). Rebuild of servo (external cost).
Rebuild of suspension including replacement of shock absorbers, re-building/
replacement of leaf springs. All suspension bushes and rubber perishable items
to be replaced with new (as available).
Full strip and detailing of original Borrani alloy/steel wheels.
New period correct (or modern if preferred) tyres to be fitted.
Re-chrome of all existing parts if serviceable (advise replacement of front grille
surround and bumpers in stainless steel as per original — front bumper incorrect,
rear heavily damaged, similarly grille.
Total mechanical hours 480.
Electrical.
Full rewire of entire car in modem cable (with correct and original appearance.) Rebuild of fuse
box and all switches and lights as required.
Rebuild of original wiper motor.
Replacement/ remake of electric window motors/ mechanisms (were not fitted and are high current
usage anyway) switches damaged/ missing.
Rebuild of internal gauges and light units (possible external cost here).
Total hours 180
Interior
Full strip and rebuild/ remake of all seats. Metal frames to be repaired/ welded and painted.
Rebuild of seating cushions and remake to exact original specification of all seats and door panels
in 'Bridge of Weir' leather (best quality).
Remake of headlining by hand to original specification in correct materials, with sound deadening
to roof fitted.
New' Wilton' carpeting with leather binding in choice of colours to original pattern.
Rebuild/ recovering of dashboard to original specification.
Total hours 240
Reassembly/Manufacturing
Full reassembly of entire car with all new rubbers and fittings as required.
Time includes remaking in-house of obsolete parts and fittings as required.
Road testing and tuning.
Total hours 450
Estimated total hours = 2250
Assessment and Restoration Program for 1961 Maserati 3500 GTI
Chassis number AM1O1 1988
Bodywork
Following full inspection after blasting of bodyshell and phosphate coating of
all steel parts.
Measure, assess and fabricate new aluminium nose section. This is required
following poor repairs to cosmetic impact in the past. Nose has been drilled and
pulled and is heavily misshapen. This is required prior to cutting away affected
metal. It is recommended that a new stainless steel grill is made prior to
establishment of new nose panel/sections as front is not true or symmetrical.
Remove aluminium sills after measurement for access to heavily corroded and
damaged inner sill sections.
Remake 1.6mm sections and ‘backbone’ of inner sills (4 sections per side). Cut
away and remove all corroded steel.
Seam weld new inner sills to original patterns and fabricate outer new
aluminium sills, seam weld (Tig) as required and level.
Remove all floors. Fabricate new floor sections (corroded and badly dented)
with original ‘sandwich’ heat dissipation material.
Remove rear valences (centre and both sides). Fabricate new aluminium centre
valence and both rear wing bottoms.
Remake ‘space frame’ which is missing and corroded where present in steel.
Remake inner nearside and offside boot floors as required (steel).
Fabricate and remake front and rear wing! wheel arch sections. Remake and
replace wire formers to front and rear wheel arches (missing or corroded).
Rebuild nearside and offside door frames in steel and, repair aluminium skins as
required and re-shape.
Remake front tubular sections to bumper supports as missing/ damaged.
Remake front centre chassis panel (damaged).
Fabricate all front engine bay sections for heat/ sound prevention as per original
factory specification (modem internal insulators to be used).
Fabricate nearside inner sill heat dissipation system for exhaust.
Remake front to rear tubular sections for wiring conduction/ heater for rear of
the car — fit to inner sills.
Level/planish all outer body panels as required.
Etch prime entire bodyshell and underneath. Seam seal all under sections for
Texture (3M) rubber coating to provide modern protection whilst retaining
original appearance.
Prepare and prime outer bodyshell. Level by hand and re- prime as required.
Apply base coat and 4/5 further coats (typical total of 10 coats to be applied in
total). Finish body to ‘show standard’.
Approximate 600 hours sheet metal/fabrication and 300 hours body preparation,
sealing and painting 300 hours.
Total bodywork 900 hours.
Mechanical
Strip engine and carry out full inspection of all internals.
Rebuild engine including re-grind/ polish of crankshaft with all new bearings.
Re-bore with all new pistons to be fitted.
Rebuild of cylinder head (assuming serviceable condition). New valve guides
with new unleaded valve seats to be fitted.
All new valves to be fitted. Camshafts have been assessed (concern of fuel
pump drive gear on inlet camshaft) exhaust appears serviceable.
Rebuild of all ancillaries including starter motor, dynamo and waterpump
(replacement where not serviceable)
Full detail and blast preparation / repaint to original specification of all engine
parts to ‘as new’ condition/ appearance.
Strip and overhaul of gearbox + full reseal, all parts as required.
Re-build of entire braking system including full rebuild of all brake calipers,
replacement of pads, and discs (or re-engineering of original discs if required).
Replacement of all pipework and hydraulic system including master cylinder (or
re build if not available). Rebuild of servo (external cost).
Rebuild of suspension including replacement of shock absorbers, re-building/
replacement of leaf springs. All suspension bushes and rubber perishable items
to be replaced with new (as available).
Full strip and detailing of original Borrani alloy/steel wheels.
New period correct (or modern if preferred) tyres to be fitted.
Re-chrome of all existing parts if serviceable (advise replacement of front grille
surround and bumpers in stainless steel as per original — front bumper incorrect,
rear heavily damaged, similarly grille.
Total mechanical hours 480.
Electrical.
Full rewire of entire car in modem cable (with correct and original appearance.) Rebuild of fuse
box and all switches and lights as required.
Rebuild of original wiper motor.
Replacement/ remake of electric window motors/ mechanisms (were not fitted and are high current
usage anyway) switches damaged/ missing.
Rebuild of internal gauges and light units (possible external cost here).
Total hours 180
Interior
Full strip and rebuild/ remake of all seats. Metal frames to be repaired/ welded and painted.
Rebuild of seating cushions and remake to exact original specification of all seats and door panels
in 'Bridge of Weir' leather (best quality).
Remake of headlining by hand to original specification in correct materials, with sound deadening
to roof fitted.
New' Wilton' carpeting with leather binding in choice of colours to original pattern.
Rebuild/ recovering of dashboard to original specification.
Total hours 240
Reassembly/Manufacturing
Full reassembly of entire car with all new rubbers and fittings as required.
Time includes remaking in-house of obsolete parts and fittings as required.
Road testing and tuning.
Total hours 450
Estimated total hours = 2250
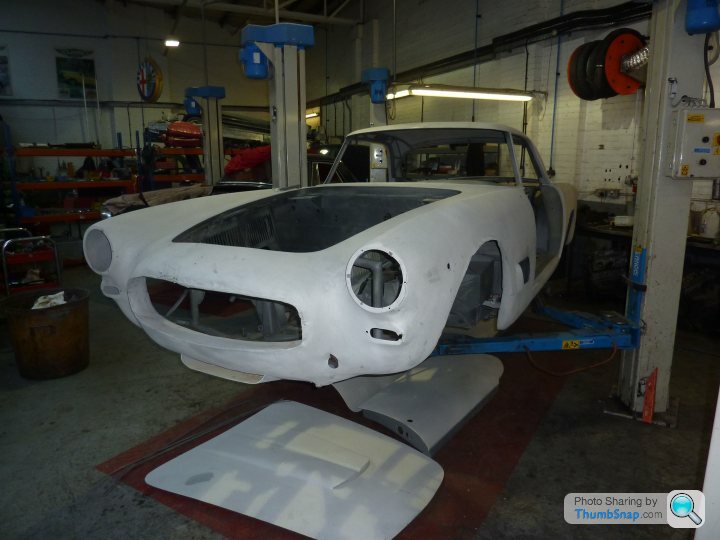
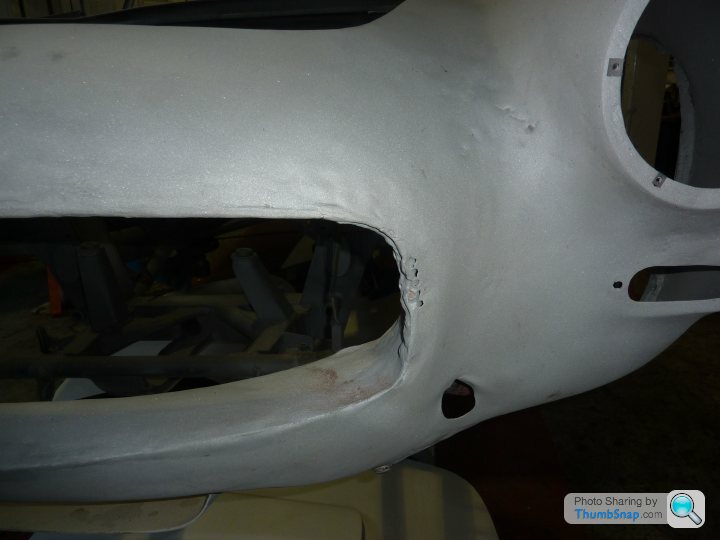
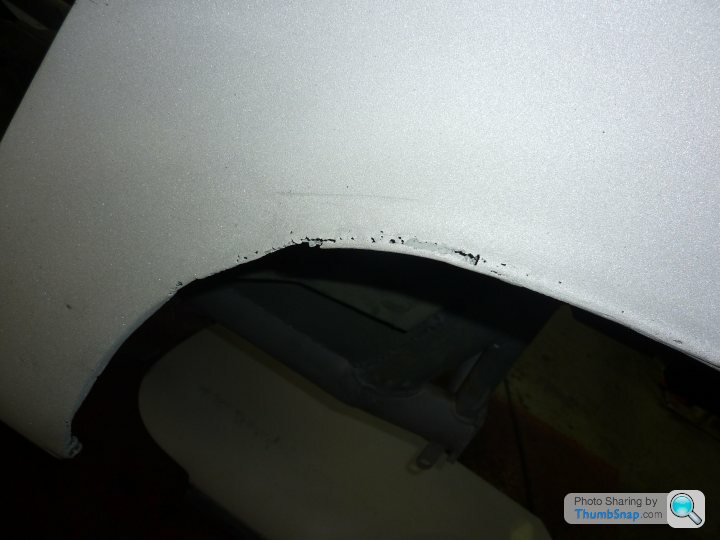
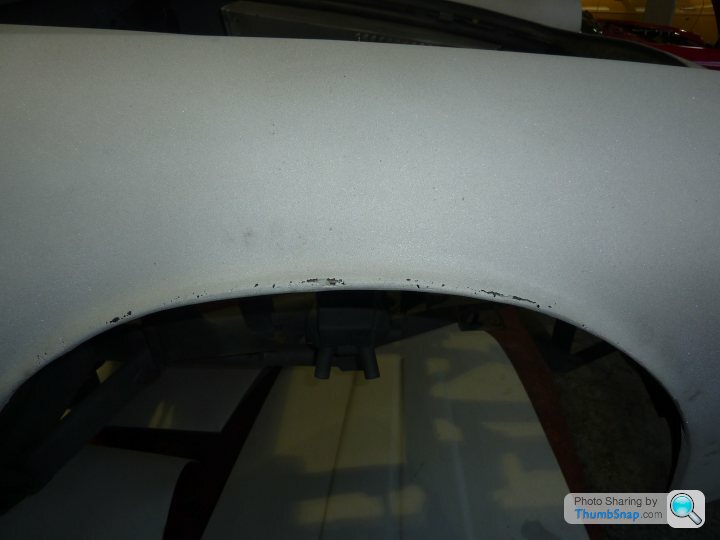
The aluminium body means that, before blasting, it didn't look that bad (unless you could look from the inside). The biggest issue is that the steel space frame that sits under the aluminium panels is in a pretty bad way. It has either rusted or reacted with the aluminium. The steel needs to be replaced, but it is now clear that almost every panel (other than the roof) will need to be cut away and repaired. The pictures below show the state of the wheel arches.
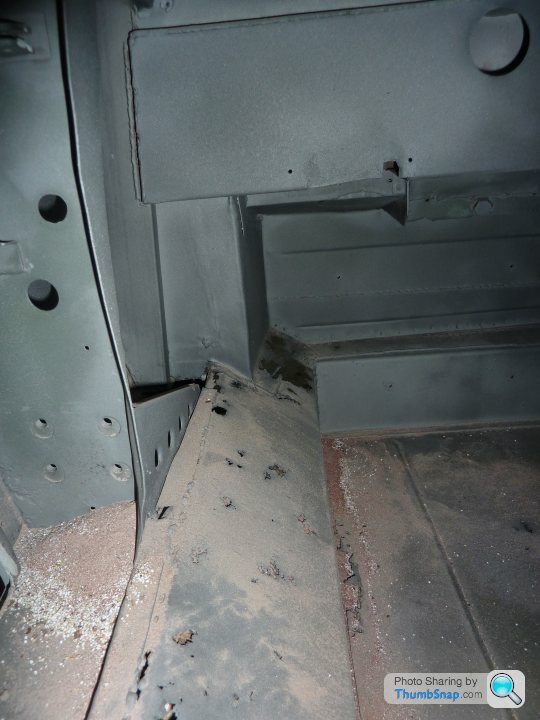
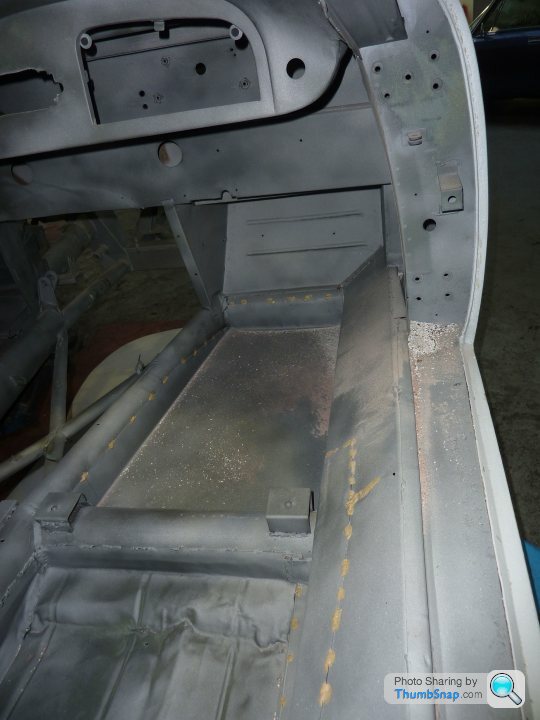
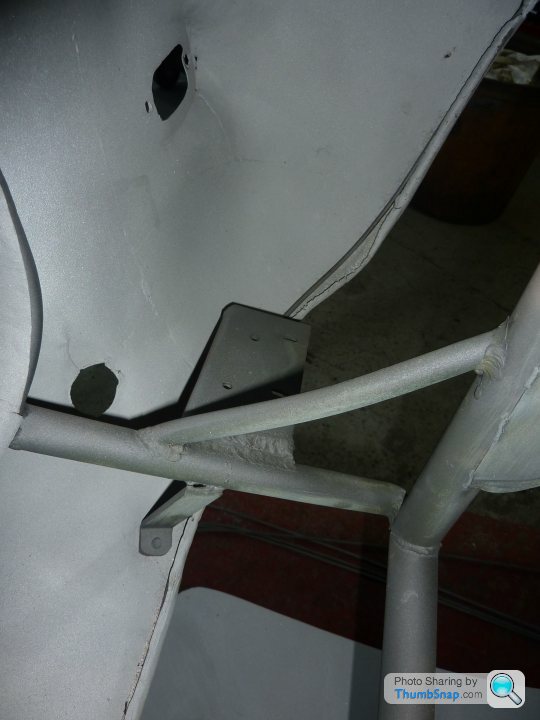
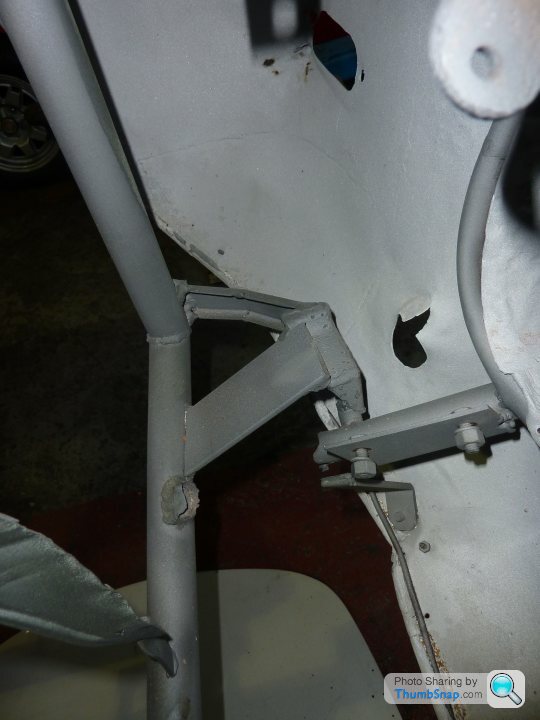
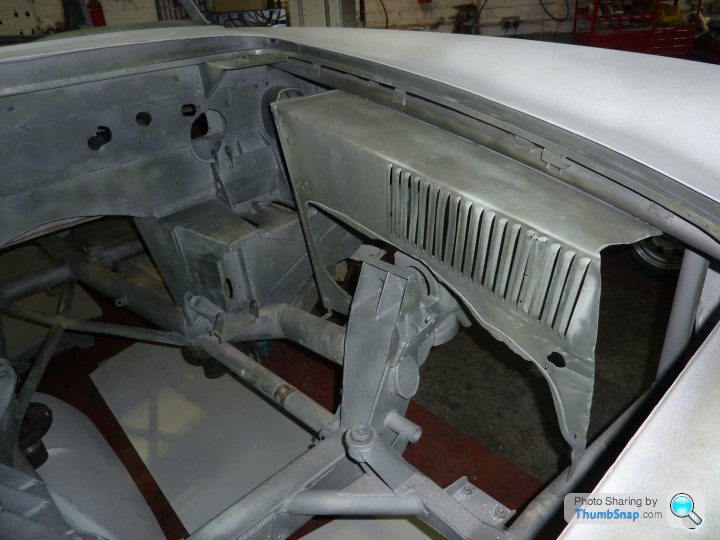
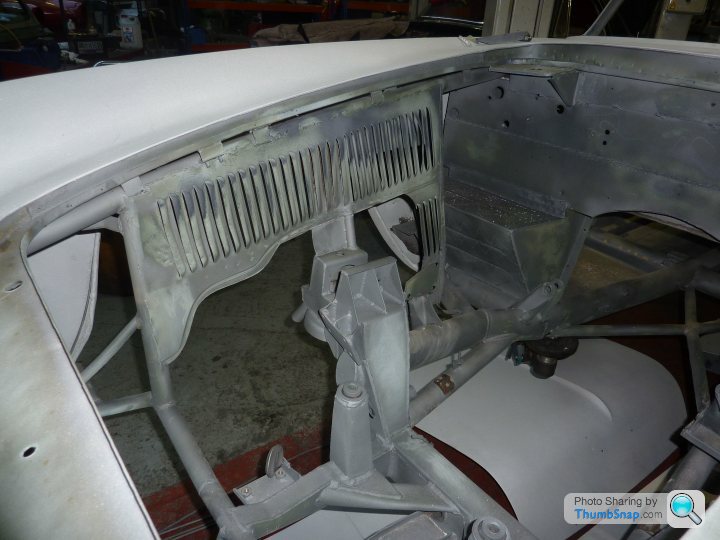
Now for the floor and the sills. These cars have an interesting quirk in that the exhaust runs up the driver's side in a channel by the sill, and on the passenger side there is another channel which has running through it (i) a pipe that takes hot air from the engine to demise the rear window (no, really) and (ii) electric cabling. Paul said that the cabling is as thick as the cabling for a cooker in your kitchen! Hopefully the pictures below illustrate all this.
The first set are the driver side floor/footwell:
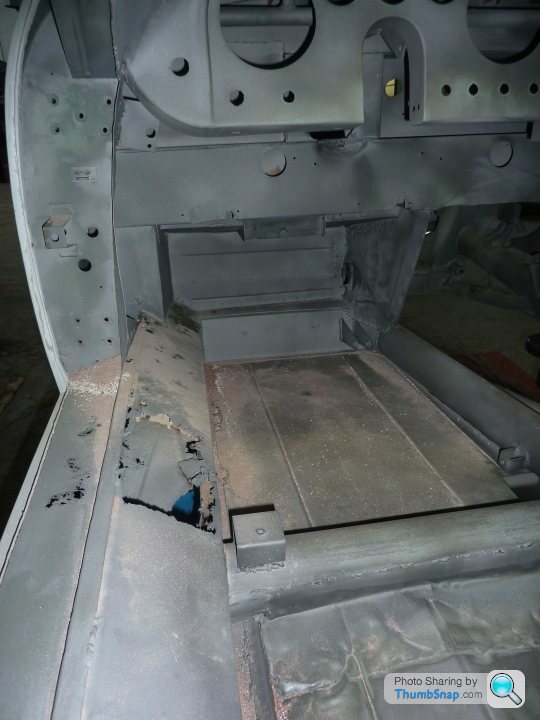

Now the passenger side:
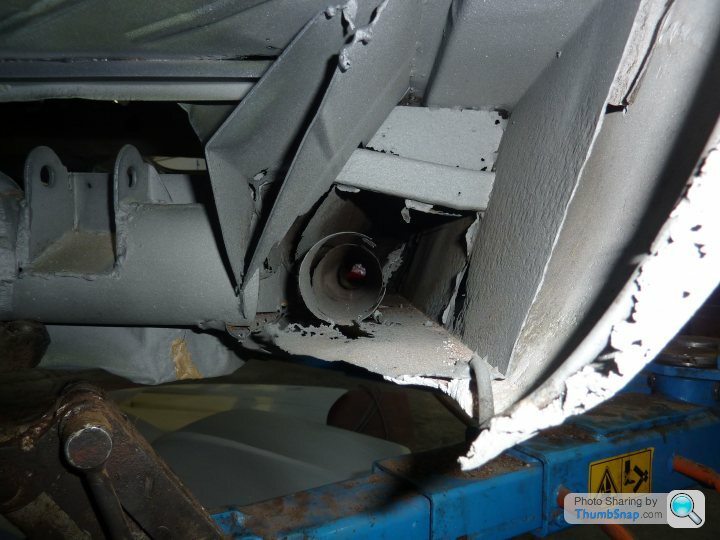
Heating/cabling conduit:
The first set are the driver side floor/footwell:
Now the passenger side:
Heating/cabling conduit:
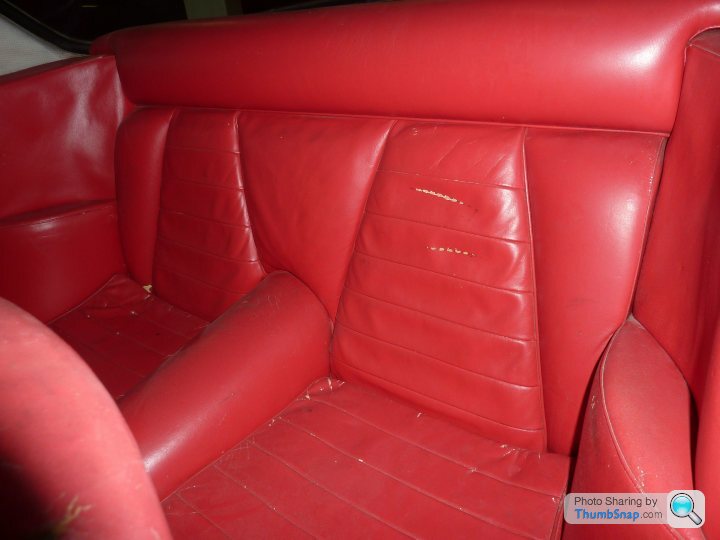
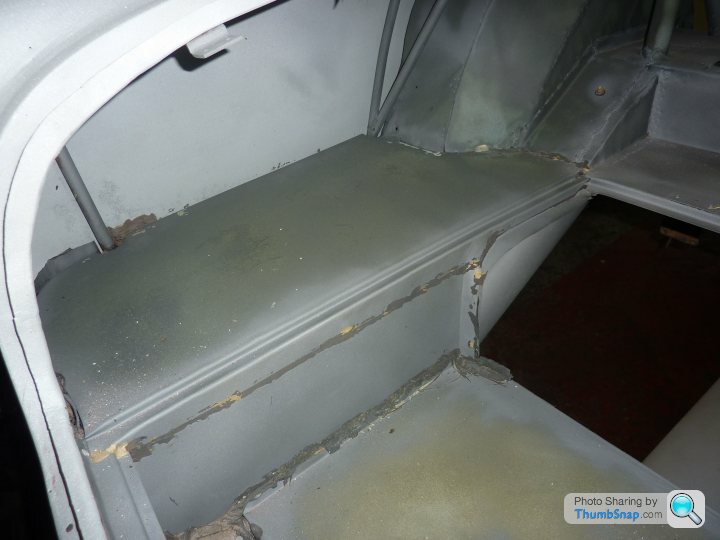
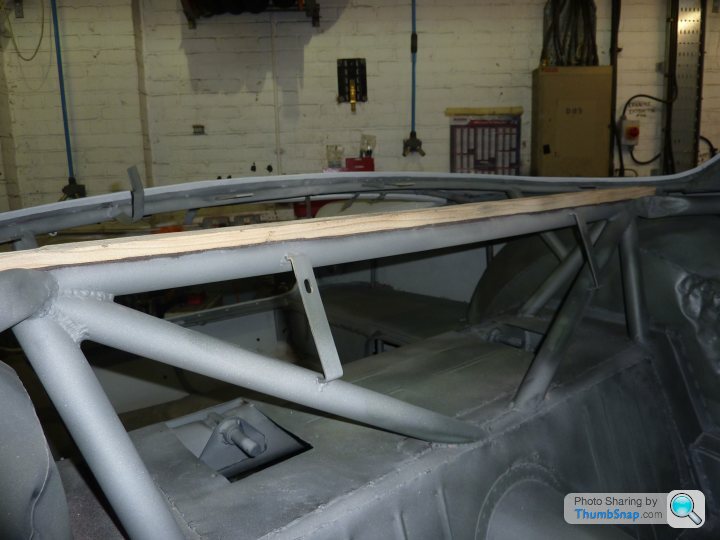
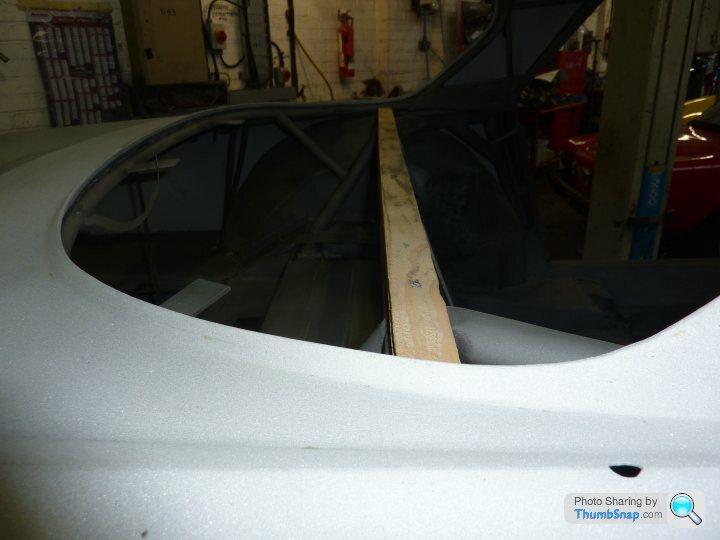
Some photos of the boot and rear seat arrangement. Points of interest are the evidence of prior work in the boot area (the gold is from brazing - i.e. using brass - this was a new one on me, but apparently it's not used anymore because it's not strong enough), and the piece of wood that is attached to ensure the rear parcel shelf sits at the right height. I am told that is original!


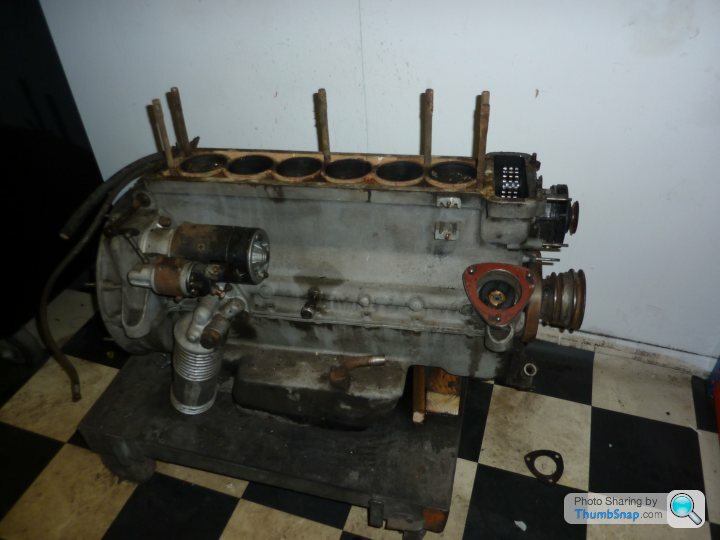
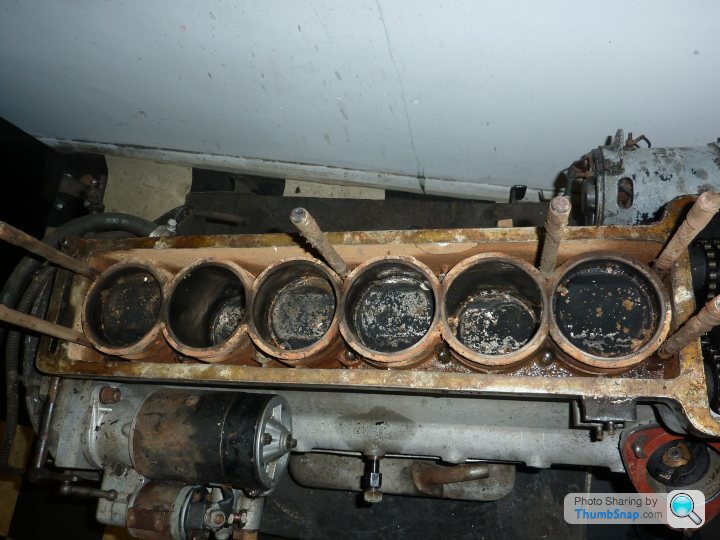
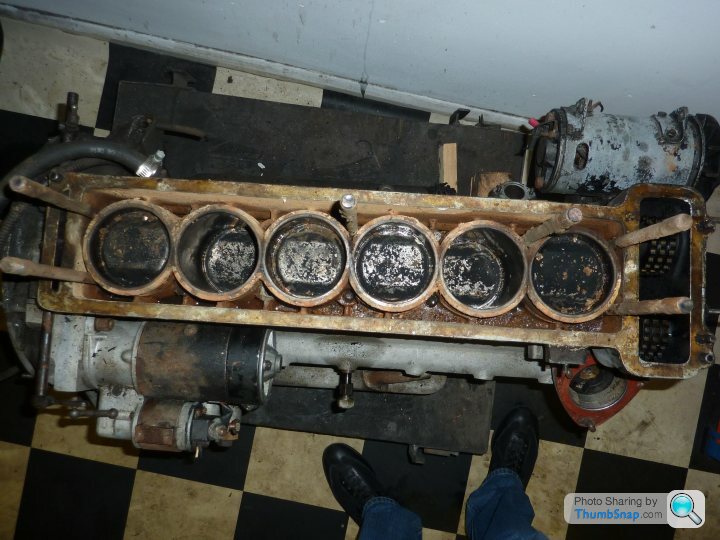
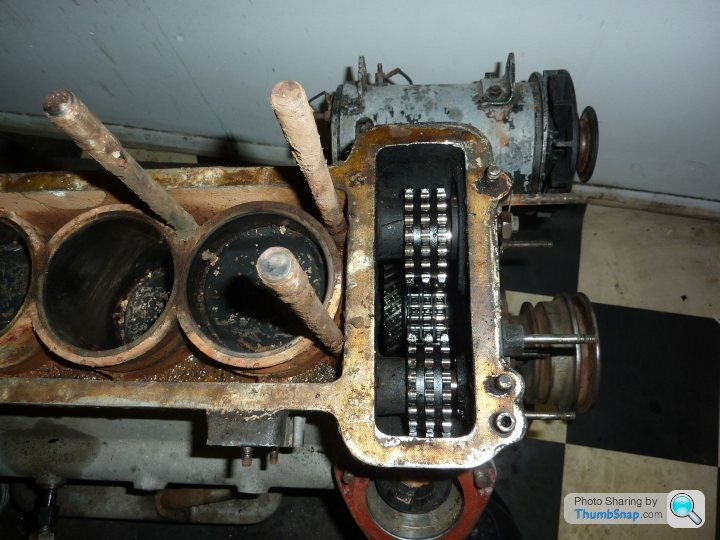
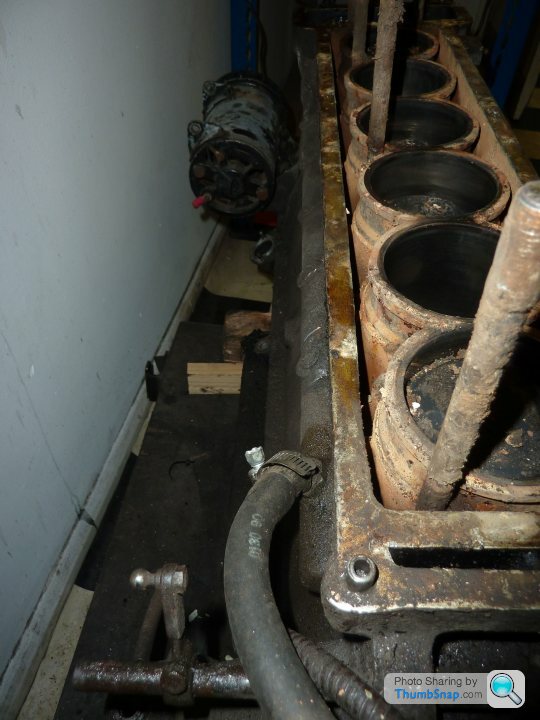
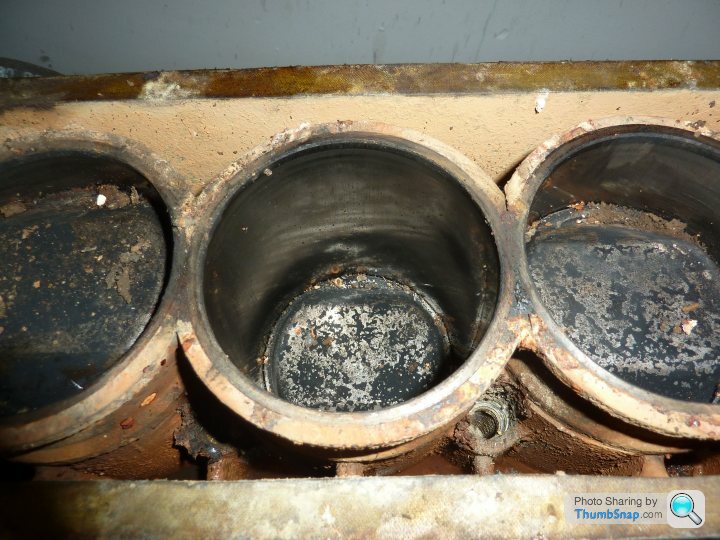
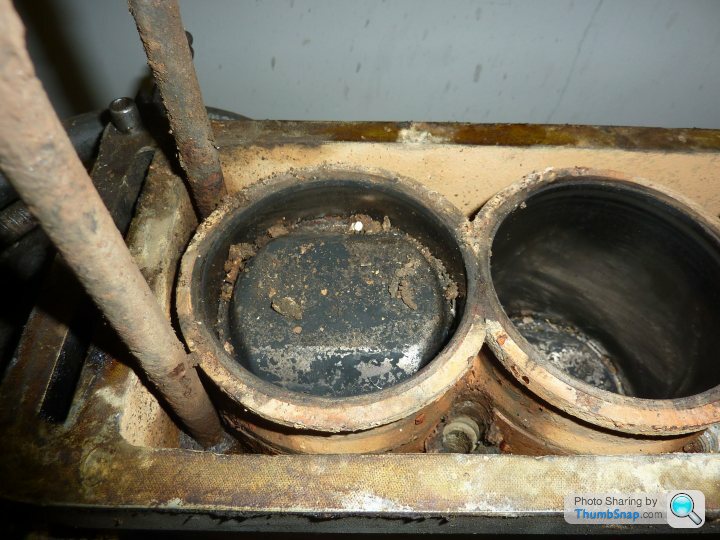
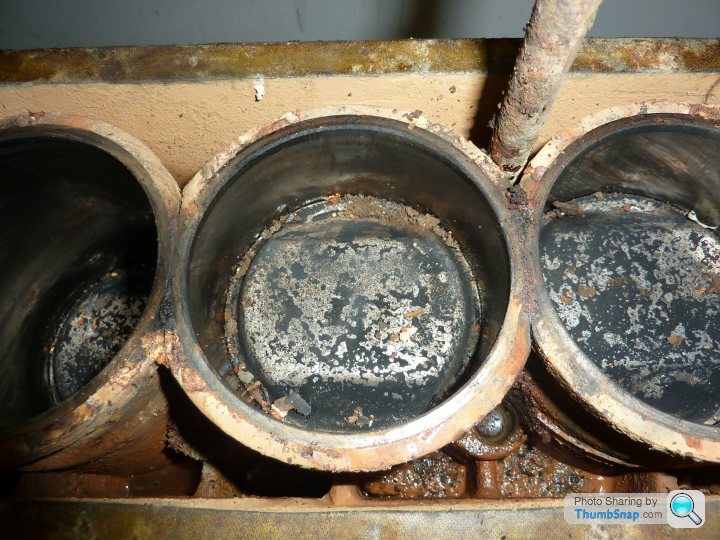
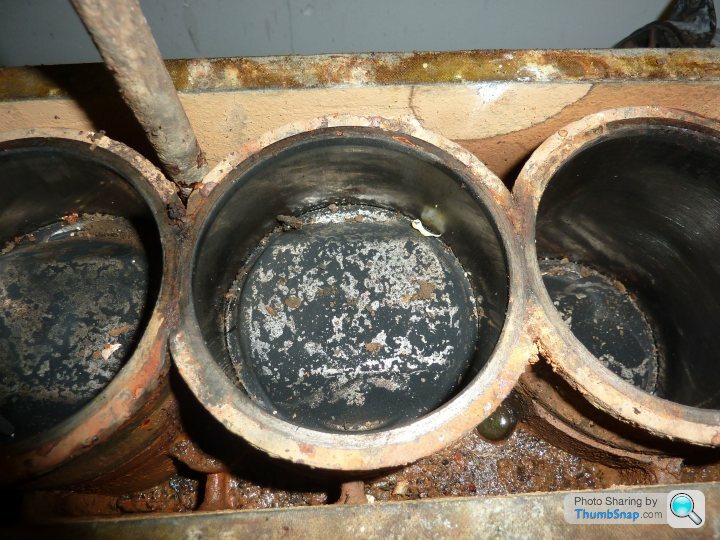
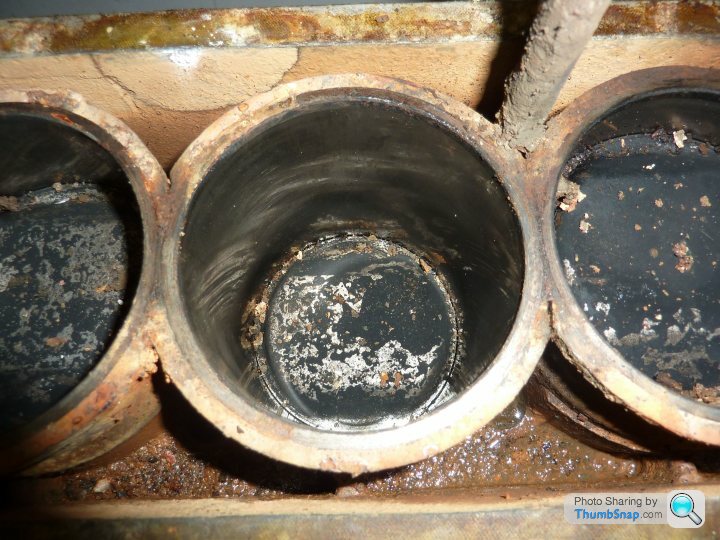
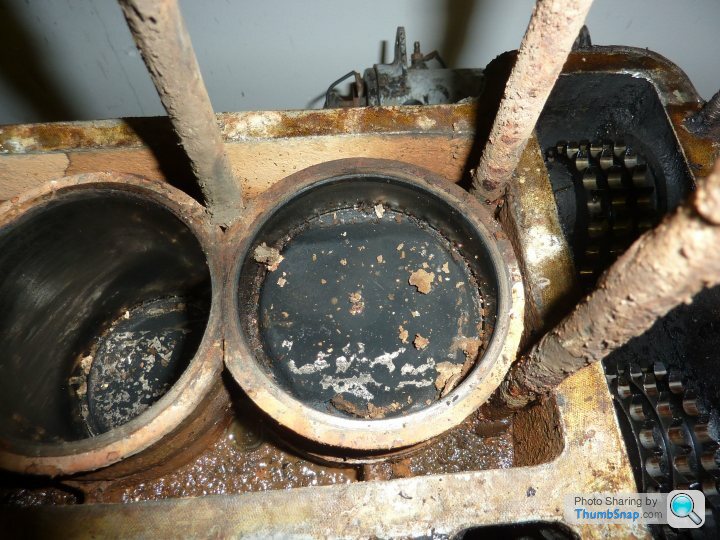
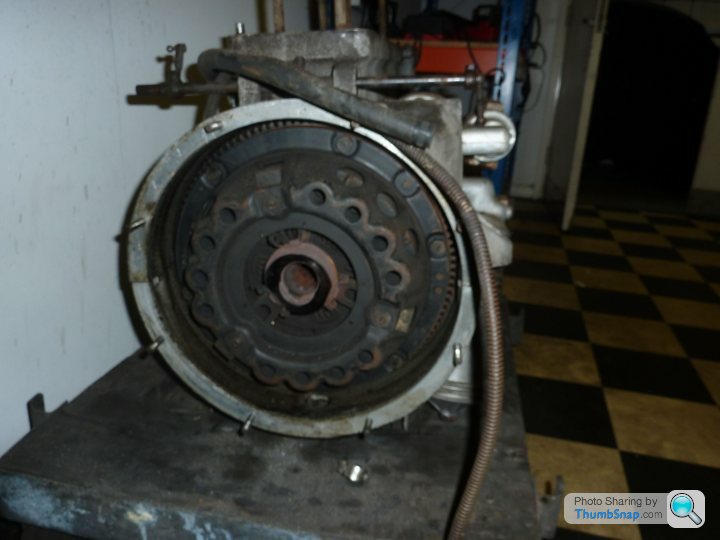
Now for the engine. It was a pig to get apart - not difficult to see why from the photos. Believe it or not, this was running before it was stripped. I'm glad that Paul didn't run it for any length of time! The biggest concern is that the head seems to have been worked on before and it is not clear whether there is enough thickness there. The unit is going down to Brands Hatch for stress testing to make sure it is OK before anything further is done to it.


Gassing Station | Classic Cars and Yesterday's Heroes | Top of Page | What's New | My Stuff