The PBY5A thread
Discussion


To keep doc's hawk thread clear this is my attempt to clean up and detail (slightly, you just cannot see much inside a 1:72 Catalina when you get past the gondola thingies. Them you can see into though!) the venerable Airfix Catalina PBY-5A.
As my dad served in Coastal toward the end of the war he encouraged me to build the Cat when it first came out and it gave me a taste for the beast.
Here we are exactly fifty years later, he cannot help me now though so it's all t'intynet nowadays for info.
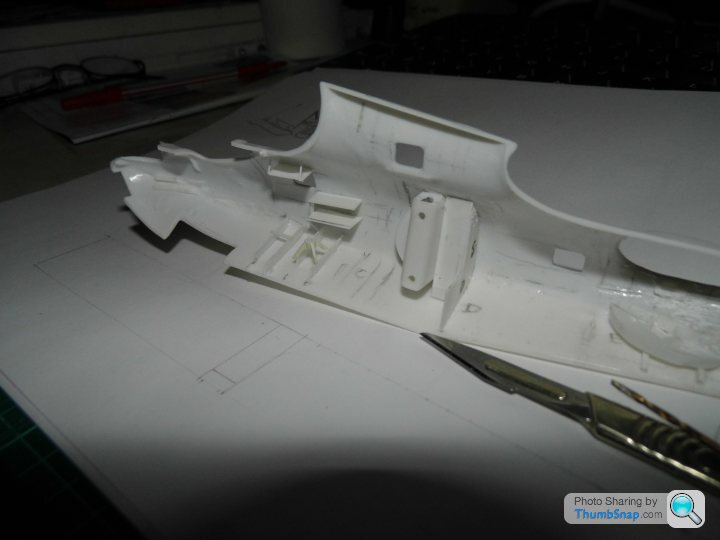
Started detailing the bits you can see and making the necessary bulkheads and doors.
A few pics but to be honest I am hoping we can get the bomb rack details somewhere or it may stall.
Gunnery gondola walkways and internal doors (some of them)

interior bulkheads in situ
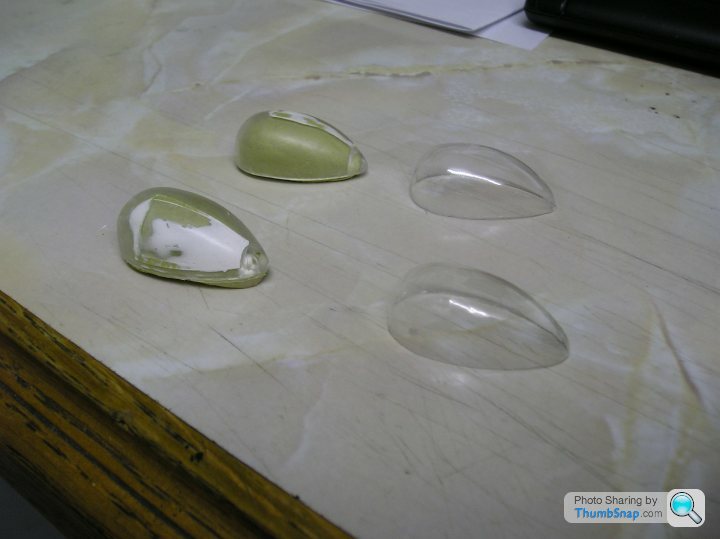
And if I'm putting stuff inside I want to be able to look at it through scale sized windows, so Milliput and kit glazing items to make thin windows
If there's any interest I will pop stuff here from time to time
I'm engaged in removing the rivets from the after sections of the mainplanes and flight control surfaces which should be fabric covered.
But I will not be removing much of the rivet details Airfix gave us, Catalinas are knobbly skinned buggers

As my dad served in Coastal toward the end of the war he encouraged me to build the Cat when it first came out and it gave me a taste for the beast.
Here we are exactly fifty years later, he cannot help me now though so it's all t'intynet nowadays for info.
Started detailing the bits you can see and making the necessary bulkheads and doors.
A few pics but to be honest I am hoping we can get the bomb rack details somewhere or it may stall.
Gunnery gondola walkways and internal doors (some of them)
interior bulkheads in situ
And if I'm putting stuff inside I want to be able to look at it through scale sized windows, so Milliput and kit glazing items to make thin windows
If there's any interest I will pop stuff here from time to time
I'm engaged in removing the rivets from the after sections of the mainplanes and flight control surfaces which should be fabric covered.
But I will not be removing much of the rivet details Airfix gave us, Catalinas are knobbly skinned buggers
dr_gn said:
Do you want the rest of the interior pics on here? There are quite a few.
Do I? Oh yes please even though I am well on the way I am considering the Academy one in future, it makes a lovely model, from the pictures I have seen so far.Eric as I always say its the modeller that makes the model, you have done some quite brilliant things from older kits in the past. Why not have a go?
I am going to try salt treating the paintwork where the sea erosion effects need simulating, this will be a great kit to practice on.
If I had another Airfix one I would be removing the undercart and making the PBY-2 as in the early RAF days.
This is an ideal model to practice such radical changes with, cheap as chips see...

Thank you doc, it's amazing to think the flight engineer used to sit up high in the pylon working the mechanical bits for the driver.
These pictures are really good and even though I had enough to get on with I see the cockpit floor/nose wheel box detail you took can help me
I love the controls too, manually pushing the inverted U shaped yoke to go down and pull her up by pulling back
I really appreciate them, they will be a big help.
If you saw the Sherpa build you may recall I had to break off in January so I can get my Hospice Charity model built for my club meeting in February.
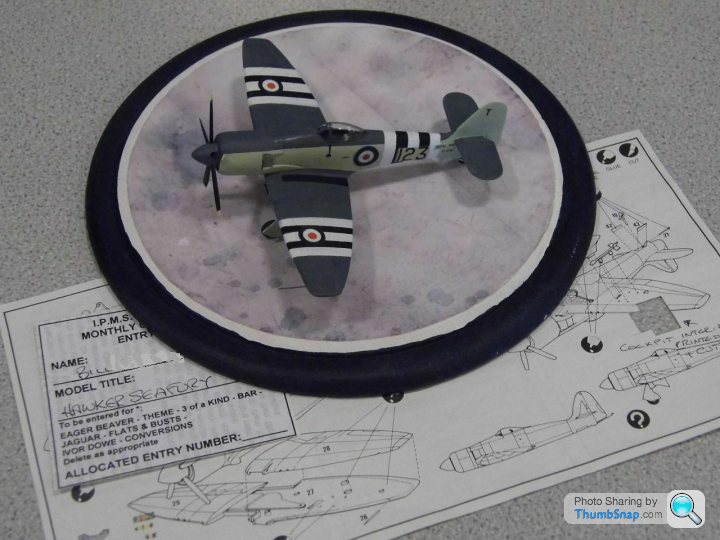
Not too taxing though, I drew a Pioneer models Hawker Sea Fury in 1:72 to make "out of the box"
Coming along quietly, with luck I won't fall foul of the extra donation penalty by missing the deadline.
No after market allowed and only items in the box, I can use the instruction sheet to make seatbelts and sprue to add detailing, when stretched.
So on with the Cat big time in February. I can show other bits I have already got made from time to time
I'll have to ask on Britmodeller whether anyone has bomb rack photos, hardly anything on the web it seems
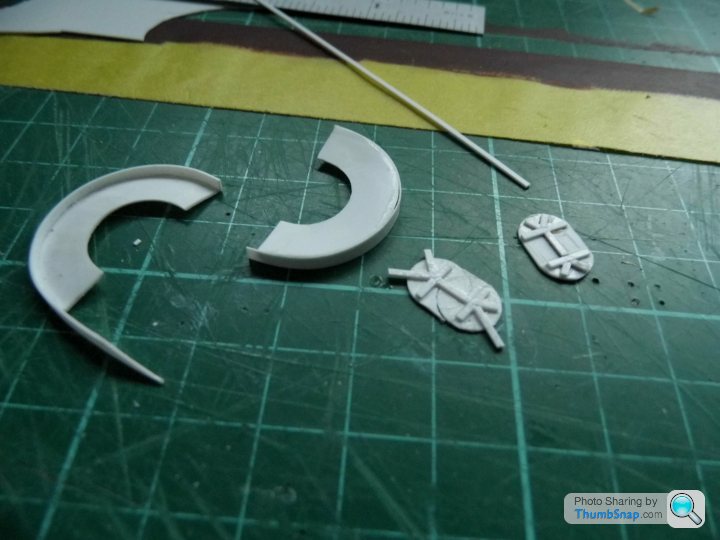
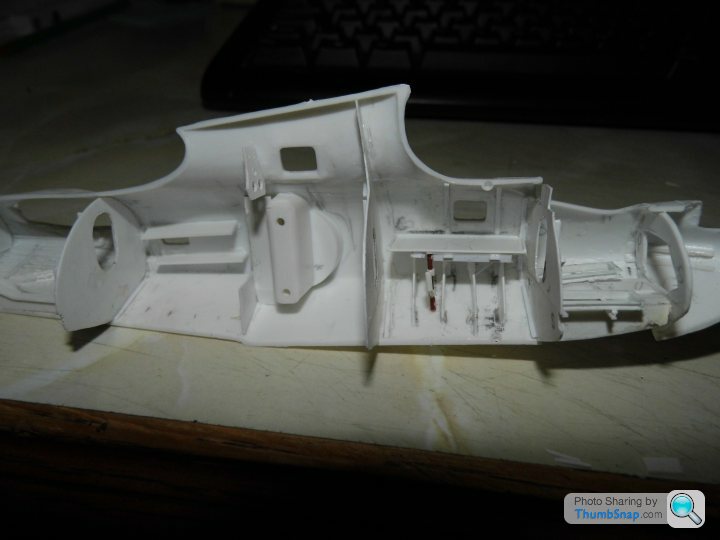
The seat for aforesaid flight engineer carved from a spare drop tank (origin unknown, I picked up a load of tanks, bombs and rockets from a club member thirty years ago, thank the Lord I didnt ditch them) and set upon its crossmember.
It will never be seen but you do, don't you, you put things in anyway.
This is the tank, American fifties or sixties do we think?
Radio shack sketched out with operator seat mount carved from the rear fin section from an Airfix F4's Sparrow missile. Radios will be added after painting the inner spaces.
Navigator station on port side opposite the radios, almost none of this will be visible so I am not going any further overboard than this inside once the charts are on the table.
Well, except for the crew bunks behind the wheel well structures. And the flight engineer's backplate armour.
I halted the build just as I'm building the rear gun mounts, oh yes and I have just received one Pratt&Whitney Twin Wasp for one side. Search on for another now.
These pictures are really good and even though I had enough to get on with I see the cockpit floor/nose wheel box detail you took can help me
I love the controls too, manually pushing the inverted U shaped yoke to go down and pull her up by pulling back
I really appreciate them, they will be a big help.
If you saw the Sherpa build you may recall I had to break off in January so I can get my Hospice Charity model built for my club meeting in February.
Not too taxing though, I drew a Pioneer models Hawker Sea Fury in 1:72 to make "out of the box"
Coming along quietly, with luck I won't fall foul of the extra donation penalty by missing the deadline.
No after market allowed and only items in the box, I can use the instruction sheet to make seatbelts and sprue to add detailing, when stretched.
So on with the Cat big time in February. I can show other bits I have already got made from time to time
I'll have to ask on Britmodeller whether anyone has bomb rack photos, hardly anything on the web it seems
The seat for aforesaid flight engineer carved from a spare drop tank (origin unknown, I picked up a load of tanks, bombs and rockets from a club member thirty years ago, thank the Lord I didnt ditch them) and set upon its crossmember.
It will never be seen but you do, don't you, you put things in anyway.
This is the tank, American fifties or sixties do we think?
Radio shack sketched out with operator seat mount carved from the rear fin section from an Airfix F4's Sparrow missile. Radios will be added after painting the inner spaces.
Navigator station on port side opposite the radios, almost none of this will be visible so I am not going any further overboard than this inside once the charts are on the table.
Well, except for the crew bunks behind the wheel well structures. And the flight engineer's backplate armour.
I halted the build just as I'm building the rear gun mounts, oh yes and I have just received one Pratt&Whitney Twin Wasp for one side. Search on for another now.
dr_gn said:
perdu said:
I am hoping we can get the bomb rack details somewhere or it may stall.
These any use?Well that's it then, absolutely bang on thanks
I couldn't find them no matter what I did, I am just no use at the research bit obviously.
Thank you G
Edited by perdu on Monday 27th January 16:02
What an offer
But storage would be a sod, is it all right if I just beg as necessary
I am really grateful they are just what I wanted
I saw them fitting a torp and some bombs on a Black Cats film on Youtube but the filming was all in darkness under the wings
But storage would be a sod, is it all right if I just beg as necessary
I am really grateful they are just what I wanted
I saw them fitting a torp and some bombs on a Black Cats film on Youtube but the filming was all in darkness under the wings
Edited by perdu on Sunday 26th January 22:23
Morf said:
OP,
If you haven't already seen it, watch "The Last African Flying Boat" - http://www.youtube.com/watch?v=Hv8PDWHNOfA - besides being a fascinating tale, there's plenty of Catalina footage in there as source material.
Morf, thanks for that. I will be keeping that ref for the future too, ta.If you haven't already seen it, watch "The Last African Flying Boat" - http://www.youtube.com/watch?v=Hv8PDWHNOfA - besides being a fascinating tale, there's plenty of Catalina footage in there as source material.
Minor update, no progress with the PBY5A but the Sea Fury did get finished in time for the club comp, phew.
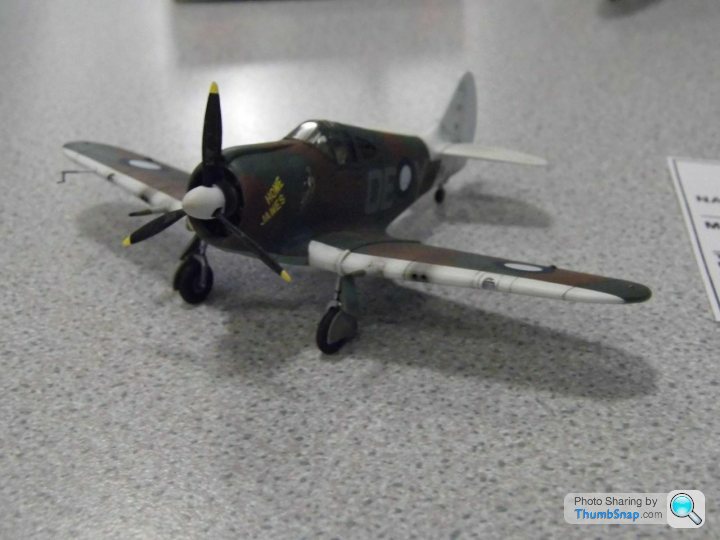
Sixth out of fifteen on the table, so no penalty fines but as the decal/transfers are so awful I have started stripping off the first paint job and oversize lettering on the decals this is the only photo of it extant as was last Sunday, praise be.
New finish being planned already, possibly red German single seater. Who knows?
Awful decals on a quite nice moulding so I am ressurrecting it later.
This came joint sixth.
Dainty and with a lovely finish too.
And this was model of the day.
Apologies for the crap photo.
Anyway, this is history so I will be getting on with the Cat next.
Sixth out of fifteen on the table, so no penalty fines
but as the decal/transfers are so awful I have started stripping off the first paint job and oversize lettering on the decals this is the only photo of it extant as was last Sunday, praise be.New finish being planned already, possibly red German single seater. Who knows?
Awful decals on a quite nice moulding so I am ressurrecting it later.
This came joint sixth.
Dainty and with a lovely finish too.
And this was model of the day.
Apologies for the crap photo.
Anyway, this is history so I will be getting on with the Cat next.
Riighht
I am repainting and surface cleaning up the above Sea Fury now but have hit a slight snag.
As I mentioned the kit's decals were appalling so using the bay I have obtained a set of the decals for Airfix's release of what I'm told is the same moulding.
The seller on ebay didn't have any instructions for the Airfix kit but when I got the lovely things this morning I found the sheet has a plethora of stencils etc.
So the appeal is simple, does any of my friends here have a copy of the decalling and paint instructions that they could scan for me?
I would hate to waste such fine decals attempting to use the blurred images that are all I can find on a Googling.
thanks
Bill
Red Firecracker said:
Help?That is so good it almost puts them on for me
Thanks RF!
The annoying decals have been "doing my head in" so I needed to get rid at once.
Then I can return to building the Cat.

b
Thought I'd revive this one as I have just been reading the discussion on planes trains etc about the machine guns in wartime aircraft and I have just been knocking up a pair of rough .50 cals for the blister gunners
I have closed up the fuselage and have been working on the transparent bits recently, the MGs were a kind of relax modelling event.
It seems that thumbsnap is down
Pics to follow as and when...
I have closed up the fuselage and have been working on the transparent bits recently, the MGs were a kind of relax modelling event.
It seems that thumbsnap is down
Pics to follow as and when...
dr_gn said:
You can get on with painting those exhaust collector rings now...get yourself some Alclad jet exhaust and mix it with a bit of Alclad brass, they'll look spot on!
HmmJet exhaust and brass you reckon?
I usually paint them matt pinkish brown and added rust and iron grey to replicate real exhaust pipes
I'll have to try your recipe
Next time I do a Brit engined machine

I hope Photobucket can do the trick, damned long winded way to go......
A few of the build, gun barrels from a shop in Lowestoft, very quick posting too. They sell two makes of .50 barrels, I cannot see any difference between them for a big price difference. I ordered both of course
two .30cals and two .50cals

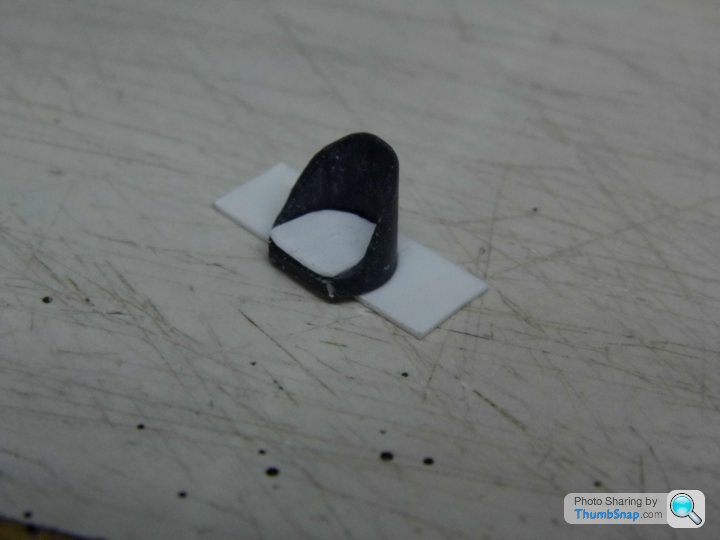
Gunnery mounts for the .50s, .020" Evergreen rod

The .50s ready to mount.

Armour screens cut from a drinks can. Ihave been mainly using cans from the Royal Danish Court preferred lager
Probably

And mounted in the unfinished blister turret

The front turret moulded in three pieces, not counting the .30 cals

A few of the build, gun barrels from a shop in Lowestoft, very quick posting too. They sell two makes of .50 barrels, I cannot see any difference between them for a big price difference. I ordered both of course
two .30cals and two .50cals

Gunnery mounts for the .50s, .020" Evergreen rod

The .50s ready to mount.

Armour screens cut from a drinks can. Ihave been mainly using cans from the Royal Danish Court preferred lager
Probably

And mounted in the unfinished blister turret

The front turret moulded in three pieces, not counting the .30 cals

Thread resurrection time
A final look at wot I dun
Lots of interior stuff I wasted my time on
I can't see, so there's b all chance any one else will ;(
Bunks, Flight engineer station, Radio Shack with radios and sparkys seat and desk, Nav's table with chart drawer sextant case, bulkhead doors with characteristic pressed steel stiffeners built in.
Ribs across the floor, now invisible and walkways too.
At the back you can make out the gunnery positions at least and the ammo box and track central on the floor
At the front engine and prop controls in the roof, pilot and co-pilot's seats on their complicated framing and the control wheels on their pivoted yoke and instrument panel
The later style eyeball front turret with twin 30cal Brownings moulded in two pieces
As I mentioned earlier I used after market stuff on a model (for myself) for the first time, four of the gun barrels from Hannants (no doc both sets of 50cal barrels had the same number of holes, it's the thirtys that were diferent)
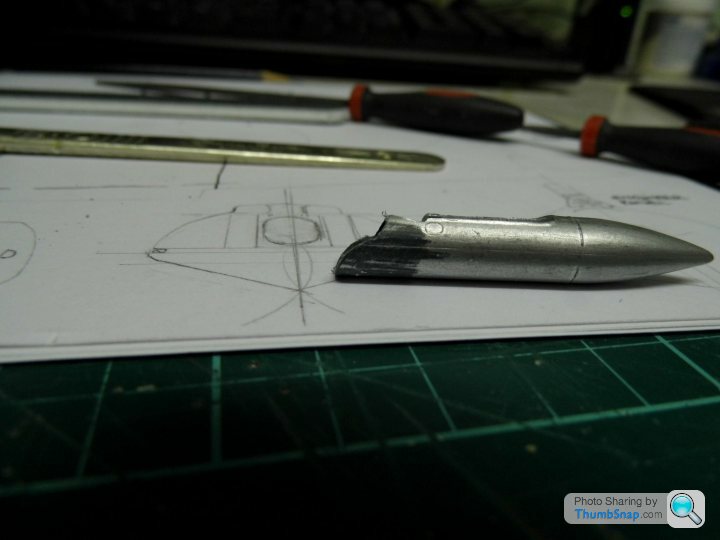
I bought two Aeroclub P&W Twin Wasps off ebay from different sellers. Sadly one was just stuck in an envelope so some bright spark in the Post Office scraped at the envelope, possibly thinking he'd be pocketing a ring or brooch carelessly posted by an idiot.
He scraped off the bolt detail from one of them and wore away part of the moulding with a gnarly thumbnail (I suspect) I mentioned this to the seller who kindly refunded the money for the engine.
I couldn't find another Twin Wopse in time so in desperation I used a smidgeon of Milliput and filler to rebuild the front of the damaged one. I can hardly see it now, so does using it mean I owe the guy the money back, back?
I also used after market vac form mouldings for the rear gondolas after hacking Airfix's distorted turret mount away to suit.
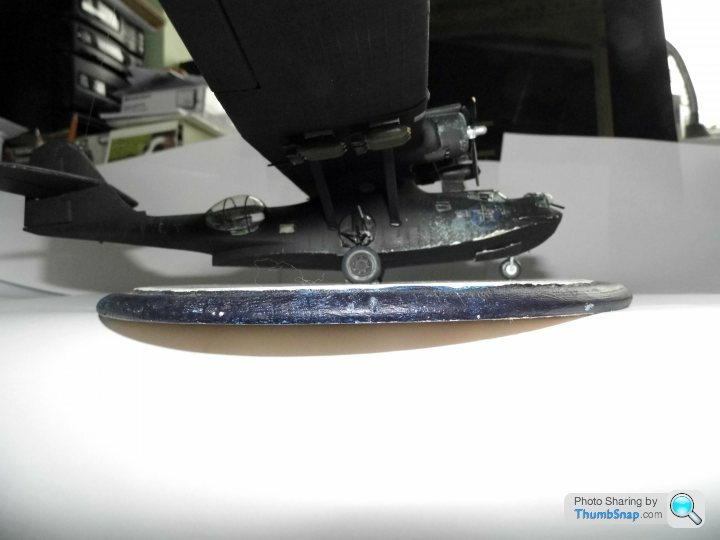
Airfix made a horrid job of the complex undercarrriage, I made a horrid job too but have at least given her the proper twin wishbone suspension ISH
The nosewheel fork was made from soldered brass tube, just to see if I could and the nosewheel is made from four pieces. Just because...
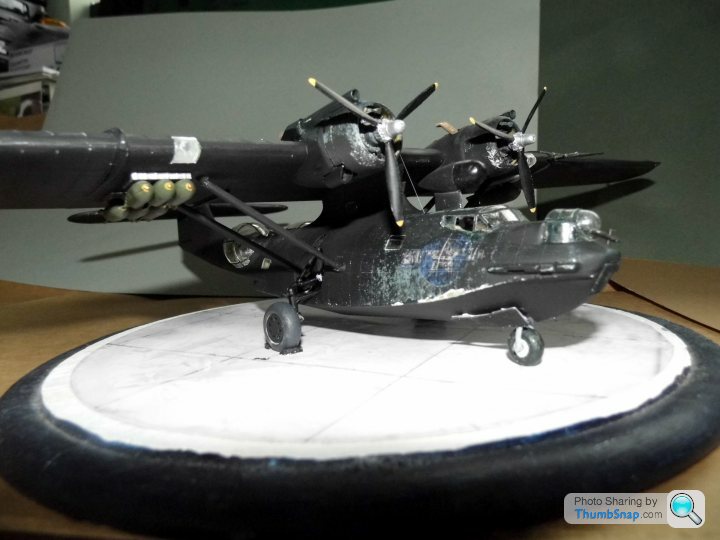
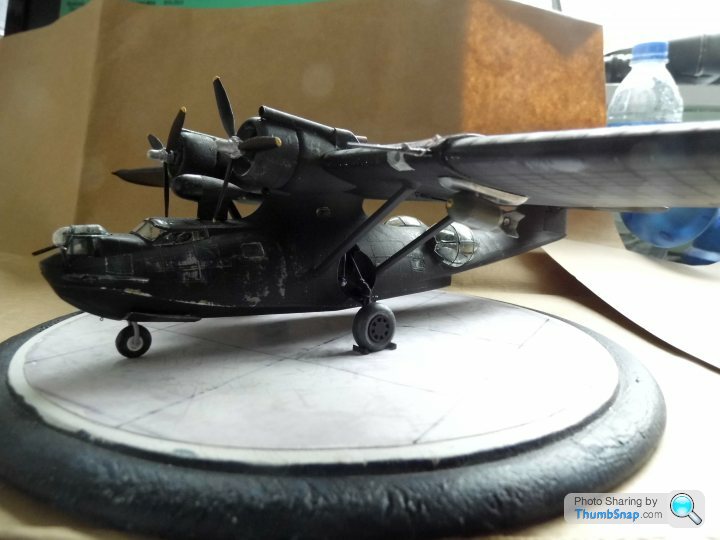
As it is a "Black Cat" machine I have painted it as a typical version. The US National markings were toned down almost to invisibility, white parts of the stars and bars were greyed out and frequent repainting and touching up with Lamp Black and dope mix have resulted in a truly manky finish
A radar dome was fabricated from an old drop tank in my bits box and because it is horrendously tail heavy I have pinned the nosewheel to the stand and added chocks to the mainwheels
Hope you like it a bit, it's very dark...
A final look at wot I dun
Lots of interior stuff I wasted my time on
I can't see, so there's b all chance any one else will ;(
Bunks, Flight engineer station, Radio Shack with radios and sparkys seat and desk, Nav's table with chart drawer sextant case, bulkhead doors with characteristic pressed steel stiffeners built in.
Ribs across the floor, now invisible and walkways too.
At the back you can make out the gunnery positions at least and the ammo box and track central on the floor
At the front engine and prop controls in the roof, pilot and co-pilot's seats on their complicated framing and the control wheels on their pivoted yoke and instrument panel
The later style eyeball front turret with twin 30cal Brownings moulded in two pieces
As I mentioned earlier I used after market stuff on a model (for myself) for the first time, four of the gun barrels from Hannants (no doc both sets of 50cal barrels had the same number of holes, it's the thirtys that were diferent)
I bought two Aeroclub P&W Twin Wasps off ebay from different sellers. Sadly one was just stuck in an envelope so some bright spark in the Post Office scraped at the envelope, possibly thinking he'd be pocketing a ring or brooch carelessly posted by an idiot.
He scraped off the bolt detail from one of them and wore away part of the moulding with a gnarly thumbnail (I suspect) I mentioned this to the seller who kindly refunded the money for the engine.
I couldn't find another Twin Wopse in time so in desperation I used a smidgeon of Milliput and filler to rebuild the front of the damaged one. I can hardly see it now, so does using it mean I owe the guy the money back, back?
I also used after market vac form mouldings for the rear gondolas after hacking Airfix's distorted turret mount away to suit.
Airfix made a horrid job of the complex undercarrriage, I made a horrid job too but have at least given her the proper twin wishbone suspension ISH
The nosewheel fork was made from soldered brass tube, just to see if I could and the nosewheel is made from four pieces. Just because...
As it is a "Black Cat" machine I have painted it as a typical version. The US National markings were toned down almost to invisibility, white parts of the stars and bars were greyed out and frequent repainting and touching up with Lamp Black and dope mix have resulted in a truly manky finish
A radar dome was fabricated from an old drop tank in my bits box and because it is horrendously tail heavy I have pinned the nosewheel to the stand and added chocks to the mainwheels
Hope you like it a bit, it's very dark...
Edited by perdu on Saturday 28th June 15:31
dr_gn said:
Shame about the hidden details, but there you go - you never know how much will be visible through the glazing.
I know it looks excellent from some of your other pics on BM, but I must say you're not really doing justice to your models with those photos (and obviously I've seen your work first hand at shows). Why not take them outside on an overcast day on a neutral background?
You wouldn't think I did a photography course a few weeks ago, just 'cos of this would you.I know it looks excellent from some of your other pics on BM, but I must say you're not really doing justice to your models with those photos (and obviously I've seen your work first hand at shows). Why not take them outside on an overcast day on a neutral background?
That is a good idea, I just used sheets of pastel paper and brown paper to hide my 'pooter... and beer cans
I will be back, thanks doc.
Gassing Station | Scale Models | Top of Page | What's New | My Stuff