P-51B Mustang "Old Crow" Academy 1:72
Discussion


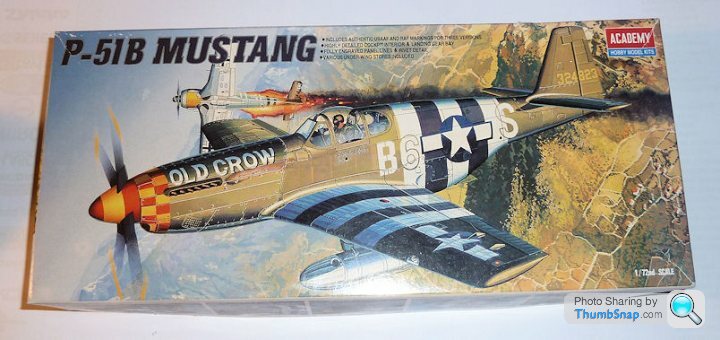
So after a few months off I'm back into modelling again with this very nice Academy kit of Bud Anderson's P-51B "Old Crow". Picked up for just £3 from Cosford show!
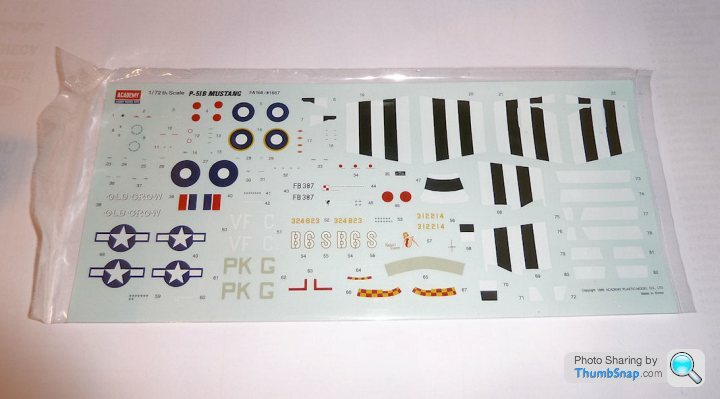
There are three decal options for either the Malcolm hood or birdcage canopy versions, and a choice of paper or metal drop tanks or bombs. One option is RAF, the others US. Decals look very nice, although I'll be painting the invasion stripes:
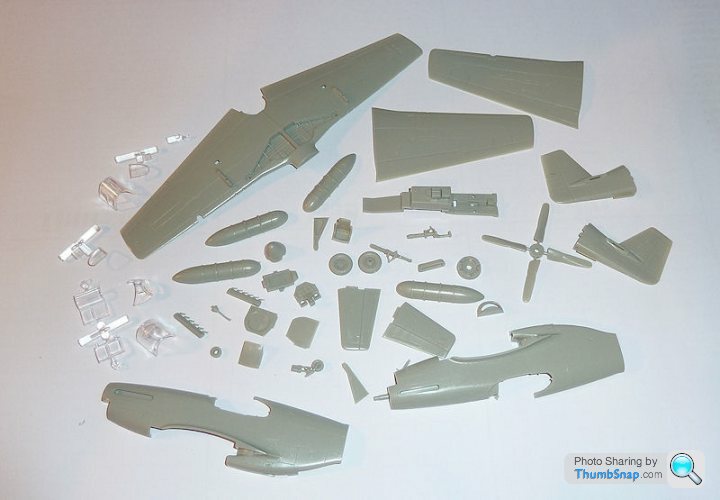
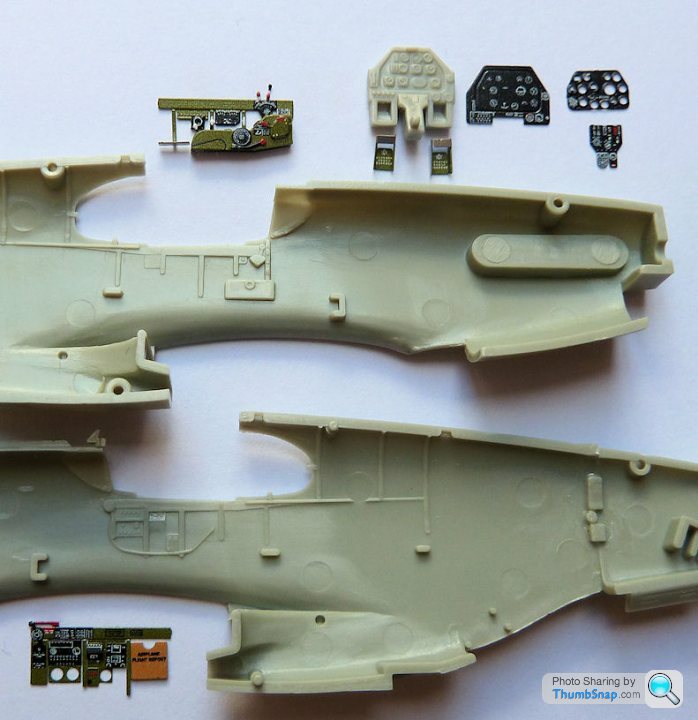
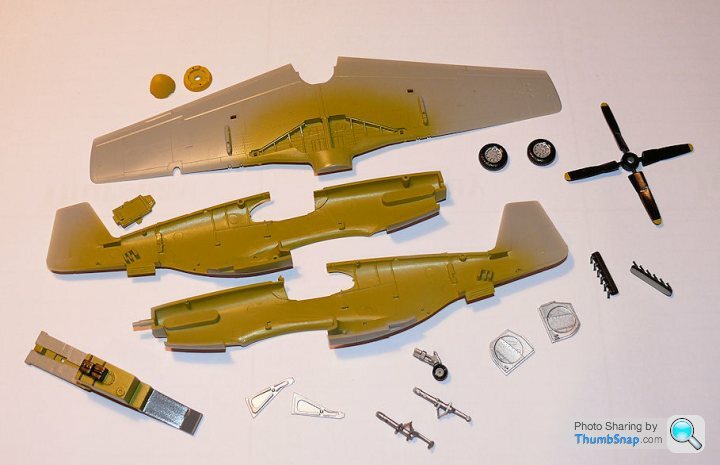
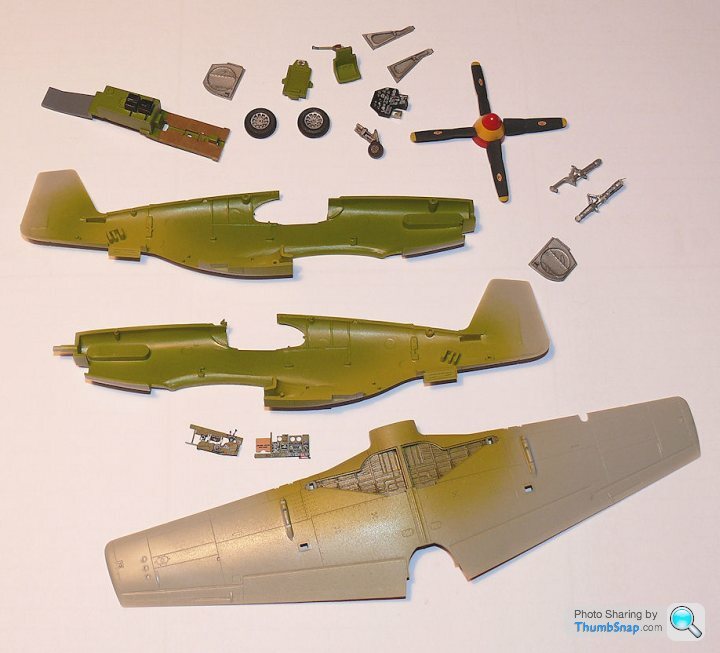
I've cleaned all the pieces up, and as usual they look very well moulded in decent quality plastic with fine surface detail:
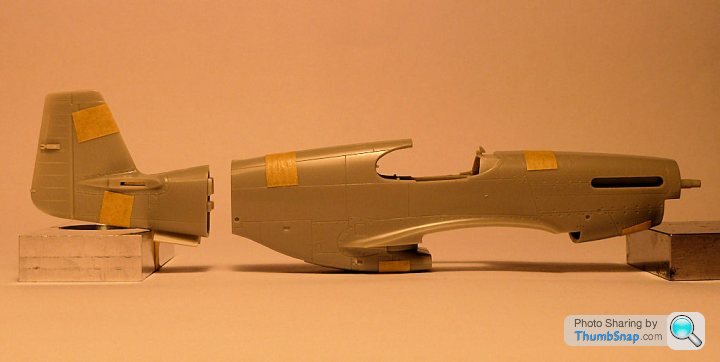
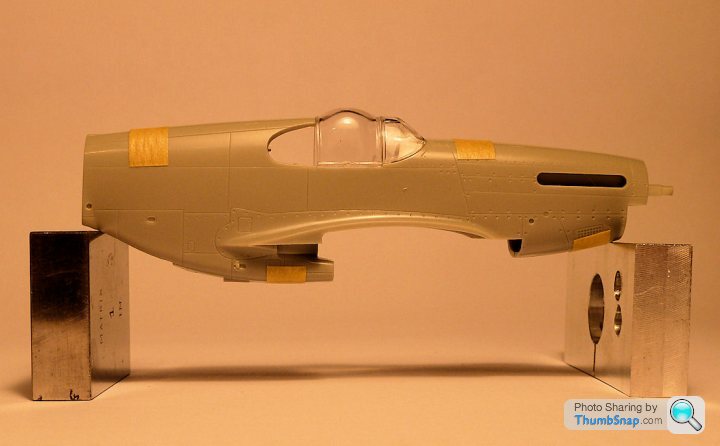
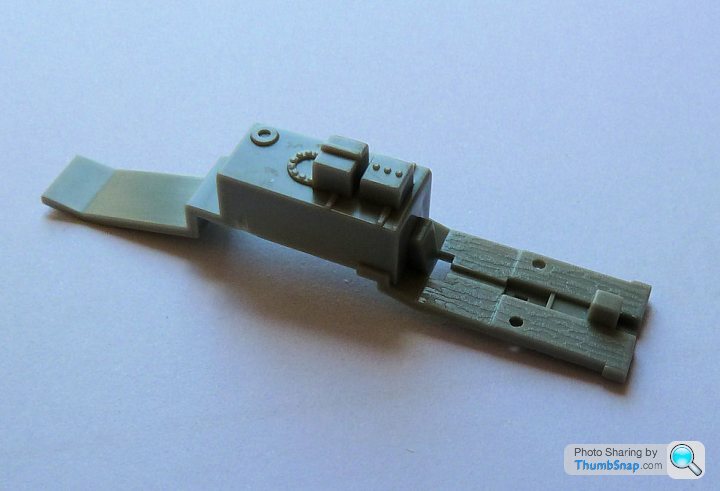
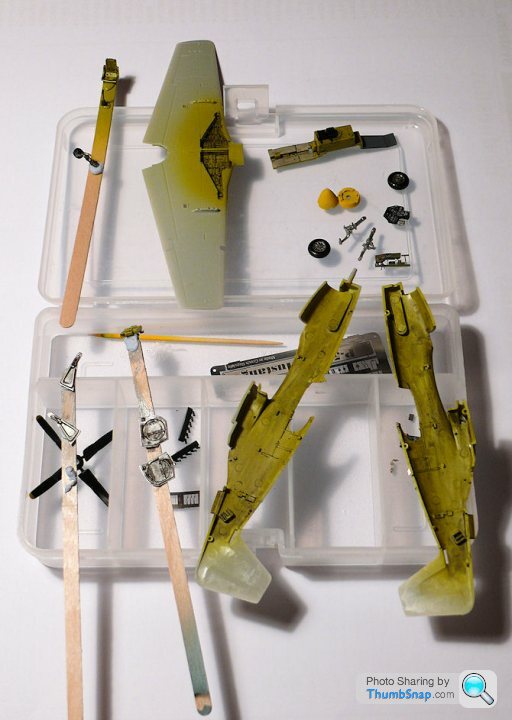
One strange feature of the kit design is the separate tail, presumably there is another version available with slightly different features:
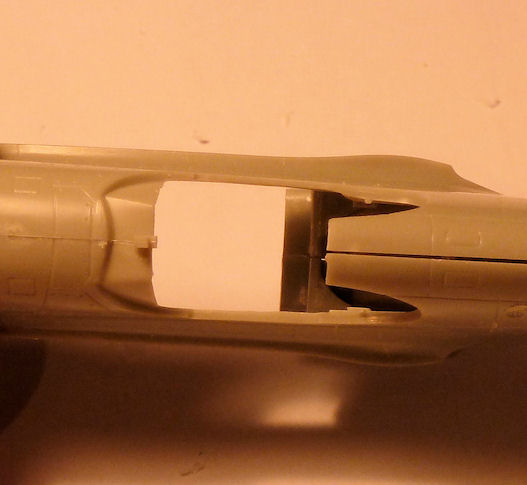
The one thing that's not so good about the kit is the Malcolm hood. To my eyes it's way too bulged, and the plastic is quite thick:
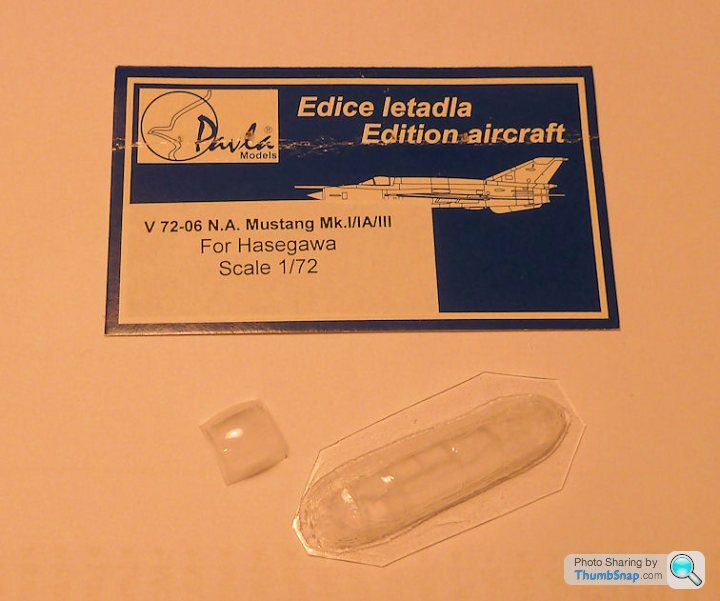
It's not a problem since I want to display the model with the hood open, and as usual at this scale, the standard moulding is too thick to fit in the open position. I got hold of a Pavla vacform canopy off EBay for a couple of quid. It's actually for the Hasegawa P-51 :
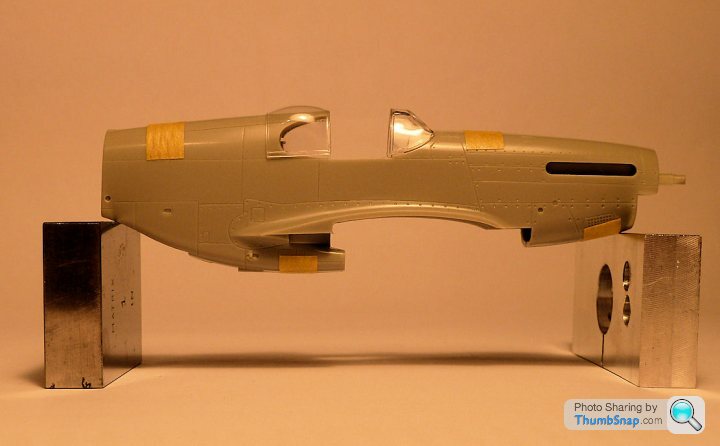
After half an hour's cutting and fettling, it fits perfectly, and looks like a more realistic shape:
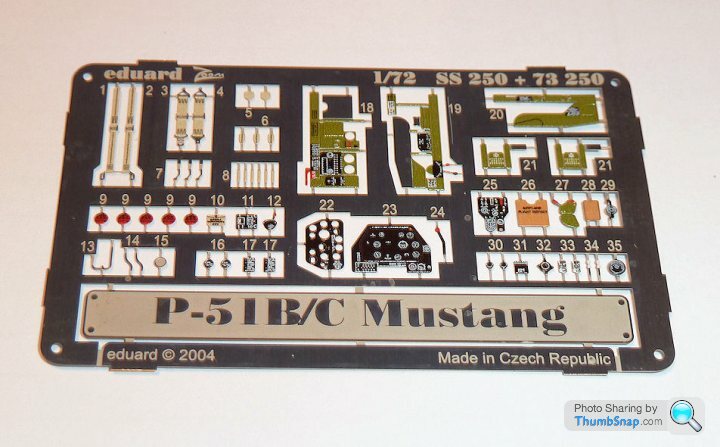
I also picked up an Eduard Zoom p/e set, but I probably won't use all the parts. This is the first pre-coloured p/e I've used, so it will be interesting to see how I can match the cockpit colours up...
The only other mods I'm, going to make are brass tube gun barrels, wheel brake lines and replacing the solid plastic gunsight reflector with a sliver of acetate.
There are three decal options for either the Malcolm hood or birdcage canopy versions, and a choice of paper or metal drop tanks or bombs. One option is RAF, the others US. Decals look very nice, although I'll be painting the invasion stripes:
I've cleaned all the pieces up, and as usual they look very well moulded in decent quality plastic with fine surface detail:
One strange feature of the kit design is the separate tail, presumably there is another version available with slightly different features:
The one thing that's not so good about the kit is the Malcolm hood. To my eyes it's way too bulged, and the plastic is quite thick:
It's not a problem since I want to display the model with the hood open, and as usual at this scale, the standard moulding is too thick to fit in the open position. I got hold of a Pavla vacform canopy off EBay for a couple of quid. It's actually for the Hasegawa P-51 :
After half an hour's cutting and fettling, it fits perfectly, and looks like a more realistic shape:
I also picked up an Eduard Zoom p/e set, but I probably won't use all the parts. This is the first pre-coloured p/e I've used, so it will be interesting to see how I can match the cockpit colours up...
The only other mods I'm, going to make are brass tube gun barrels, wheel brake lines and replacing the solid plastic gunsight reflector with a sliver of acetate.
Yertis said:
Hang on - what happened to that Tornado you started?
I think I started a thread, but then...I can't remember what happened. I've got all the stuff I need, but I've not made a start yet. I've got loads of kits I want to build this year - not sure whether to start them all, or do one at a time.
Mutley said:
 Always enjoy following a Doc build.
I have a box load of starter kits, am introducing my nephew into the fun of kits this summer, so could well be inundated with glue and paint the next few months
I'd just crash in and build a few of them to get a feel for it. If he likes it then gradually refine the techniques. With a decent quality kit that's known to go together nicely, with a bit of help most people can make a nice model I think.
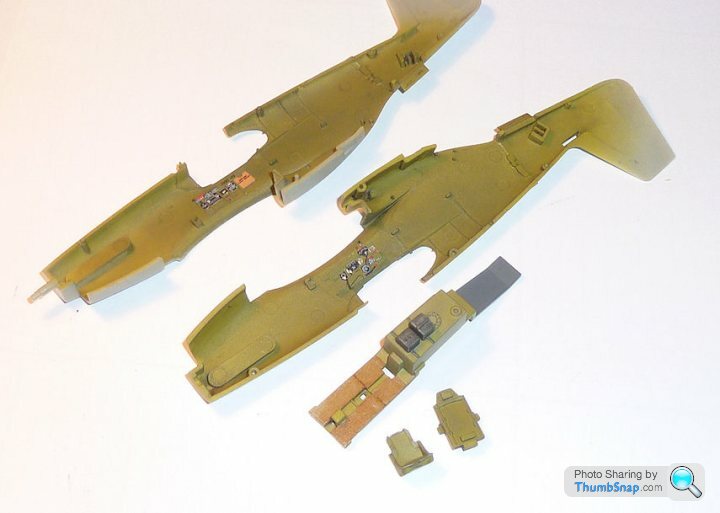
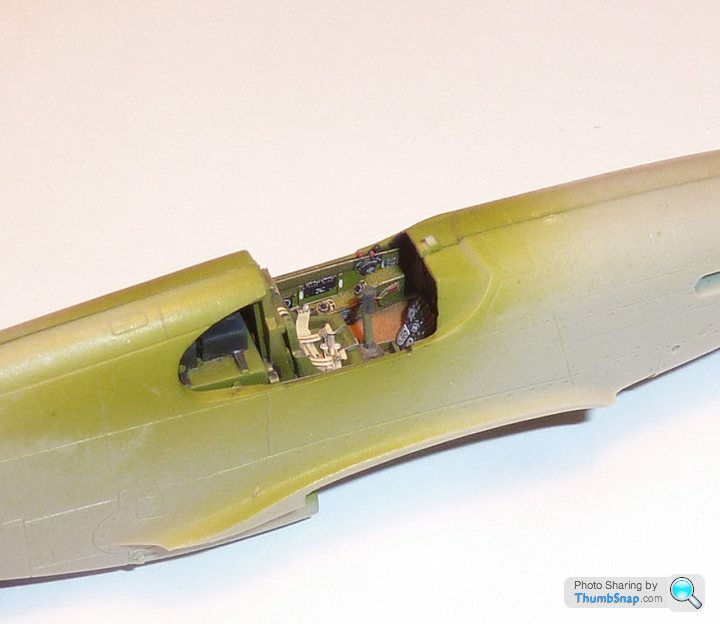
I made a start on removing the original moulded detail and thinning the cockpit sides tonight:
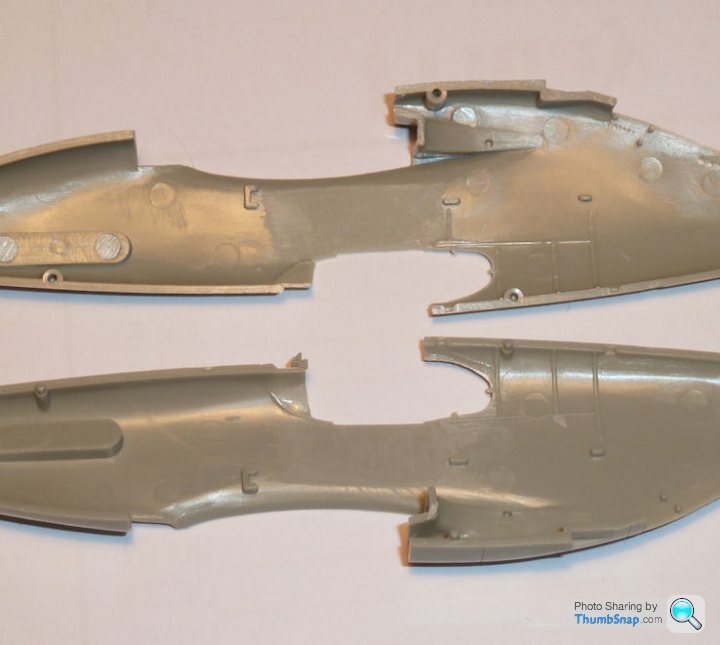
It's not strictly necessary, in order to fit the photo-etch, but since I'm having the canopy open, the cockpit cills would look too thick if left alone. I'm reducing wall thickness by about 25% overall (top half is nearly finished, bottom half is original thickness):
Hopefully tomorrow I can get them idential and straight, then make a start on detail painting.
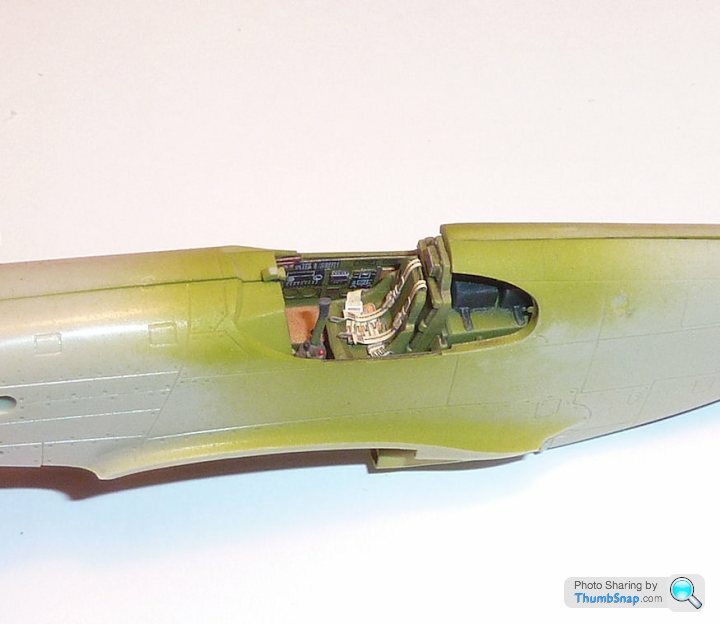
First stages of detail painting this evening; basic colours and a coat of Klear to get rid of the porosity ready for the next stages:
They all need a dark wash, dry brushed highlights and matt coat. I'll be adding the wheel brake pipes and data plates to the u/c legs before that though.
They all need a dark wash, dry brushed highlights and matt coat. I'll be adding the wheel brake pipes and data plates to the u/c legs before that though.
Tried to match the pre-coloured etch to the cockpit by using Tamiya pastels, but it was impossible. My initial misgivings about coloured etch are proving right. From the photo the match is perfect, but in daylight there is a distinct difference, so it will all probably have to be stripped to start again:
Red Firecracker said:
Can you not cover the detail that you want keep (the dials etc) with PVA and then blend in the cockpit green to minimise the step in colour change?
A lot of the detail is printed in the green bits. I think pva or masking fluid would remive the printing too. Its a case of mixing paint to suit. Its a pretty crap concept tbh. Resin is the best solution for adding detail.I ended up mixing some yellow, blue and olive green to get a match with the etch. I made it a shade lighter to compensate for the subsquent light weathering it will get. Even so , you can see in the picture how different it is from what I believe to be the correct zinc chromate green around the tailwheel well and radiator duct. It will do. I also painted the stripes on the spinner and finished one u/c leg. I tried Bare Metal Foil on the sliders to represent chrome and it worked OK. 1:72 is a bit small for that technique though.
Eric Mc said:
Have a go. You will learn a lot by doing and messing up.
Small 1/72 kits are cheap (under £10 mostly) so can be "wasted" as you learn. If you have a stash of unbuilt kits, select one of the simplest you have and give it a try.
Dr Gn's models are top class - and a beginer won't be able to match his levels. I've been building for almost 50 years and would never achieve that skill level either.
But that doesn't matter. Build to the standard YOU are happy with - and use the good Dr as a source of inspiration (as I do), not as a discouragement.
I appreciate your comments, but I'm not sure the way I build a model is fundamentally any different from anyone else, yours included.Small 1/72 kits are cheap (under £10 mostly) so can be "wasted" as you learn. If you have a stash of unbuilt kits, select one of the simplest you have and give it a try.
Dr Gn's models are top class - and a beginer won't be able to match his levels. I've been building for almost 50 years and would never achieve that skill level either.
But that doesn't matter. Build to the standard YOU are happy with - and use the good Dr as a source of inspiration (as I do), not as a discouragement.
I've been model building for as long as I can remember (and I'm 43), but it was only this past 4 years or so that I've tried different techniques. Even so, the standard of my models is much higher than it was 4 years ago. The first model I tried anything new on was the Globemaster, there is a build log on PH somewhere. The Globemaster was the lightbulb moment when I realised that things like preshading and washes are in fact, not at all difficult, but they make a massive difference to the look of a model. The rest is basic modelling like cleaning parts up well, filling gaps and masking canopies. All things that even now I usually have to make multiple attempts at.
The real uber-modellers - the ones who can really weather a model realistically, are still in a different class, and I'm not even sure I'm that motivated to try to join them. I'm fairly happy with the standard I'm at.
Cardigan kid, you should just have a go as Eric suggested. At the end of the day you're building something unique that didn't previously exist, which is a nice feeling. Your skills will undoubtedly improve. One thing is for sure though: If you don't make a start, you'll always be at the same level!
Ayahuasca said:
Nudge....white wall tyres

Glad I found this thread I love Dr model builds.
Thanks, yeah he mentioned that his crew chief painted them with "barn paint" as a personal touch. I think the main tyres will be easy, but I might be defeated by the tailwheel tyre, unelss I can find some spare circular white decals to put on there.Glad I found this thread I love Dr model builds.
Red Firecracker said:
dr_gn said:
Thanks, yeah he mentioned that his crew chief painted them with "barn paint" as a personal touch. I think the main tyres will be easy, but I might be defeated by the tailwheel tyre, unelss I can find some spare circular white decals to put on there.
Diameter, thickness, density. Sorted 

Ayahuasca said:
Why did they use this model of P-51 (with the non-flush fuselage and non-bubble canopy) this late in the war? I note the first Old Crow had the flush fuselage and bubble canopy.
Bud Anderson had three 'Old Crow' P-51's: Two B models (the first got shot down while being flown by another pilot and was fitted with the birdcage canopy), the second was this one and IIRC he shot down the most aircraft with this. The third was the D model with the bubble canopy.Before the P-51's there was also a P-39 'Old Crow', and later an F-105D known as "Old Crow II" which he flew in Vietnam.
Red Firecracker said:
dr_gn said:
Cockpit's done. It's all a bit bright, particularly the harness, but they were pre-painted. I might try toning them down a bit, but otherwise it will do:
They look very new, don't they. Would be nice if they produced them with a bit of wear, but then I guess they feel they'd be just at fault on some models. At least this way they allow the modeller to weather or age them to their requirements and taste.RichB said:
dr_gn said:
...I might be defeated by the tailwheel tyre, unelss I can find some spare circular white decals to put on there.
Would it not be easier to paint the whole wheel white, then pick out the silver strut and paint on the black surface with a fairly hard brush? Gassing Station | Scale Models | Top of Page | What's New | My Stuff