1:250 Scale Paper Model: Fishing Boat "Wuppertal"
Discussion


I've seen a few of these ship models built up in the Hamburg Maritime Museum and at the Telford show, and have always been mighty impressed with the levels of details possible with just paper. I bought this one a few years ago at the museum (10 Euros), and finally made a start.
The models come in the form of a book which contains both the printed parts and the instructions, plus a brief history of the vessel (in German):

I also bought the supplementary laser cut card details set, for things such as railings on other fine components:
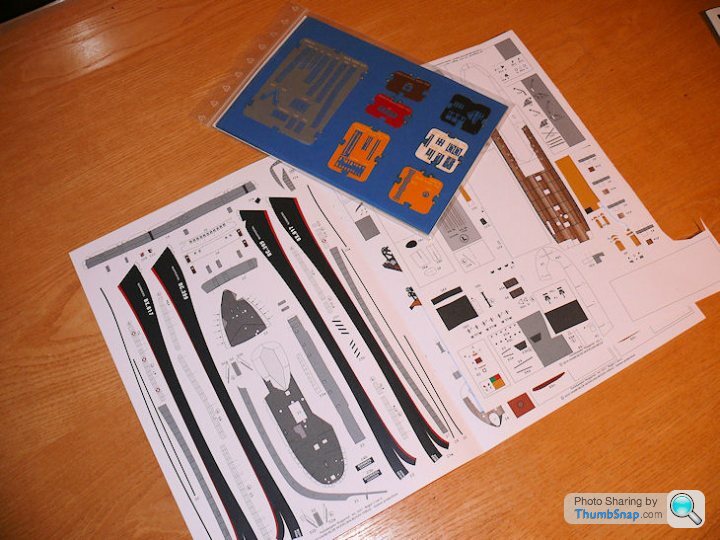
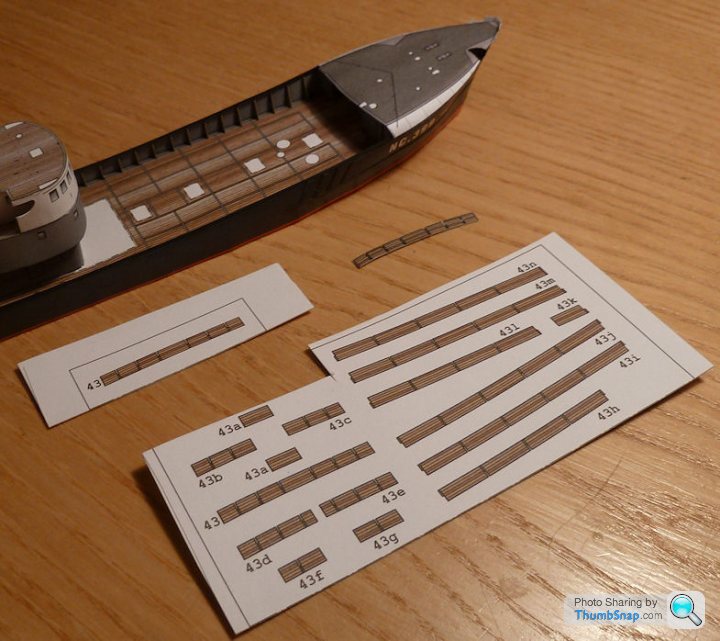
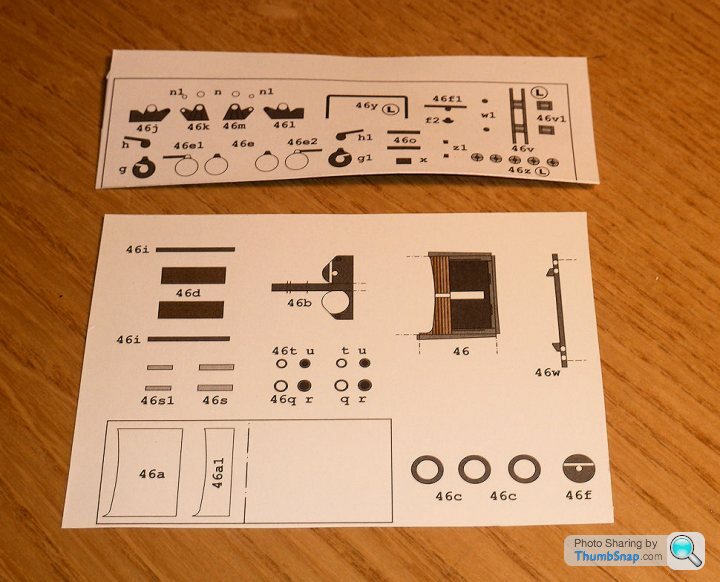
First job is to thoroughly read and understand what the instructions mean, then very carefully cut out the appropriate parts:
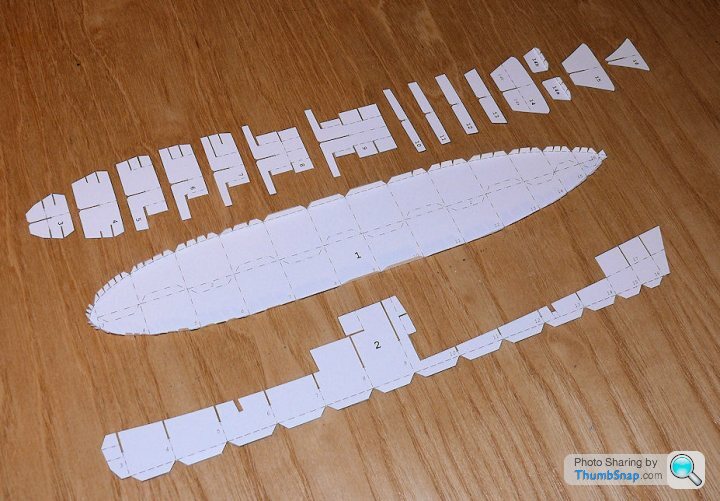
Then piece the parts together:
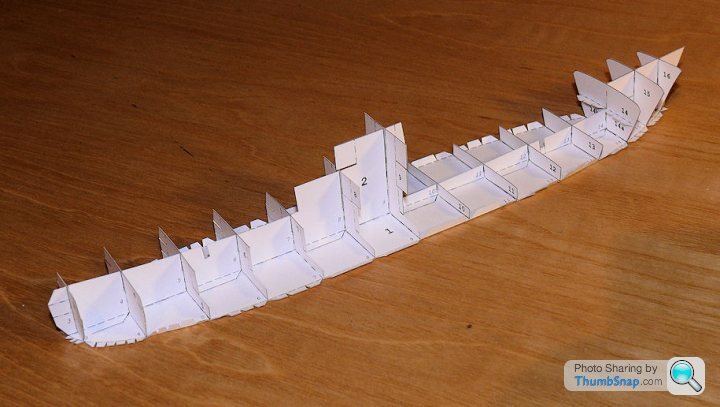
The manufactureer (HMV) had a stall at Telford last year, and the guy there recommended UHU as the best adhesive. I'd assumed PVA, but he said it would wrinkle the paper. Anyhow, I tried UHU, but as expected it was hopeless for sticking tiny bits of paper together: Far too 'grabby' and stringy. I reverted to PVA applied by a cocktail stick and had no problems at all:

Some pieces need two or three layers of backing paper to build up the thickness.
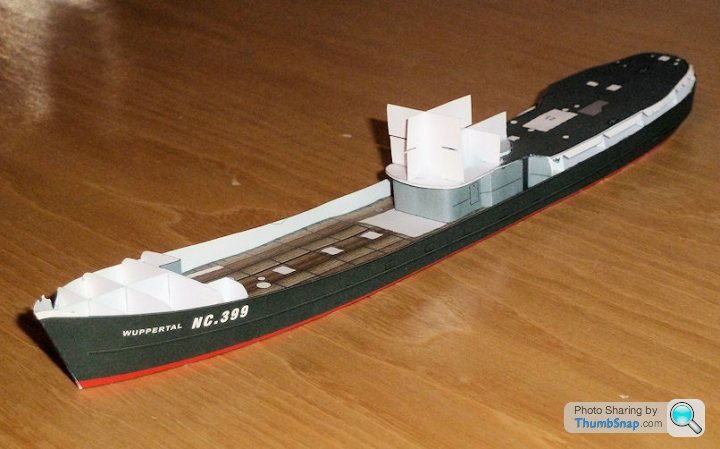
The above is about 3 hours work. Strangely therapeutic, especially since there is no painting required, and all the parts so far, have been a perfect fit. The model is about 240mm in length when complete.
The models come in the form of a book which contains both the printed parts and the instructions, plus a brief history of the vessel (in German):
I also bought the supplementary laser cut card details set, for things such as railings on other fine components:
First job is to thoroughly read and understand what the instructions mean, then very carefully cut out the appropriate parts:
Then piece the parts together:
The manufactureer (HMV) had a stall at Telford last year, and the guy there recommended UHU as the best adhesive. I'd assumed PVA, but he said it would wrinkle the paper. Anyhow, I tried UHU, but as expected it was hopeless for sticking tiny bits of paper together: Far too 'grabby' and stringy. I reverted to PVA applied by a cocktail stick and had no problems at all:
Some pieces need two or three layers of backing paper to build up the thickness.
The above is about 3 hours work. Strangely therapeutic, especially since there is no painting required, and all the parts so far, have been a perfect fit. The model is about 240mm in length when complete.
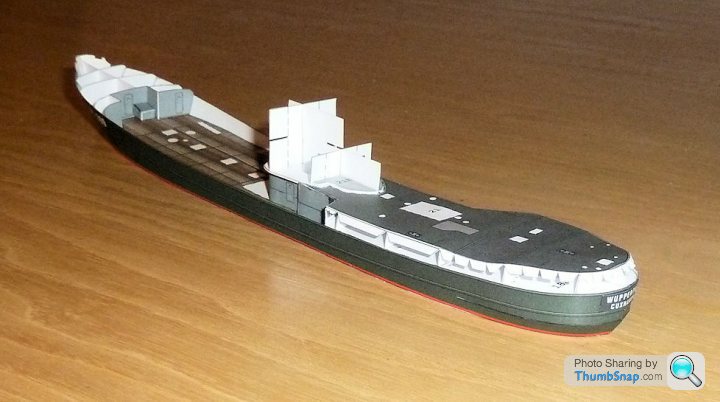
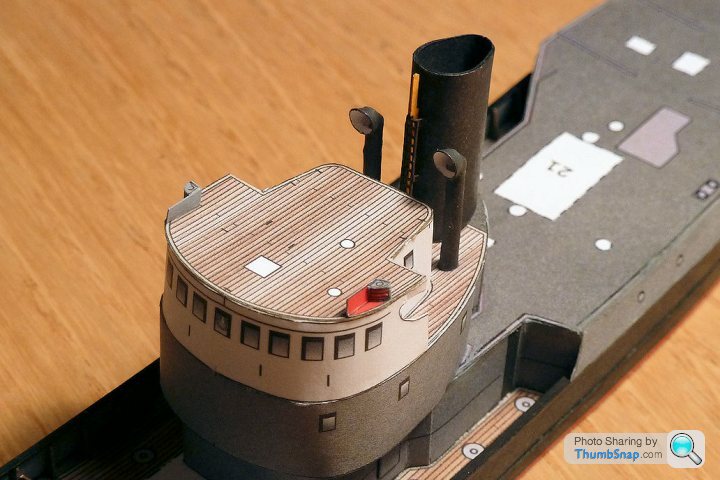
Got a couple more decks on and the rear bulkhead of the forecastle (if that's what it's called):
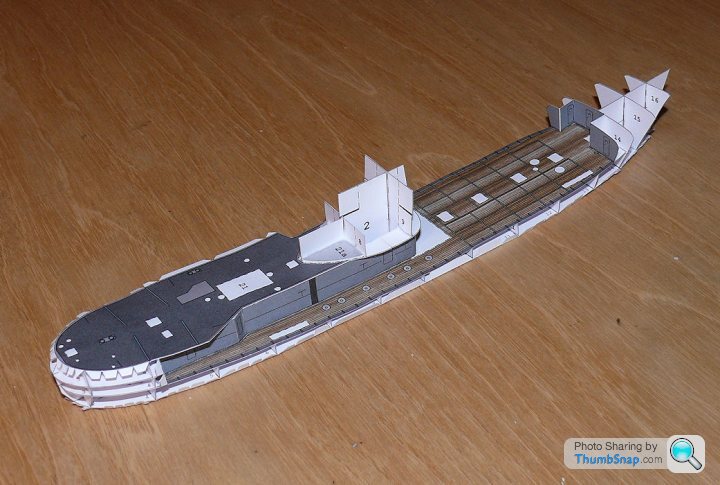
This is probably the most demanding bit of modelling I've ever done in terms of the accuracy of assembly required. If something is 0.5mm out, everything after that becomes even further out. Plus everything is a bit wobbly until the glue has set. It's great to see it come together though - respect to whover designed it.
This is probably the most demanding bit of modelling I've ever done in terms of the accuracy of assembly required. If something is 0.5mm out, everything after that becomes even further out. Plus everything is a bit wobbly until the glue has set. It's great to see it come together though - respect to whover designed it.
esuuv said:
Good work there.
I like paper models - there are loads online, you can just print yourself - mainly meaning if you mess up a piece you can just replace it.
On a PH theme, there Yamaha have some pretty complex motorbikes
http://global.yamaha-motor.com/yamahastyle/enterta...
and some racing cars.........
http://www.epson.jp/sponsor/nakajima/craft/
One little tip is to buy a big packet of felt tip pens - before you glue pieces together run it round and colour in the edge where you've cut the paper - saves ugly white lines.
I also tend to use superglue - you only ever need a minute amount so no wrinkle problems and it sets on contact.
Thanks, and thanks for the links. I like paper models - there are loads online, you can just print yourself - mainly meaning if you mess up a piece you can just replace it.
On a PH theme, there Yamaha have some pretty complex motorbikes
http://global.yamaha-motor.com/yamahastyle/enterta...
and some racing cars.........
http://www.epson.jp/sponsor/nakajima/craft/
One little tip is to buy a big packet of felt tip pens - before you glue pieces together run it round and colour in the edge where you've cut the paper - saves ugly white lines.
I also tend to use superglue - you only ever need a minute amount so no wrinkle problems and it sets on contact.
Do you happen to know of any Star Wars paper model sites for free download? My son would love to try one.
I did read about felt pens along the edges, and it's something I'll need to do. The problem is matching the colour andapplying it acccurately enough. I was going to try brushing a bit of graphite dust along the creases.
I wish I'd have scanned the parts first so that I had a copy in case of errors. Next time I'll do that.
Cheers.
esuuv said:
Not quite free - but only a few quid for an X Wing or R2D2, his super cars are pretty good too - am currently building the Ferrari.
http://visualspicer.com/store/
Thanks for that, I might have a go. Do you know where there's an AT-AT card model?http://visualspicer.com/store/
perdu said:
That looks like fun doc, I think I'm going to enjoy this
I built a few of the paper/card railway buildings when P jnr has his train set pash, many years ago
I may even build some of these paper ones like this now you've reawakened the interest
Looks good
Ta Perdu,I built a few of the paper/card railway buildings when P jnr has his train set pash, many years ago
I may even build some of these paper ones like this now you've reawakened the interest
Looks good
I built a few card buildings a couple of years ago for the railway, but this is a bit more tricky. For a start it's pretty much paper rather than thick card, there are lots of compound curves around the hull, and the levels of detail are much greater.
I'm pretty much starting from zero, so at least I can make mistakes and have an excuse! I think I'll be making more of these. They are fun to build.
This is the Bismarck from the same company:
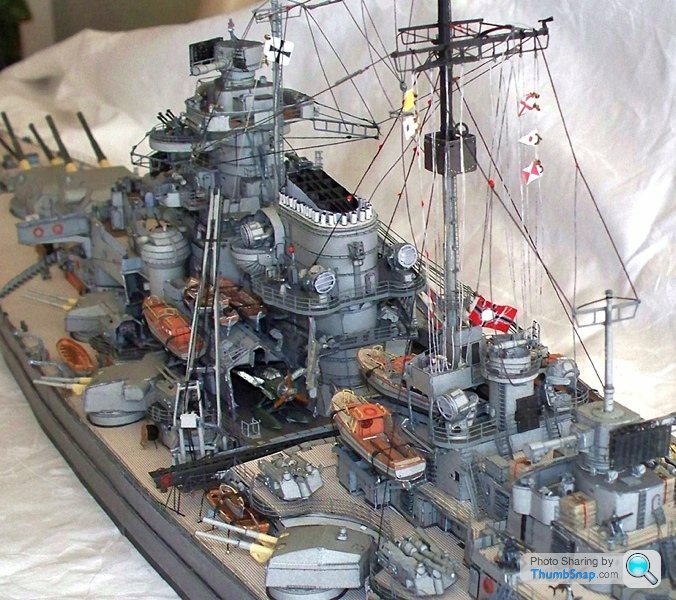
http://i-am-modelist.com/2012/07/15/bismarck-2/
...which I think is pretty unbelievably good no matter what it's made out of, never mind paper.
Got to the stage of having to correct my inevitable self imposed tolerance stack, which is taking some time...I also took esuuv's advice about the visible cut lines. I found a pretty much exact match with Vallejo acrylic medium grey and applied it with a fine brush. It did make a big difference to the model.
Anyway, first bits of laser-etched card went on this evening - the triangular hull stiffeners. I'm sure there is a proper term for them, but I don't know it yet:

The laser etched card is comparable in fidelity with the photo-etched brass I'm used to using for plastic models:

Anyway, first bits of laser-etched card went on this evening - the triangular hull stiffeners. I'm sure there is a proper term for them, but I don't know it yet:
The laser etched card is comparable in fidelity with the photo-etched brass I'm used to using for plastic models:
Edited by dr_gn on Tuesday 26th August 23:49
Yertis said:
dr_gn said:
MonkeySpanker said:
I think the term your looking for is either; gussets, fillets or ribbing.
I love it when you talk dirty.Or from what I can find...Bulwark Stanchions?
I've been struggling with assembling the 'lids' of closed boxes, especially when they have compound curves around the edges. With the closure panles there is no way of pre-assembling with tape to get the fit right, then applying glue from the inside (which is what I've been doing). With the forecastle deck I decided to cut access holes in the waterline base through which I could apply glue to the back of the taped join. Not pretty, but it did the job and the bodge will be invisible when mounted on a base(if I get that far!).


The deck box structure is made up of interlocking sections of doubled paper. The paper is printed and cut so that the markings appear on both sides:
And here they are fitted to the deck:

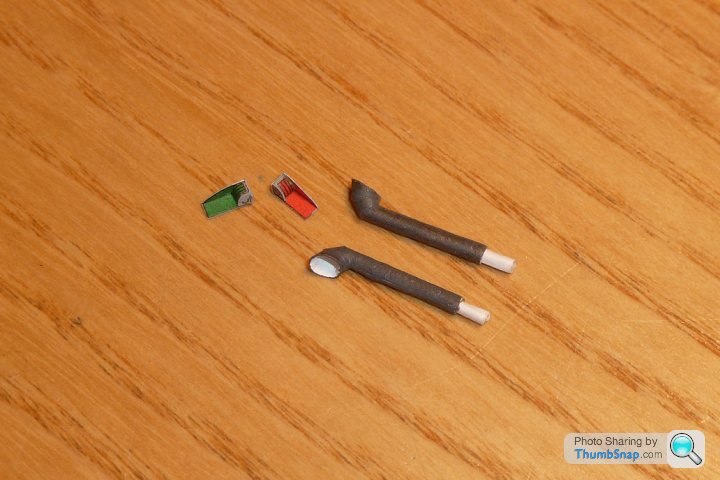
Here are some folded deck boxes and hatches, and the navigation lights for the top of the wheelhouse. Each light is made up of three parts; a reflector, lens and lid:

And here they are fitted to the deck:
Here are some folded deck boxes and hatches, and the navigation lights for the top of the wheelhouse. Each light is made up of three parts; a reflector, lens and lid:
shortar53 said:
dr_gn said:
Here are some folded deck boxes and hatches, and the navigation lights for the top of the wheelhouse. Each light is made up of three parts; a reflector, lens and lid:
are those reflectors curved?This kit is definitely a step (or 10) ahead of the free stuff i've done so far. Think I might have a look in my LMS today
Completed both lights, and built up the wheelhouse ventilators. Each one is made up of three sections which aere rolled into shape and stuck to each other:
I made some spigots out of rolled paper and fitted them into holes drilled into the deck to give a strong join. Here they are in place along with the navigation lights:

I made some spigots out of rolled paper and fitted them into holes drilled into the deck to give a strong join. Here they are in place along with the navigation lights:
Just realised the insides of the ventilators should be red. Never mind I'll do them again later.
I think these things are called King Pulleys. They fit on the deck and lines go around them from the main winch to - I assume - the nets. Here they are in pieces:

And built up:

Currently building the main winch, which is probably the most complex assembly of the whole model.
I think these things are called King Pulleys. They fit on the deck and lines go around them from the main winch to - I assume - the nets. Here they are in pieces:
And built up:
Currently building the main winch, which is probably the most complex assembly of the whole model.
Here are the winch components on the sheet:
Which is doubled, and then the components cut out. Some are tiny:

I've already formed the winch drums into shape and applied glue, just need all edges painting then assembly. There is a bit of laser cut card to add too.
Which is doubled, and then the components cut out. Some are tiny:
I've already formed the winch drums into shape and applied glue, just need all edges painting then assembly. There is a bit of laser cut card to add too.
Edited by dr_gn on Friday 12th September 16:47
Gassing Station | Scale Models | Top of Page | What's New | My Stuff