1:48 scale DH Mosquito T.III RR299
Discussion


Hi folks.
I used to be an avid modeller as a boy/teenager but stopped when I left home due mainly to lack of anywhere suitable/comfortable to spray paint.
I'm trying to get back in to model making again now although I'm usually distracted from my own projects on to simpler ones within 10 minutes as my keen-as-mustard 4 year old daughter appears wanting to join in... not that I'm complaining of course!
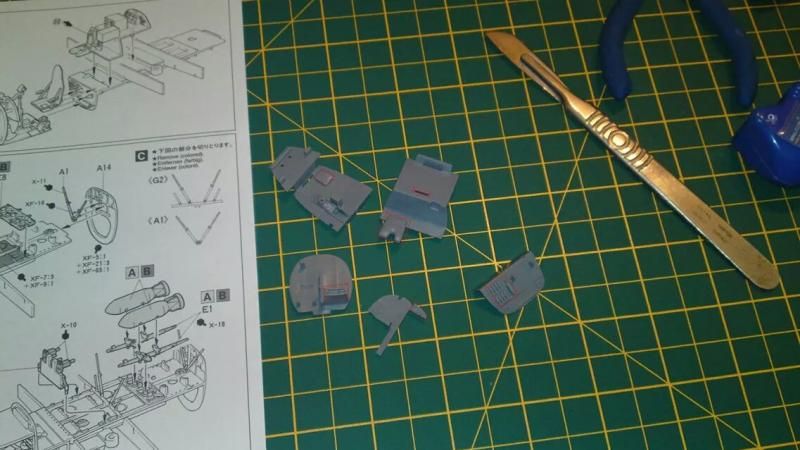
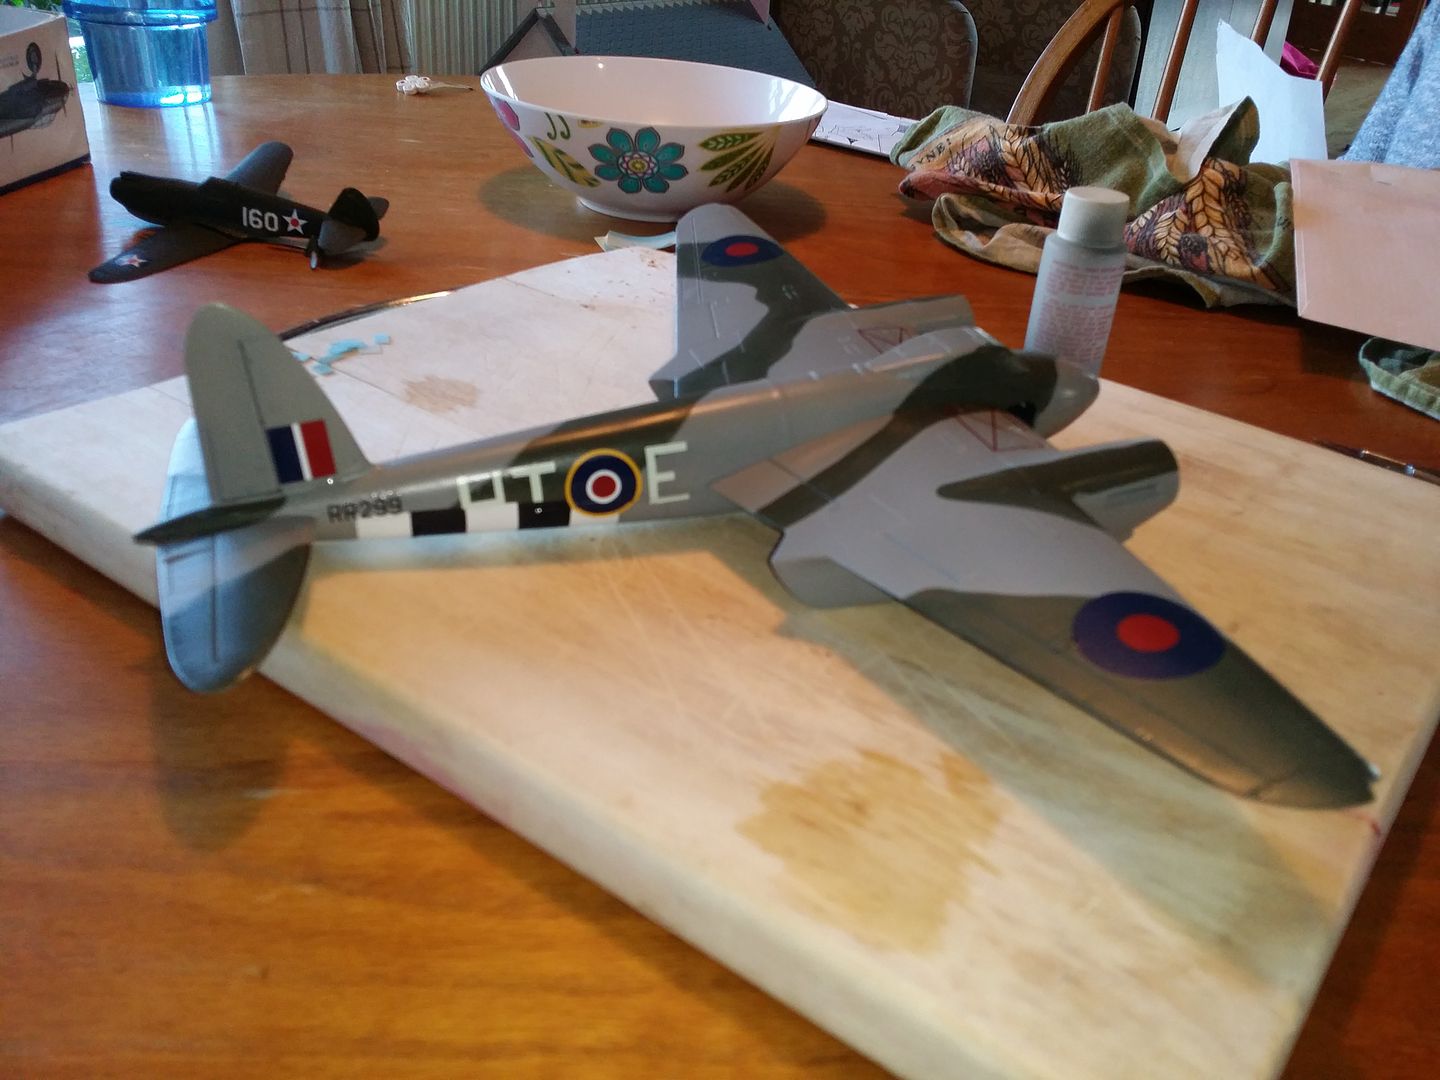
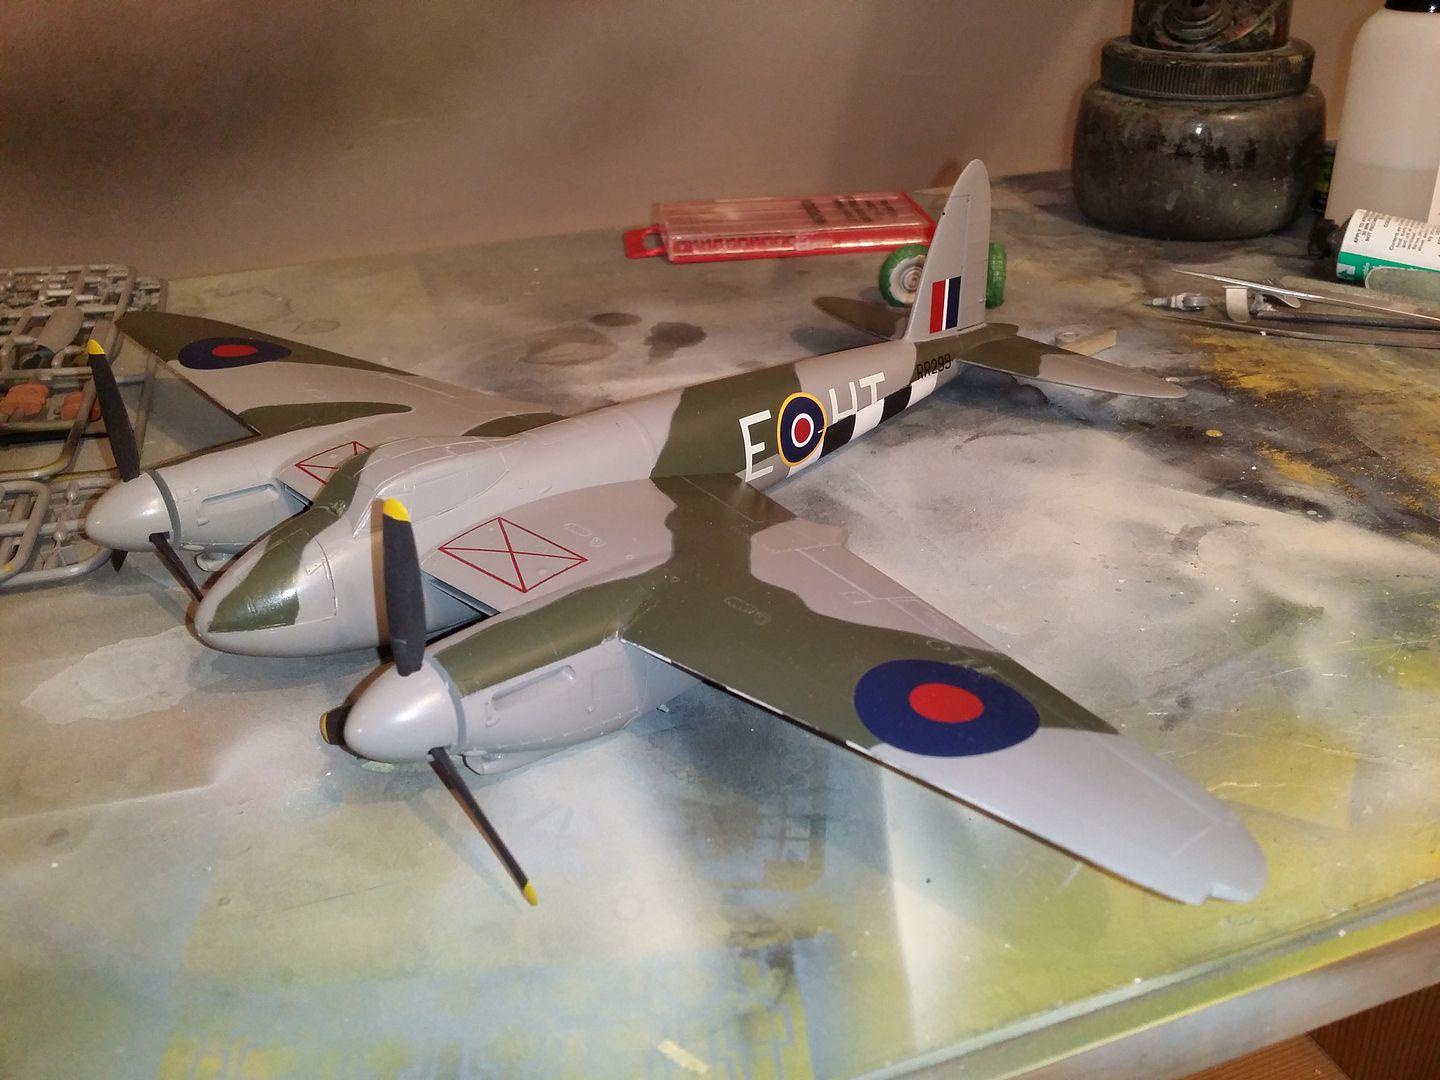
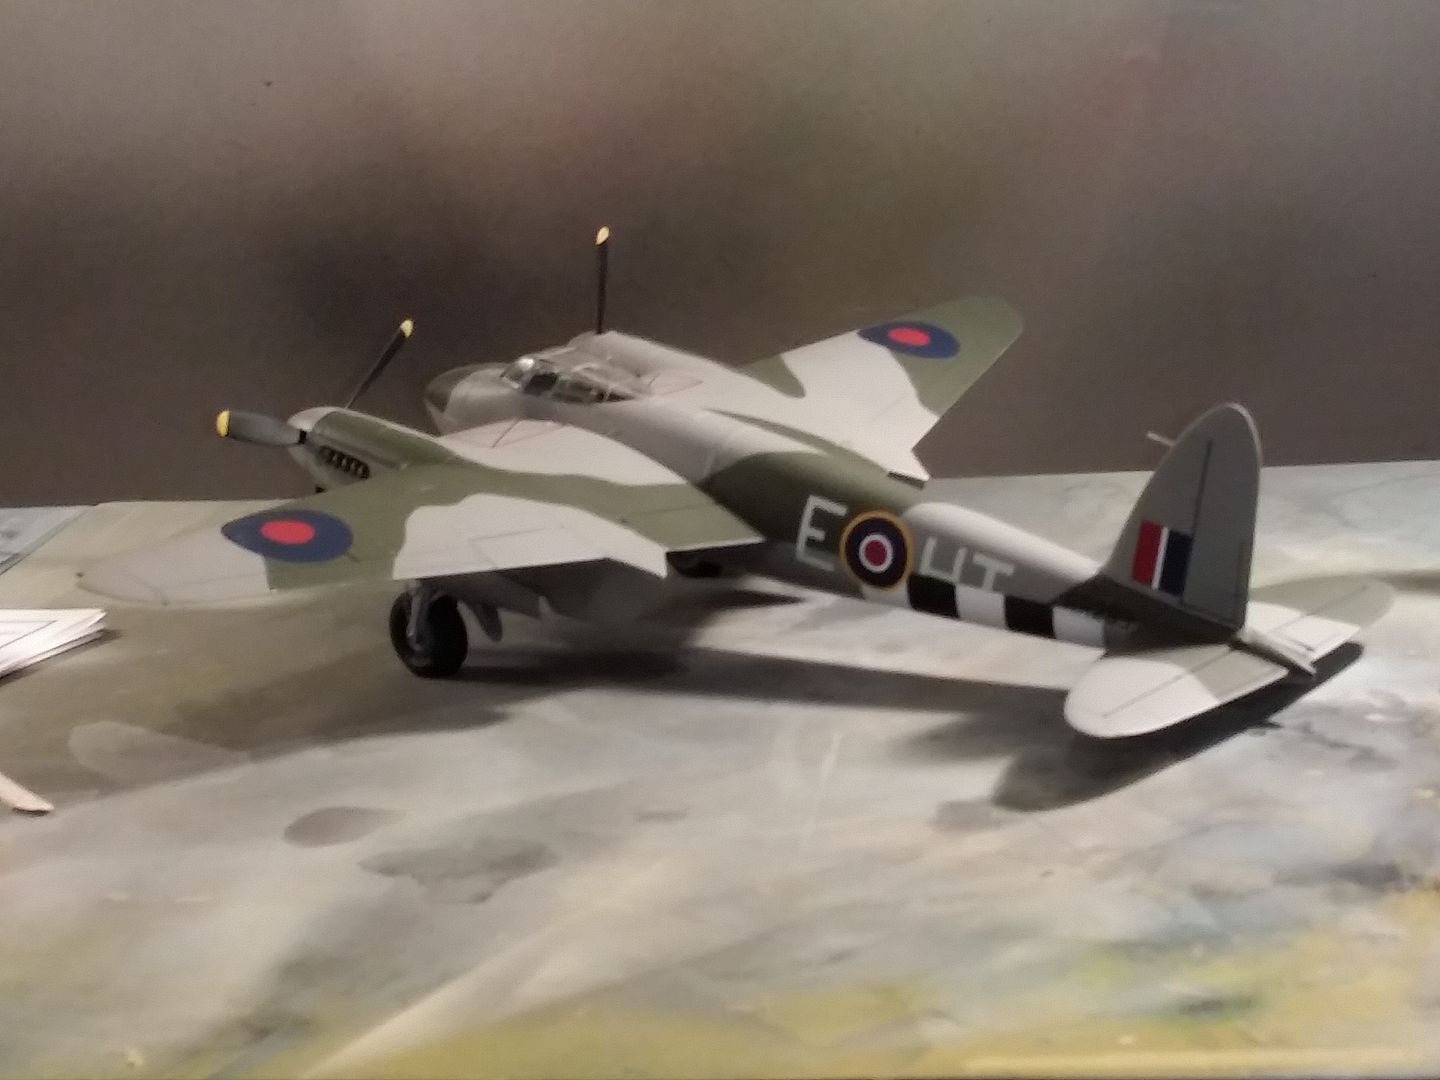
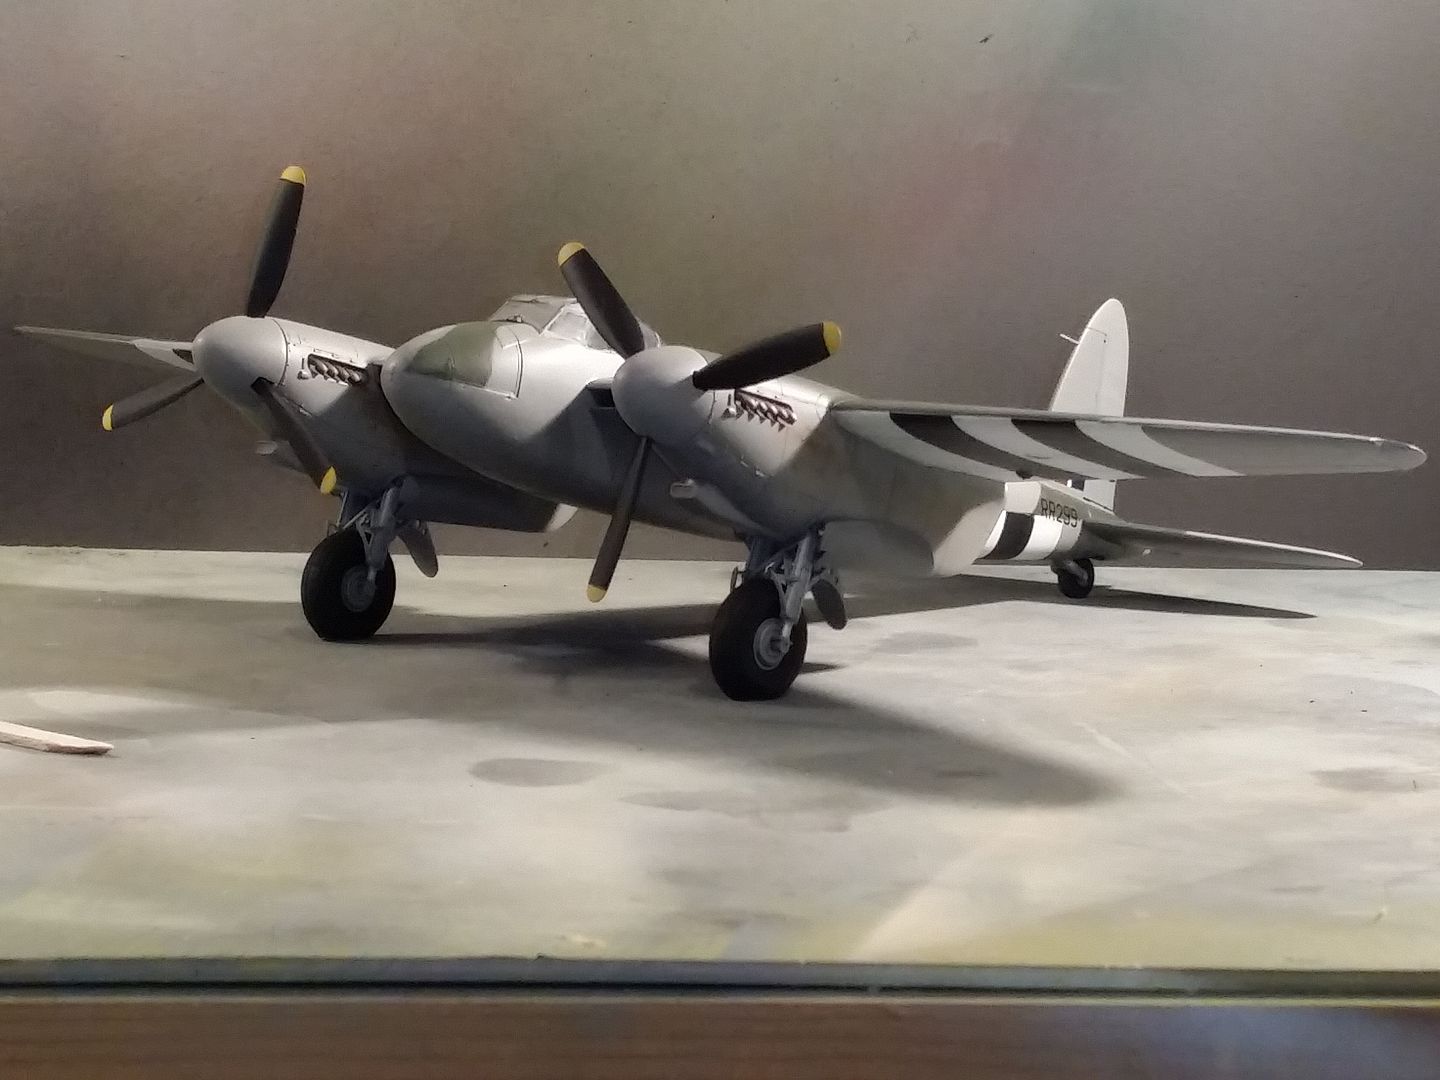
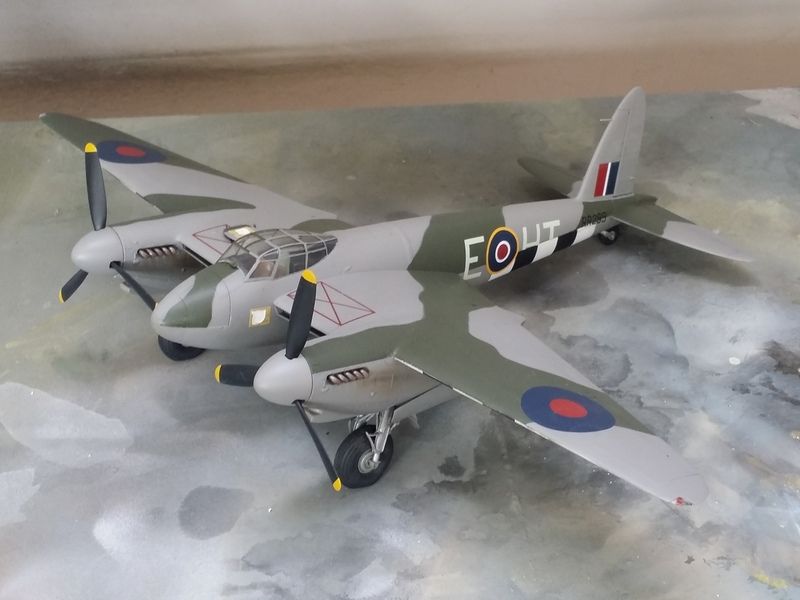
I started this simple conversion of a Tamiya FB.IV a while ago, bought some resin bits and collected some photographs and picked it up again over the weekend. I'm modelling G-ASKH, the BAe operated Mosquito formerly registered as RR299 in RAF service and wearing the ficticious squadron codes HT-E from its time in the terrible film "Mosquito Squadron".
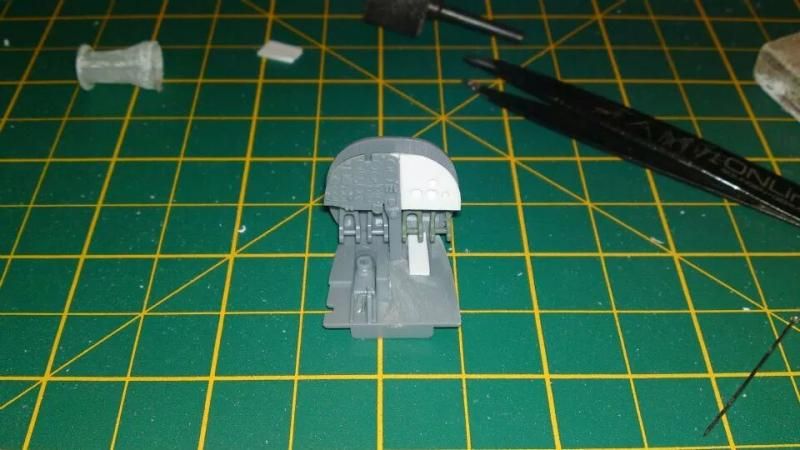
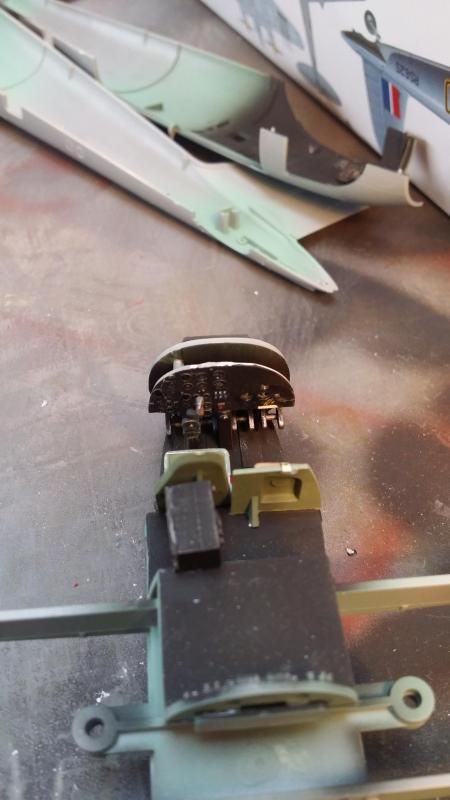
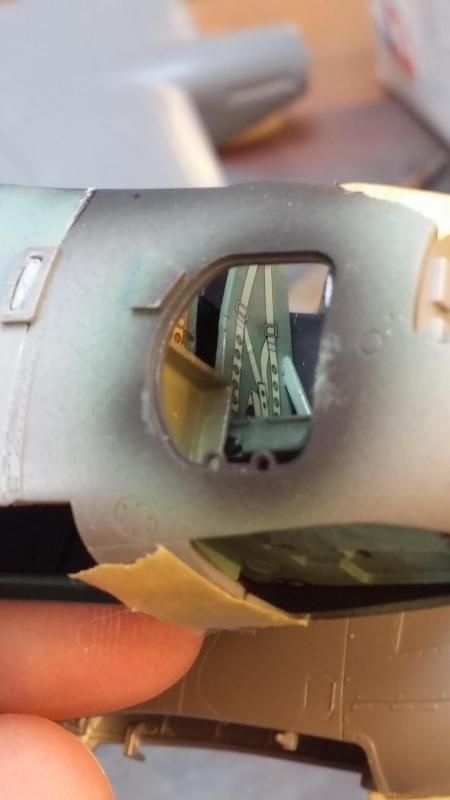
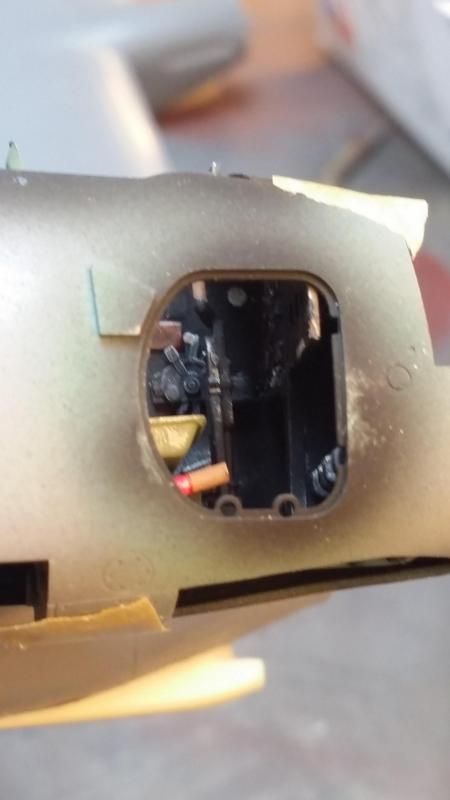
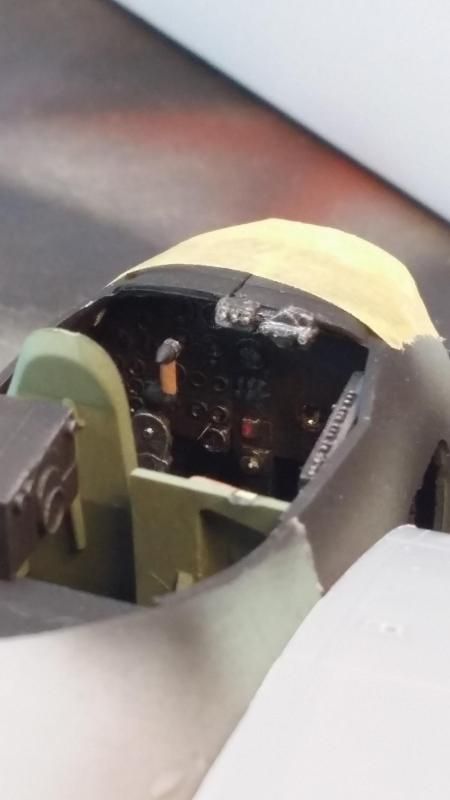
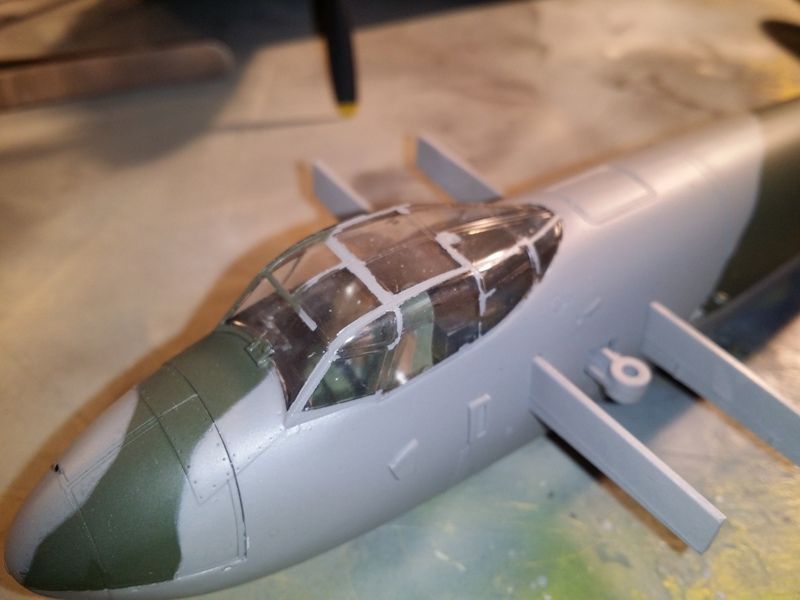
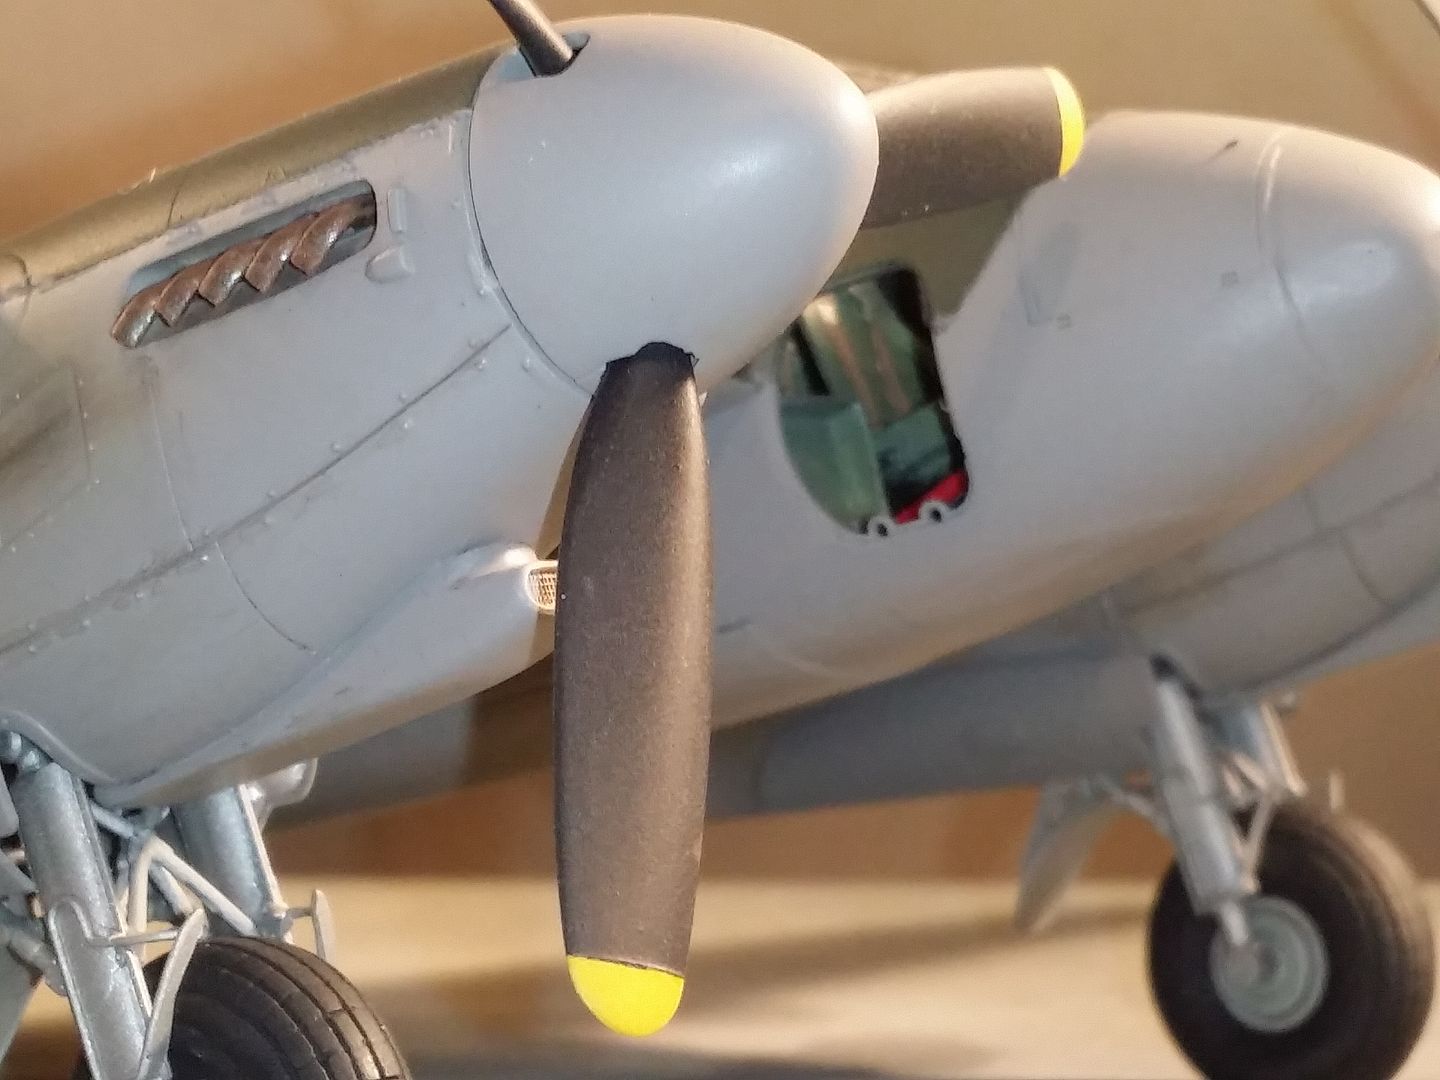
I've done an approximation of the cockpit. From my references, RR299 appeared to have a black painted cockpit and flew with the instructor's control column removed to aid access.
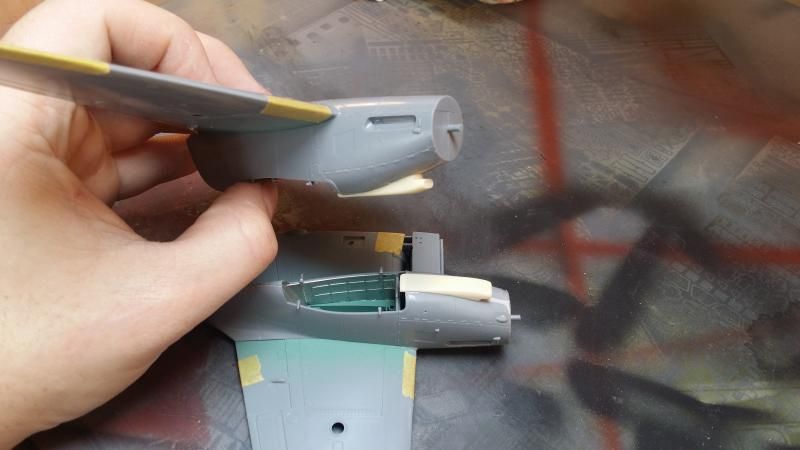
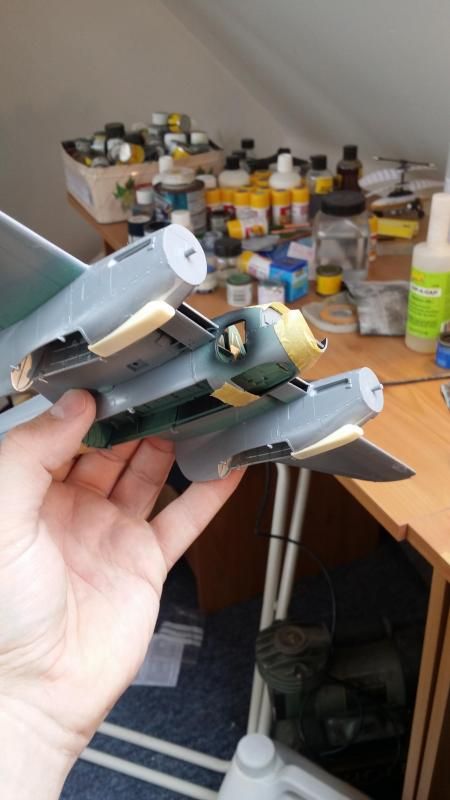
I've changed the carburrettor intakes for the tropical filter type.
General pics
Since the house move everything hobby-related has been dumped outside in my big barn/shed thing. Last night I started moving some 1/48 kits indoors. There's still more to sort through plus other scale stuff.
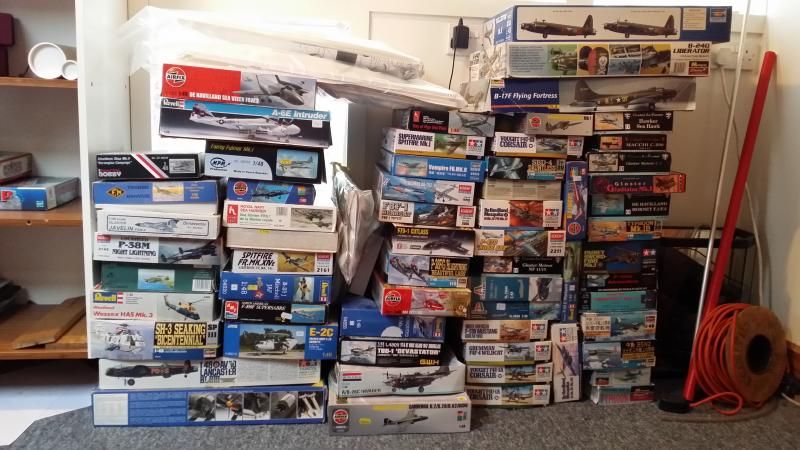
Should keep me busy for a while!
I used to be an avid modeller as a boy/teenager but stopped when I left home due mainly to lack of anywhere suitable/comfortable to spray paint.
I'm trying to get back in to model making again now although I'm usually distracted from my own projects on to simpler ones within 10 minutes as my keen-as-mustard 4 year old daughter appears wanting to join in... not that I'm complaining of course!
I started this simple conversion of a Tamiya FB.IV a while ago, bought some resin bits and collected some photographs and picked it up again over the weekend. I'm modelling G-ASKH, the BAe operated Mosquito formerly registered as RR299 in RAF service and wearing the ficticious squadron codes HT-E from its time in the terrible film "Mosquito Squadron".
I've done an approximation of the cockpit. From my references, RR299 appeared to have a black painted cockpit and flew with the instructor's control column removed to aid access.


I've changed the carburrettor intakes for the tropical filter type.


General pics


Since the house move everything hobby-related has been dumped outside in my big barn/shed thing. Last night I started moving some 1/48 kits indoors. There's still more to sort through plus other scale stuff.

Should keep me busy for a while!
That's my problem in a nutshell Eric.
I've decided 1/48 is the worst possible scale. It's big enough to see everything but too small to do anything about it in most cases. Still, I'm heavily invested in 1/48 so will stick with it! I just need to stop beating myself up and finish stuff - nobody else cares a jot anyway!
I've decided 1/48 is the worst possible scale. It's big enough to see everything but too small to do anything about it in most cases. Still, I'm heavily invested in 1/48 so will stick with it! I just need to stop beating myself up and finish stuff - nobody else cares a jot anyway!
Brigand said:
jamieduff1981 said:
As for your kit though, its looking good so far, it'll be interesting to see how it finally turns out.

I used to be far more productive as a youngster. Then again, it was all about getting it finished. Quality was coincidental if any was apparent in the finished product and I could certainly spend much more time than I could money. That has reversed somewhat now of course. The main reason was that I never really stopped buying interesting stuff although I did slow the pace. I always wanted to get back in to it.
As others have said above, I like to have several on the go at once as my mood chops and changes a lot, both in terms of the subject and my enthusiasm for it and the physical nature of the task itself - e.g. sometimes I prefer gluing things together, other times I prefer painting. Sometimes I like to get busy with scalpels and razor saws! Having a few on the go keeps it interesting
Progress on the Mossie will slow up soon but shall resume in a few weeks...
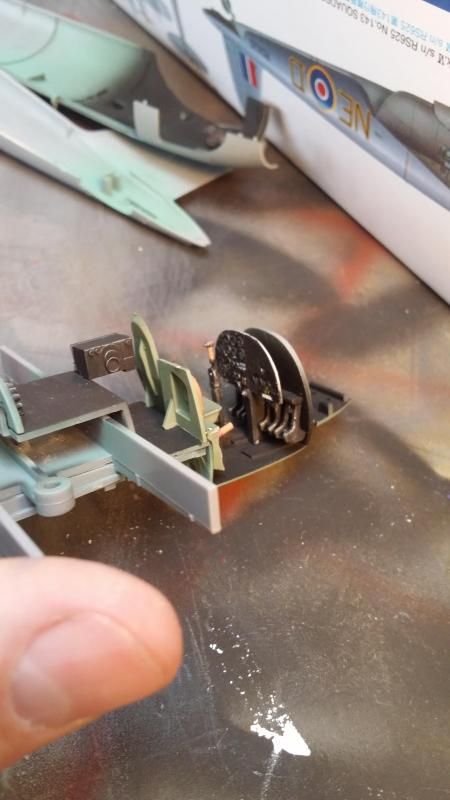
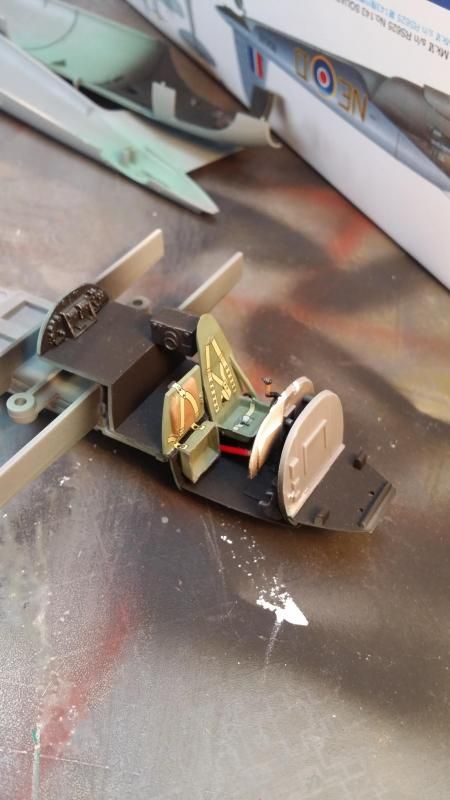
Keen not to lose momentum and stall in this early phase of getting back in to modelling, I did a brief check on Hannants and decided to make new belts from some Bare Metal Foil I had lying around. They could be better - but I want to move on. The last thing I need is another potentially well detailed pile of bits in a box for years!
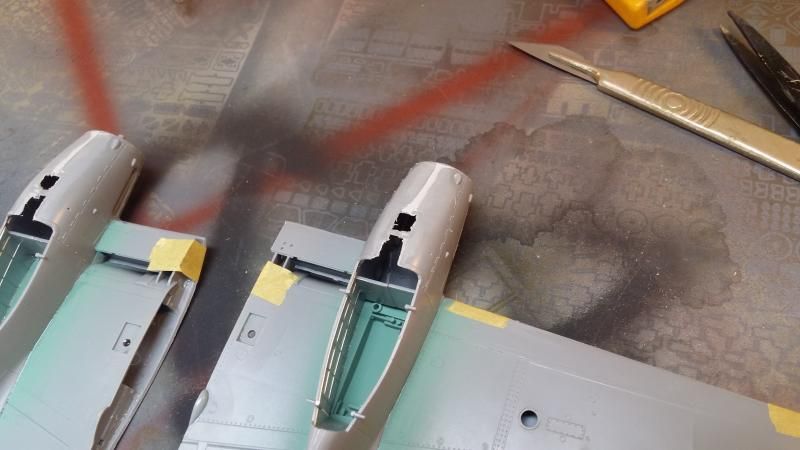
I've given the fuselage seams a sand and they need a light fill. I've also filled the gun ports. These were patched over on the T.III and still visible on the real thing.


I've given the fuselage seams a sand and they need a light fill. I've also filled the gun ports. These were patched over on the T.III and still visible on the real thing.

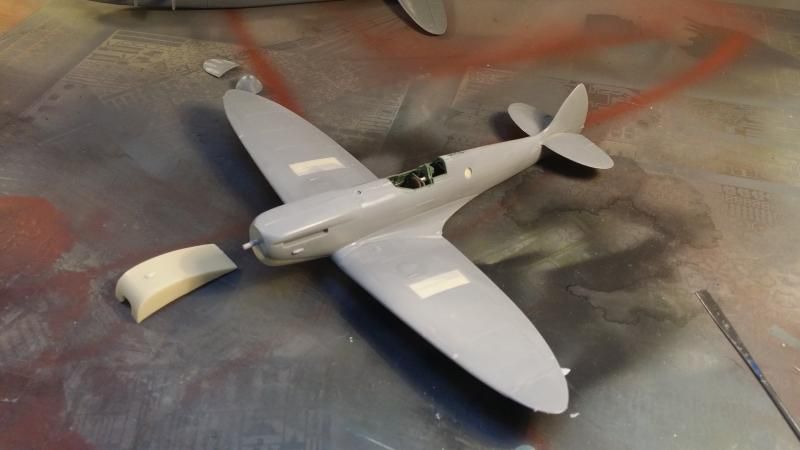
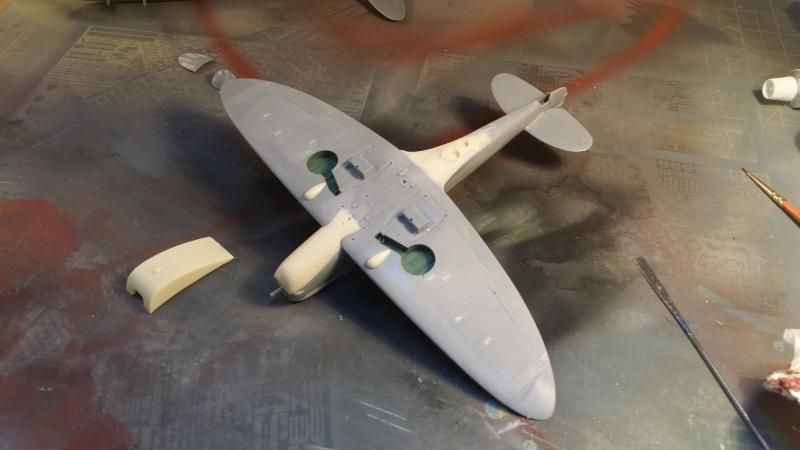
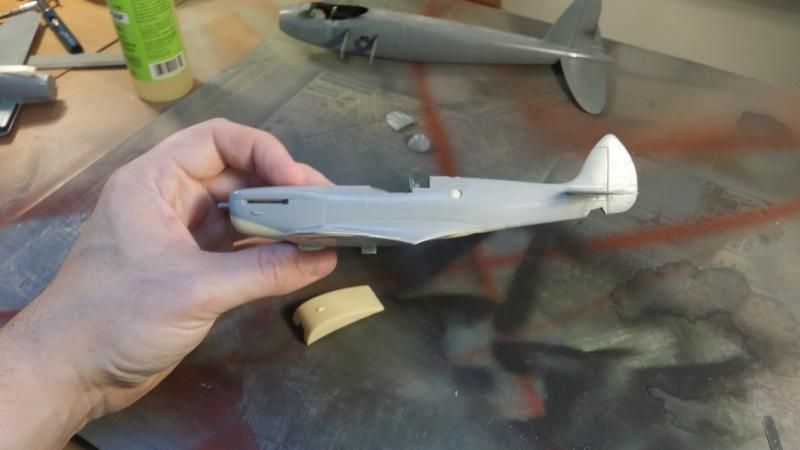
I've done a tad more tonight. I've sanded the fuselage filler and needed a touch more for a couple of low spots. In between I've been pushing this Spitfire PR.X conversion along to get it ready to be sprayed pink. It's a Hasegawa Mk.IX kit I had and an Airwaves conversion I picked up for it a while ago.
Anyway, back to Mossies.
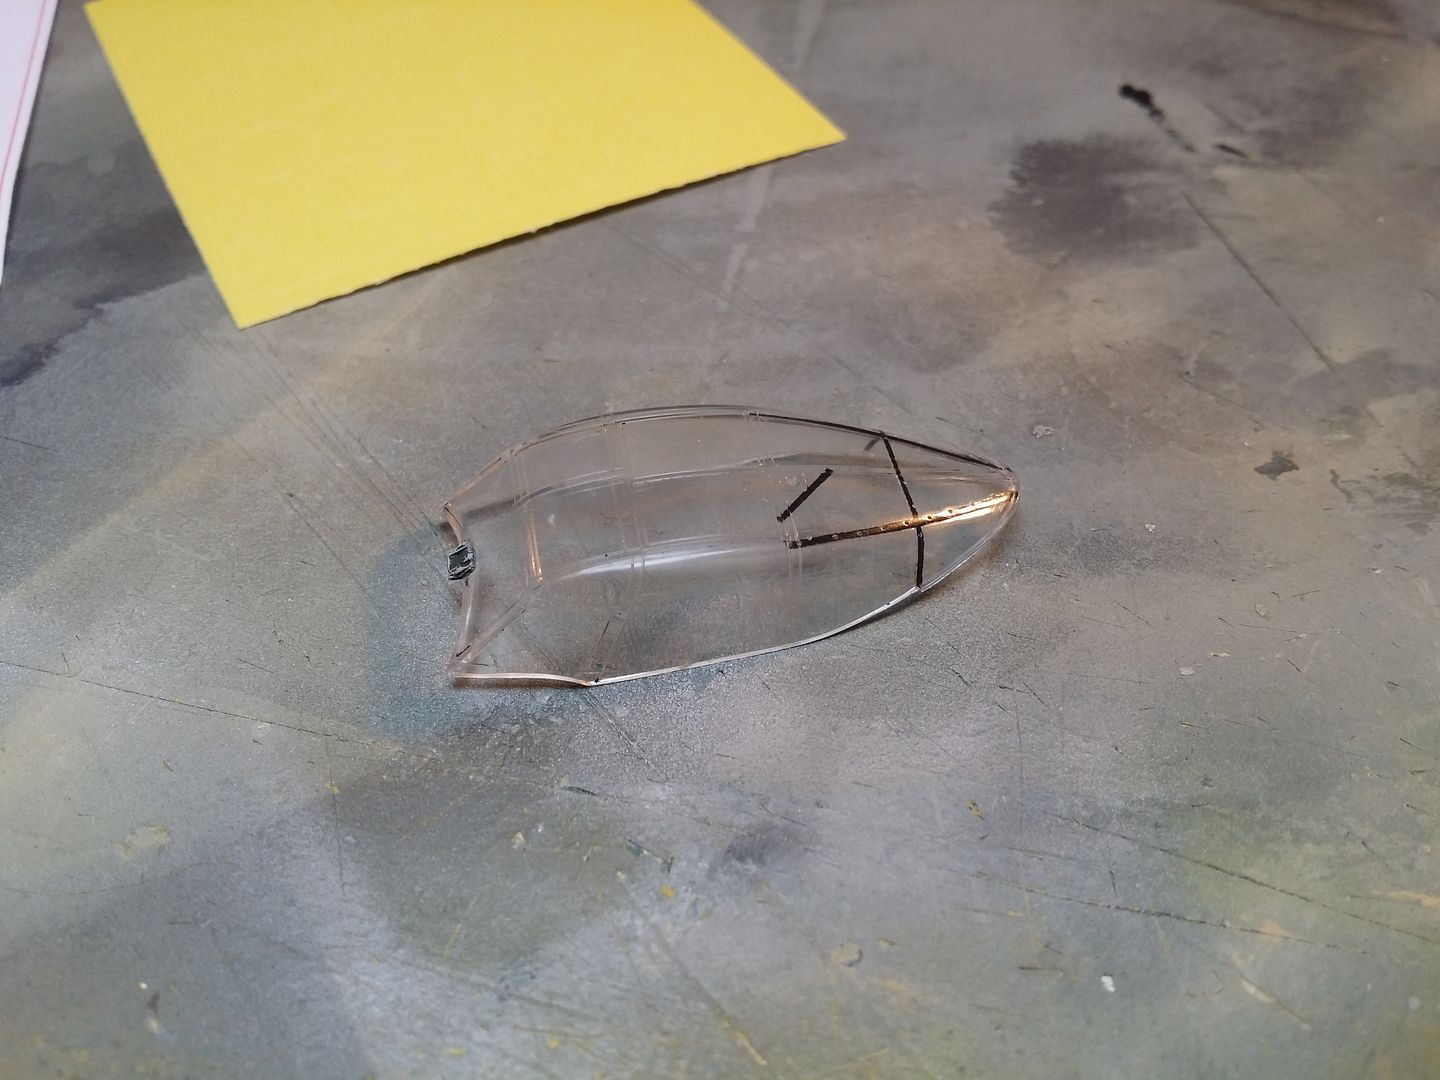
The Tamiya FB.VI kit has a windscreen wiper moulded on to the armoured windscreen thus:

RR299 did not appear to have the windscreen wiper fitted in any photographs I can find. It makes sense. It looks like it would get right in the way and when operated as G-ASKH on the airshow circuit it would have flown on a Permit to Fly and been restricted to VFR flying both legally and by the desire to preserve and protect the aircraft by BAe.

So, I sliced away the wiper with a scalpel. The windscreen was then sanded and polished back to an acceptable finish.
Scary:

Not so bad:


Anyway, back to Mossies.
The Tamiya FB.VI kit has a windscreen wiper moulded on to the armoured windscreen thus:

RR299 did not appear to have the windscreen wiper fitted in any photographs I can find. It makes sense. It looks like it would get right in the way and when operated as G-ASKH on the airshow circuit it would have flown on a Permit to Fly and been restricted to VFR flying both legally and by the desire to preserve and protect the aircraft by BAe.
So, I sliced away the wiper with a scalpel. The windscreen was then sanded and polished back to an acceptable finish.
Scary:

Not so bad:

Risky business for sure - but that wiper would have irritated me had it stayed!
I've built maybe 3 or 4 Tamiya Mossies previously and have used both the supplied decals for the canopy framing and painted it. Painting looked best on the last one I did. The first one I used decals and the middle one or two (I forget exactly how many) I also painted but struggled to mask it neatly inside, although I got there in the end and I learned the hard way that it needed several more coats of paint than I gave it. The middle one I can remember looked worse than the decals and it was a massive pain in the backside.
I applied the decals to this one tonight and have clearfixed it on!
80/20 rule in action!
dr_gn said:
Fiddly scope creep hmmm. Welcome to my world.
Your Tornado is nice though I started a 1:48 GR1 which I lost momentum with. I won a competition with a 43Sqn F.3 with dropped flaps and slats using Paragon Designs bits. I decided to do it again in green & grey wraparound GR1 flavour as I remember them as a kid but with more detail, so I have that huge Flightpath etched brass and resin detail & weapons set and again the Paragon Designs flaps and slats. It can be difficult to see how to proceed when projects become over complicated and too many construction sequence and painting conflicts arise. This was one such case. There's a Buccaneer in a similar state. I'll finish them one day.
Raise your offer to £25 
I came back from holiday to some surprise news about a close relative's late-stage cancer diagnosis so the modelling has been biffed again for the most part.
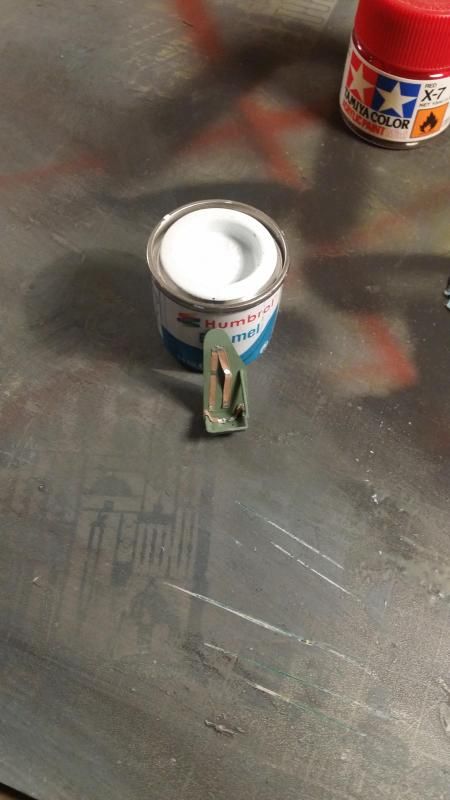
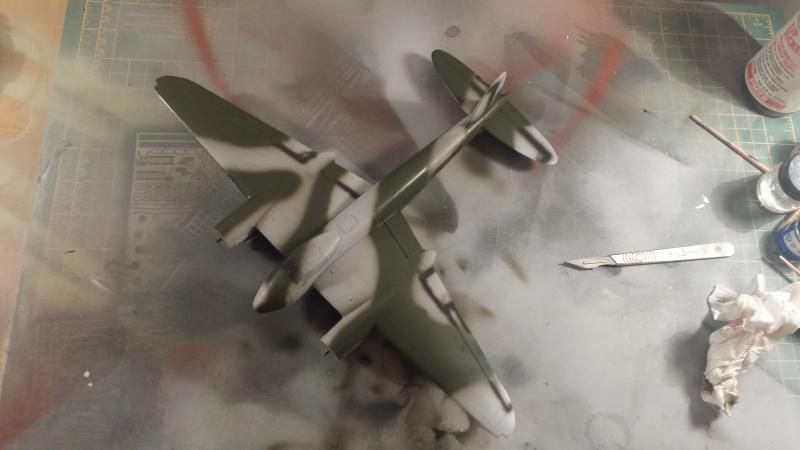
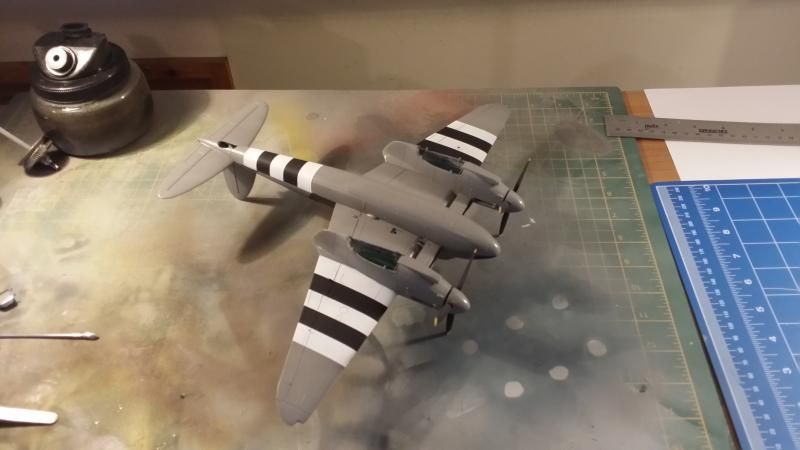
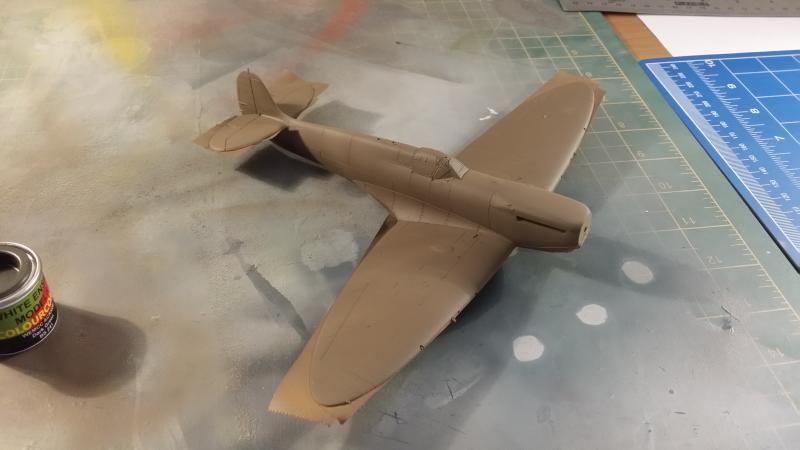
I did opt to start painting however, albeit as and when it suits. It was given a light coat of Tamiya surface primer because I had some handy. I did some very dark grey pre-shading (I think I tend to coat thicker than some as when using medium contrasts I've been unable to see anything at all when finished) around the cowlings and hinge lines. Humbrol enamel white was used to apply the white for the D-Day stripes worn by RR299 which were then masked and overpainted with Humbrol enamel black.
That all dried by around 2130 last night, so I marked out the camoflage pattern worn by RR299 with reference to all the photos I've downloaded from Google Images and applied the dark green, which was an Xtracrylic colour.
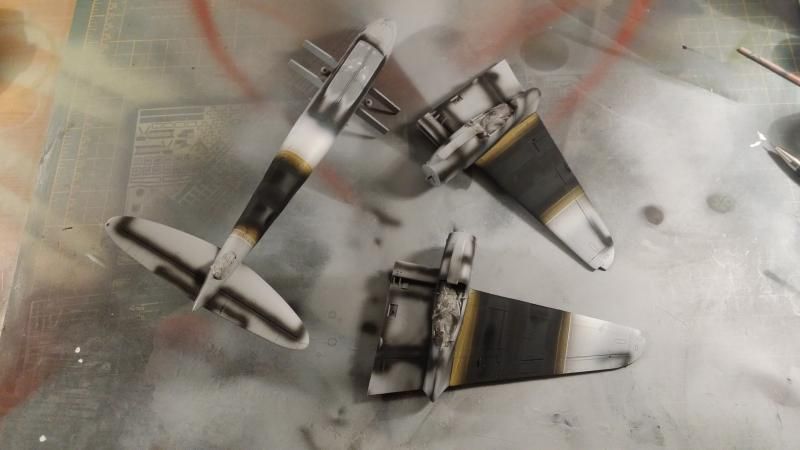
I then went to bed. Car parking is ridiculous now that the area around my work is over-run with multiple construction companies erecting new office blocks in very close proximity and coning off the roadsides all around and digging up carparks. In order to drive in 30 miles from the countryside to get parked, beating the obese pie-fuelled tobacco breathers who drive in from locations a 5 minute's walk away, I have the alarm clock set for 04:50, which is a little anti-social in my book! Still that's what the team-funded Nespresso machine is for!
I came back from holiday to some surprise news about a close relative's late-stage cancer diagnosis so the modelling has been biffed again for the most part.
I did opt to start painting however, albeit as and when it suits. It was given a light coat of Tamiya surface primer because I had some handy. I did some very dark grey pre-shading (I think I tend to coat thicker than some as when using medium contrasts I've been unable to see anything at all when finished) around the cowlings and hinge lines. Humbrol enamel white was used to apply the white for the D-Day stripes worn by RR299 which were then masked and overpainted with Humbrol enamel black.
That all dried by around 2130 last night, so I marked out the camoflage pattern worn by RR299 with reference to all the photos I've downloaded from Google Images and applied the dark green, which was an Xtracrylic colour.


I then went to bed. Car parking is ridiculous now that the area around my work is over-run with multiple construction companies erecting new office blocks in very close proximity and coning off the roadsides all around and digging up carparks. In order to drive in 30 miles from the countryside to get parked, beating the obese pie-fuelled tobacco breathers who drive in from locations a 5 minute's walk away, I have the alarm clock set for 04:50, which is a little anti-social in my book!
Still that's what the team-funded Nespresso machine is for! This model has suffered a series of setbacks in painting.
I regret choosing acrylics for this. In my break from modelling I'd forgotten just how badly I get on with them.
I made a bit of an impulse purchase and bought my favourite enamel paint brand a week ago and have been busy (well, my wife has) building a webstore and getting other stuff set up.
I may strip the Mossie back and start over with enamel.
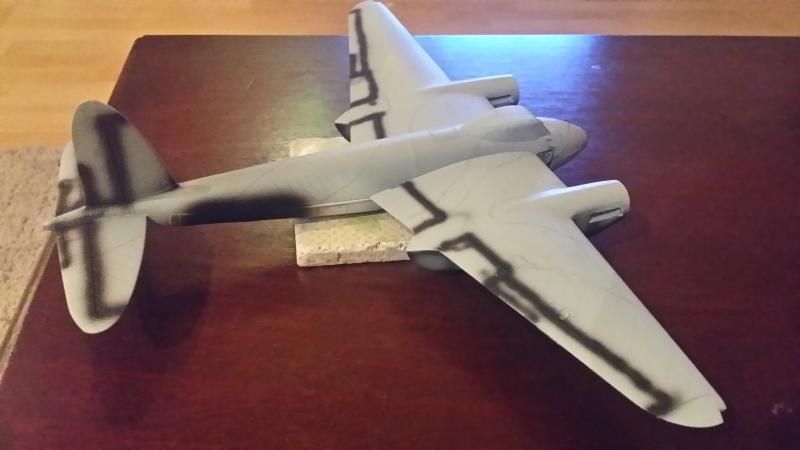
At first, yes. I sprayed the Dark Green first. It went on fine but lifted when masked. After mucho rubbing down I got a decent and robust coat on. Today I masked it up again with blu tac and Tamiya tape and sprayed the Medium Sea Grey. It got loads of mixing, even using my new electric mixer gadget. Consistency seemed spot on too but it just spat out of the airbrush, generally tried to clog and looks very uneven on the model.
I may give it a flat back, throw away that particular pot of paint and flash another coat from another pot over before getting too drastic!
I may give it a flat back, throw away that particular pot of paint and flash another coat from another pot over before getting too drastic!
Can I ask what brand of flow improver you're using? I've never used any. It would be interesting to try though.
My modelling has taken a naval turn with a 1/350 collection starting. I have HMS King George V in 1941 fit on the go with a Pontos Models detail set which is lovely. I also acquired Hood recently, and have been given Bismarck and Admiral Graf Spee. I'm writing this in a hotel 10mins from Wonderland Models where I picked up an ex-Accurate Miniatures Dauntless and I may run back and spend some more before they close!
I have 26,000 tins of enamel in the house so my usual excuse of not having the right colour handy is no longer valid - so I've changed to not having detail sets
The stash increased a tad more at Christmas:
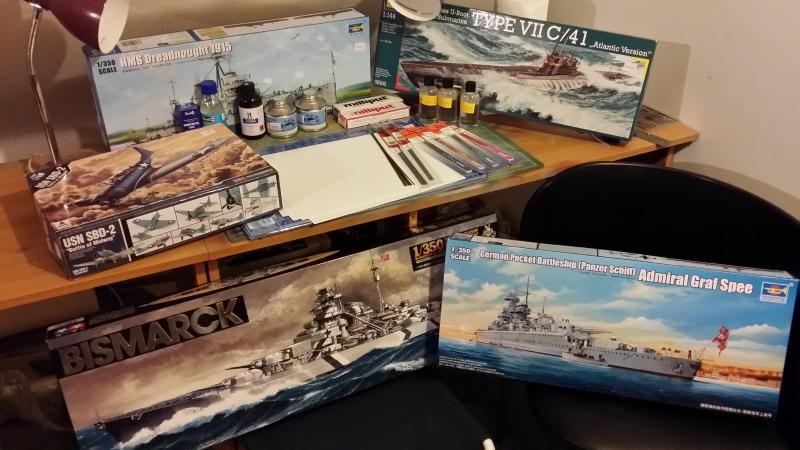
These are welcome additions which expand my collection of warships to 250% the current size. Here's an OT pic of HMS King George V that I'm currently working on:

HMS Hood has been mounted and will be started properly soon. I have to research who makes the best bits for the new ones at present.
Anyway - I think I've retrieved the situation with the Mosquito and am happy to move forwards with it now.
I've gone back to enamels which I prefer on this Spitfire Mk1A I've built with my daughter. I find them so much easier to use.

These are welcome additions which expand my collection of warships to 250% the current size. Here's an OT pic of HMS King George V that I'm currently working on:
HMS Hood has been mounted and will be started properly soon. I have to research who makes the best bits for the new ones at present.
Anyway - I think I've retrieved the situation with the Mosquito and am happy to move forwards with it now.


I've gone back to enamels which I prefer on this Spitfire Mk1A I've built with my daughter. I find them so much easier to use.

Edited by jamieduff1981 on Thursday 1st January 16:22
The Mosquito became a Shelf of Doom resident for a while, mostly due to paint problems.
I decided to crack on and finish it, just accepting the poor quality paint. It continues to vex me though - the lovely pre-cut canopy masks were wasted since all the acrylic paint peeled and flaked off the canopy frames when the masking was removed. Never again ...
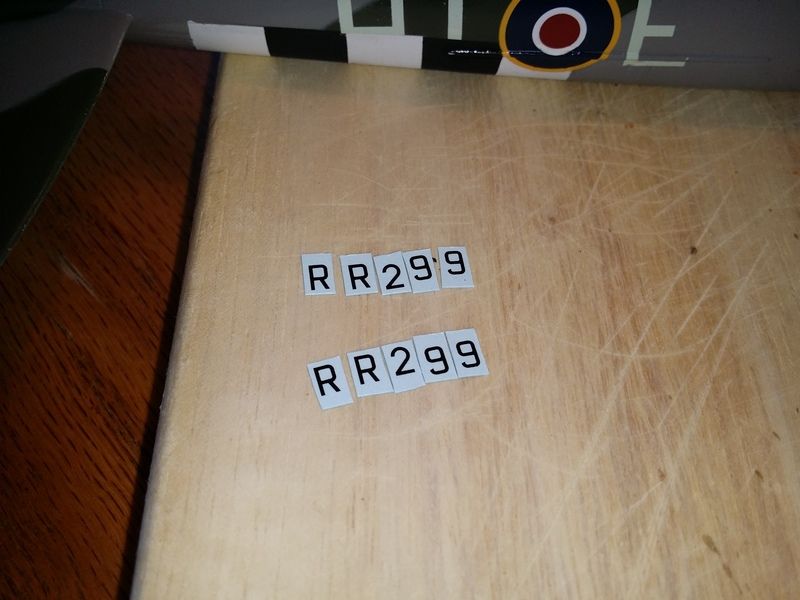
The decals are part Tamiya (although in retrospect the Tamiya roundel blue is far too dark. I had to touch up the roundel where it cracked when Microsol'd over the strengthening strip above the battery door on the fuselage and I had to mix 2/3 roundel blue (which I know is accurate) with 1/3 night bomber black to get a dark enough blue to match the decal) and part Xtradecal (i.e. the lettering and numbering).
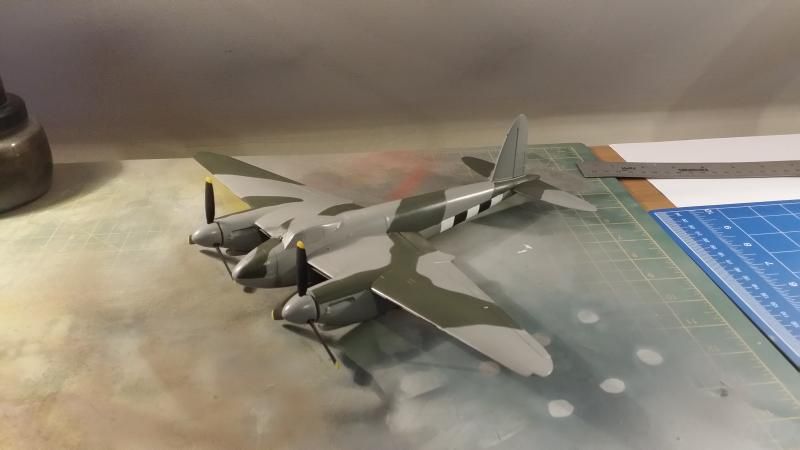
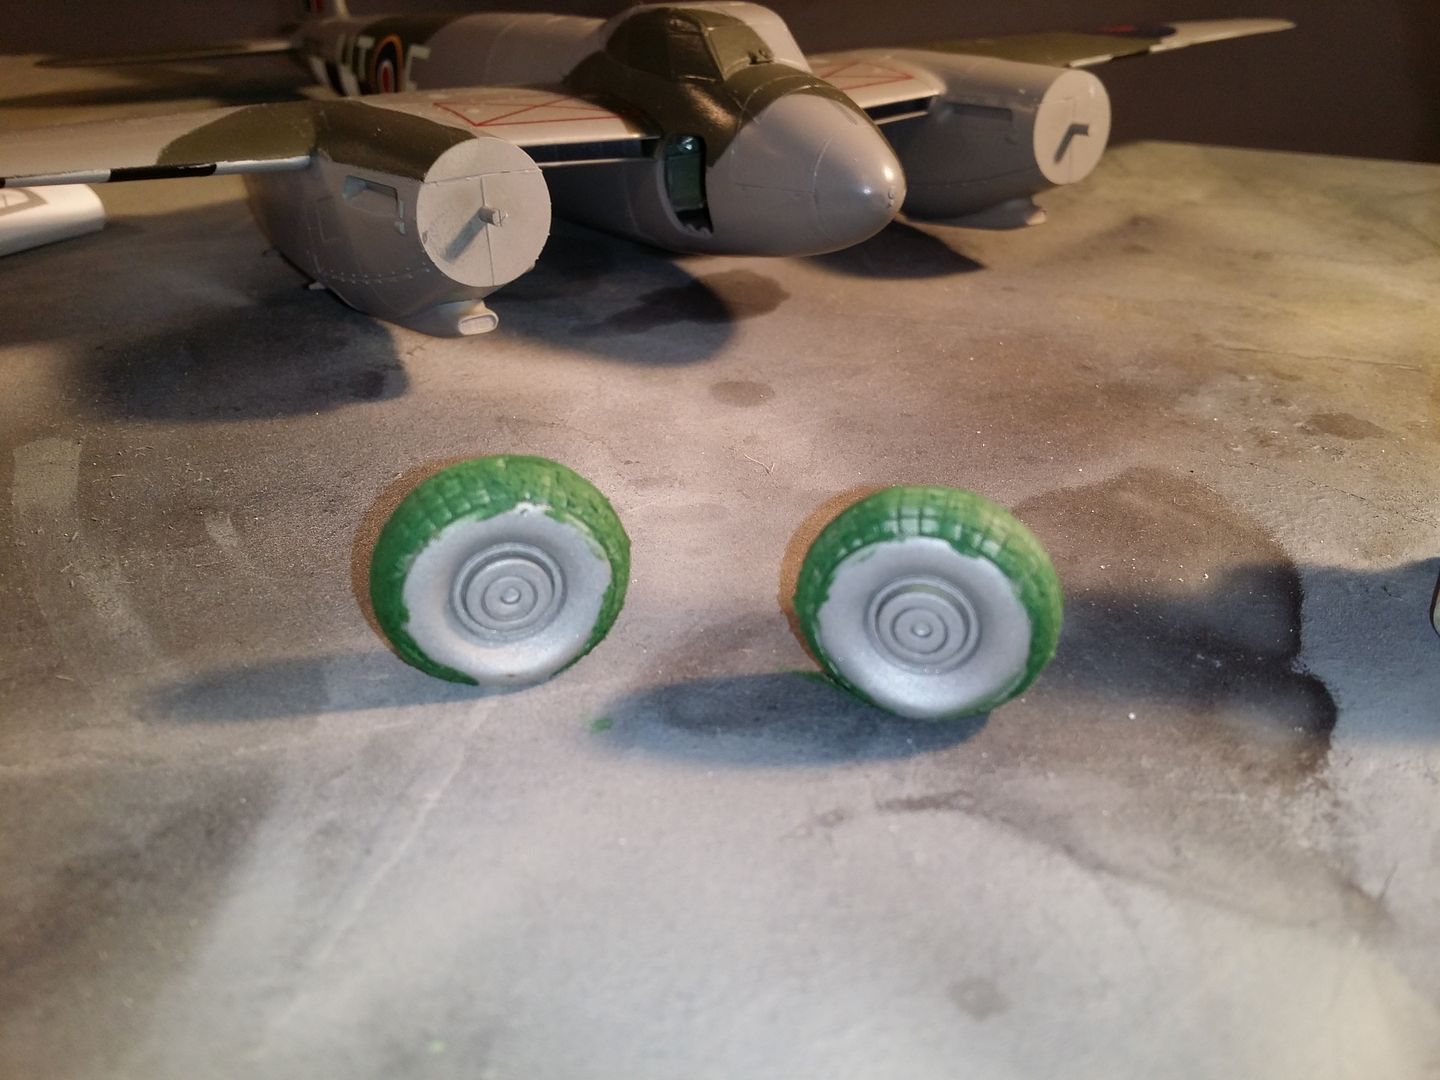
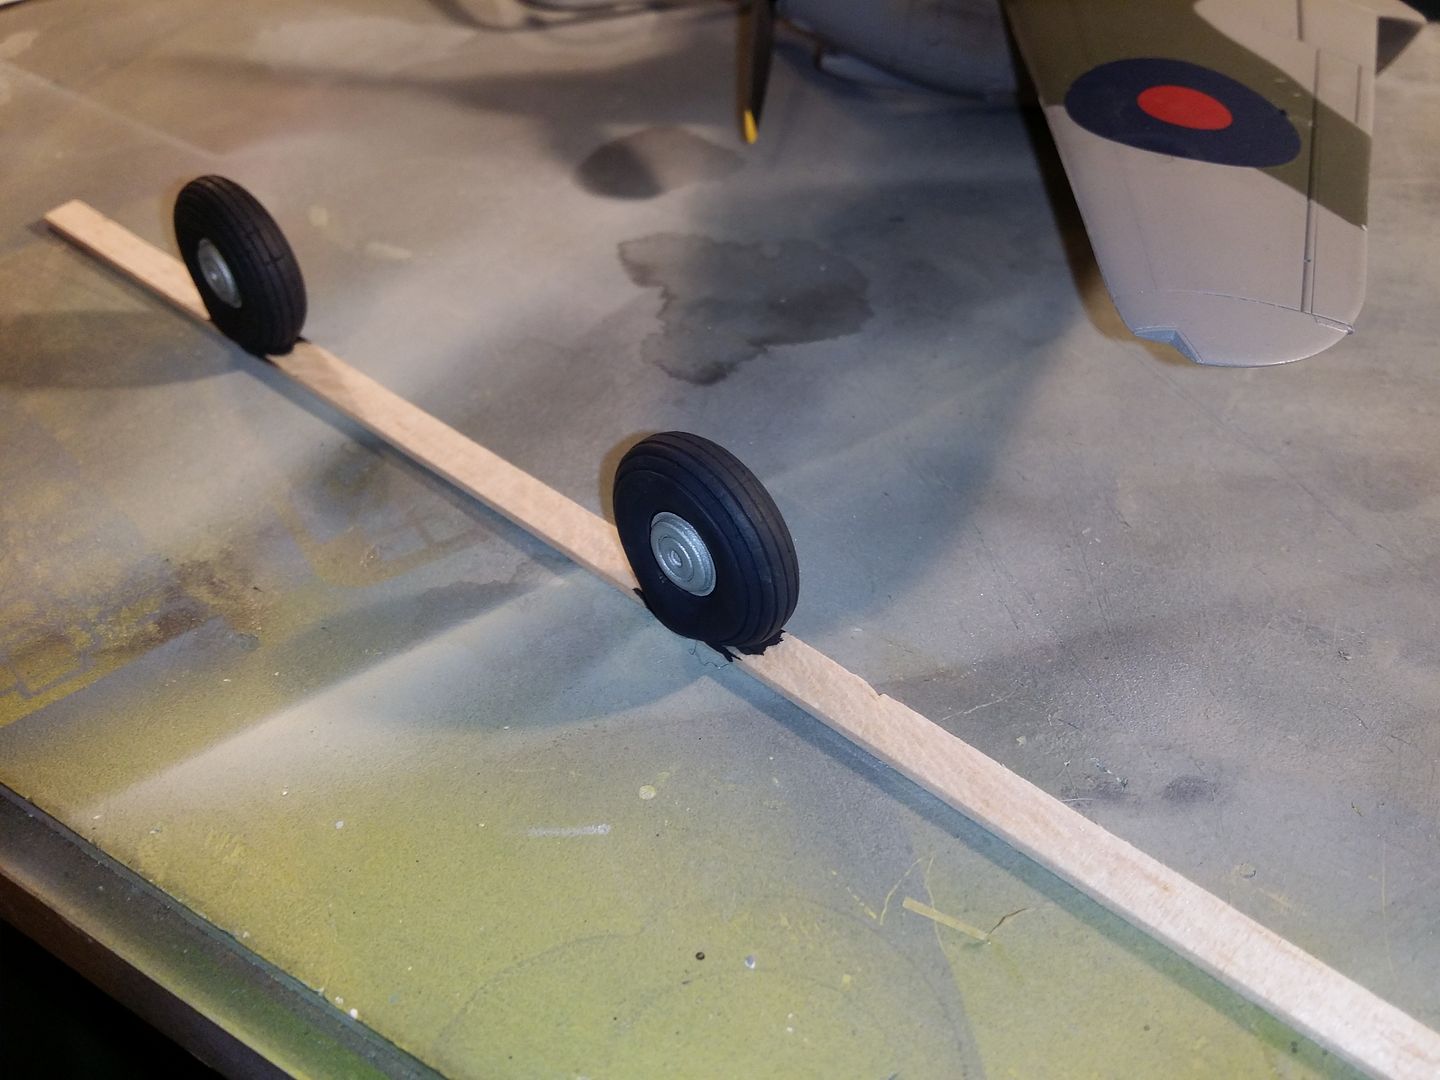
The wartime tyres had block pattern treads for operating from grass. RR299 being preserved aircraft operated by BAe from hard runways (but before the modern day preference for originality became de rigour - e.g. it had a black cockpit in line with very late war / post war RAF aircraft) had more circumferential treads only like a modern airliner. I filled the treads of some weighted resin wheels with dual brake drums and rescribed:
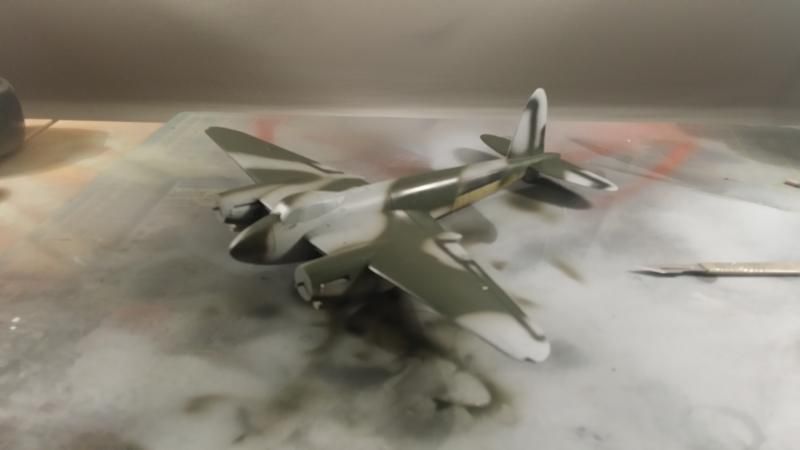
The exhaust stacks were replaced with Quickboost resin items which I had, and I applied some light exhaust staining visible on most reference photos (again common with well looked after preserved aircraft that transit distances to airshows over a season).
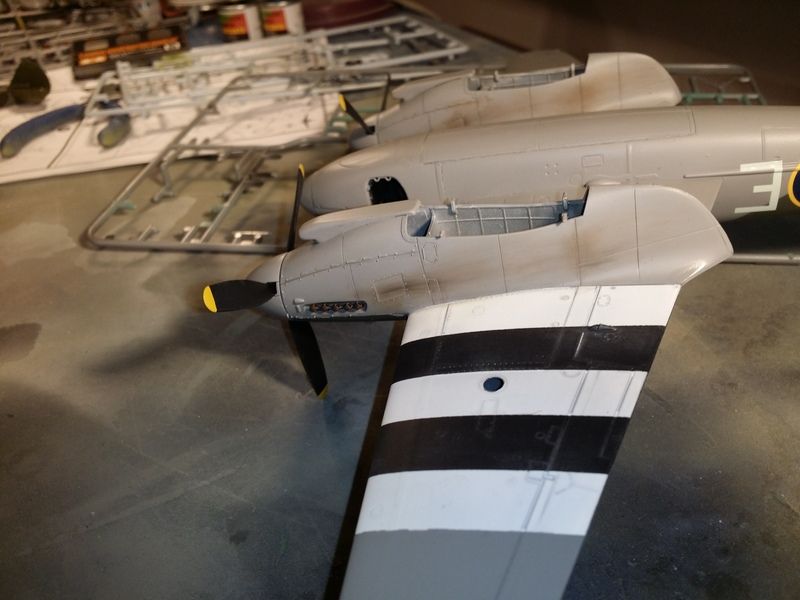
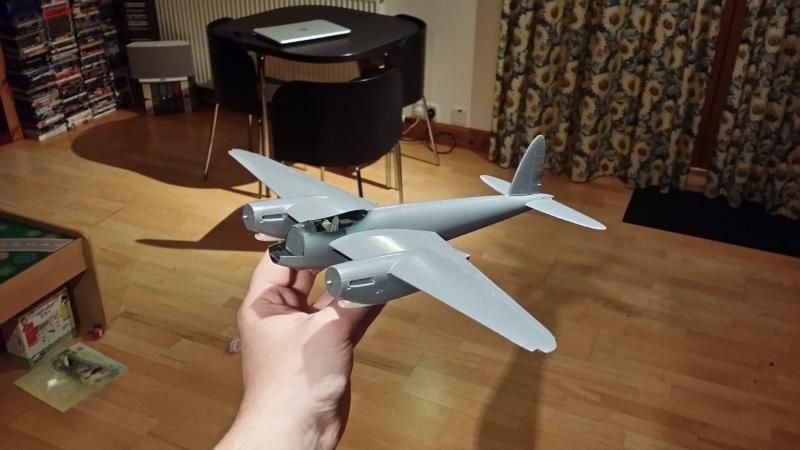
The undercarriage was assembled and the wings finally glued on.

It still needs some finishing touches, plus of course that mess of a canopy sorted out.
I decided to crack on and finish it, just accepting the poor quality paint. It continues to vex me though - the lovely pre-cut canopy masks were wasted since all the acrylic paint peeled and flaked off the canopy frames when the masking was removed. Never again ...

The decals are part Tamiya (although in retrospect the Tamiya roundel blue is far too dark. I had to touch up the roundel where it cracked when Microsol'd over the strengthening strip above the battery door on the fuselage and I had to mix 2/3 roundel blue (which I know is accurate) with 1/3 night bomber black to get a dark enough blue to match the decal) and part Xtradecal (i.e. the lettering and numbering).


The wartime tyres had block pattern treads for operating from grass. RR299 being preserved aircraft operated by BAe from hard runways (but before the modern day preference for originality became de rigour - e.g. it had a black cockpit in line with very late war / post war RAF aircraft) had more circumferential treads only like a modern airliner. I filled the treads of some weighted resin wheels with dual brake drums and rescribed:


The exhaust stacks were replaced with Quickboost resin items which I had, and I applied some light exhaust staining visible on most reference photos (again common with well looked after preserved aircraft that transit distances to airshows over a season).

The undercarriage was assembled and the wings finally glued on.


It still needs some finishing touches, plus of course that mess of a canopy sorted out.
Canopy removed, cleaned up, polished a tad and the internal frames were painted on.
Then the canopy was masked up, painted matt enamel black, then enamel MSG and DG, which weren't the same hue as the original acrylics. I recently boxed up and posted almost all of my acrylics to a guy on Britmodeller but kept the left overs from the paints I'd used on the Mossie. I went over the frames with the acrylics then and made sure I ran around them all with a scalpel prior to peeling the masks off.
I've got a few stencils to add, and I'm painting on the little crests either side of the fuselage at the moment.

Gassing Station | Scale Models | Top of Page | What's New | My Stuff