Airfix 1:72 Tiger Moth (G-ACDC)
Discussion


Hi all, my next model is the crimson Tiger Moth from Headcorn Aerodrome. I've got Vallejo 70.908 Carmine Red for the fuselage that I think will look good when finished with a gloss glaze but not sure what to use for the wings as photos don't show metallic shades well. Airfix's colour callout just says 'Silver', but there's a lot of different silvers out there and daubing on Humbrol's silver custard doesn't appeal. I was wondering if anyone had seen the aircraft; is it a really hard metallic, or more of a gloss/pearl grey?
Thanks for the feedback - I'll get some Aluminium for trials along with the various silvers I've already got and see which looks better. Might even try a light grey with the pearl medium I found in the back of the drawer.
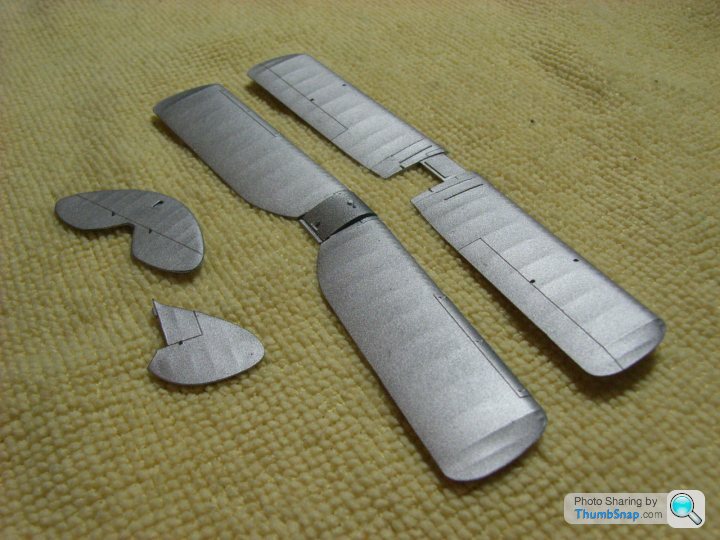
Already managed to break a strut just pulling the sprues out of the pack.
As my sprue stretching skills are pretty poor, I got some 0.4mm elasticated thread for the rigging; should be feasible with some cyano glue and a lot of patience. If I type up the final reveal with my toes, you'll know the plane is still wrapped around my fingers.

Fuselage assembled:
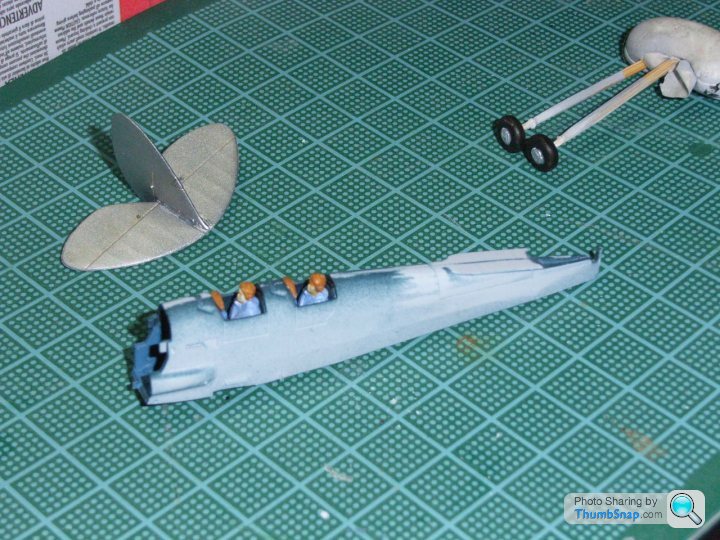
I did some detailing in the cockpit, but most of it is hidden as I went with the option for closed doors and pilots. The controls are so low that they would only be seen with the doors in the open position. So if you are thinking of using the Eduard PE kit, then I would recommend opting for open doors.
The decals for the instrument panels are oversize and need the film trimming back, particularly around the edge of the printed area where there's some transparent film. It would be a lot easier to do this before they're wetted.
I assembled the tail-plane ahead of schedule as there's no support and this allowed me to use a thumb-size lump of tack to hold the vertical stabiliser steady. (It sticks down 5mm under the horizontal stabiliser, so can be poked into the tack.) This worked well until I blobbed the glue and put on far too much which has left a very obvious join.
Quiet on here today, everyone must be at Le Mans.
Here's a vaguely related video of an XK140 and Tiger Moth: https://youtu.be/zIBGPJruNiQ
And a progress pic:
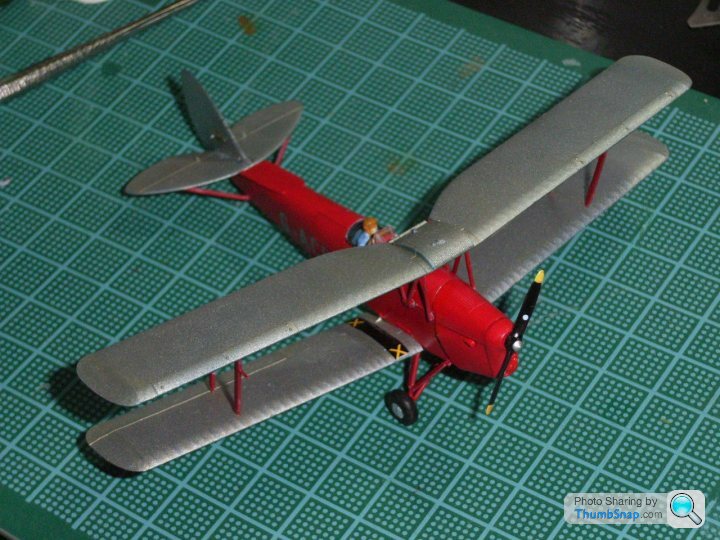
Plan for this weekend is a little more weathering on the fuselage and the bracing wires.
Here's a vaguely related video of an XK140 and Tiger Moth: https://youtu.be/zIBGPJruNiQ
And a progress pic:
Plan for this weekend is a little more weathering on the fuselage and the bracing wires.
Bracing wires not going well. Two hours and one wire fitted.
Hiow do you do this?
I'm using CA glue and plastic thread, dabbing an end in it and holding in place with tweezers. First end goes OK, but trying to get the second end to stay in place, while retaining a vaguely straight 'tensioned' wire is proving too tricky for me. I think I can't hold the thread steady enough, so the bond is weak, and when I let go it just pops off.
Gassing Station | Scale Models | Top of Page | What's New | My Stuff