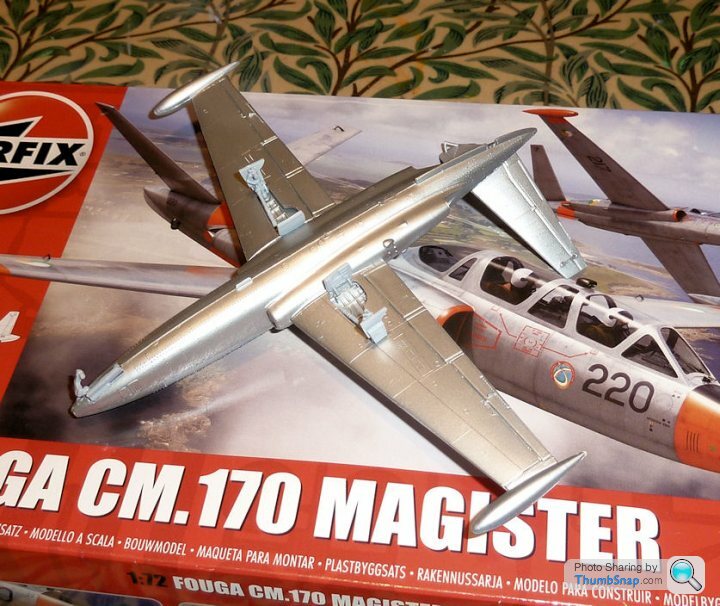
Airfix 1:72 Fouga Magister
Discussion


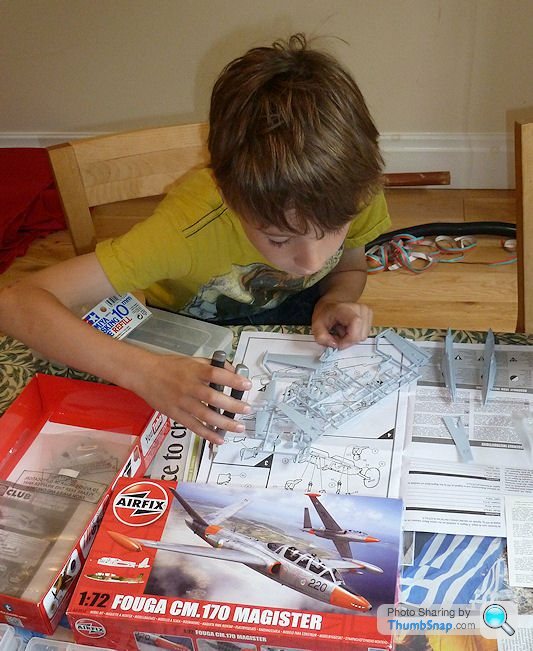
This build thread is on behalf of the boy, who won this kit at Cosford for third place with his Matchbox Skyservant. Airfix donated the prizes for the junior class I think.
It's a pretty good kit, almost unbelievably good considering it's dated 1975; it looks much more modern despite the odd rivet and raised panel line. Plastic is the current Airfix soft grey stuff, decals by Cartograf are superb. As with most current Airfix kits, box design pretty much says "buy me and build me now", although in this case he had a paint by numbers Puffin and a wooden F1 car to finish first:

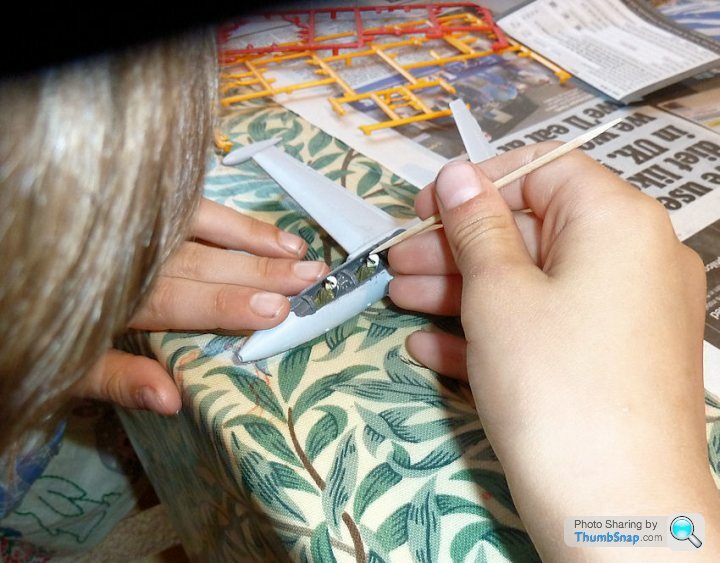
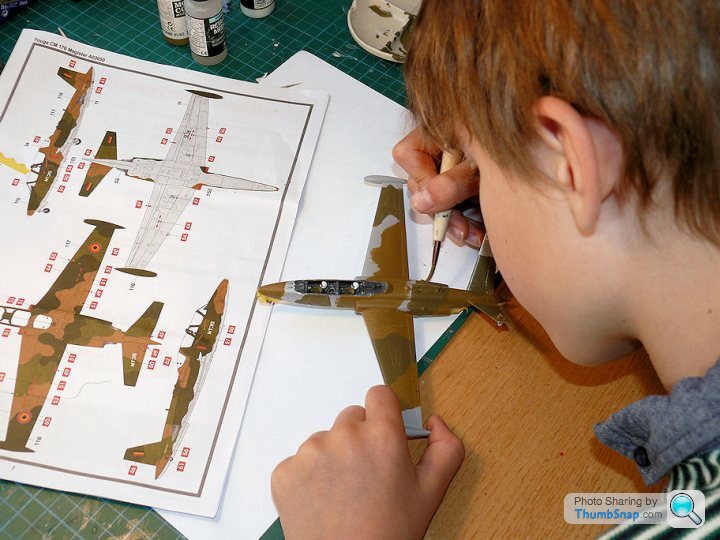
As with the Skyservant, I'm doing any scalpel work if required, the boy is doing the rest, although rather than me doing one part and him copying it, he's doing it all this time. First off, cockpit assembly:
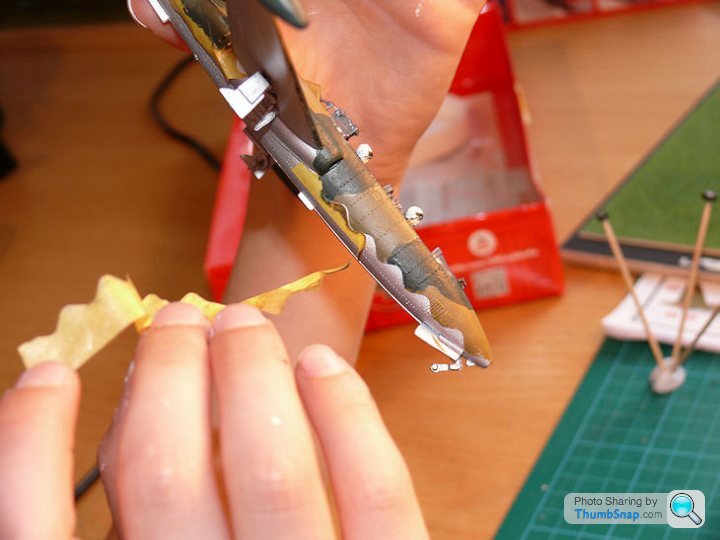
...quickly followed by searching for his first lost microscopic part, ahhhh:
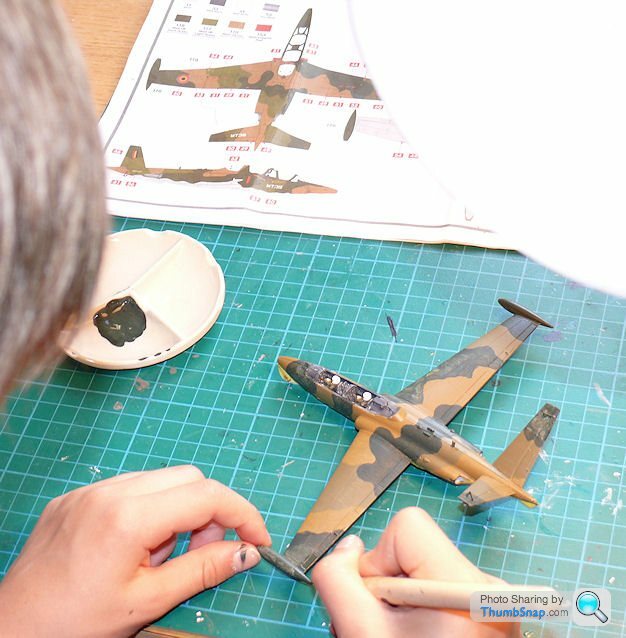
Then a spot of painting:
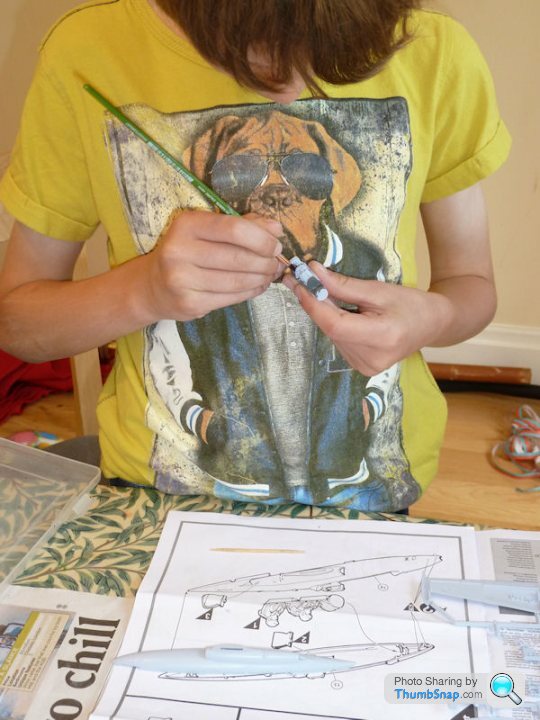

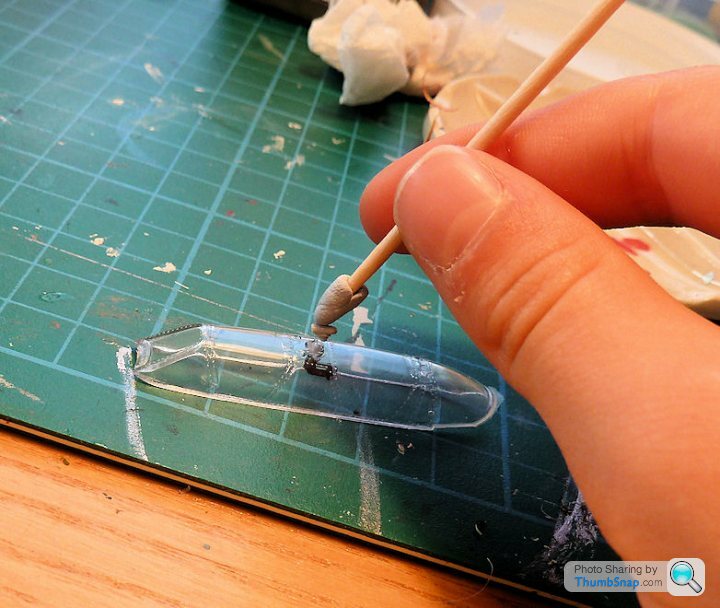
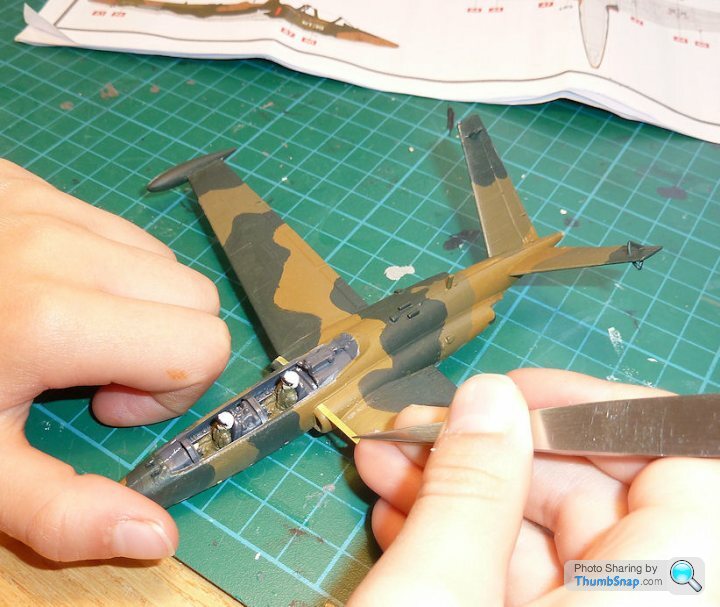
Pilots faces need dotting in and their visors painting, then the fuselage can be glued together permanently:
I think this thread will probably consist of a few main updates and some final images rather than much more detail TBH.
It's a pretty good kit, almost unbelievably good considering it's dated 1975; it looks much more modern despite the odd rivet and raised panel line. Plastic is the current Airfix soft grey stuff, decals by Cartograf are superb. As with most current Airfix kits, box design pretty much says "buy me and build me now", although in this case he had a paint by numbers Puffin and a wooden F1 car to finish first:
As with the Skyservant, I'm doing any scalpel work if required, the boy is doing the rest, although rather than me doing one part and him copying it, he's doing it all this time. First off, cockpit assembly:
...quickly followed by searching for his first lost microscopic part, ahhhh:
Then a spot of painting:
Pilots faces need dotting in and their visors painting, then the fuselage can be glued together permanently:
I think this thread will probably consist of a few main updates and some final images rather than much more detail TBH.
perdu said:
Well G no matter how you plan to ration our helpings of his 'journey' I'm in to enjoy it
He shows lots of potential, I like his builds a lot
(and if I like the finished article I may buy one for myself)
It does build into a nice, delicate model albeit with a few overscale details which would be easily fixed. I have read that the Heller version is marginally better though overall. I'd be tempted to get one myself if I saw one at a show. He shows lots of potential, I like his builds a lot
(and if I like the finished article I may buy one for myself)
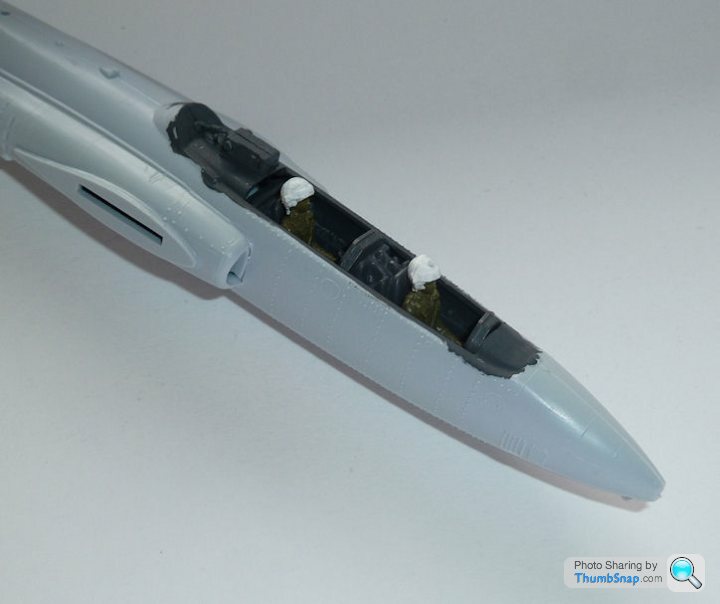
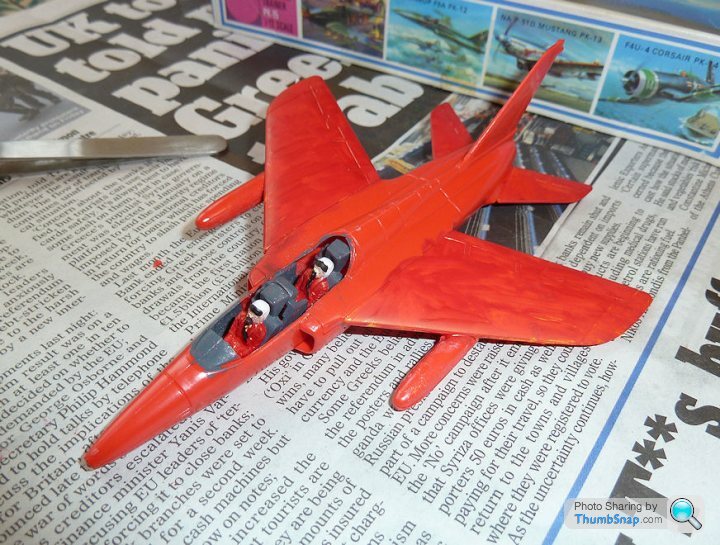
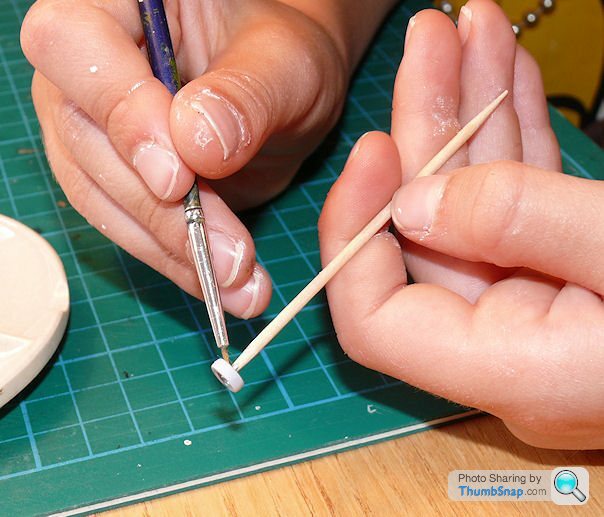
So the pilots are finished (flesh tone faces and hands, and black visors). If I put a blob of each colour on an onld credit card, he quite happily corrects any smudges as he goes. I then gave him some weathering powder to play with, which improved the look of the cockpit. I think the instant results of that simple process went down well. Pilots then secured with PVA:
He's now giving assembly advice to his sister, who is making impressive process with the Matchbox Gnat. The truth is she doesn't need any advice, having mastered cutting sprues, sanding and applying glue using a liquid cement dispenser within about an hour...

He's now giving assembly advice to his sister, who is making impressive process with the Matchbox Gnat. The truth is she doesn't need any advice, having mastered cutting sprues, sanding and applying glue using a liquid cement dispenser within about an hour...
Tonight only child v2 rev.0 wanted to do a spot of work, so no progresss on the Magister. I assumed that a 5 year old would not have the dexterity to paint faces/helmets/boots to any degree of accuracy, but it seems I was wrong.

Luckily I've persuaded her to not bother with the wheels; I wanted her to build it all herself (or with the minimum of help), and I think the undercarriage might have been a step too far.
Luckily I've persuaded her to not bother with the wheels; I wanted her to build it all herself (or with the minimum of help), and I think the undercarriage might have been a step too far.
perdu said:
Fair dos to both of them
That Gnat makes up nicely if my memory serves me well
I have had a similar thing with my grand-daughter (6)
I gave her the Mk 1 Spitfire from my stash because she wanted to do what granddad does
She left it unfinished until her next visit in the school hols
Just wants wheels. prop and canopy to finish
She painted the camouflage before she left it for me to guard, so she felt she'd done a lot
And transfers on too so not far to go
If she gives her permission I'll pop it in here
Yes, like the Skyservant, the Gnat is pretty good for a beginner, although a couple of the main gear doors don't make an appearance in teh instructions, and I think one of the aerial fairings is positiond incorrectly. Not that it matters.That Gnat makes up nicely if my memory serves me well
I have had a similar thing with my grand-daughter (6)
I gave her the Mk 1 Spitfire from my stash because she wanted to do what granddad does
She left it unfinished until her next visit in the school hols
Just wants wheels. prop and canopy to finish
She painted the camouflage before she left it for me to guard, so she felt she'd done a lot
And transfers on too so not far to go
If she gives her permission I'll pop it in here
Would be good to see the equavelnt Spitfire is permission is forthcoming.

I assumed the undersides were light grey, but on closer examination, they are indicated as silver. Dammit. Since it's impossible to get a decent finish by brush painting, and since I had the airbrush out for the Spitfire paint repair, I thought I might as well give the boy a go at it. After fitting the mask to his face, and the masking tape to the cockpit, he soon got the hang of it:

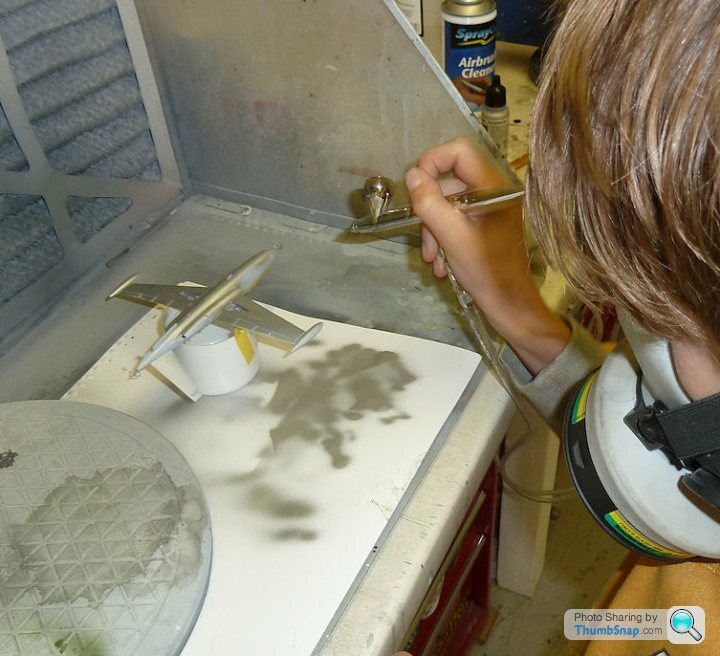
Paint was Vallejo Air Aluminium, straight form the bottle.
Paint was Vallejo Air Aluminium, straight form the bottle.
perdu said:
End of a short era, he'll not want to do all the rest of his modelling with hairy sticks now
Looks as if he's doing well enough too
Nice work young 'un
My granddaughter came across from Nottingham today and insisted on finishing her Spitfire
So I had to forgo watching F1 qually and hang around her in action
She didn't take much watching and soon got the little oddments in place and paint touched in
Then insisted on taking it home before I could take a picture
Oh well, it's hers after all
Ta Perdu, I think brush painting is the preferred method TBH; it's a process he can do pretty much unsupervised (brush cleaning can be a bit Russian roulette at the moment).Looks as if he's doing well enough too
Nice work young 'un
My granddaughter came across from Nottingham today and insisted on finishing her Spitfire
So I had to forgo watching F1 qually and hang around her in action
She didn't take much watching and soon got the little oddments in place and paint touched in
Then insisted on taking it home before I could take a picture
Oh well, it's hers after all
davepoth said:
dr_gn said:
Tonight only child v2 rev.0 wanted to do a spot of work, so no progresss on the Magister. I assumed that a 5 year old would not have the dexterity to paint faces/helmets/boots to any degree of accuracy, but it seems I was wrong.
Luckily I've persuaded her to not bother with the wheels; I wanted her to build it all herself (or with the minimum of help), and I think the undercarriage might have been a step too far.
I'm looking at the Airfix Gnat I have on my bookshelf, and frankly I feel a little ashamed. Luckily I've persuaded her to not bother with the wheels; I wanted her to build it all herself (or with the minimum of help), and I think the undercarriage might have been a step too far.

Camo in progress, just the dark green to add. I gave him a Zoukei Mura brush to try - I'd forgotten how much difference a decent brush makes vs. a Hobbycraft special. I mixed the paints for him using Vallejo Model Colour plus thinners plus Retarder medium to give him a fighting chance of getting a level-ish finish before it dried:
It looks pretty good so far. I'll be interested to see how the wavy demarcation turns out after cutting the masking tape with dressmaking scissors.
Daughter's Gnat is finished:
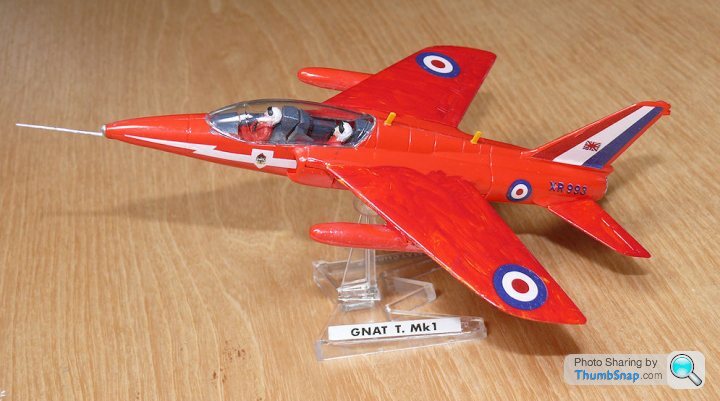
I helped her mostly with decal placement and fitting the pitot tube. I also PVA'd the stand socket into the fuselage.
It looks pretty good so far. I'll be interested to see how the wavy demarcation turns out after cutting the masking tape with dressmaking scissors.
Daughter's Gnat is finished:
I helped her mostly with decal placement and fitting the pitot tube. I also PVA'd the stand socket into the fuselage.

perdu said:
You're giving him such a good basic grounding it seems right to me for you to get him using canopy painted/taped lines
That is a great basic measure after all
The tape edging is great
b
Ta Perdu - I actually meant paint strips of tape, then stick them onto the canopy rather than mask the canopy. We can try masking for nothing, but I don't want frustration to set in if it doesn't work, especially since he's put in a pretty big and sustained amount of concentration to get this far with it. The Skyservant was a bit different because it was just two straight lines to mask, and no external framing.That is a great basic measure after all
The tape edging is great
b
johnS2000 said:
dr_gn said:
Ta Perdu - I actually meant paint strips of tape, then stick them onto the canopy rather than mask the canopy. We can try masking for nothing, but I don't want frustration to set in if it doesn't work, especially since he's put in a pretty big and sustained amount of concentration to get this far with it. The Skyservant was a bit different because it was just two straight lines to mask, and no external framing.
I know the feeling well as a confirmed canopy ruin-er Got a 1/72 A6M Zero nearing completion apart from the canopy that still needs doing .perdu said:
That was what I thought and meant
Basic 'tape as framing' has to be a good useful skill, including deciding how wide it needs to be for each part of the frame
I expected 'taping as masking' to be a later addition to his lexicon
This lad can go far in this hobby if he tries, the skills are coming along nicely
I see. Yup, will probably let him tape the frames and dip in Klear to seal them on.Basic 'tape as framing' has to be a good useful skill, including deciding how wide it needs to be for each part of the frame
I expected 'taping as masking' to be a later addition to his lexicon
This lad can go far in this hobby if he tries, the skills are coming along nicely
Fitted the wheels:
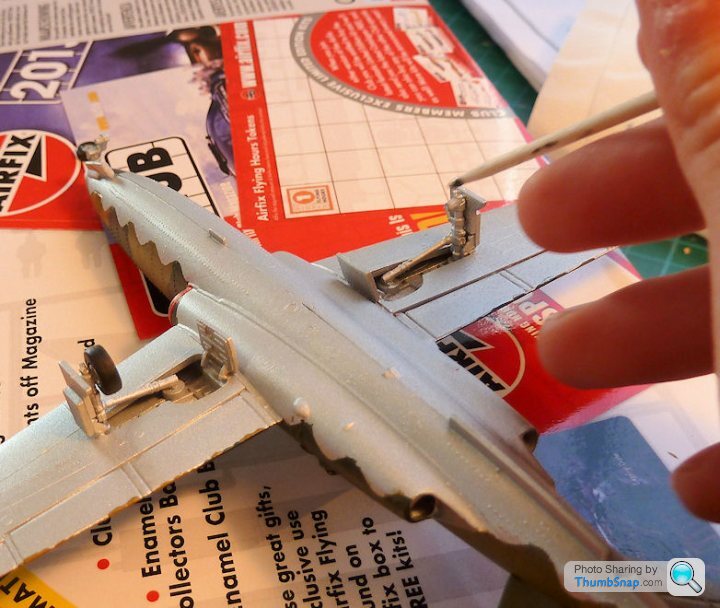
painted and fitted the periscope:
masked and painted the intake edges red. Old hand at masking these days...
and got half the decals on:
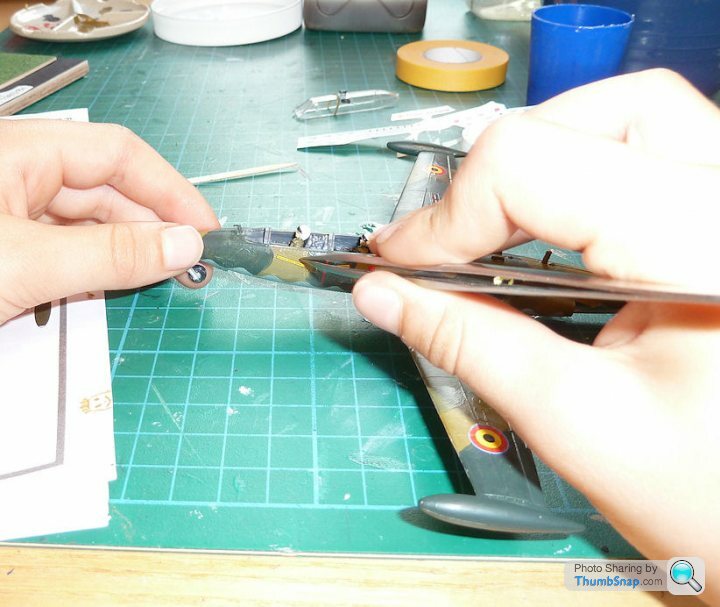

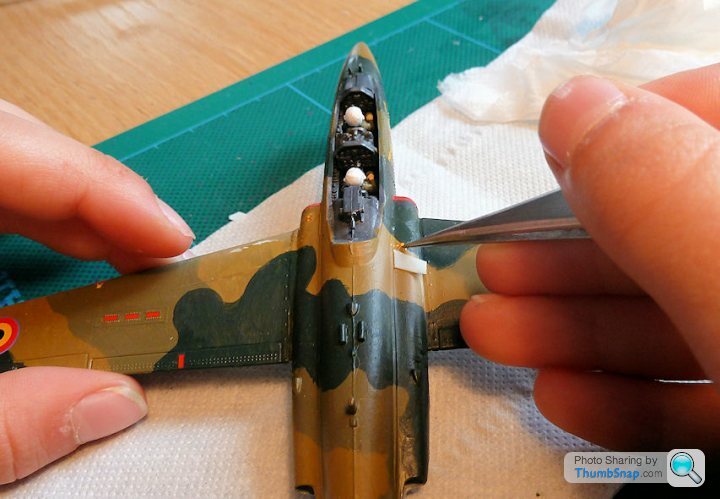
Just the other decals to go, then the dreaded canopy frames; we tried freehand painting them...not good. Not good at all So I sliced some masking tape strips up and he painted them in the three camo colours. I tried one and it looks OK, so we'll see how the rest goes.
I've got some spare "little lenses" so I think they would improve the nose light and maybe the tip tank lamps too. then that'll be it finished.
painted and fitted the periscope:
masked and painted the intake edges red. Old hand at masking these days...
and got half the decals on:
Just the other decals to go, then the dreaded canopy frames; we tried freehand painting them...not good. Not good at all
So I sliced some masking tape strips up and he painted them in the three camo colours. I tried one and it looks OK, so we'll see how the rest goes.I've got some spare "little lenses" so I think they would improve the nose light and maybe the tip tank lamps too. then that'll be it finished.
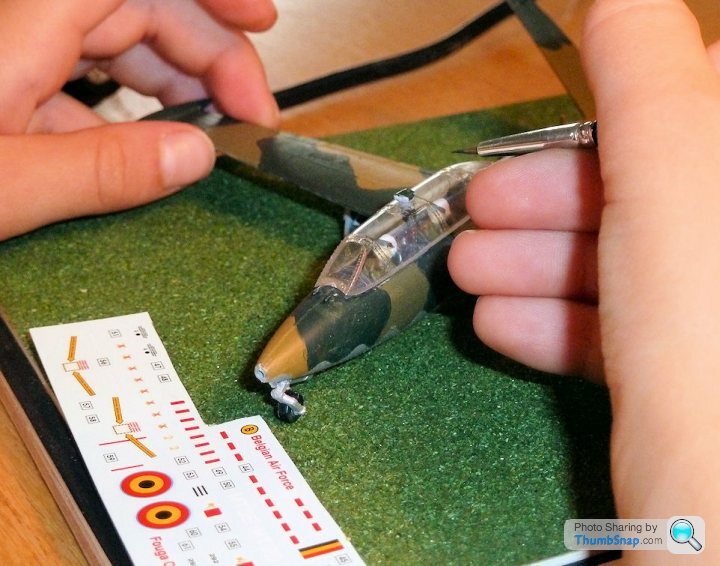
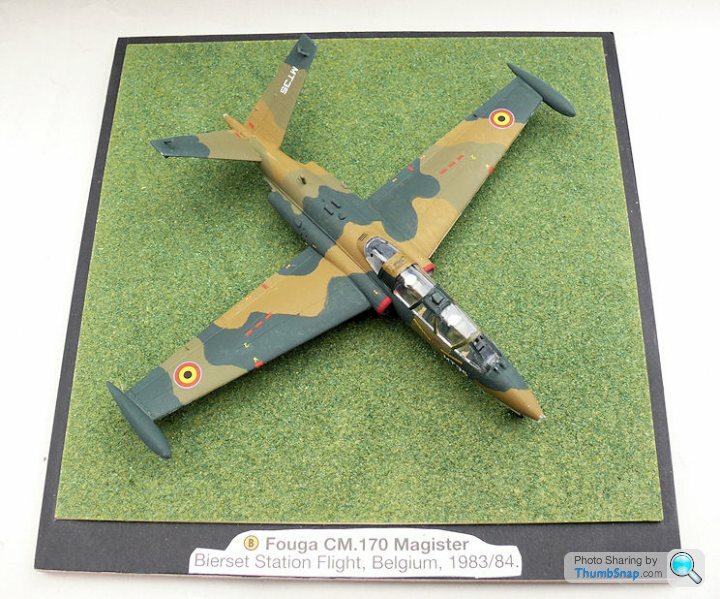
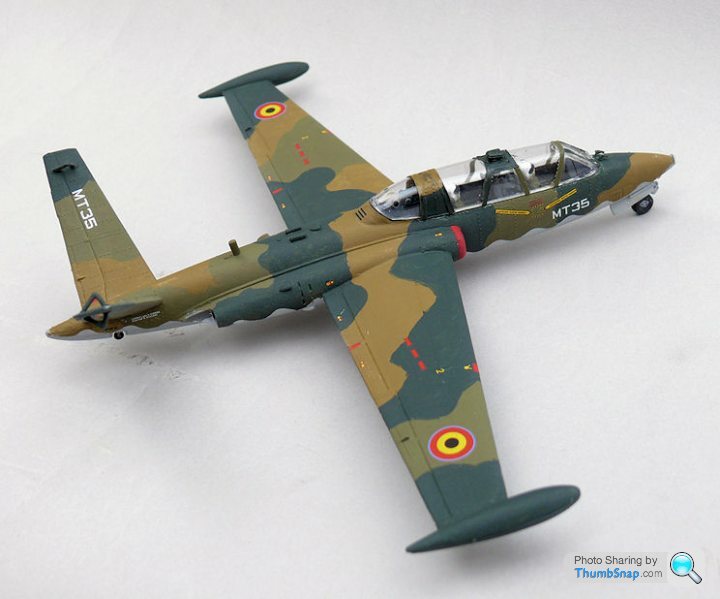
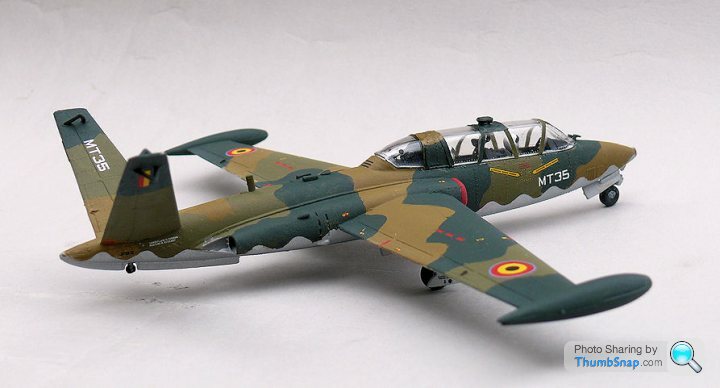
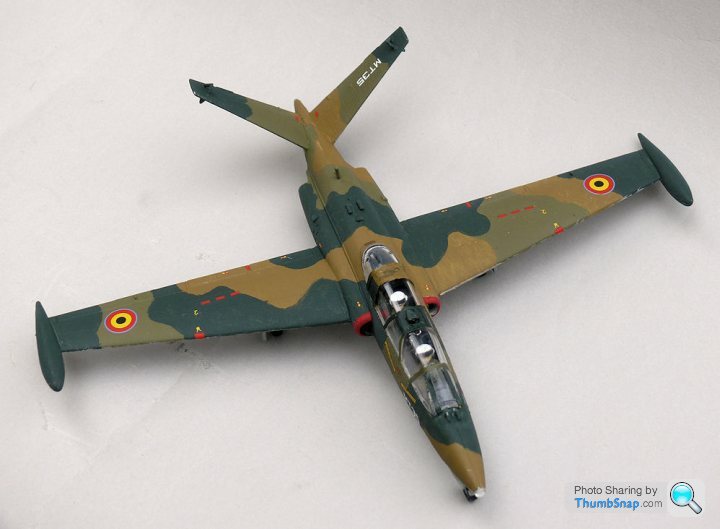
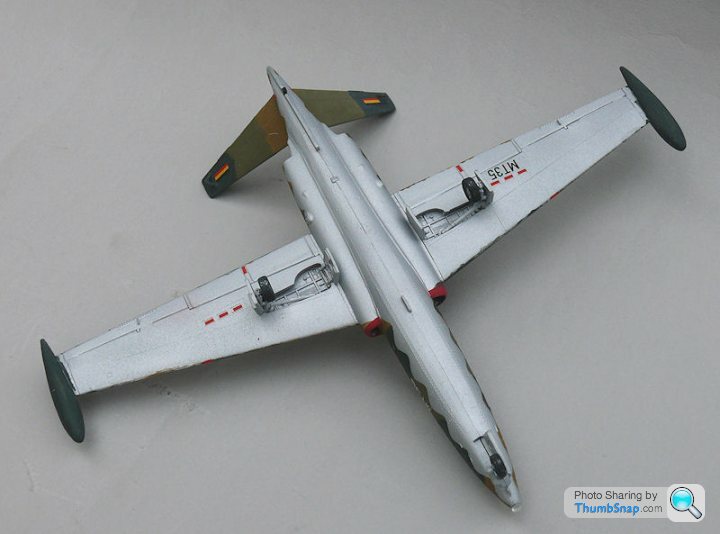
Final decals on - I suggested only using the main ones, but he wanted to do the whole lot. Took several sessions but he got there:
Ended up using painted Tamiya tape for the canopy, which worked well enough. Then after spraying with Humbrol Matt, I found a clear "little Lens" for the nose light; maybe a bit big, but effective enough:
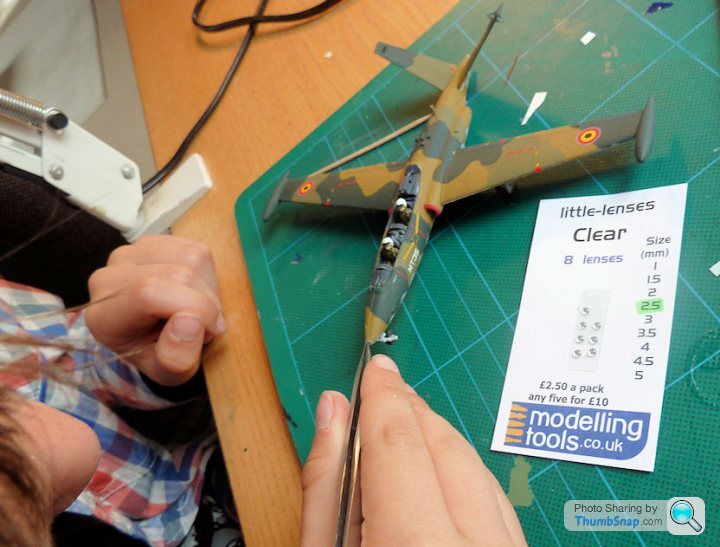
Ended up using painted Tamiya tape for the canopy, which worked well enough. Then after spraying with Humbrol Matt, I found a clear "little Lens" for the nose light; maybe a bit big, but effective enough:

perdu said:
Good looking model Master N
Zero next
Hmm are we going to work on salt weathering next?
He has a very neat approach to the task, good chap G
Ta Perdu - I'll tell him...Zero next
Hmm are we going to work on salt weathering next?
He has a very neat approach to the task, good chap G
I think the Zero will be more of the same, should be pretty much leave him to it apart from maybe mixing the paints again. The Zero has far fewer and larger parts; figuring out instructions/orientations of small parts is something he still needs a bit of help with.
Must admit, after a coat of Humbrol Matt, the Vallejo colour paints on this thing look awesome, especially bearing in mind he's not fully got the hang of application/distribution yet. Even the imperfect lumpy/streaked bits of paint aren't that noticable.
Gassing Station | Scale Models | Top of Page | What's New | My Stuff