Eduard 1:72 F6F-3 Hellcat
Discussion


I thought I'd build a couple of Pacific theatre aircraft to expand the collection a bit. Luckily this Eduard ProfiPack kit, along with Tamiya's new tool Zero are arguably two of the best 1:72 aircraft kits ever made, so I'm looking forward to a couple of straightforward builds.
First the Eduard F6F-3:

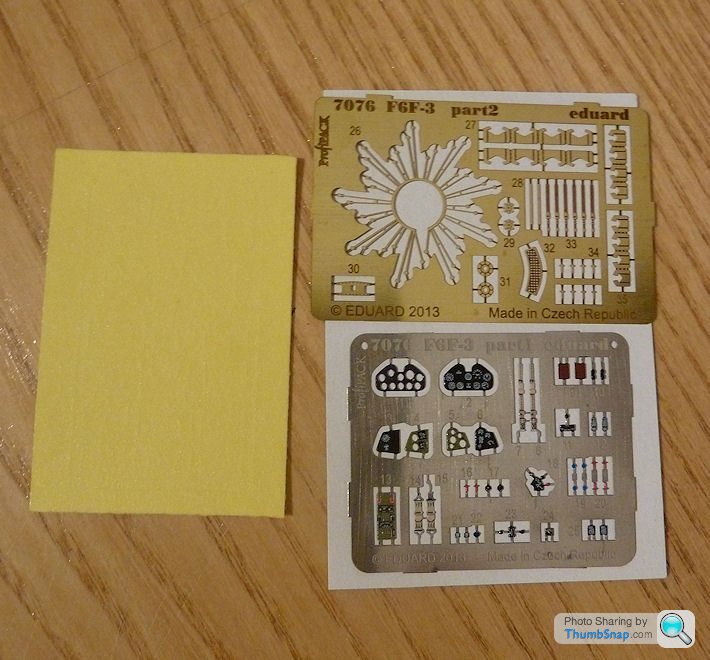
I guess to say I'll build it "out of the box" is true, although the box does include paint masks, and two photo-etch frets, one of which is in colour:
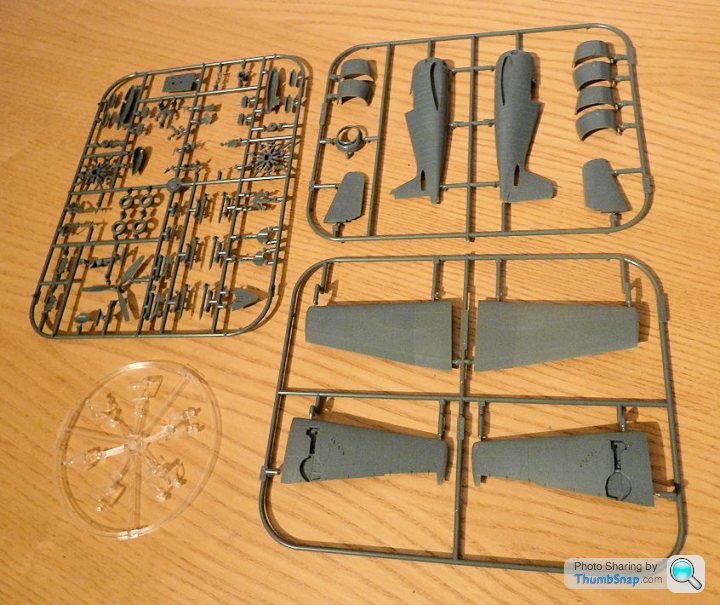
Plastic looks superb, with finely engraved panel lines and no flash:
Excellent instruction booklet, with full colour diagrams for 5 schemes. Decals also look great:

...all for a grand total of £10, brand new.
I'll be finishing it in the early (1943) VF-16 USS Lexington 3 tone scheme, with the red outline insignia - just because I like the look of it:

I found what I think are the correct colour codes with Vallejo paint, so hopefully it will be in the right ballpark:

First the Eduard F6F-3:
I guess to say I'll build it "out of the box" is true, although the box does include paint masks, and two photo-etch frets, one of which is in colour:
Plastic looks superb, with finely engraved panel lines and no flash:
Excellent instruction booklet, with full colour diagrams for 5 schemes. Decals also look great:
...all for a grand total of £10, brand new.
I'll be finishing it in the early (1943) VF-16 USS Lexington 3 tone scheme, with the red outline insignia - just because I like the look of it:
I found what I think are the correct colour codes with Vallejo paint, so hopefully it will be in the right ballpark:
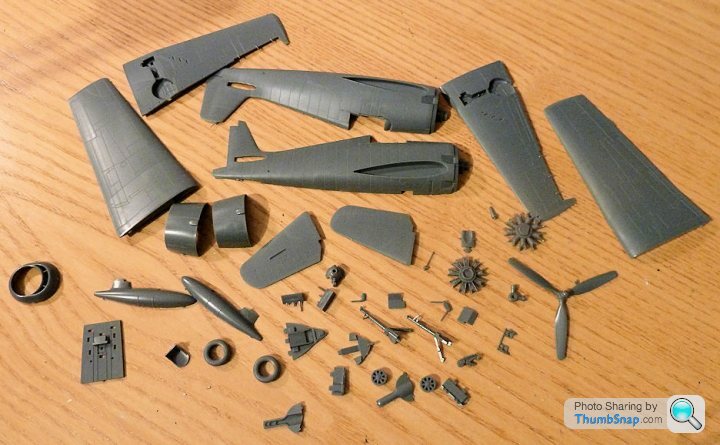
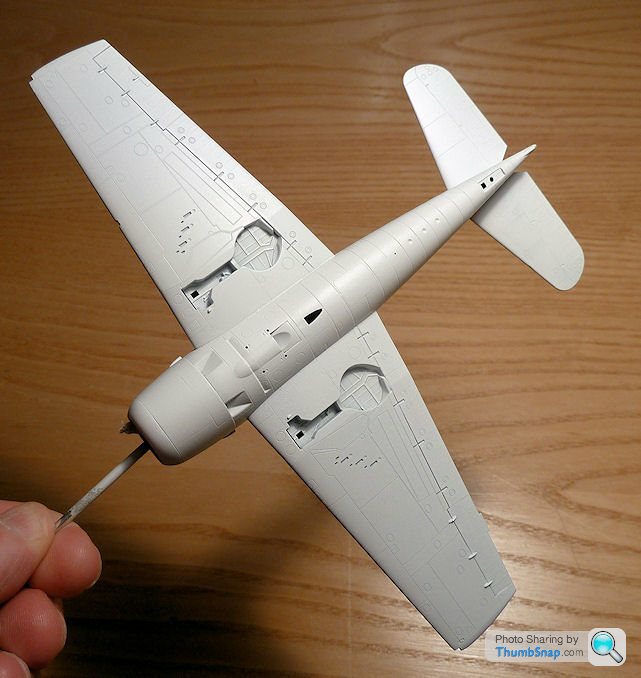
It's not a particularly elaborate kit - only 44 plastic parts:
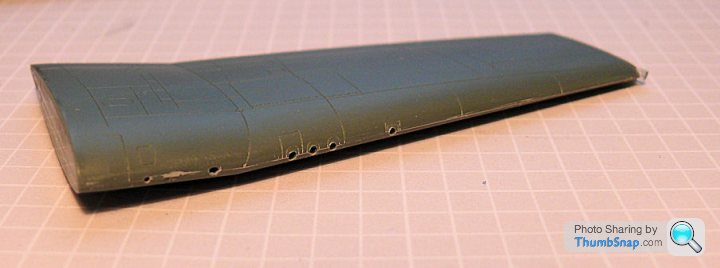
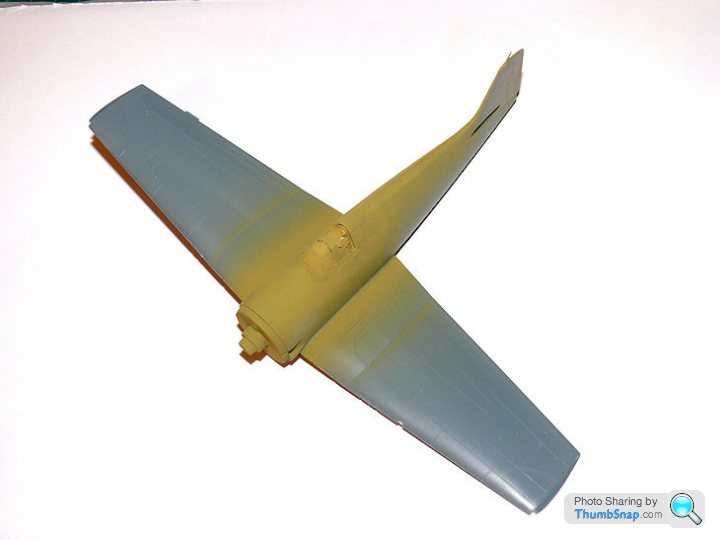
The design is refreshingly simple compared with some needlessly complex recent kits; wings and tailplanes simply push into sockets, which even without glue gives a rigid assembly and is self-aligning:

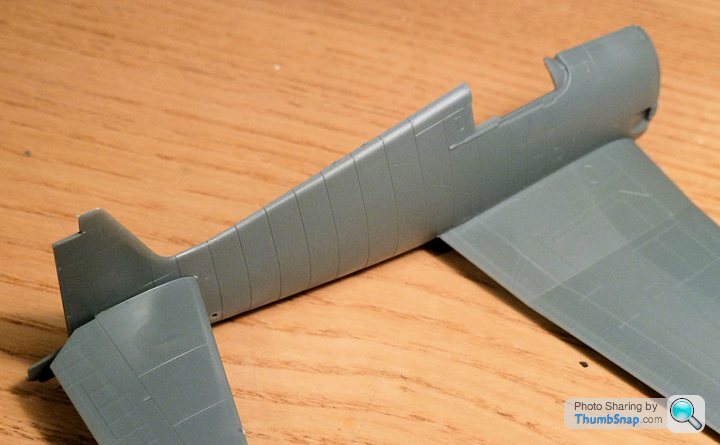
Doesn't look like any filler will be needed either.
The design is refreshingly simple compared with some needlessly complex recent kits; wings and tailplanes simply push into sockets, which even without glue gives a rigid assembly and is self-aligning:
Doesn't look like any filler will be needed either.
Refined a few small details this evening:
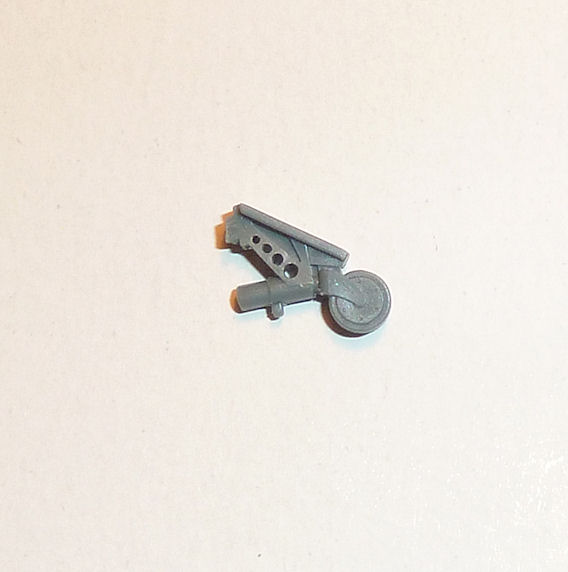
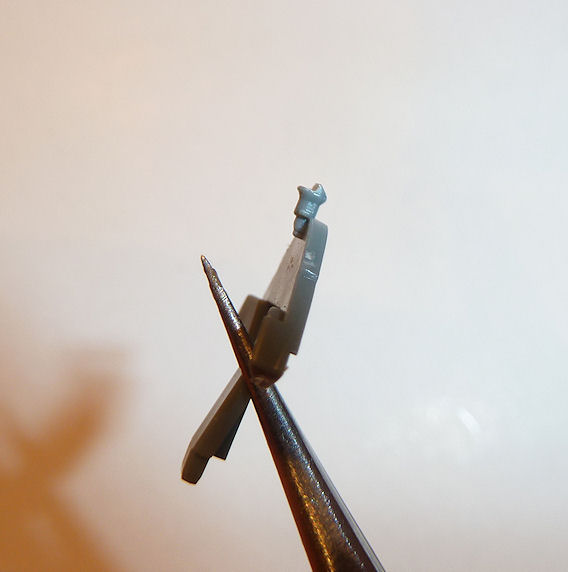
Started by cutting a tab of the tailwheel so that I can add it last rather than having to fit it between the fuselage halves and mask it:

Also drilled out the pockets in the drag link fabrication:
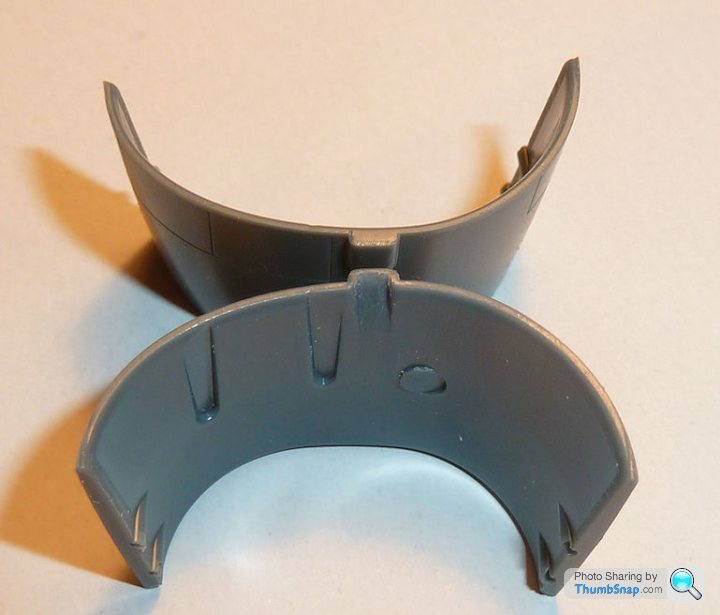
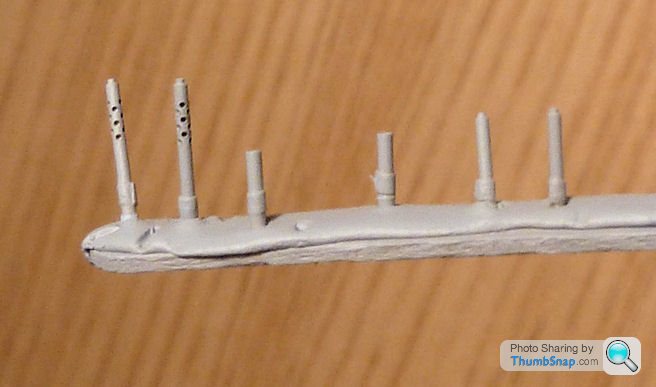
And opened out the moulded-in exhaust stubs:
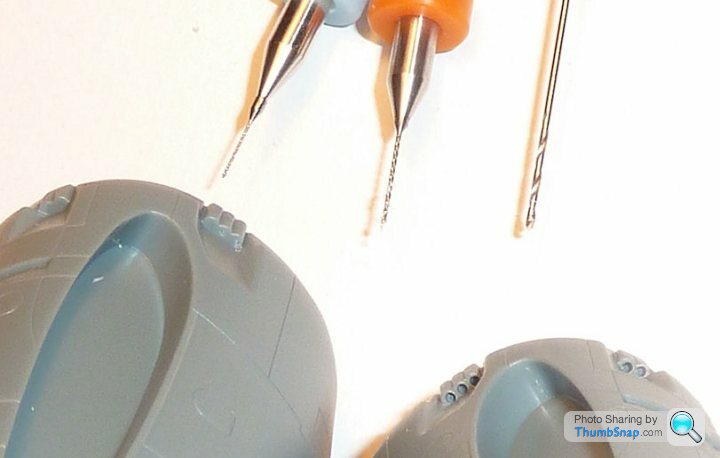
...and the exhaust bulges in the early version cowlings:
Drilled out the tiny gun barrel inserts:

As with the exhausts, it would have been better to fit brass tubes I guess, but it's meant to be OOB, so I'd class refining kit parts as acceptable.
Finally, the gunsight reflector plate is moulded solid:
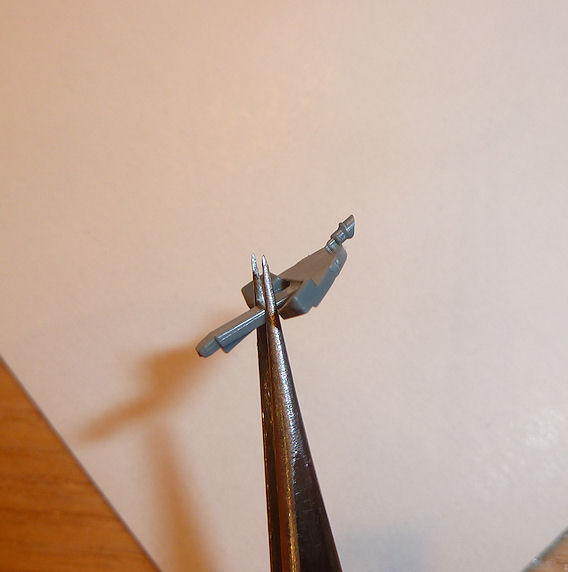
So I notched it and I'll use the resulting stub to mount a shaped bit of spare transparency sprue to represent the glass (it is in the box after all so why not use it):
I'm going to wash all the parts in detergent tomorrow ready for painting. I've never really bothered with this before, but I seem to have had increasing issues with both lacquer primer and acrylic paint not sticking. Not sure whetherit's the paint, some kind of mould release agent ar just an inherent property of modern plastics.
Started by cutting a tab of the tailwheel so that I can add it last rather than having to fit it between the fuselage halves and mask it:
Also drilled out the pockets in the drag link fabrication:
And opened out the moulded-in exhaust stubs:
...and the exhaust bulges in the early version cowlings:
Drilled out the tiny gun barrel inserts:
As with the exhausts, it would have been better to fit brass tubes I guess, but it's meant to be OOB, so I'd class refining kit parts as acceptable.
Finally, the gunsight reflector plate is moulded solid:
So I notched it and I'll use the resulting stub to mount a shaped bit of spare transparency sprue to represent the glass (it is in the box after all so why not use it):
I'm going to wash all the parts in detergent tomorrow ready for painting. I've never really bothered with this before, but I seem to have had increasing issues with both lacquer primer and acrylic paint not sticking. Not sure whetherit's the paint, some kind of mould release agent ar just an inherent property of modern plastics.

sad61t said:
Hi dr_gn, what drills do you use? Thanks.
From here:http://www.uschivdr.com/shopping-categories/shop-t...
ETA And one of these generic sets for larger sizes - the small ones in these are often very brittle:
https://www.machinemart.co.uk/shop/product/details...
Ta.
Edited by dr_gn on Tuesday 29th September 10:27

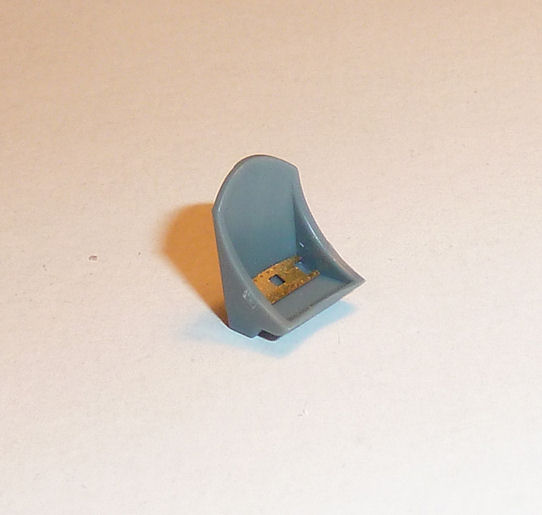
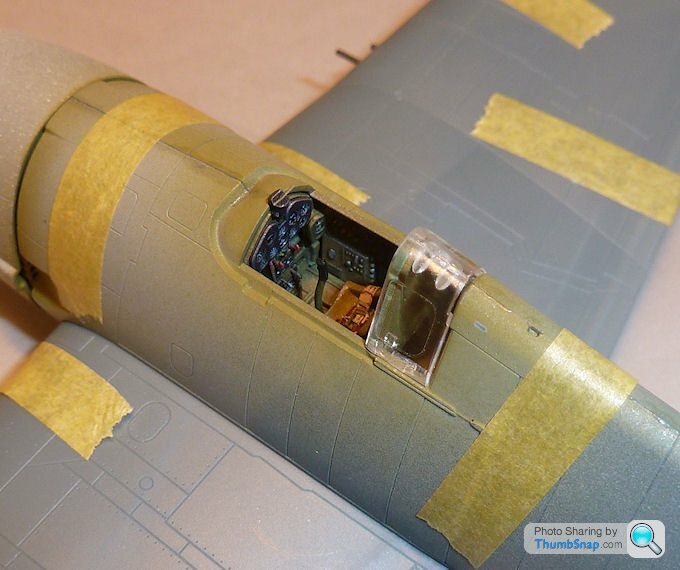
Completed some detail work tonight: Cockpit is finished apart from the transparent gunsight glass which I've not made yet:


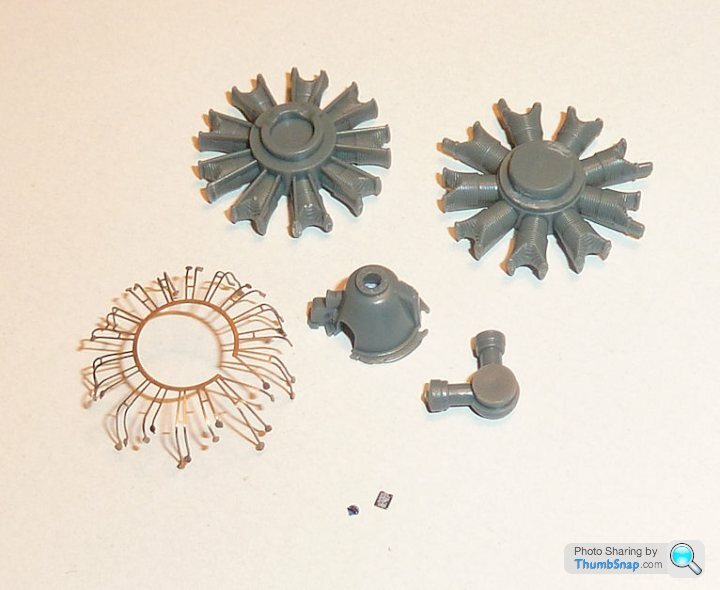
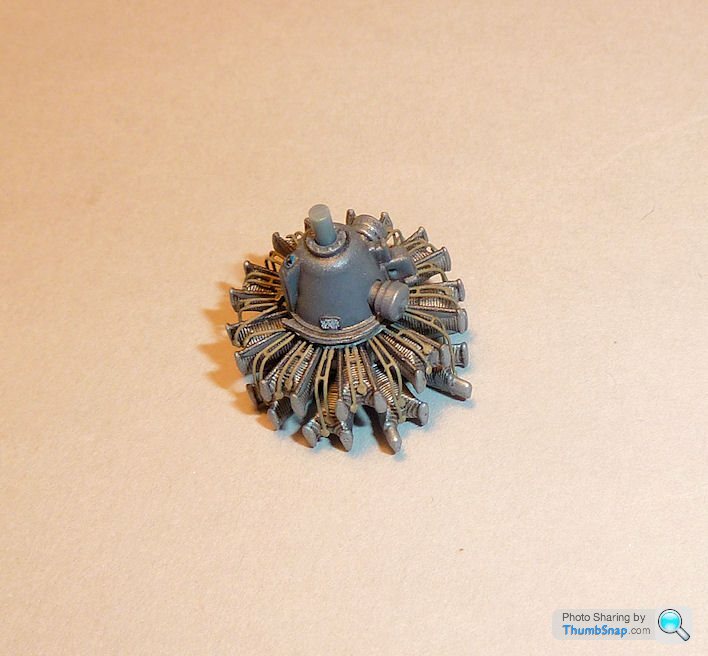
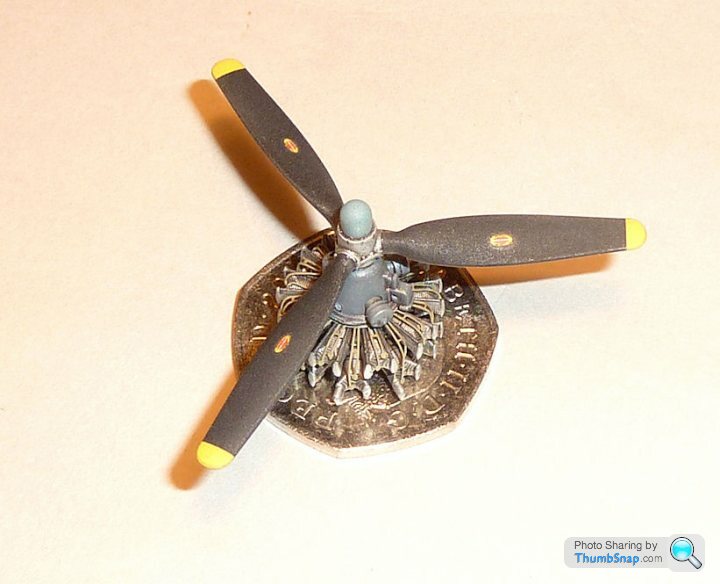
And the engine & propeller:
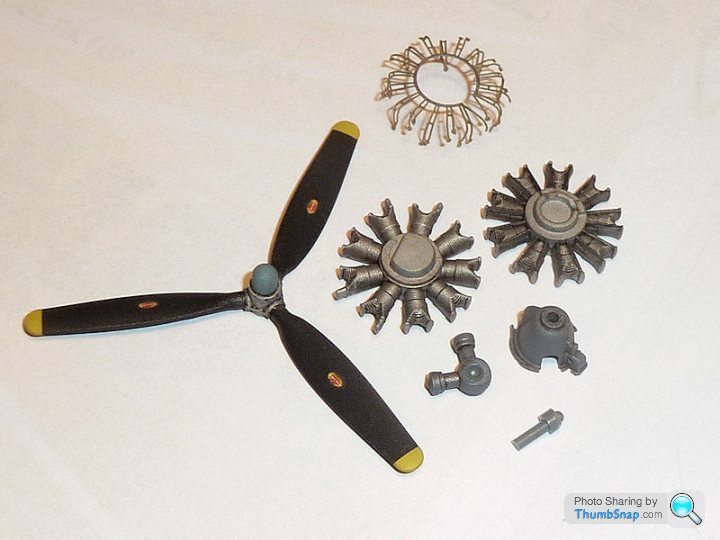

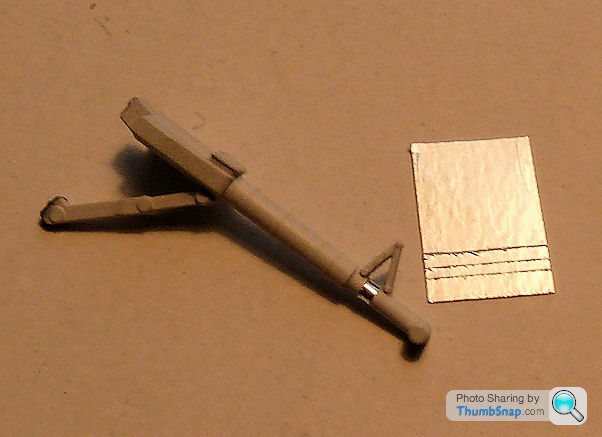
Also applied Bare Metal Foil to the u/c legs to represent the chromium plated sliders; paint never looks right (not that these are too visible when assembled):
Still a few small finishing touches to all of the above, mainly coating some of the balck bits with Klear to remove some of the greyness and give some variation to the rather extensive matt finish, but at least some assembly done.
And the engine & propeller:
Also applied Bare Metal Foil to the u/c legs to represent the chromium plated sliders; paint never looks right (not that these are too visible when assembled):
Still a few small finishing touches to all of the above, mainly coating some of the balck bits with Klear to remove some of the greyness and give some variation to the rather extensive matt finish, but at least some assembly done.
jamieduff1981 said:
That's looking great.
Subconsciously inspired, perhaps, I ordered the 1/48 version (albeit in weekend edition - it's easier to slip the profipack contents past Ground Control in pieces) for less than £7 from Mike Jolly the other night. Can't go wrong at that price!
Ta! I've not built a 1:48 kit yet in this modelling era, but I'd have had a go at that for £7. I fancy the Eduard Polikarpov I-16, so if I see one at Telford I might have a go. There are some real bargains at model shows sometimes. Don't know why, but I've always had a soft spot for that type after completely screwing up the old Revell version when I was about 6 years old:Subconsciously inspired, perhaps, I ordered the 1/48 version (albeit in weekend edition - it's easier to slip the profipack contents past Ground Control in pieces) for less than £7 from Mike Jolly the other night. Can't go wrong at that price!

Edited by dr_gn on Wednesday 7th October 22:48
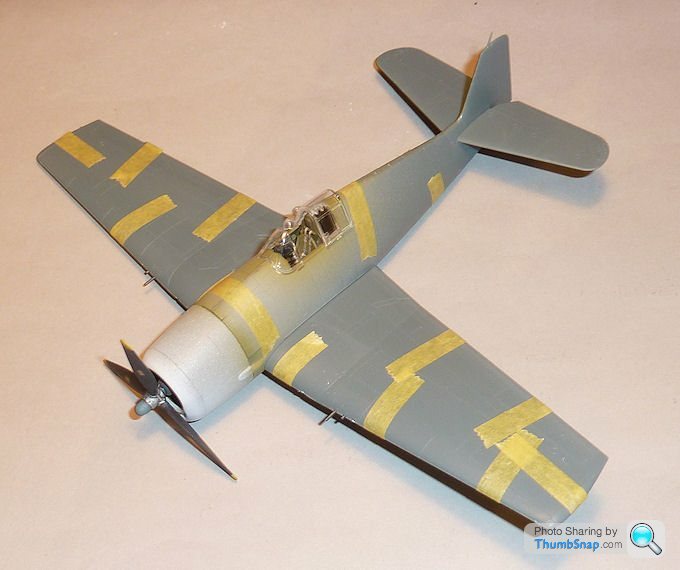
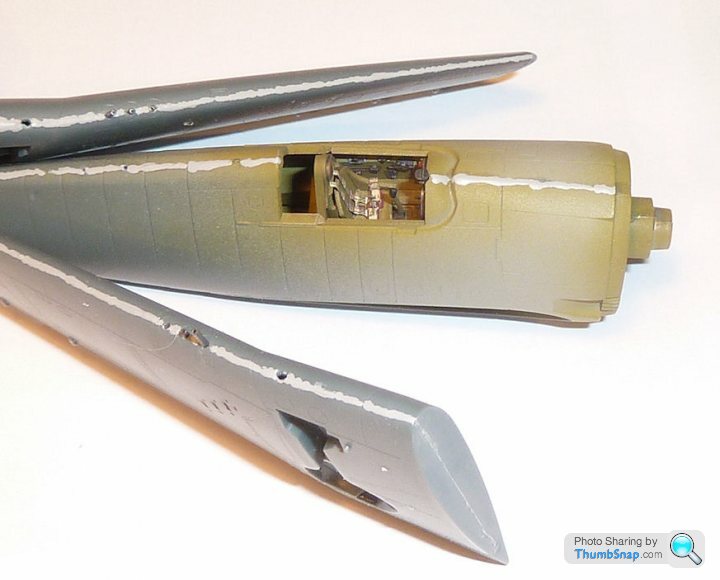
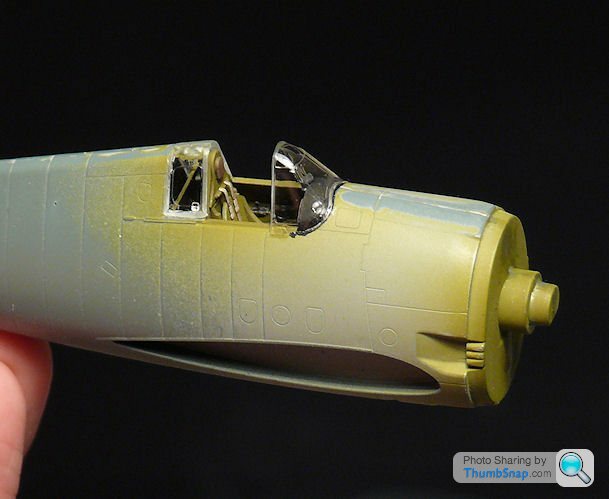
Fuselage and wing halves together tonight, so I thought I'd dry fit the wings and other main bits together to see how it looks. I'll probably leave the cowling loosely fitted for painting so that I don't have to mask the engine, and it will allow me to paint the exhaust stubs much more easily:
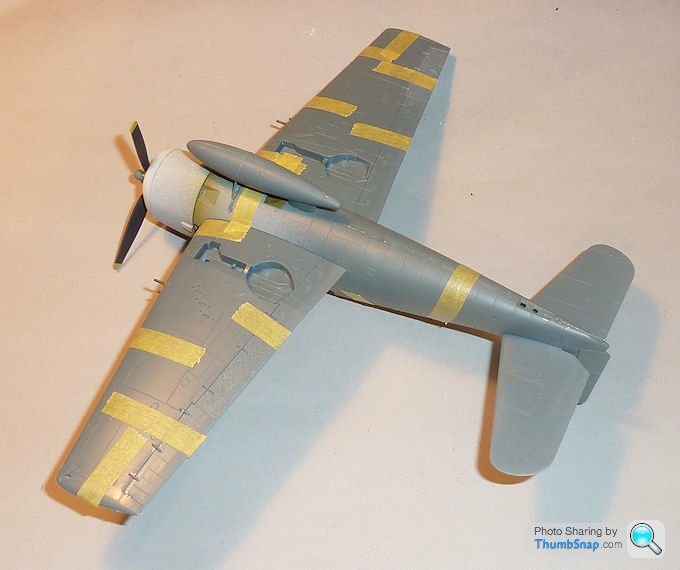
The rear glazing is formed as a separate transparent assembly that has to be masked before sparaying the camo. The masks are included in the kit:
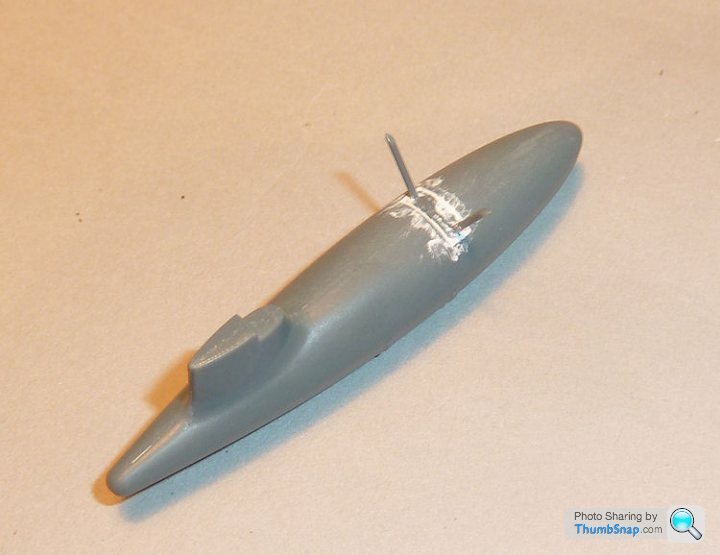
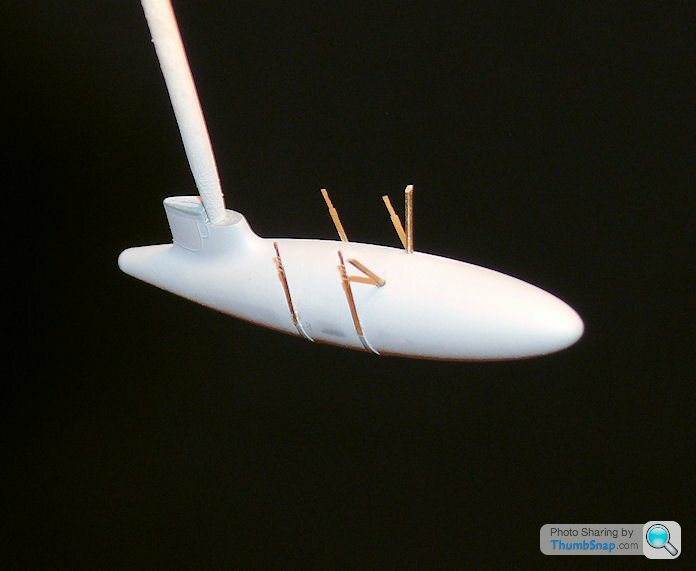
The ventral tank has an insert for the front stays, which are extremely finely moulded. It would have been easier to add them separately, especially since there is a very slight step around the mating surfaces, but...whatever:
I was going to fit bombs, since they have very nice photo-etched fins, but the fins appear to be much too small:
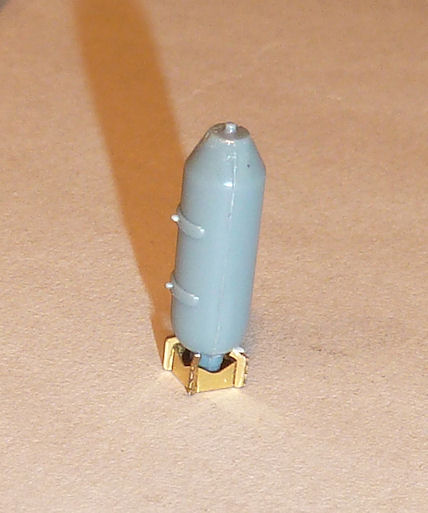
(they are on the wrong end of the bomb in the image!).
The rear glazing is formed as a separate transparent assembly that has to be masked before sparaying the camo. The masks are included in the kit:
The ventral tank has an insert for the front stays, which are extremely finely moulded. It would have been easier to add them separately, especially since there is a very slight step around the mating surfaces, but...whatever:
I was going to fit bombs, since they have very nice photo-etched fins, but the fins appear to be much too small:
(they are on the wrong end of the bomb in the image!).
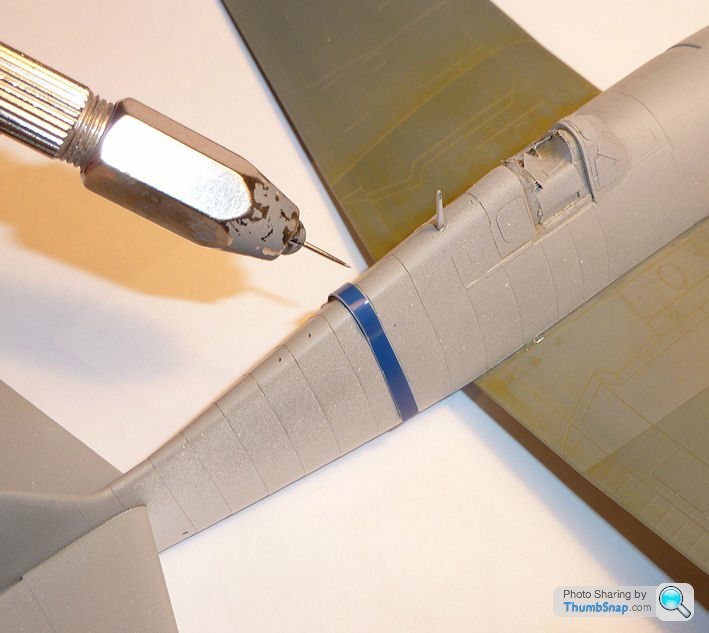
Coated the fuselage and wing joints with Mr.Surfacer just in case there were any gaps (don't think there were, but difficult to see), and filed the cut-outs for the wing-tip navigation lights. I also removed the moulded-in dorsal lamp bumps and drilled pilot holes in preparation for inserting some more realistic clear sprue, and for the VHF whip aerial. There is another hole drilled on the underside for the IFF aerial, and one on the side behind the cockpit for the radio flying lead:
I might yet snap the gun barrels off and use brass tube; as they are they make sanding the l/e joint difficult and will be a nightmare to mask.
Also snapped off the ventral tank struts by being clumsy, so I thought 'sod it' and went for my initial idea which was to drill and use brass tube. Also makes sanding the insert flush much easier:

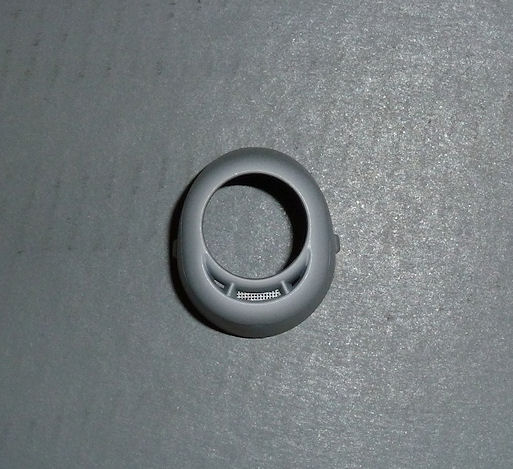
And fitted the photo-etch mesh into the oil cooler intake:
I might yet snap the gun barrels off and use brass tube; as they are they make sanding the l/e joint difficult and will be a nightmare to mask.
Also snapped off the ventral tank struts by being clumsy, so I thought 'sod it' and went for my initial idea which was to drill and use brass tube. Also makes sanding the insert flush much easier:
And fitted the photo-etch mesh into the oil cooler intake:
Added the p/e bracing struts to the inside of the rear canopy assembly:
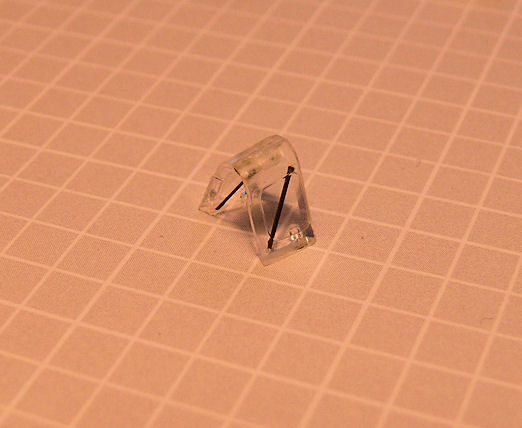
And the gunsight:
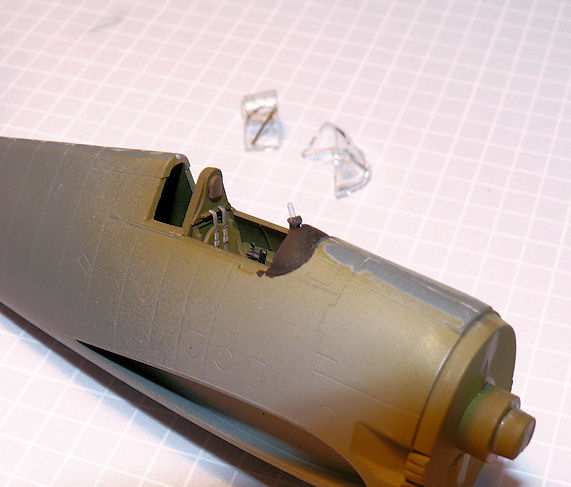
And fitted the front and rear screens with PVA:
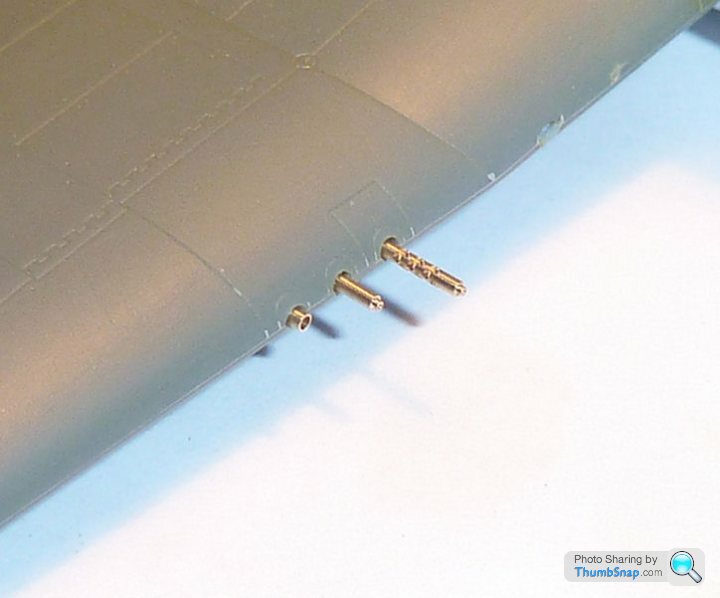
Also ended up snapping the gun barrels off and drilling the wing to accept brass tube to be fitted after painting (there is also a l/e landing light in the process of being opened out in preparation for a clear lens:
And filed out the solid wingtip lamp covers to replace with scrap clear styrene:

Here's one after profiling and polishing:
I'll snap them out and add them finally after main painting.
Small details, but they add up to make a big difference to the look of a model at this scale.
And the gunsight:
And fitted the front and rear screens with PVA:
Also ended up snapping the gun barrels off and drilling the wing to accept brass tube to be fitted after painting (there is also a l/e landing light in the process of being opened out in preparation for a clear lens:
And filed out the solid wingtip lamp covers to replace with scrap clear styrene:
Here's one after profiling and polishing:
I'll snap them out and add them finally after main painting.
Small details, but they add up to make a big difference to the look of a model at this scale.
Finished the main landing gear, just added some brake lines from lead wire:

It's great that the wheels and tyres are separate parts.
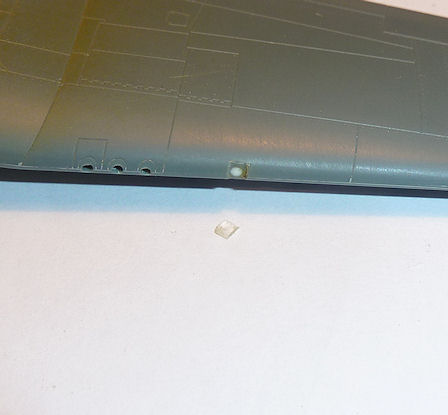
The ventral signalling lamps are shown on the plans, but aren't there on the plastic. I've drilled shallow indents that I will either dot with silver and then clear paint, or use 1mm Little Lenses:
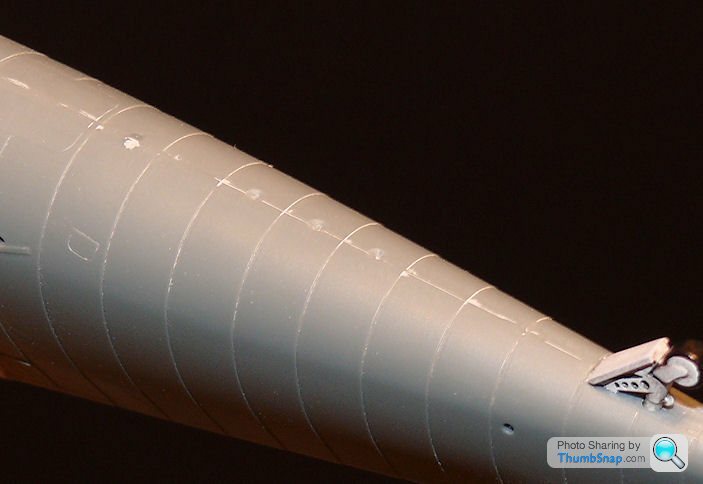
The overlapping fuselage construction is nicely represented, but there will be a lot of rescribing needed along the join lines.
Quite a few bits of brass on the drop tank now:
It's getting to that demoralising stage where the airframe looks a disaster. Things usually improve a lot when everything is a uniform colour and all the corrections, filling and sanding is covered up.
It's great that the wheels and tyres are separate parts.
The ventral signalling lamps are shown on the plans, but aren't there on the plastic. I've drilled shallow indents that I will either dot with silver and then clear paint, or use 1mm Little Lenses:
The overlapping fuselage construction is nicely represented, but there will be a lot of rescribing needed along the join lines.
Quite a few bits of brass on the drop tank now:
It's getting to that demoralising stage where the airframe looks a disaster. Things usually improve a lot when everything is a uniform colour and all the corrections, filling and sanding is covered up.
Masked the windscreen and rear screens using the pre-cut masks. As with the Mosquito, most of them weren't exactly right, but could be cut to fit pretty well - hopefully. Then sprayed interior green which will show through on the inside of the framing. I also used this colour as a guide coat to see where any rescribing and filling needs doing. I think it's just rescribing on this one:
Edited by dr_gn on Monday 12th October 22:52
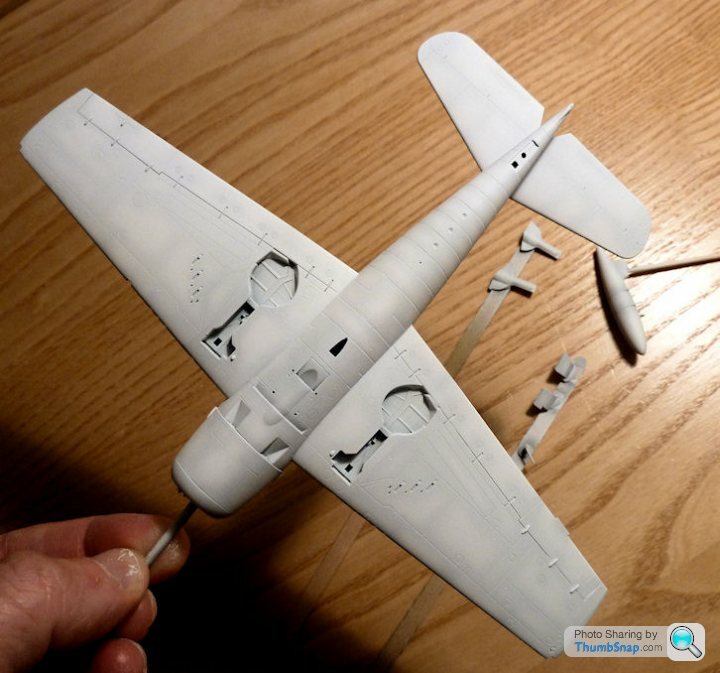
Rescribing done (pin and Dymo tape as a guide, followed by light flatting as usual these days), and wings fitted:
A bit of filler might be needed around the wing-fuselage joints, depends on how it looks in primer.
I got some 1mm "Little Lenses" to try out for te signalling lamps. I peeled the foil off the back of them to make them a bit less sudden. I think they will look good once the drilled indents they are located in are toned down a bit with some dark grey preshade:

Also made a landing light out of scrap clear styrene after filing the aperture in the wing:
Might put a clear "Little Lens" behind it to represent the lamp reflector.
I also got some MasterModel turned brass barrels (OK so it's no quite OOB anymore, but they are awesome bits of kit for not much outlay):
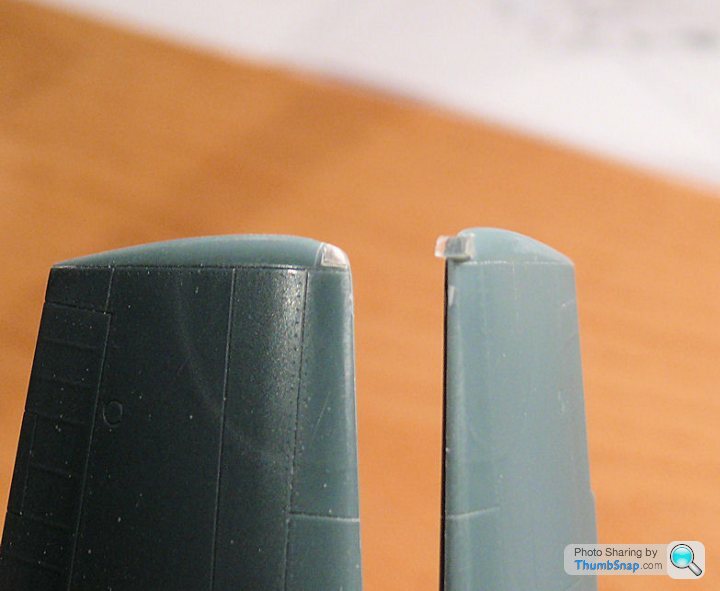
I'm still puzzling over the best way to get woodgrain on my Tamiya Mosquito, so it's still w.i.p., but it's interesting to compare it with the Hellcat:
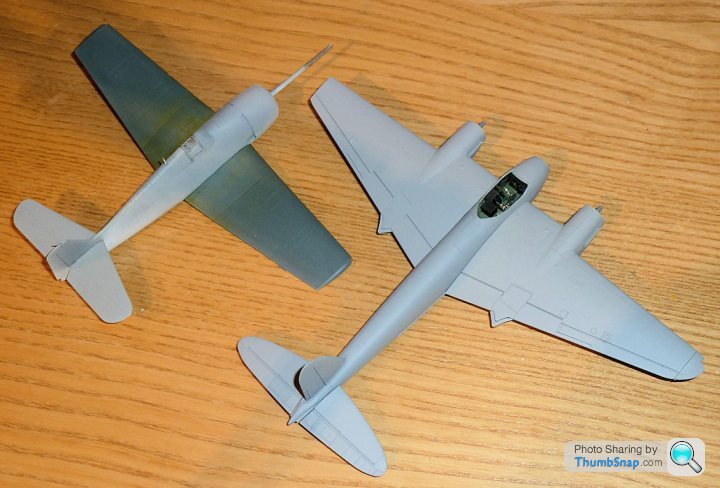
It's a big machine.
A bit of filler might be needed around the wing-fuselage joints, depends on how it looks in primer.
I got some 1mm "Little Lenses" to try out for te signalling lamps. I peeled the foil off the back of them to make them a bit less sudden. I think they will look good once the drilled indents they are located in are toned down a bit with some dark grey preshade:
Also made a landing light out of scrap clear styrene after filing the aperture in the wing:
Might put a clear "Little Lens" behind it to represent the lamp reflector.
I also got some MasterModel turned brass barrels (OK so it's no quite OOB anymore, but they are awesome bits of kit for not much outlay):
I'm still puzzling over the best way to get woodgrain on my Tamiya Mosquito, so it's still w.i.p., but it's interesting to compare it with the Hellcat:
It's a big machine.
Catweazle said:
dr_gn said:
I'm still puzzling over the best way to get woodgrain on my Tamiya Mosquito, so it's still w.i.p., but it's interesting to compare it with the Hellcat:
It's a big machine.
This is how the railway modellers do it. It's a big machine.
http://www.rmweb.co.uk/forum/viewtopic.php?f=86&am...
Hope this helps.
http://www.pistonheads.com/gassing/topic.asp?h=1&a...
Ta.
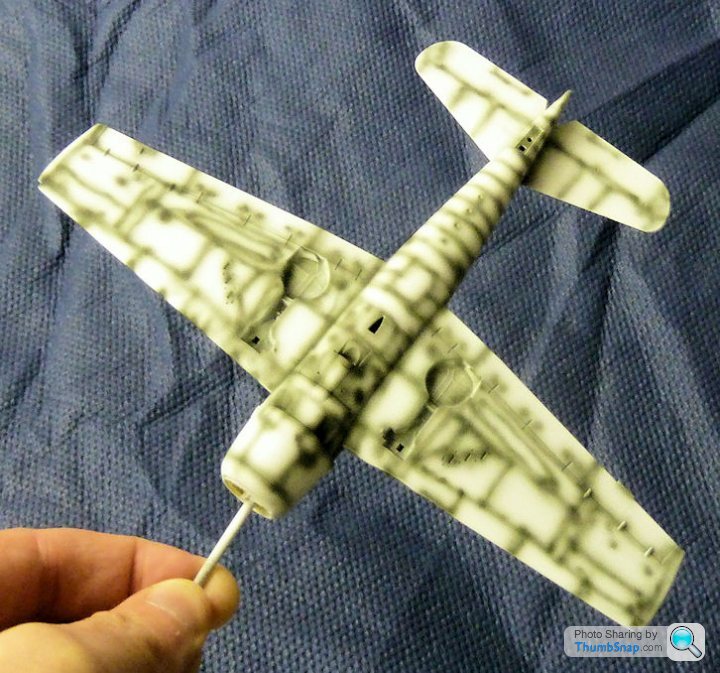
Put a smidge of filler around the wing roots, and got some Tamiya Grey primer on the wings. The cowling is still temproarily PVA'd in place for camo painting:

I used Tamiya Fine White Primer on the undersides; Vallejo White covers about as well as milk, but the primer covers everything in a couple of coats and is still very thin. I'll preshade with NATO Black straight over this:
Also primed the brass gun barrels/blast tubes:
I've wrapped them in a narrow strip of Tamiya tape and cyano so that when they are fitted into the sockets I drilled, they are concentric with the openings in the wings.
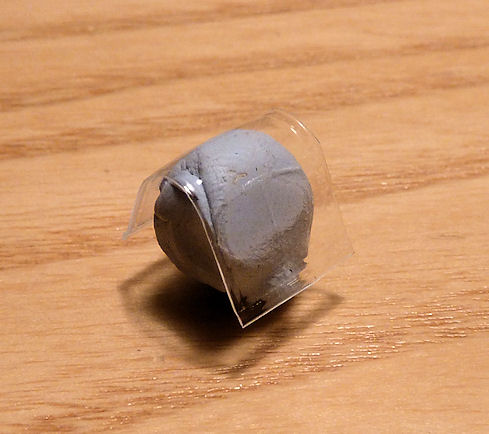
I thought a vacform canopy hood might look better than the overly thick plasitc version, so I got the Squadron item. It's designed to fit the Hasegawa Hellcat, but it will do. In the process of trimming the excess:
I used Tamiya Fine White Primer on the undersides; Vallejo White covers about as well as milk, but the primer covers everything in a couple of coats and is still very thin. I'll preshade with NATO Black straight over this:
Also primed the brass gun barrels/blast tubes:
I've wrapped them in a narrow strip of Tamiya tape and cyano so that when they are fitted into the sockets I drilled, they are concentric with the openings in the wings.
I thought a vacform canopy hood might look better than the overly thick plasitc version, so I got the Squadron item. It's designed to fit the Hasegawa Hellcat, but it will do. In the process of trimming the excess:
Edited by dr_gn on Friday 16th October 23:06
Gassing Station | Scale Models | Top of Page | What's New | My Stuff