1/48 Hawker Tempest V
Discussion


I've been so busy this year that my life seems to have flown by. I've had my first couple of days off (well 1.5 actually) since early July this weekend so I rummaged through the stash for something a) I could make a fresh start on, b) that I actually fancied building and c) had everything I needed to get on with it.
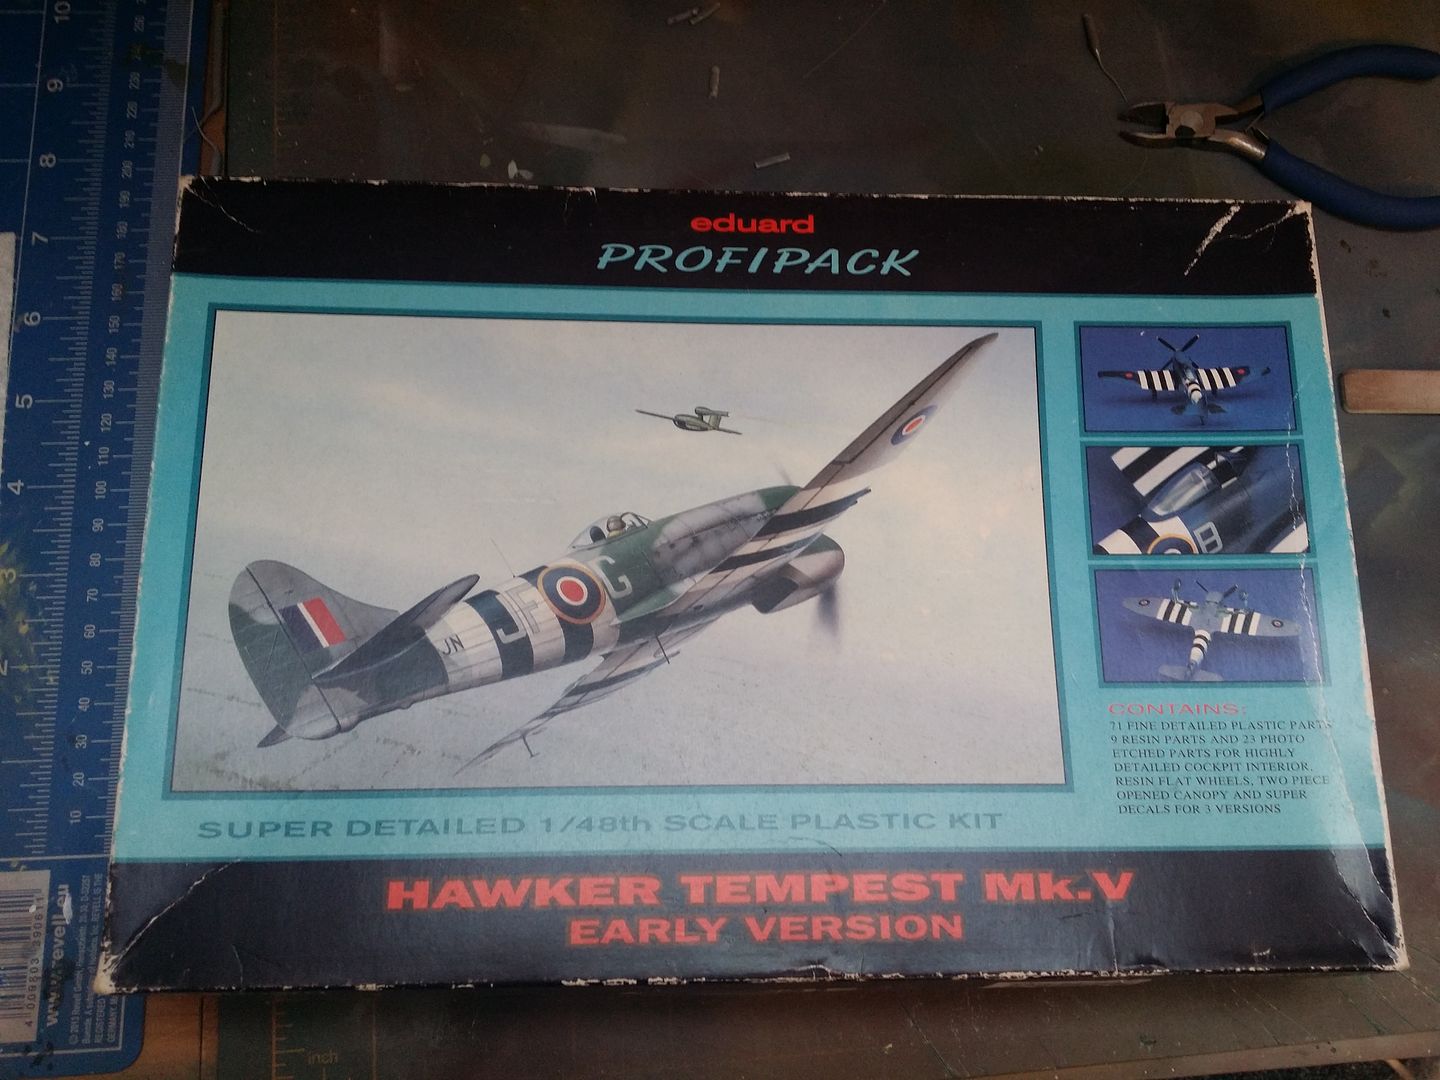
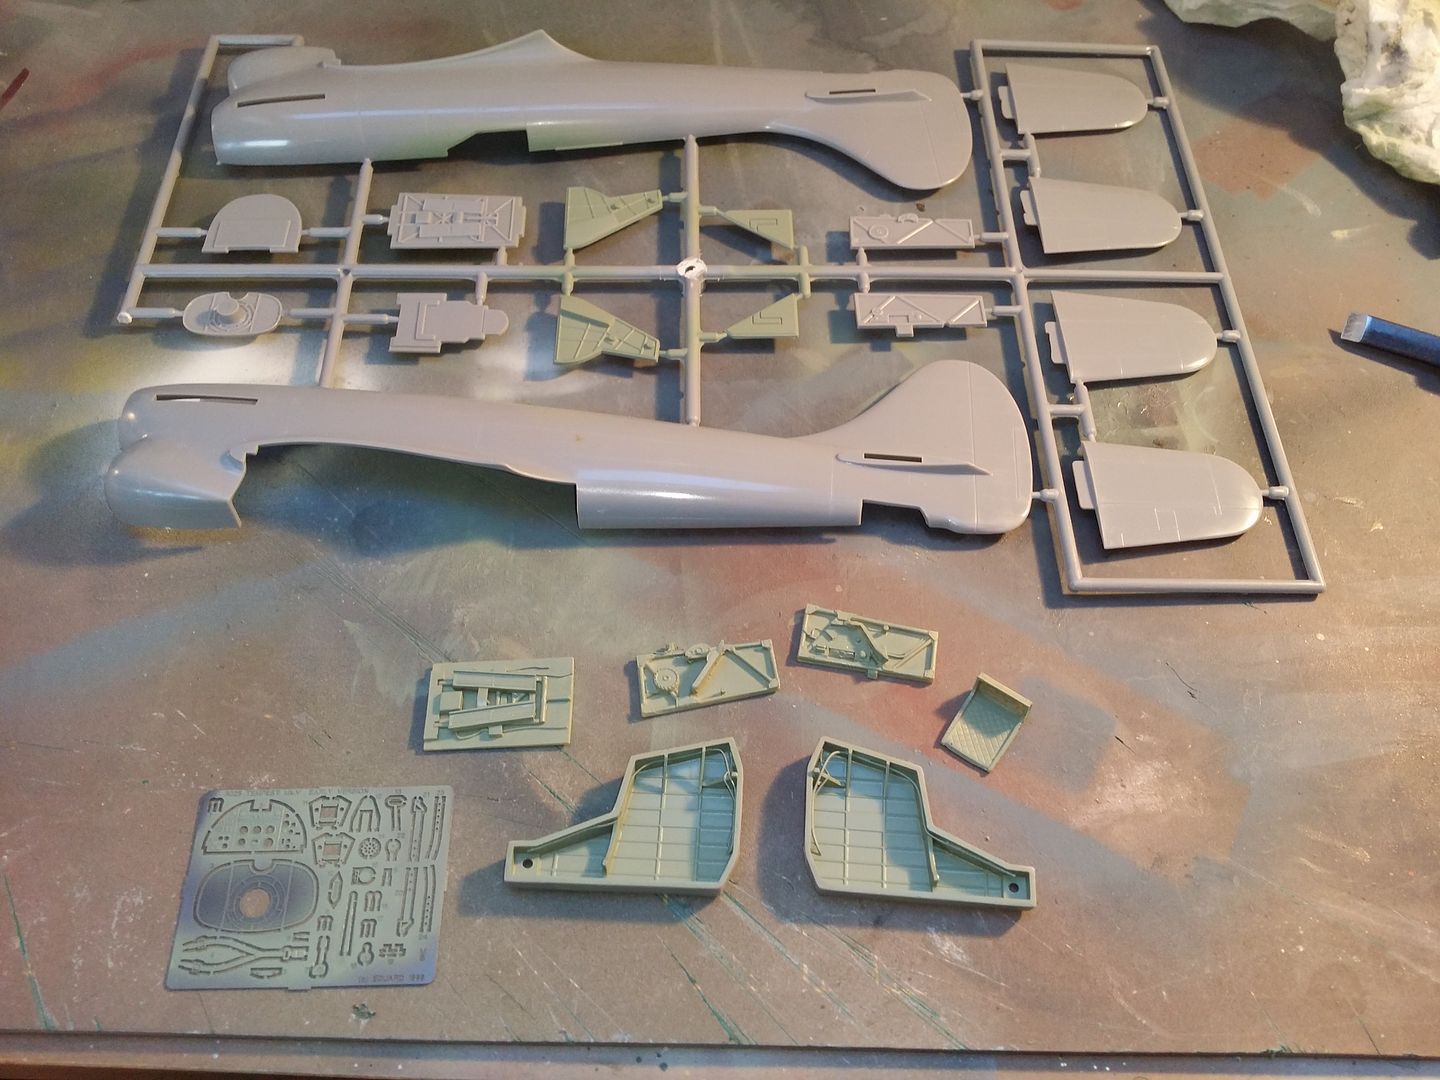
This Eduard Profipack Tempest has been sat in there for longer than I care to remember. It's a limited run-style multi-media kit with injection moulded main parts. These have nicely engraved panel lines but a lot of ejector pin marks inside and no locating pins on the parts - pretty common for the era. The cockpit is injection moulded on the sprues but the Profipack contains lovely cast resin replacements as well as weighted wheels and a small fret of photo etched brass, plus a pack of canopy masks.
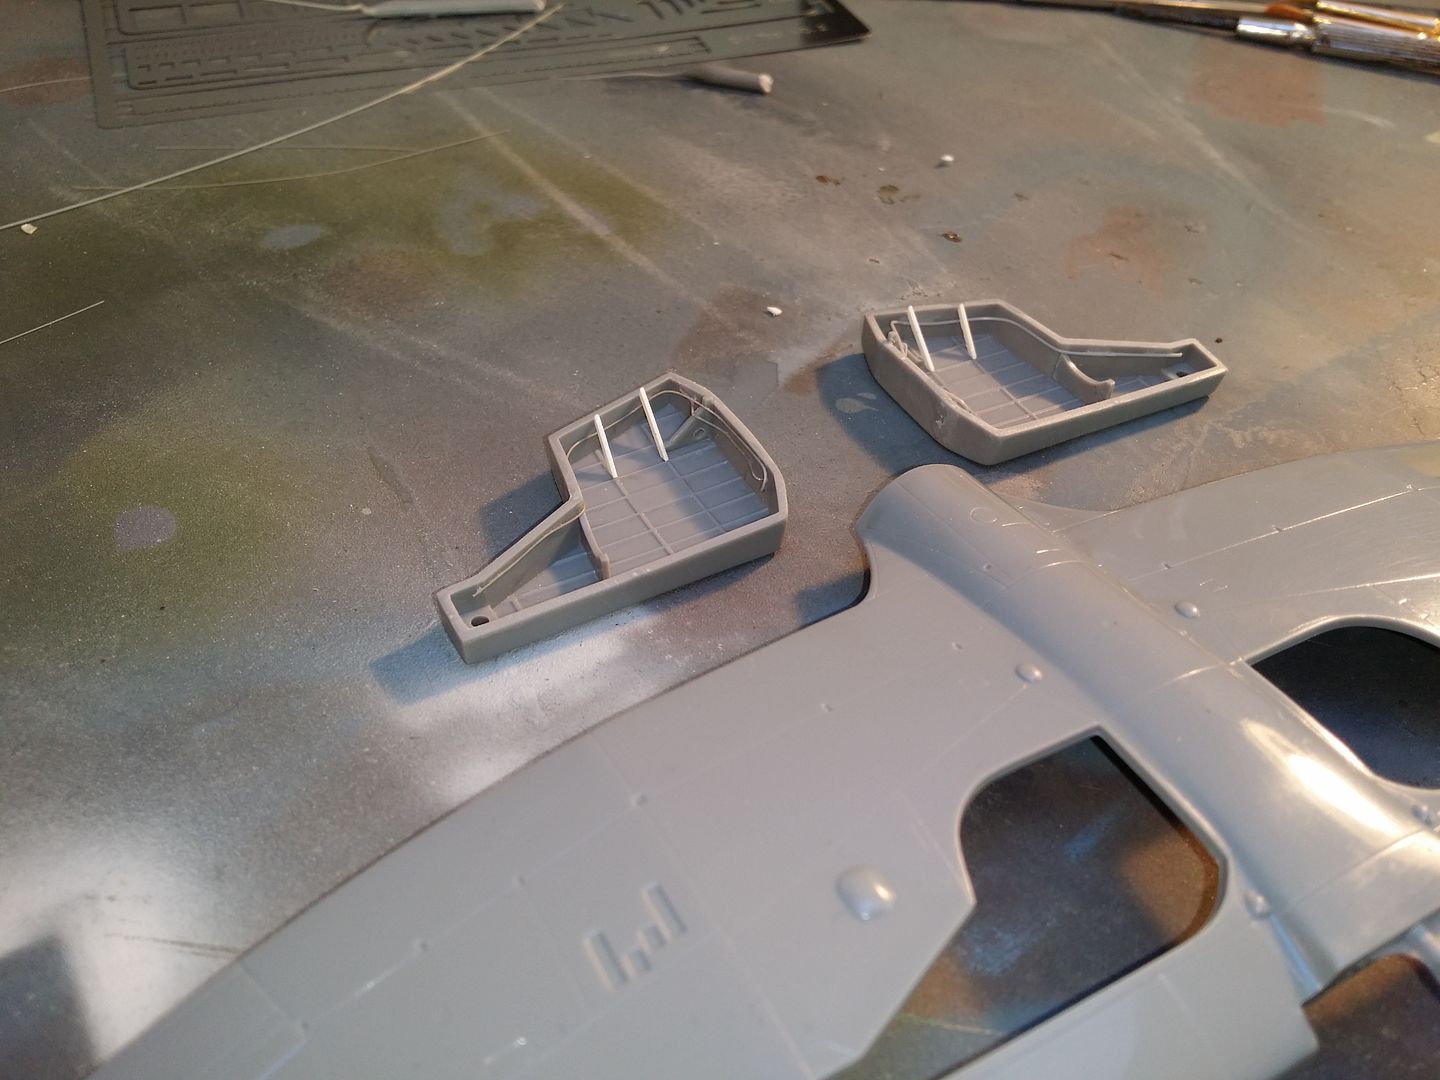
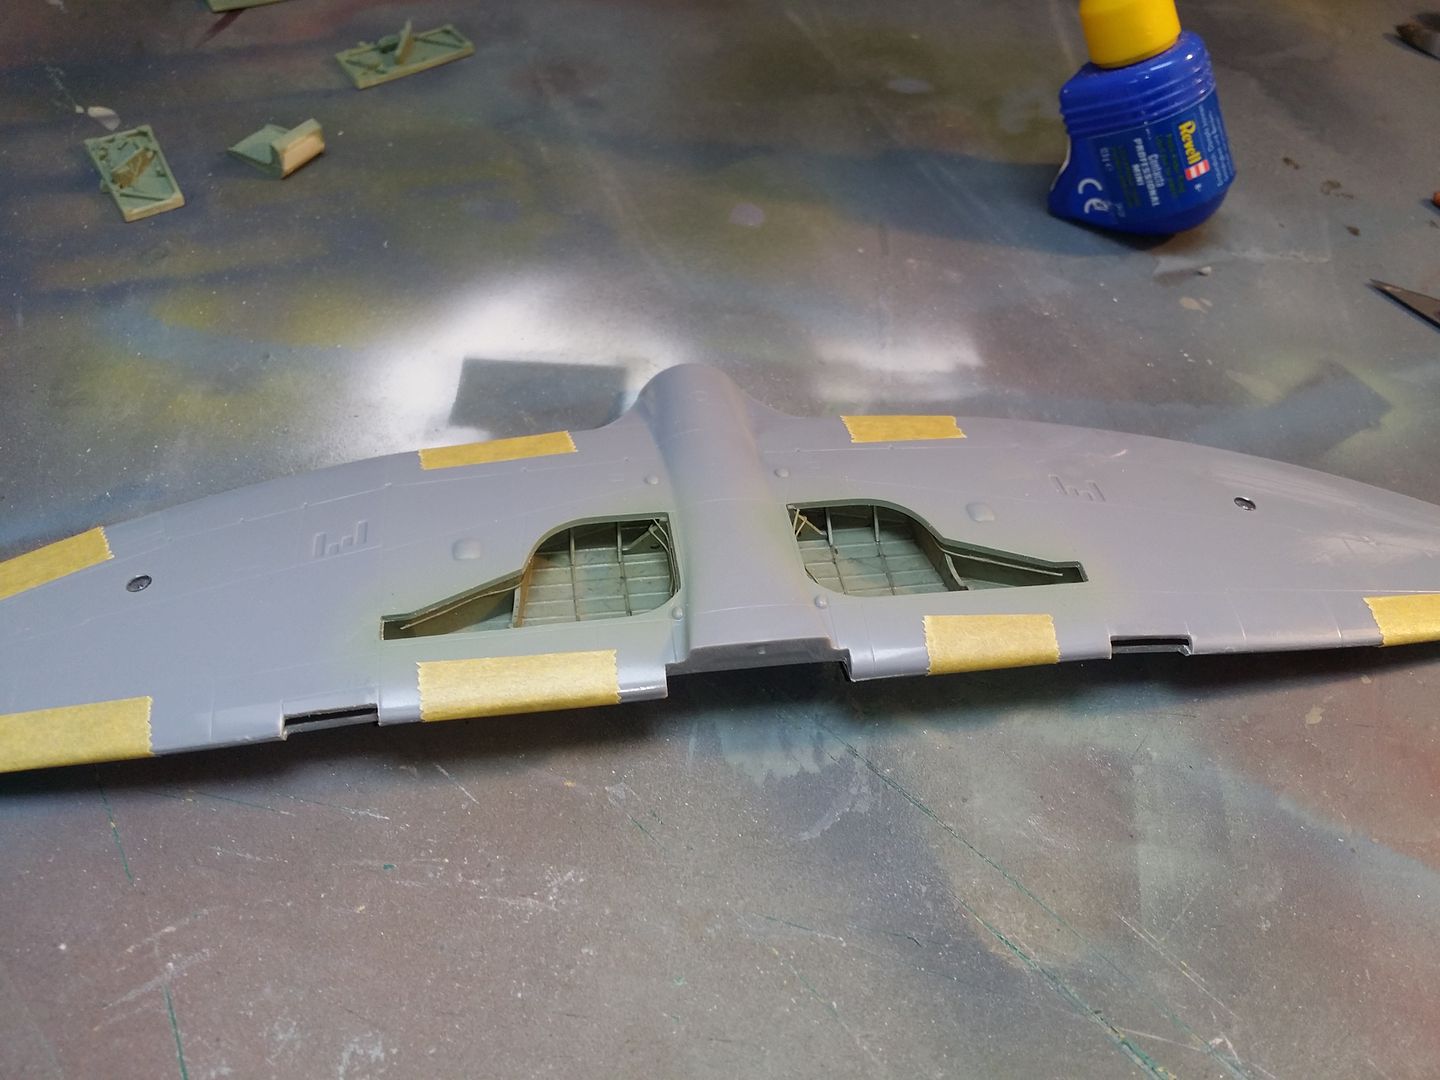
I normally start with cockpits but for some reason I decided to start this model off with the wheel wells. The kit contains injection moulded inserts with some basic rib and stringer detail. Once upon a time, when I was a more content modeller this would have been fine but modern me added hydraulic lines and braces. The reference material was Tempest II restoration project photographs. Feel free to not correct me if it's inaccurate - I'm happy with it.
The interior parts were given a squirt of Colourcoats ACRN28 British interior grey-green from an early morning stock room raid.
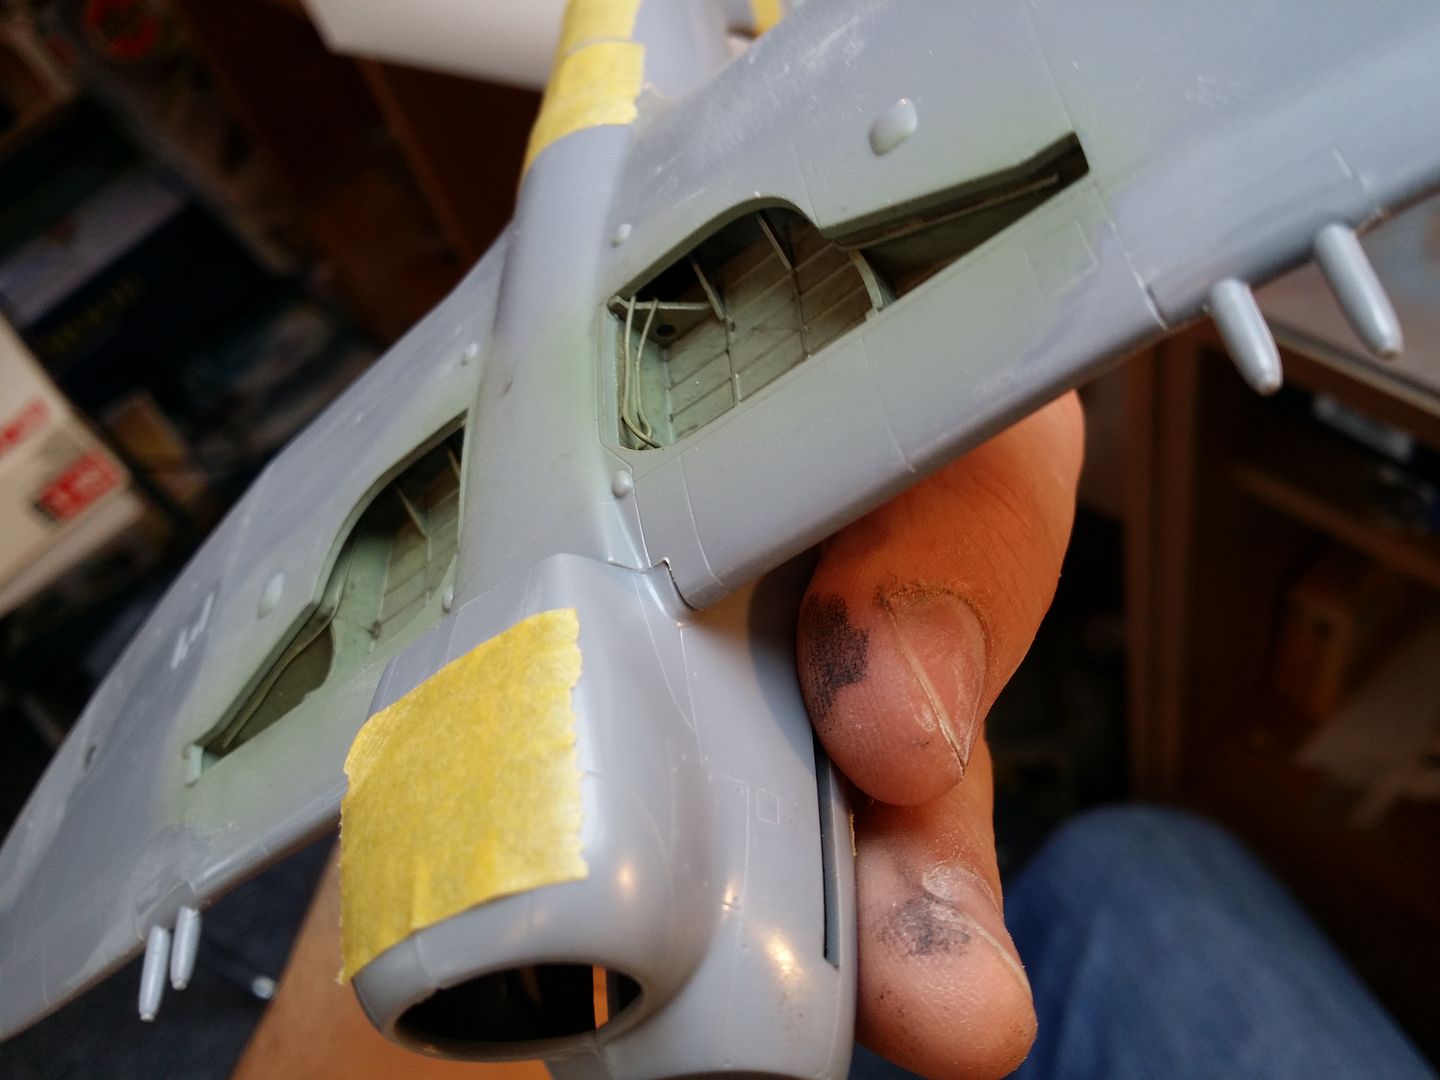
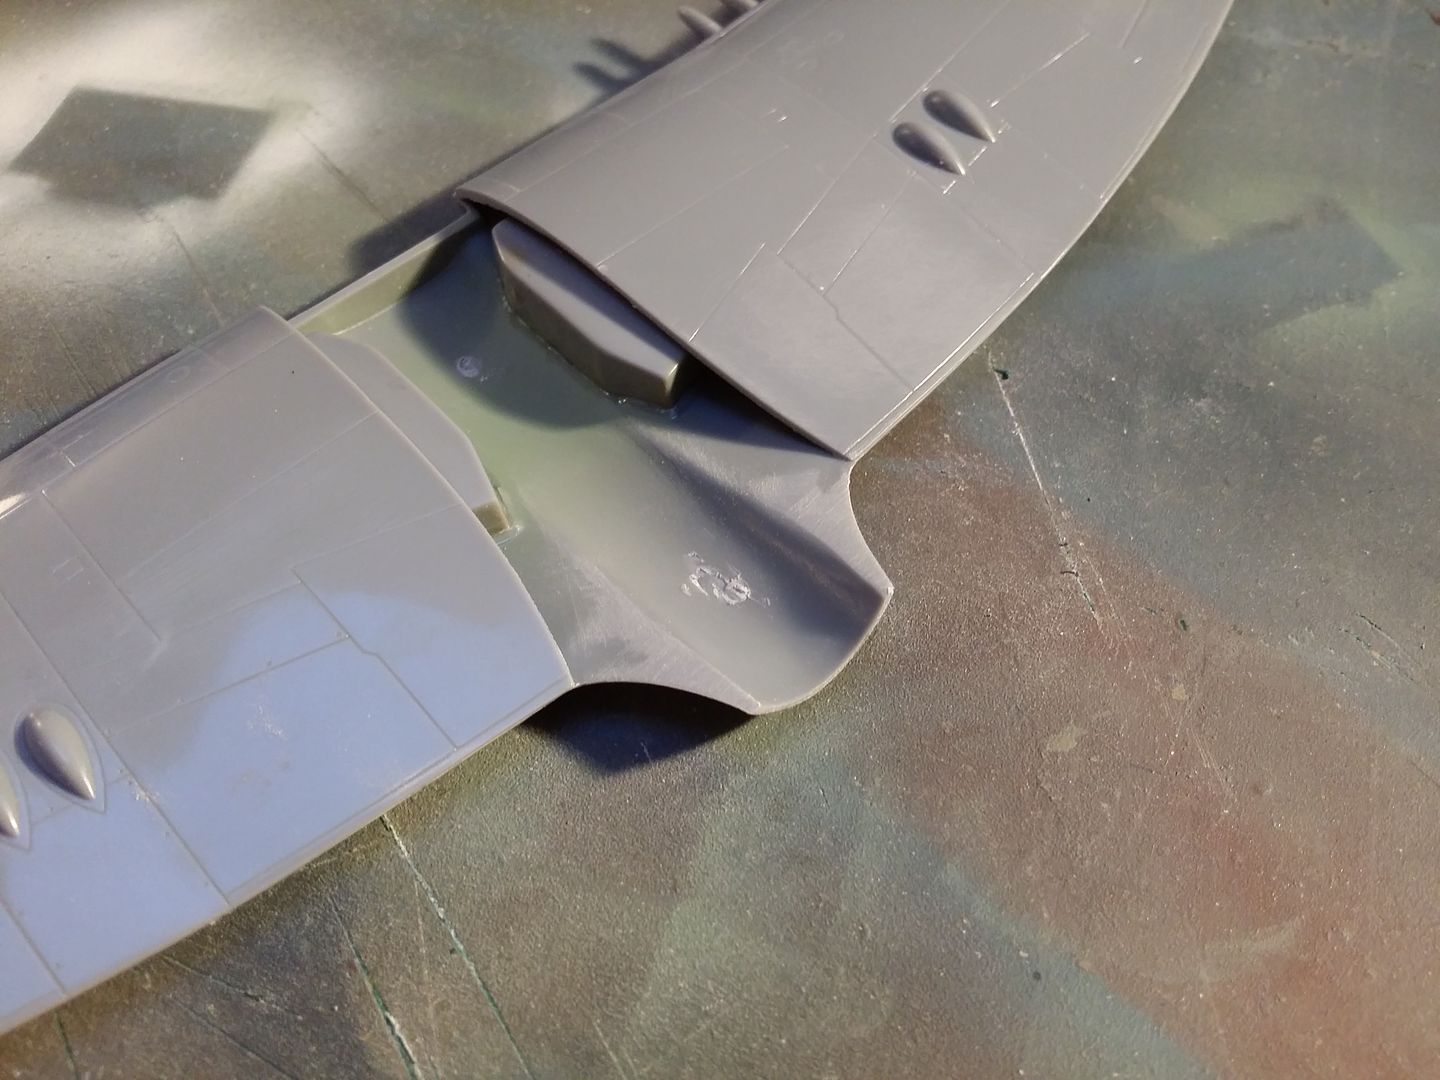
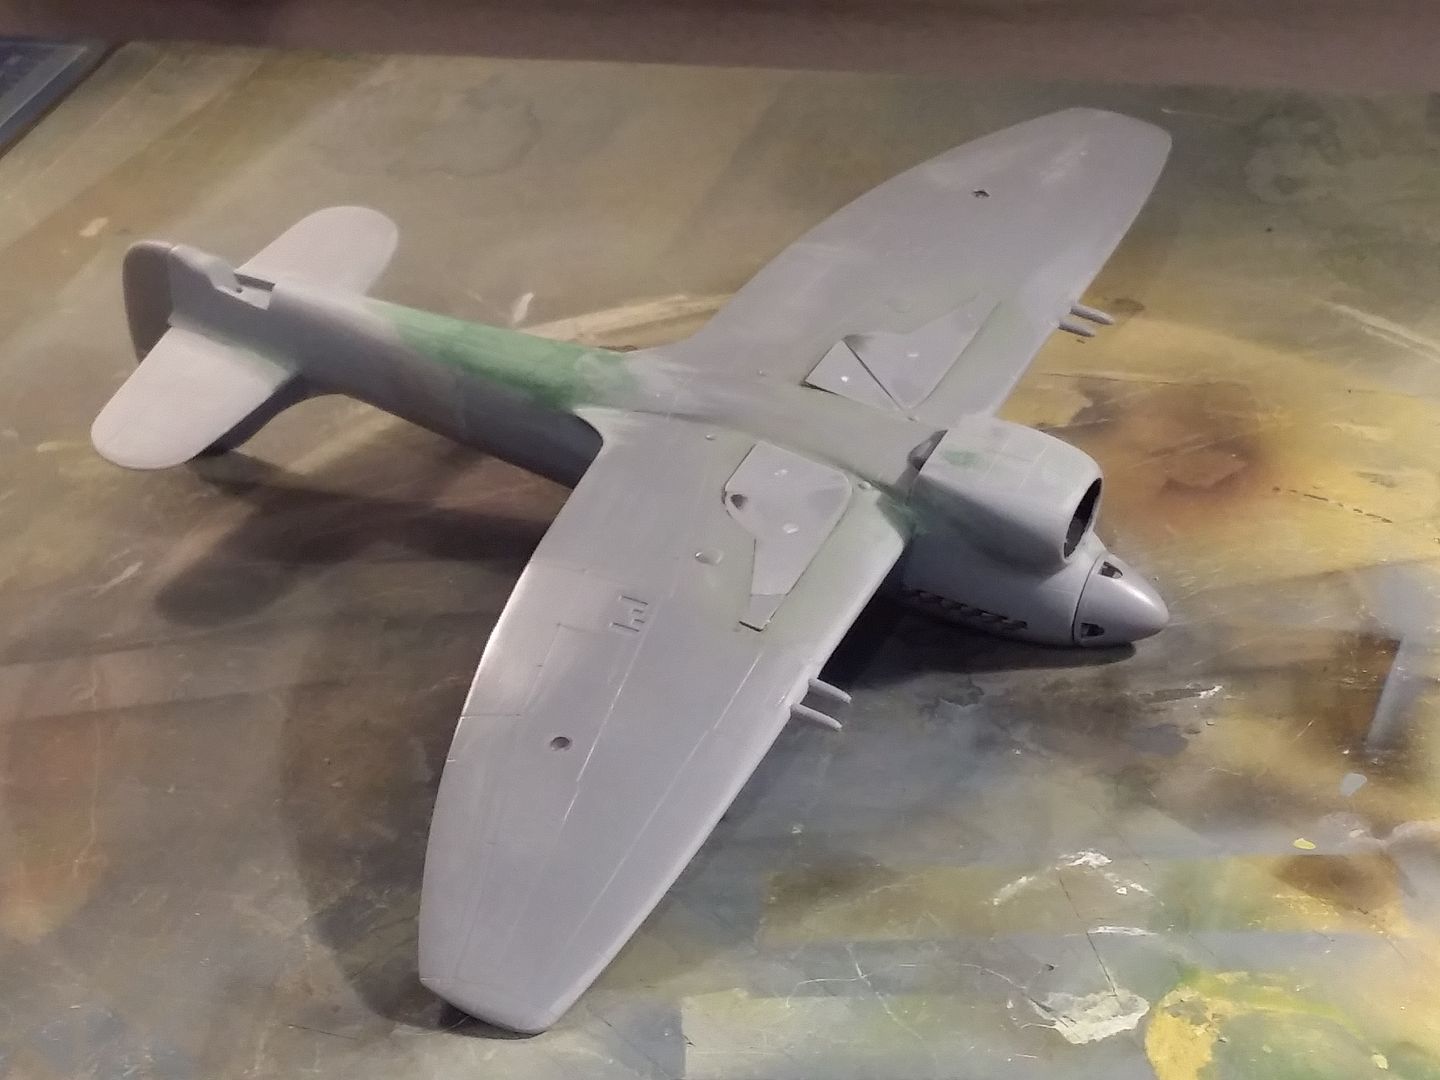
I assembled the wing next. I feared fit problems but the parts fit is better than many current-day offerings. A little tape was used to keep it snug whilst the cement dried. Once dry, the wheel wells were washed using old acrylics; very dark brown, followed by sandy yellow, followed by an earthy brown.
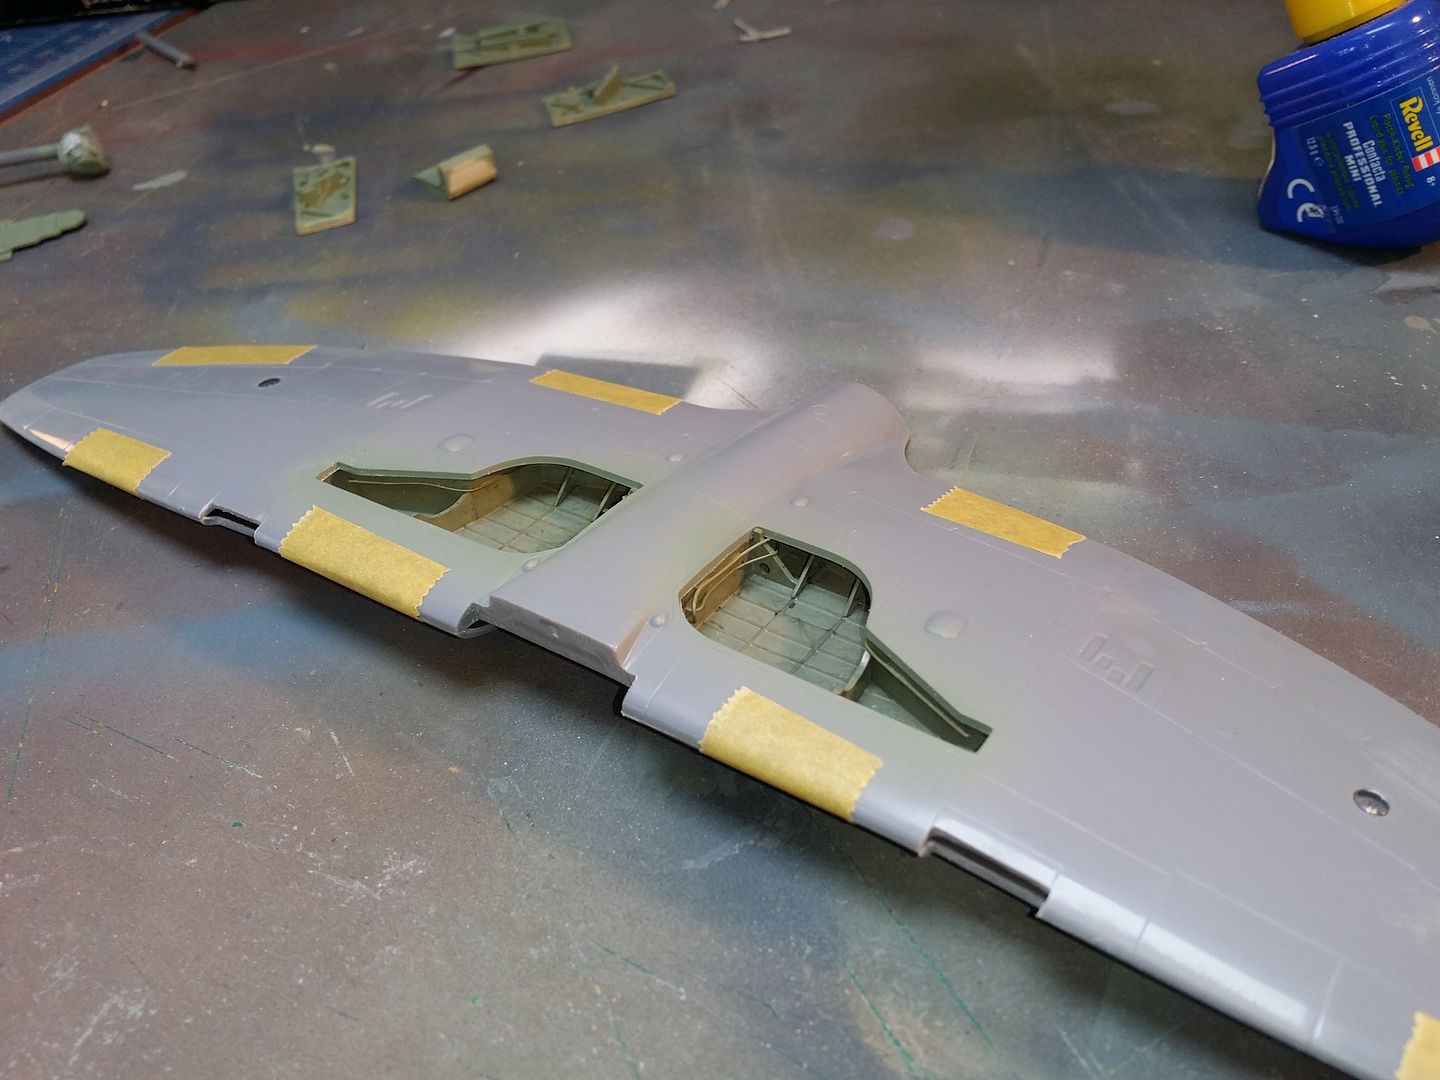
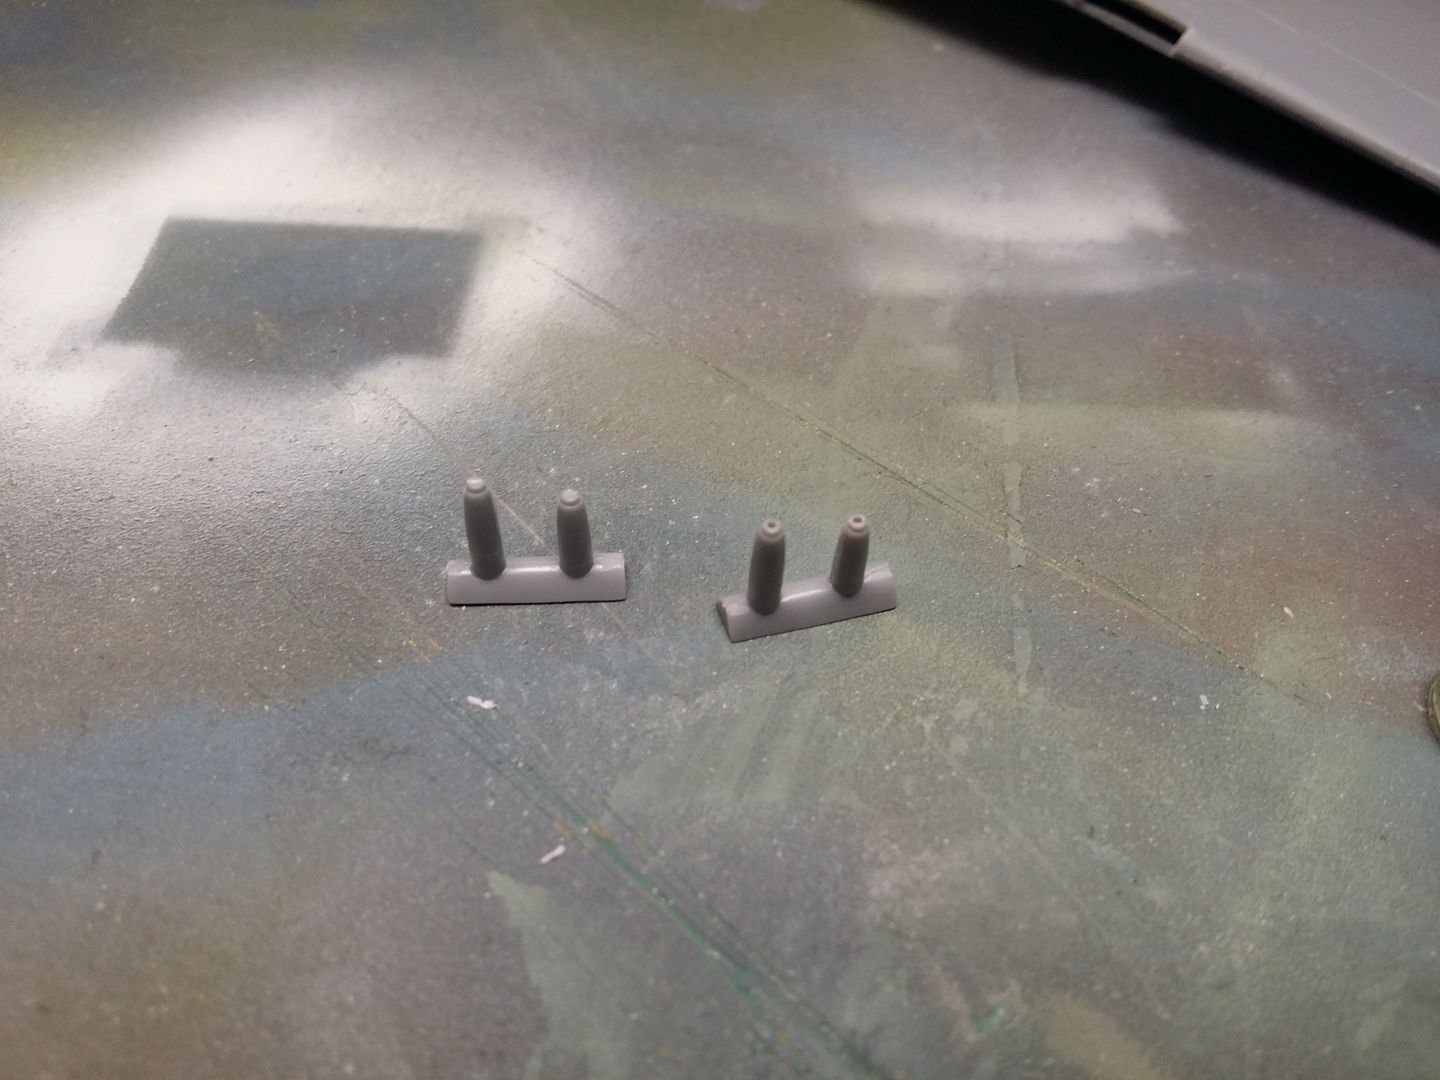
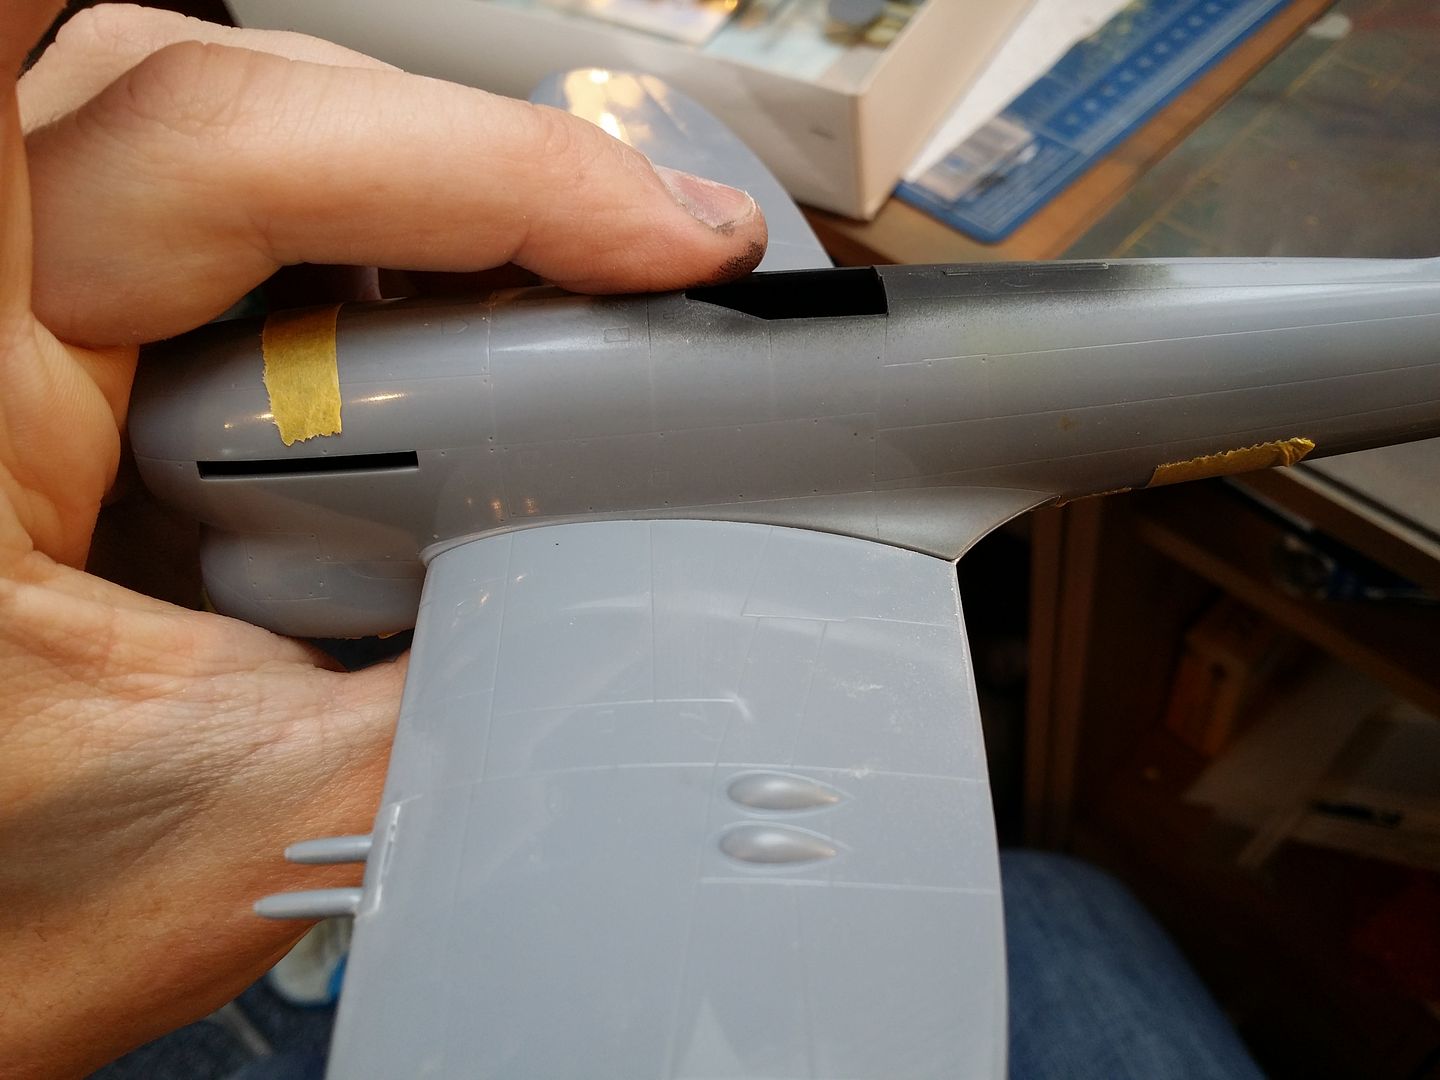
The early Tempest V had the original long barrel Hispano cannons. In terms of the kit this means cutting out the leading edges and fitting inserts, which I drilled out.
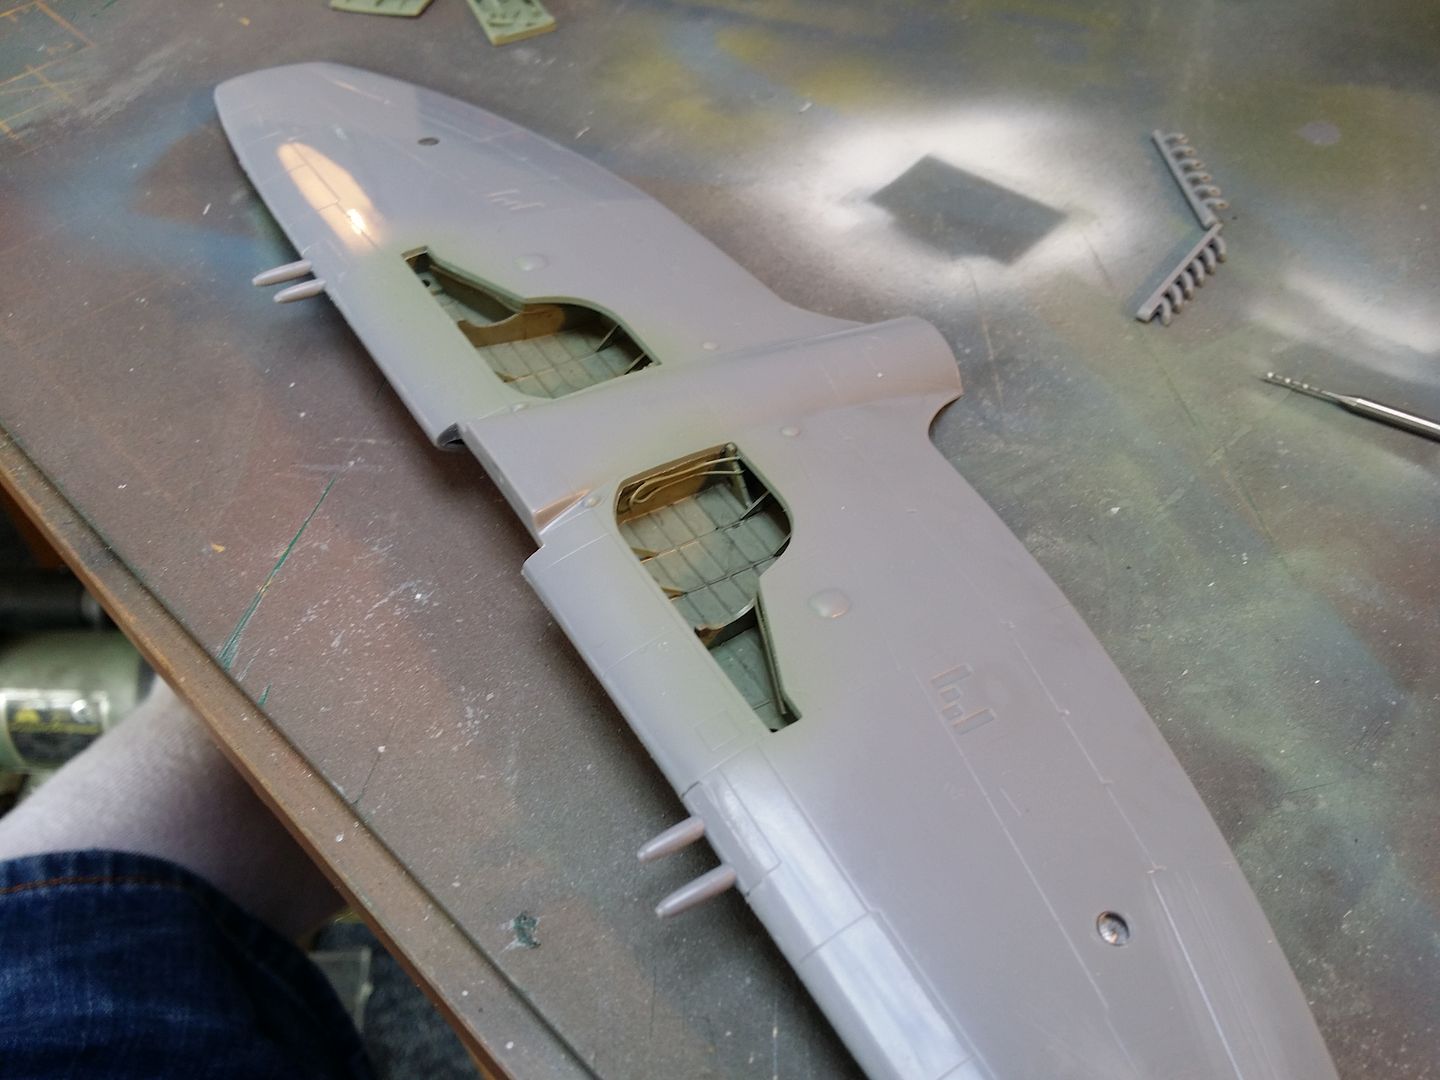
That concludes the wing near enough - I think I'll cut out the navigation lights and replace with clear sprue though.
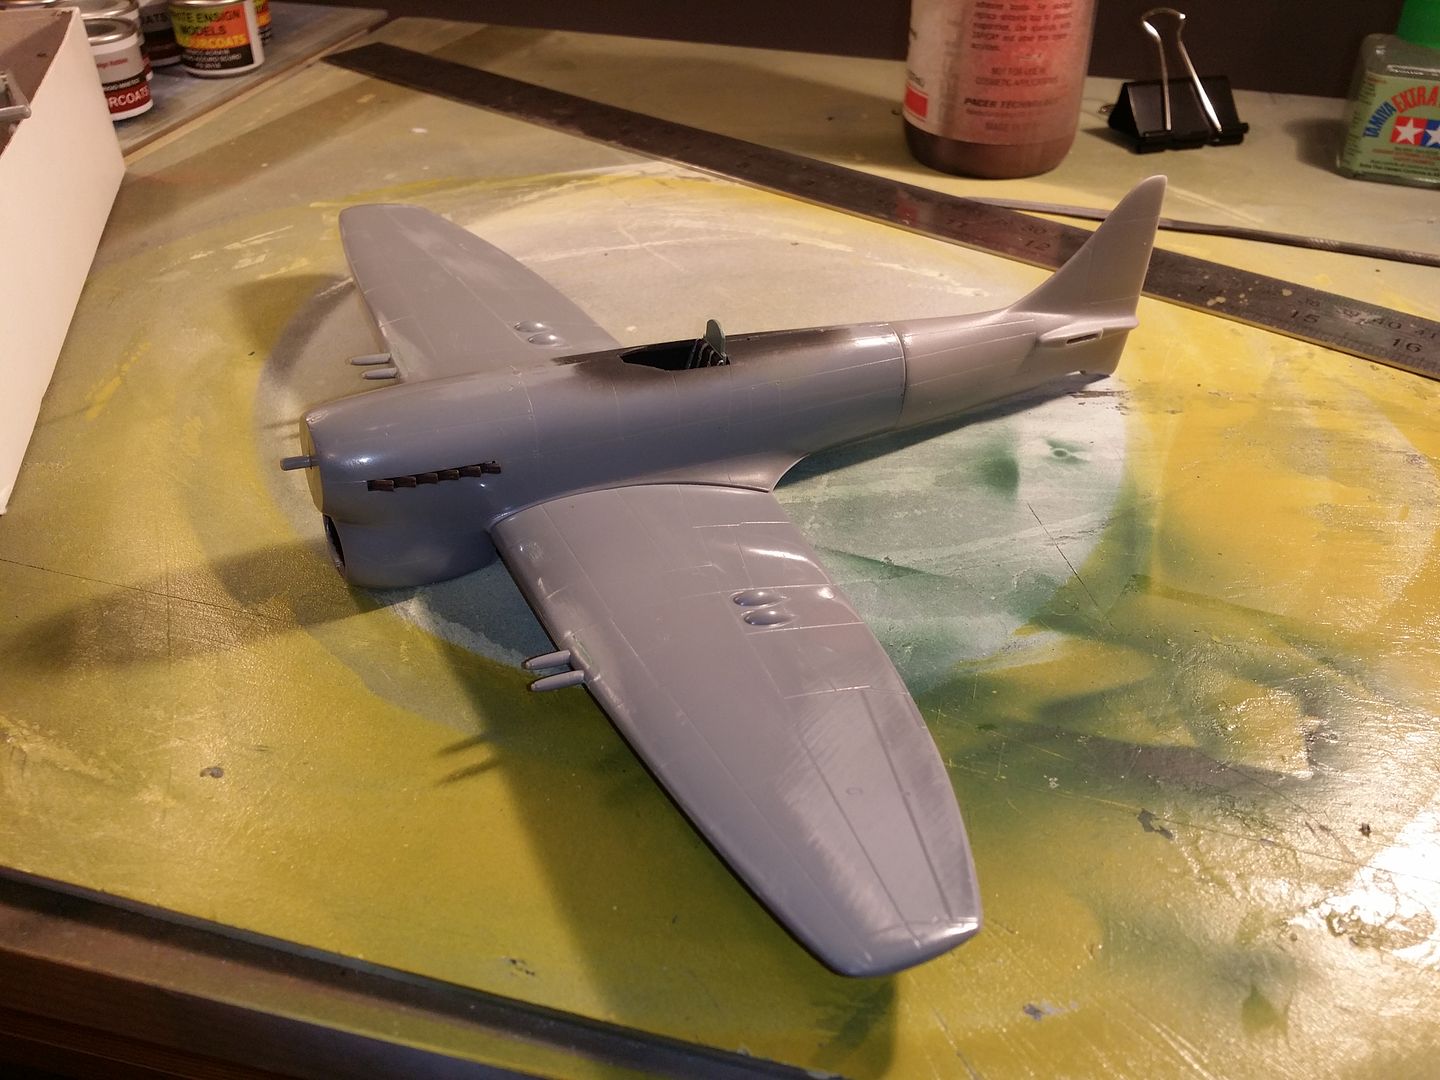
I taped the fuselage halves together as I was dreading the fit with the wing. It'll need a little filler but once again, I've had far, far worse from modern kits. It looks rather Tempesty.
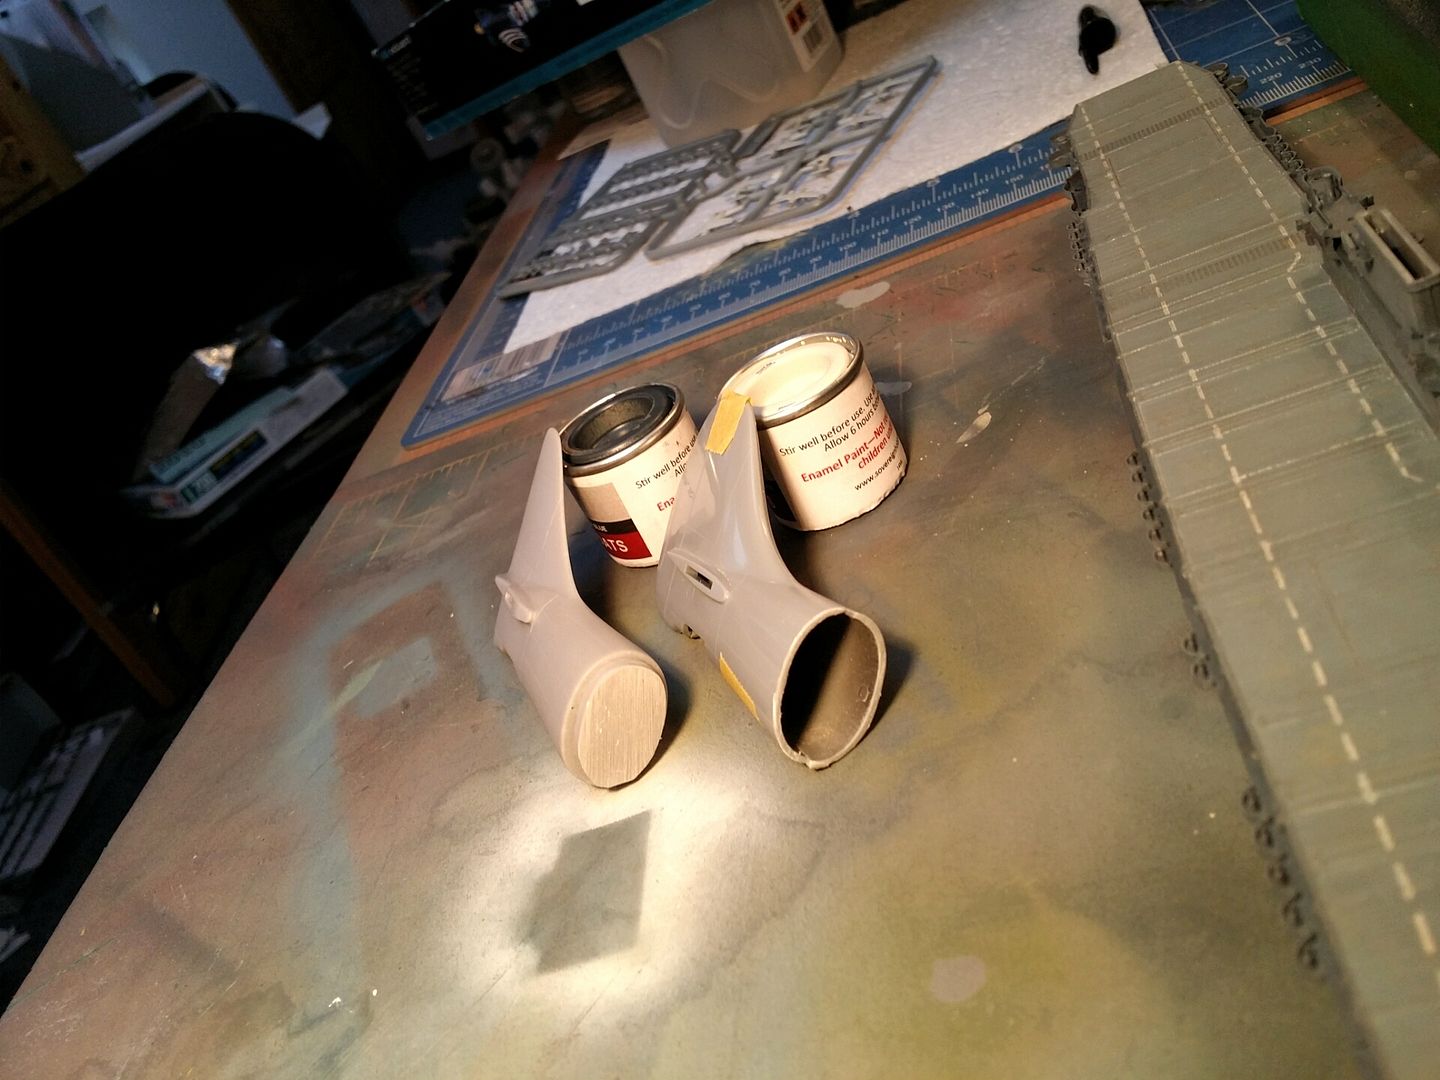
I've just started detail painting the cockpit, and whilst the black was drying I drilled out the exhaust stacks.

This Eduard Profipack Tempest has been sat in there for longer than I care to remember. It's a limited run-style multi-media kit with injection moulded main parts. These have nicely engraved panel lines but a lot of ejector pin marks inside and no locating pins on the parts - pretty common for the era. The cockpit is injection moulded on the sprues but the Profipack contains lovely cast resin replacements as well as weighted wheels and a small fret of photo etched brass, plus a pack of canopy masks.
I normally start with cockpits but for some reason I decided to start this model off with the wheel wells. The kit contains injection moulded inserts with some basic rib and stringer detail. Once upon a time, when I was a more content modeller this would have been fine but modern me added hydraulic lines and braces. The reference material was Tempest II restoration project photographs. Feel free to not correct me if it's inaccurate - I'm happy with it.

The interior parts were given a squirt of Colourcoats ACRN28 British interior grey-green from an early morning stock room raid.

I assembled the wing next. I feared fit problems but the parts fit is better than many current-day offerings. A little tape was used to keep it snug whilst the cement dried. Once dry, the wheel wells were washed using old acrylics; very dark brown, followed by sandy yellow, followed by an earthy brown.


The early Tempest V had the original long barrel Hispano cannons. In terms of the kit this means cutting out the leading edges and fitting inserts, which I drilled out.


That concludes the wing near enough - I think I'll cut out the navigation lights and replace with clear sprue though.
I taped the fuselage halves together as I was dreading the fit with the wing. It'll need a little filler but once again, I've had far, far worse from modern kits. It looks rather Tempesty.


I've just started detail painting the cockpit, and whilst the black was drying I drilled out the exhaust stacks.

The post man came today.
I measuredededed (and grafittied)
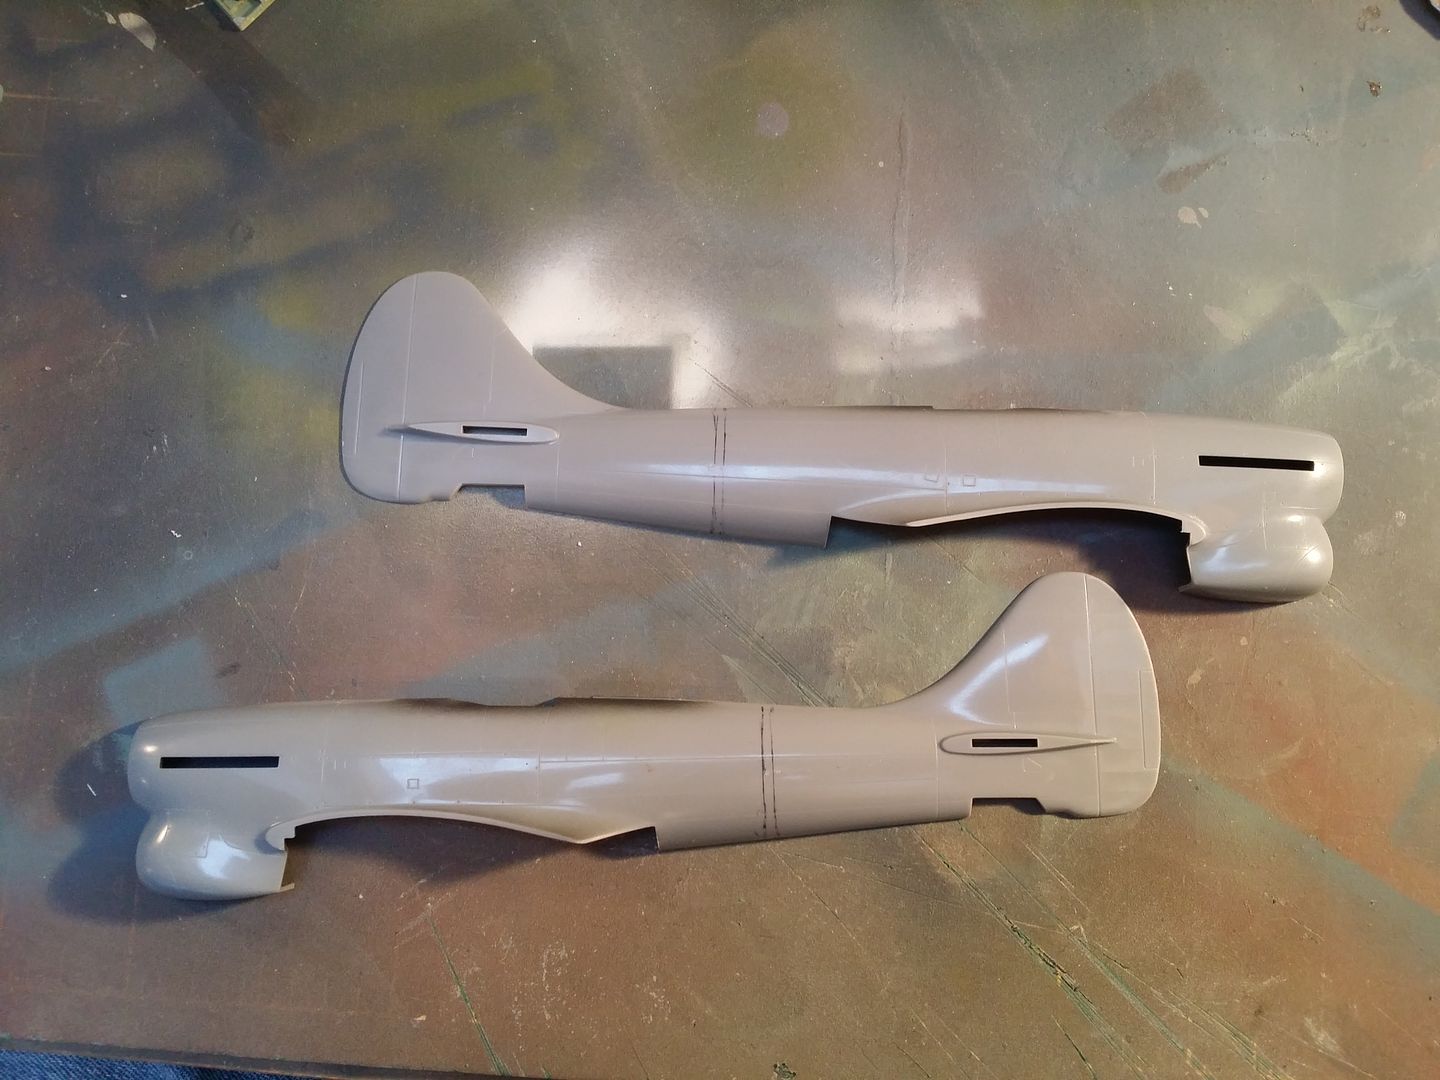

The Alleycat tail is a decent casting with no bubbles and not warped which is nice. The fit needs a little work though. with the panel lines and contours over the upper half lining up quite nicely it's the bottom that doesn't seem to fit too well
I've tackled this by lightly sanding the lower fuselage mating surfaces behind the wing. With a pinch vertically the rear fuselage now matches up with the Alleycat rear fuselage fairly well.
It does mean that when the wing is offered up the belly stands proud now.
This I've tackled by sanding the mating surface of the wing fillets thus
Much better

I don't want to go any further on the wing so I'll give the opposite mating surfaces on the fuselage halves a tickle likewise and she'll be reet.
I measuredededed (and grafittied)


The Alleycat tail is a decent casting with no bubbles and not warped which is nice. The fit needs a little work though. with the panel lines and contours over the upper half lining up quite nicely it's the bottom that doesn't seem to fit too well


I've tackled this by lightly sanding the lower fuselage mating surfaces behind the wing. With a pinch vertically the rear fuselage now matches up with the Alleycat rear fuselage fairly well.

It does mean that when the wing is offered up the belly stands proud now.

This I've tackled by sanding the mating surface of the wing fillets thus

Much better

I don't want to go any further on the wing so I'll give the opposite mating surfaces on the fuselage halves a tickle likewise and she'll be reet.
Edited by jamieduff1981 on Friday 2nd October 18:53
My bad - that really is worthy of explanation before jumping straight in with a saw!
I have a thread going in parallel on Britmodeller. Someone happened to ask if I was intending to use this correction set. In truth I hadn't realised there was anything wrong but it was one of those things that once seen could not be unseen. That's the trouble with the internet and other people in general. Model away by yourself in the mid-1990s and you'll be ignorant to the odd inaccuracy and all the happier for it. Nowadays the existance of information itself seems determined to point out that your P&J is wrong...
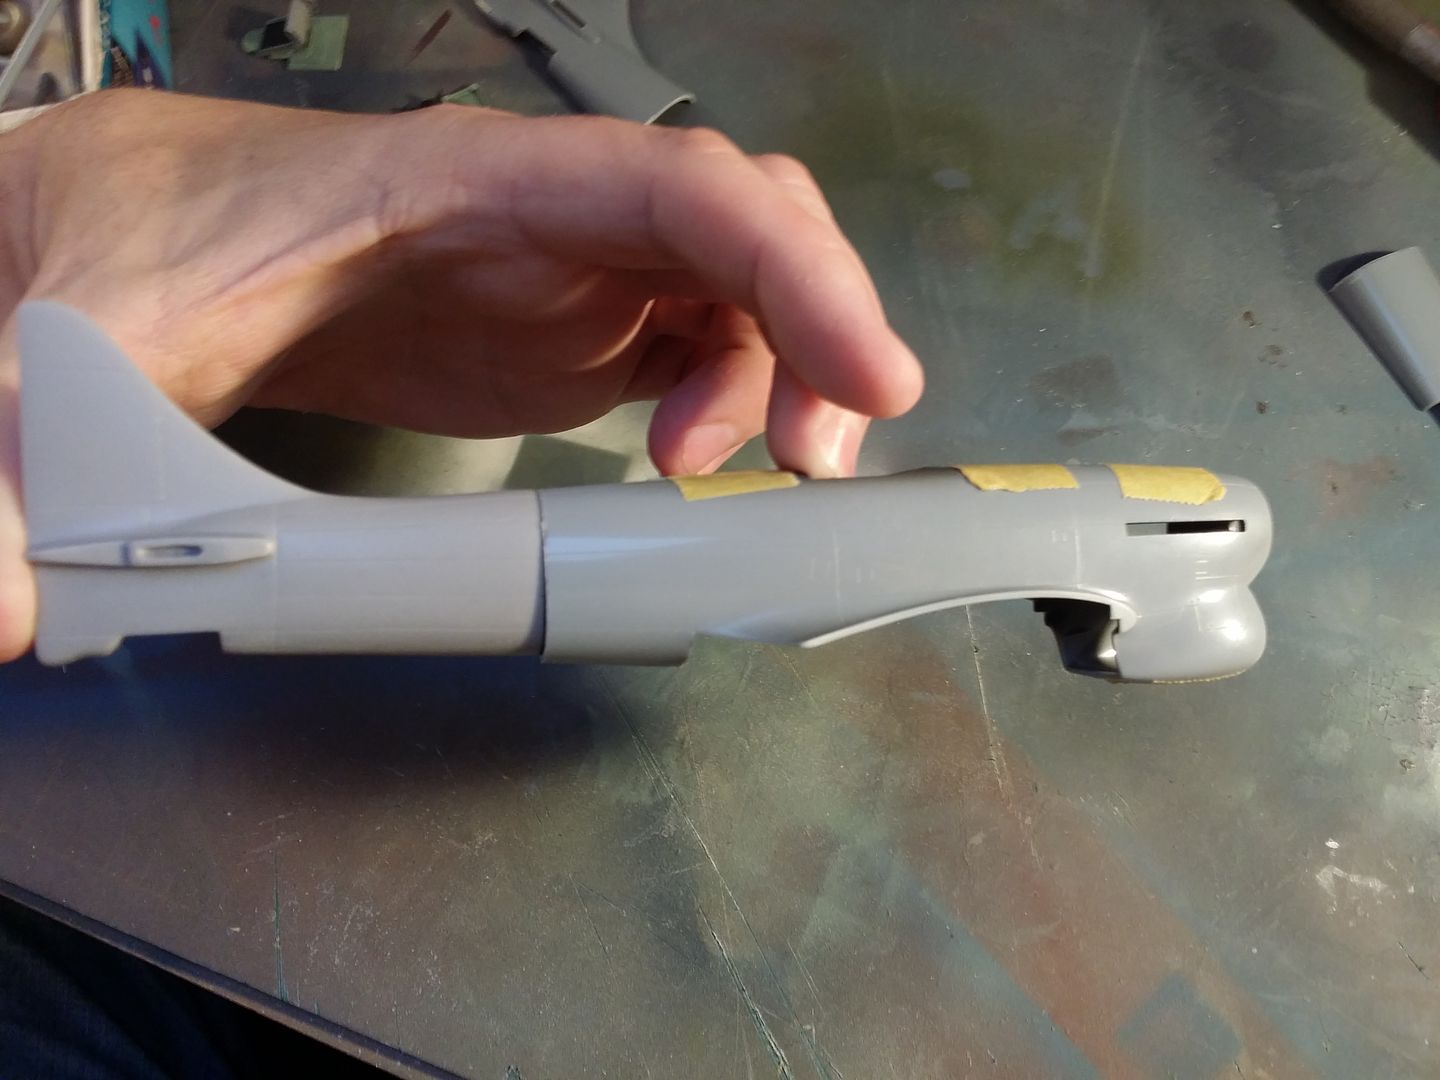
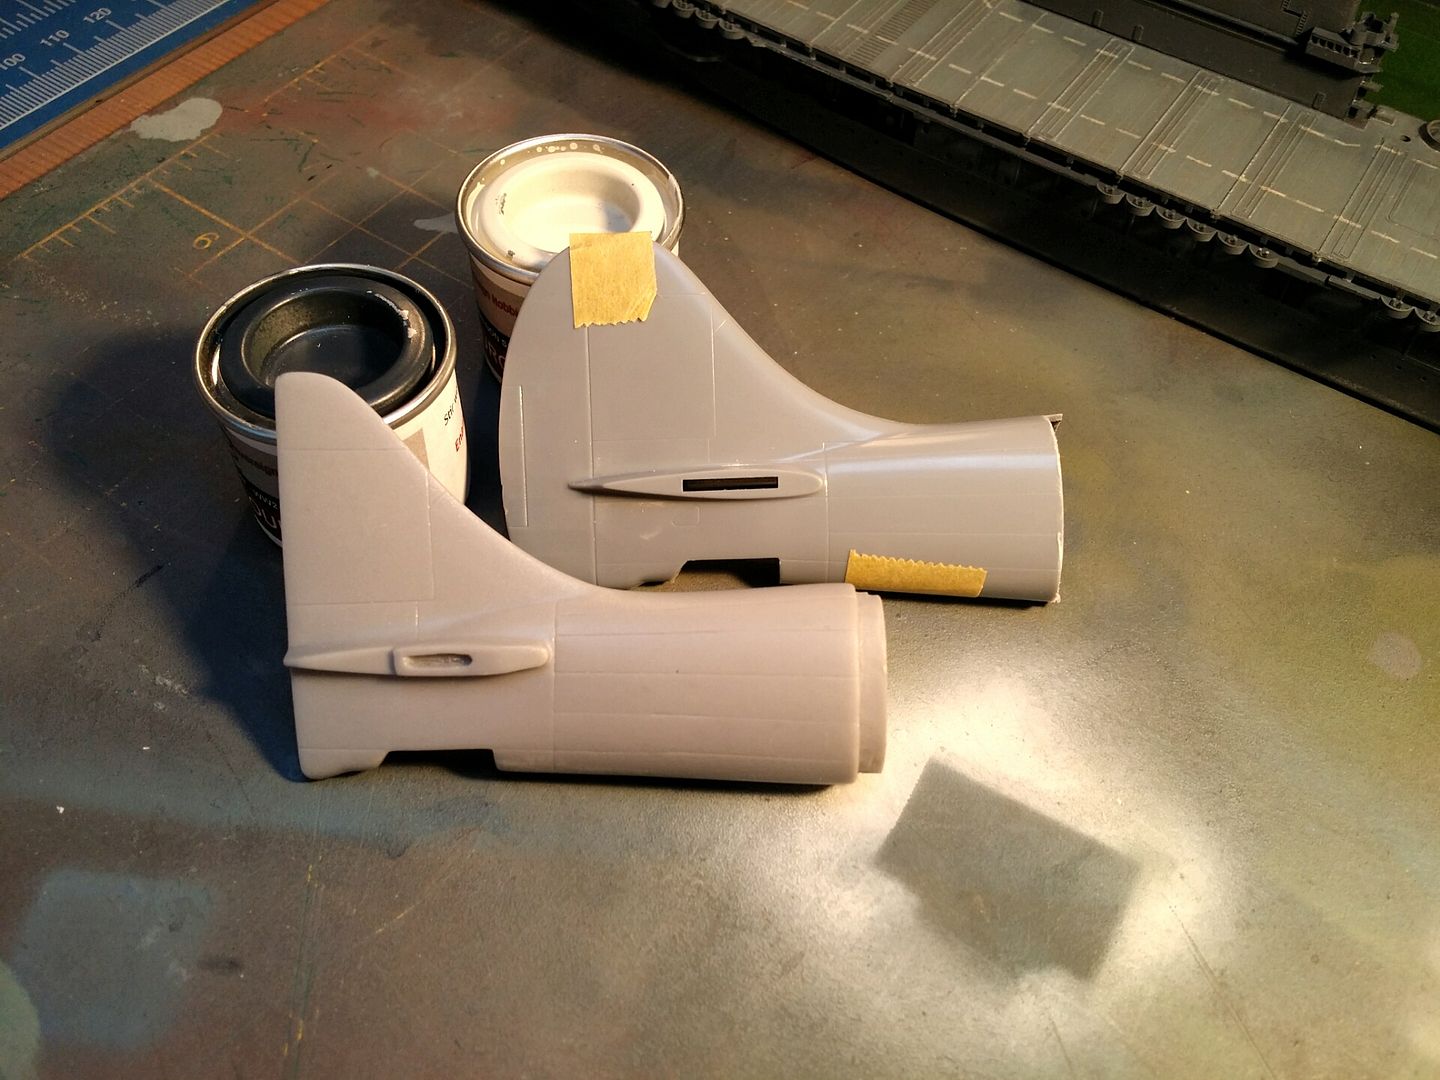
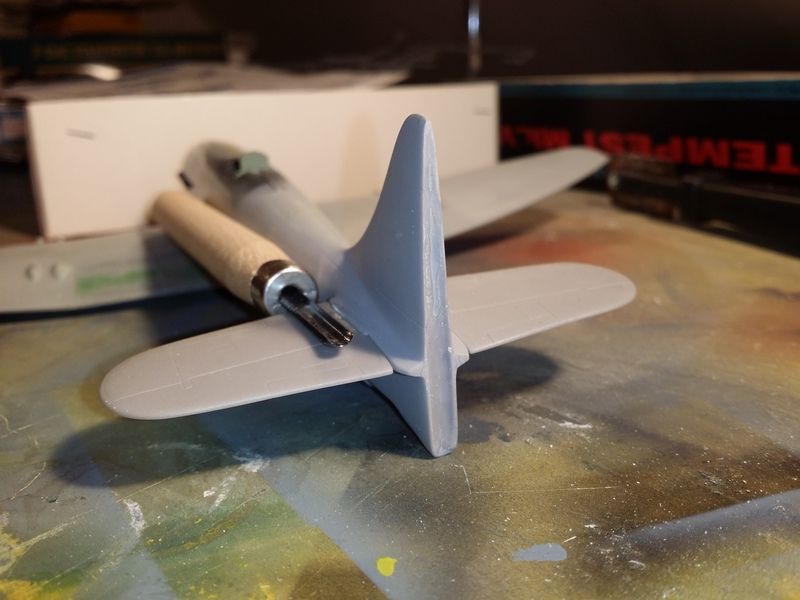
Anyway, the Tempest was an evolution of the Typhoon; specifically a new wing and an extended nose to fit more fuel in. When they lengthened the nose they needed more keel surface area aft for directional stability. The Typhoon's tail was given a big curvey dorsal fin and you got the Tempest. The Tempest's dorsal fin is concave in section and comes to a sharpish leading edge. That in turn helps expose what looks like a hump over the tailplane. The Eduard kit moulded the fin with a fairly typical aerofoil section throughout. It's also 2mm too short overall, but that's in the realms of "who cares". Ignoring the length the fin could be fixed with filler and a load of time. Alleycat's replacement back end costs £9. I could buy a lot of Alleycat corrections for the time it would take me to sort this out, so choppy choppy.
I have a thread going in parallel on Britmodeller. Someone happened to ask if I was intending to use this correction set. In truth I hadn't realised there was anything wrong but it was one of those things that once seen could not be unseen. That's the trouble with the internet and other people in general. Model away by yourself in the mid-1990s and you'll be ignorant to the odd inaccuracy and all the happier for it. Nowadays the existance of information itself seems determined to point out that your P&J is wrong...
Anyway, the Tempest was an evolution of the Typhoon; specifically a new wing and an extended nose to fit more fuel in. When they lengthened the nose they needed more keel surface area aft for directional stability. The Typhoon's tail was given a big curvey dorsal fin and you got the Tempest. The Tempest's dorsal fin is concave in section and comes to a sharpish leading edge. That in turn helps expose what looks like a hump over the tailplane. The Eduard kit moulded the fin with a fairly typical aerofoil section throughout. It's also 2mm too short overall, but that's in the realms of "who cares". Ignoring the length the fin could be fixed with filler and a load of time. Alleycat's replacement back end costs £9. I could buy a lot of Alleycat corrections for the time it would take me to sort this out, so choppy choppy.


I parked this for a wee bit as I fancied working on ships, but picked it up again tonight.
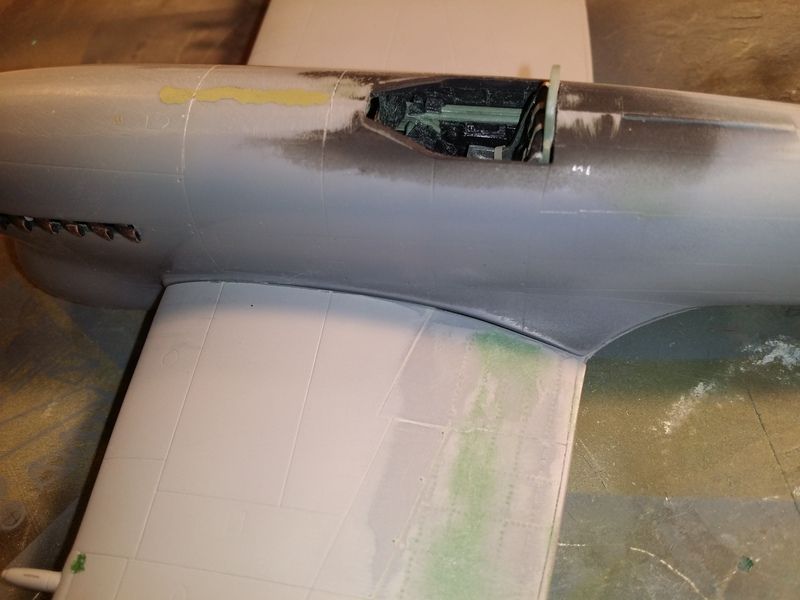
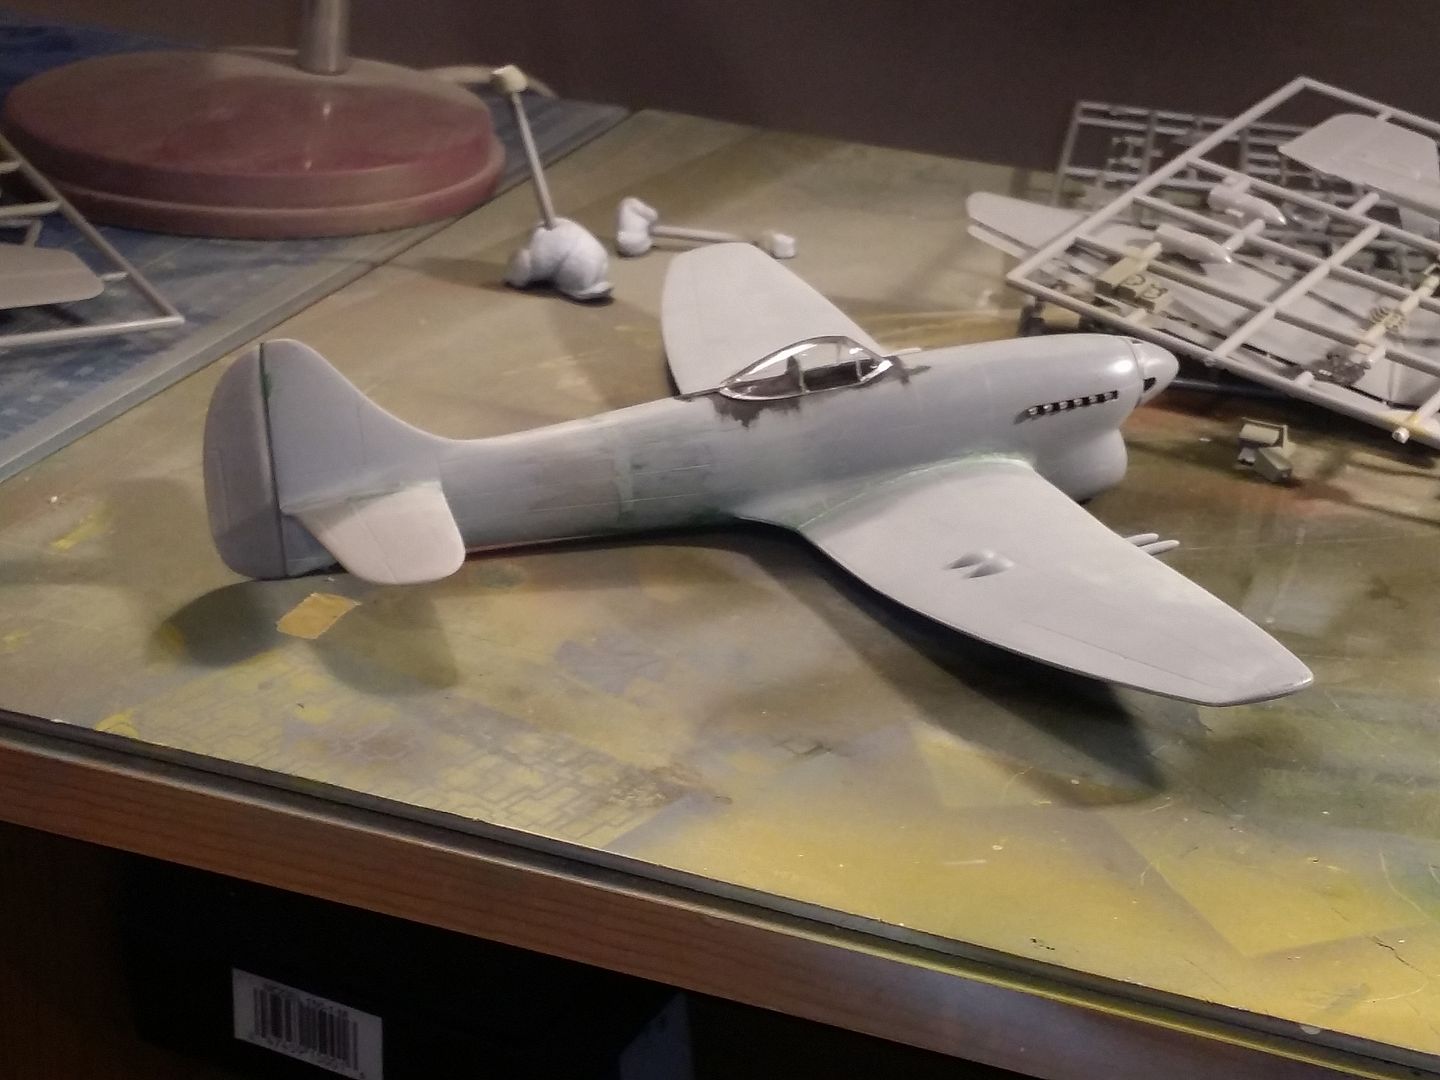
The cockpit is now assembled. I haven't applied any weathering/dirt/shading/highlighting yet because I was rather concerned that the cockpit wouldn't fit the fuselage. As it turns out, the resin profipack seat was slightly wider than the hole in the top of the fuselage, but it does fit within the canopy - so I thinned the sills on the fuselage down a bit and now it does fit.
I can now get in about with some washes etc to bring out some of the detail.
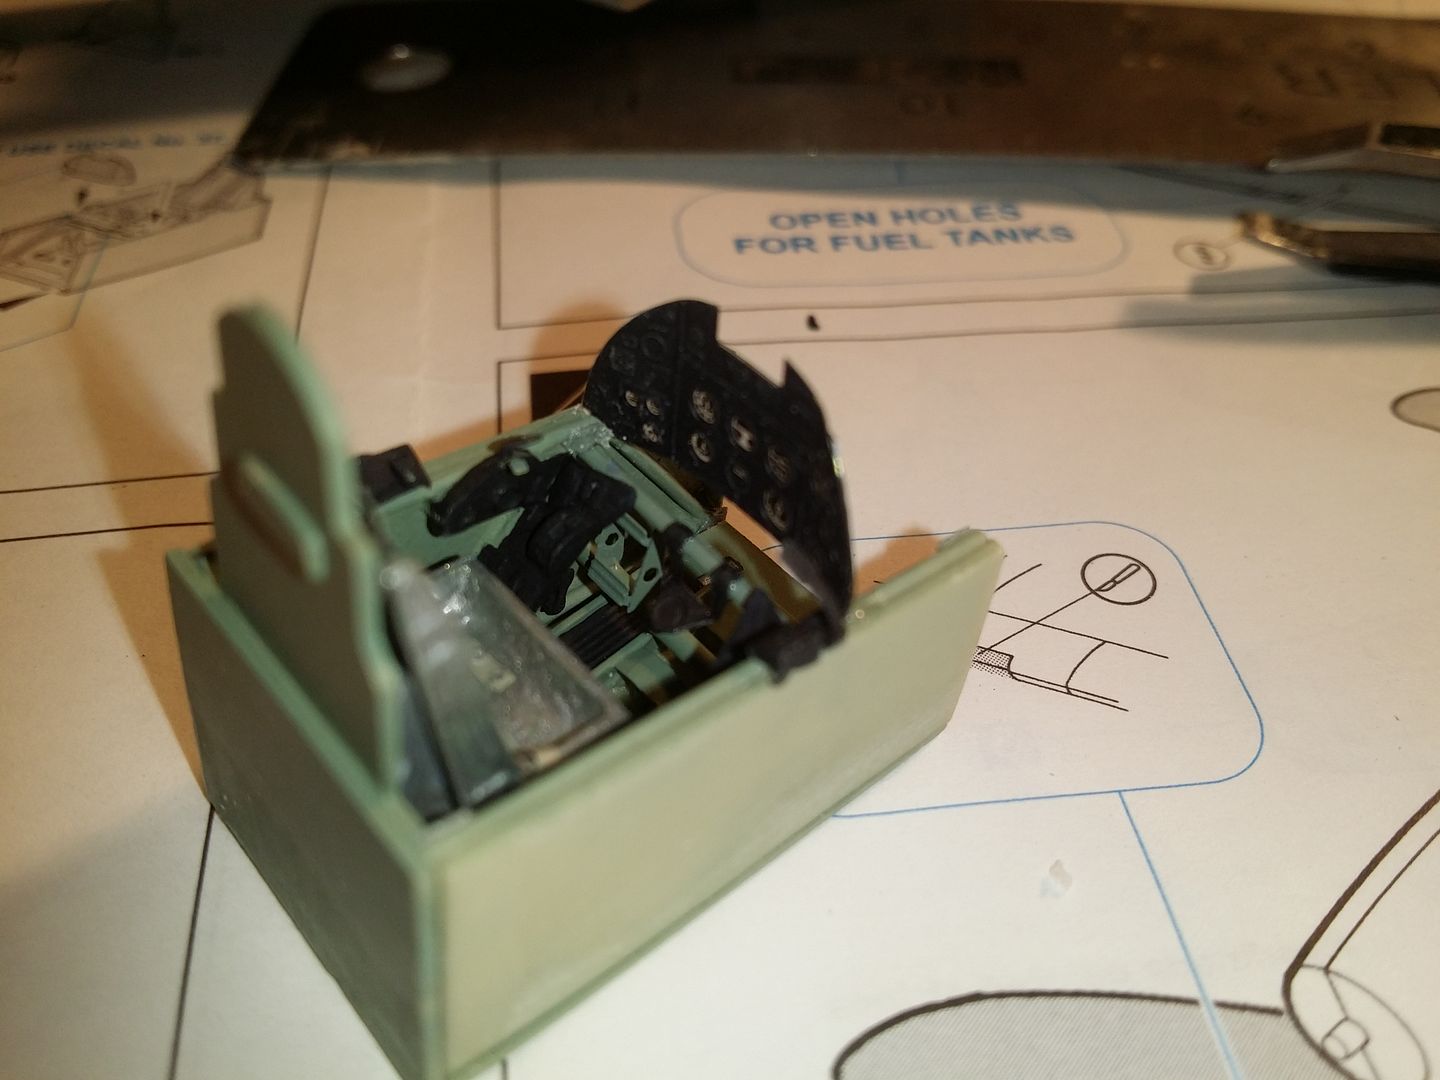

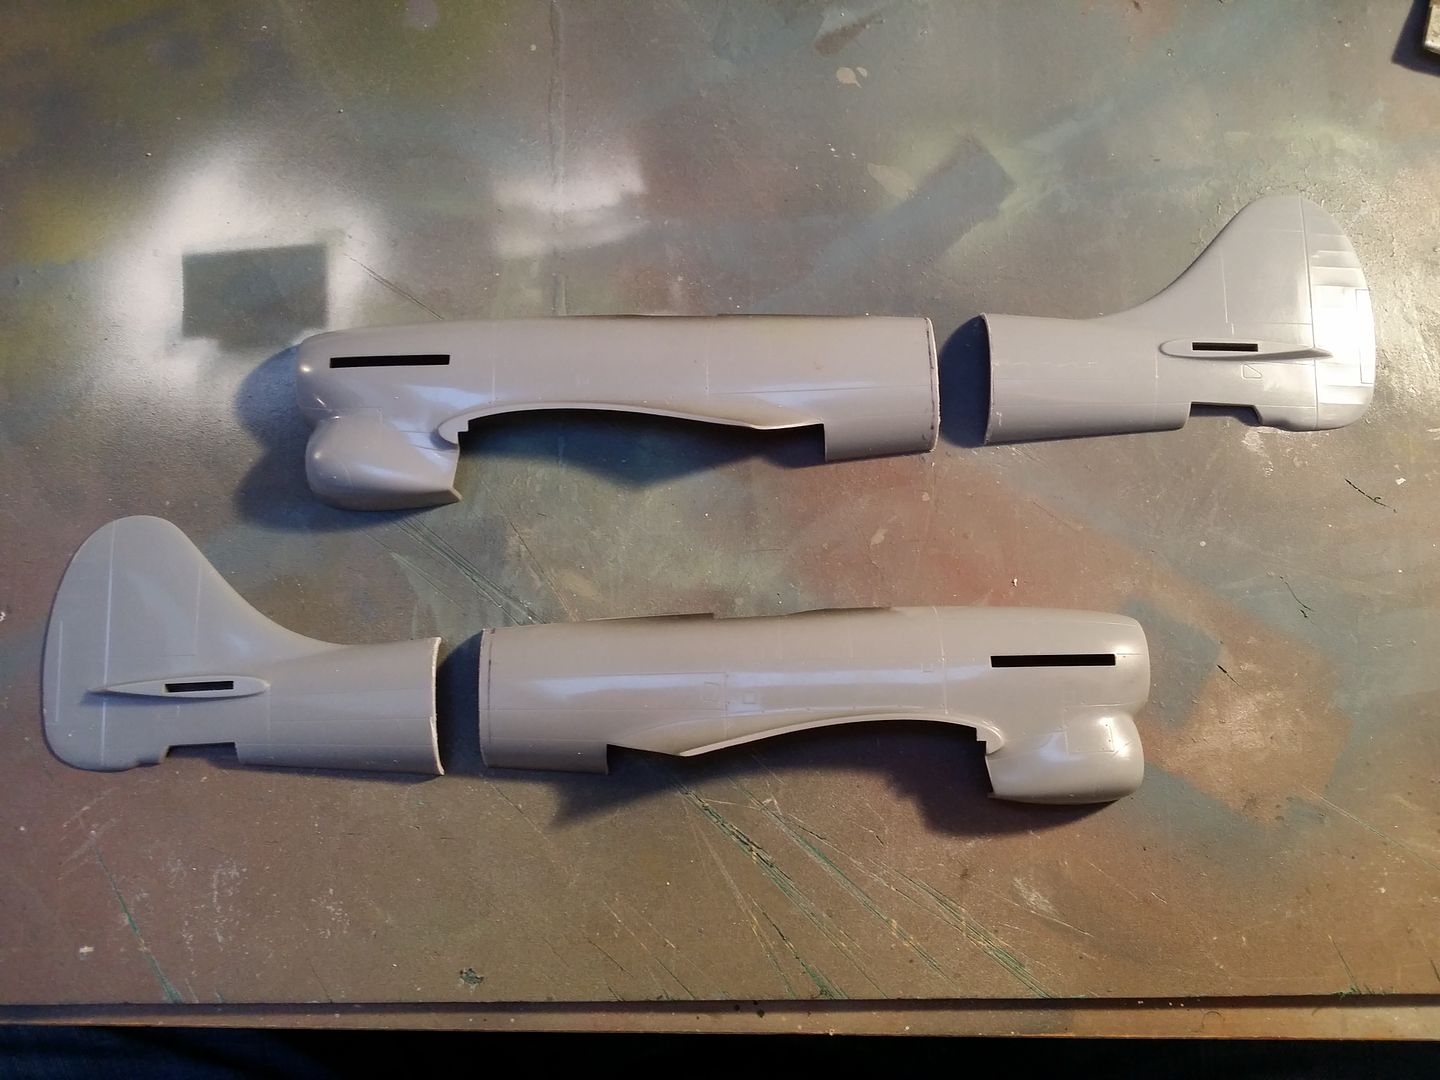
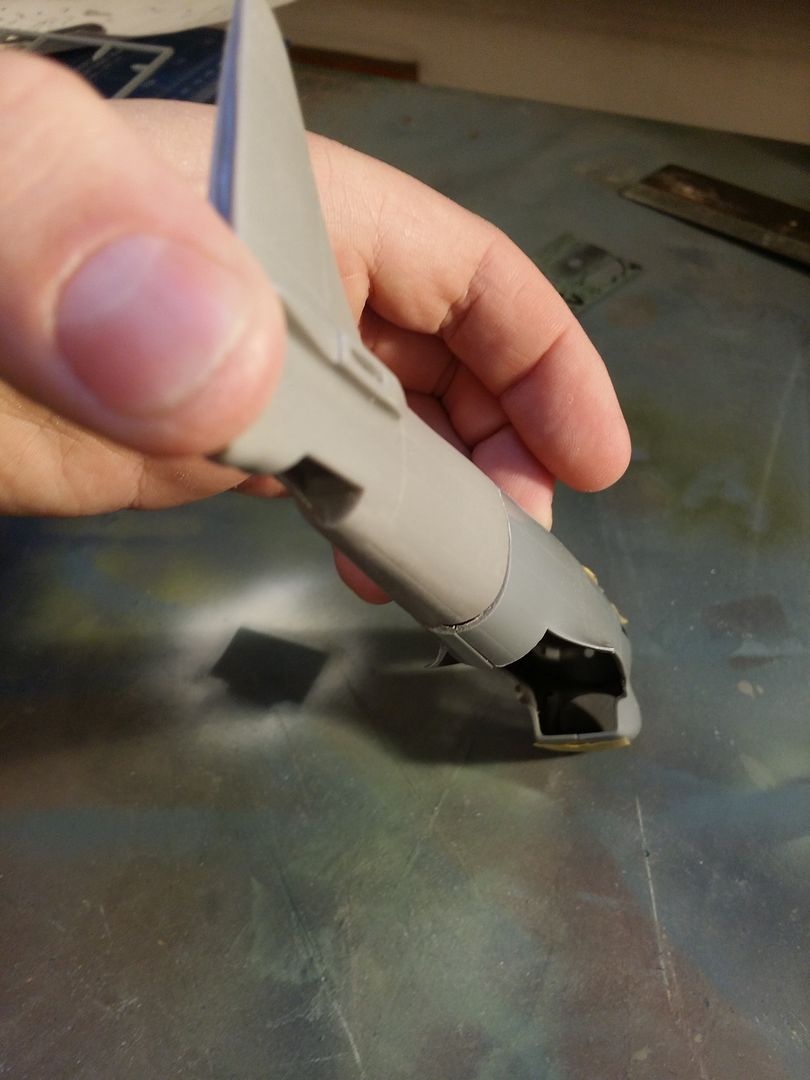
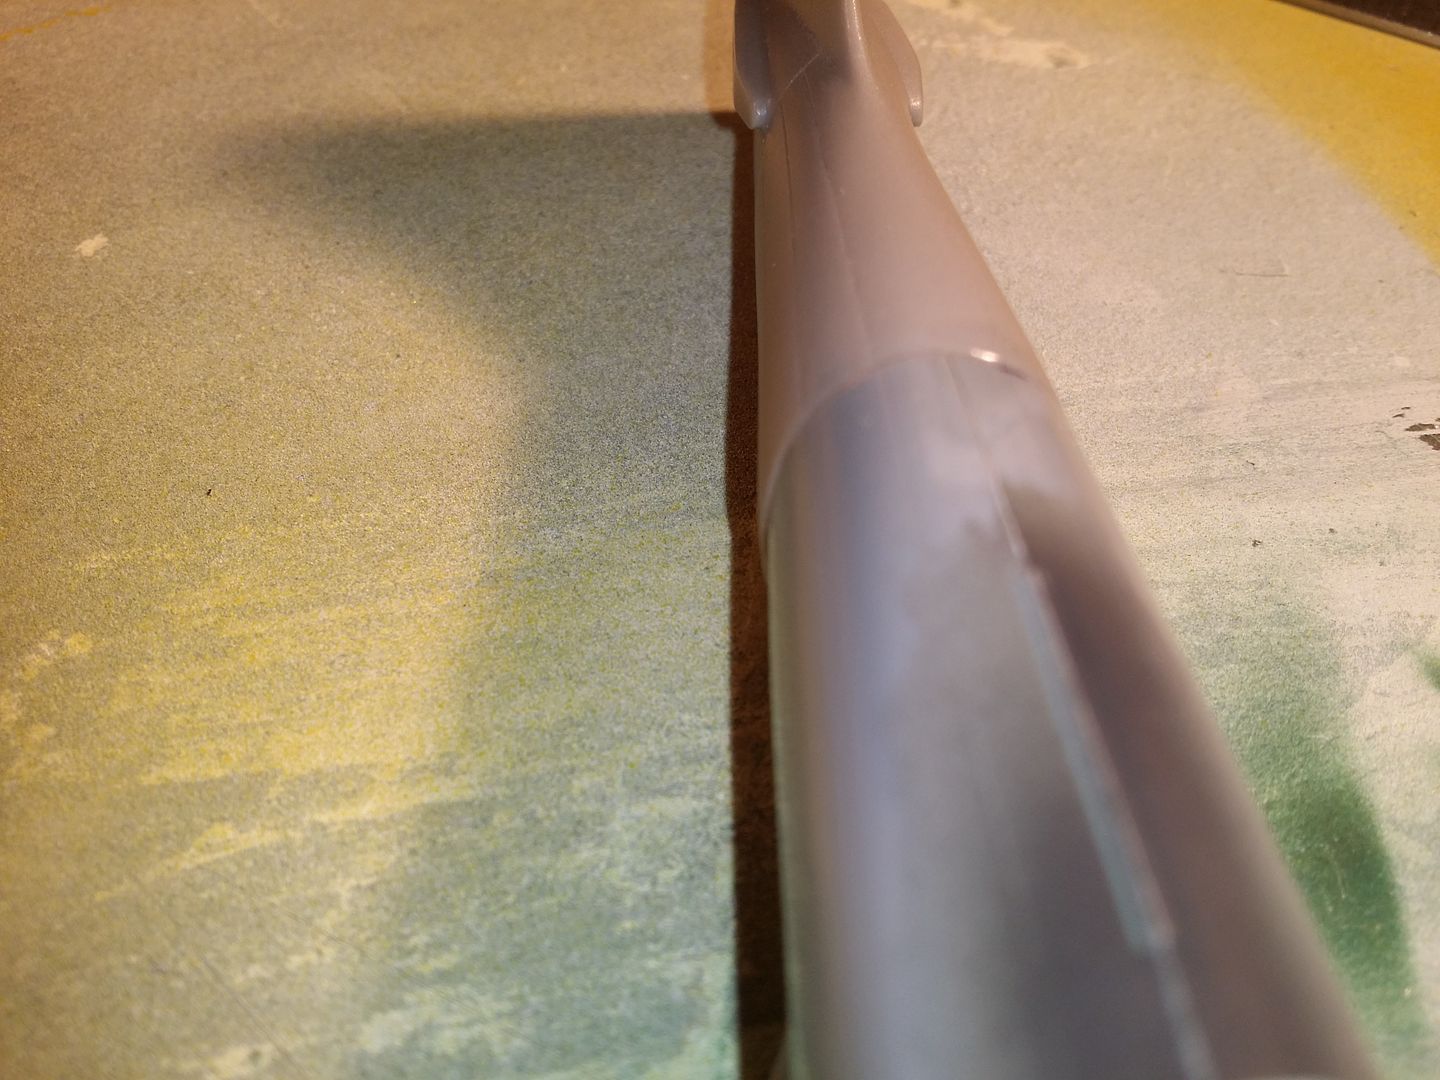
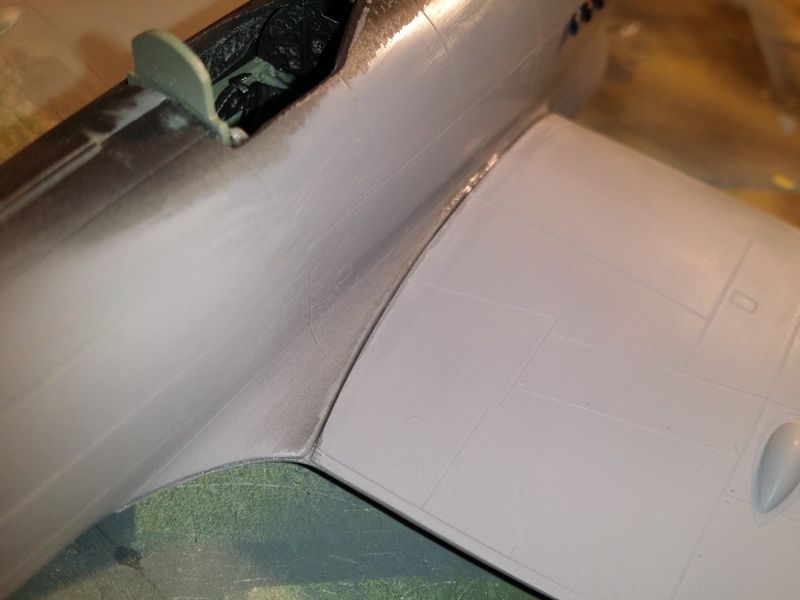
I found time to join the kit fuselage halves and fit the resin replacement rear fuselage.
Being a limited run style, and as with the wings, there were no locating pins but the parts mated up well regardless. The wing isn't stuck on - it's just there.
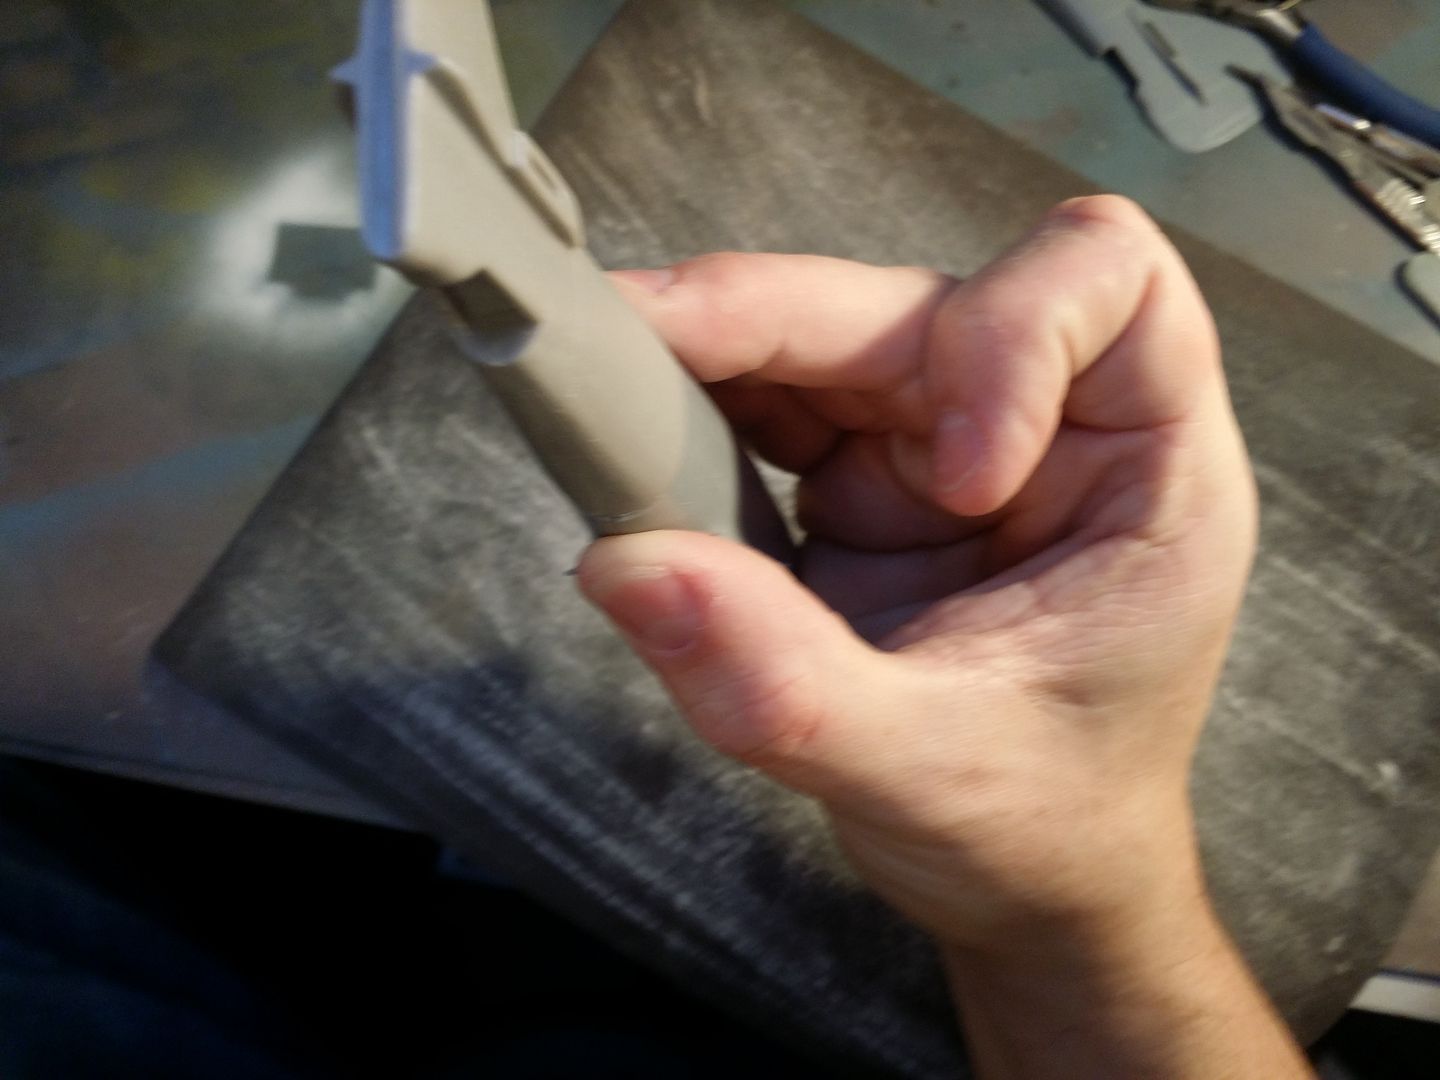
The rear fuselage shape still needs some reconciliation with the front. This time it appeared sensible to attack the resin and make it fit the plastic. The previous plastic surgery sorted the big difference in depth of the parts. The resin is still fatter than the front though. It's easier to go at that with 240grit wet and dry and rescribe the panel lines than to pad out the plastic with loads of filler, sand and then rescribe. I've done the former now, and the small amount of filler needed is drying as I write.
Being a limited run style, and as with the wings, there were no locating pins but the parts mated up well regardless. The wing isn't stuck on - it's just there.
The rear fuselage shape still needs some reconciliation with the front. This time it appeared sensible to attack the resin and make it fit the plastic. The previous plastic surgery sorted the big difference in depth of the parts. The resin is still fatter than the front though. It's easier to go at that with 240grit wet and dry and rescribe the panel lines than to pad out the plastic with loads of filler, sand and then rescribe. I've done the former now, and the small amount of filler needed is drying as I write.


It's been a while. I've been too busy/tired/busy & tired to do much modelling recently.
I did get new riveting tools and experimented a little. I quite liked the effect however I realised that I am not retired enough to spend the time necessary to poke thousands of tiny holes all over the model, so I filled in the ones I had done and will just crack on and finish this.
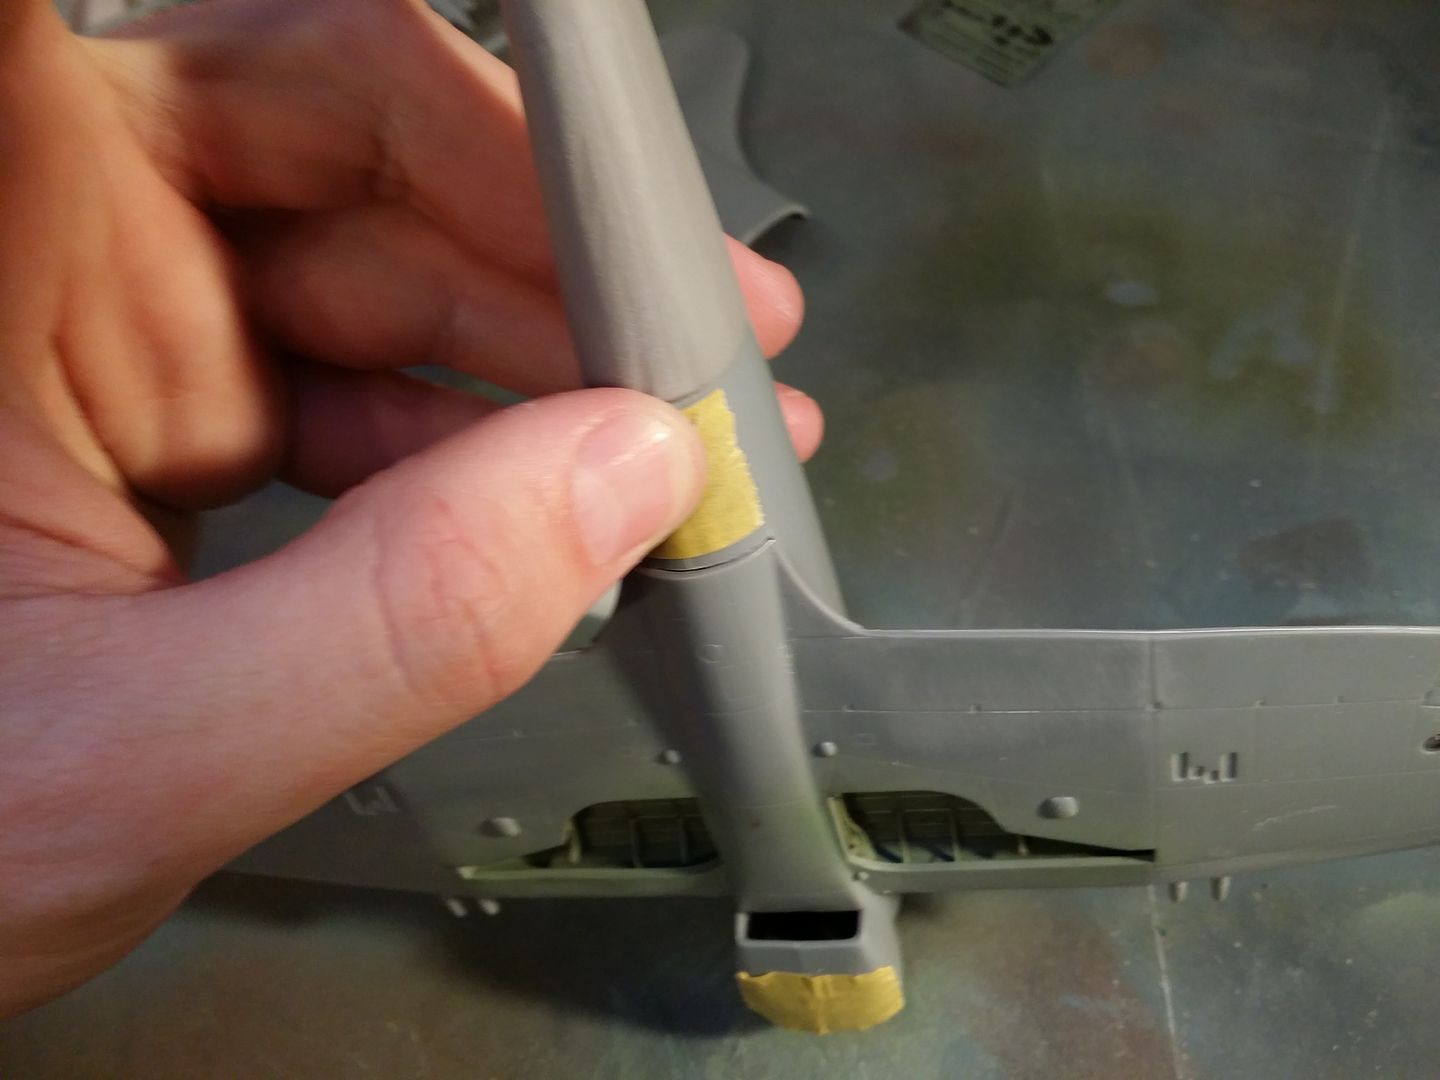
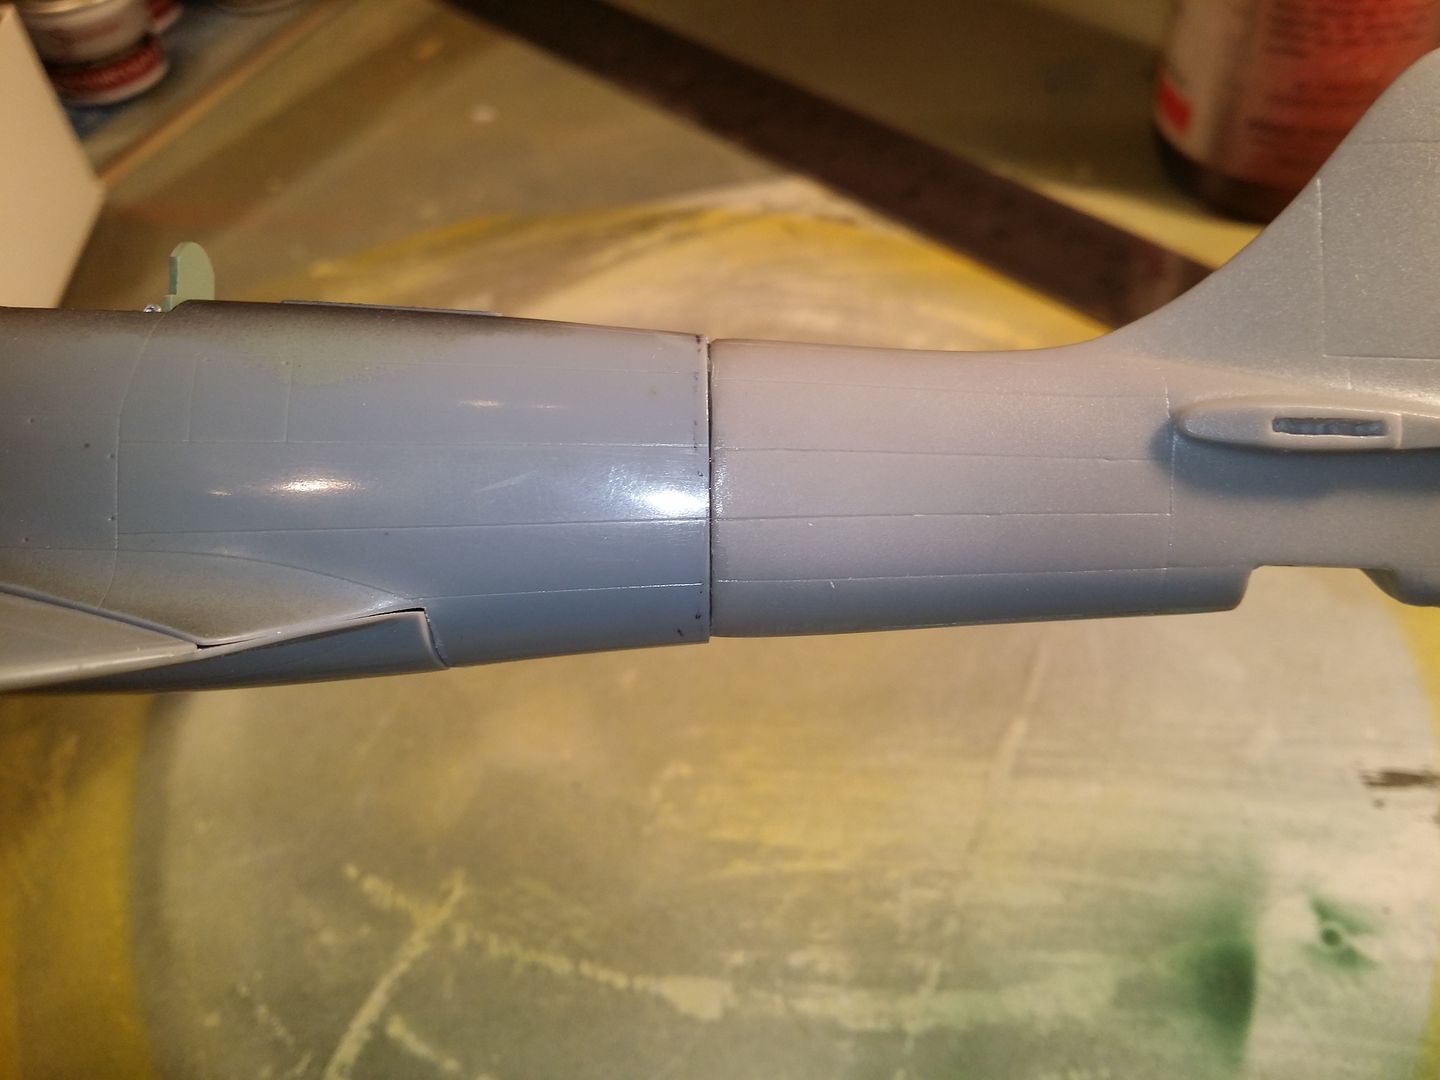
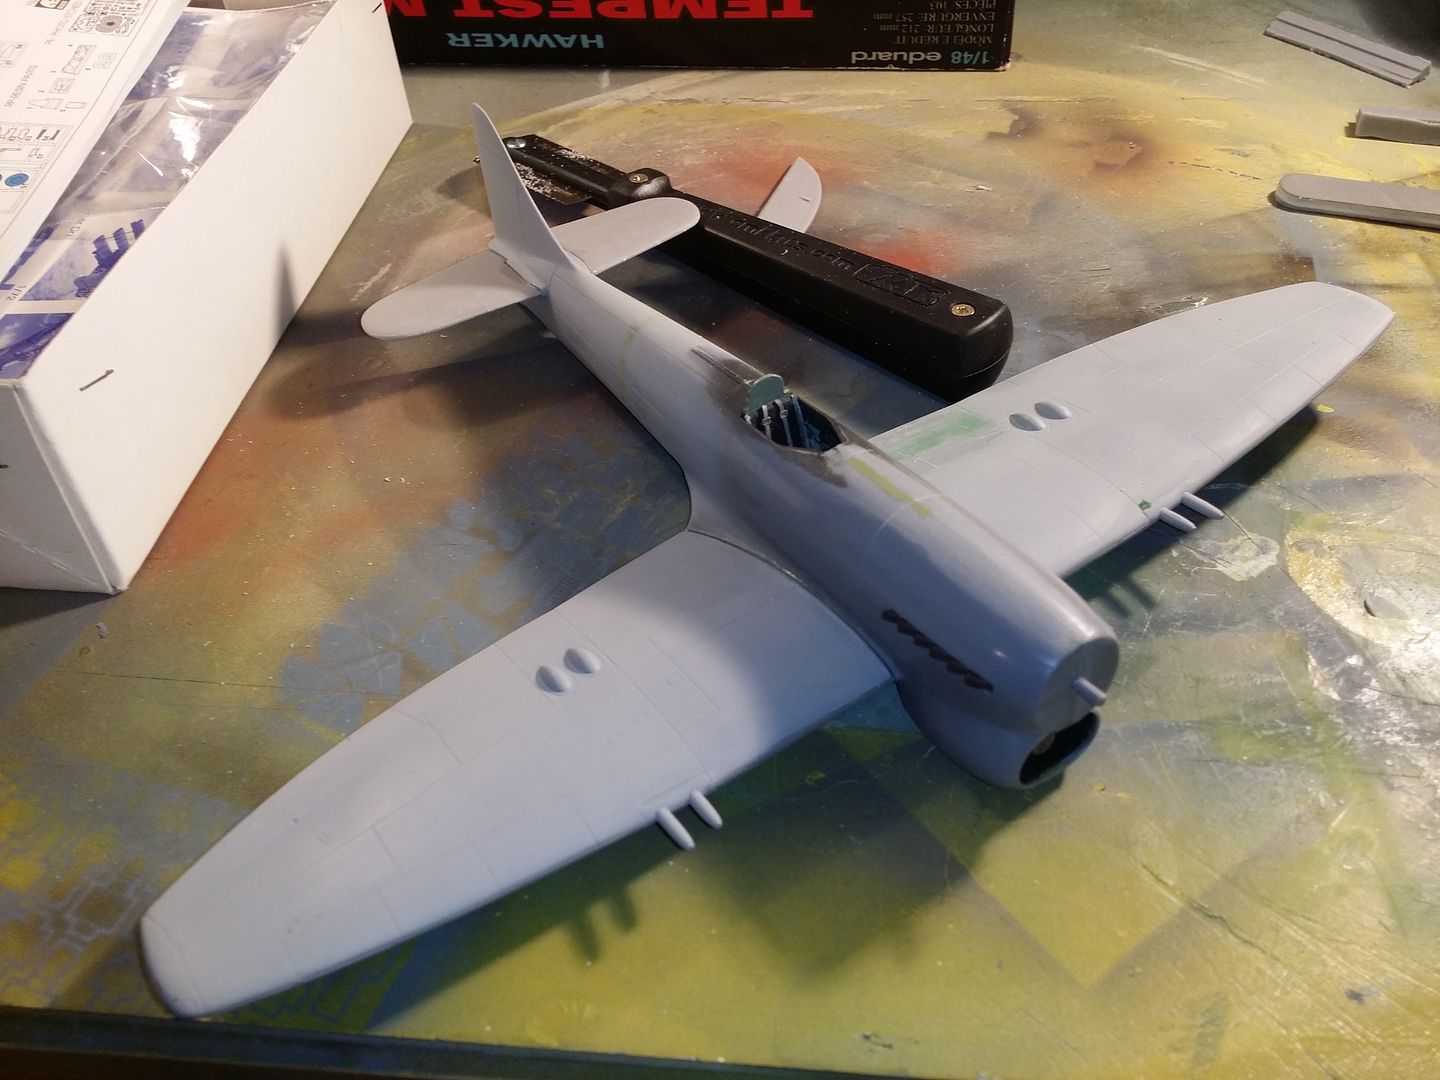
Tonight I fitted the wing to the fuselage. This was a doctored fit, the reader may recall from the earlier adjustments to the circumference of the fuselage to fit the resin back end. Ironically, this was the best fitting part of the wing. There were gaps of approximately 0.7mm between each fillet and the upper surface of the wings. I filled these gaps with medium CA applied with an instrument screwdriver blade, going a few millimetres at a time.
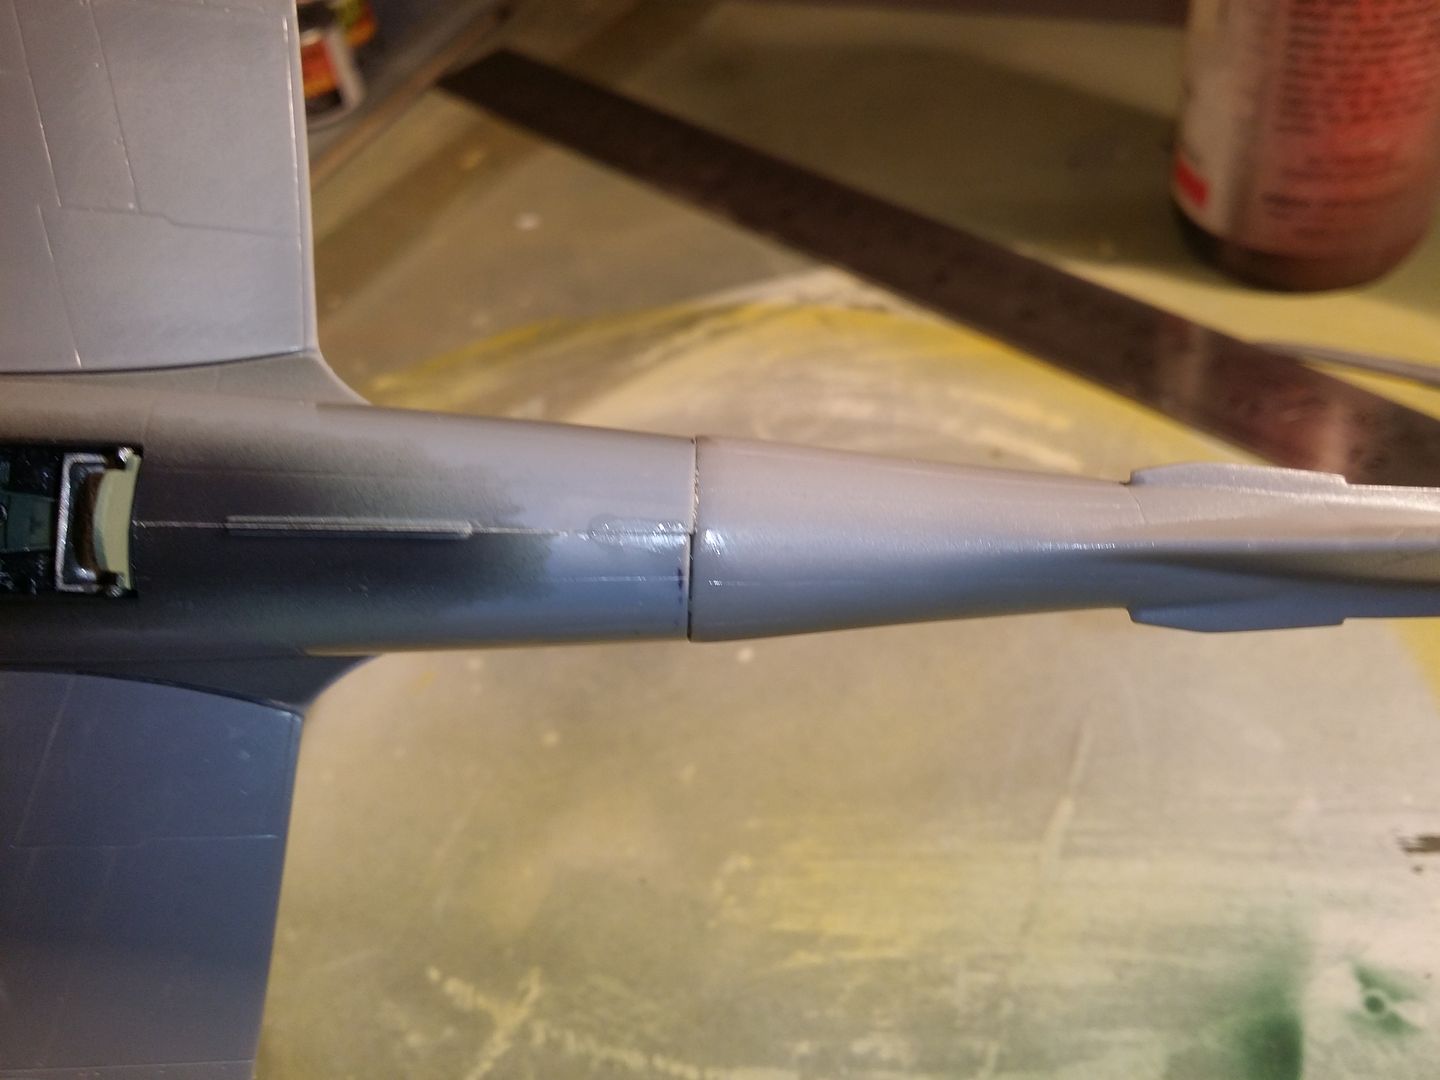
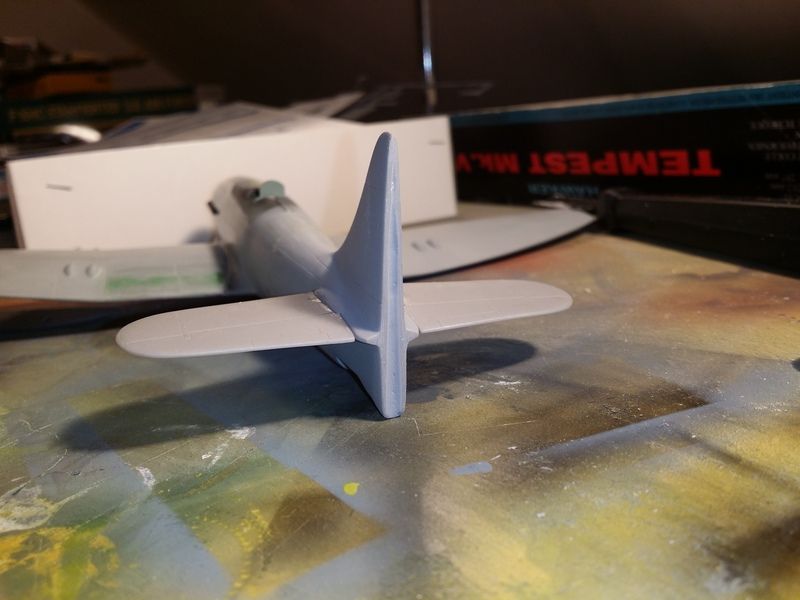
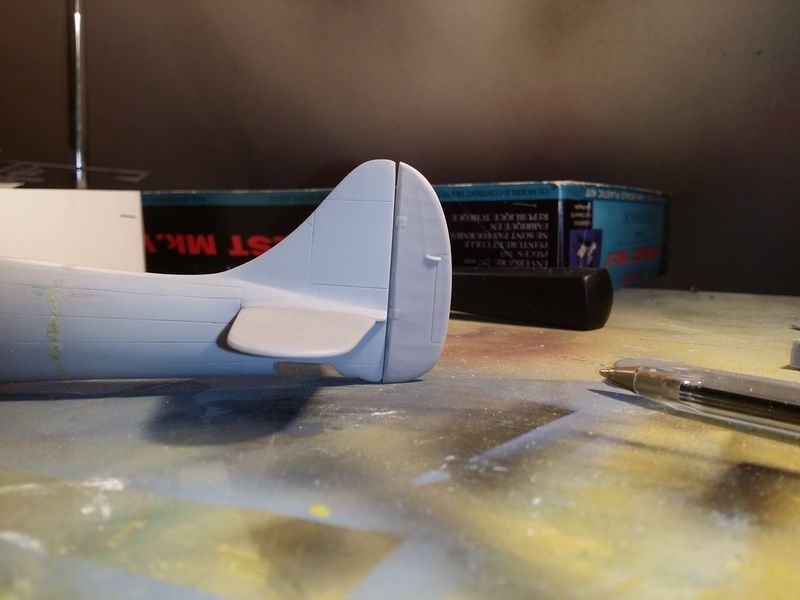
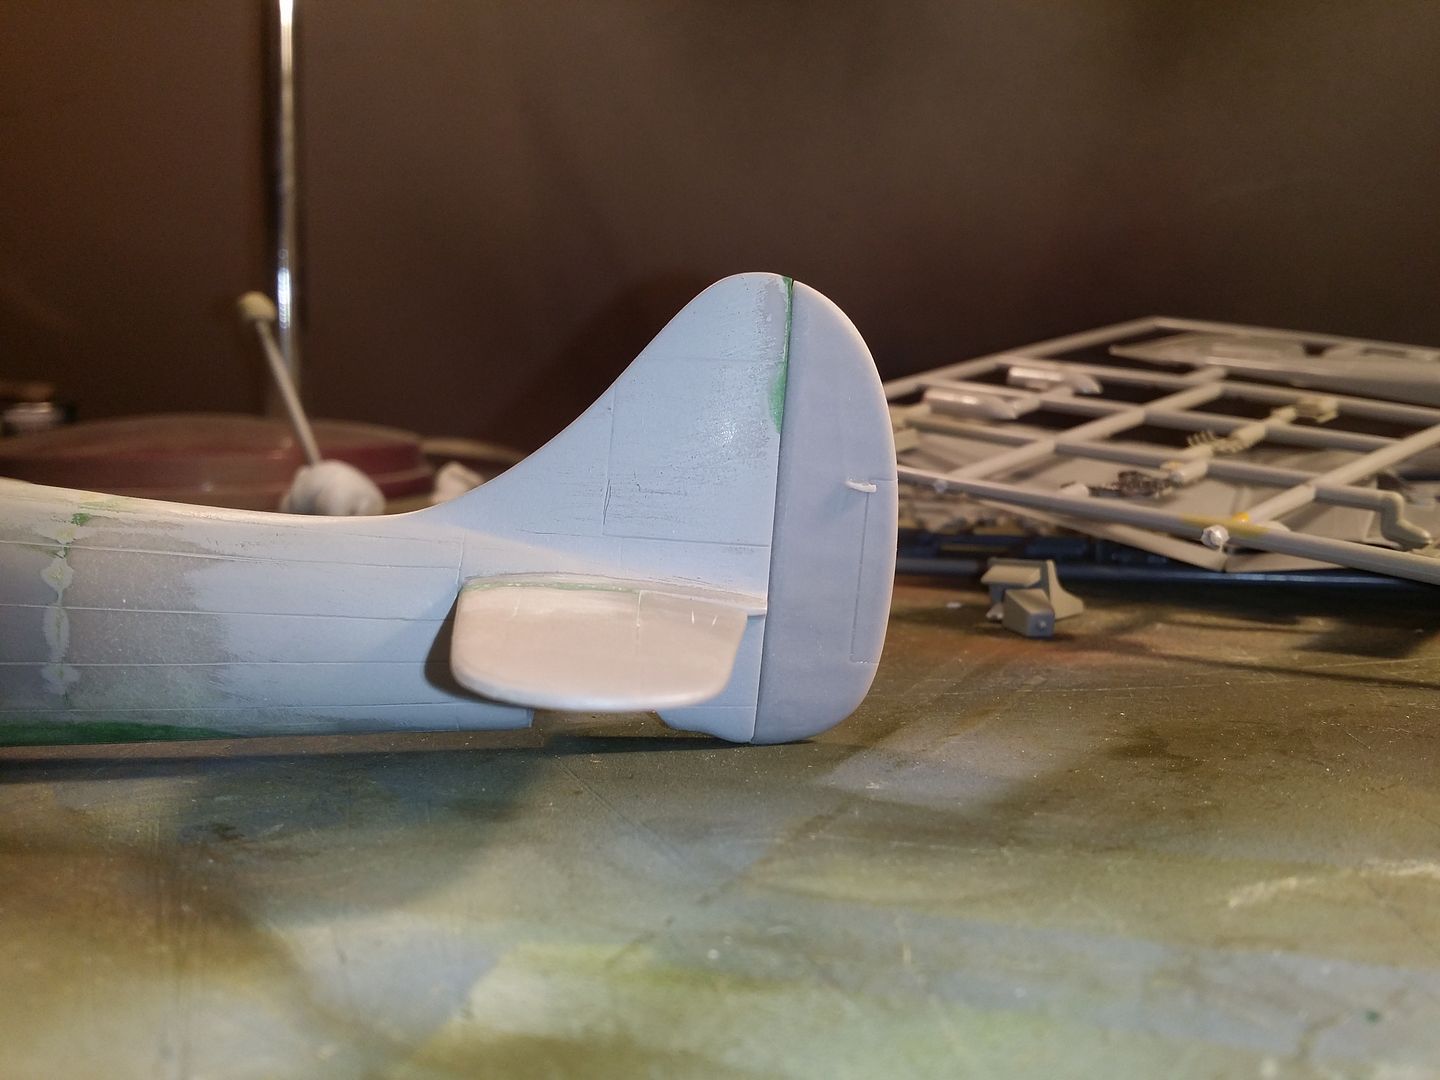
Next on to the resin tail planes and elevators. These cleaned up and fitted fine.
The rudder comes as a separate casting in this correction set. The fin is taller than the kit item, so the rudder is required. Unfortunately, the rudder is somewhat taller than the tailpost it's supposed to mate to, so this was adjusted.


Running out anal-retentiveness, I did this by eye with a reference photo handy rather than faff about transposing scale drawings and measuring things. The rudder fits the fin and it looks Tempesty. Fretting about the unimportant is what initiated all this unnecessary work.
"It is fundamentally the confusion between effectiveness and efficiency that stands between doing the right things and doing things right. There is surely nothing quite so useless as doing with great efficiency what should not be done at all." Peter Drucker (1963) Managing for Business Effectiveness.
What did need to be done though was sort out the tailpost. It was not straight, but rather had a convex shape. I stood the model on its tail and straightened the tailpost with wet & dry on the table. This fixed the bentness but sanded away the shrouds.
I used this little tool-thing that I think I got in Hobbycraft. The other tools in the pack are more conventional shapes and get used often. Until now I've never found a use for this thingy.
It seems to be close to fitting now. I'll pose it slightly off-centre to hide the fact that its longitudinal cross section doesn't quite match the fin's, which would be noticeable looking head or tail-on.
I did get new riveting tools and experimented a little. I quite liked the effect however I realised that I am not retired enough to spend the time necessary to poke thousands of tiny holes all over the model, so I filled in the ones I had done and will just crack on and finish this.
Tonight I fitted the wing to the fuselage. This was a doctored fit, the reader may recall from the earlier adjustments to the circumference of the fuselage to fit the resin back end. Ironically, this was the best fitting part of the wing. There were gaps of approximately 0.7mm between each fillet and the upper surface of the wings. I filled these gaps with medium CA applied with an instrument screwdriver blade, going a few millimetres at a time.


Next on to the resin tail planes and elevators. These cleaned up and fitted fine.

The rudder comes as a separate casting in this correction set. The fin is taller than the kit item, so the rudder is required. Unfortunately, the rudder is somewhat taller than the tailpost it's supposed to mate to, so this was adjusted.


Running out anal-retentiveness, I did this by eye with a reference photo handy rather than faff about transposing scale drawings and measuring things. The rudder fits the fin and it looks Tempesty. Fretting about the unimportant is what initiated all this unnecessary work.
"It is fundamentally the confusion between effectiveness and efficiency that stands between doing the right things and doing things right. There is surely nothing quite so useless as doing with great efficiency what should not be done at all." Peter Drucker (1963) Managing for Business Effectiveness.
What did need to be done though was sort out the tailpost. It was not straight, but rather had a convex shape. I stood the model on its tail and straightened the tailpost with wet & dry on the table. This fixed the bentness but sanded away the shrouds.

I used this little tool-thing that I think I got in Hobbycraft. The other tools in the pack are more conventional shapes and get used often. Until now I've never found a use for this thingy.

It seems to be close to fitting now. I'll pose it slightly off-centre to hide the fact that its longitudinal cross section doesn't quite match the fin's, which would be noticeable looking head or tail-on.

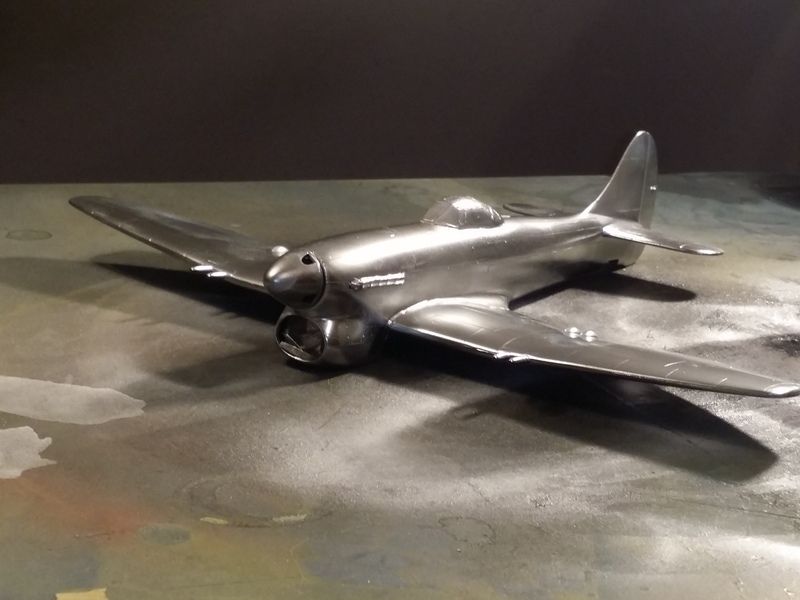
I'm still not completely happy with the rudder so will do some more work on that, but otherwise I think I'm ready to mask the canopy (which is excellent, by the way - one of the clearest I've come across) and spray a coat of something over it. I very rarely use primers - you don't really get adhesion problems with enamels hence part of my love for them, but in this case I want to see everything in an even colour before proceeding. I think I'll use enamel satin black for this.
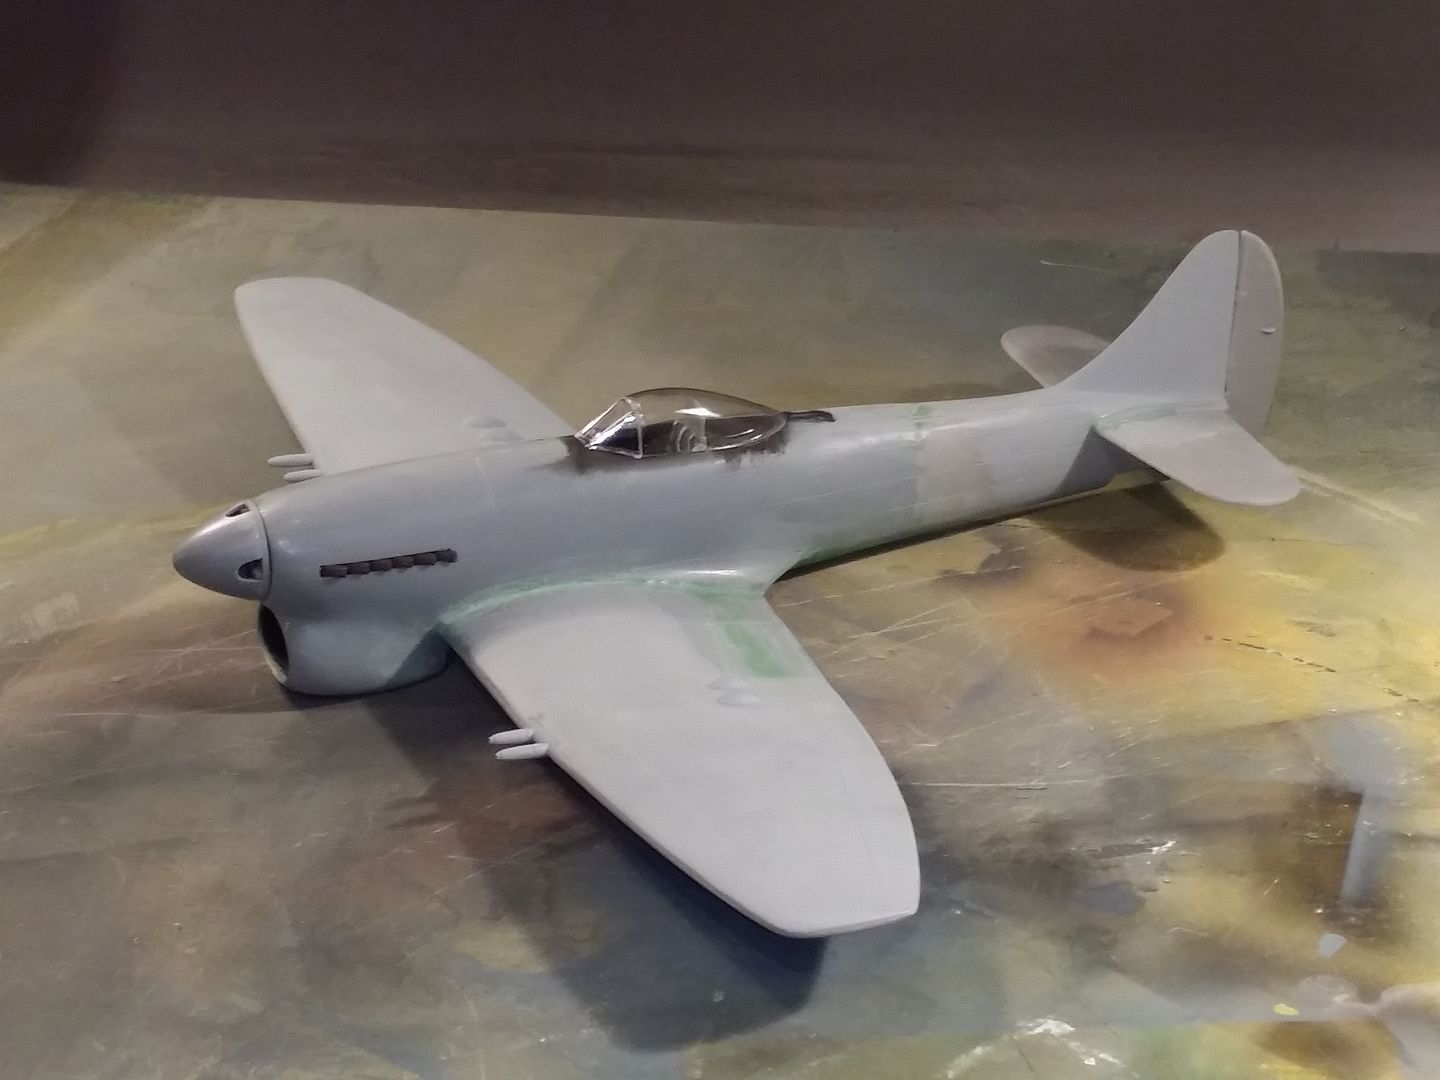
A lazy/bad habit I picked up a while ago was to tack glue (I usually use Clearfix or similar - any glue with a half-cocked adhesion power) the undercarriage doors on. This masks my wheel wells the fast way, and also means that any fancy shading work, the tones of the underside paint all match and so on and in this case, the black and white stripes line up. The doors are not the best feature of this kit - the inside detail is quite nice. The outside is, erm, basic. The inner doors will fit fine in the down position.


A lazy/bad habit I picked up a while ago was to tack glue (I usually use Clearfix or similar - any glue with a half-cocked adhesion power) the undercarriage doors on. This masks my wheel wells the fast way, and also means that any fancy shading work, the tones of the underside paint all match and so on and in this case, the black and white stripes line up. The doors are not the best feature of this kit - the inside detail is quite nice. The outside is, erm, basic. The inner doors will fit fine in the down position.


I see what you mean. The fin isn't completely straight, but it's not as bad as the photos suggest. I'll take a pic of the rudder later - it's not quite straight but the main issue is that it's not symmetrical down its vertical axis. The more I think of this, the more tempted I am to make a new one from a thin plasticard side profile core, a leading edge then half ribs (radio control scale model style).
Well that worked out quite well  .
.
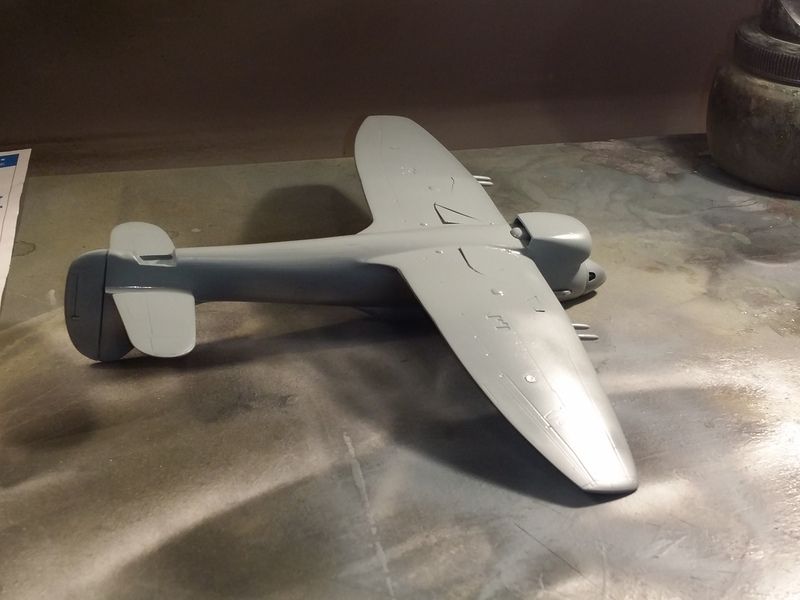
I should have moved on to a 1/350 destroyer that's supposed to go round and round on a display turntable on our table at the Scottish Nationals in April, but to be honest couldn't face the thought of faffing about with PE last night so instead I opened the box of a Revell Ju 87B that's been sat for a while and sprayed some RLM02 over it while the filler was drying (and wasted some time on Pistonheads).
This evening I've shaped the filler and reworked the hinge line. I'm happy enough with it now and shall proceed.

.I should have moved on to a 1/350 destroyer that's supposed to go round and round on a display turntable on our table at the Scottish Nationals in April, but to be honest couldn't face the thought of faffing about with PE last night so instead I opened the box of a Revell Ju 87B that's been sat for a while and sprayed some RLM02 over it while the filler was drying (and wasted some time on Pistonheads).
This evening I've shaped the filler and reworked the hinge line. I'm happy enough with it now and shall proceed.


Tonight I have mostly faffed around. The purpose of the gloss black was as waffled around above to highlight any shape issues. As it turned out, there was one. Nothing fatal, but there none the less. The right hand side / starboard was a nice contour from cockpit to tail. The left/port however wasn't. although the joint I achieved was fine, I had left a bit of a kink. This was entirely down to not being brutal enough thinning down the resin on that side, so out with the sanding sticks and at it again. To be honest I kinda thought I could feel it, but a gloss black paint job made it as clear as day.
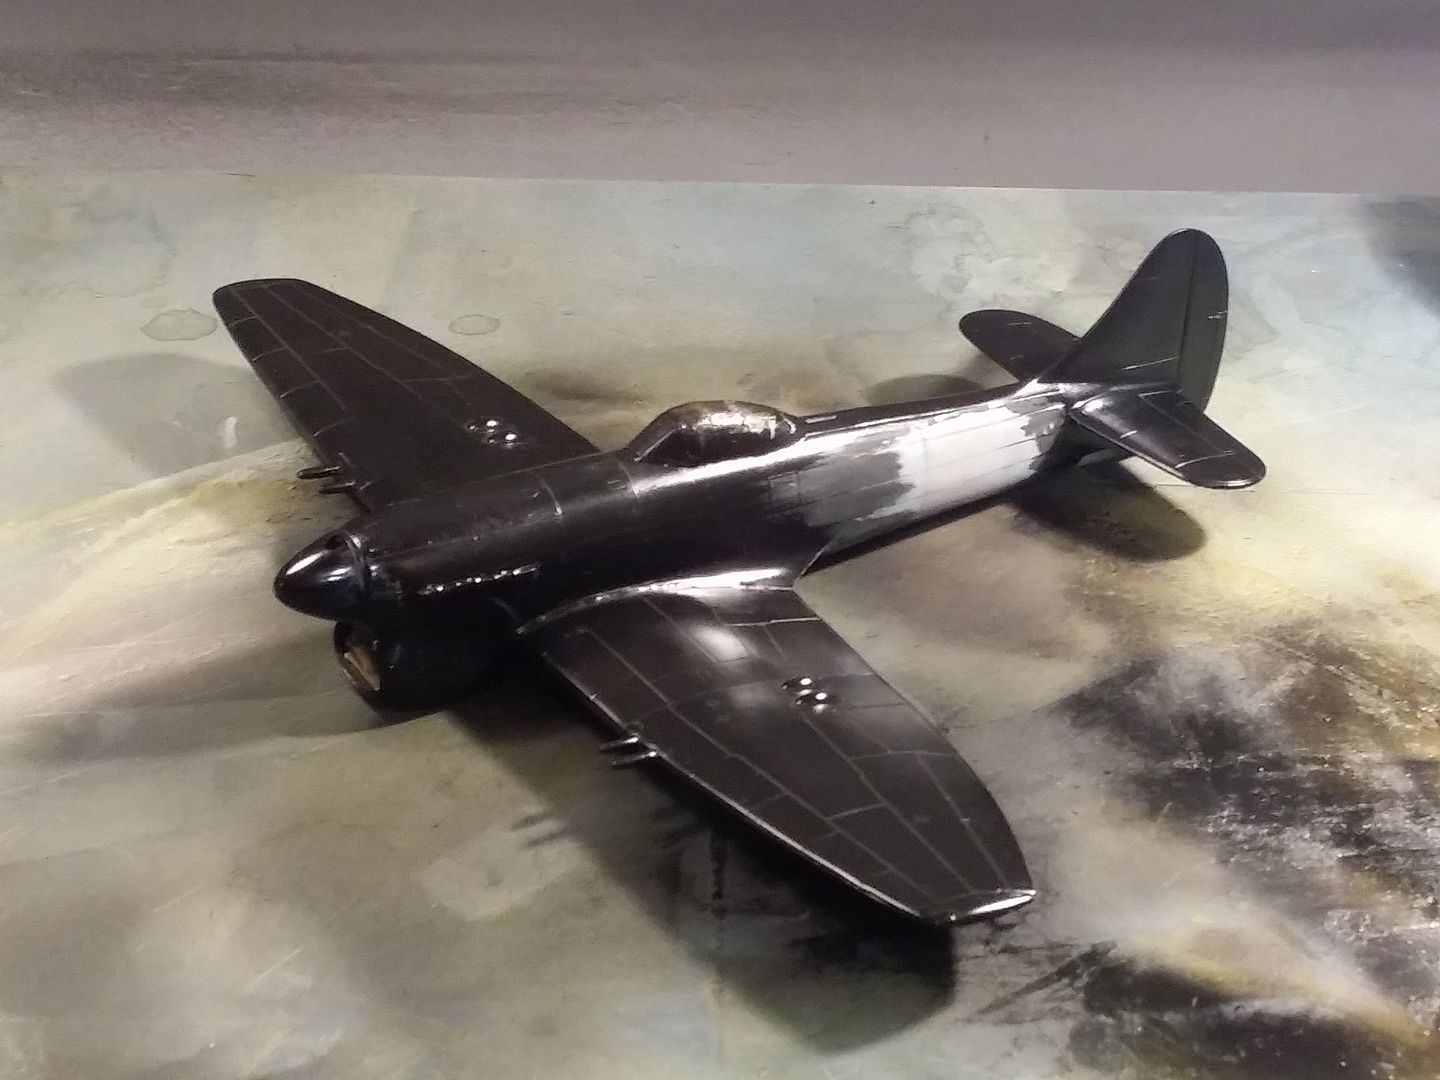
I resprayed the Alclad black lacquer and assembled some Stuka cockpit. I then sprayed an Alclad silver on it so I can wear some paint down in places later. I was all out of Aluminium so I used chrome. I thought it looked pretty attractive, however short lived it was!
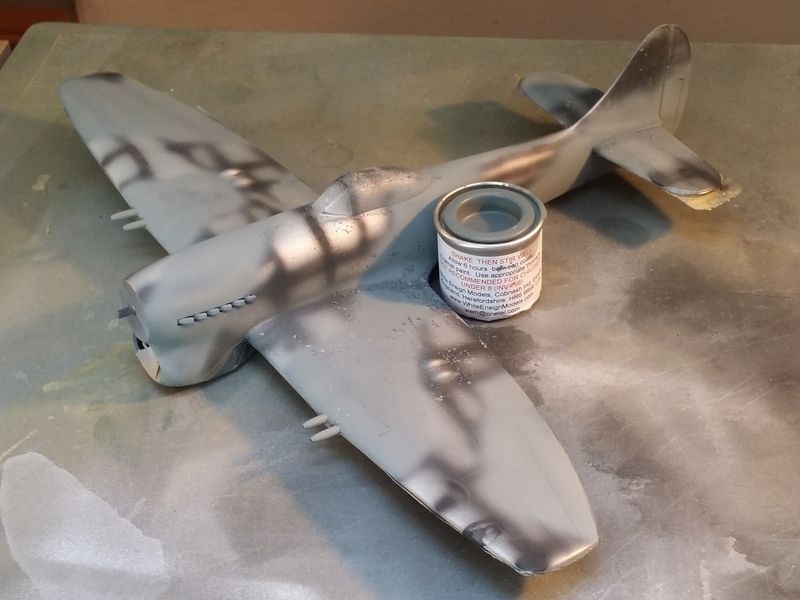
We've got a branded thinner produced for a foreign market and I've been testing it on little bits and bobs. I normally use cheap cellulose thinners for thinning and cheap white spirit for cleaning so it took a lot of nagging from my wife to actually put some milage on our own thinners to see if it's any good. I used them for the Medium Sea Grey. For a satin colour I'm quite pleased - it had started to dry noticeably in the time it took me to clean out the jar and airbrush and take a photo. That earned me some brownie points so I'm enjoying a nice glass of Aquavit whilst typing this out.

I chickened out of the chrome silver, fearful that it wouldn't look very convincing showing through as paint chips. I stripped it back and did it again with flat silver enamel.
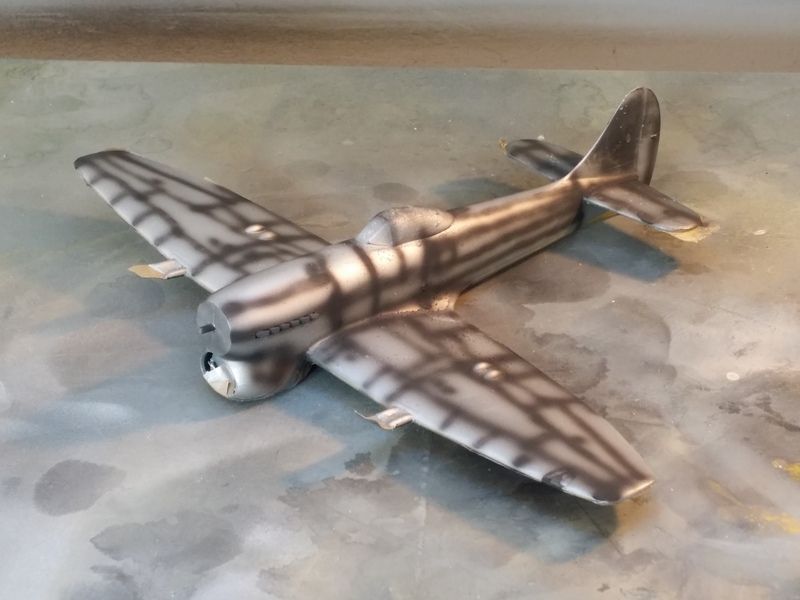
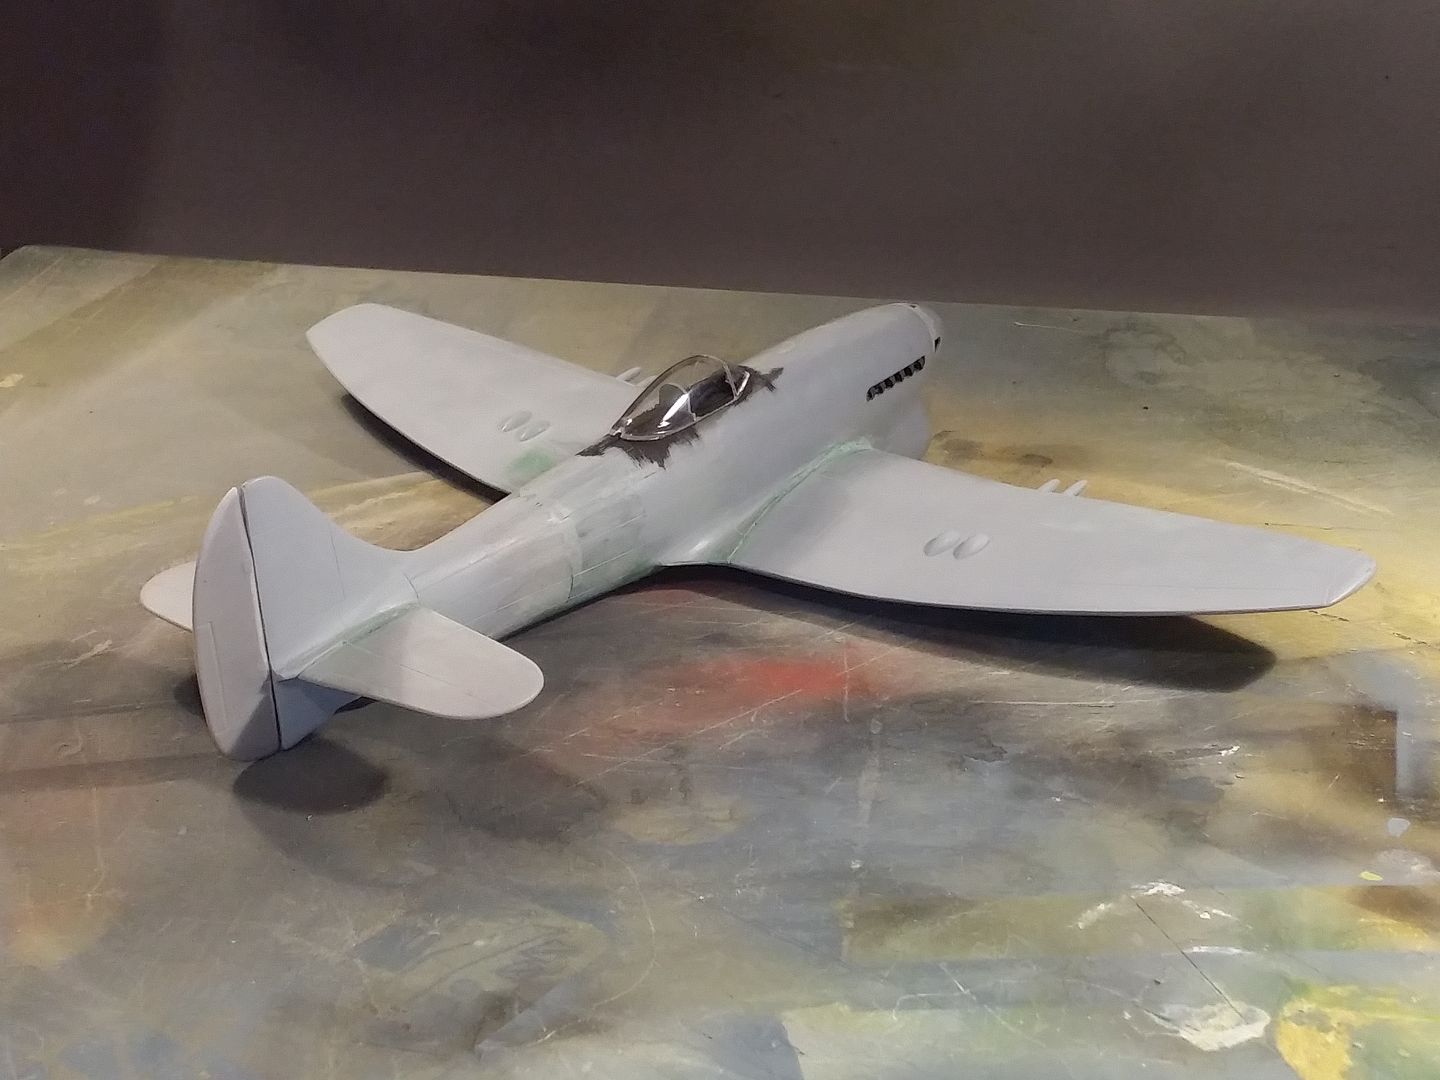
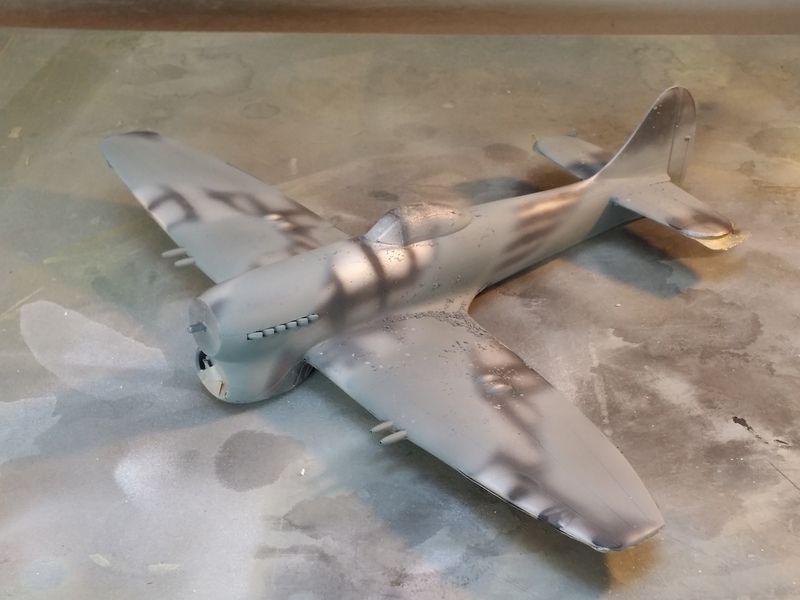
I wanted to show a weathered Tempest, but they weren't ever quite that old as to be completely knackered. Ocean grey paint is well known for chalking rapidly. I turns white much faster than the dark green weathers. I started off with our ocean grey and mixed in a lot of white and thinned it down quite a bit.
This was a lot lighter than the tin lid, and then I became concerned that it might blend too well with the medium sea grey underneath.
I thinned some straight ocean grey right down and shot some of that on the lower half of the fuselage, fin and rudder and messily sprayed some in as hap-hazard a manner I know how on the upper surfaces to break up the tone.

I wanted to show a weathered Tempest, but they weren't ever quite that old as to be completely knackered. Ocean grey paint is well known for chalking rapidly. I turns white much faster than the dark green weathers. I started off with our ocean grey and mixed in a lot of white and thinned it down quite a bit.

This was a lot lighter than the tin lid, and then I became concerned that it might blend too well with the medium sea grey underneath.
I thinned some straight ocean grey right down and shot some of that on the lower half of the fuselage, fin and rudder and messily sprayed some in as hap-hazard a manner I know how on the upper surfaces to break up the tone.


Gassing Station | Scale Models | Top of Page | What's New | My Stuff