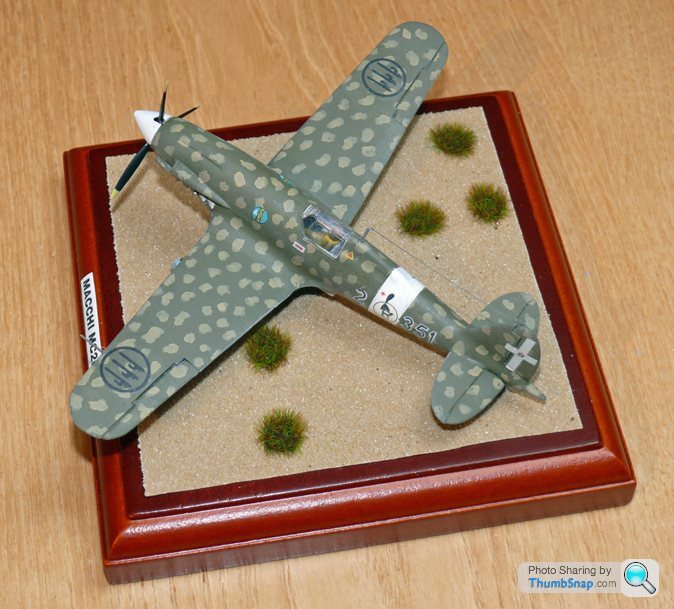
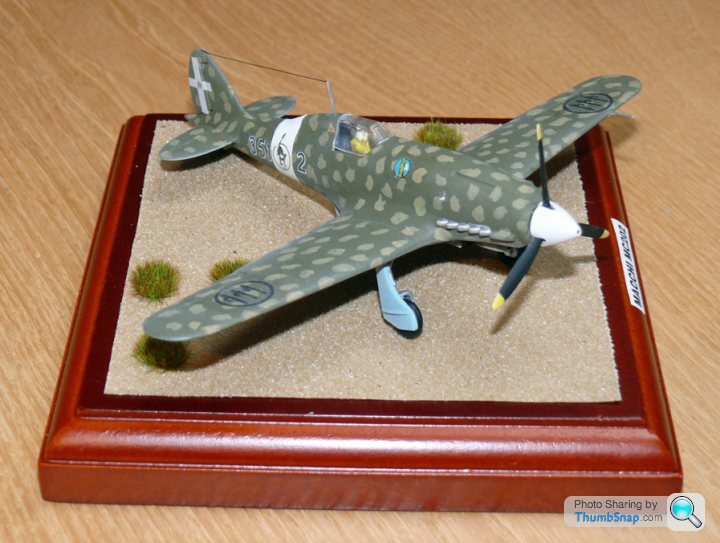
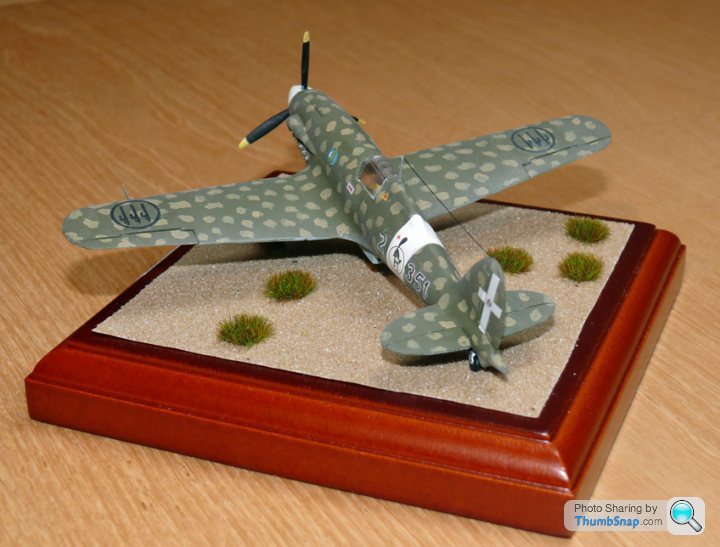
Italeri 1:72 Macchi C.202 "Folgore"
Discussion


Not having had much luck with getting on with current projects, I decided to make a start on this one, picked up from Telford last year:
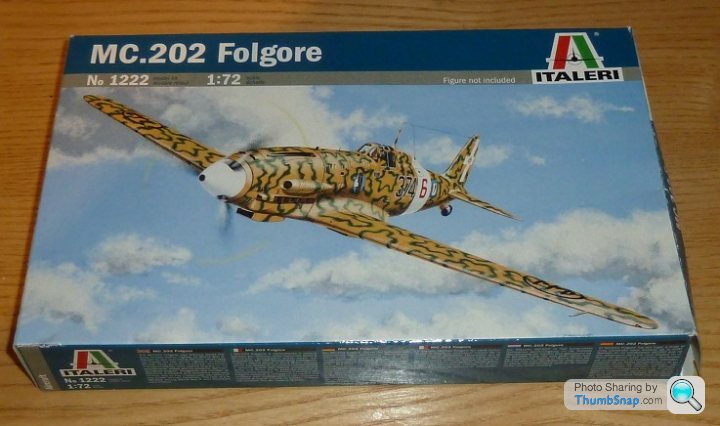
It's an aircraft I've never built before, but have always been intrigued with due to its combination of novel Italian engineering and style, German engine and a fairly unique and complex camouflage pattern. By most accounts is was a good aircraft, which could have matched or even exceeded the performance of the Bf109E (both used the DB601 engine) had it been more heavily armed. One interesting aspect of the design (and common to some other Macchi designs) was that the port wing was around 8.5" longer than the stbd. wing. This gave asymmetric lift, and provided a neat solution to counteracting the torque of the engine.
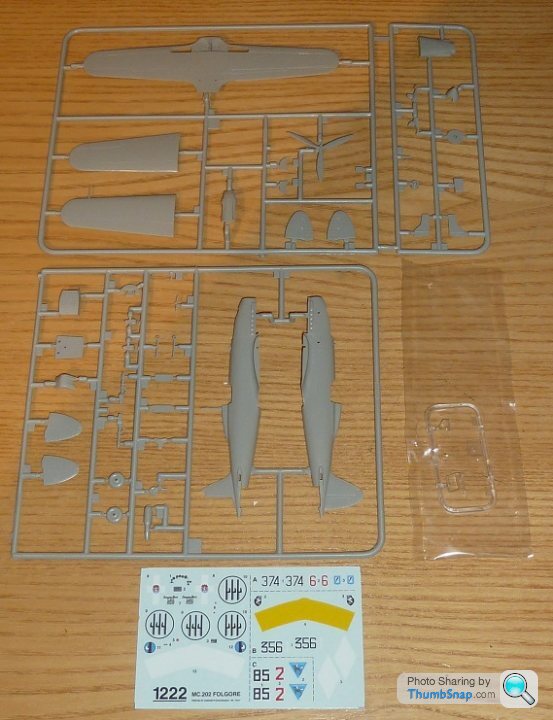
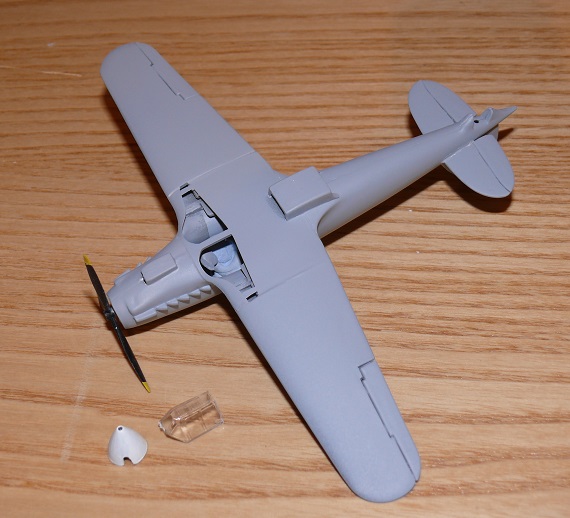
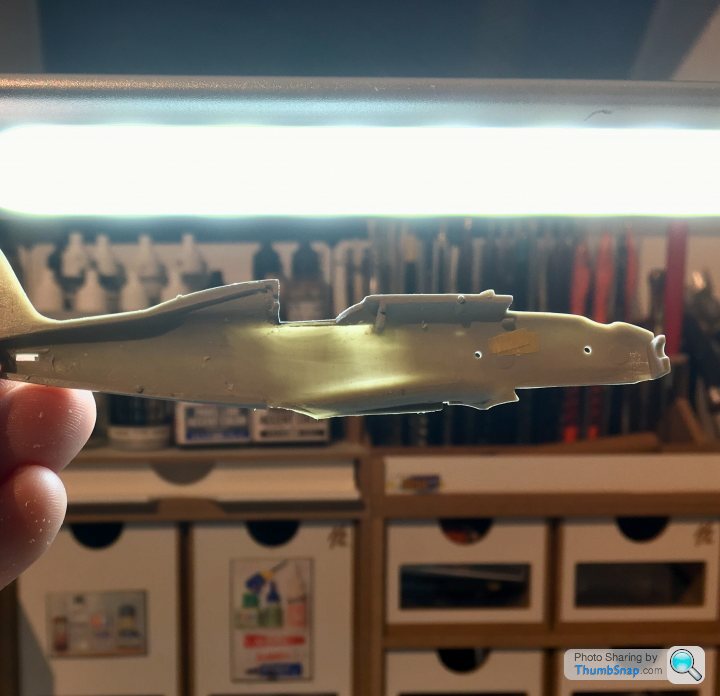
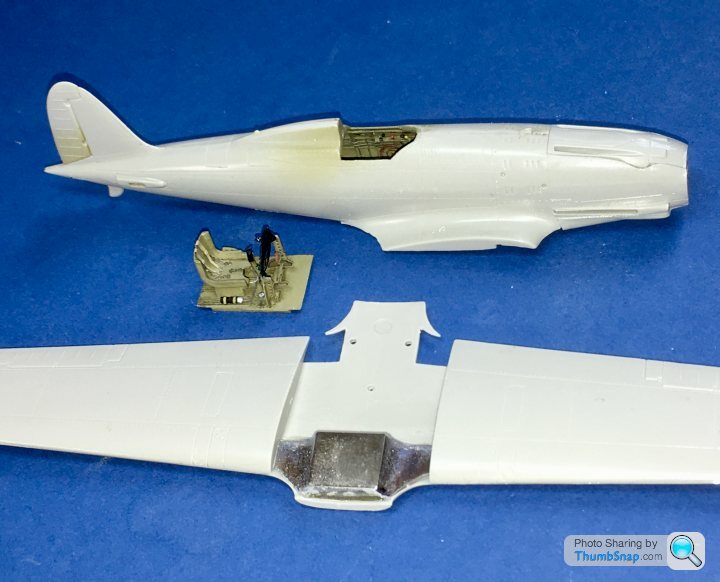
The kit dates form 2001, so fairly recent, and features a decent number of nicely moulded parts:
It will make an interesting comparison with the FROG version of this kit which I picked up at Huddersfield show for £1:

Despite the vast age difference, the FROG kit compares surprisingly well, although unfortunately, the asymmetric wings are not represented.
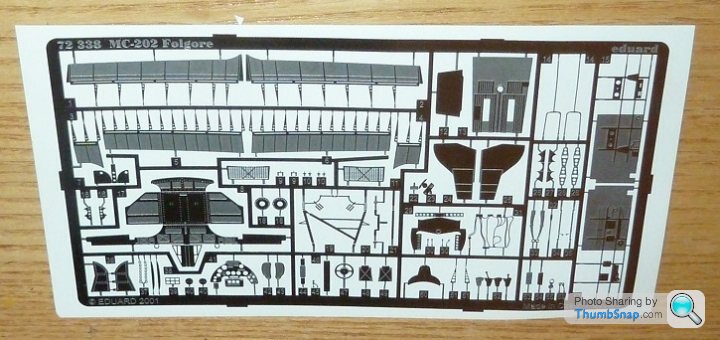
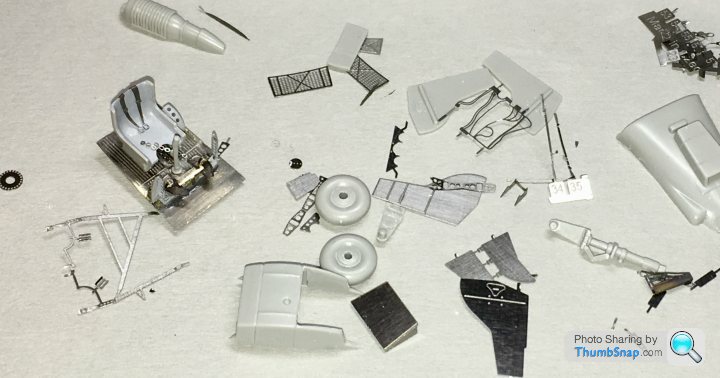
I also picked up a full Eduard photo-etch set, including flaps:
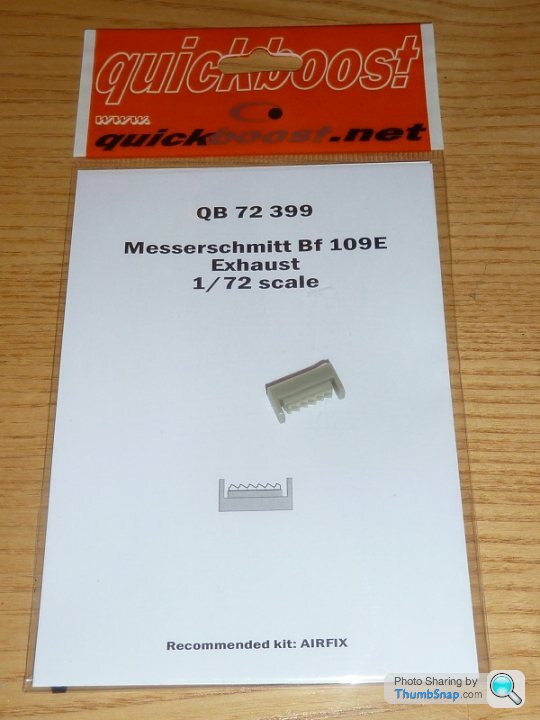
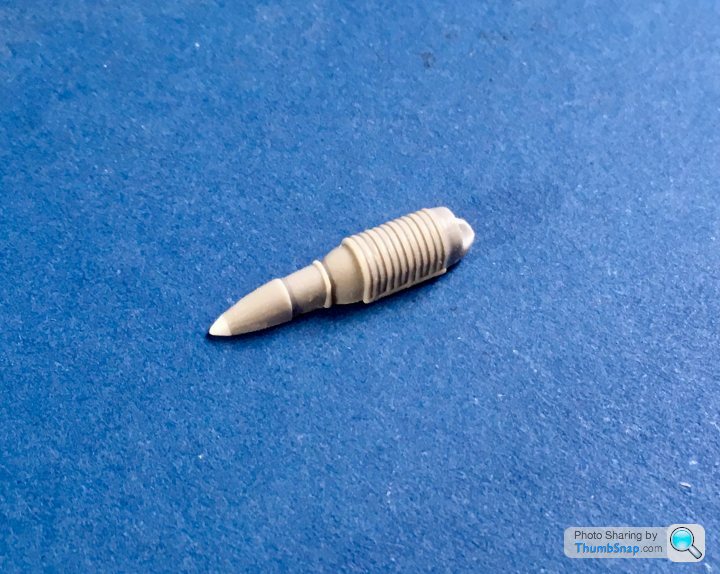
Resin exhausts (which I might not use):
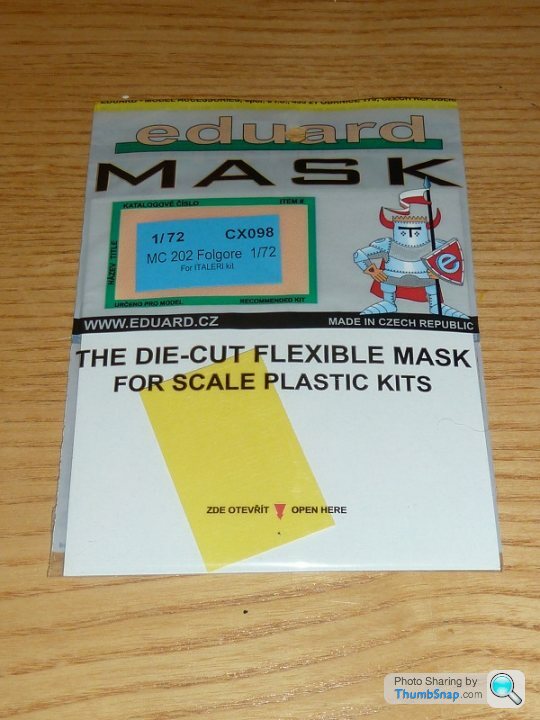
And an Eduard canopy mask set:
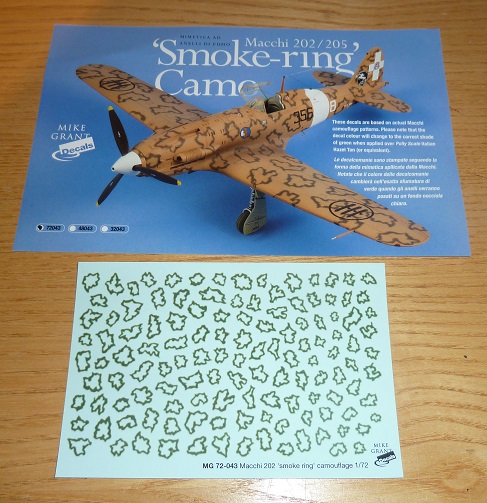
Last but not least, a set of Mike Grant "Smoke Ring" decals:
So, we'll see if this one gets beyond the parts clean-up stage before hitting any snags...
It's an aircraft I've never built before, but have always been intrigued with due to its combination of novel Italian engineering and style, German engine and a fairly unique and complex camouflage pattern. By most accounts is was a good aircraft, which could have matched or even exceeded the performance of the Bf109E (both used the DB601 engine) had it been more heavily armed. One interesting aspect of the design (and common to some other Macchi designs) was that the port wing was around 8.5" longer than the stbd. wing. This gave asymmetric lift, and provided a neat solution to counteracting the torque of the engine.
The kit dates form 2001, so fairly recent, and features a decent number of nicely moulded parts:
It will make an interesting comparison with the FROG version of this kit which I picked up at Huddersfield show for £1:
Despite the vast age difference, the FROG kit compares surprisingly well, although unfortunately, the asymmetric wings are not represented.
I also picked up a full Eduard photo-etch set, including flaps:
Resin exhausts (which I might not use):
And an Eduard canopy mask set:
Last but not least, a set of Mike Grant "Smoke Ring" decals:
So, we'll see if this one gets beyond the parts clean-up stage before hitting any snags...
PanzerCommander said:
Bookmarked.
A work colleague has just started getting back into modelling, he is currently buying tools and the like and practicing painting techniques on cheaper models and scored plasticard.
He brought in an Eduard FW190 kit the other week. The mouldings seem to be excellent quality and the PE parts sent me cross eyed - some of them are tiny. Seems a long way away from the Airfix kits that I built in my early teens.
I built a 1:72 Eduard Hellcat - it was one of the best kits I've seen. They do sometimes use base kits from other manufacturers and add their own parts though. My pal just bought a 1:48 Eduard Tomcat with all brass p/e, resin etc, but the base kit is, I think, Hobby Boss. I think the Eduard 1:48 Lightning was in fact Airfix plastic. Nothing wrong with doing that though so long as the base kit is good.A work colleague has just started getting back into modelling, he is currently buying tools and the like and practicing painting techniques on cheaper models and scored plasticard.
He brought in an Eduard FW190 kit the other week. The mouldings seem to be excellent quality and the PE parts sent me cross eyed - some of them are tiny. Seems a long way away from the Airfix kits that I built in my early teens.
Eric Mc said:
I was browsing through an old modelling magazine (PAM News from 1977) and found a review of the Supermodel 202. Is the current Italeri 202 a reboxing of the old Supermodel kit?
If it is, would you like a scan of the article?
Thanks for the offer, but I don't think it is - Scalemates says it was "New Tool".If it is, would you like a scan of the article?
With a bit of work (the m/g trough panel wasn't a very good fit), it goes together Ok, but not up to Japanese Tamiya standards even though, like several Italeri kits, this one was once re-boxed as a Tamiya kit.
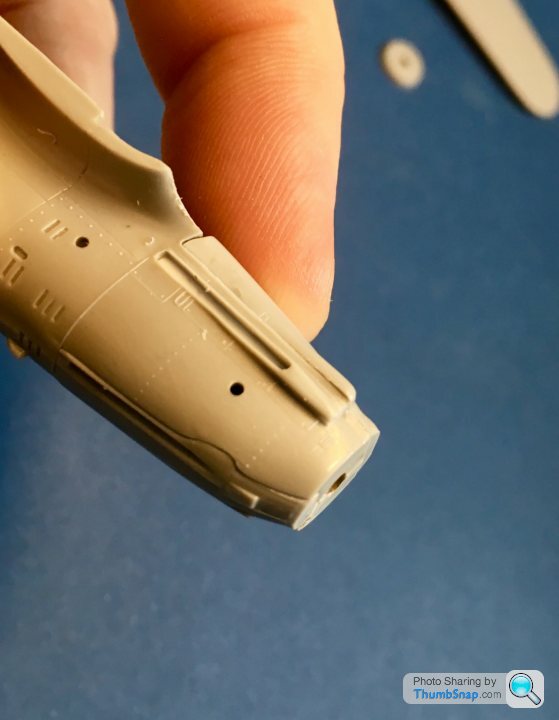
I've since cut off the pitot tube and the aerial mast; they'll never survive the build in-situ. I'll pin the aerial and replace the pitot with brass tubes.
I've since cut off the pitot tube and the aerial mast; they'll never survive the build in-situ. I'll pin the aerial and replace the pitot with brass tubes.
4321go said:
Hey, Doc. Get your printer out and print off a sheet of tiny race circuit decals. I bet they'd look almost identical! This is "Pistonheads" after all......
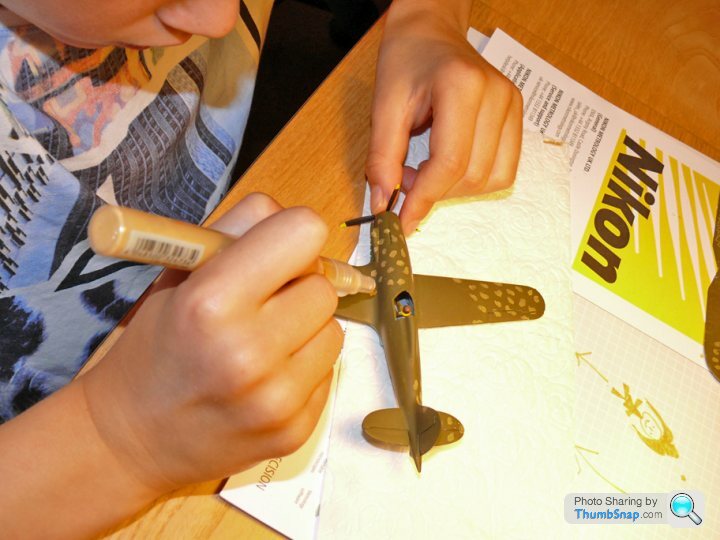
Good idea! If I had a printer I might just do that: I've given the FROG version of this aircraft to my son to build.Any recommendations for decent photo printers/scanners?
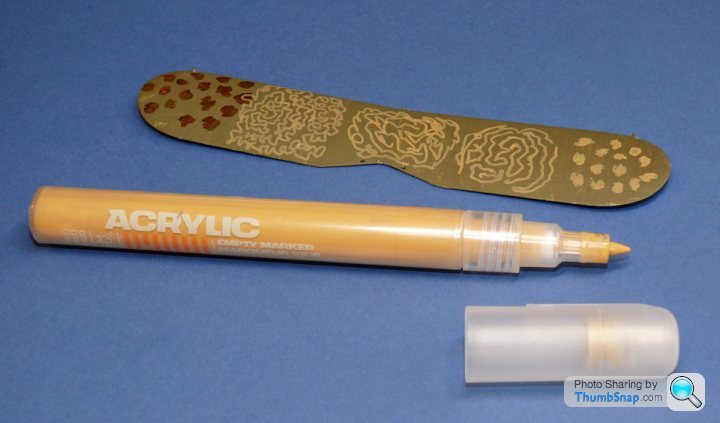
Some progress on the FROG version being built by my son: I got the him an "empty felt tip pen", filled it with Vallejo desert yellow + retarder medium and set him to work on the camo. It was very easy to get a great result - no brushes were harmed during this process:
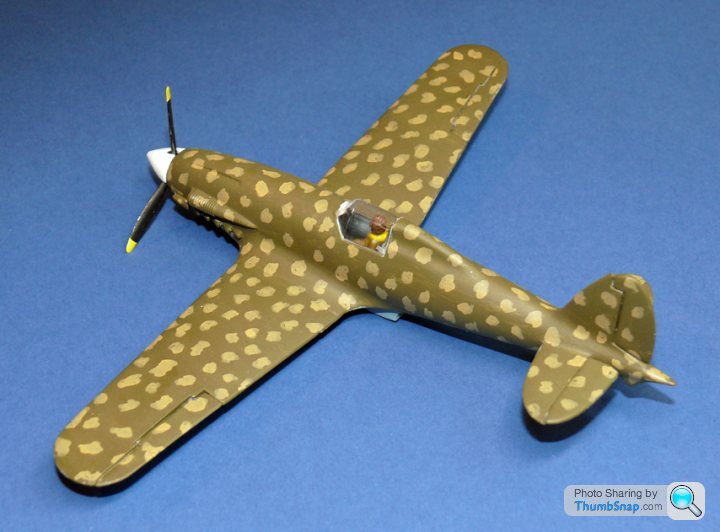
This could be a viable way of doing "smoke rings" and the Luftwaffe "squiggle" camo (the stuff that looks impossible to do), at least at 1:72
This could be a viable way of doing "smoke rings" and the Luftwaffe "squiggle" camo (the stuff that looks impossible to do), at least at 1:72
mybrainhurts said:
I used to fly FROG stuff. Thought they'd gone bust, what happened?
They folded in the 1970's, although some were subsequently produced under different manufacturers, This is an original, old kit.https://en.wikipedia.org/wiki/Frog_(models)
Son's FROG version completed this morning. We overcoated it with Humbrol #49 Acrylic Matt spray, and it was a disaster - turned to white powder, meaning that the black bits & exhausts needed repainting (even Klear didn't work). This is the first time this has happened in about 10 models using this stuff. Even stranger that it was a partially used can, and the previous model (a very dark FW190) turned out perfectly. Luckily it's not a disaster on this model.


Back to the Italeri version after a while in the modelling doldrums (got 5 on the go at the moment).
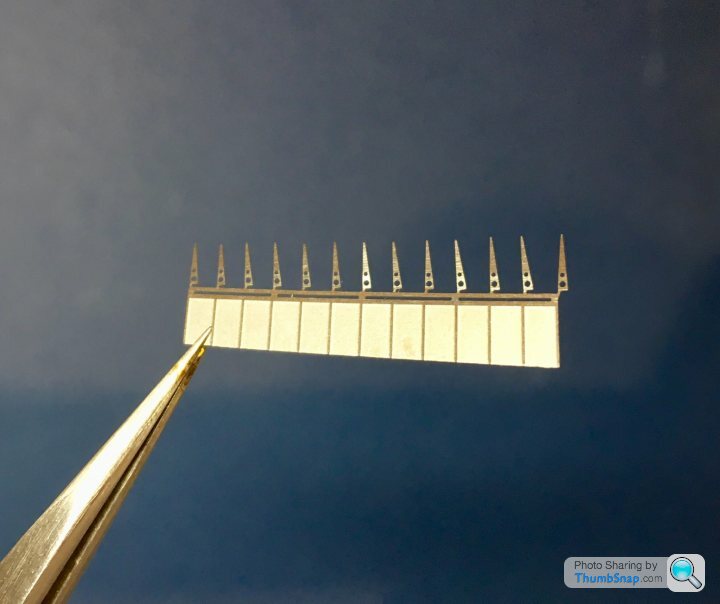
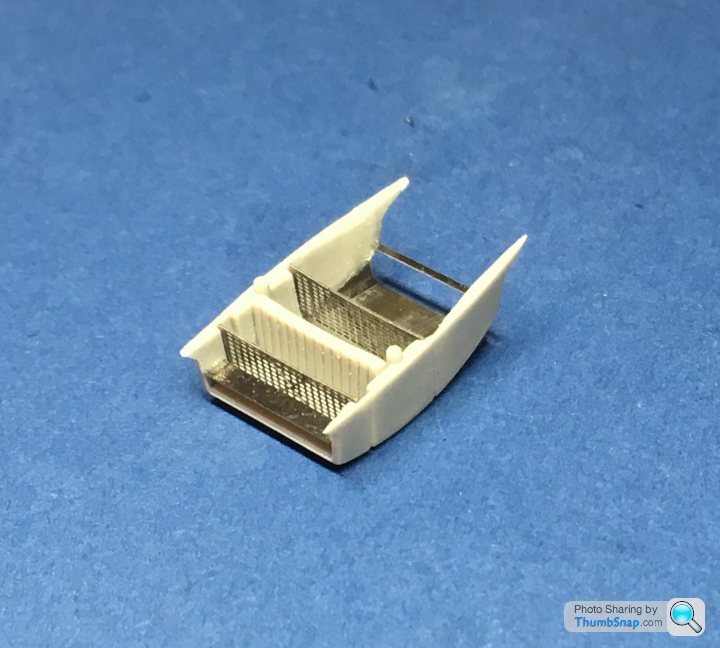
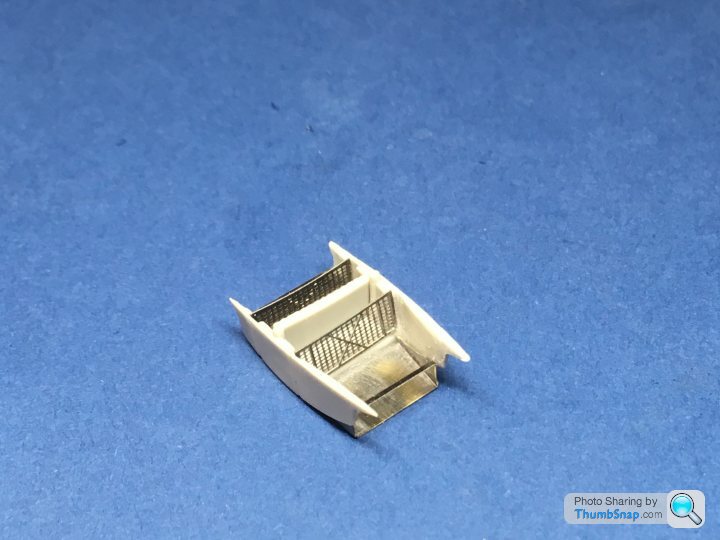
There's a lot of photo-etch in the Eduard set, and the trickiest bits are the flaps and incredibly complex undercarriage well. I cut the offending bits of plastic out of the wing:
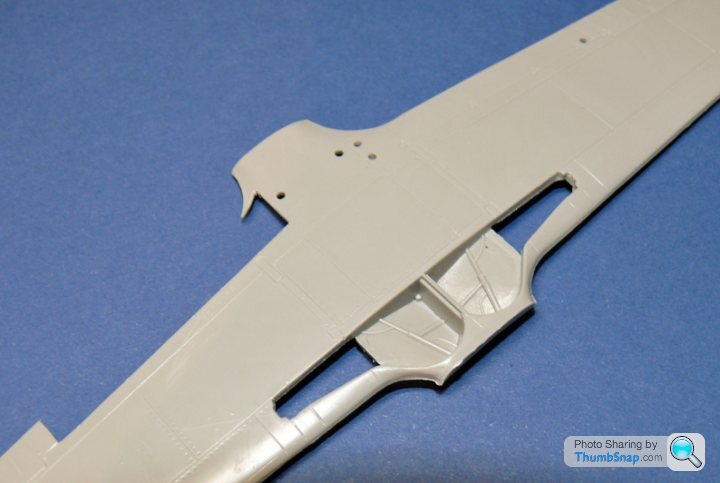
...and set to work bending, folding and cyano-ing the metal replacements:
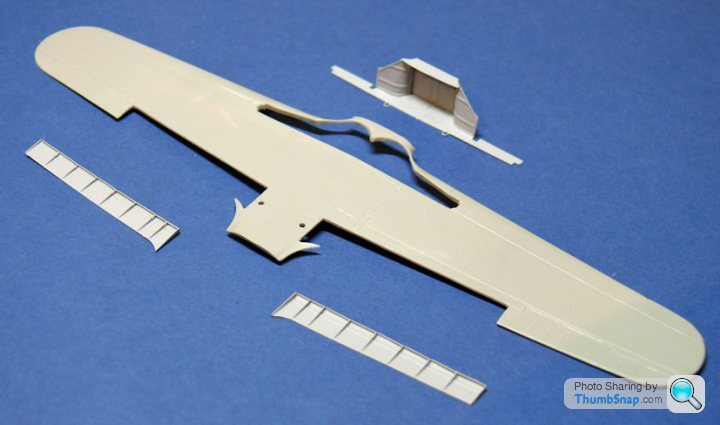
If more or less falls together now, but as with a lot of major surgery for photo-etch, the plastic is wafer-thin in places now:
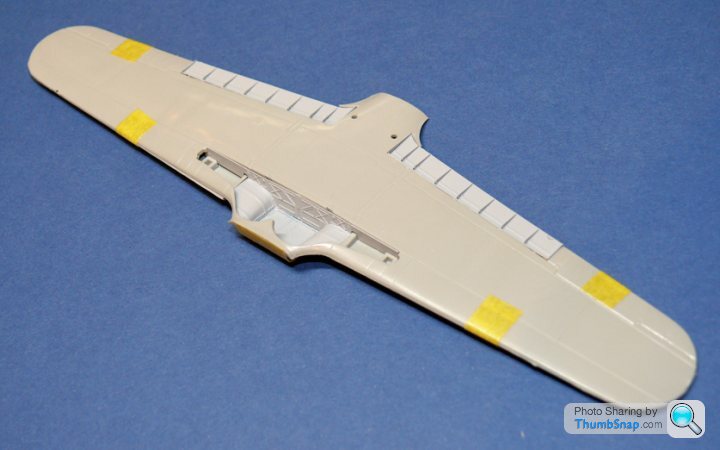
There are a LOT of stiffeners, wires and pipes still to fit in that wheel well.
There's a lot of photo-etch in the Eduard set, and the trickiest bits are the flaps and incredibly complex undercarriage well. I cut the offending bits of plastic out of the wing:
...and set to work bending, folding and cyano-ing the metal replacements:
If more or less falls together now, but as with a lot of major surgery for photo-etch, the plastic is wafer-thin in places now:
There are a LOT of stiffeners, wires and pipes still to fit in that wheel well.
Vitorio said:
Amazing stuff gn!
I dabbled with model planes as a kid, most of them got a fantasy/simple crude paint job, and seeing your posts (this one and the polikarpov in particular) really make me want to go back and do it right this time.
Find a model you fancy building, but before you buy it do a Google search for reviews - not an "in the box" review, but a full build. The quality of a kit makes all the difference.I dabbled with model planes as a kid, most of them got a fantasy/simple crude paint job, and seeing your posts (this one and the polikarpov in particular) really make me want to go back and do it right this time.
dr_gn said:
Son's FROG version completed this morning. We overcoated it with Humbrol #49 Acrylic Matt spray, and it was a disaster - turned to white powder, meaning that the black bits & exhausts needed repainting (even Klear didn't work). This is the first time this has happened in about 10 models using this stuff. Even stranger that it was a partially used can, and the previous model (a very dark FW190) turned out perfectly. Luckily it's not a disaster on this model.
Got second place in the junior class at the Huddy show last Sunday. Well pleased.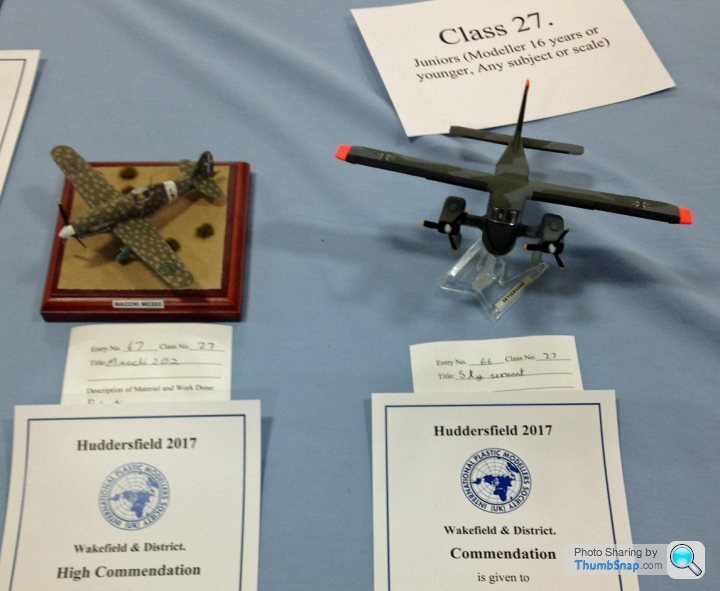
So this one got shelved, mainly due to the photo-etch not fitting very well, and me getting demoralised with the amount of work involved in correcting it. Anyway, work on the Tiger Moth came to a halt yesterday (waiting for airbrush spares), so I re-started the Macchi tonight, with one of the flaps bent and cyano’d. Took 3 hours, and it’s not done yet:

With the Tamiya Zero done, I thought it was time to get back to this one. A bit of a shock coming from a standard kit that will probably look better than this one, which will have had hours of grief getting after-market parts to fit.
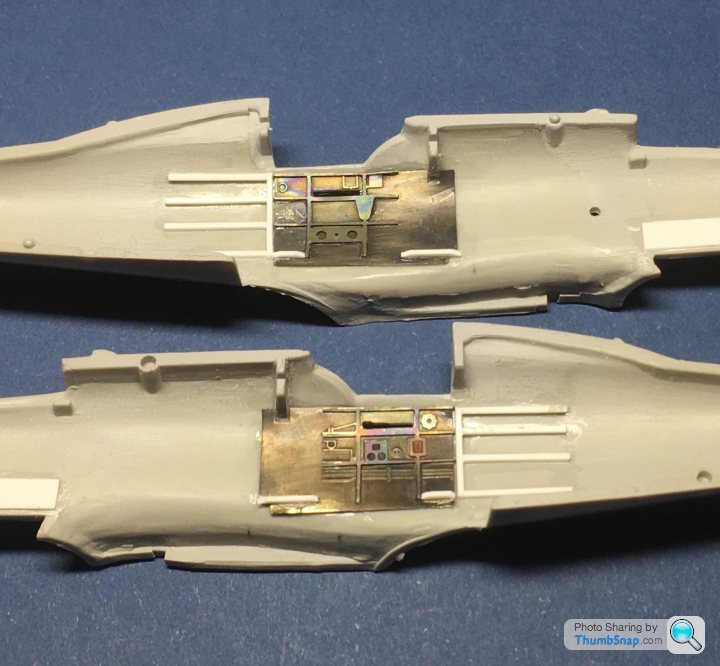
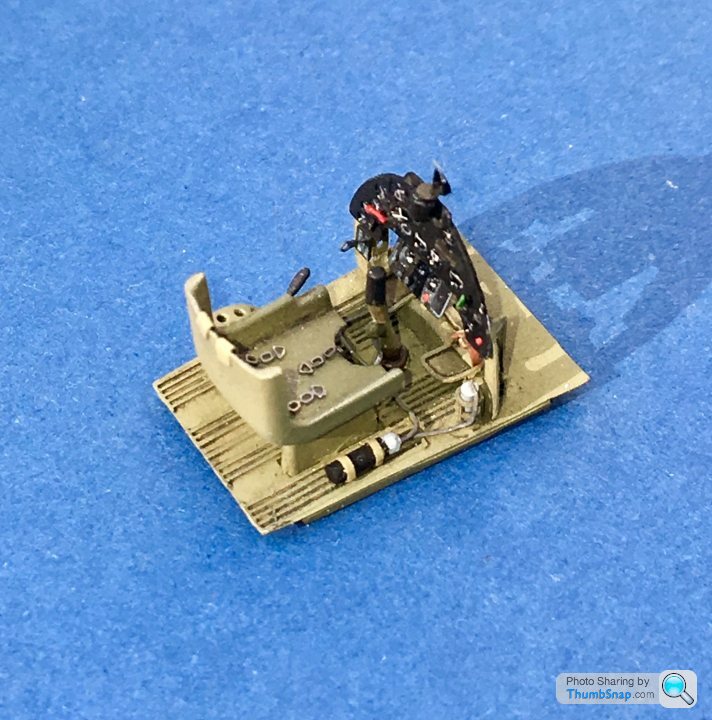
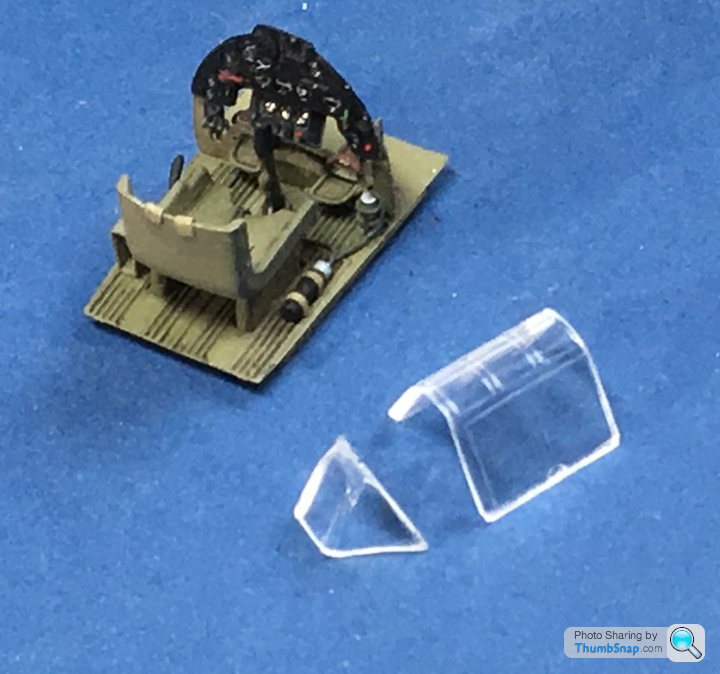
Anyway, cockpit sides and cockpit floor; the fuselage needed sanding and scraping to be wafer thin for the U-shaped bulkhead to be fitted:
I also scraped the moulded-in belts off the seat in preparation for fitting the p/e items:
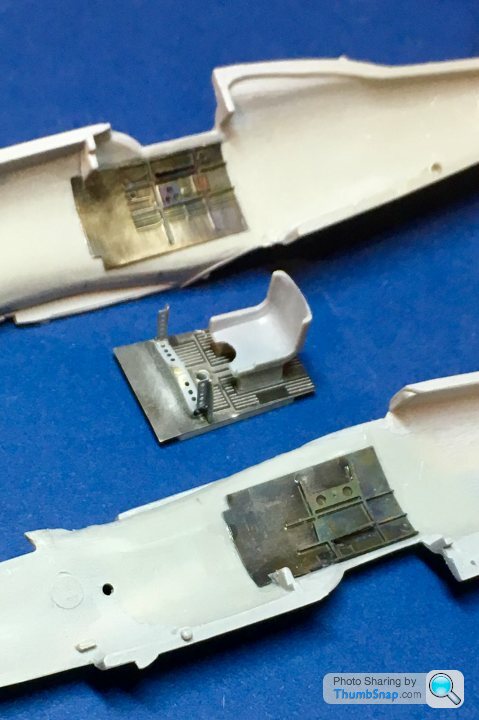
Anyway, cockpit sides and cockpit floor; the fuselage needed sanding and scraping to be wafer thin for the U-shaped bulkhead to be fitted:
I also scraped the moulded-in belts off the seat in preparation for fitting the p/e items:
Suffering from a bit of burn-out on the SMS Emden ship model, I’m back on this one (started nearly 3 yeas ago). It’s turned into a bit of a nightmare, mainly due to the sheer quantity of photo-etch, and the fact hardly any of it fits properly.
Anyway...cockpit sides now fitted with plastic locating strips to enable the floor to be fitted from below:
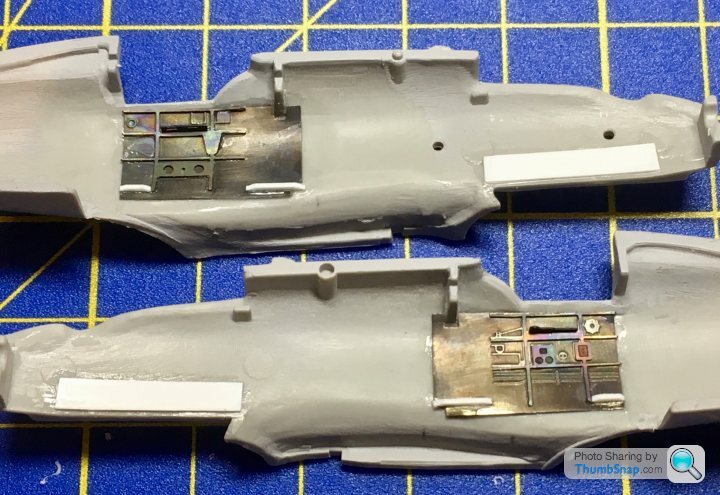
Also visible are the plastic backing strips for the resin exhaust apertures I cut out:
Still loads of tiny photo-etch bits to cut-and-shut to the plastic:
Anyway...cockpit sides now fitted with plastic locating strips to enable the floor to be fitted from below:
Also visible are the plastic backing strips for the resin exhaust apertures I cut out:
Still loads of tiny photo-etch bits to cut-and-shut to the plastic:
Added some notional stiffeners behind the seat - I think that area is partially visible through a gap behind the headrest:
And continued with adding photo-etch, firstly to the coolant radiator duct:
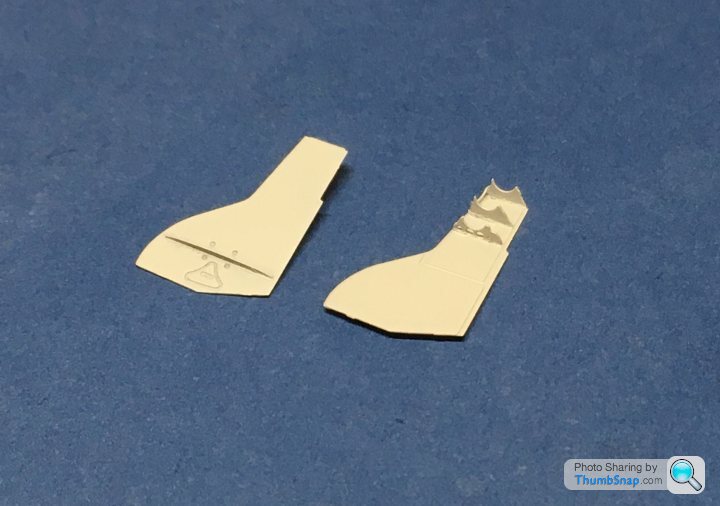
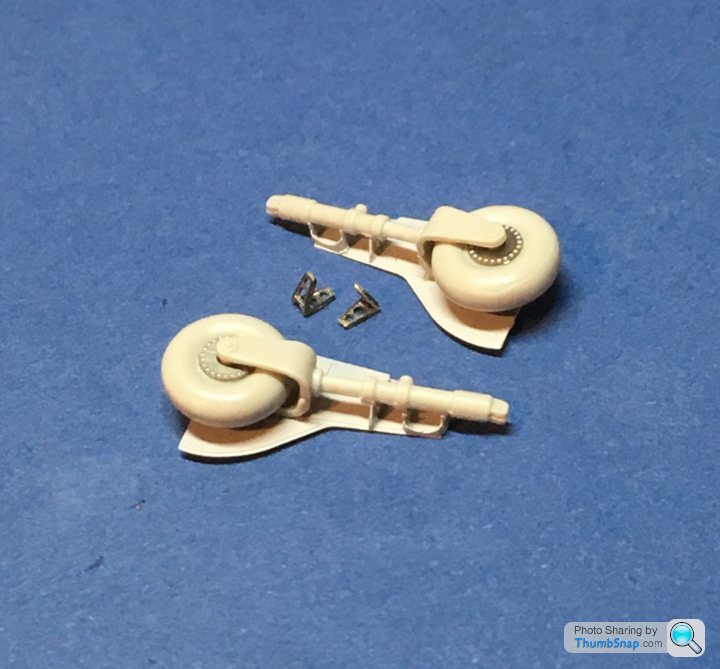
...and the undercarriage assemblies:

Next job will be to modify the windscreen so that it fits the fuselage.
And continued with adding photo-etch, firstly to the coolant radiator duct:
...and the undercarriage assemblies:
Next job will be to modify the windscreen so that it fits the fuselage.

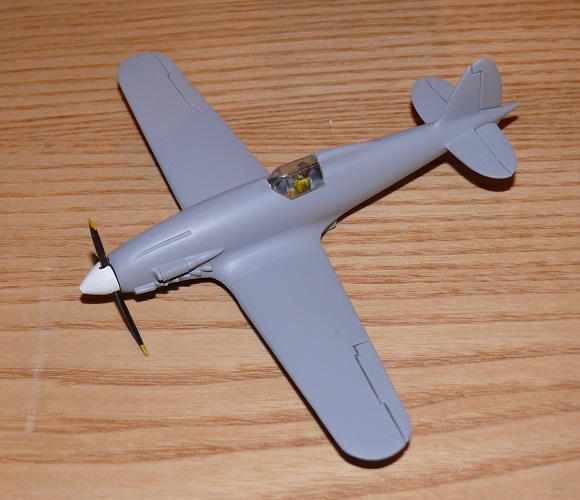
This should have been done years ago, but the fuselage is closed:
The fit of the front upper and lower fuselage panels is a bit dodgy, I glued a strut in the bottom to spring the sides apart:
The lower panel still needs some work:
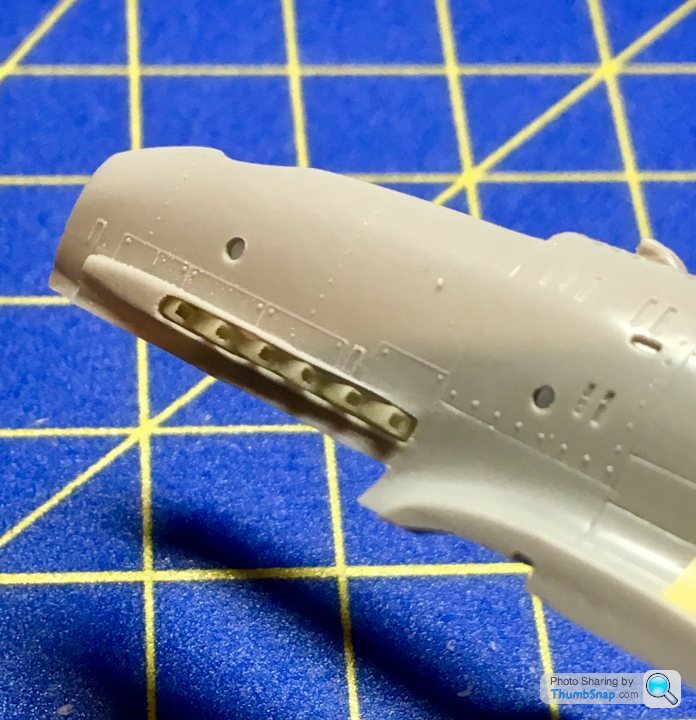
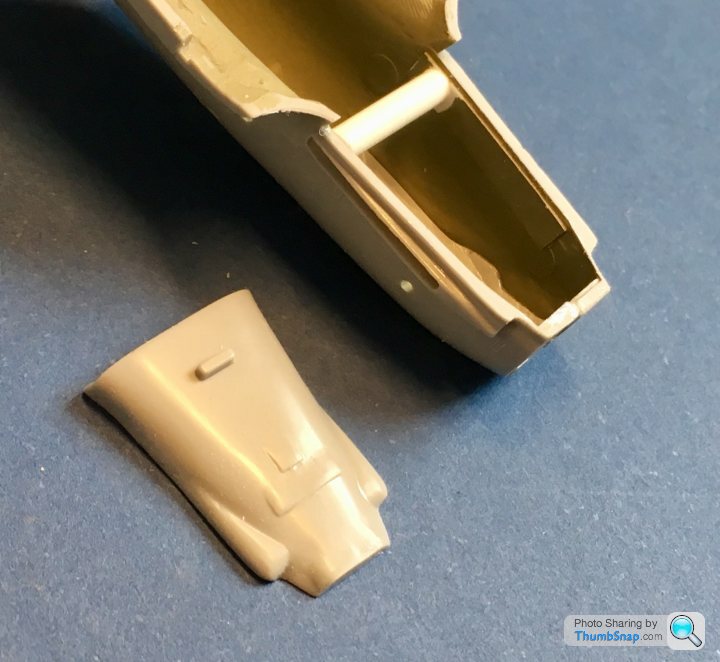
The engine filter was a short-shot, so needed a piece adding and profiling:
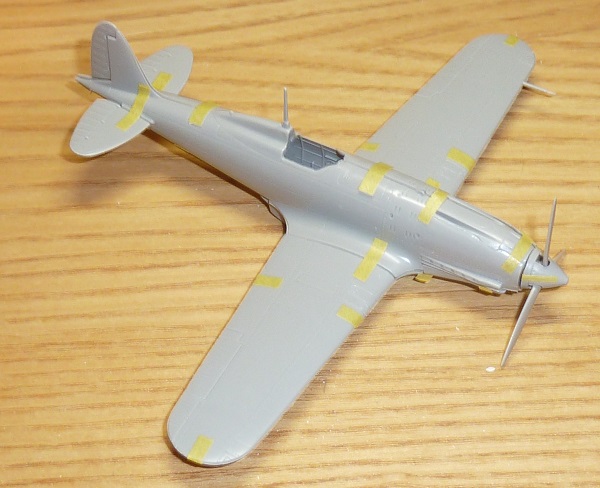
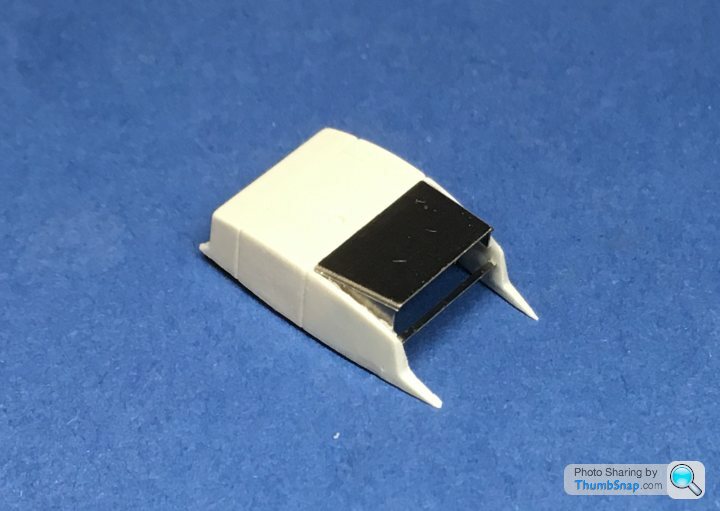
Finally, dipped the canopy and modified windscreen in Klear, which has improved the rather cloudy original plastic:
The fit of the front upper and lower fuselage panels is a bit dodgy, I glued a strut in the bottom to spring the sides apart:
The lower panel still needs some work:
The engine filter was a short-shot, so needed a piece adding and profiling:
Finally, dipped the canopy and modified windscreen in Klear, which has improved the rather cloudy original plastic:
Gassing Station | Scale Models | Top of Page | What's New | My Stuff