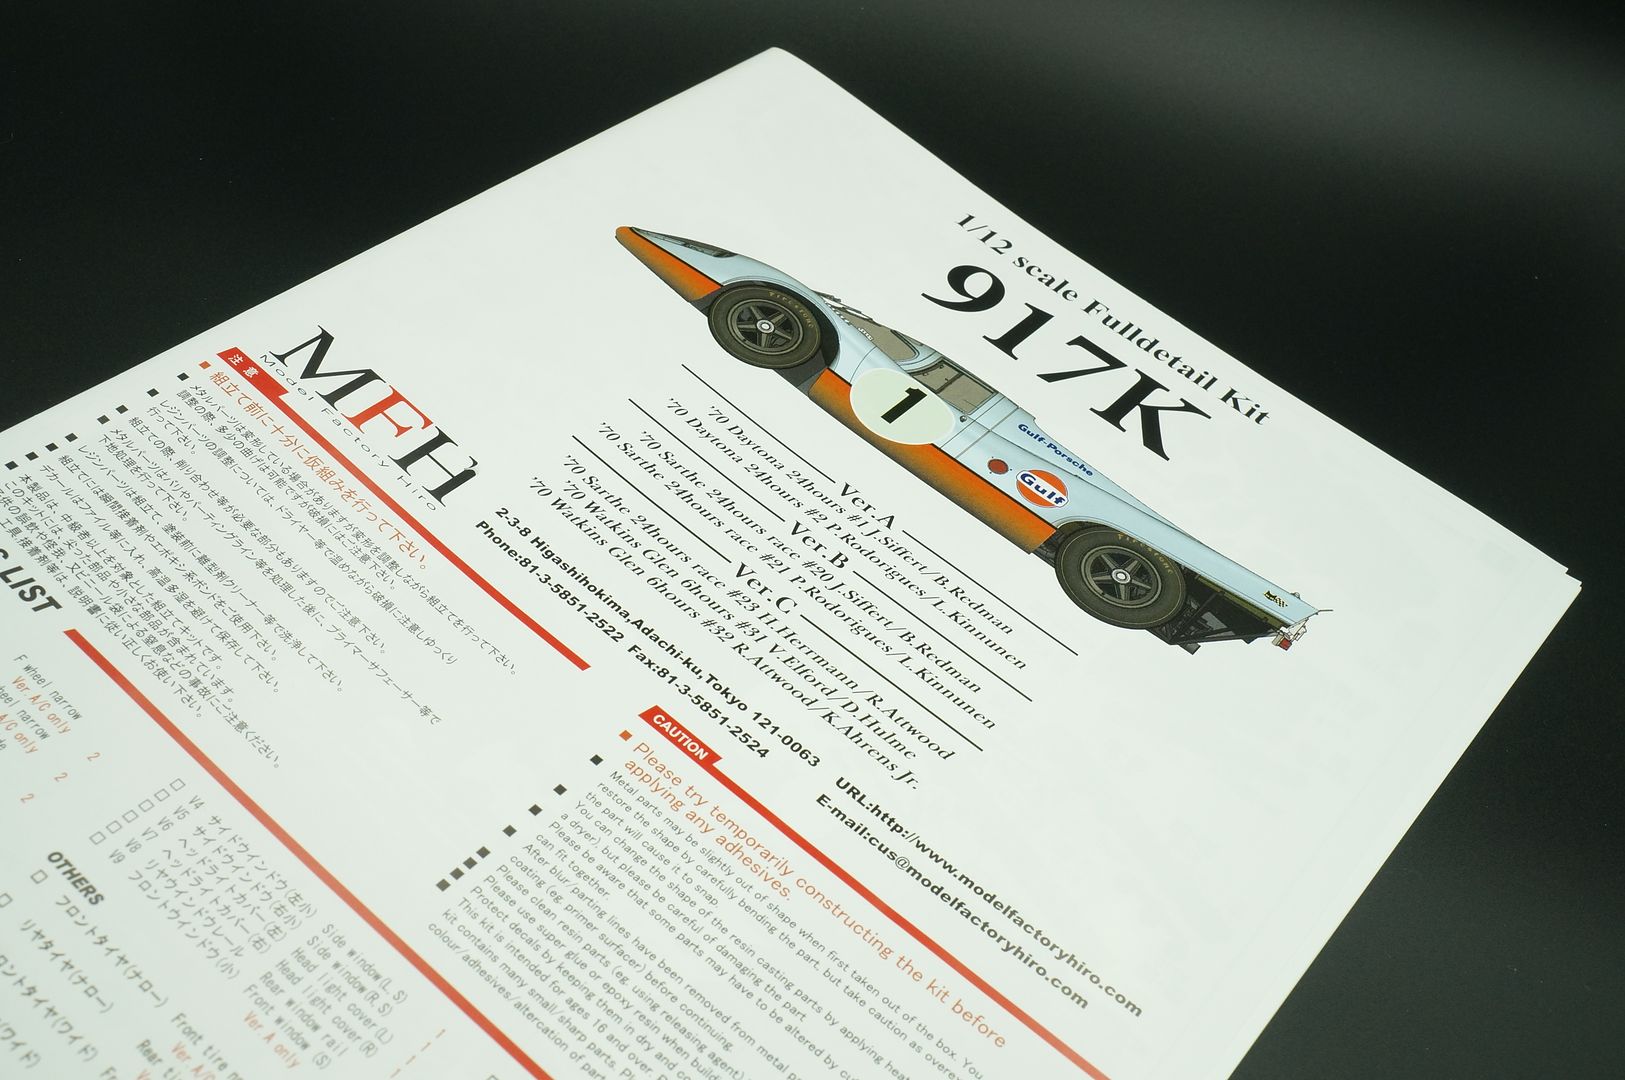
1/12 Porsche 917k - MFH
Discussion


Another WIP thread! Please don't think I have done all this modelling at the weekend  - I'm copying WIP threads from somewhere else for this crowd - I am working on the 3 posted here at the same time because a)variety and b) I want to photograph different engine side by side.
That said, quality time is getting hard to find, so progress will be slow!!
So this first few pages will be one cut 'n paste - hope that is ok (so you may see the odd answer to a question you haven't seen) then any progress from engine onward will be 'live'!
Hope you enjoy....
Having started my MP4/4 WIP I am adding another. I'm starting a few kits at the same time - I want to do a 'compare engines' project at some point.
This will be picture heavy again, and it is partly to get tips from your guys, so all comments welcome! Don't expect fast progress - finding time to do this stuff gets harder and harder - but I hope you enjoy...
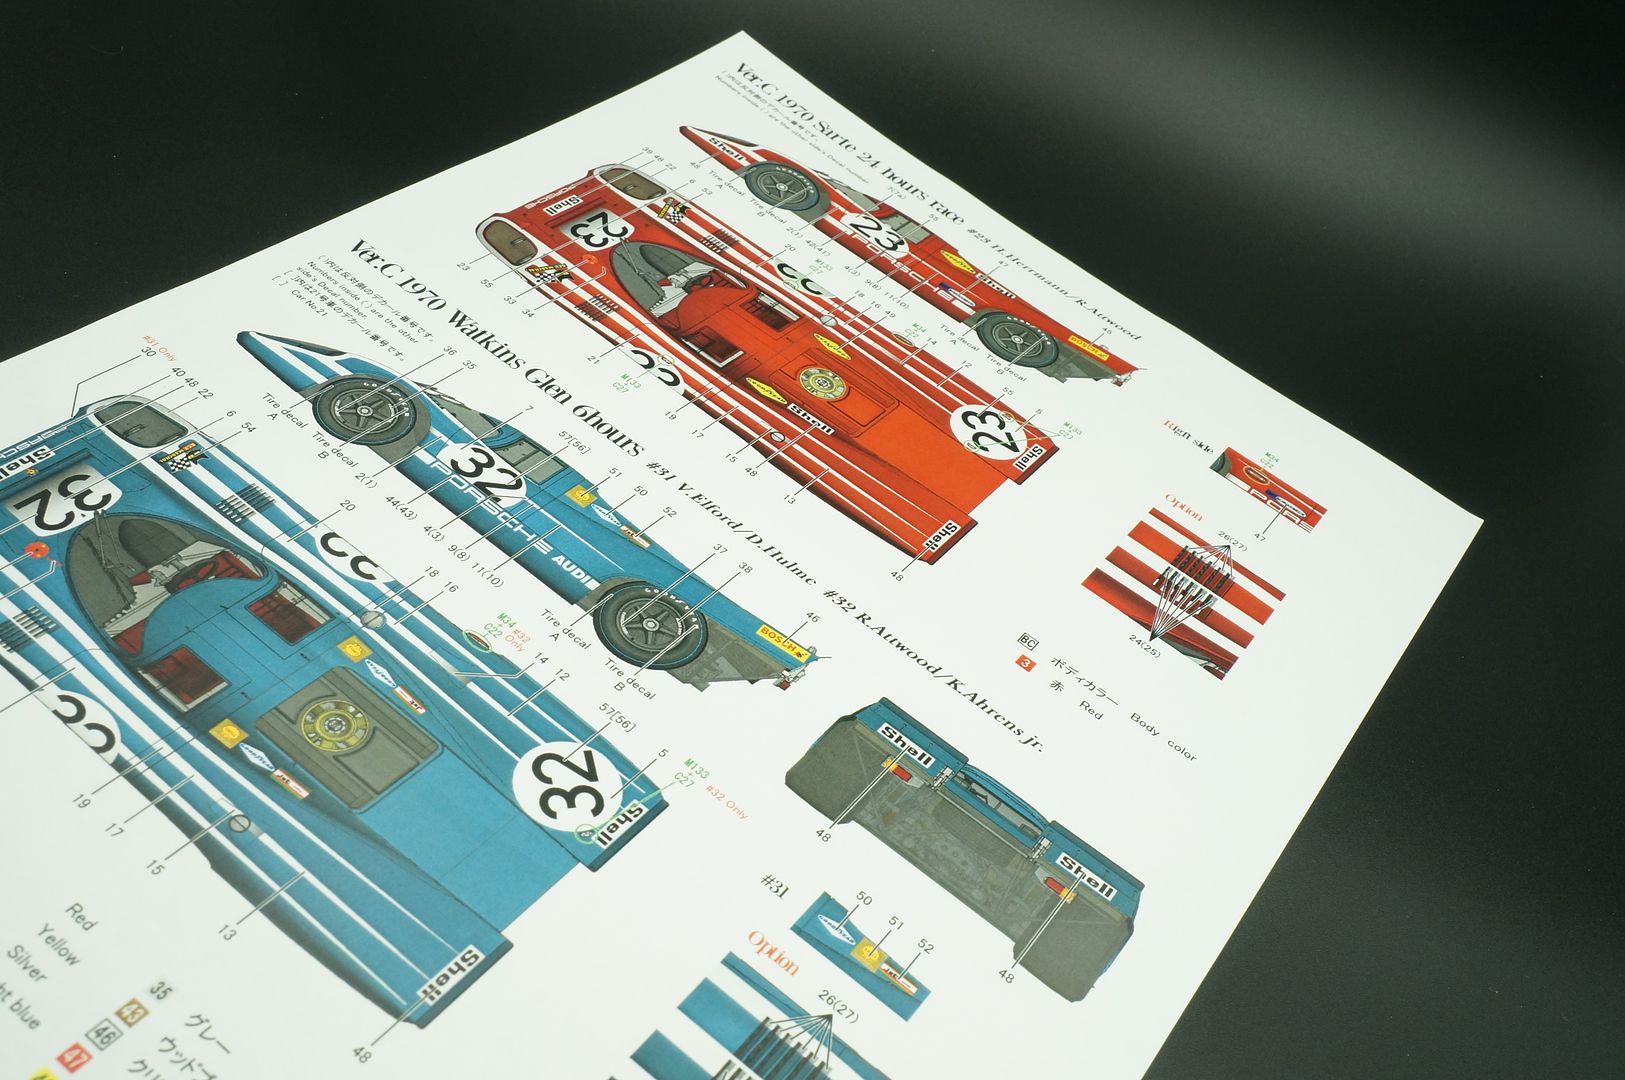
I went for the red 'Version C' that raced at '70 Sarthe 24hr Race' - I love the Gulf cars, but 'everyone does them...'
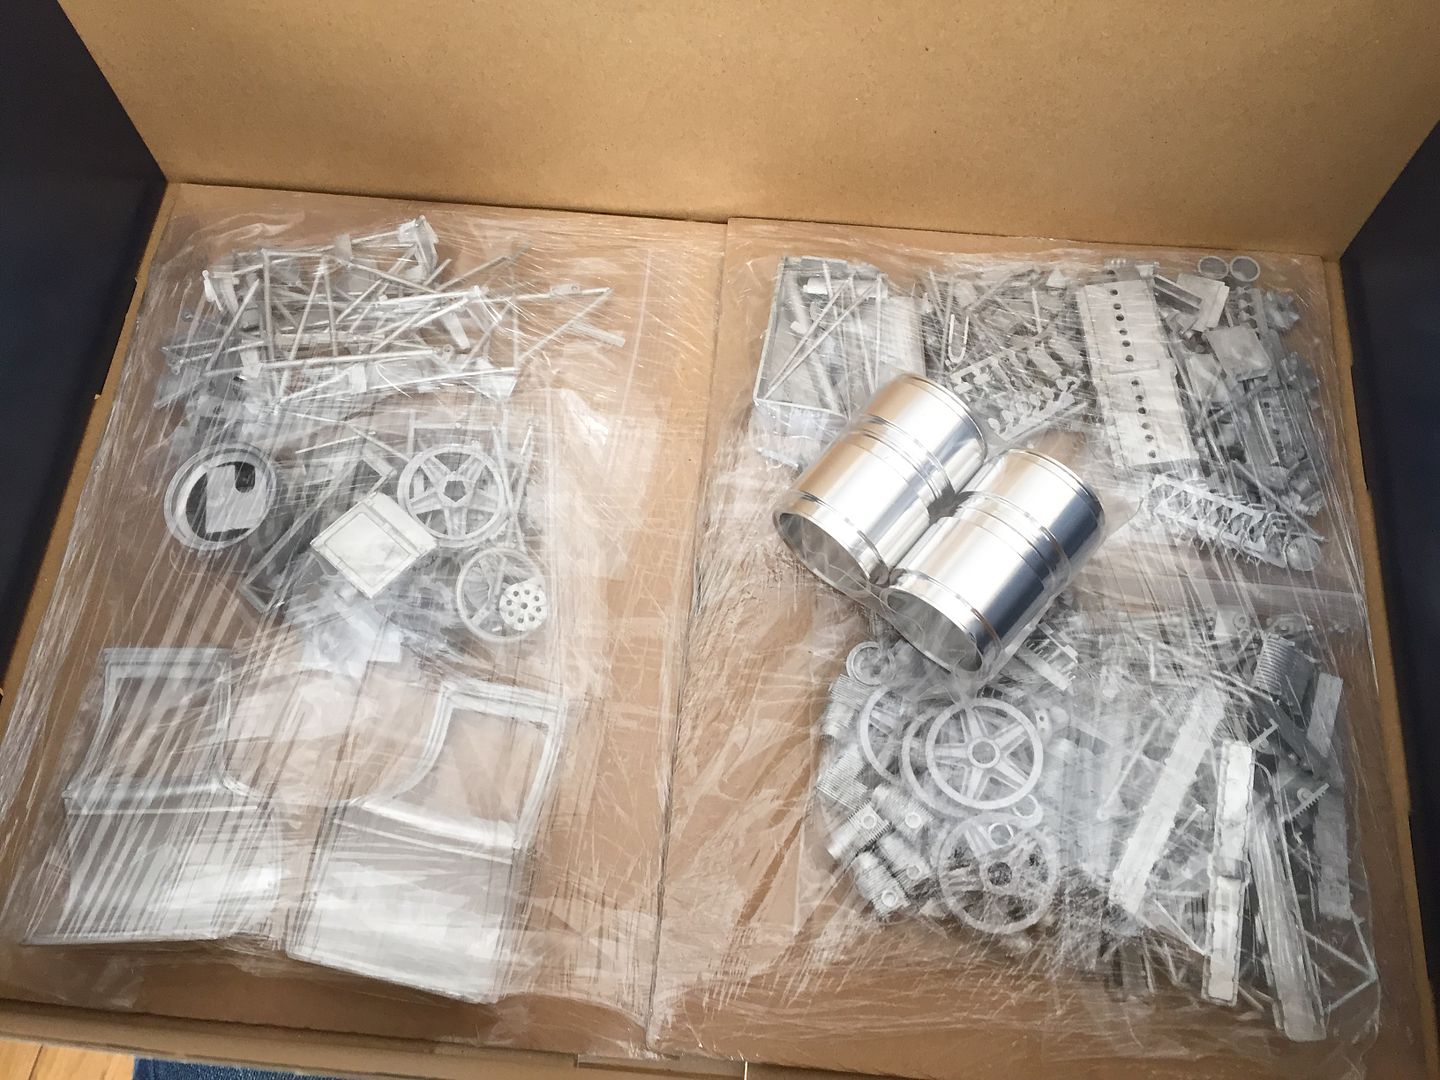
Lovely massive box...

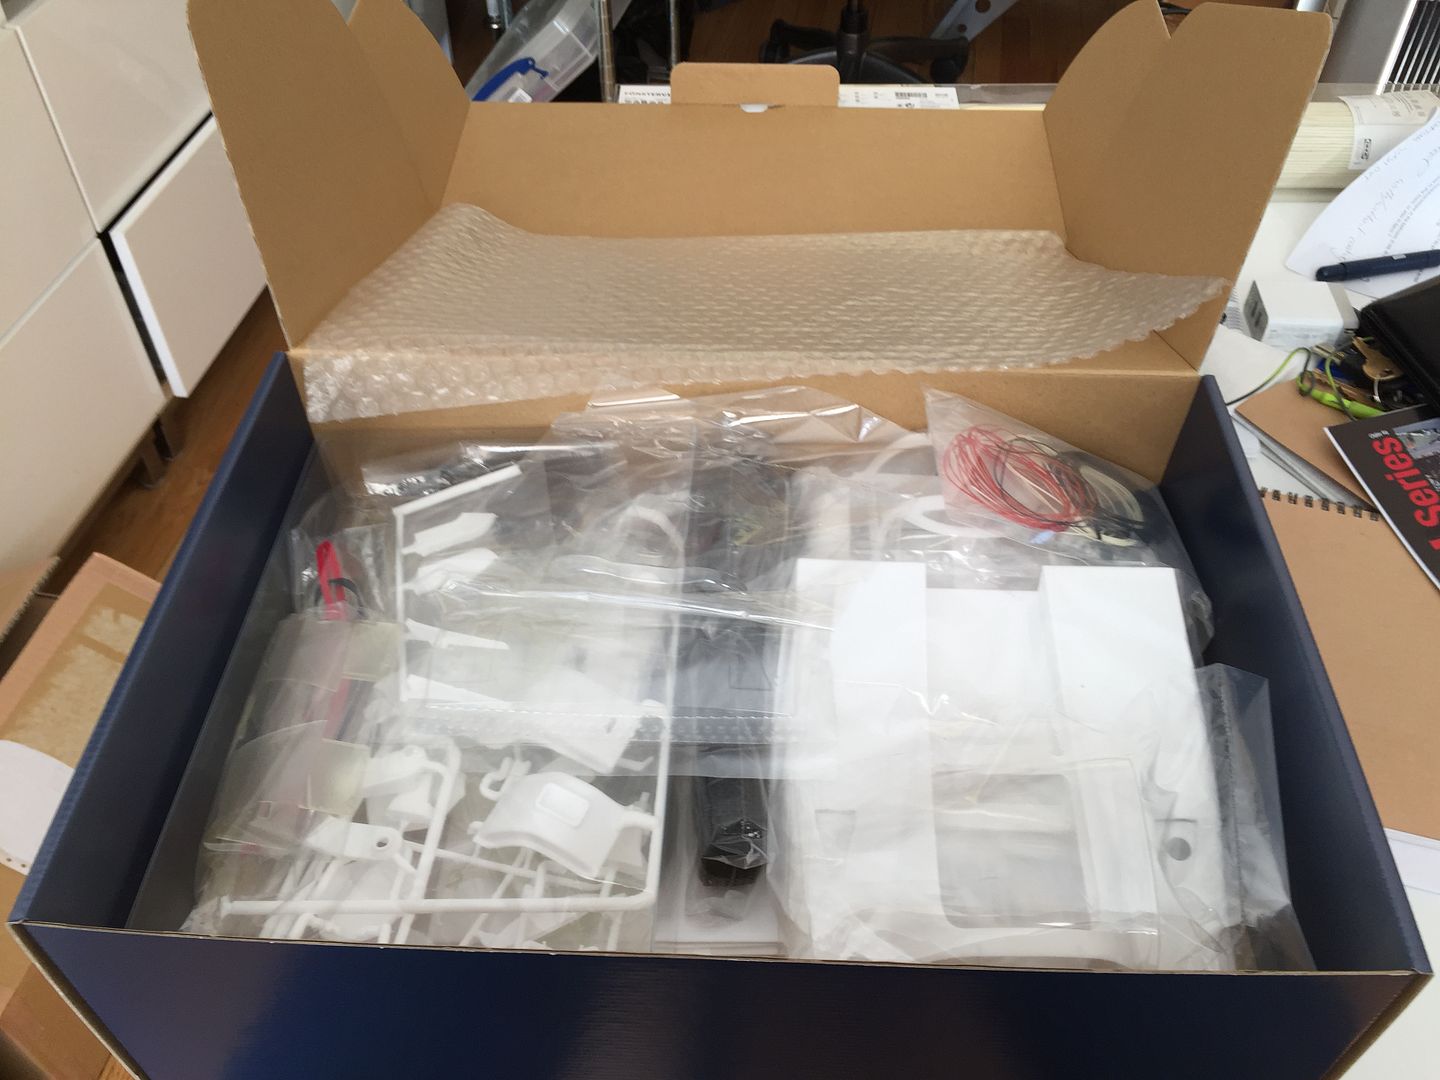
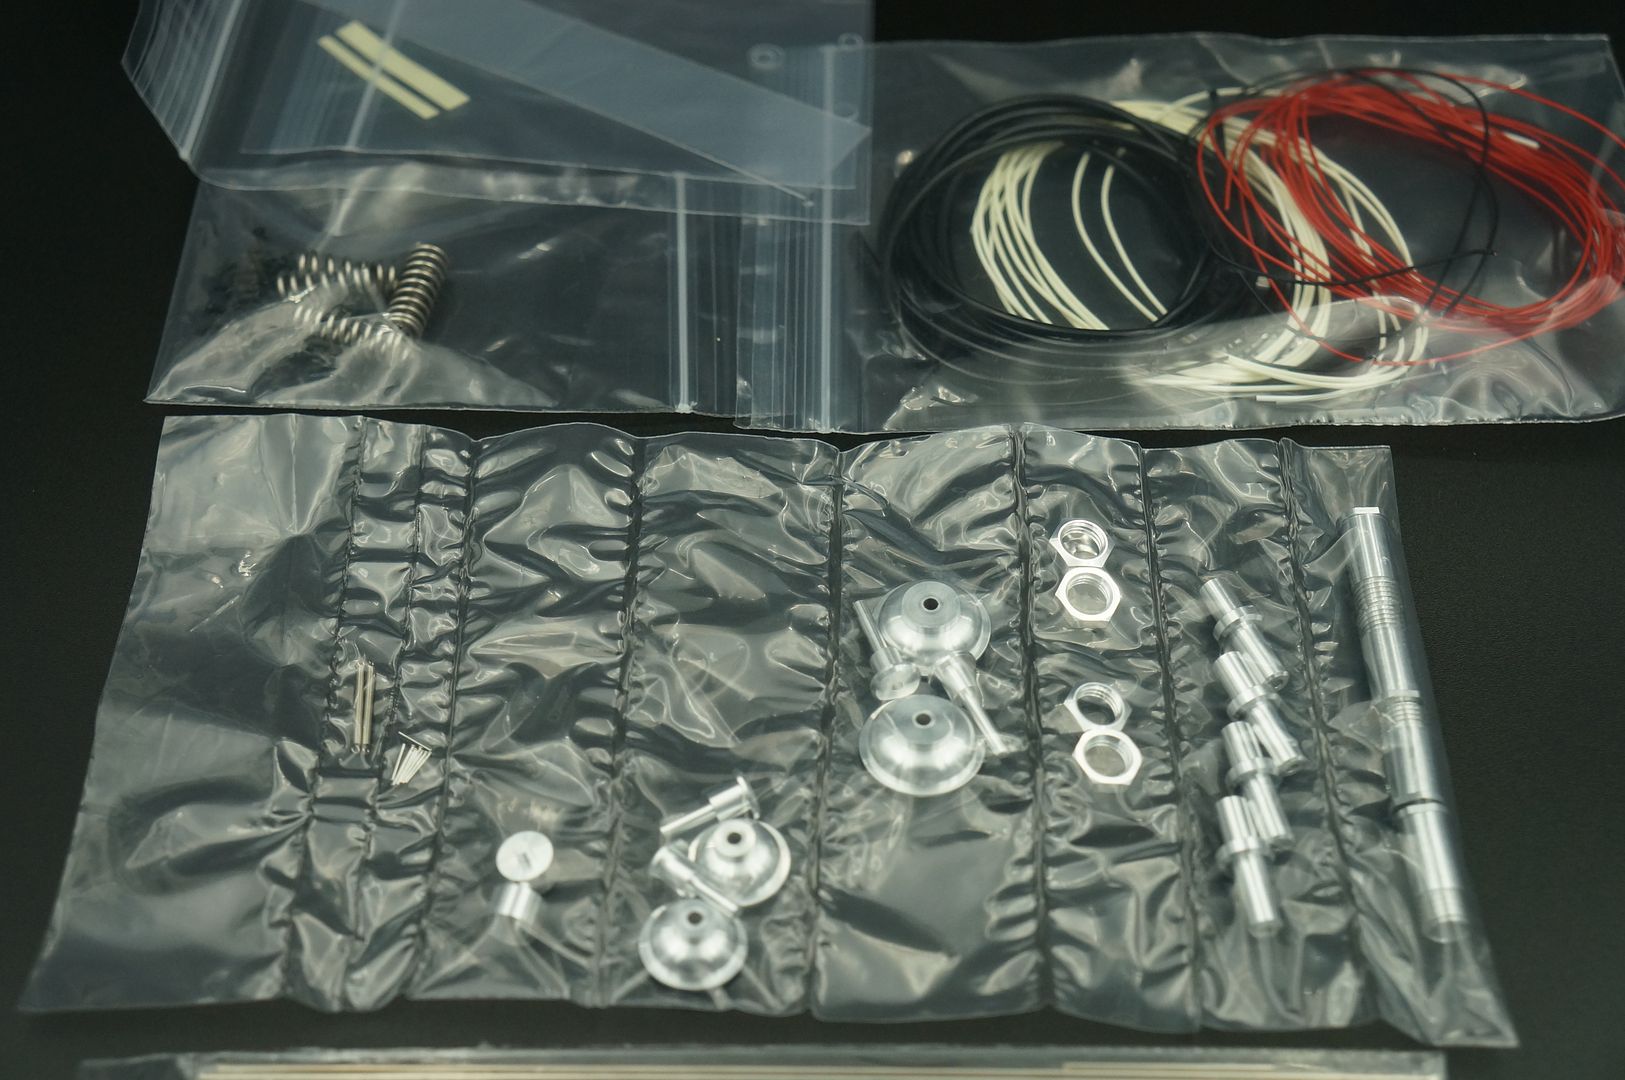
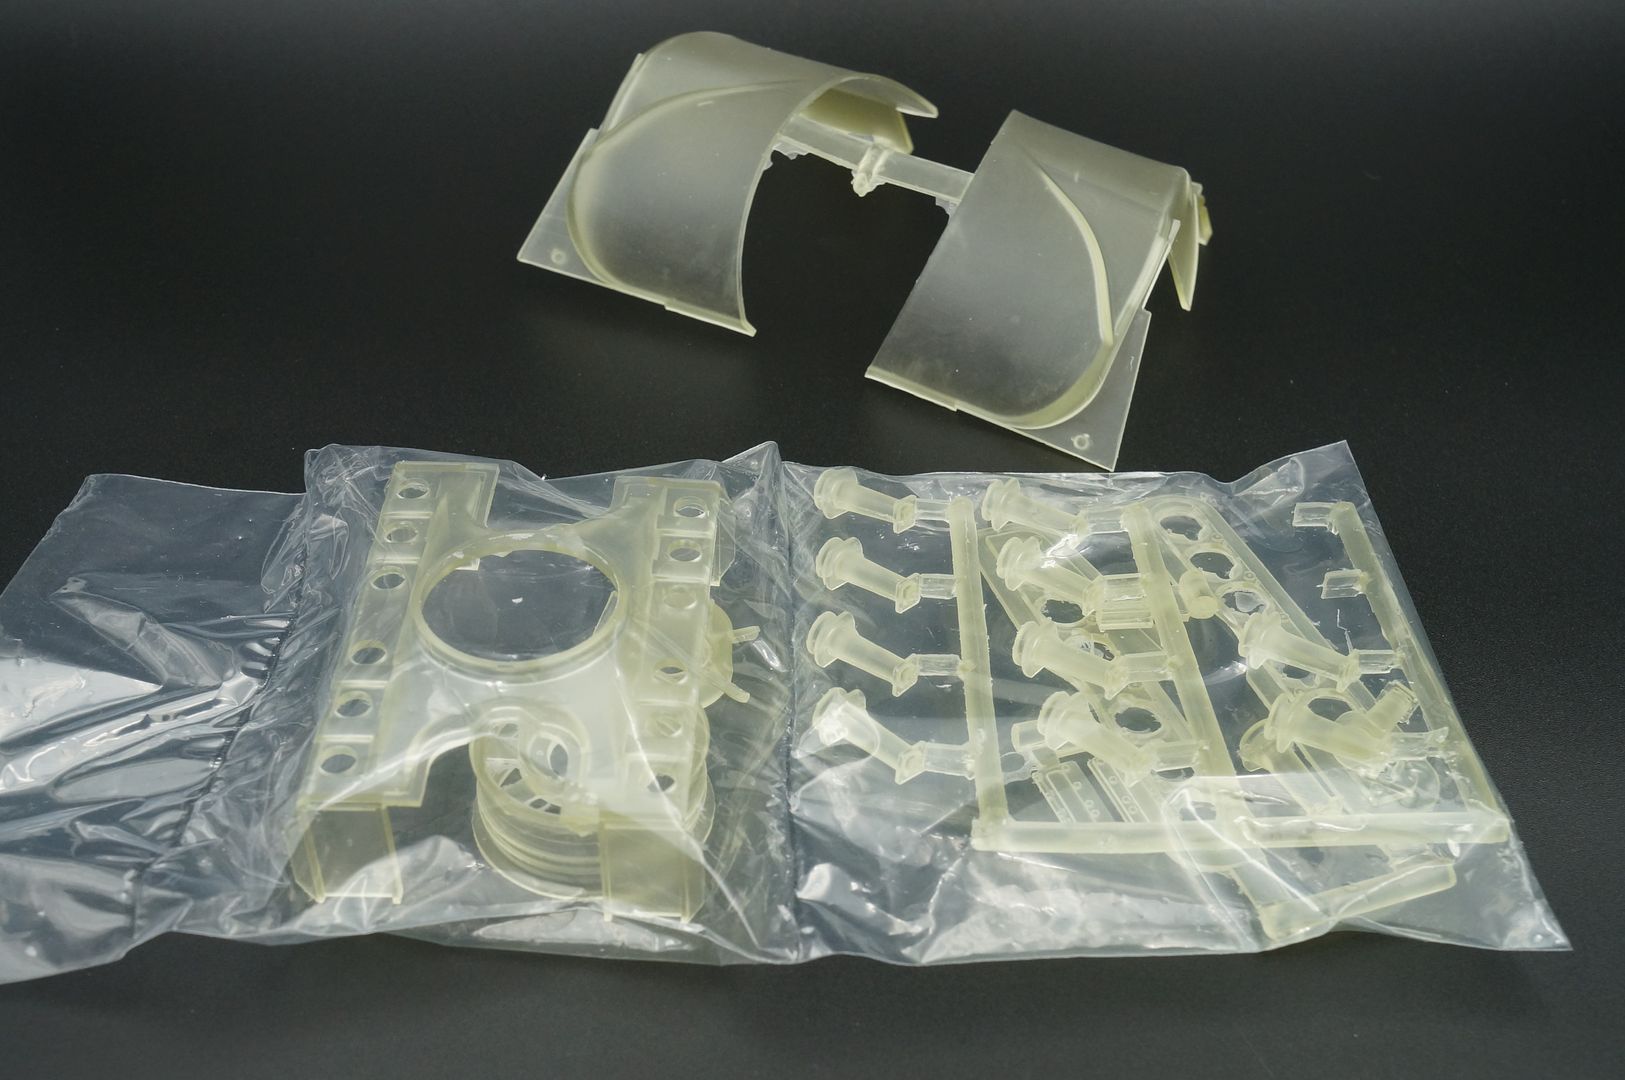
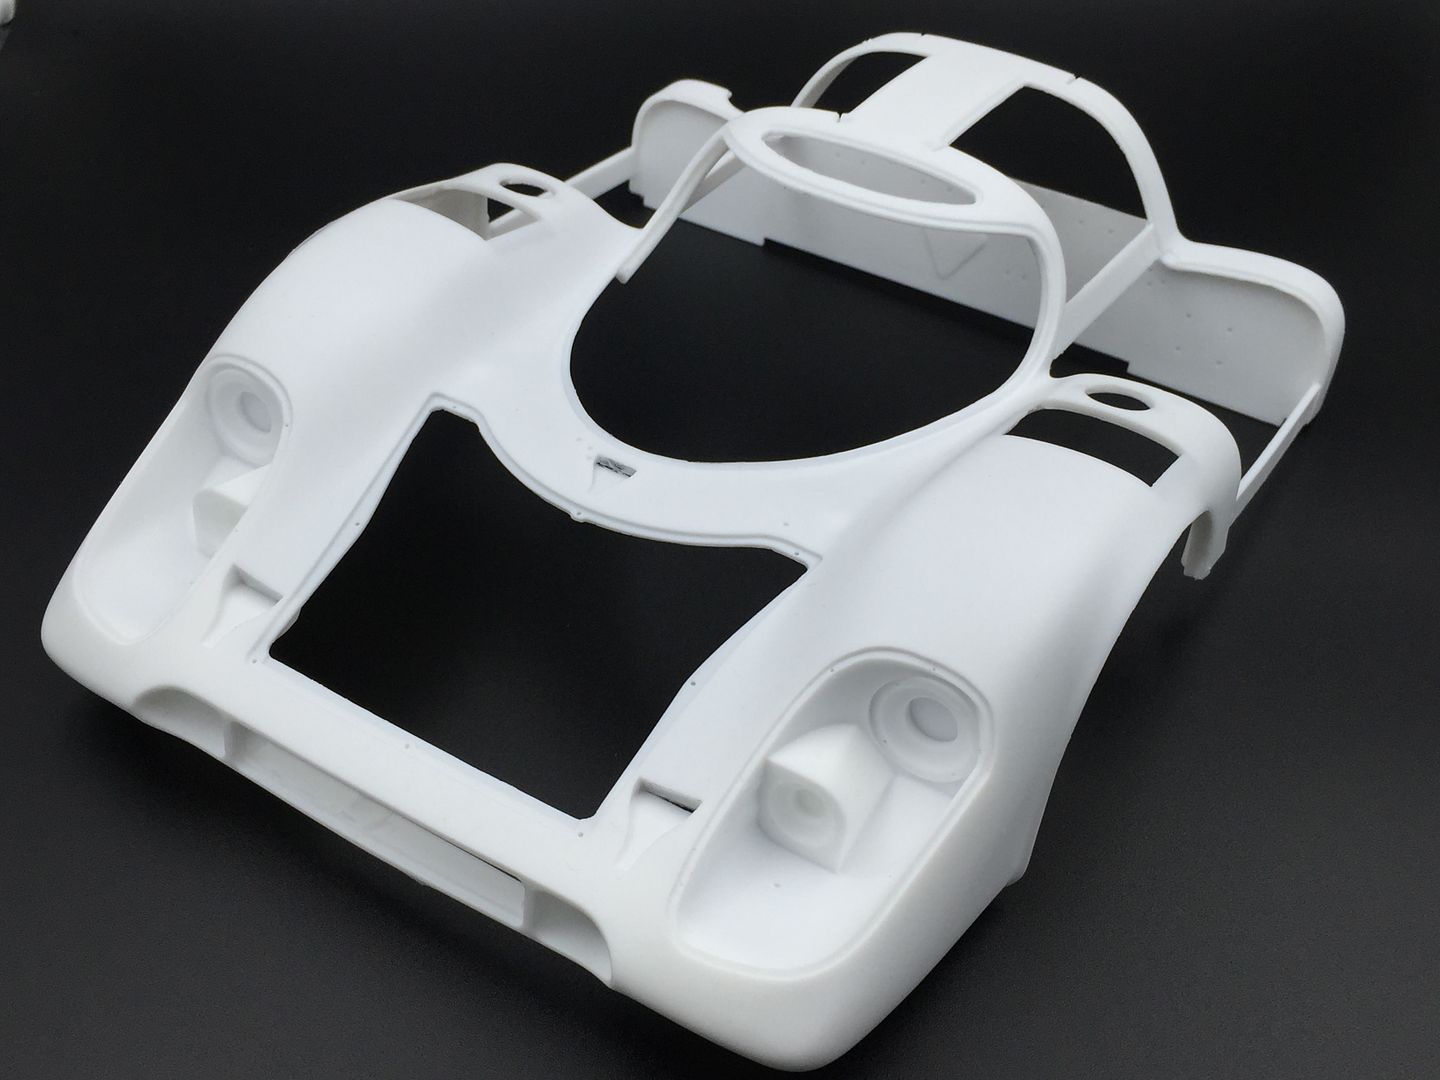
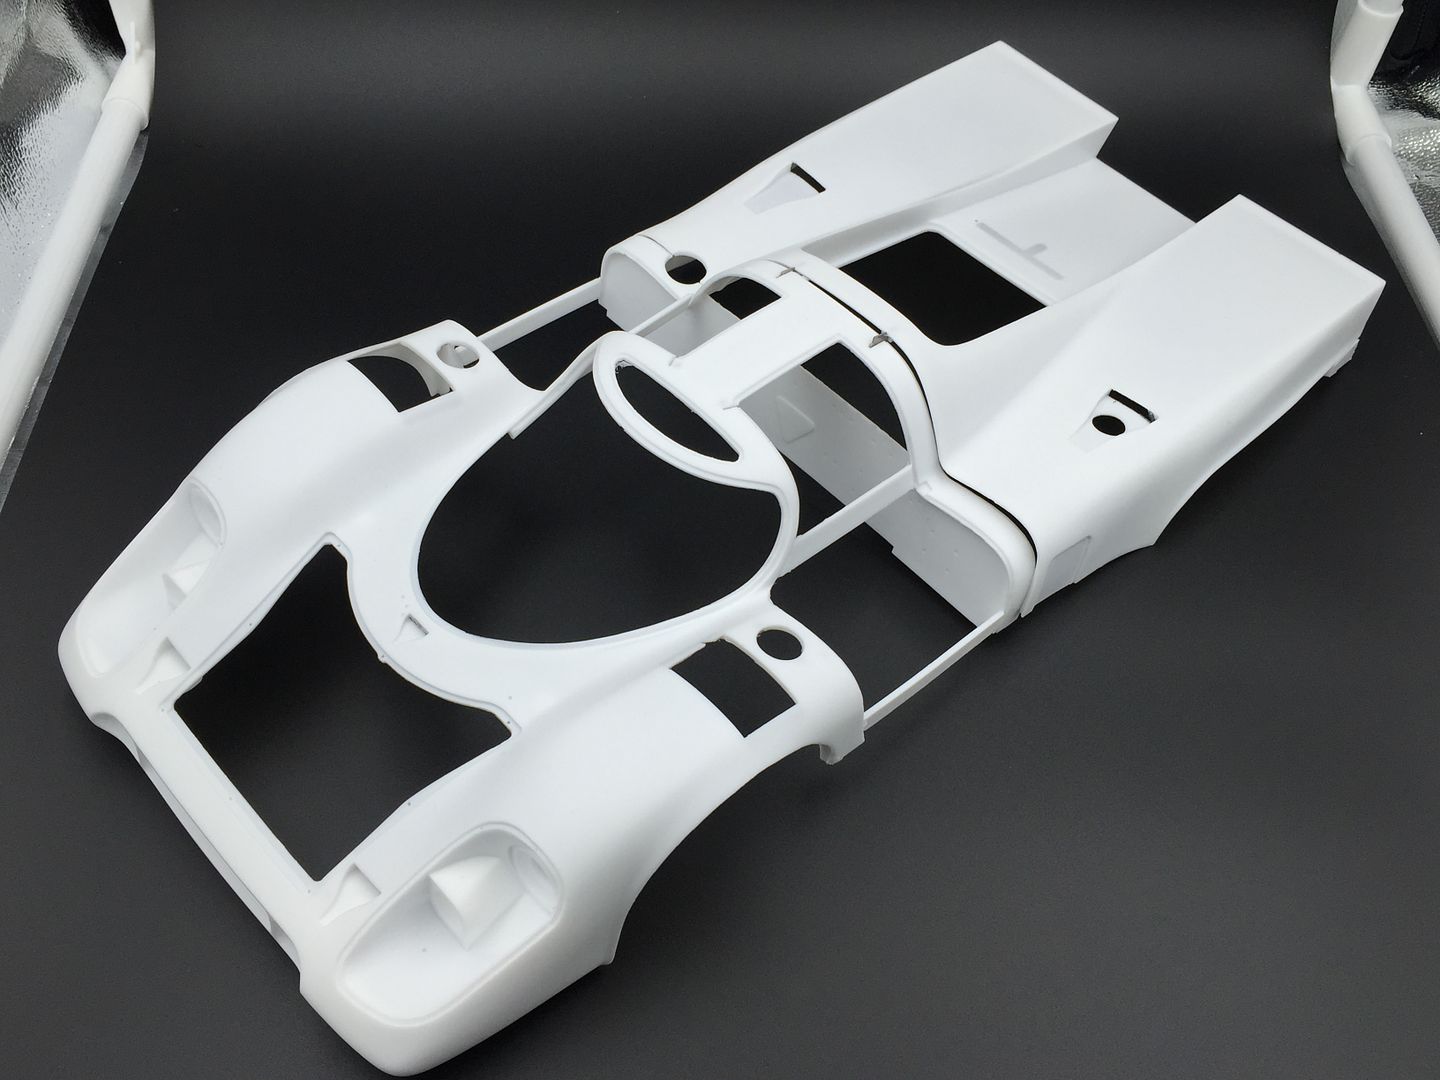
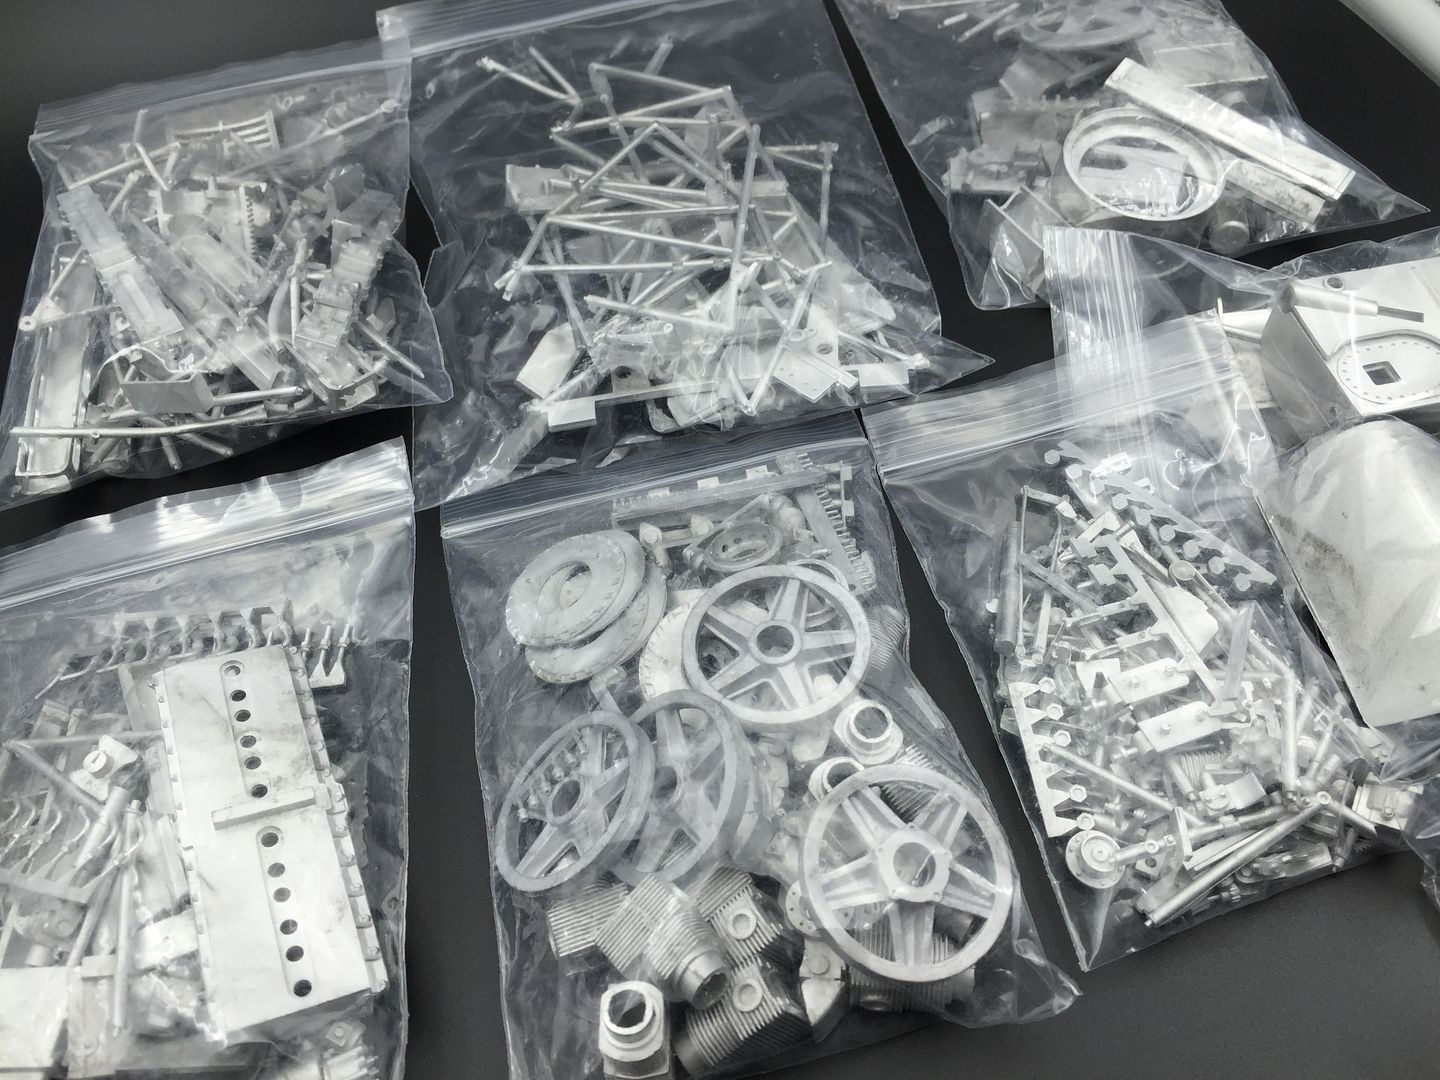
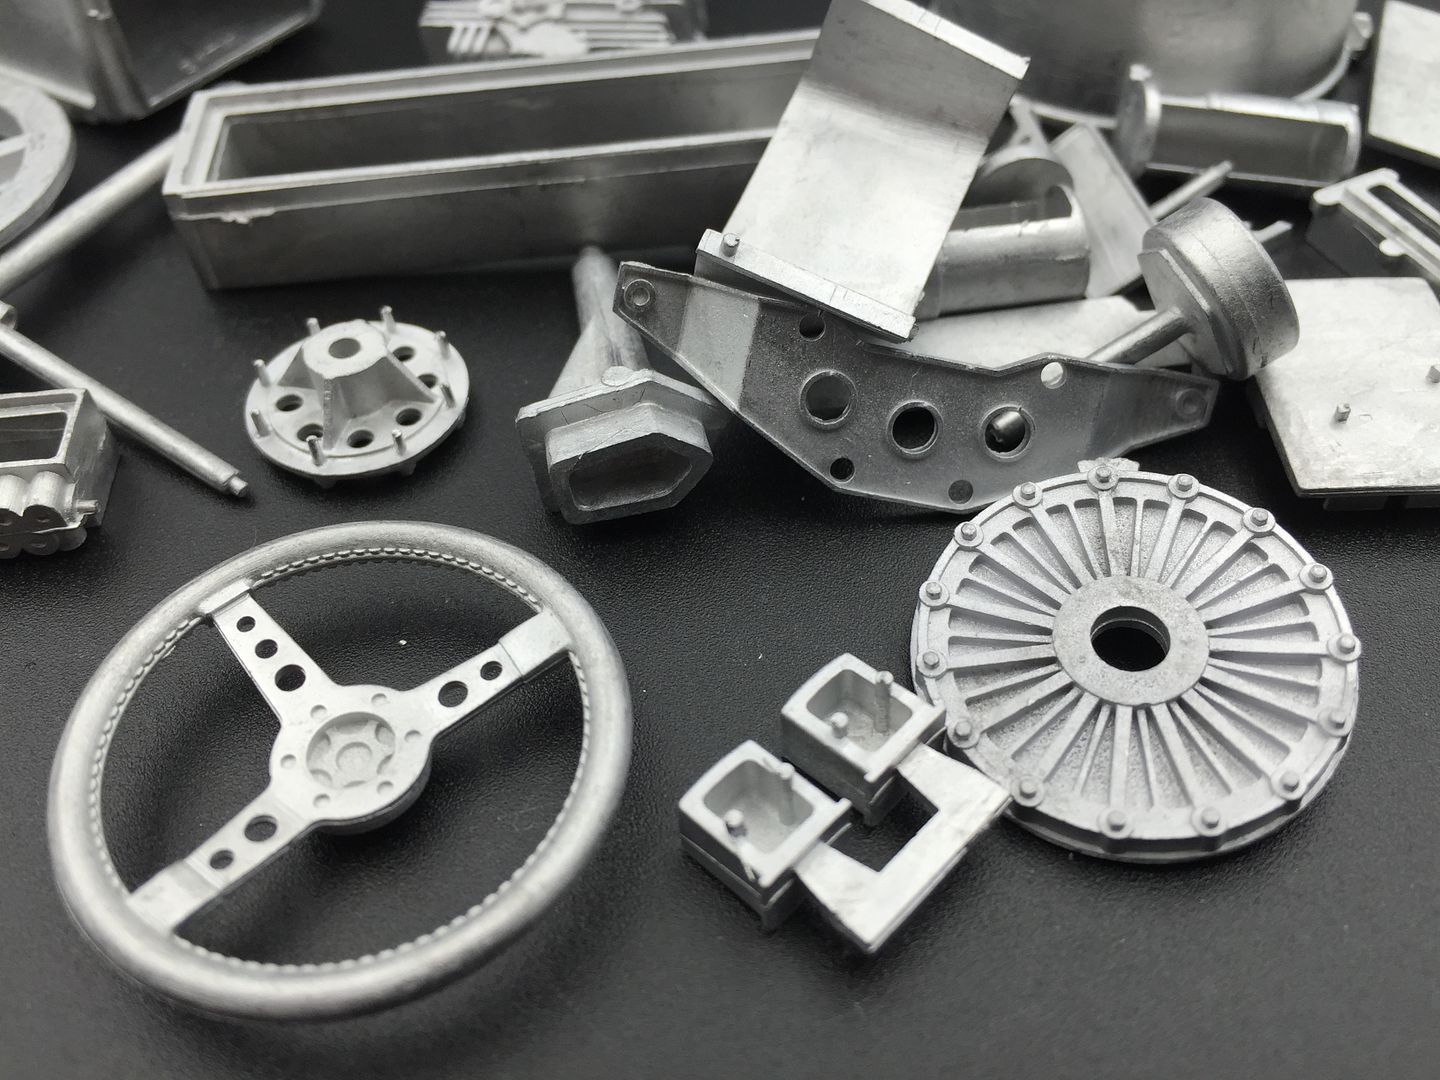
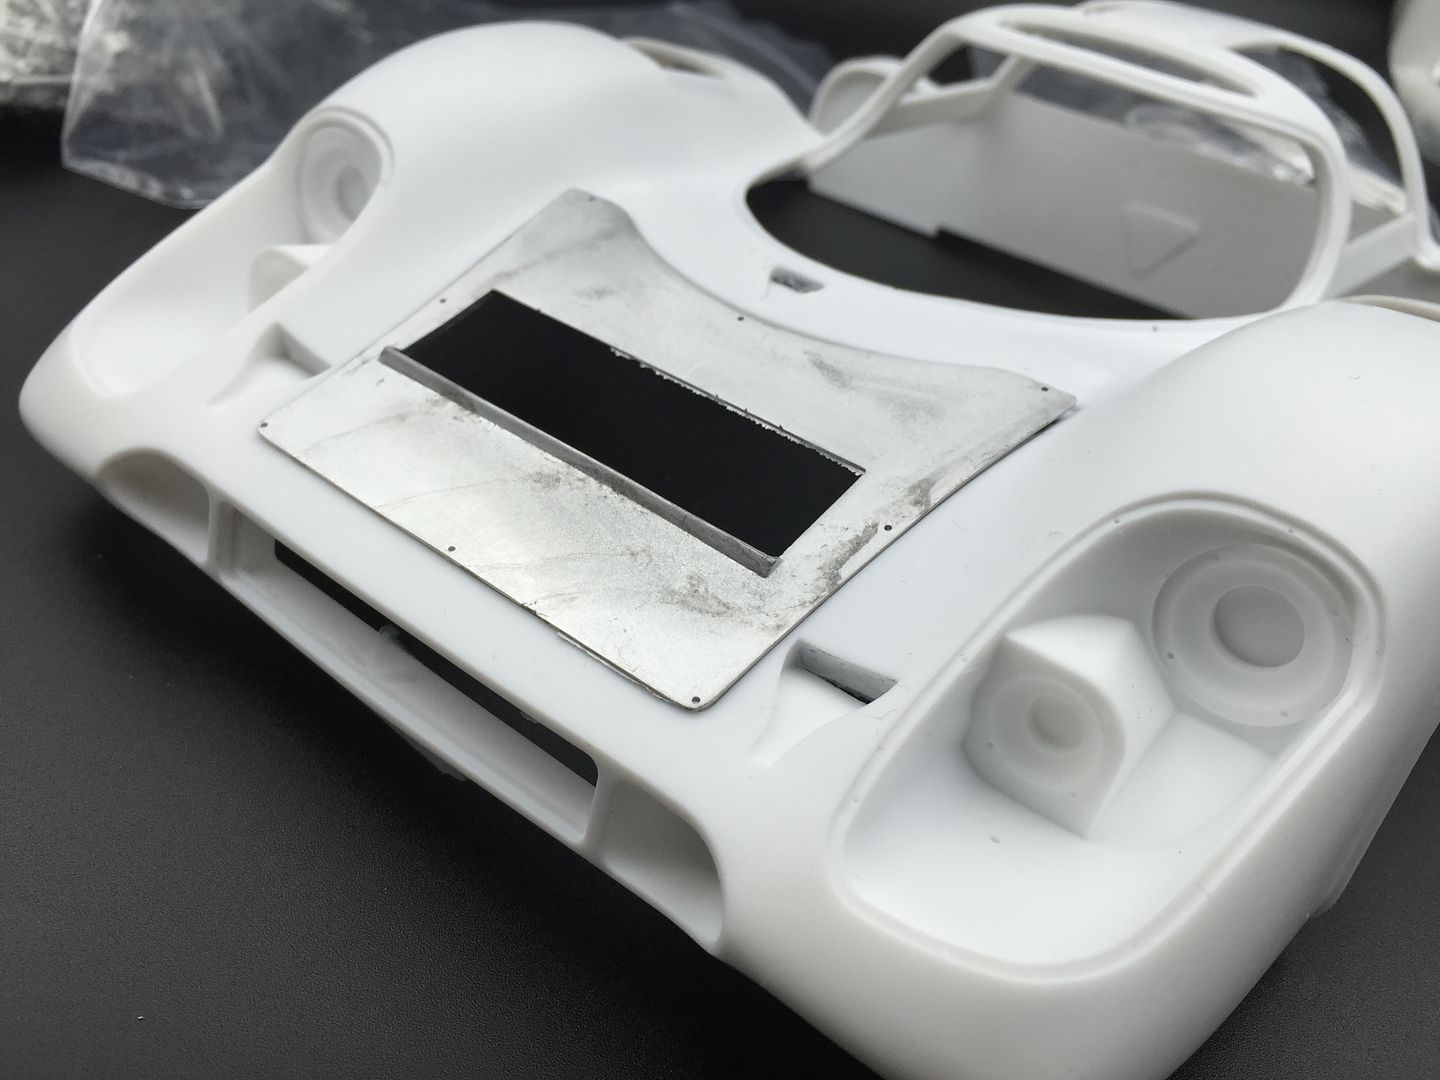
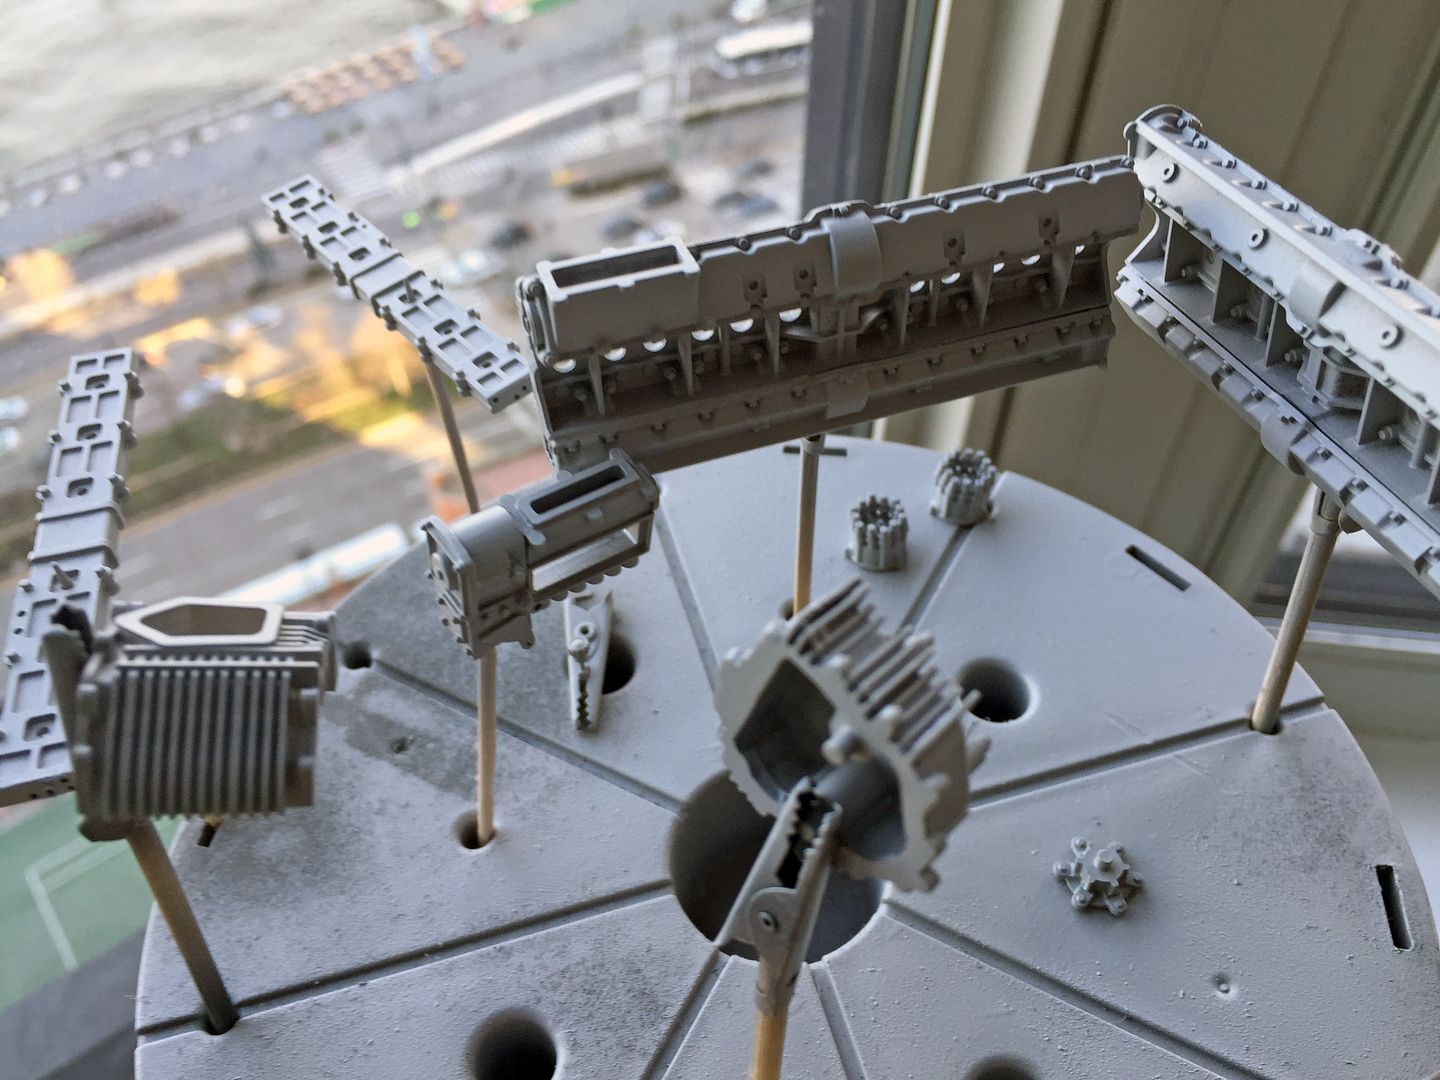
Lots of lovely bits - clear parts, resin body, lovely machined rims etc...
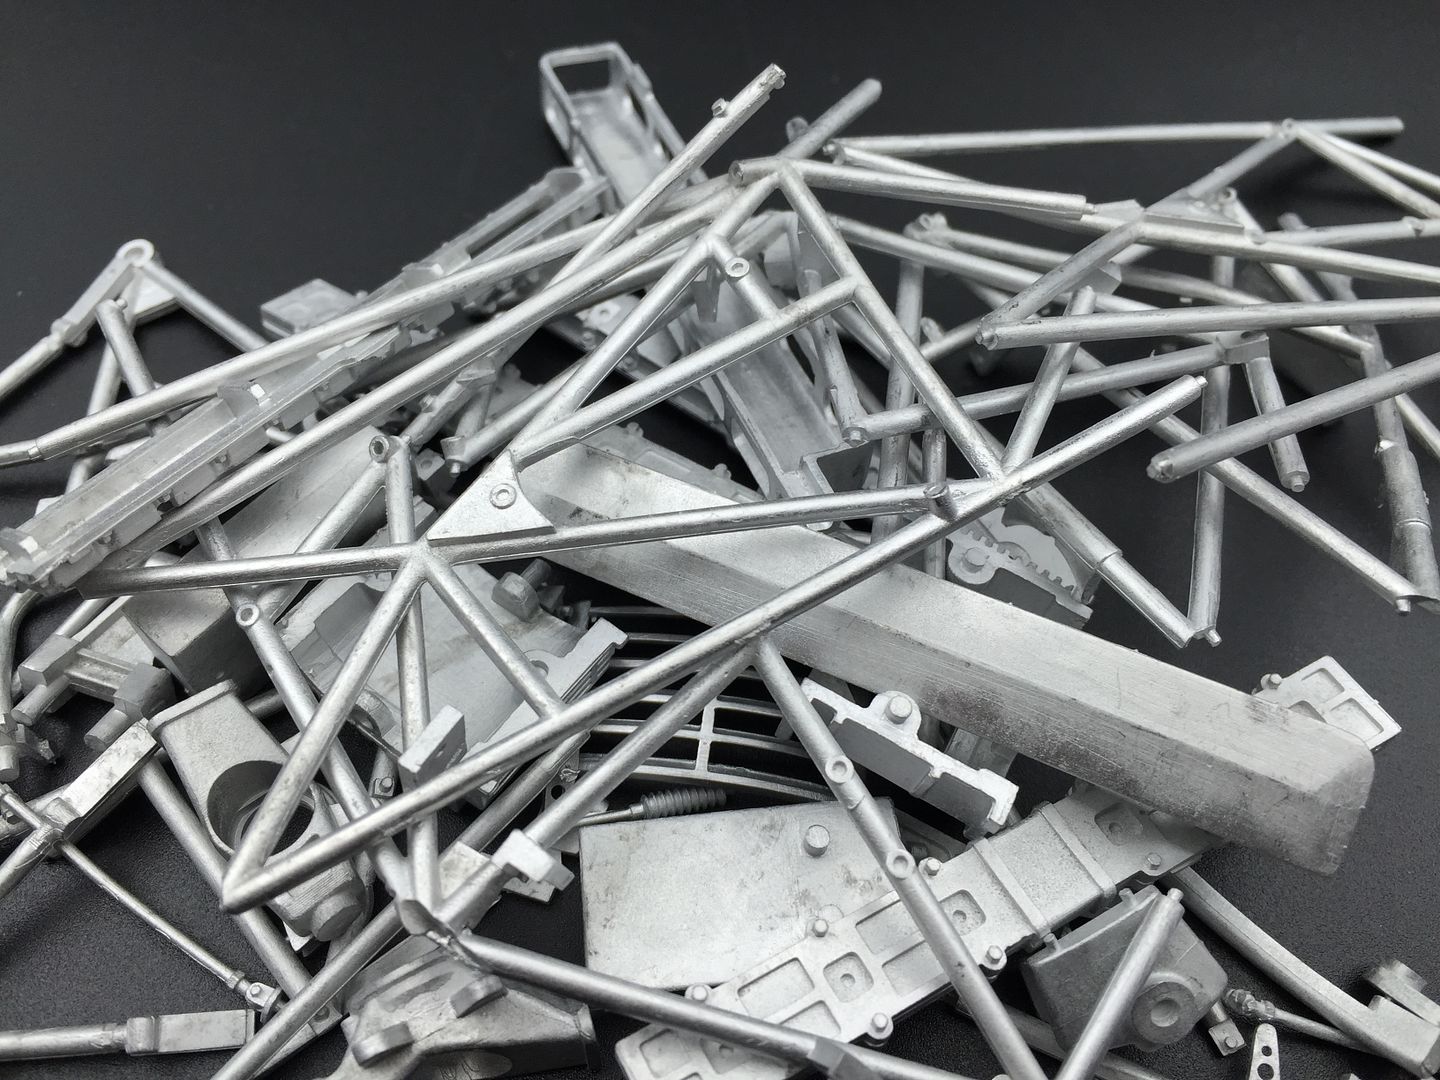
...and there - my pet hate with MFH - the packaging of the metal parts!!!

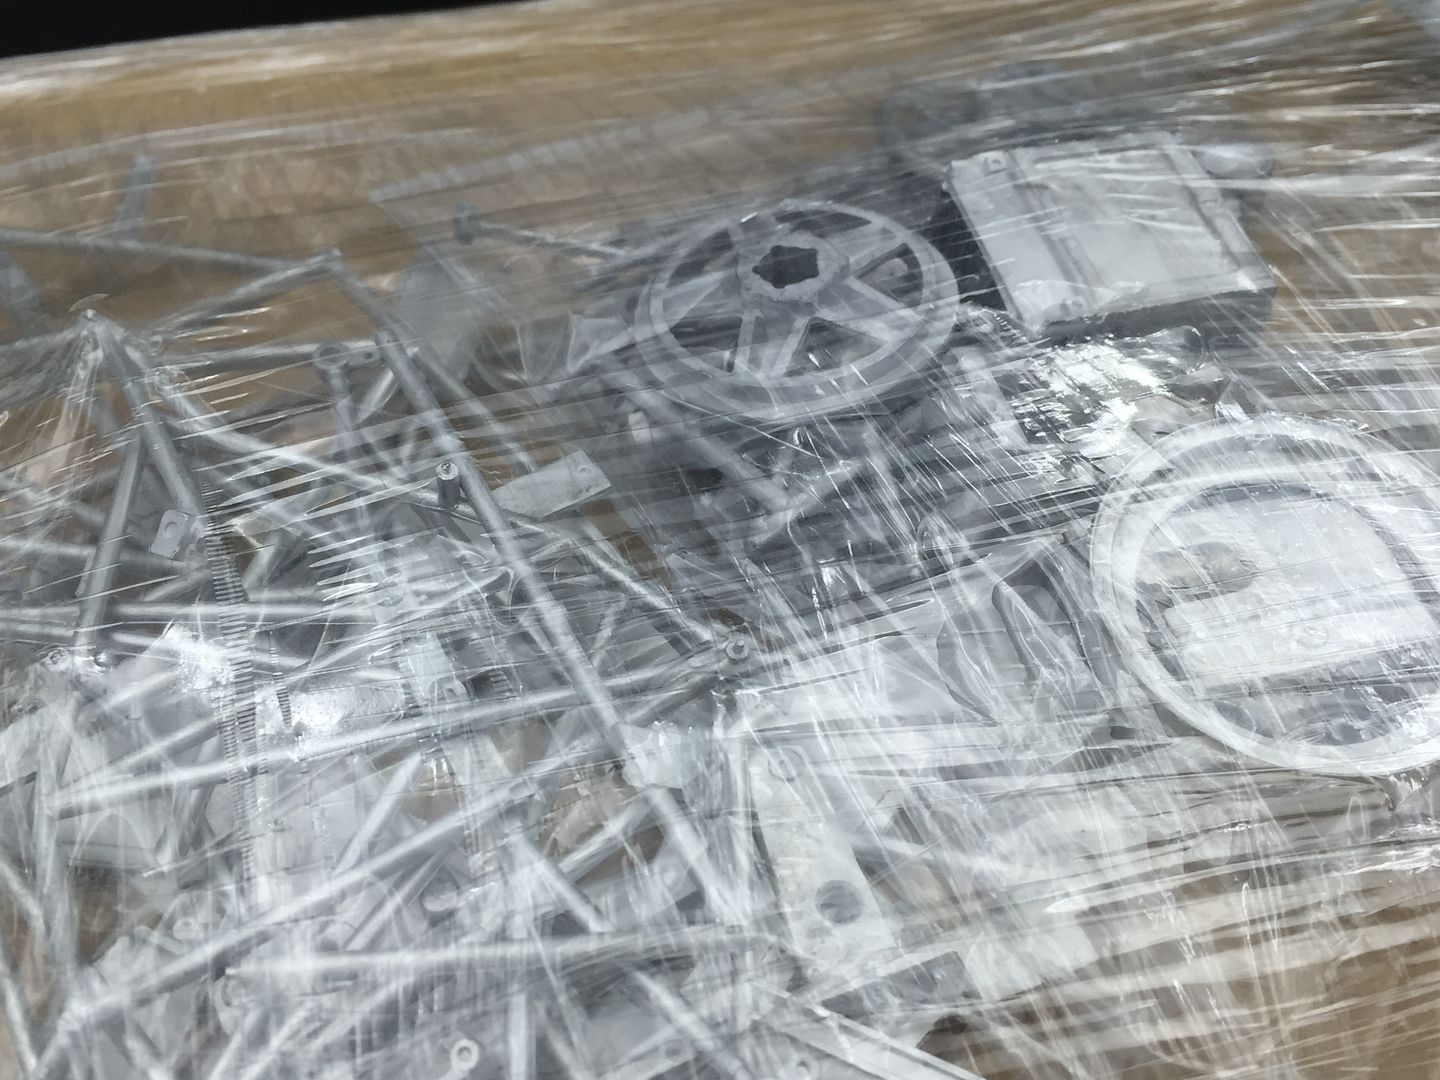
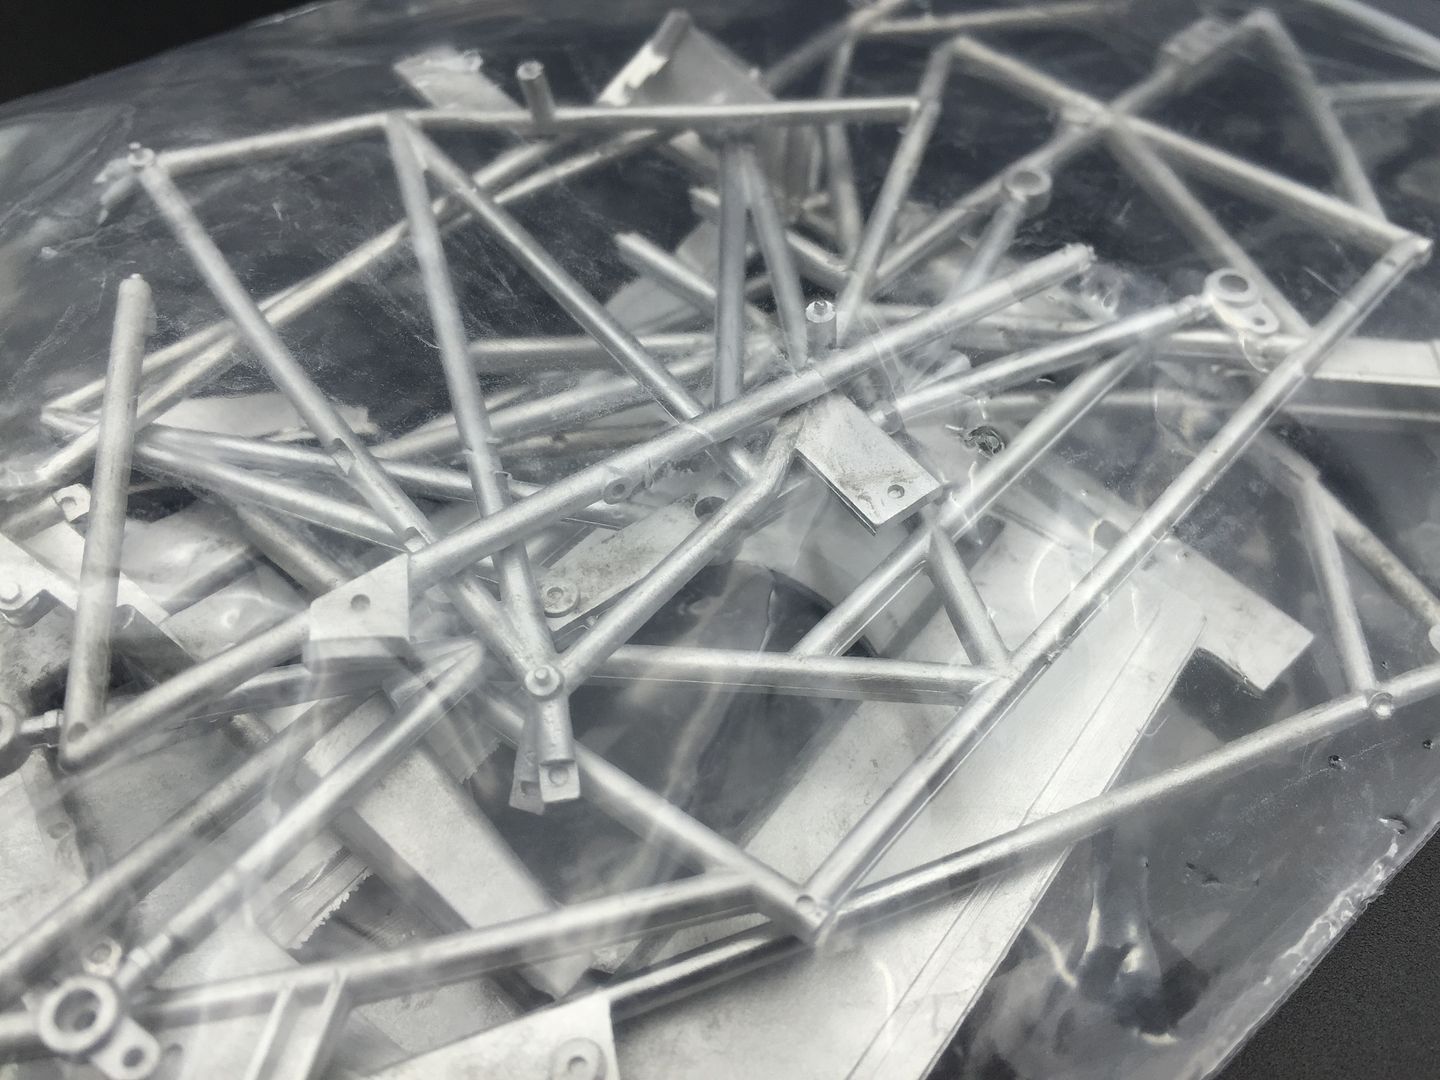
...with all that framework, you just know that some will be bent.
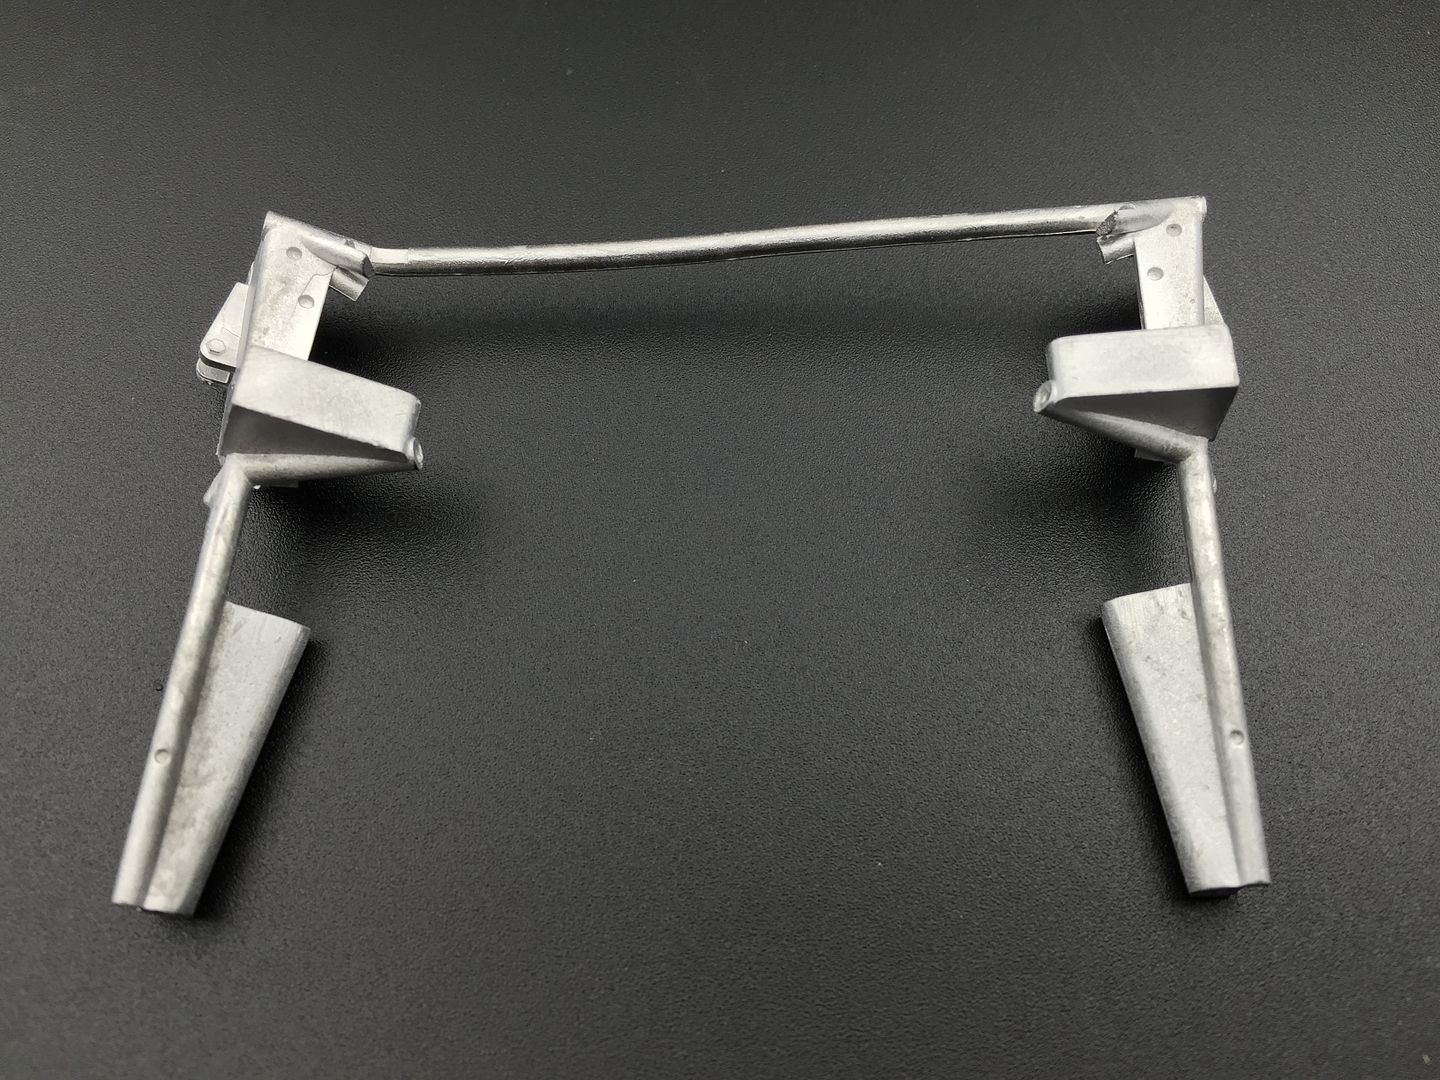
...for this much money, they must package these better!!
Back to the goodness...
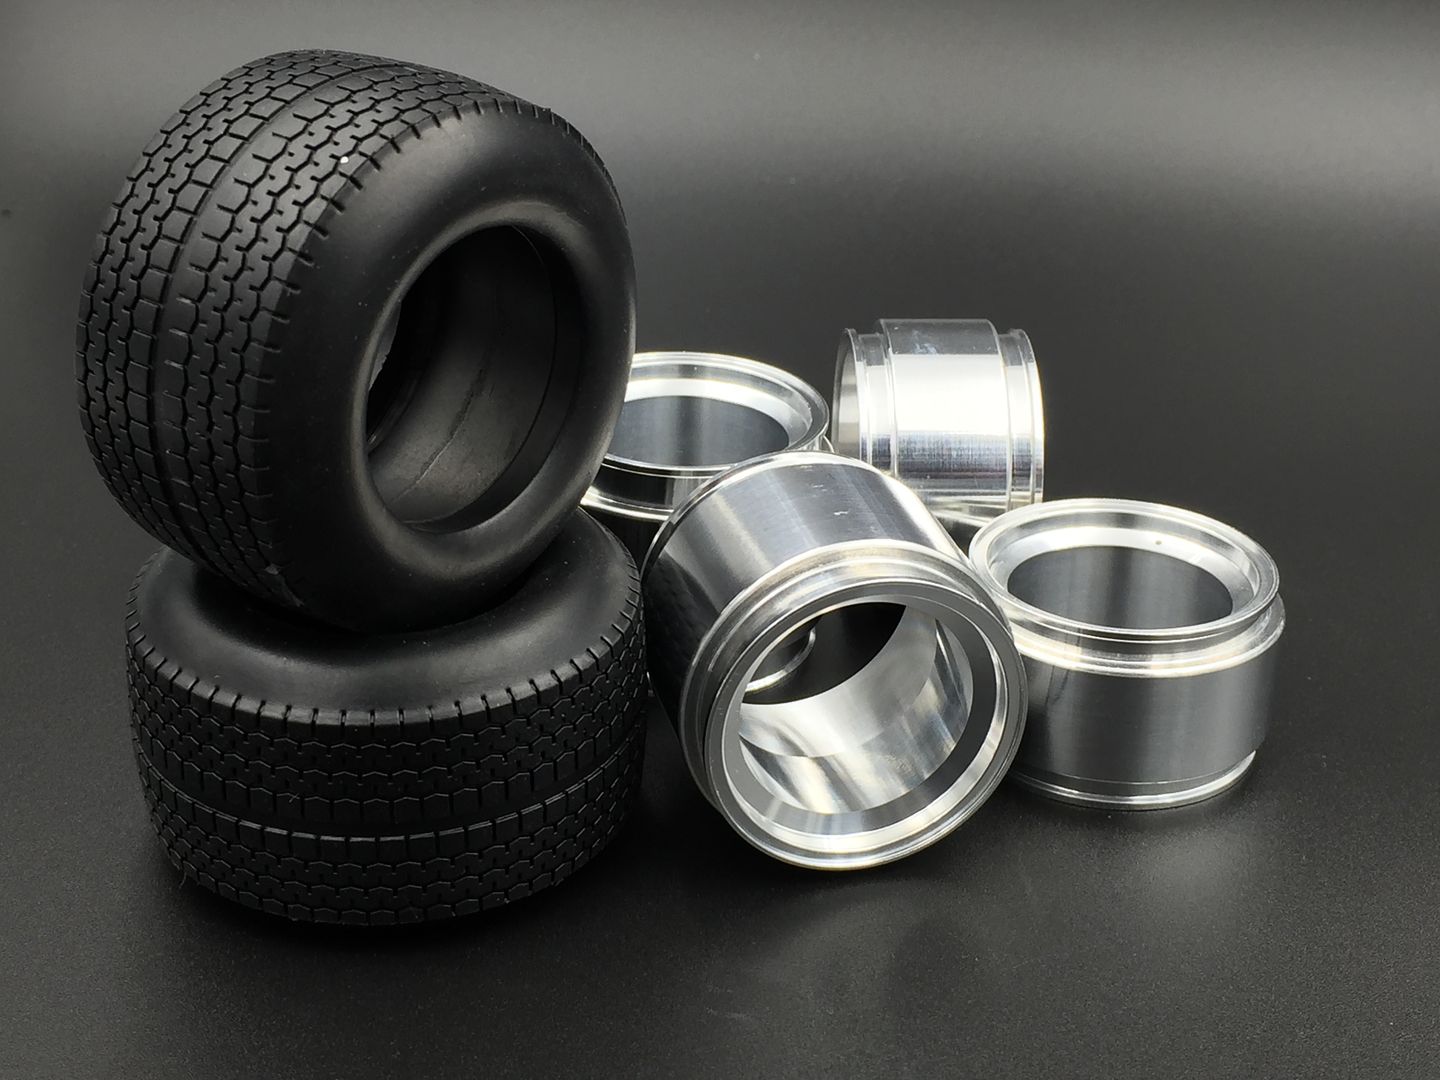
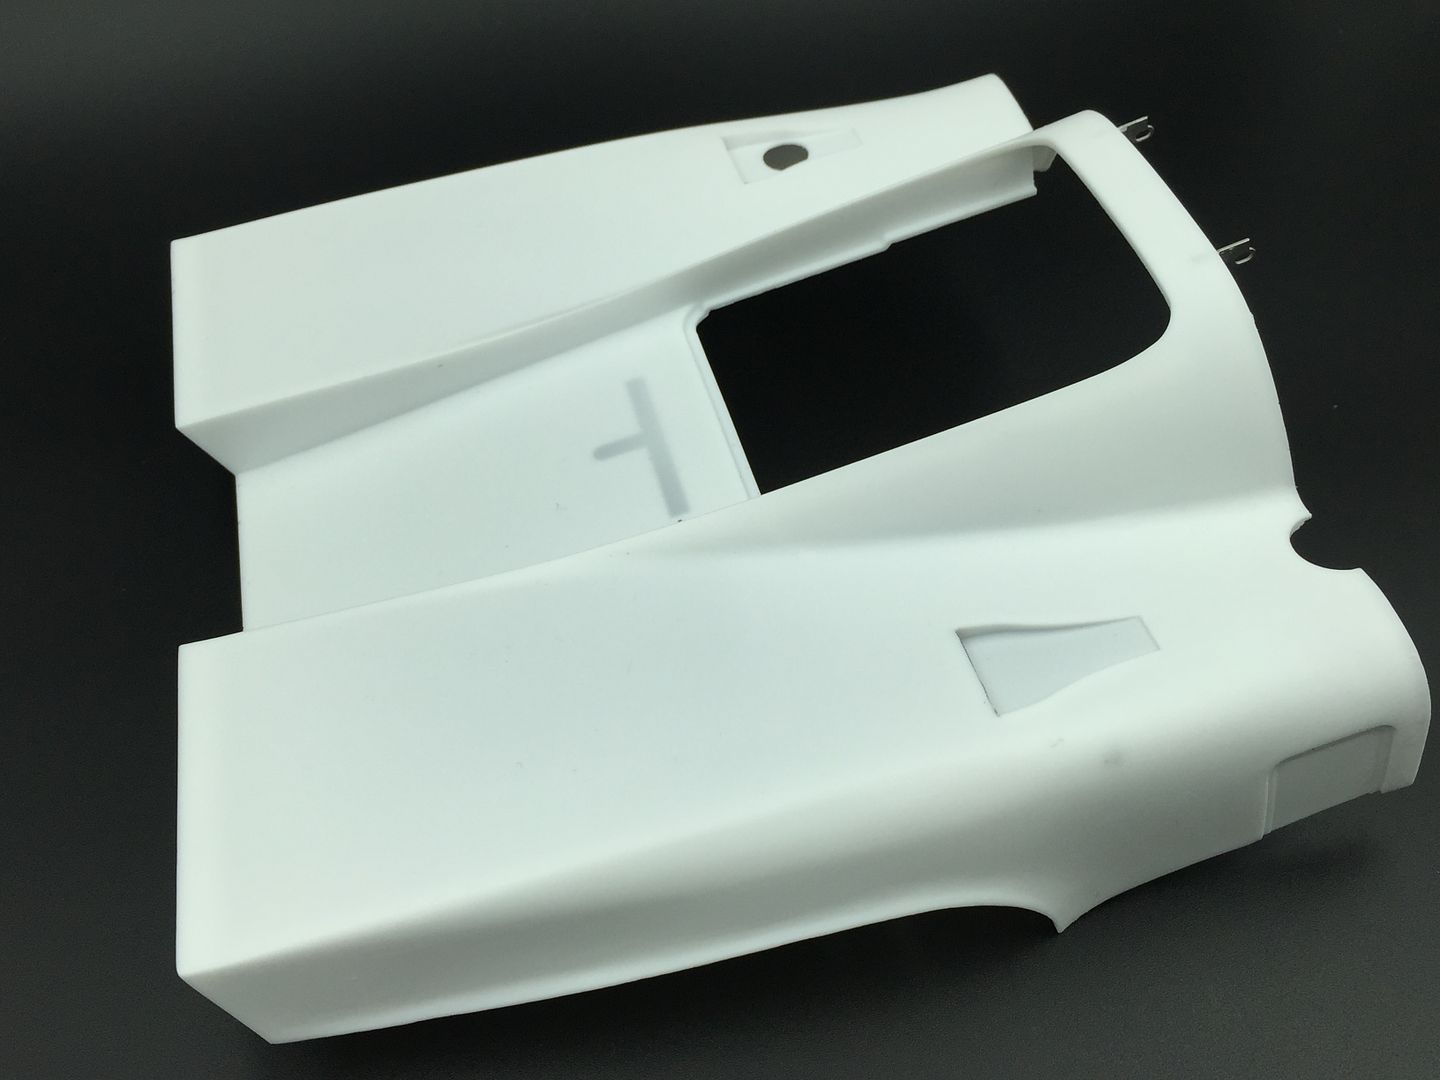
Very nice 'resin look' parts, as seen on the real cars...
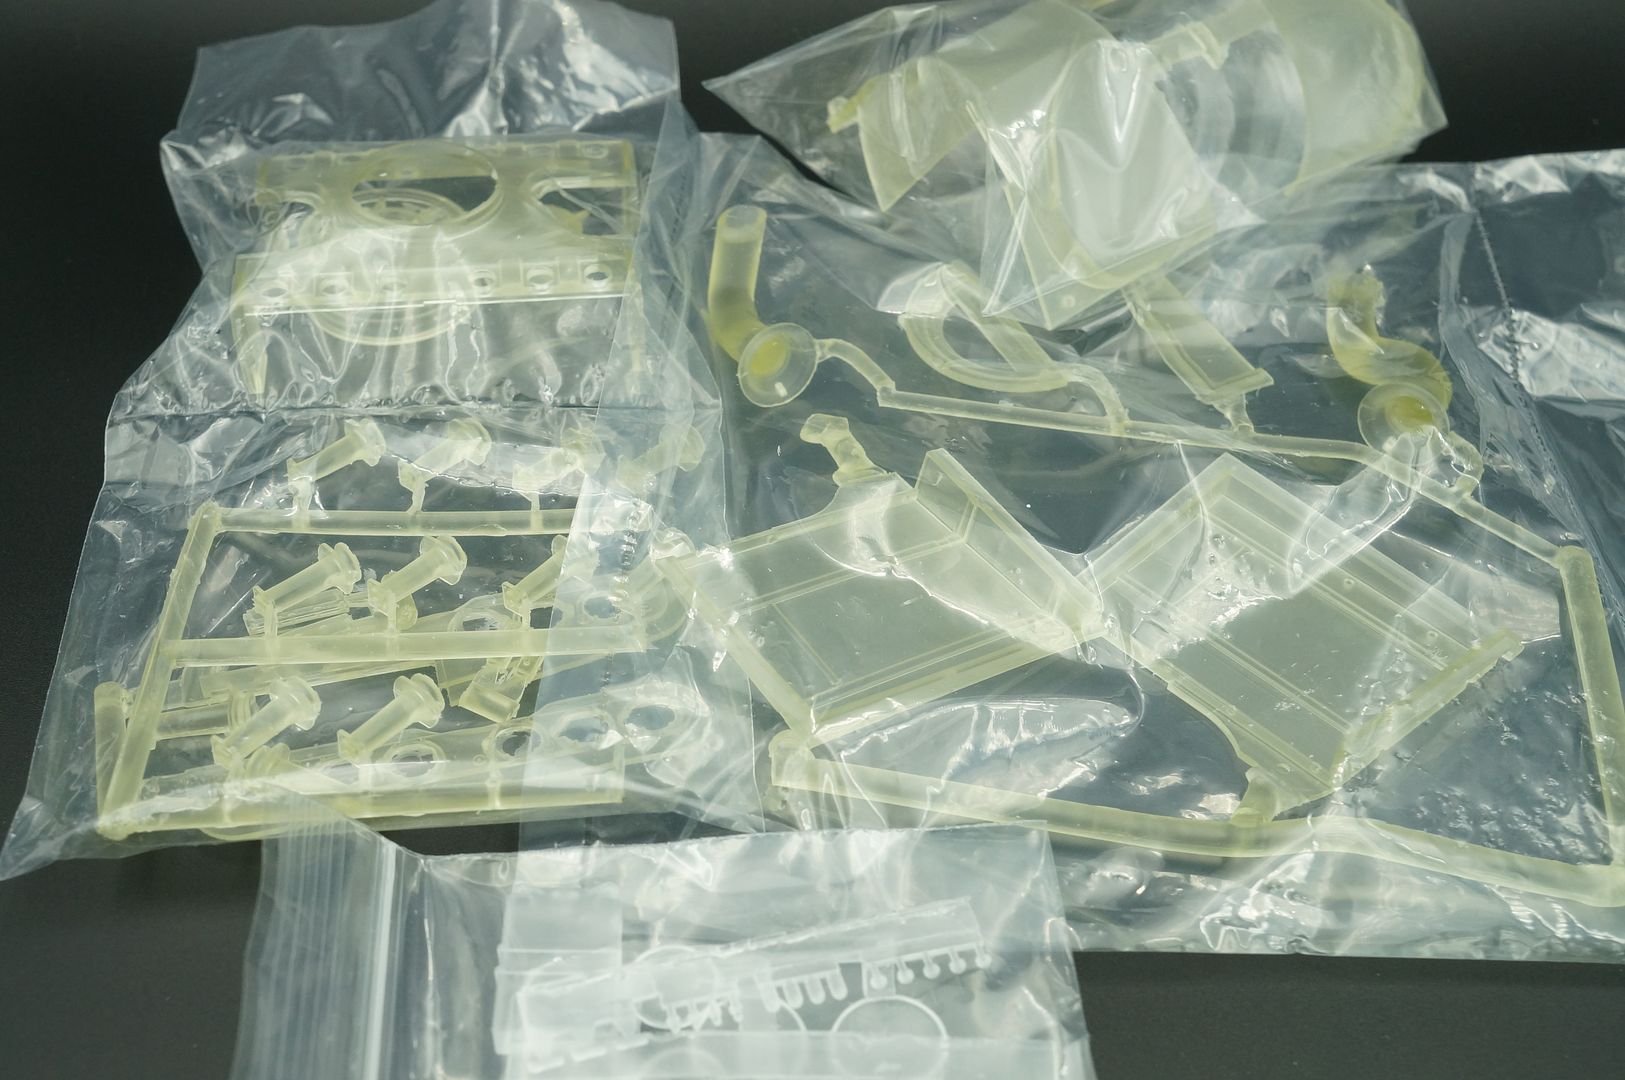
Resin body...
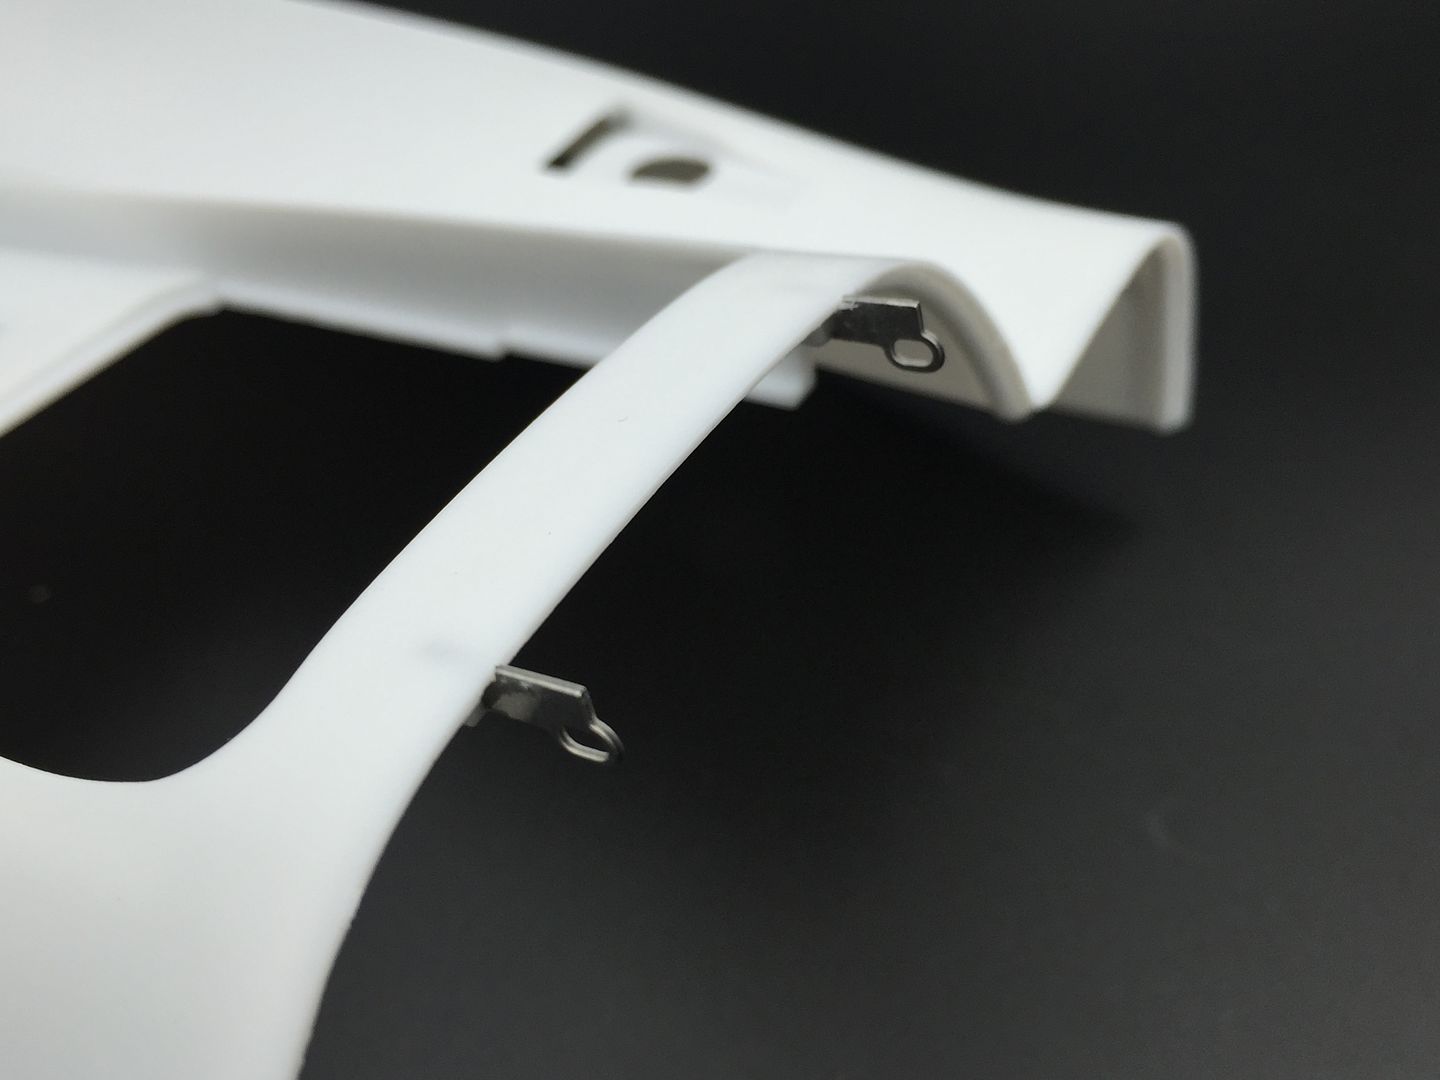
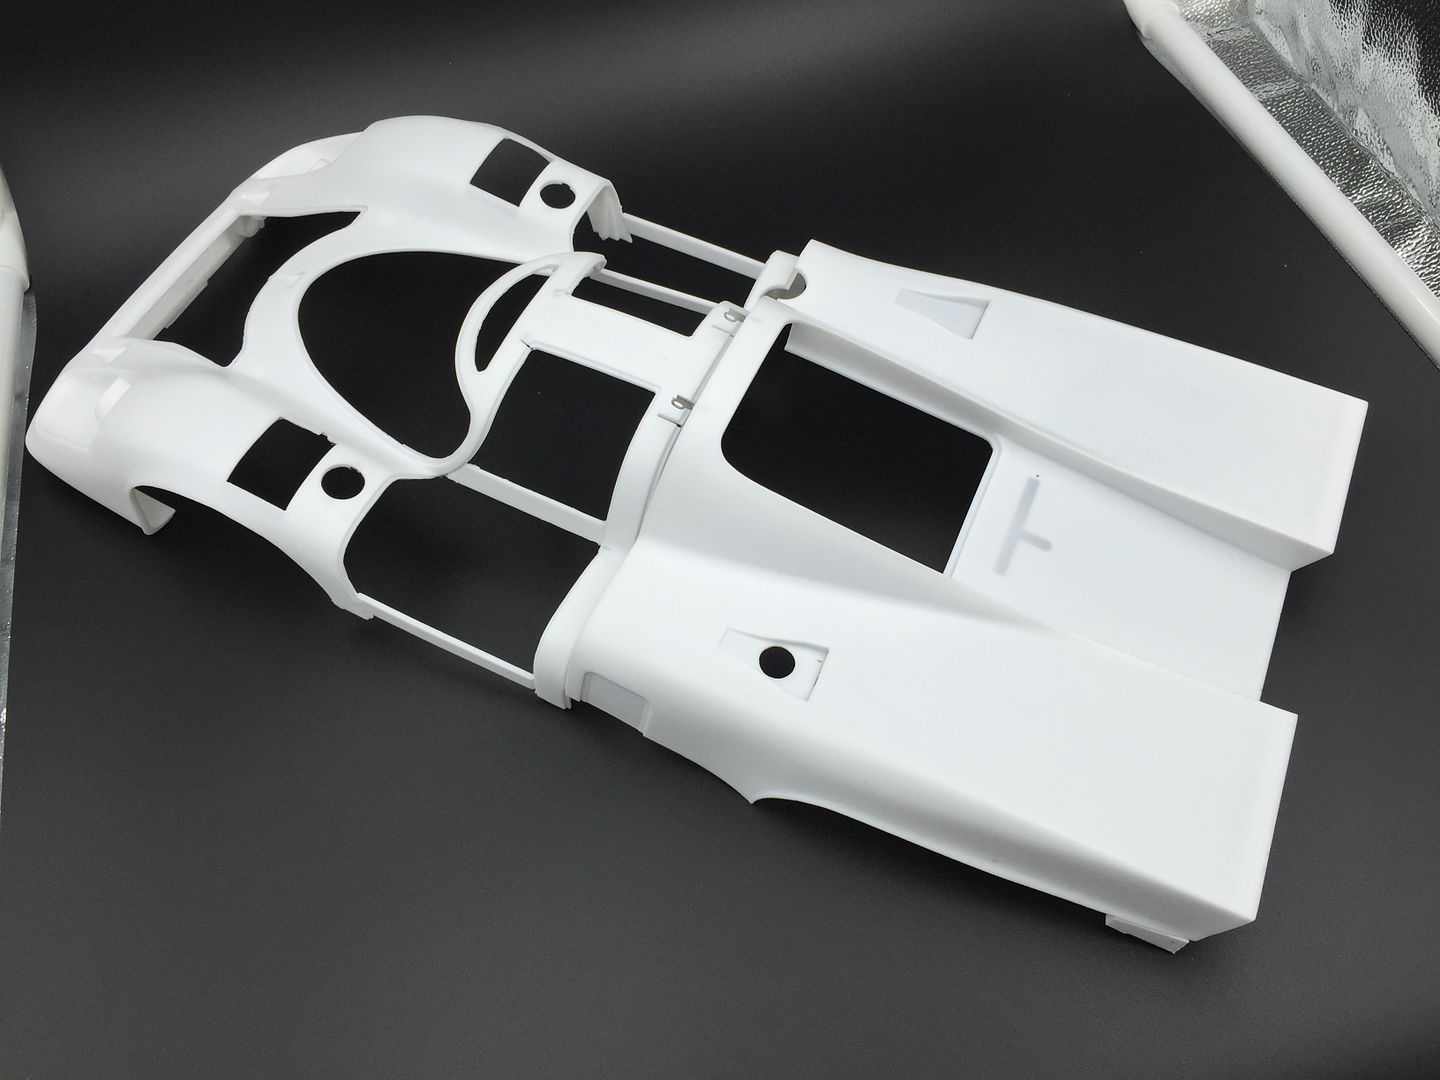
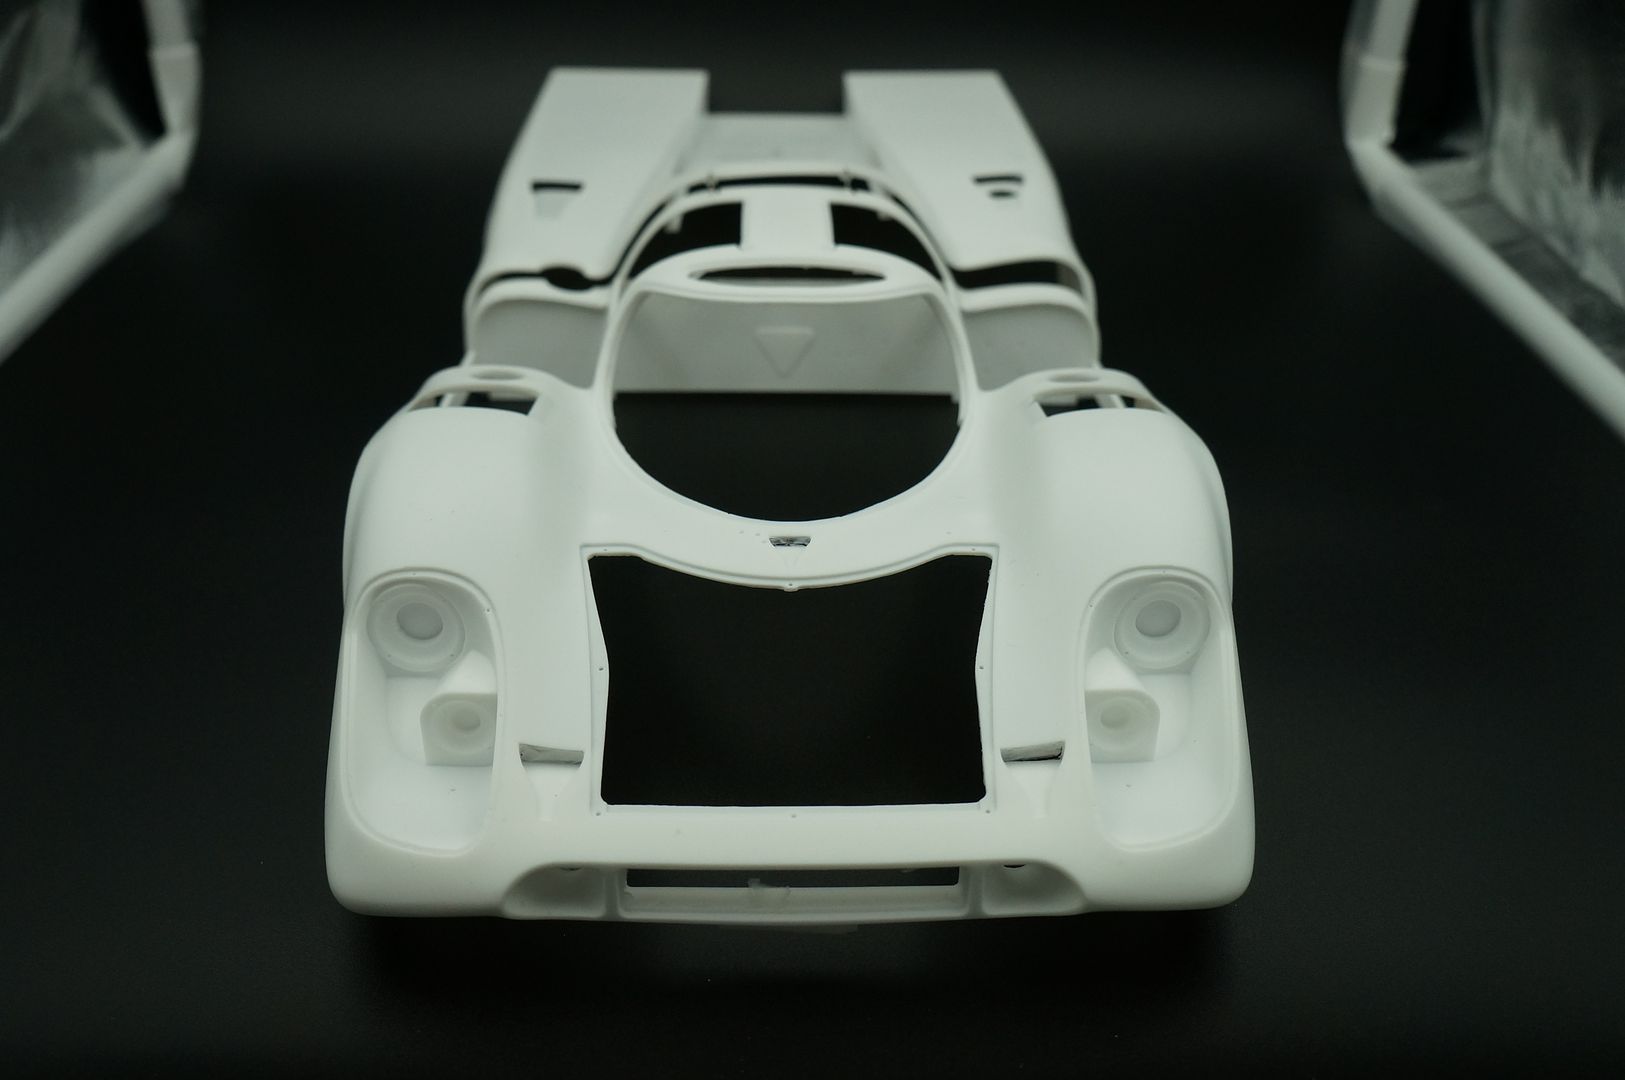
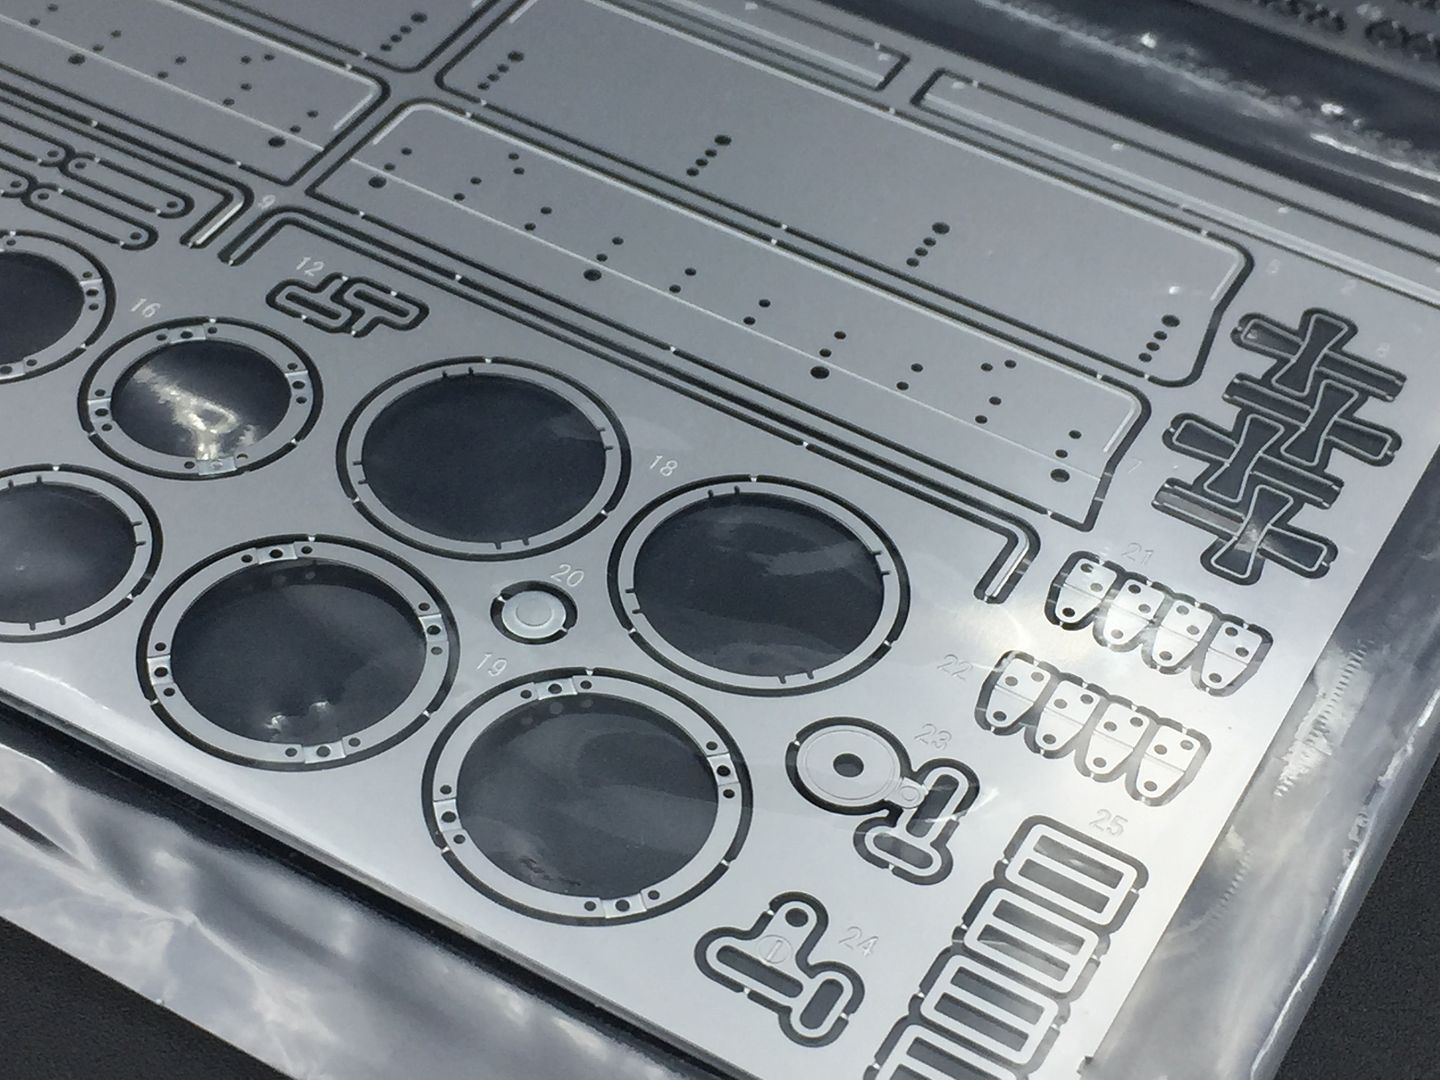
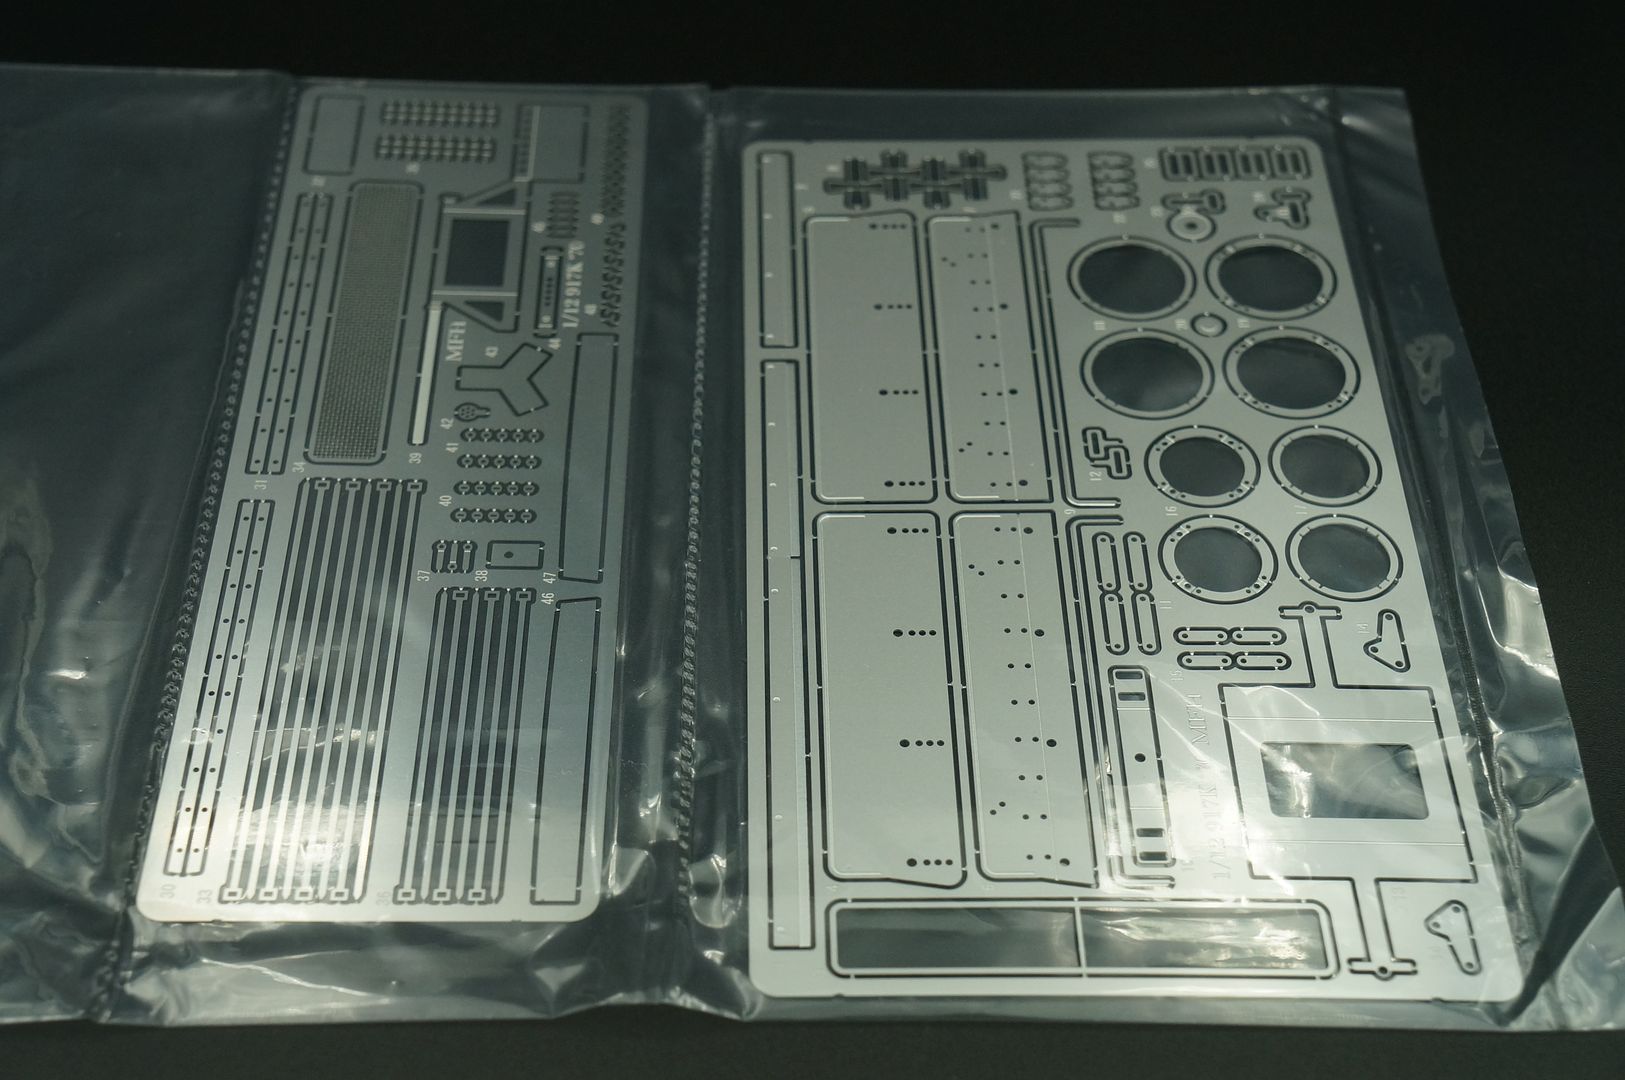
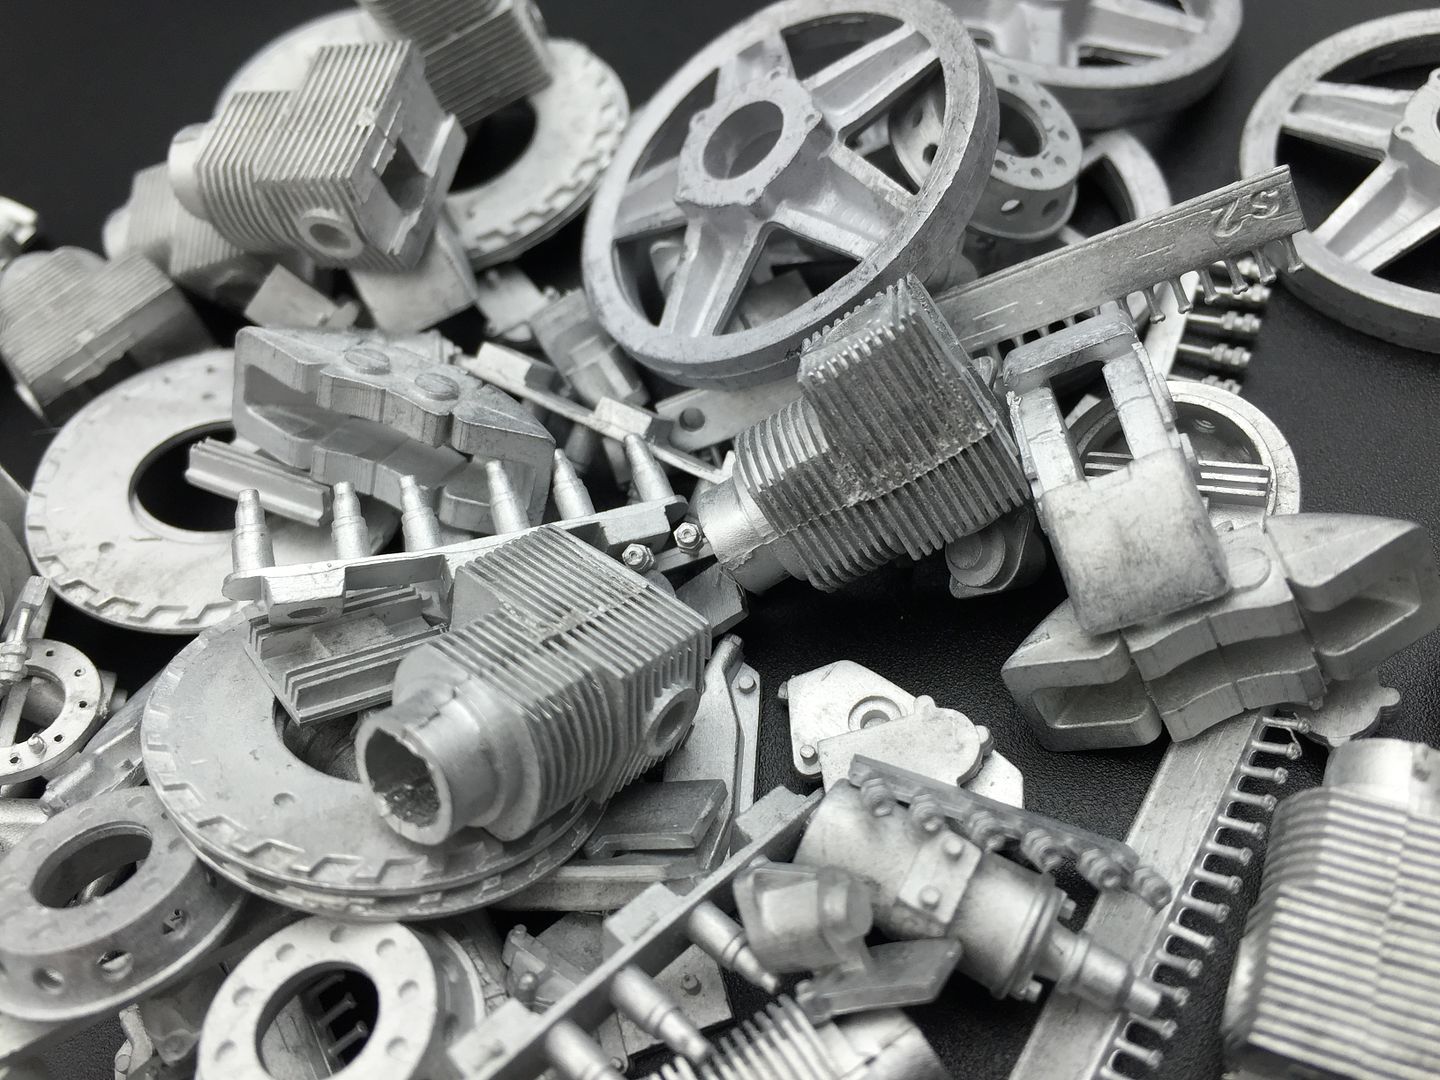
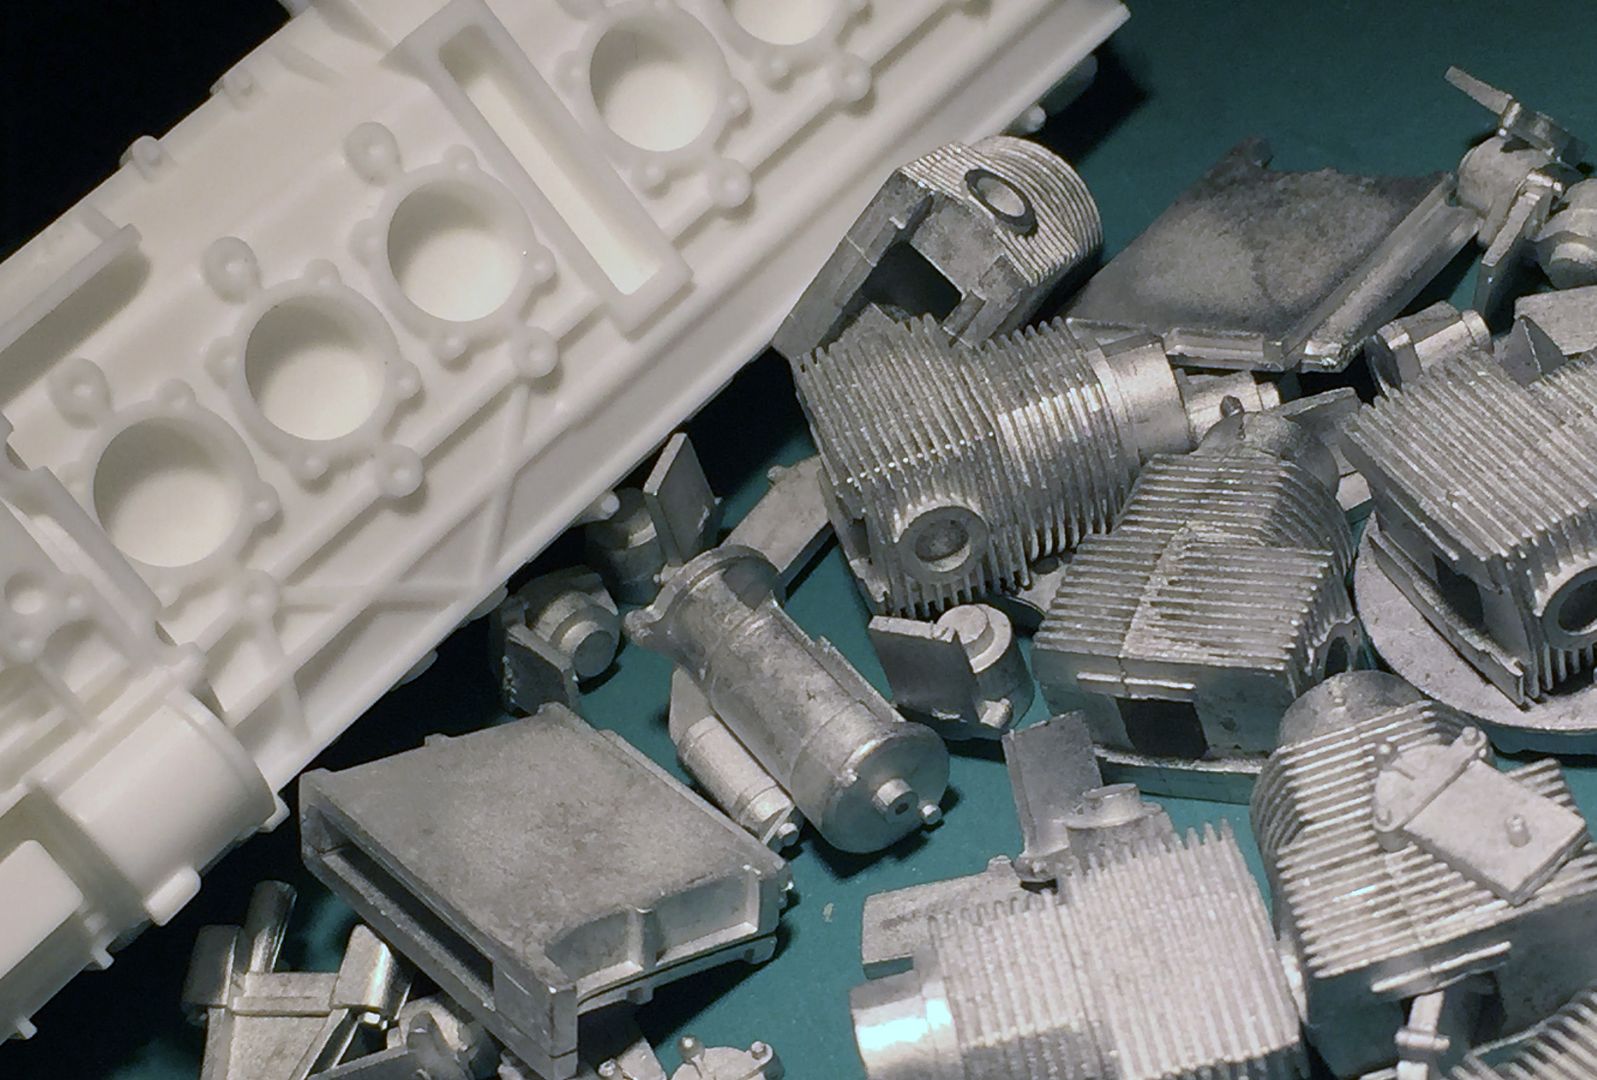
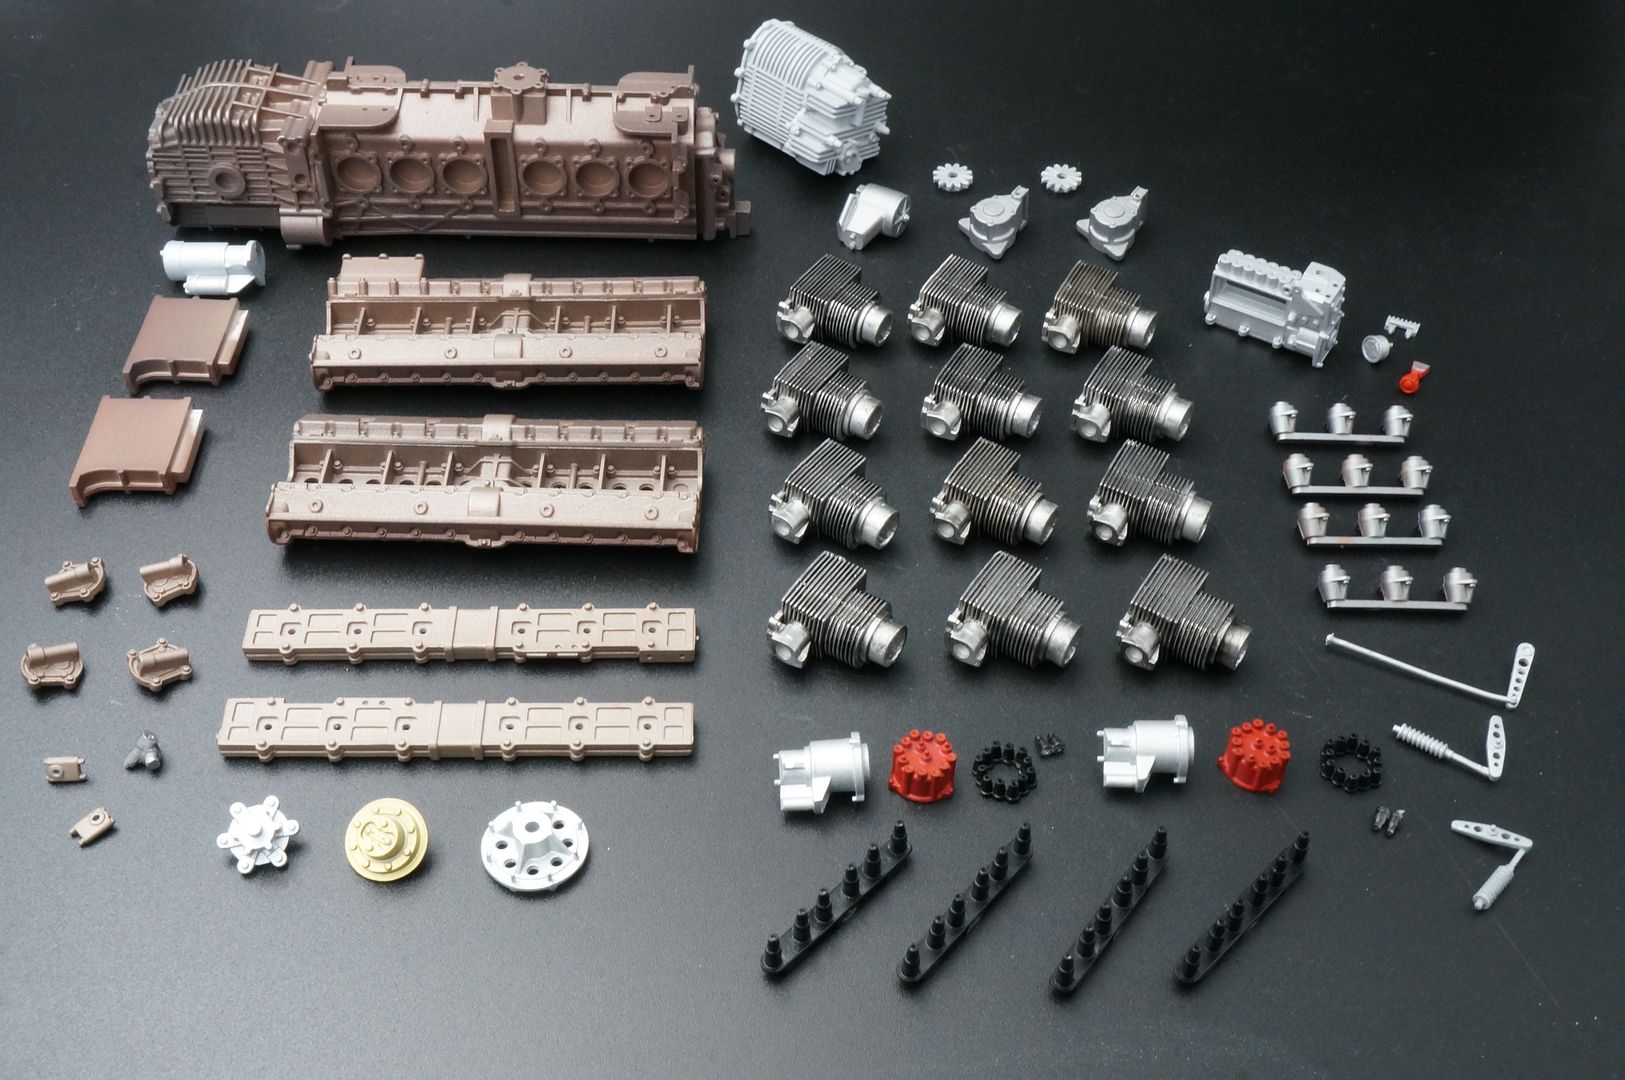
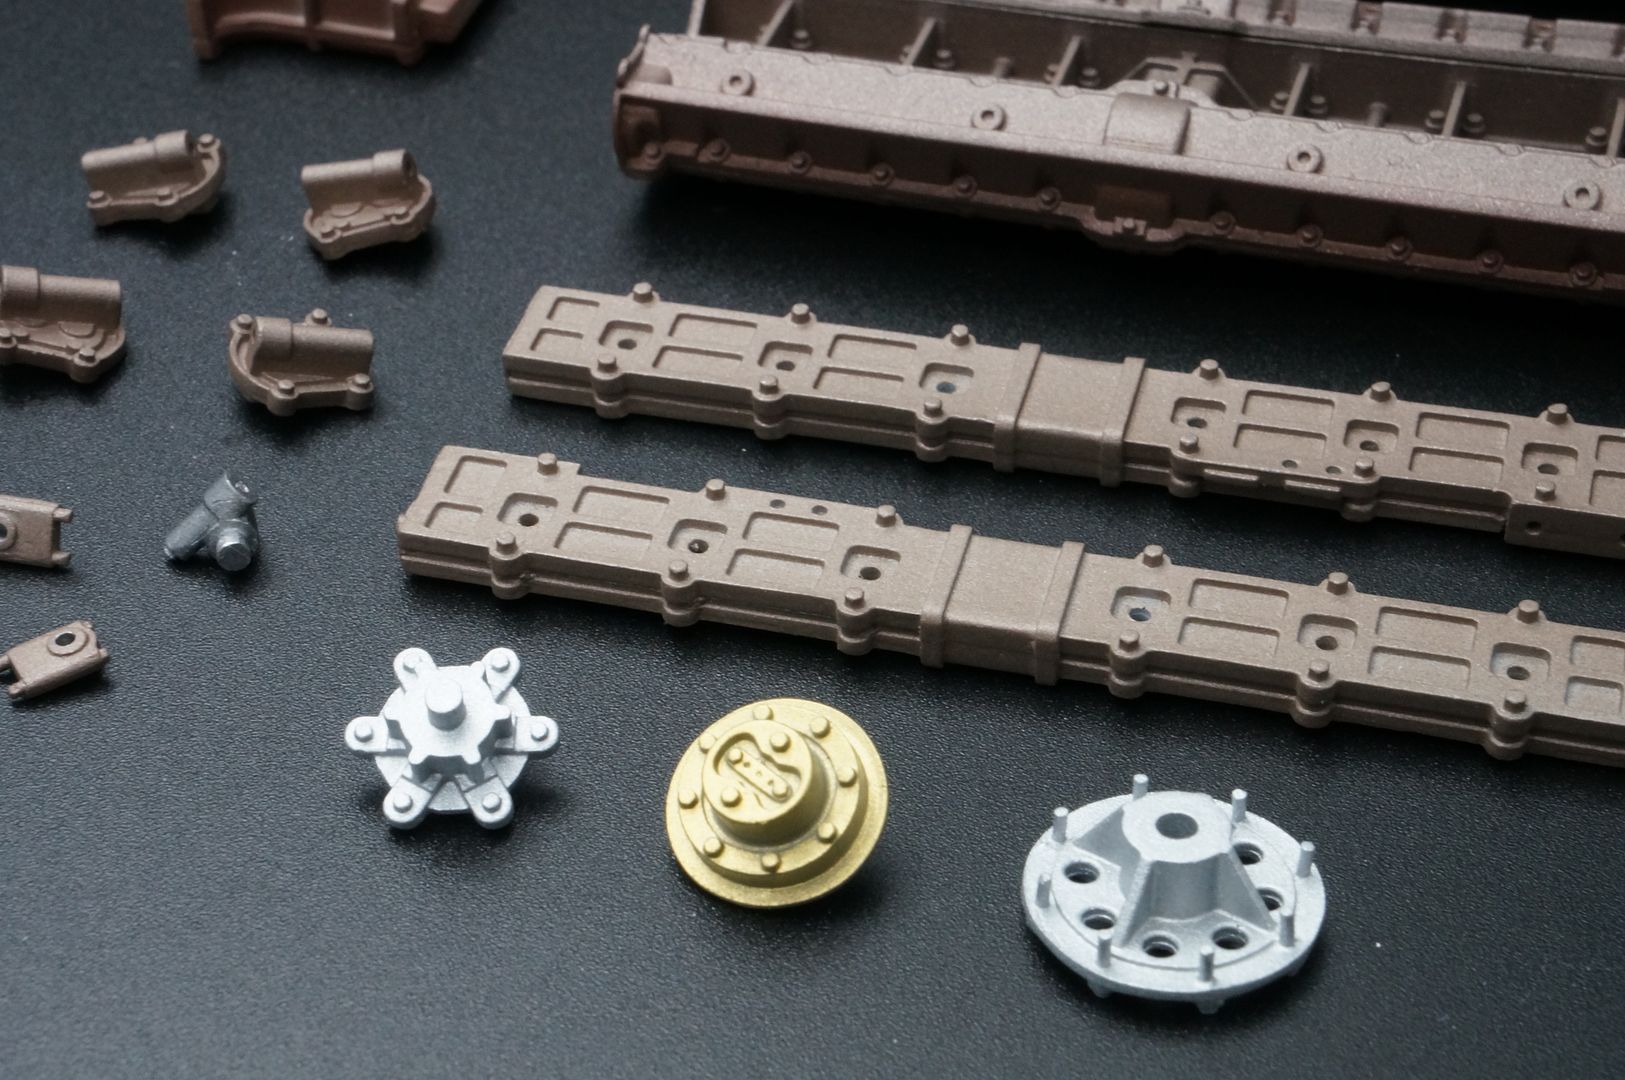
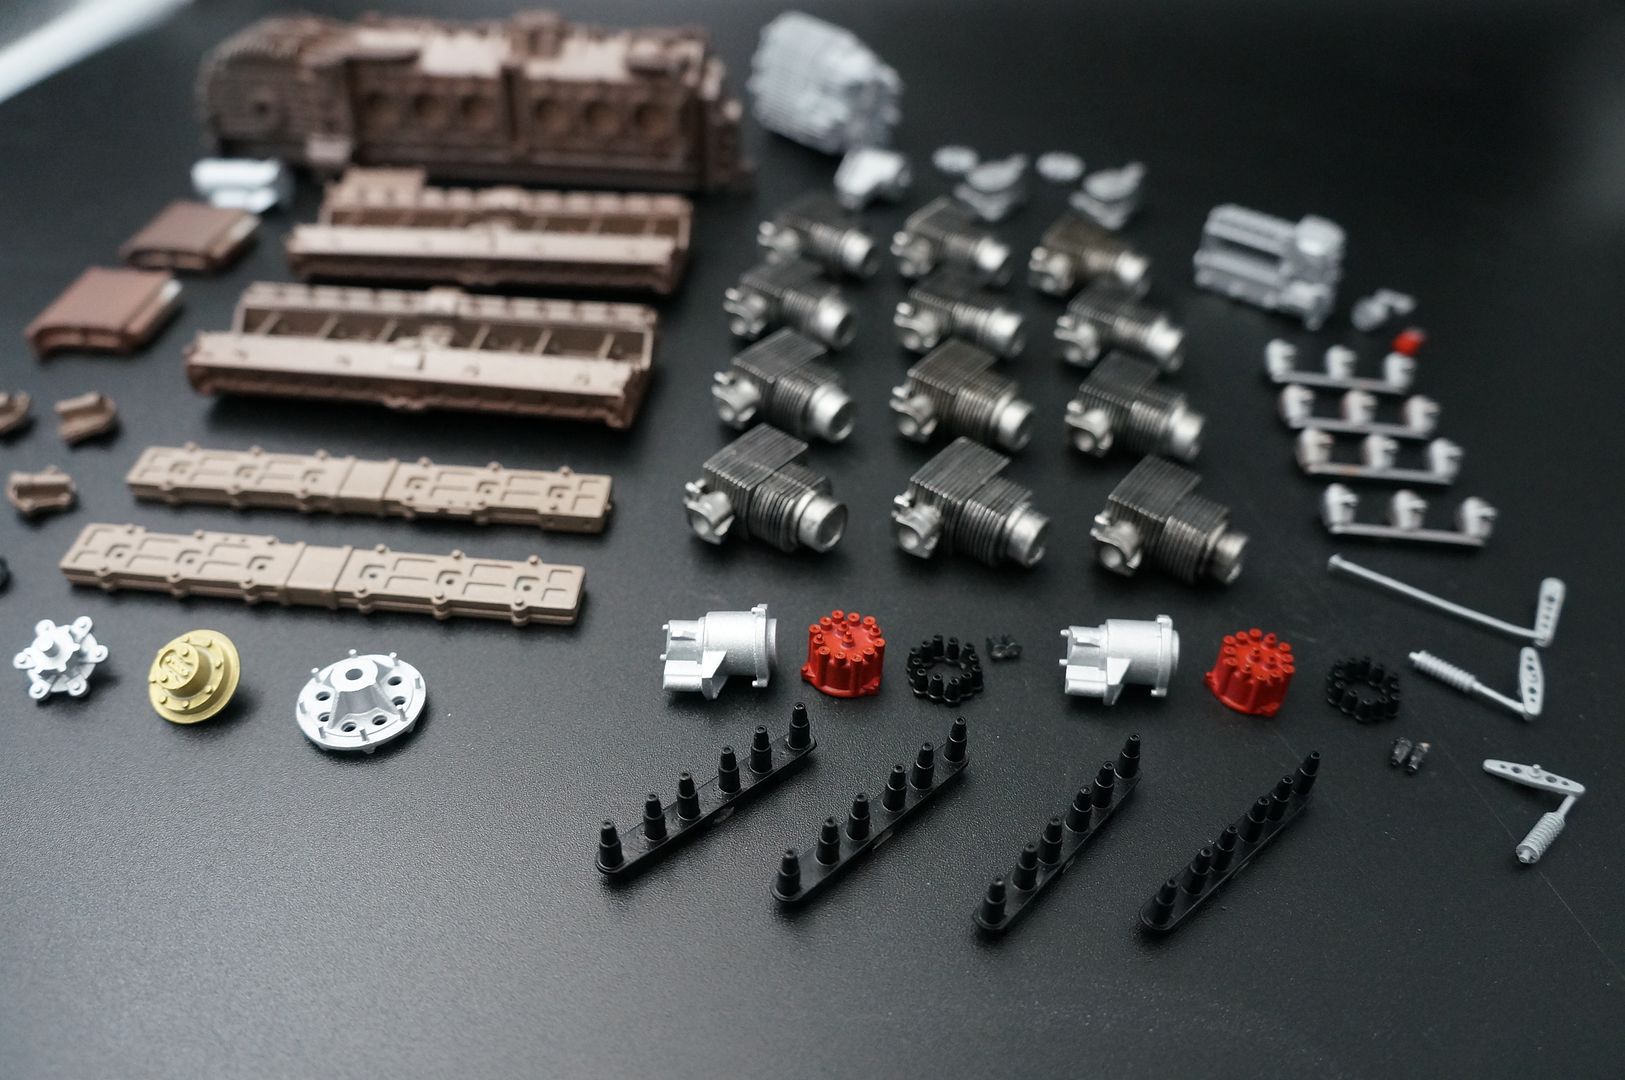
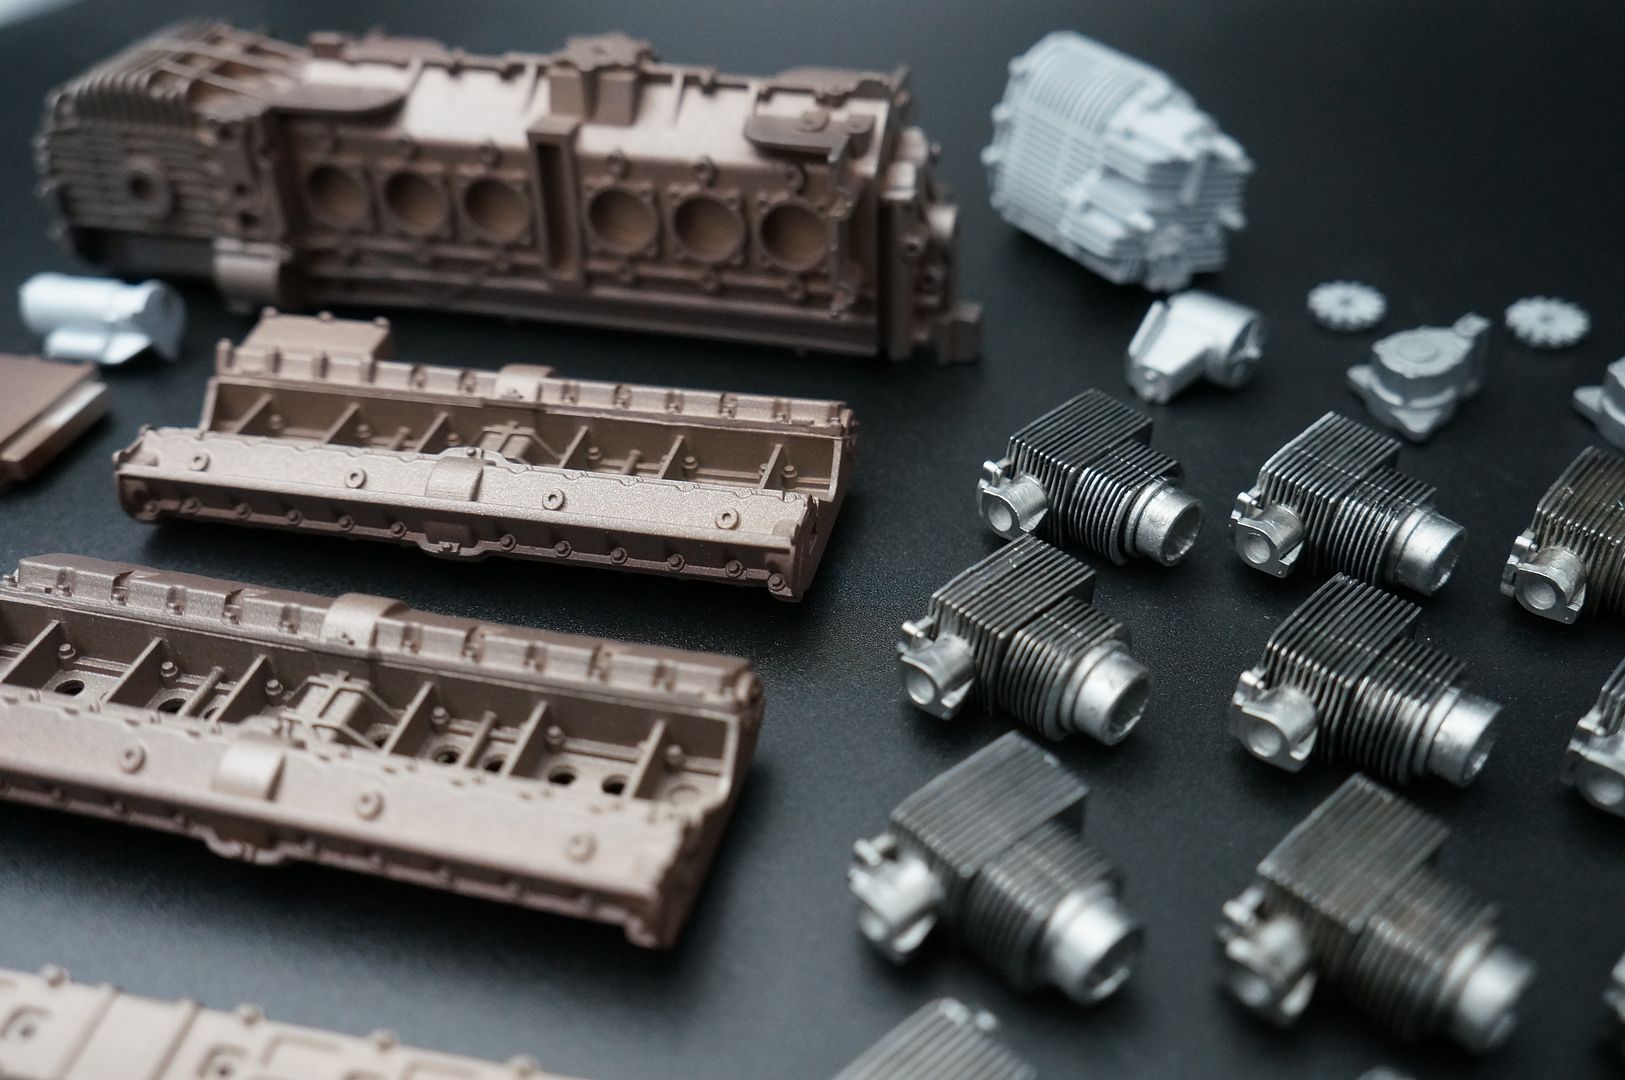
...all very nice. Now onto the large number of metal bits...
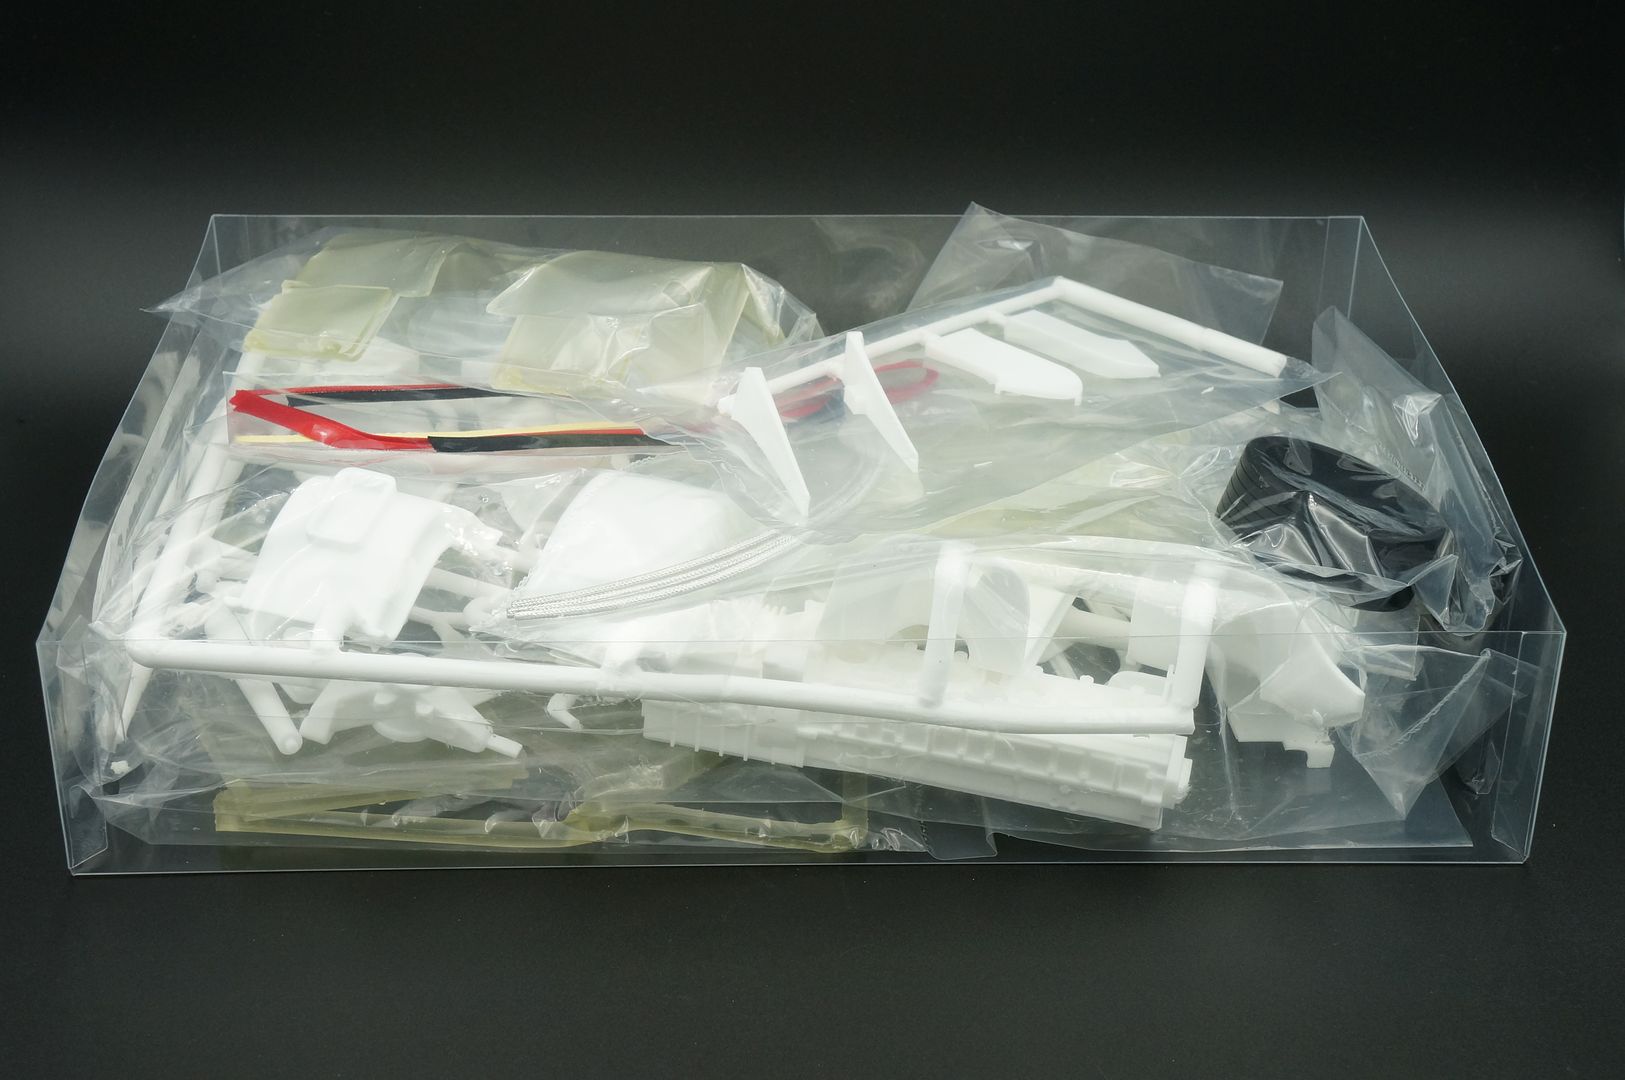
That's my box! Be nice if MFH used something similar to package!
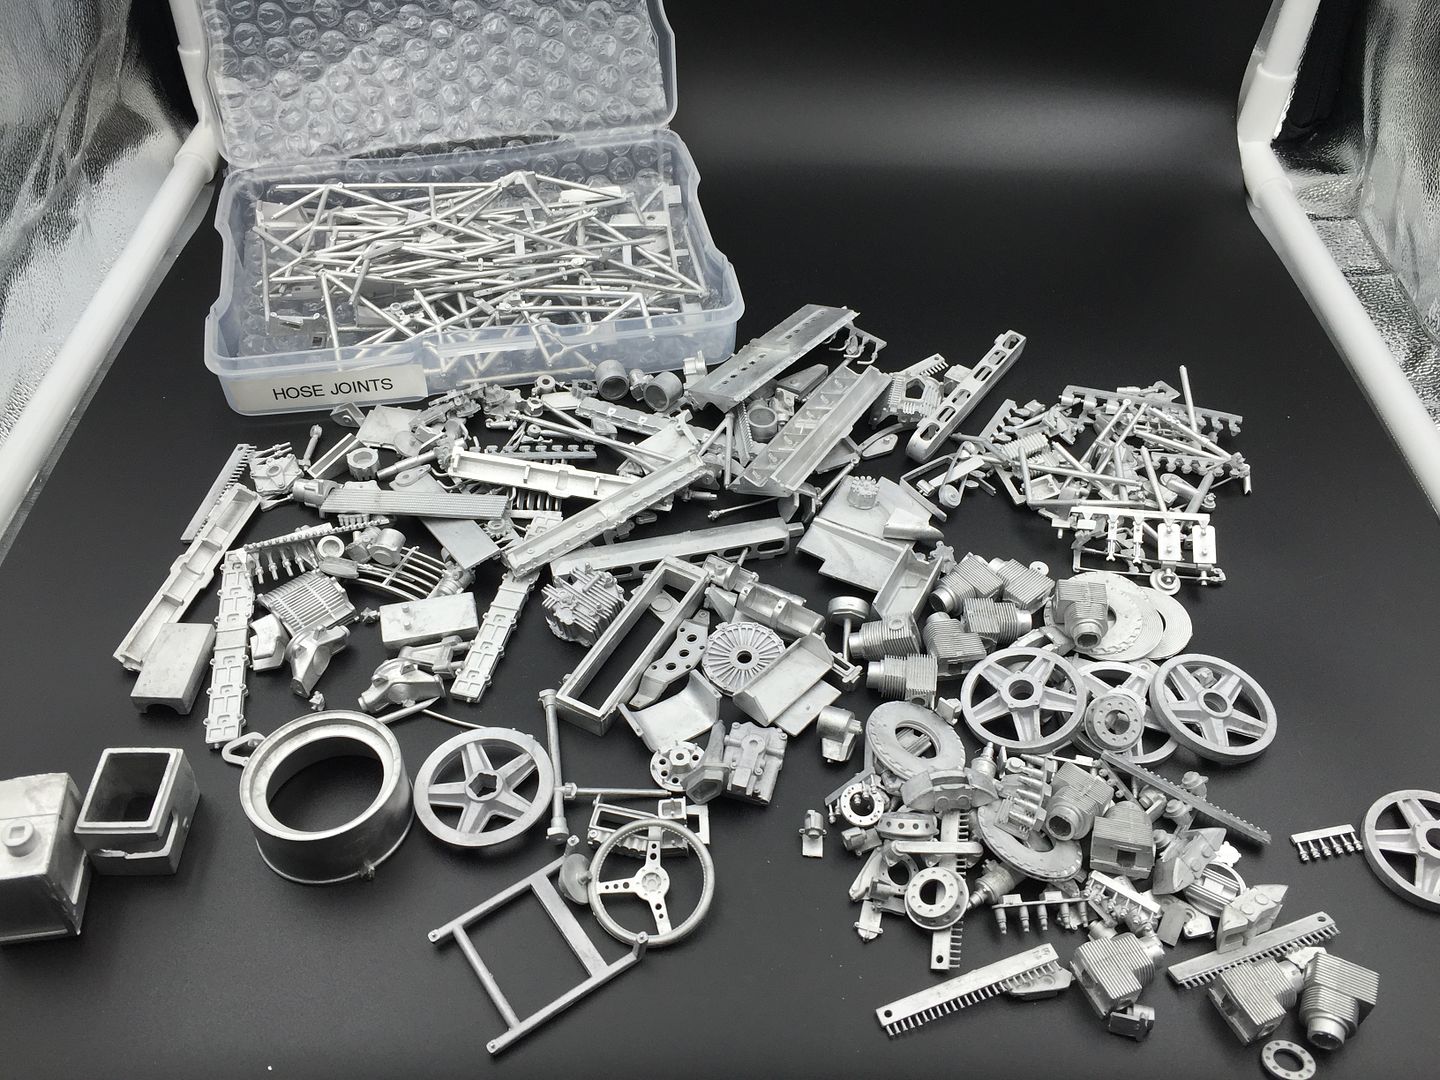
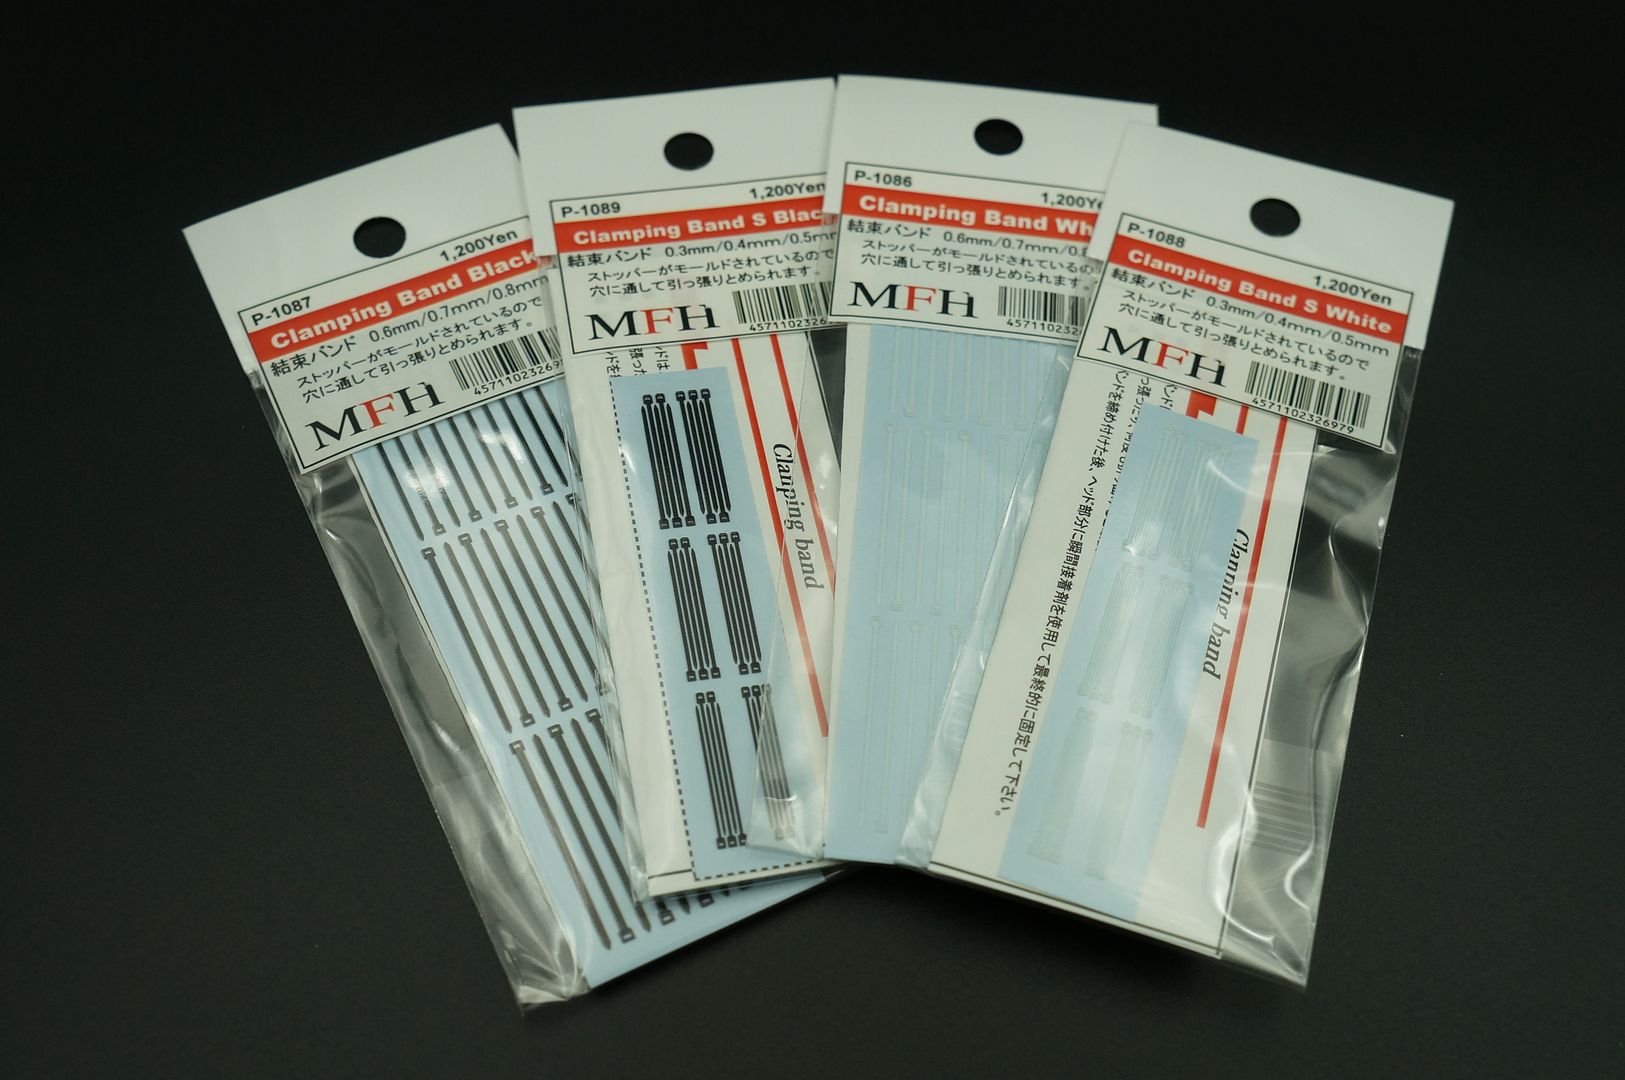
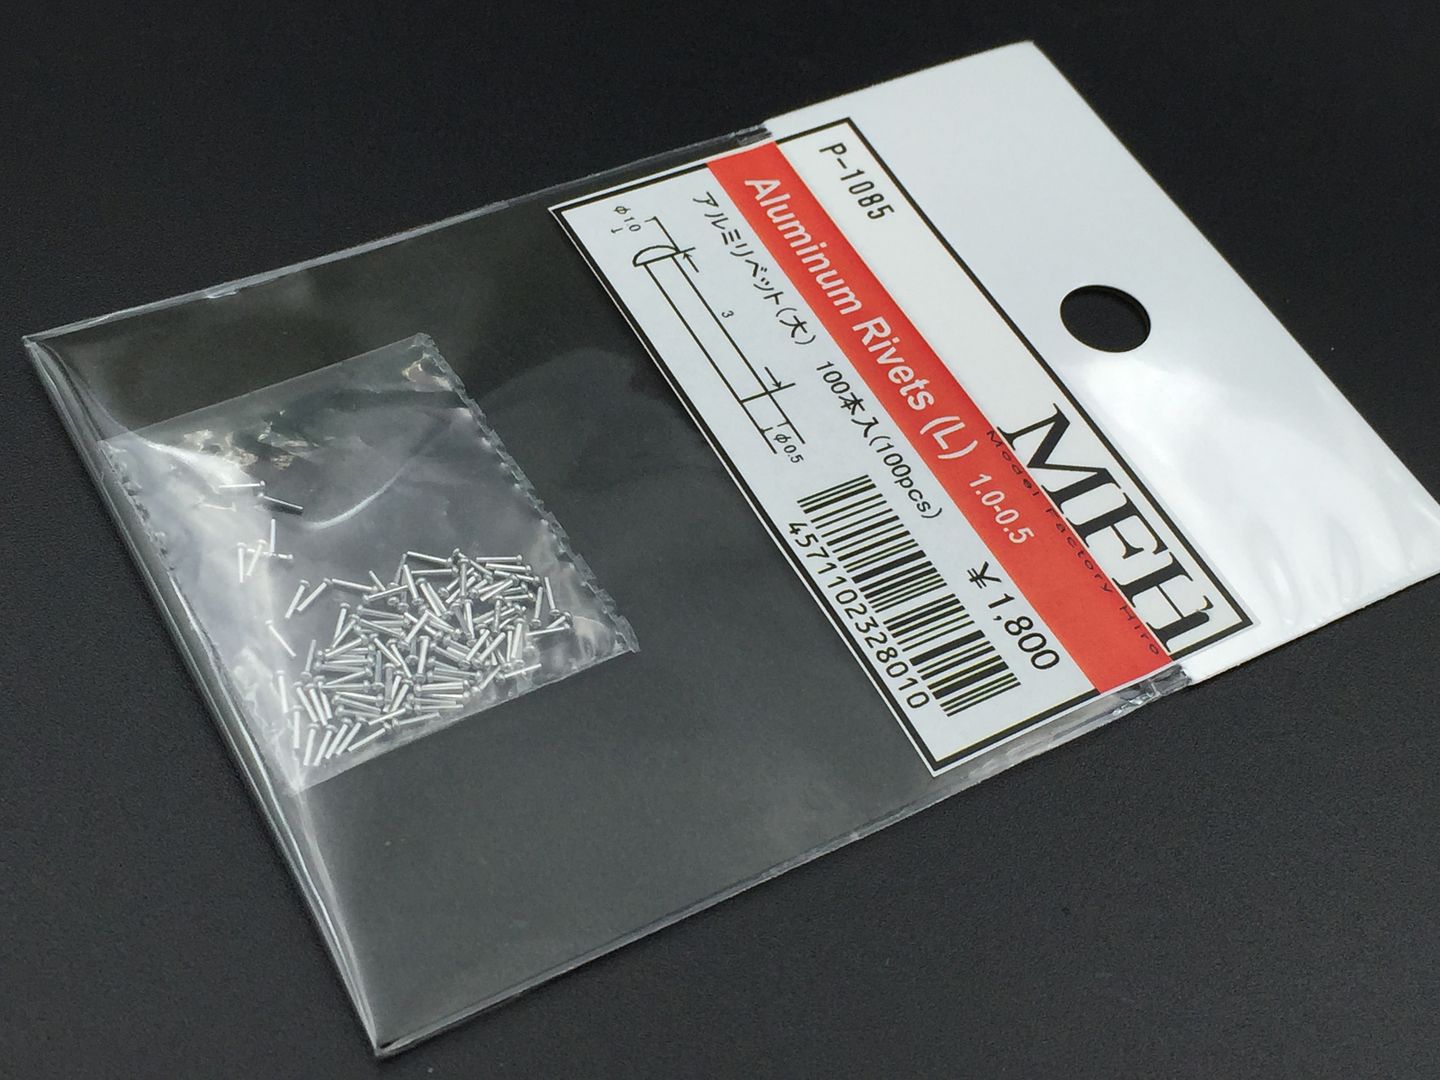
Example of a few additional purchases...
Looking forward to starting this one - engine first. There are some incredible examples of this kit (or similar) on these forums already, so great source material, and targets to aim for...
- I'm copying WIP threads from somewhere else for this crowd - I am working on the 3 posted here at the same time because a)variety and b) I want to photograph different engine side by side. That said, quality time is getting hard to find, so progress will be slow!!
So this first few pages will be one cut 'n paste - hope that is ok (so you may see the odd answer to a question you haven't seen) then any progress from engine onward will be 'live'!
Hope you enjoy....
Having started my MP4/4 WIP I am adding another. I'm starting a few kits at the same time - I want to do a 'compare engines' project at some point.
This will be picture heavy again, and it is partly to get tips from your guys, so all comments welcome! Don't expect fast progress - finding time to do this stuff gets harder and harder - but I hope you enjoy...
I went for the red 'Version C' that raced at '70 Sarthe 24hr Race' - I love the Gulf cars, but 'everyone does them...'
Lovely massive box...
Lots of lovely bits - clear parts, resin body, lovely machined rims etc...
...and there - my pet hate with MFH - the packaging of the metal parts!!!
...with all that framework, you just know that some will be bent.
...for this much money, they must package these better!!
Back to the goodness...
Very nice 'resin look' parts, as seen on the real cars...
Resin body...
...all very nice. Now onto the large number of metal bits...
That's my box! Be nice if MFH used something similar to package!
Example of a few additional purchases...
Looking forward to starting this one - engine first. There are some incredible examples of this kit (or similar) on these forums already, so great source material, and targets to aim for...
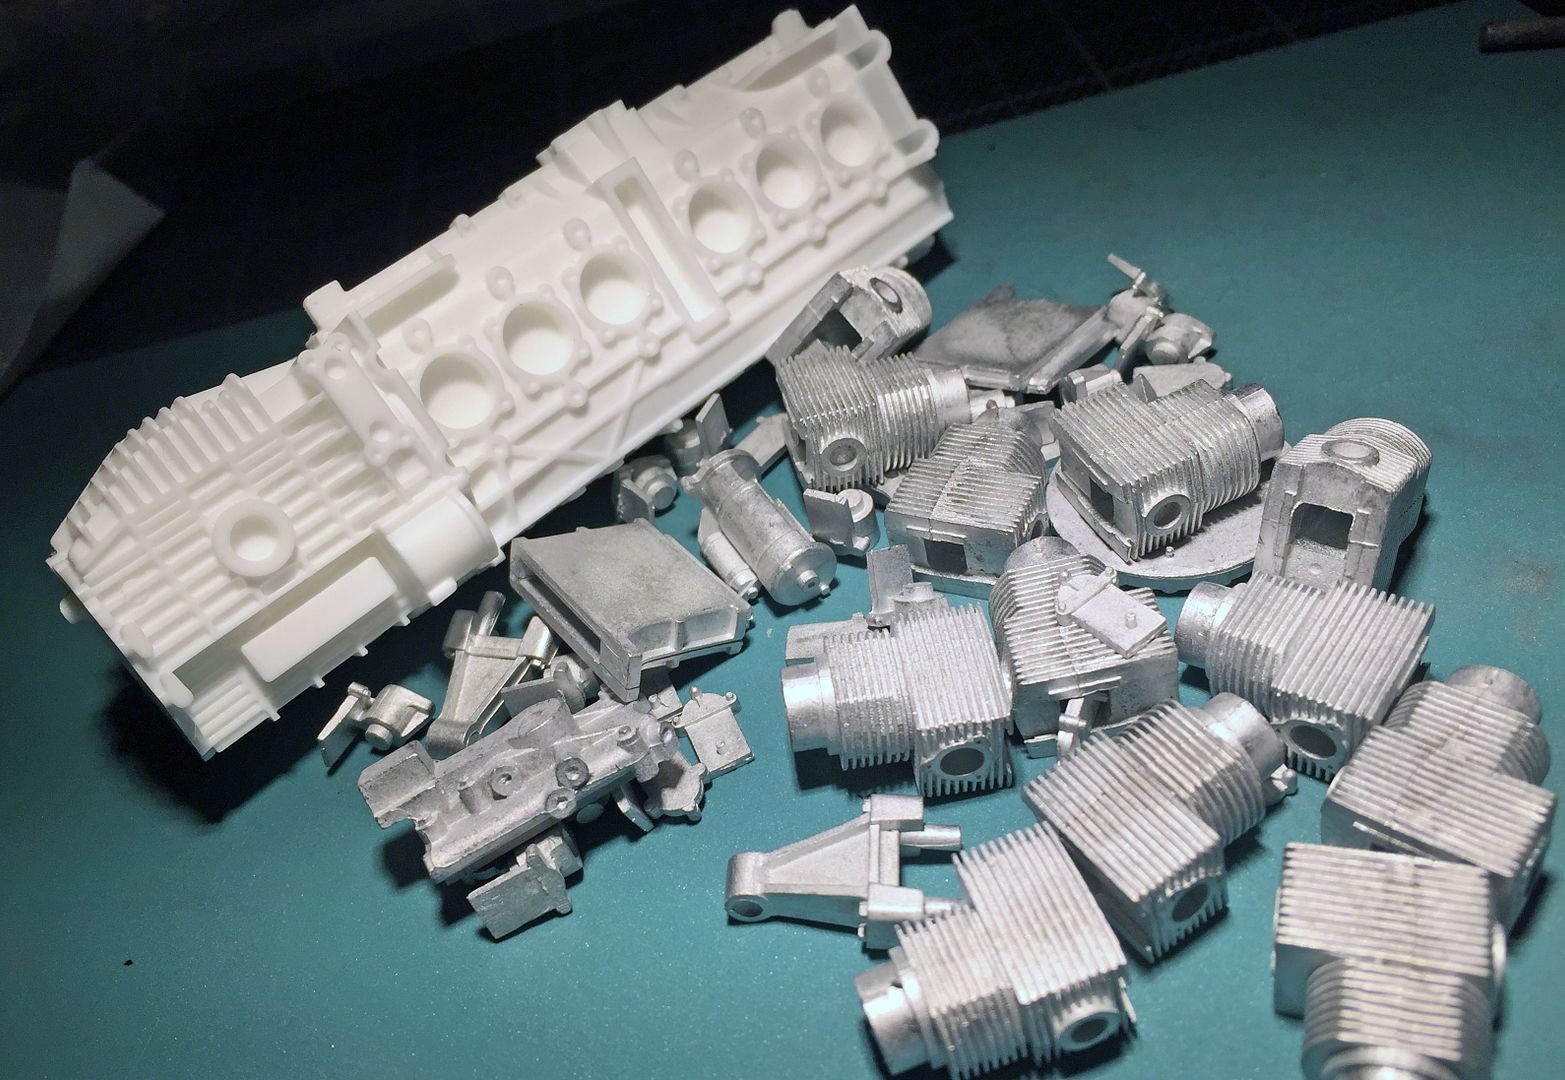
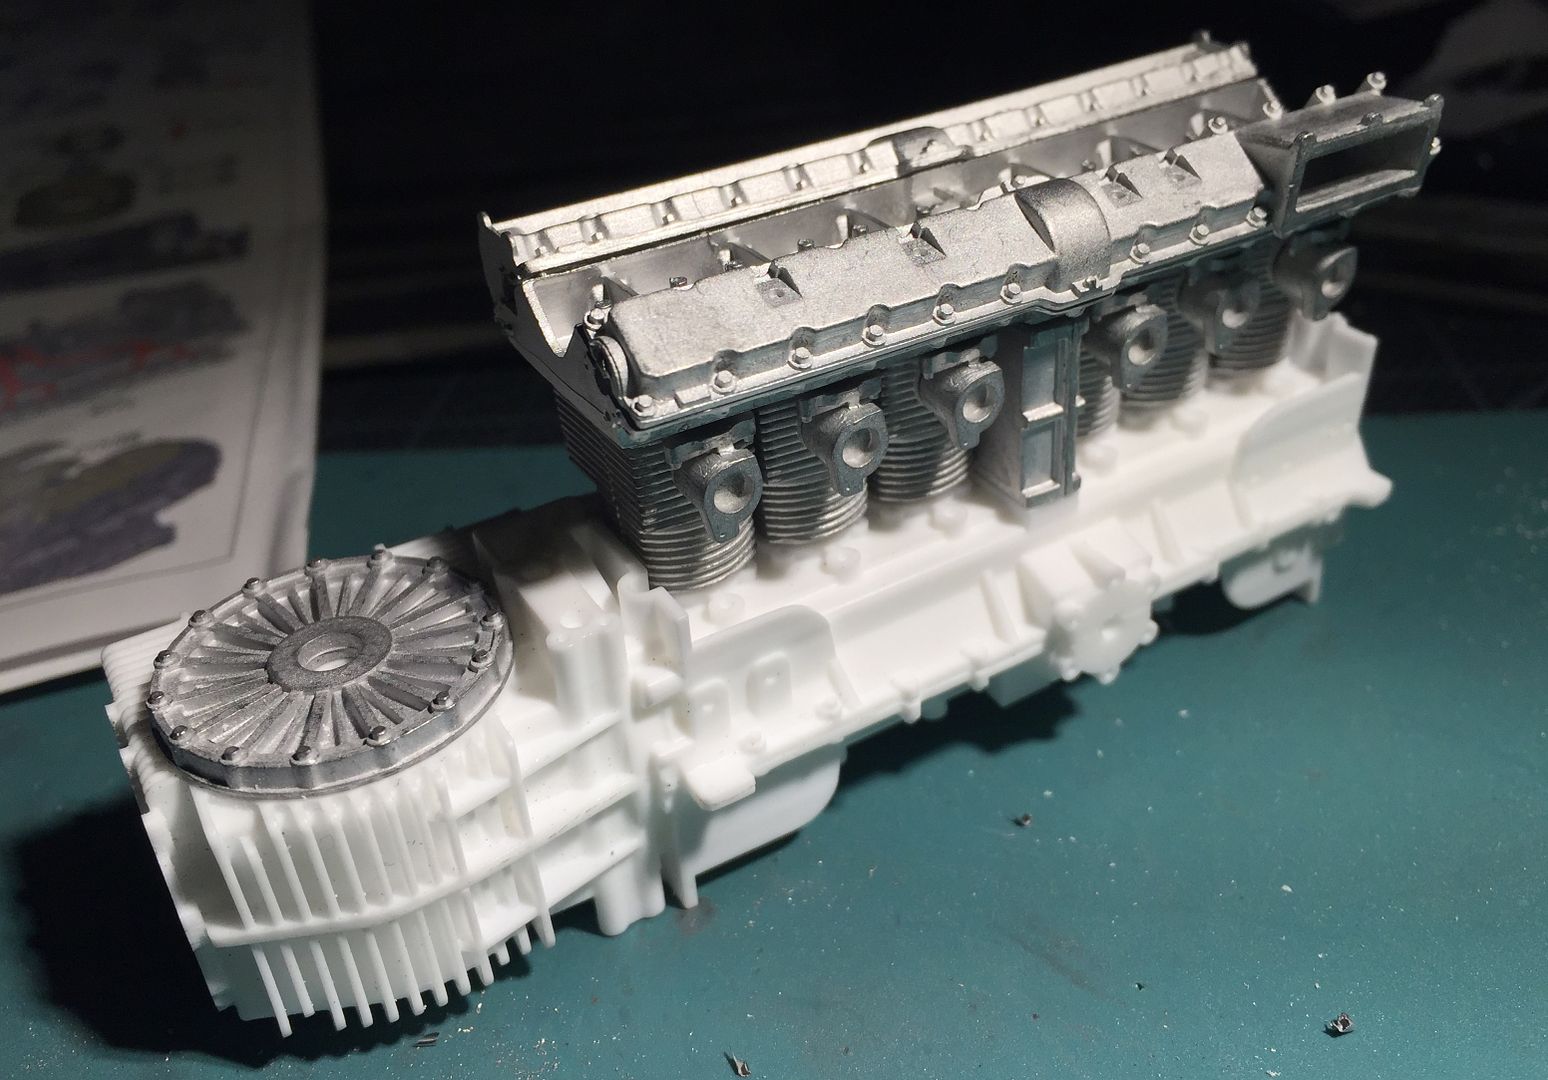
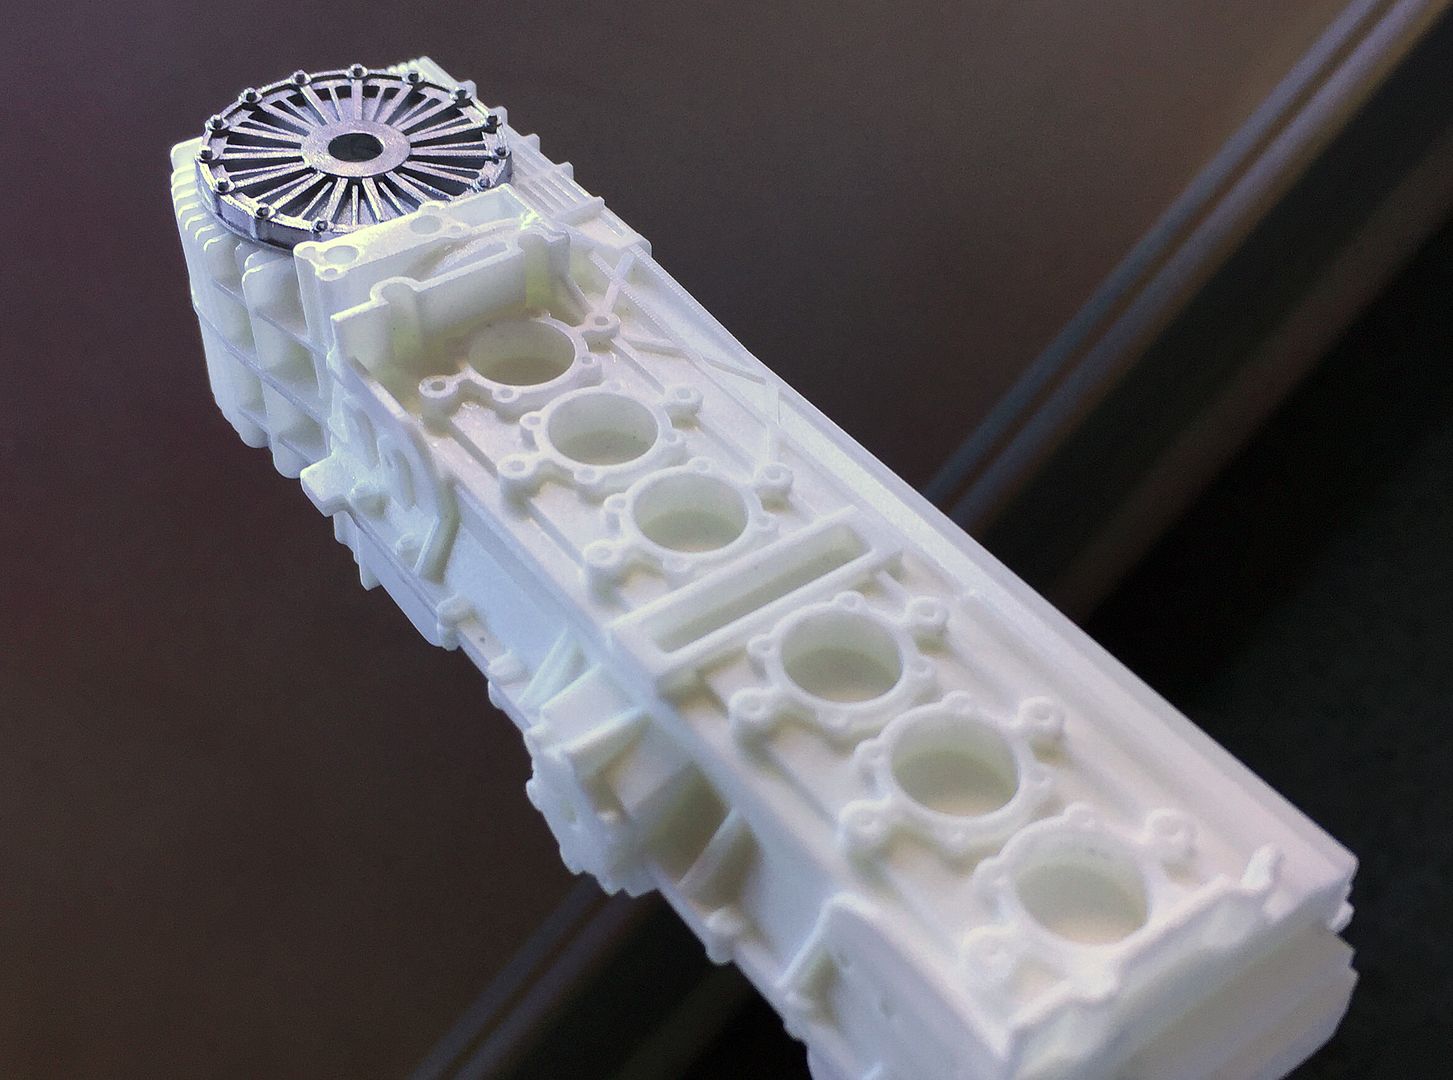
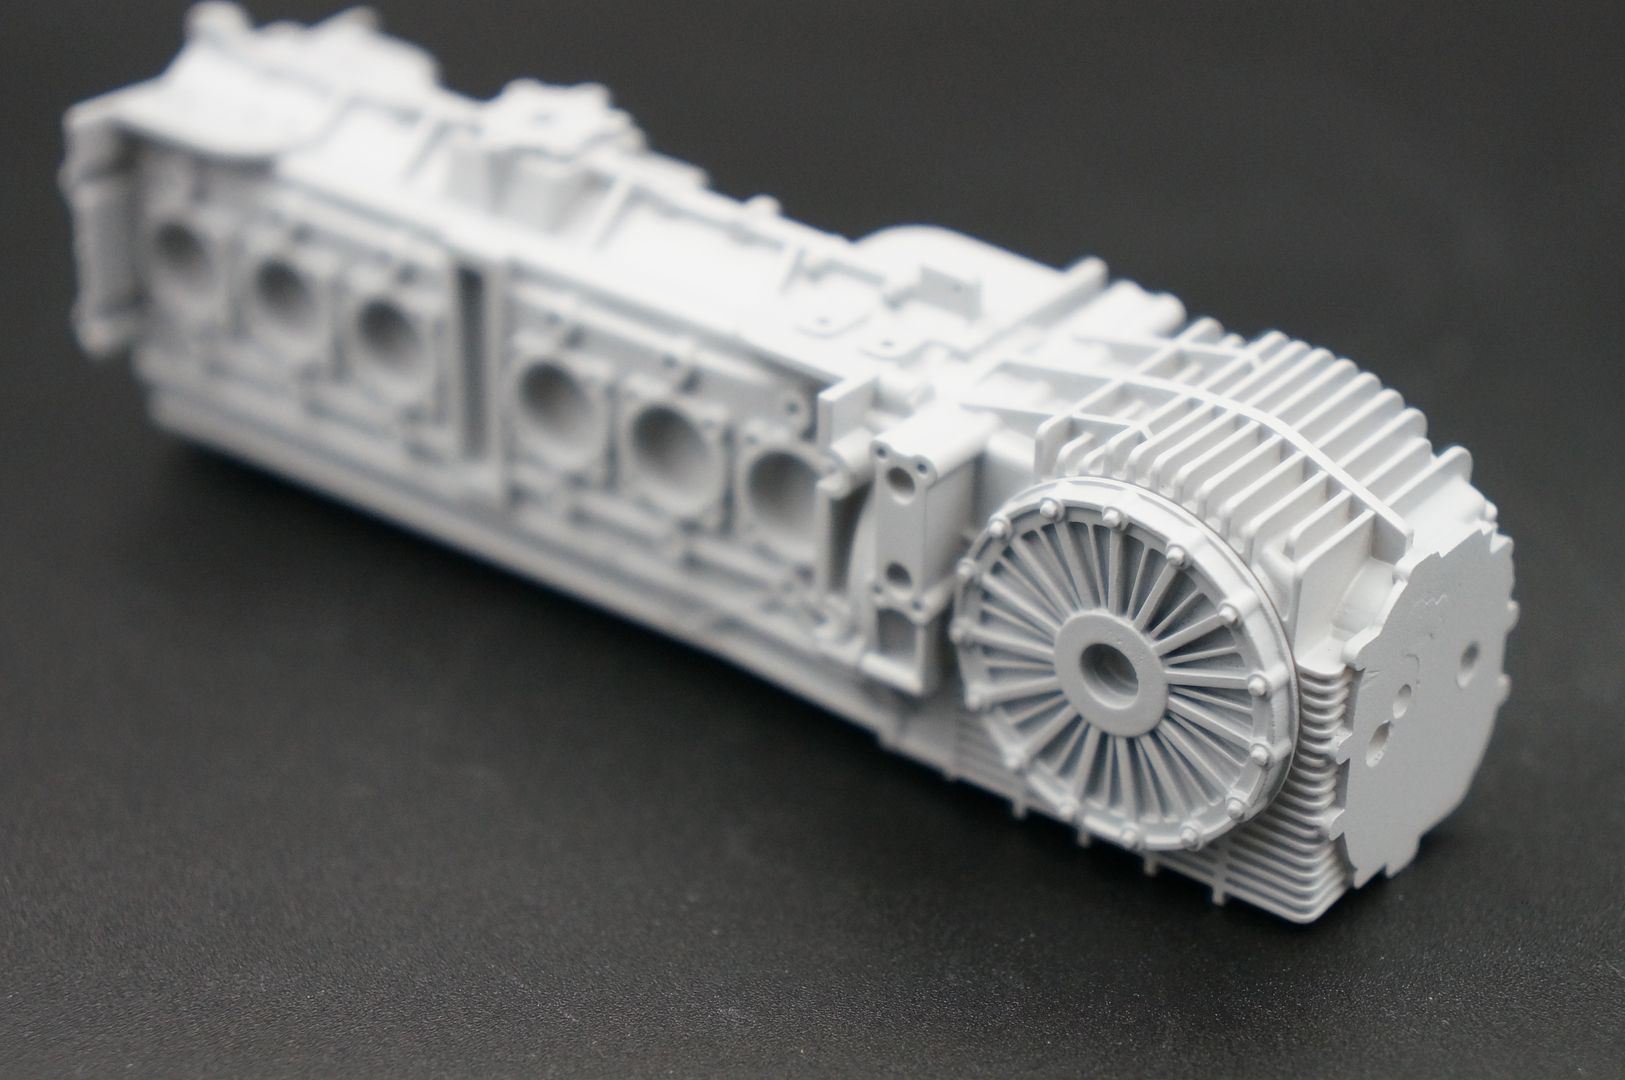
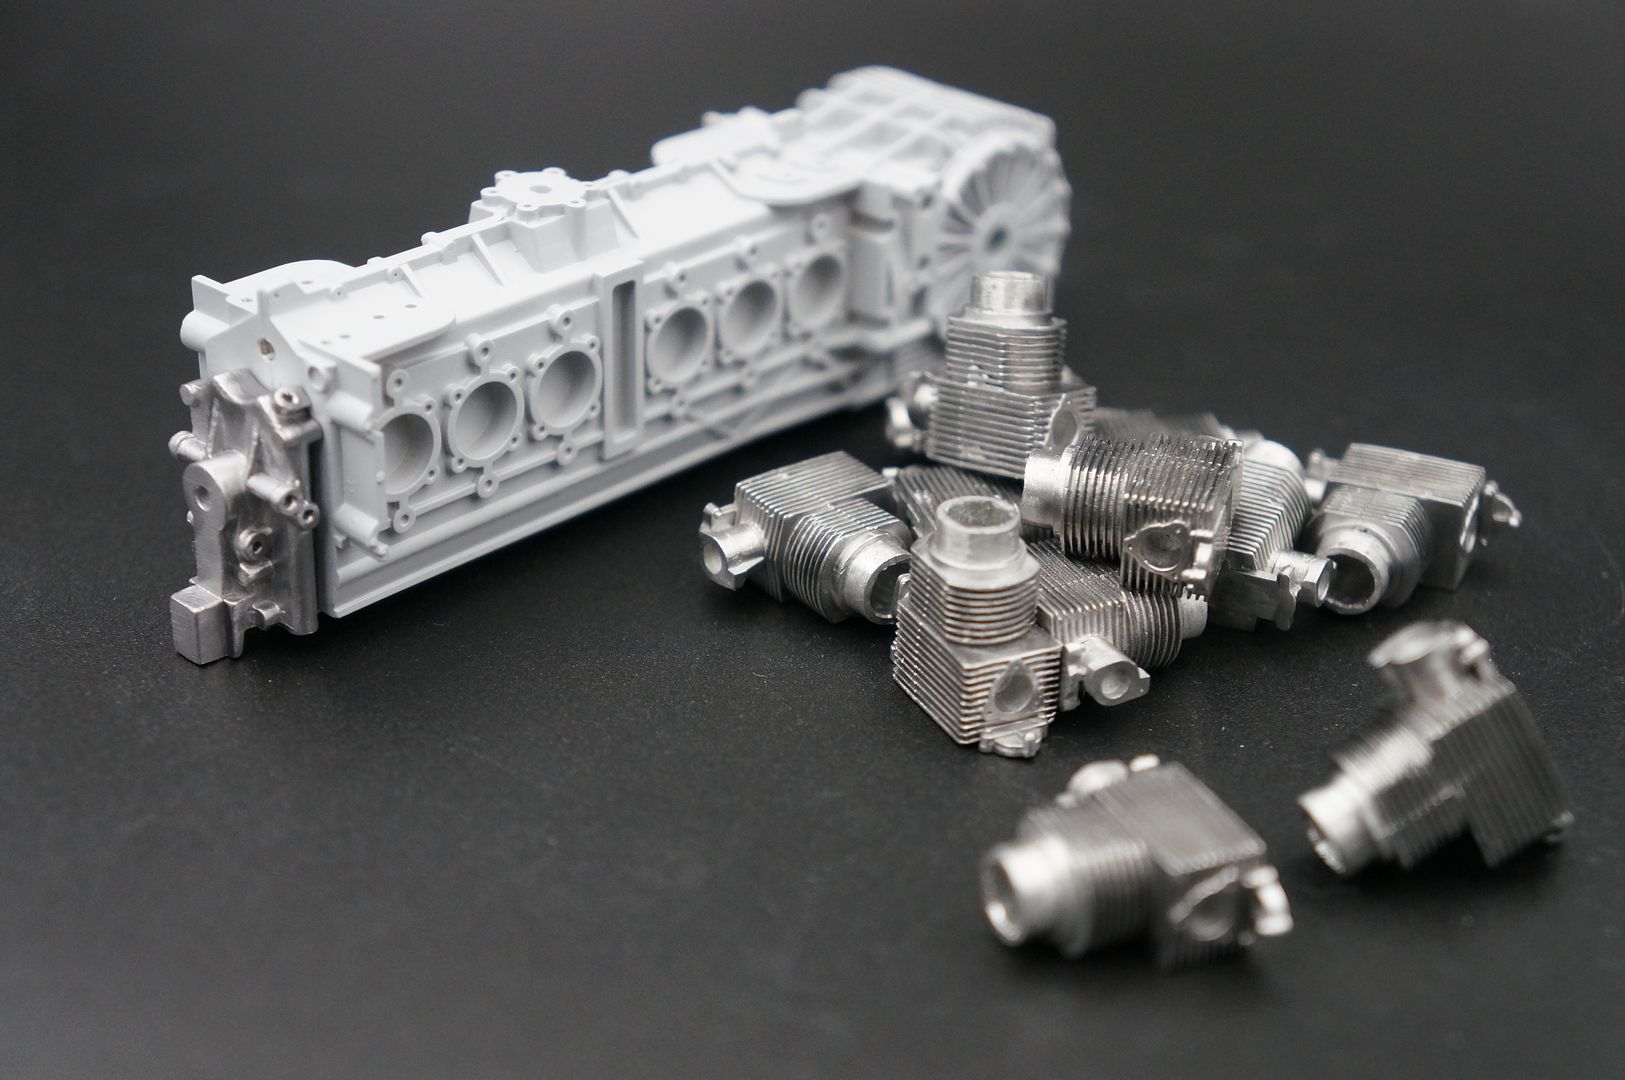
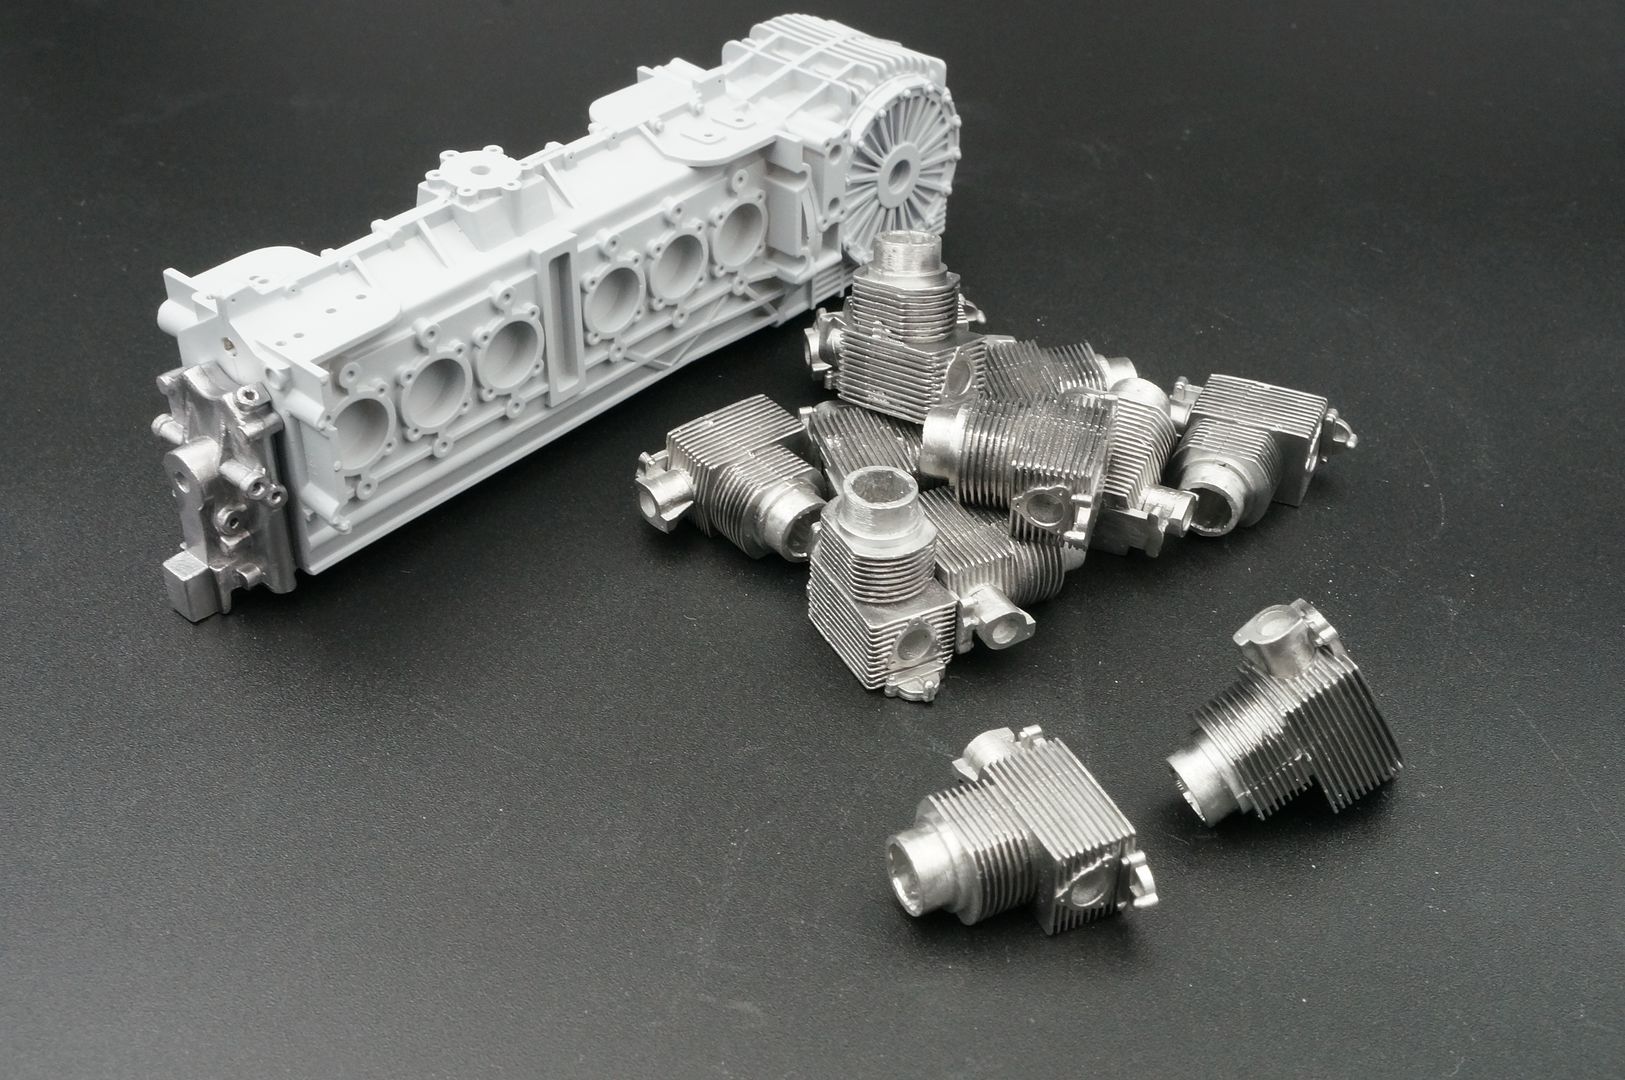
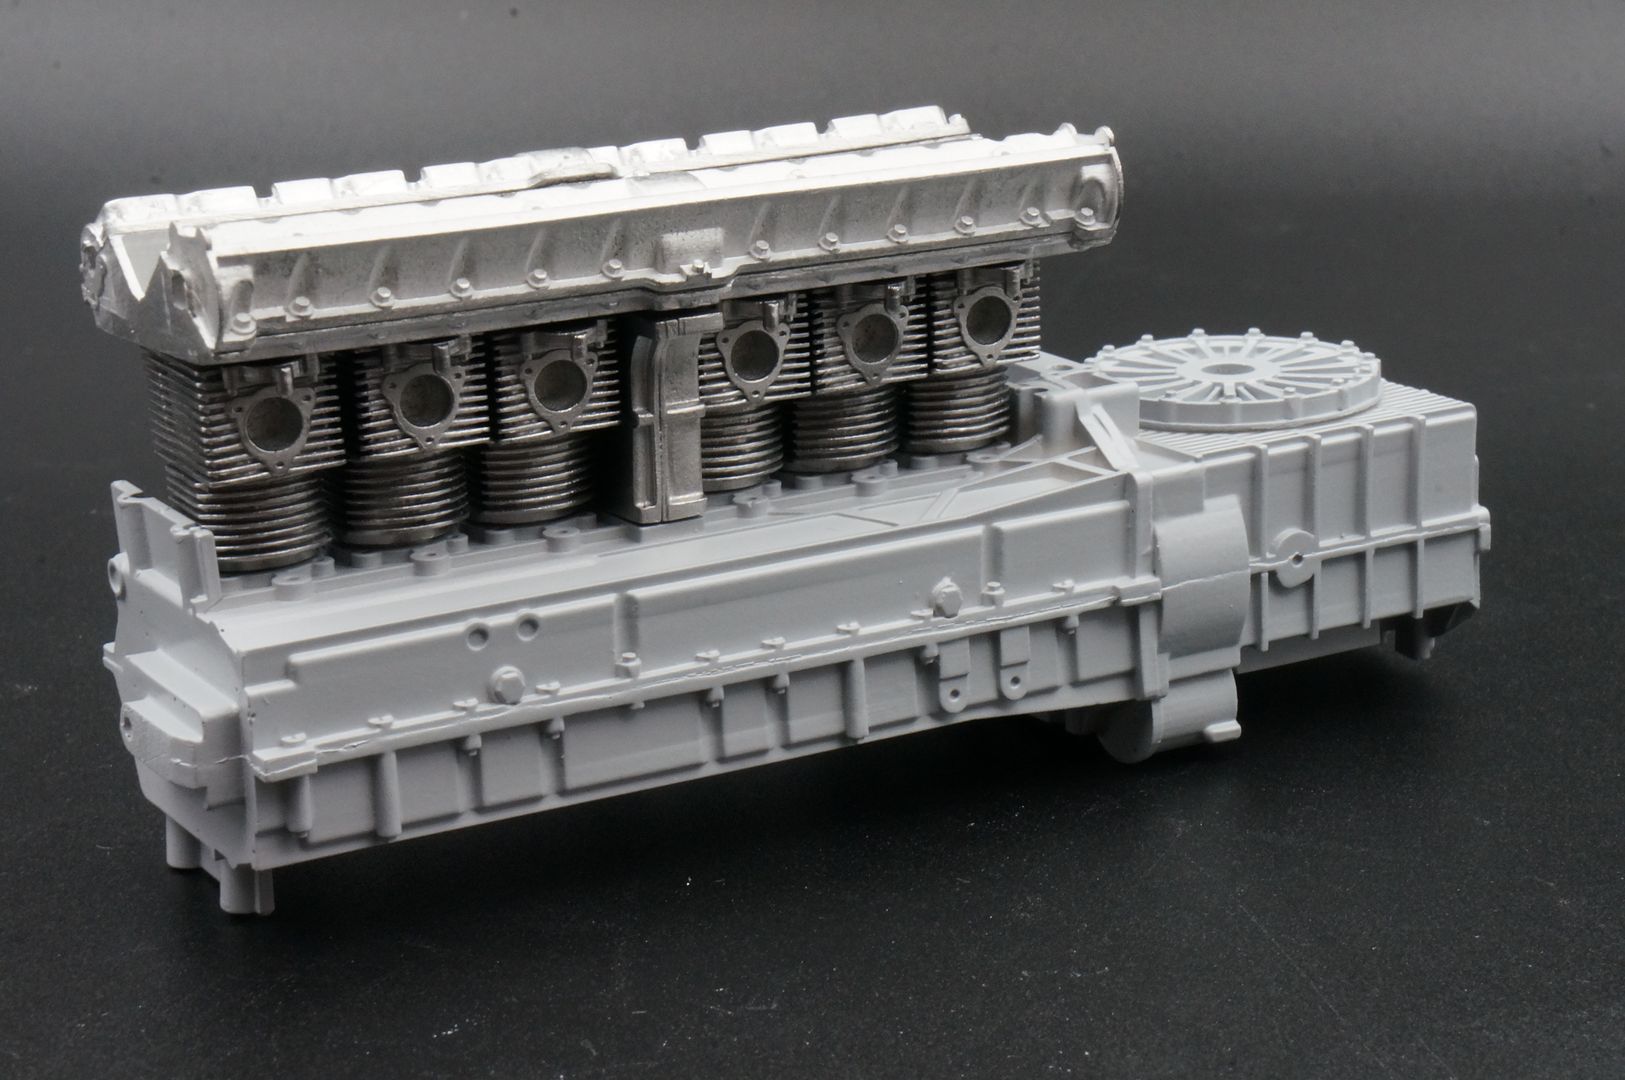
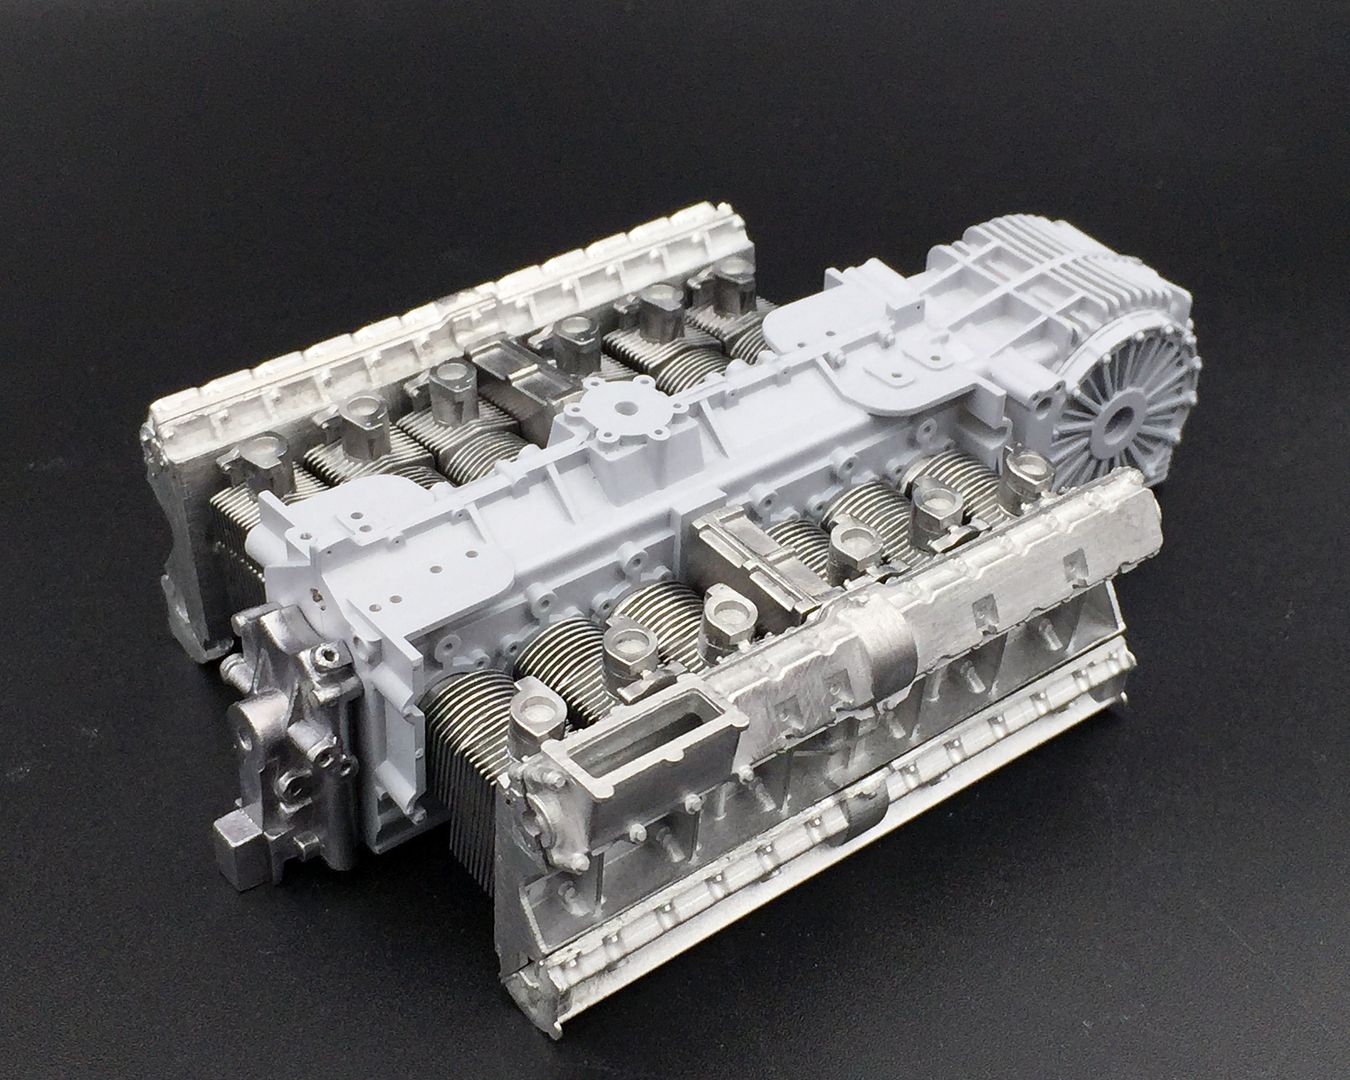
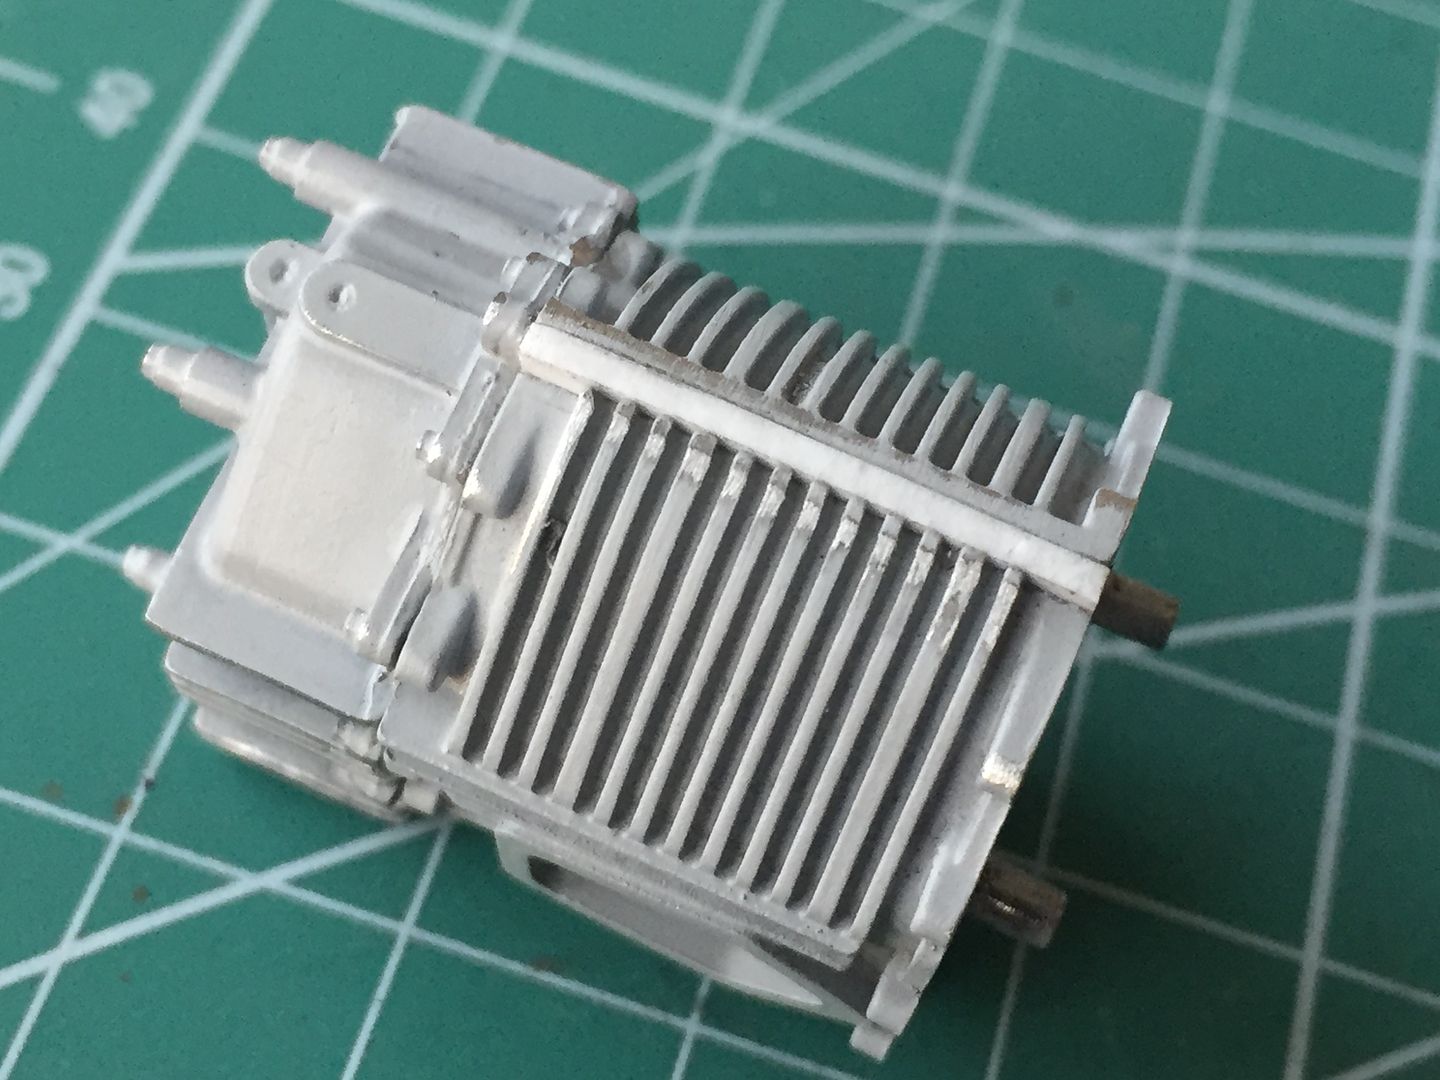
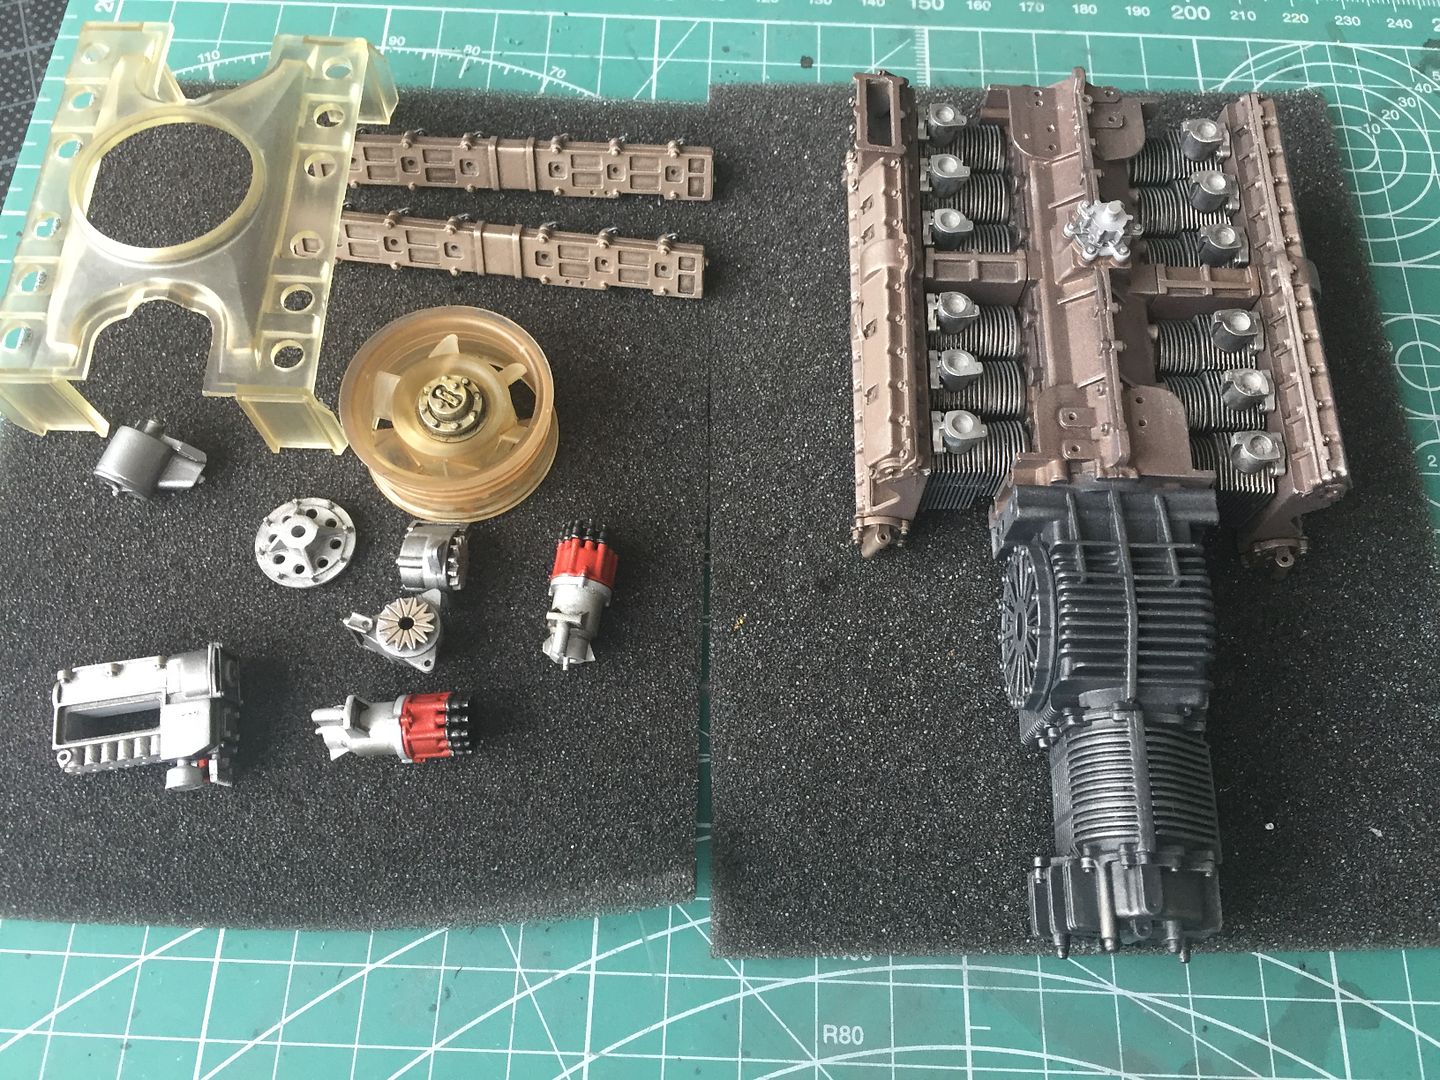
..ok, made a brief start in late last night. Opened my first ziploc bag of bits to start making the engine.
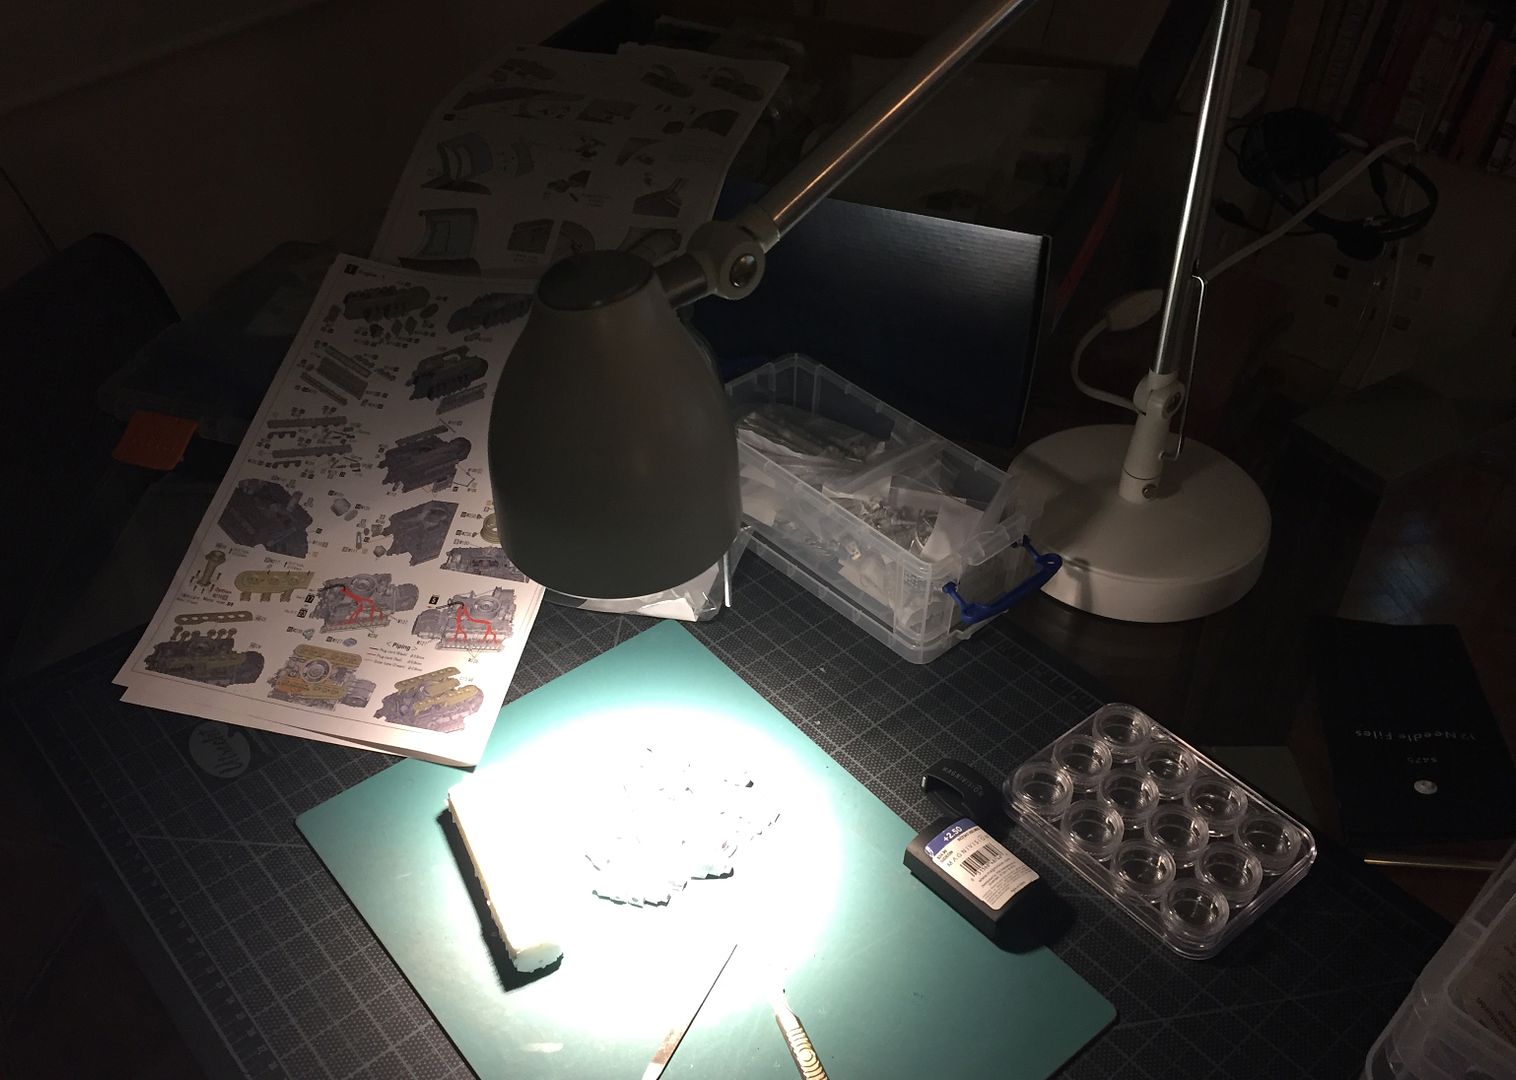
Wish I had a shed. Or spare room to do this...
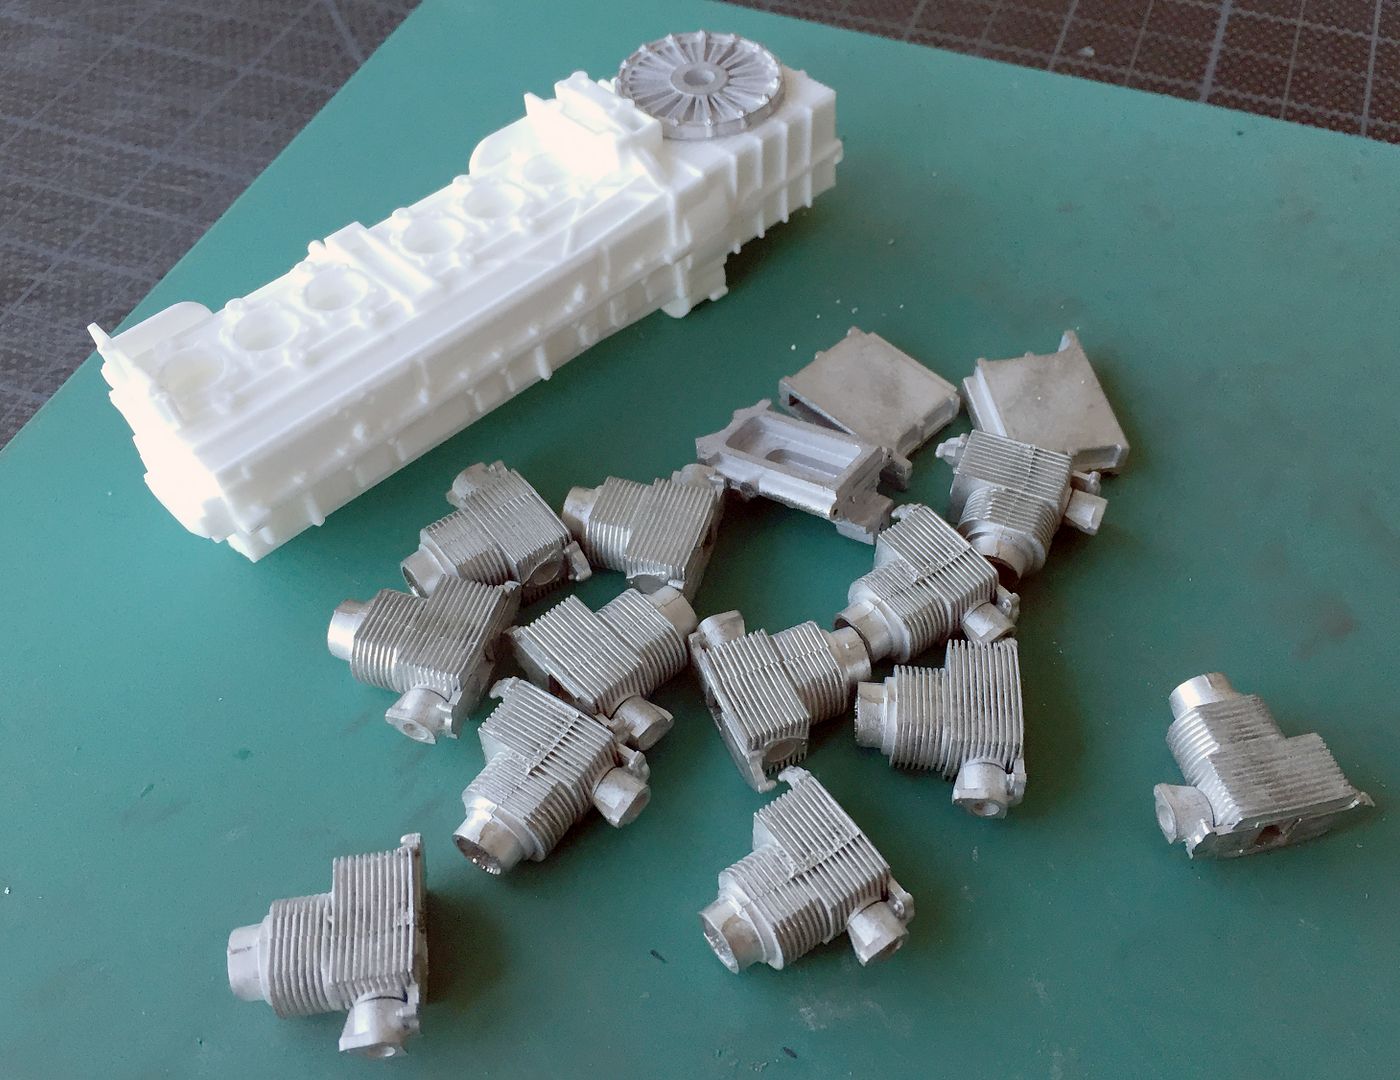
I have not (yet) cleaned or polished each part with the brass wheel - merely filed off extra sprue or defects to make sure every thing fits together nicely.
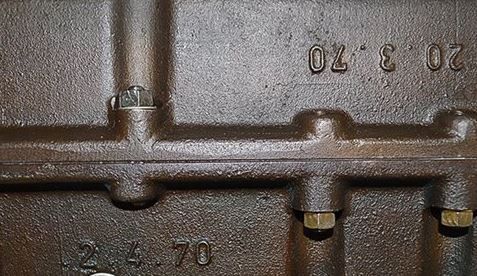
All these first parts are castings on the 'real' engine as well, so the rougher surface would be accurate anyway.
For the same reason, I might not bother replacing most of the molded in bolts - maybe just a few
Also with this in mind, I'll only file/sand off split lines where needed. For example, there is quite a prominent tooling mark visible on the 'cooling fins' of each head - won't be seen...

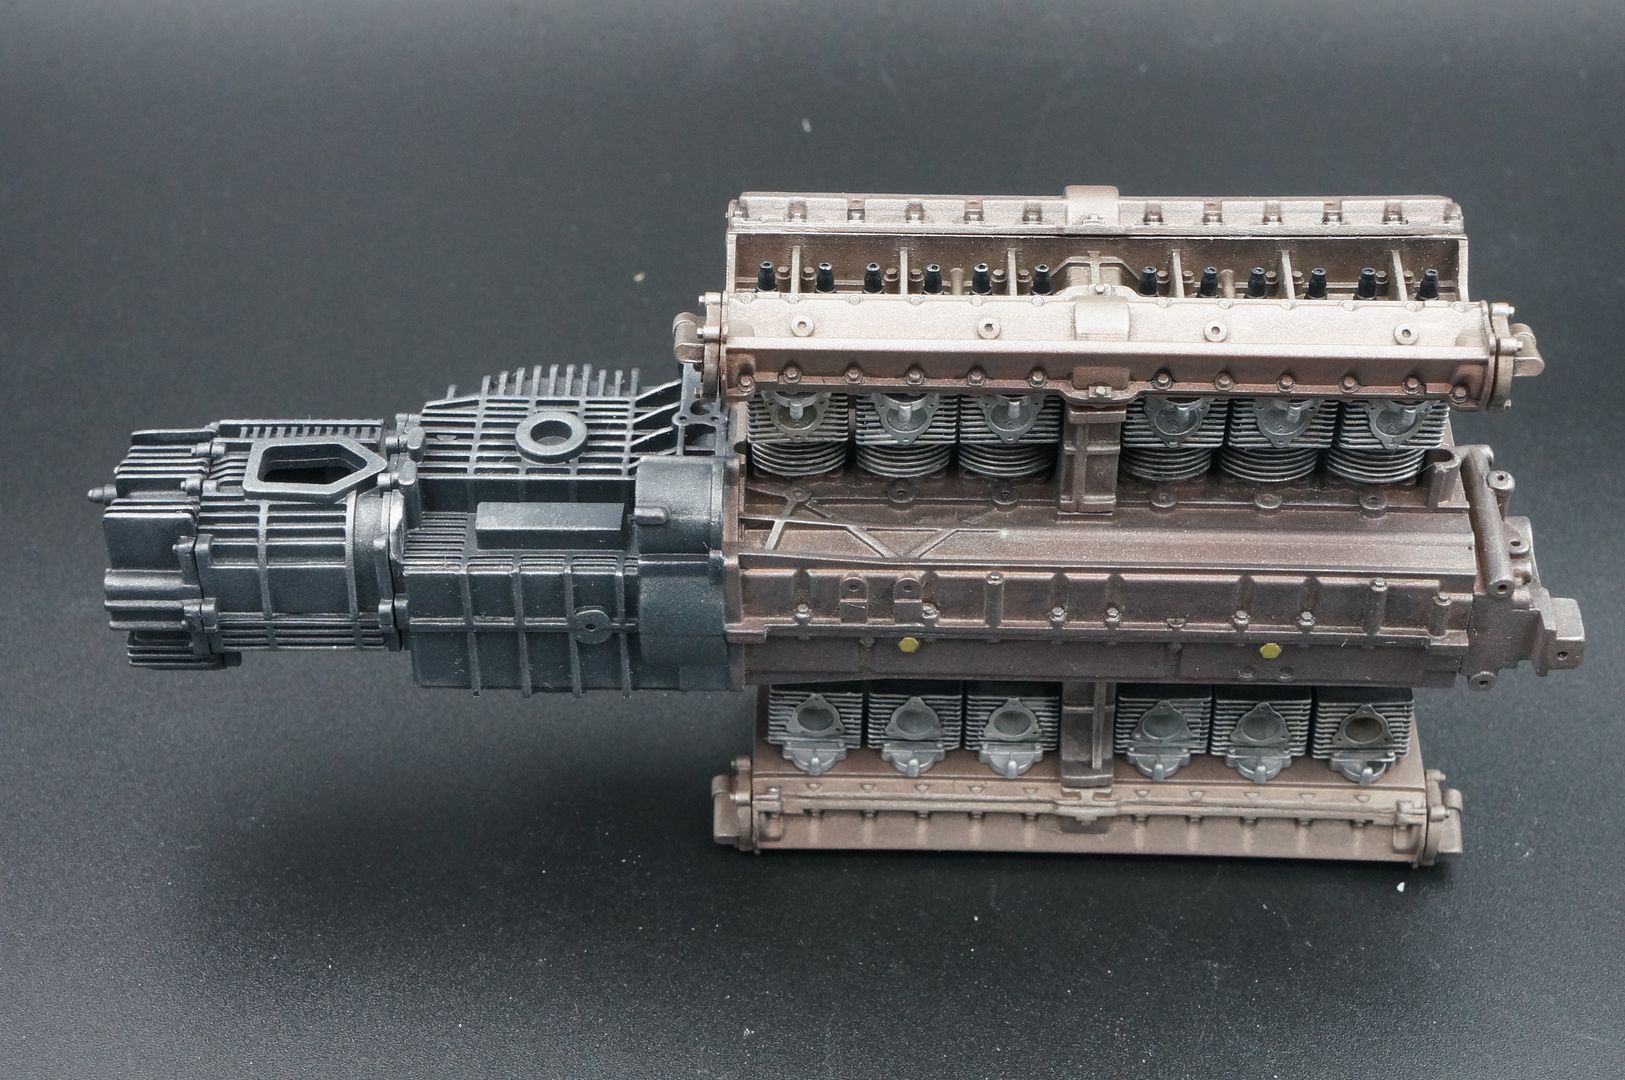
An exciting start working on the individual cylinder heads!
Might get a chance to assemble something tonight, then I'll take some better pictures - but it's a start!
Trying to figure out engine colour...a lot of the builds of similar cars (917 LH) show ali-coloured engines - MFH suggest much 'darker; colors.
Anyway - great source of engine pictures here:
http://www.pelicanparts.com/vasekauction/engine_in...
...showing browns and iron-type colours. Lots of shades...
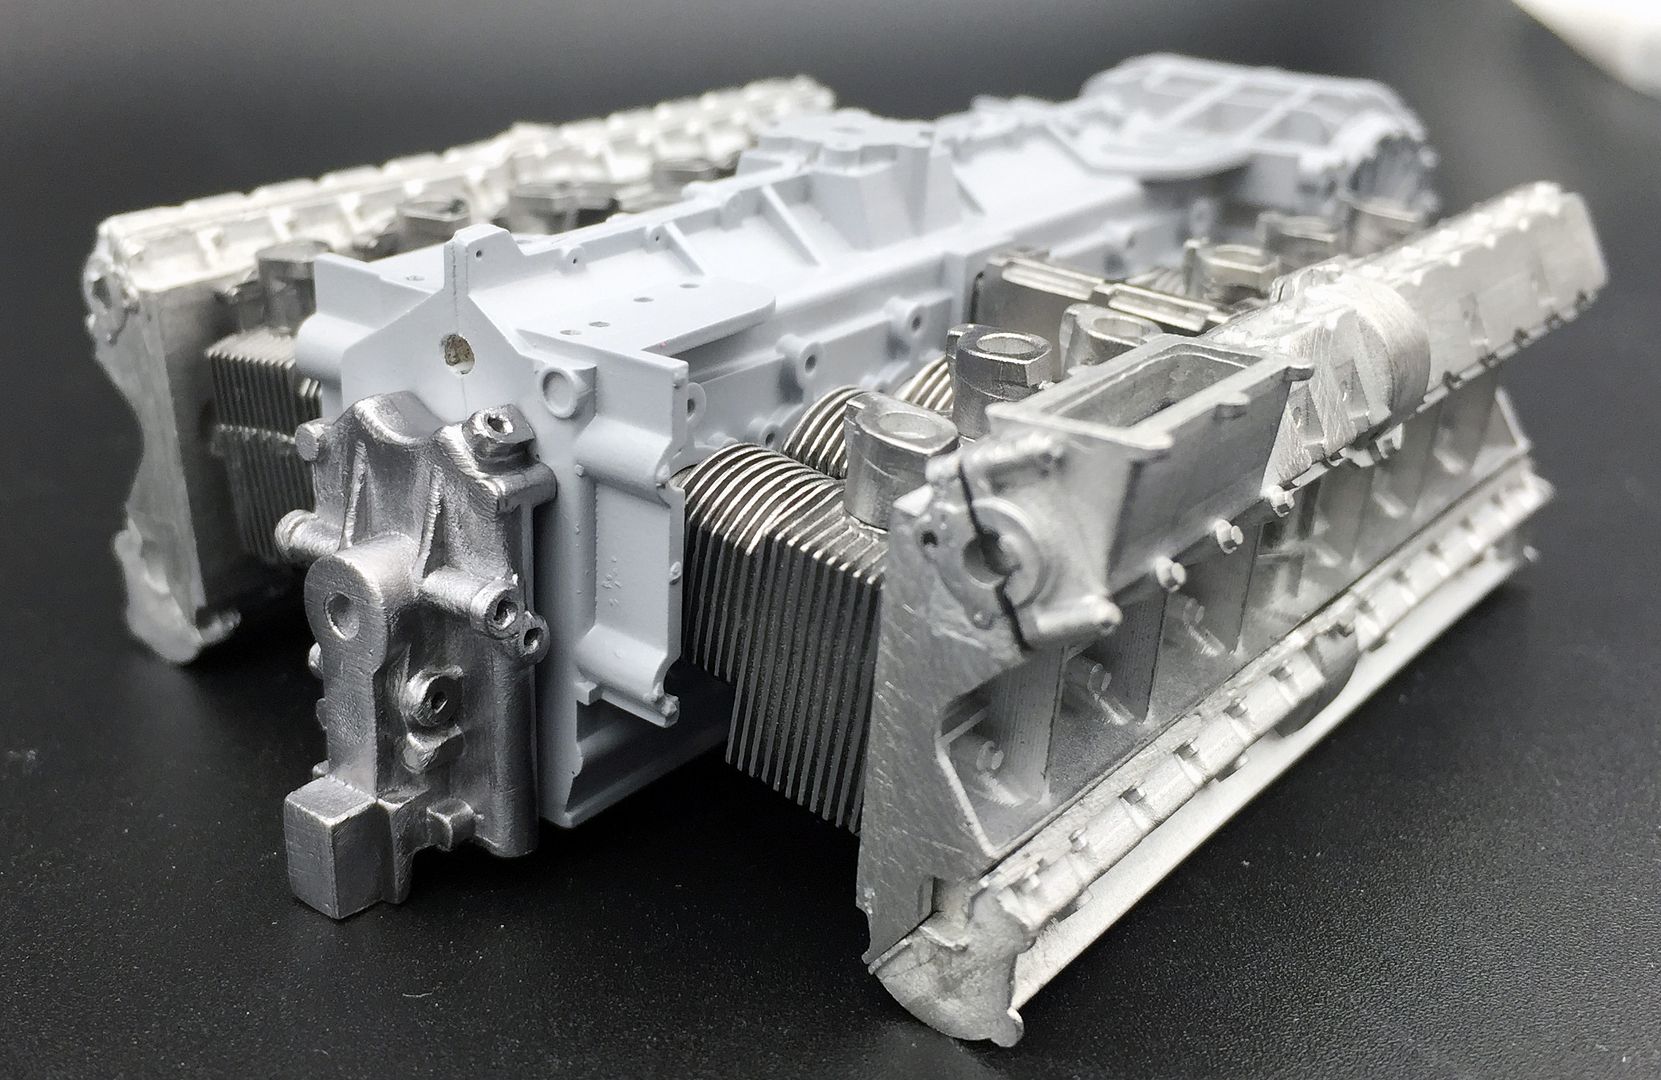
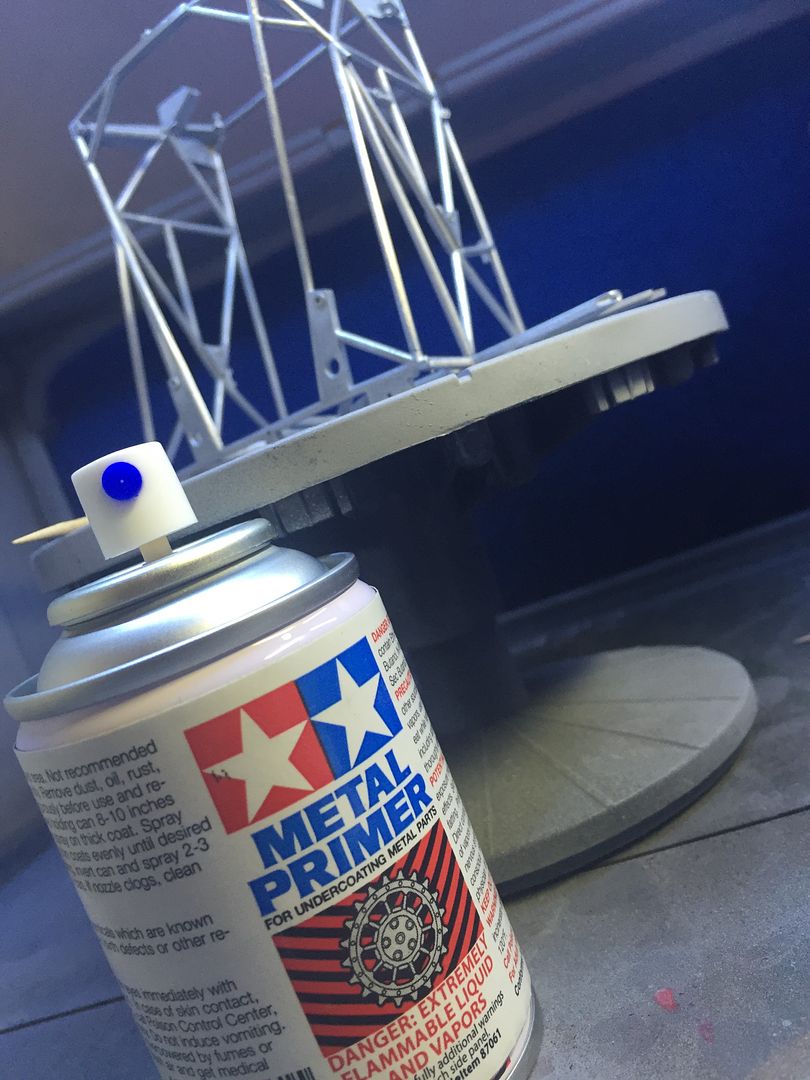
Started a little bit of priming...
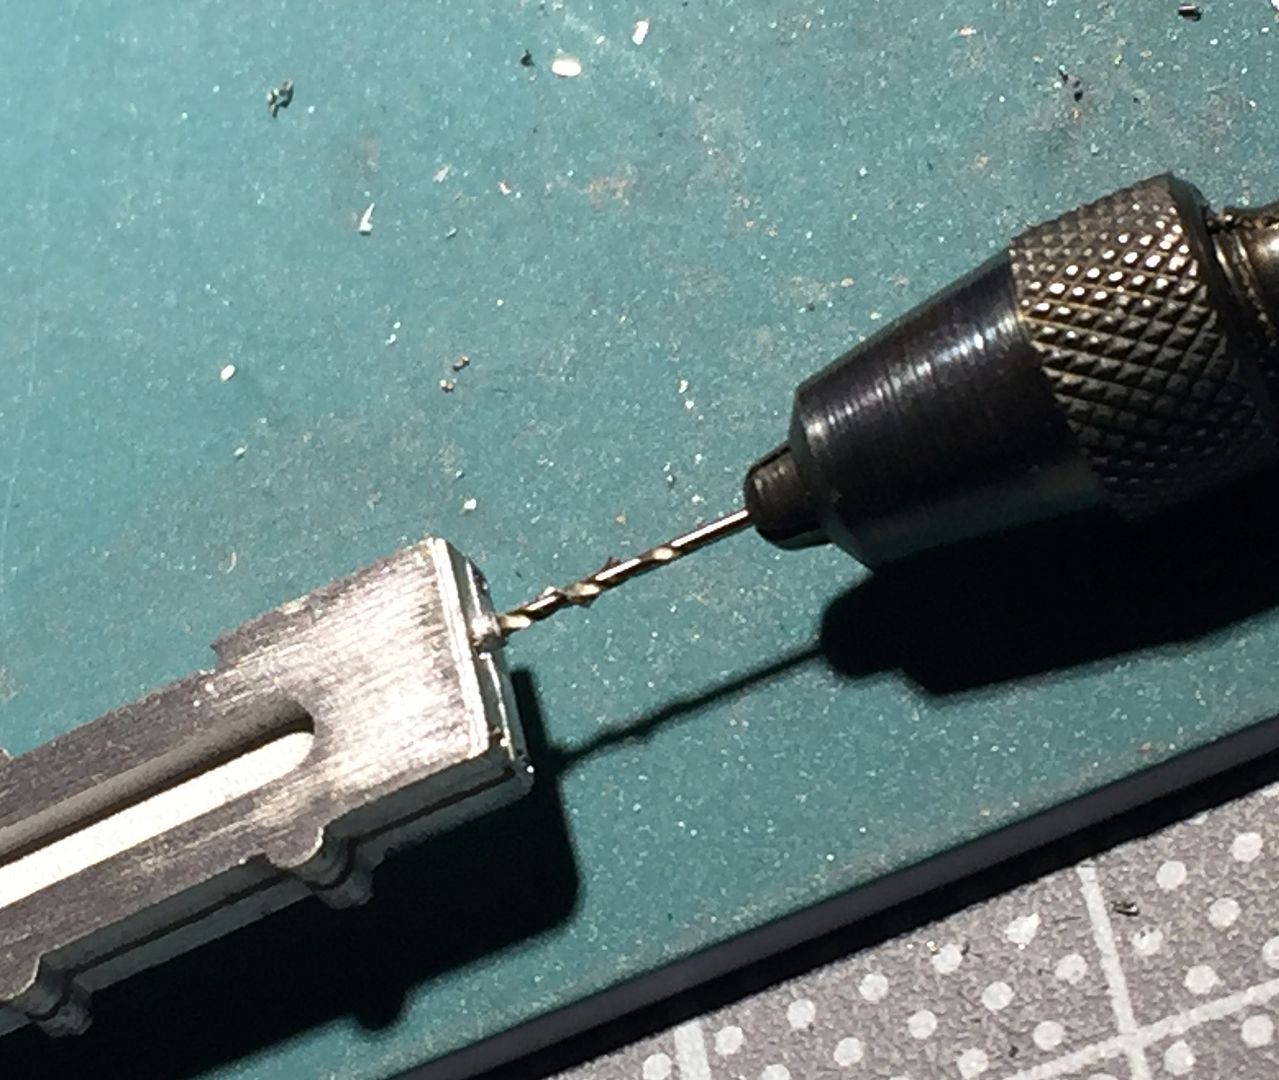
Cleaned off swarf and molding lines where applicable, then drilled any holes I think I need, using teh MFH cast marks as the guide obviously - they show you where you usually need to drill a deeper hole...I also removed a few cast-in nut * bolt detail, where I will replace with turned detail parts, from the likes of RB Motion etc...
Had to try a 'balancing-act' dry fit! Everything will look wonky as nothing is glued - that applies to all the following pictures..
I used this to clean the resin...smelly stuff. I might dry the fizzy denture pills that others have mentioned before!

I sprayed a 'squirt' of the Tamiya metal primer on the metal detail, then used the 'normal' fine detail grey primer for the main resin part - probably not necessary for that small metal disc in reality...
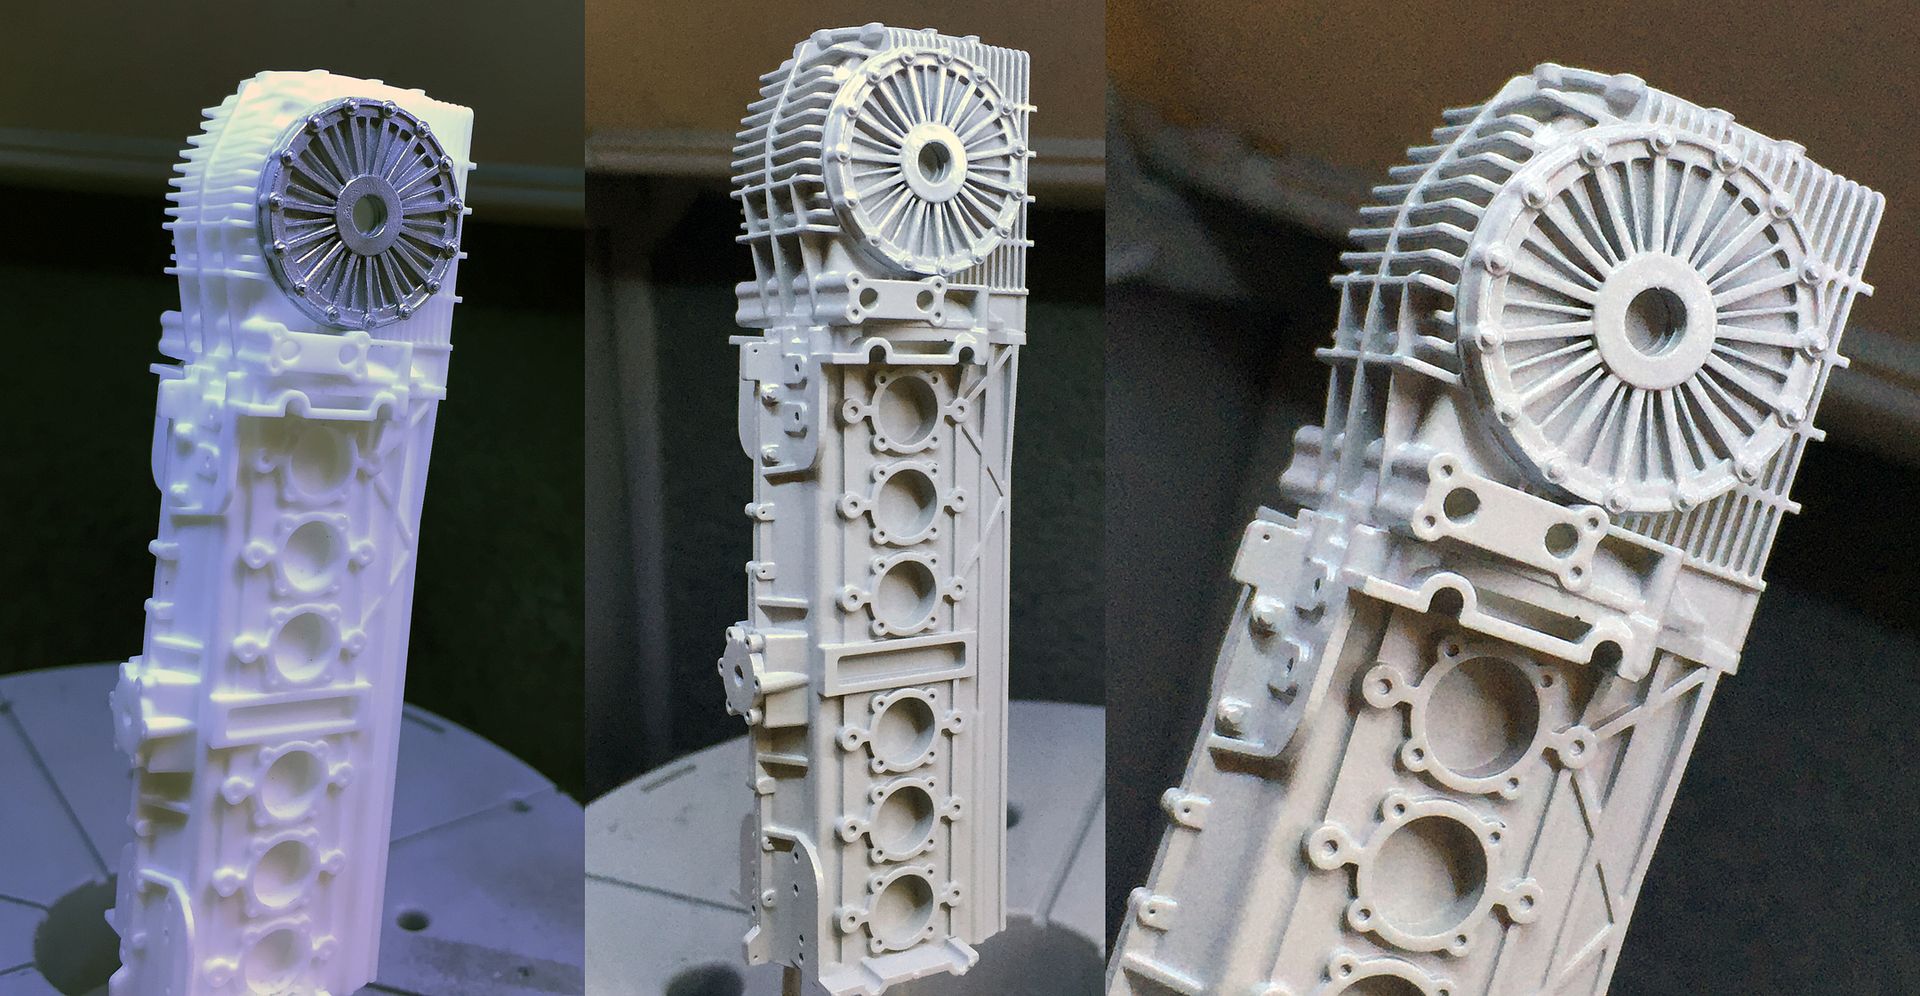
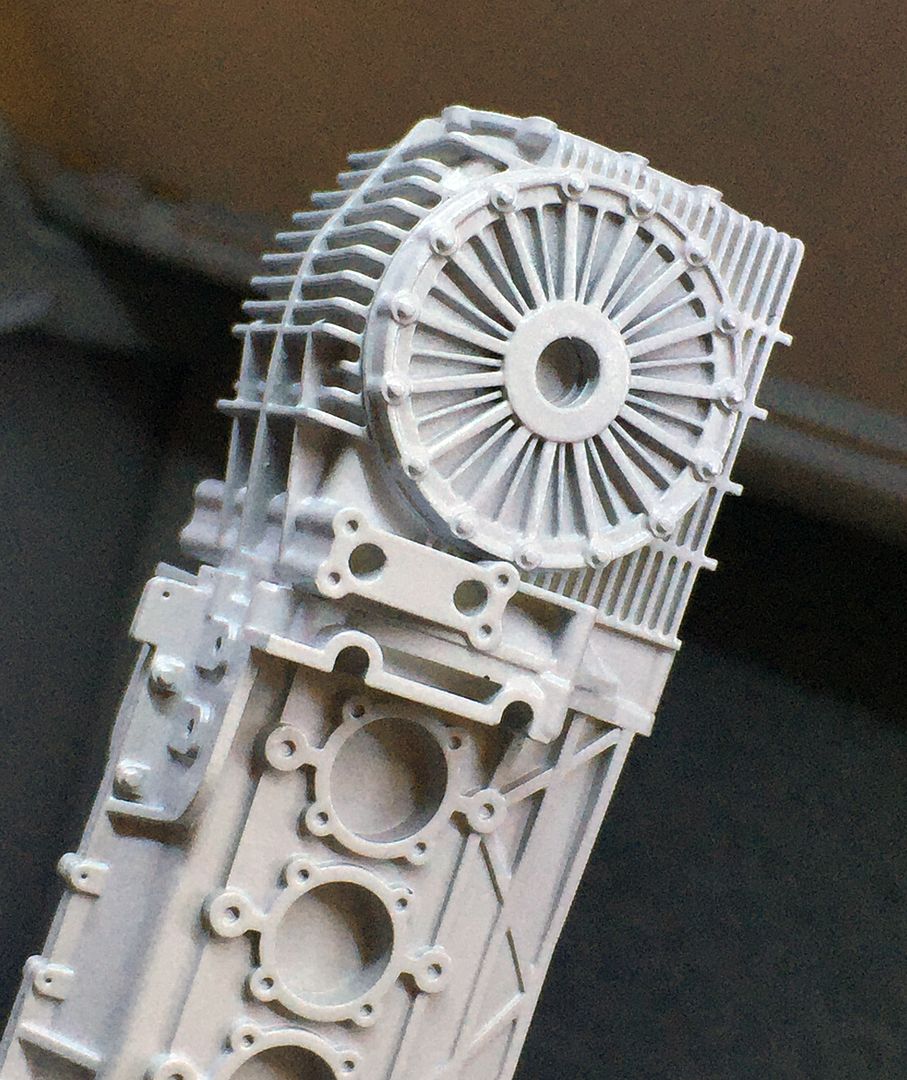

I used the metal etch primer on the cylinder heads and other metal parts...
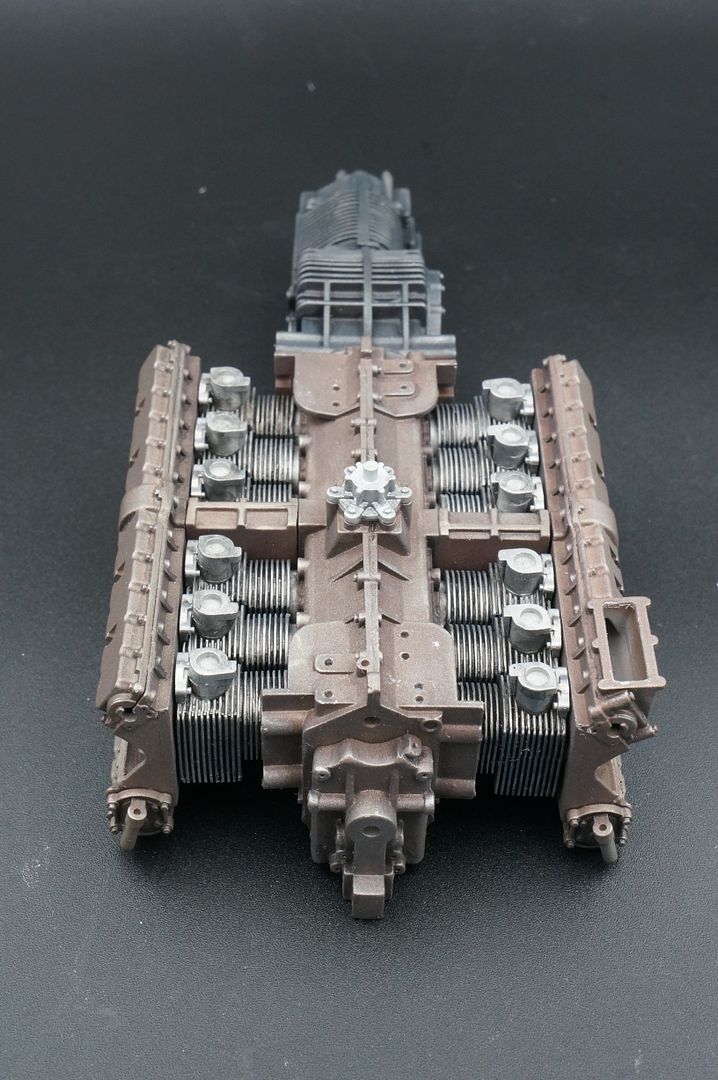
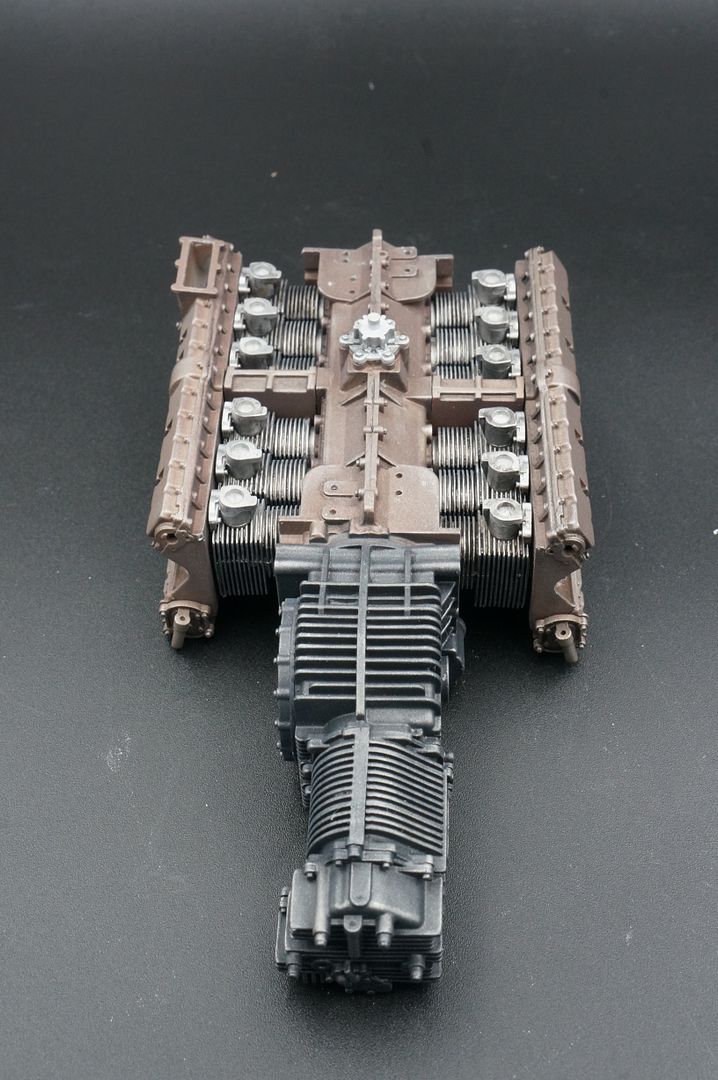
Then of course some more 'test' fitting - no glue, so wonky - but gives an idea of what the engine will look like - before it is all covered up with shrouding that is!
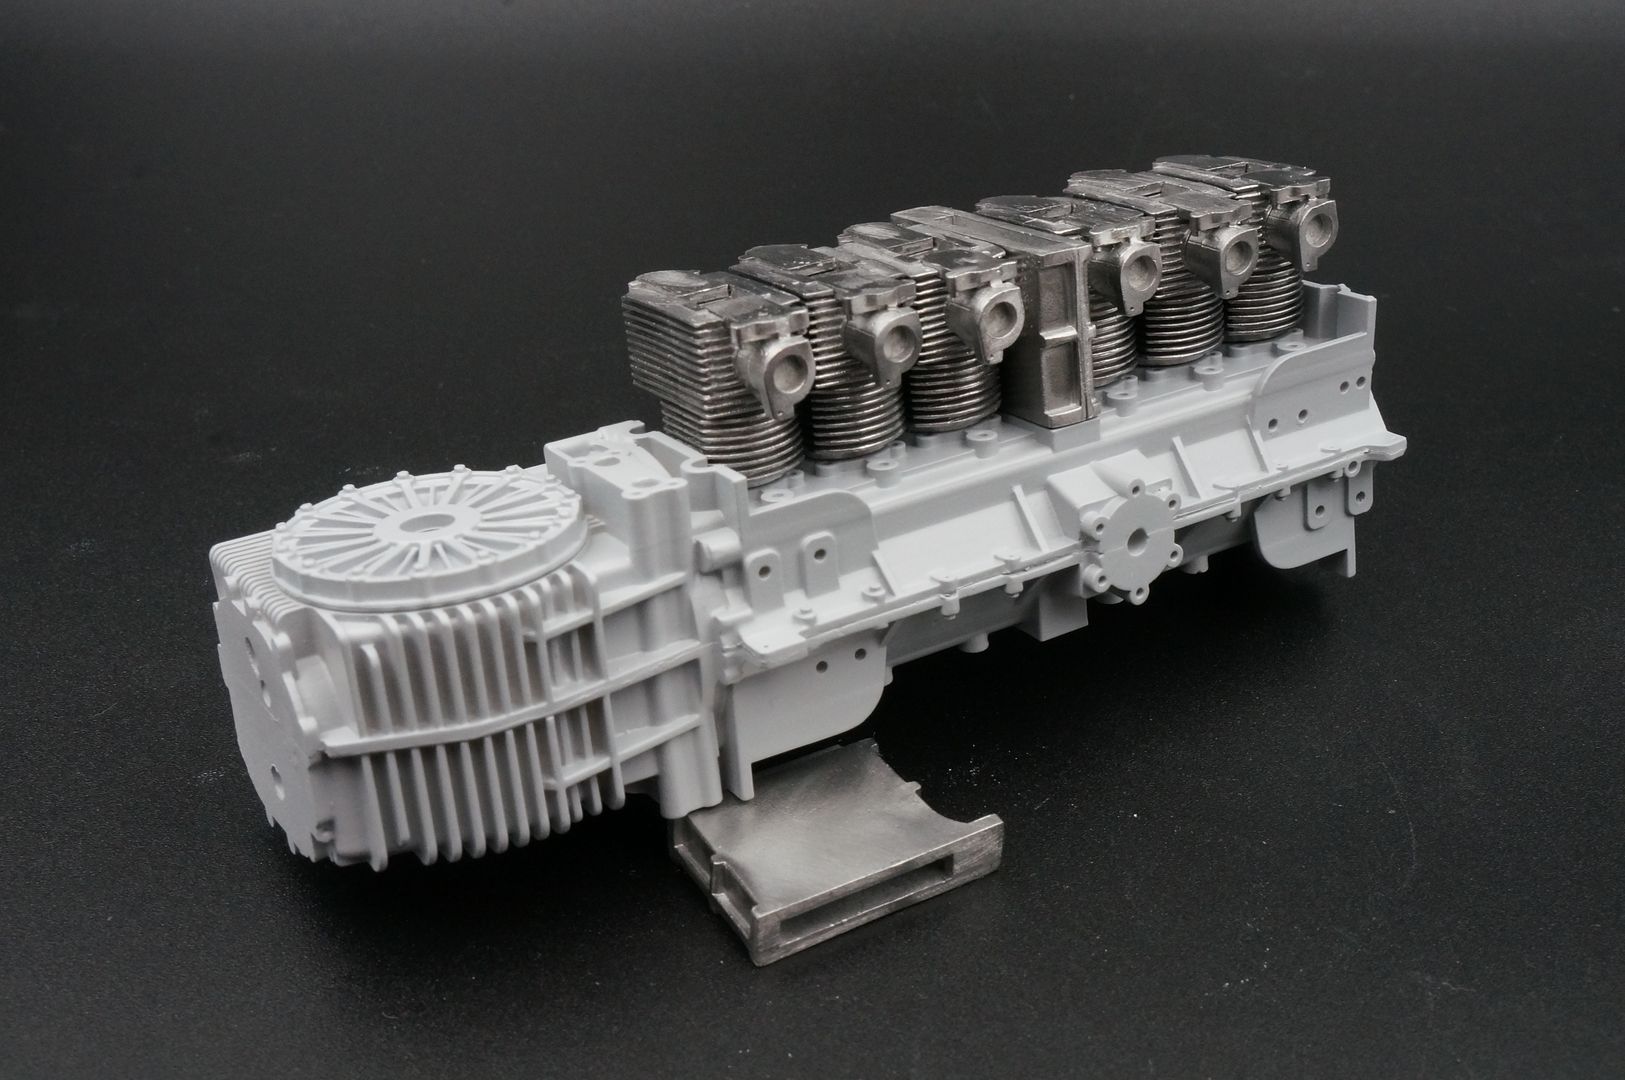
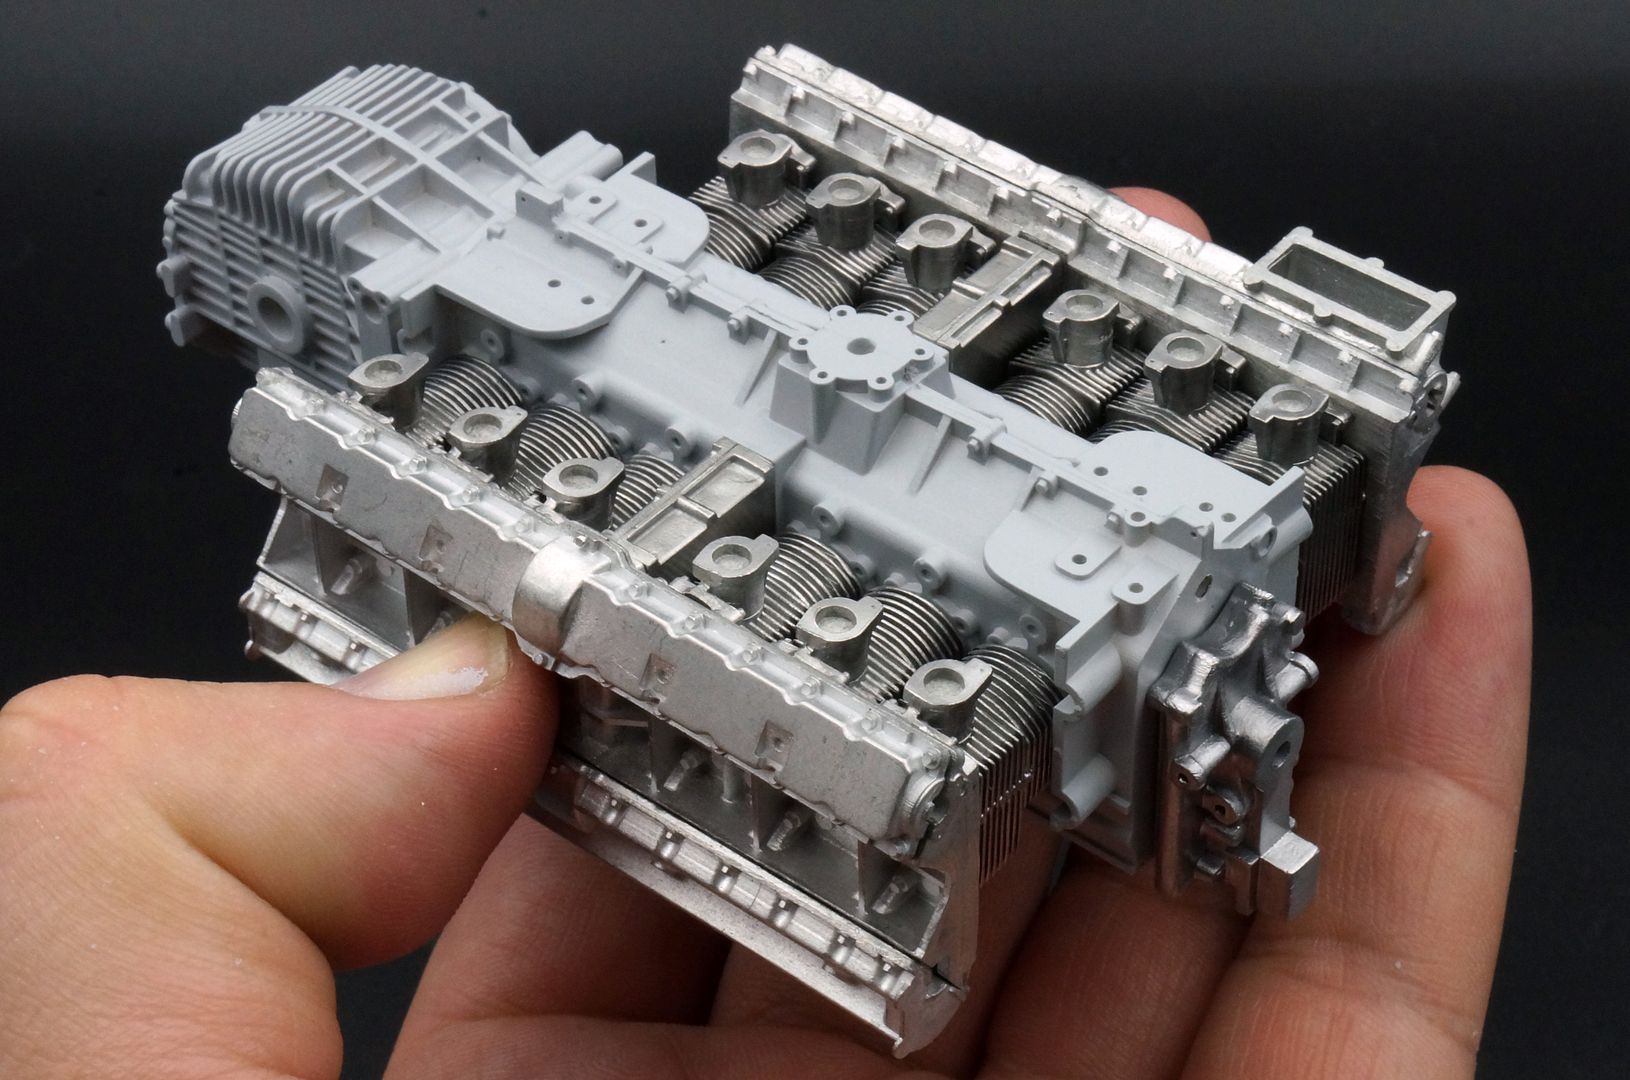
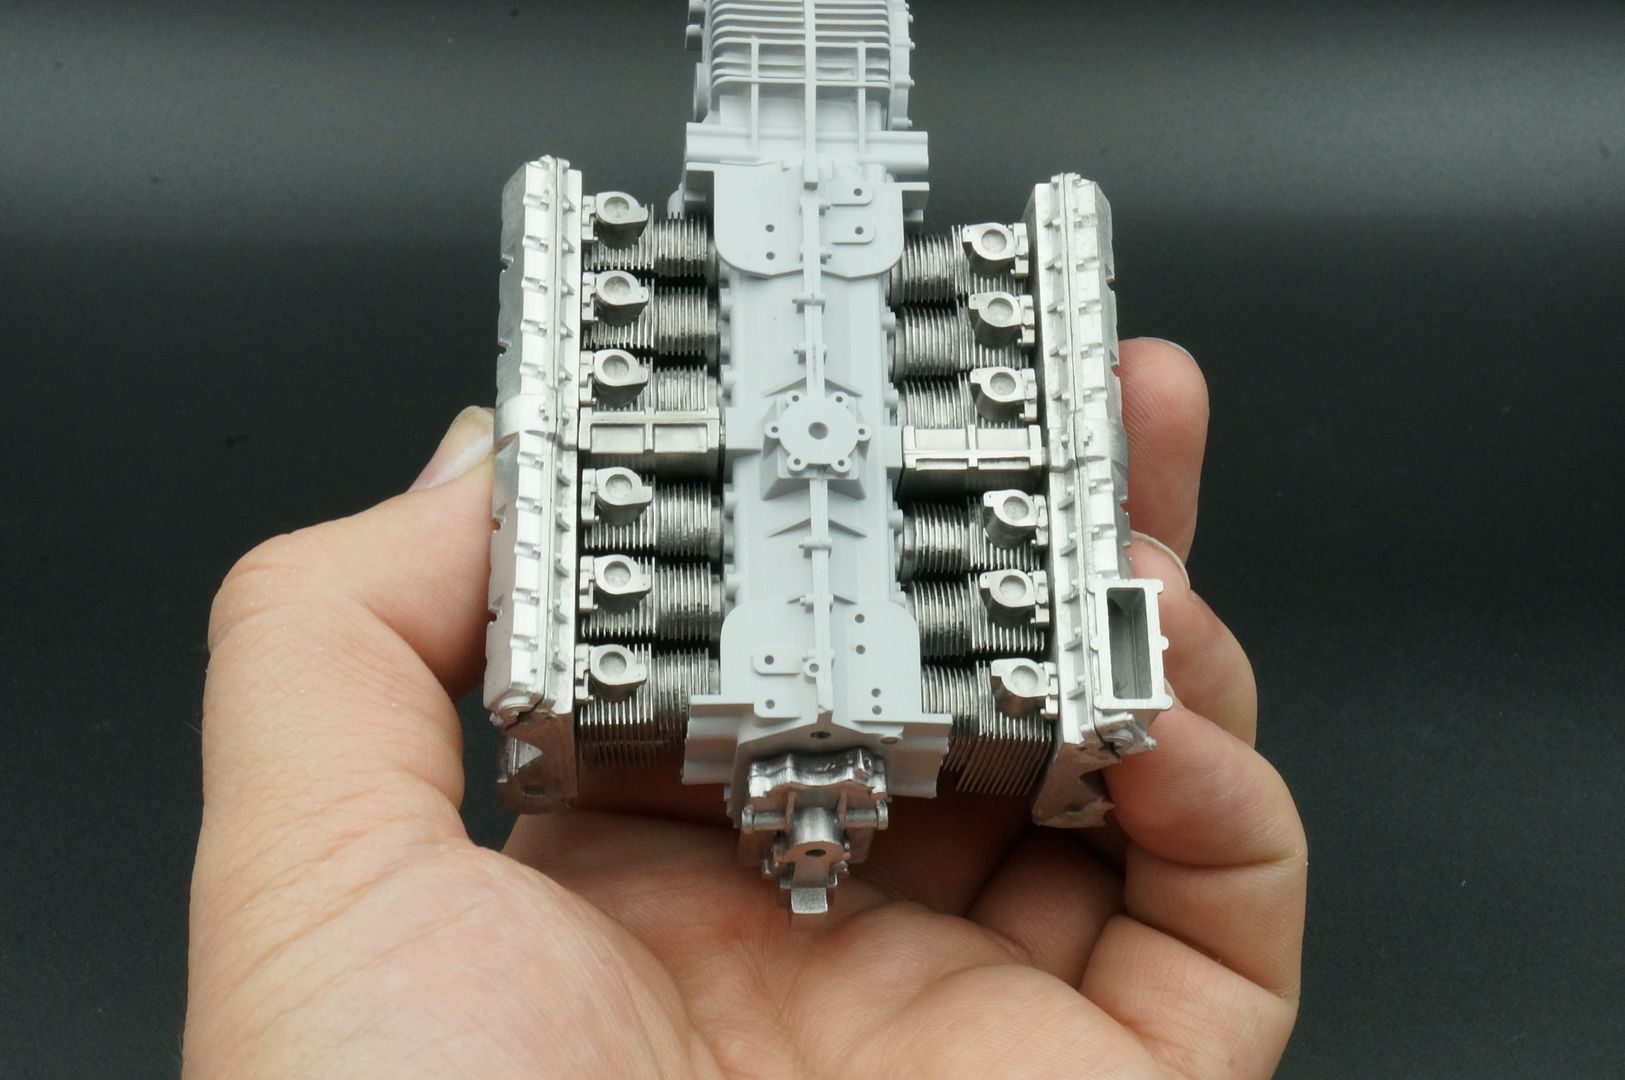
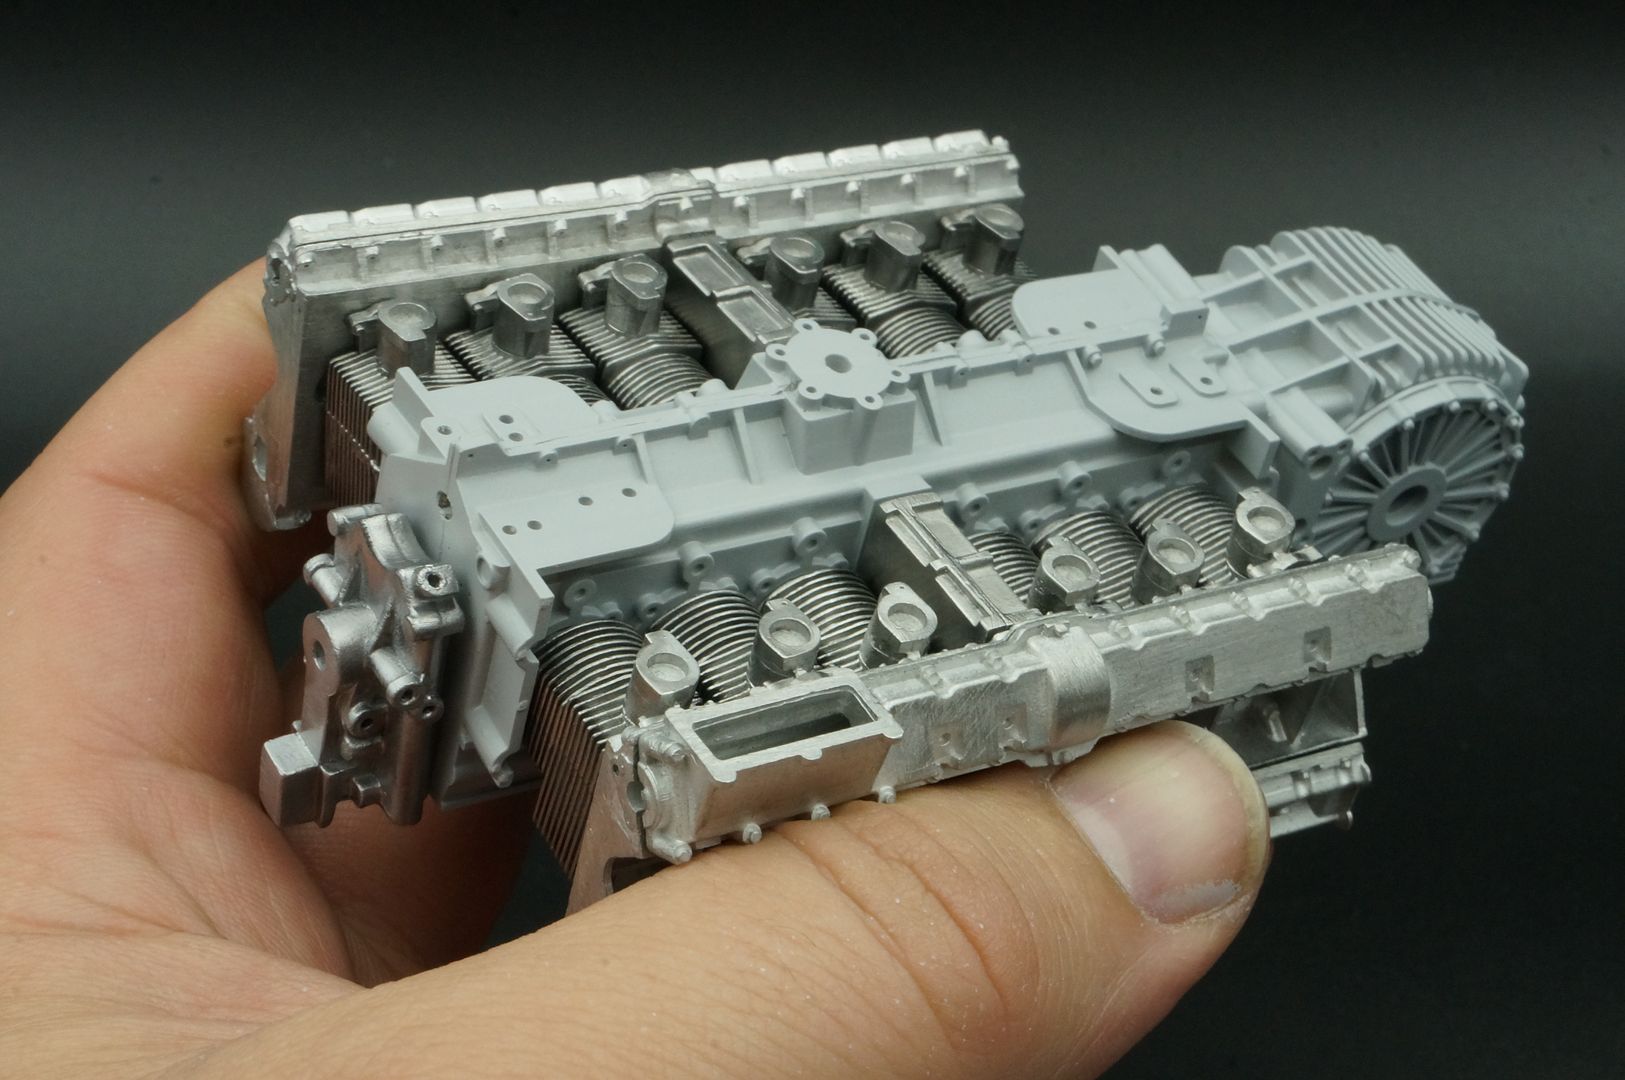
Everything balanced here!
Wish I had a shed. Or spare room to do this...
I have not (yet) cleaned or polished each part with the brass wheel - merely filed off extra sprue or defects to make sure every thing fits together nicely.
All these first parts are castings on the 'real' engine as well, so the rougher surface would be accurate anyway.
For the same reason, I might not bother replacing most of the molded in bolts - maybe just a few
Also with this in mind, I'll only file/sand off split lines where needed. For example, there is quite a prominent tooling mark visible on the 'cooling fins' of each head - won't be seen...
An exciting start working on the individual cylinder heads!
Might get a chance to assemble something tonight, then I'll take some better pictures - but it's a start!
Trying to figure out engine colour...a lot of the builds of similar cars (917 LH) show ali-coloured engines - MFH suggest much 'darker; colors.
Anyway - great source of engine pictures here:
http://www.pelicanparts.com/vasekauction/engine_in...
...showing browns and iron-type colours. Lots of shades...
Started a little bit of priming...
Cleaned off swarf and molding lines where applicable, then drilled any holes I think I need, using teh MFH cast marks as the guide obviously - they show you where you usually need to drill a deeper hole...I also removed a few cast-in nut * bolt detail, where I will replace with turned detail parts, from the likes of RB Motion etc...
Had to try a 'balancing-act' dry fit! Everything will look wonky as nothing is glued - that applies to all the following pictures..
I used this to clean the resin...smelly stuff. I might dry the fizzy denture pills that others have mentioned before!
I sprayed a 'squirt' of the Tamiya metal primer on the metal detail, then used the 'normal' fine detail grey primer for the main resin part - probably not necessary for that small metal disc in reality...
I used the metal etch primer on the cylinder heads and other metal parts...
Then of course some more 'test' fitting - no glue, so wonky - but gives an idea of what the engine will look like - before it is all covered up with shrouding that is!
Everything balanced here!
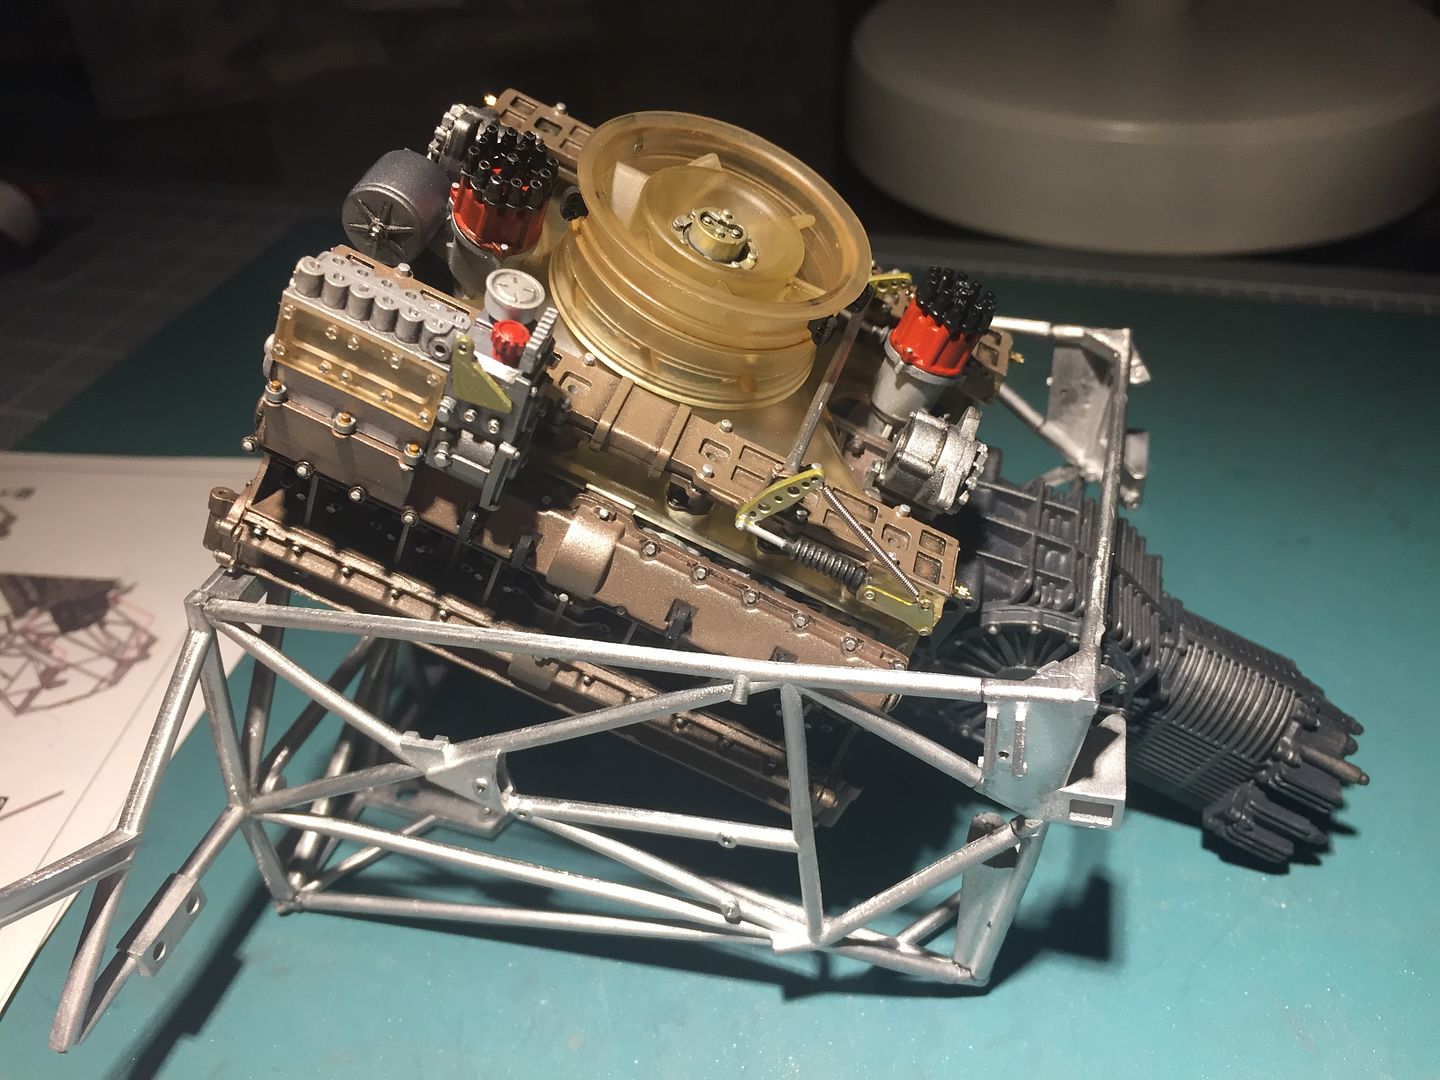
I think a lot of the newer photos of the engines show engines with age and use patina...still not decided on the colors - love the look of recently finished 917 LH engine, which is quite shiny...
...anyway, brief update. Cleaned up, metal etch primed and grey primed a lot of engine bits.
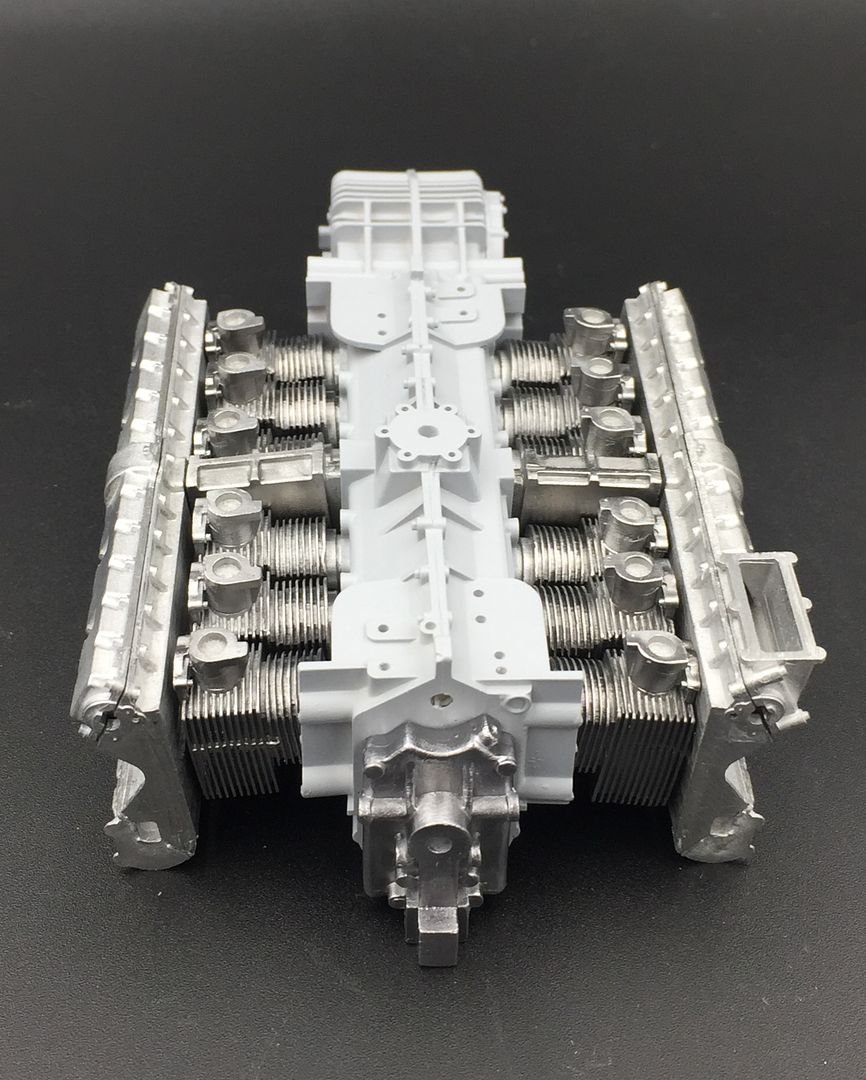
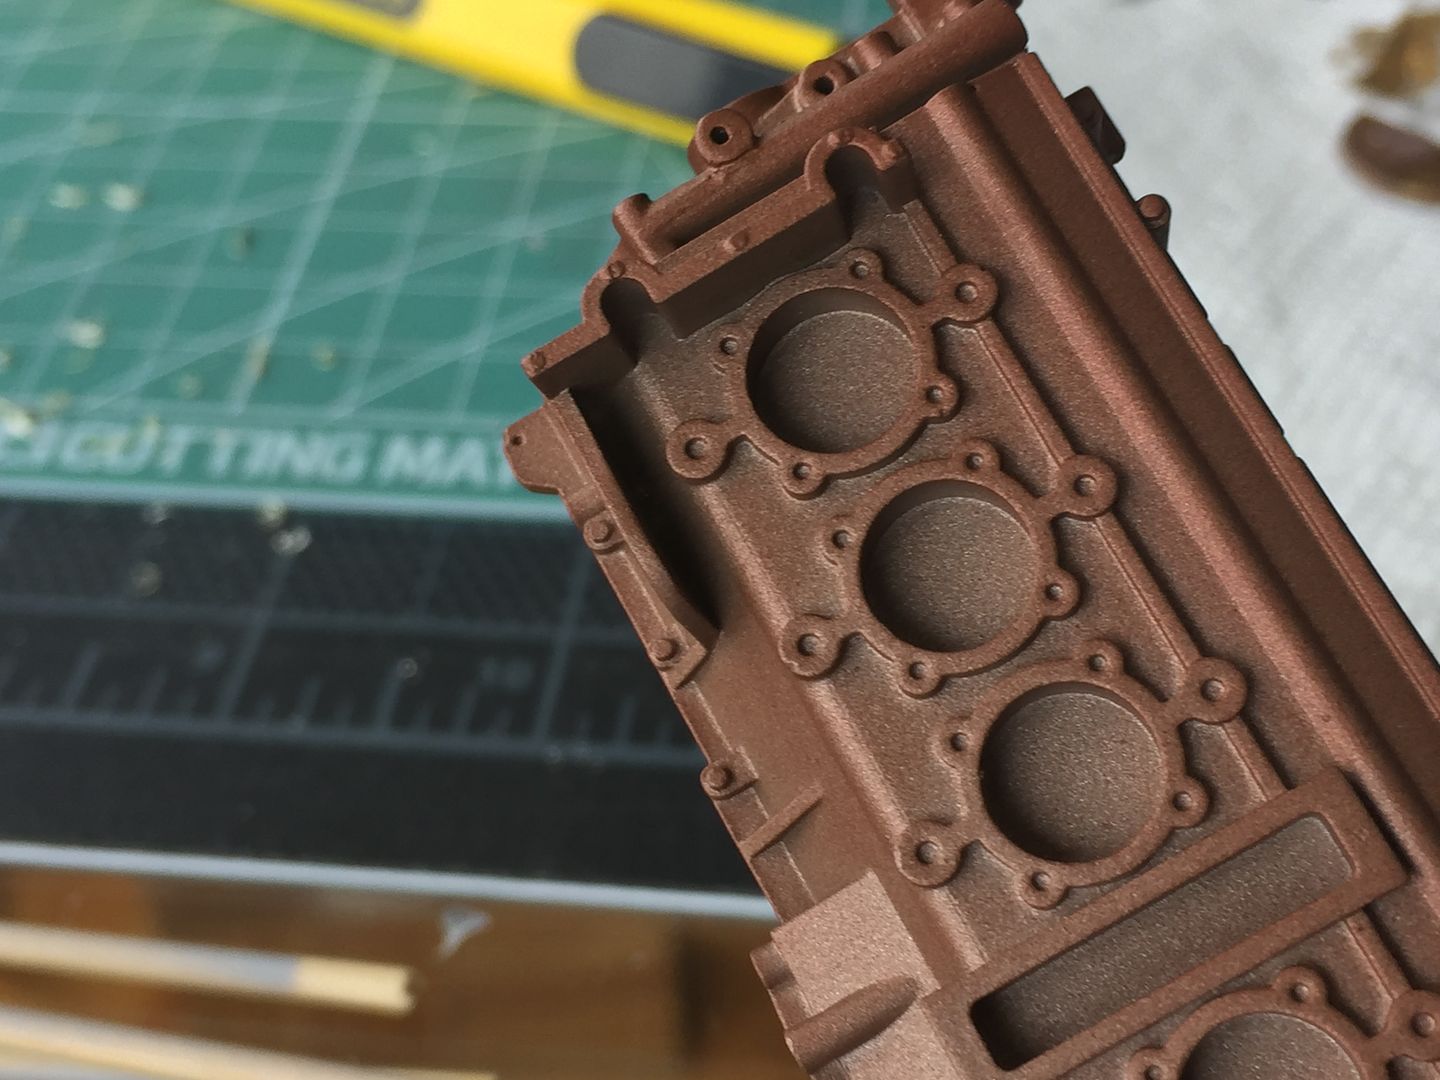
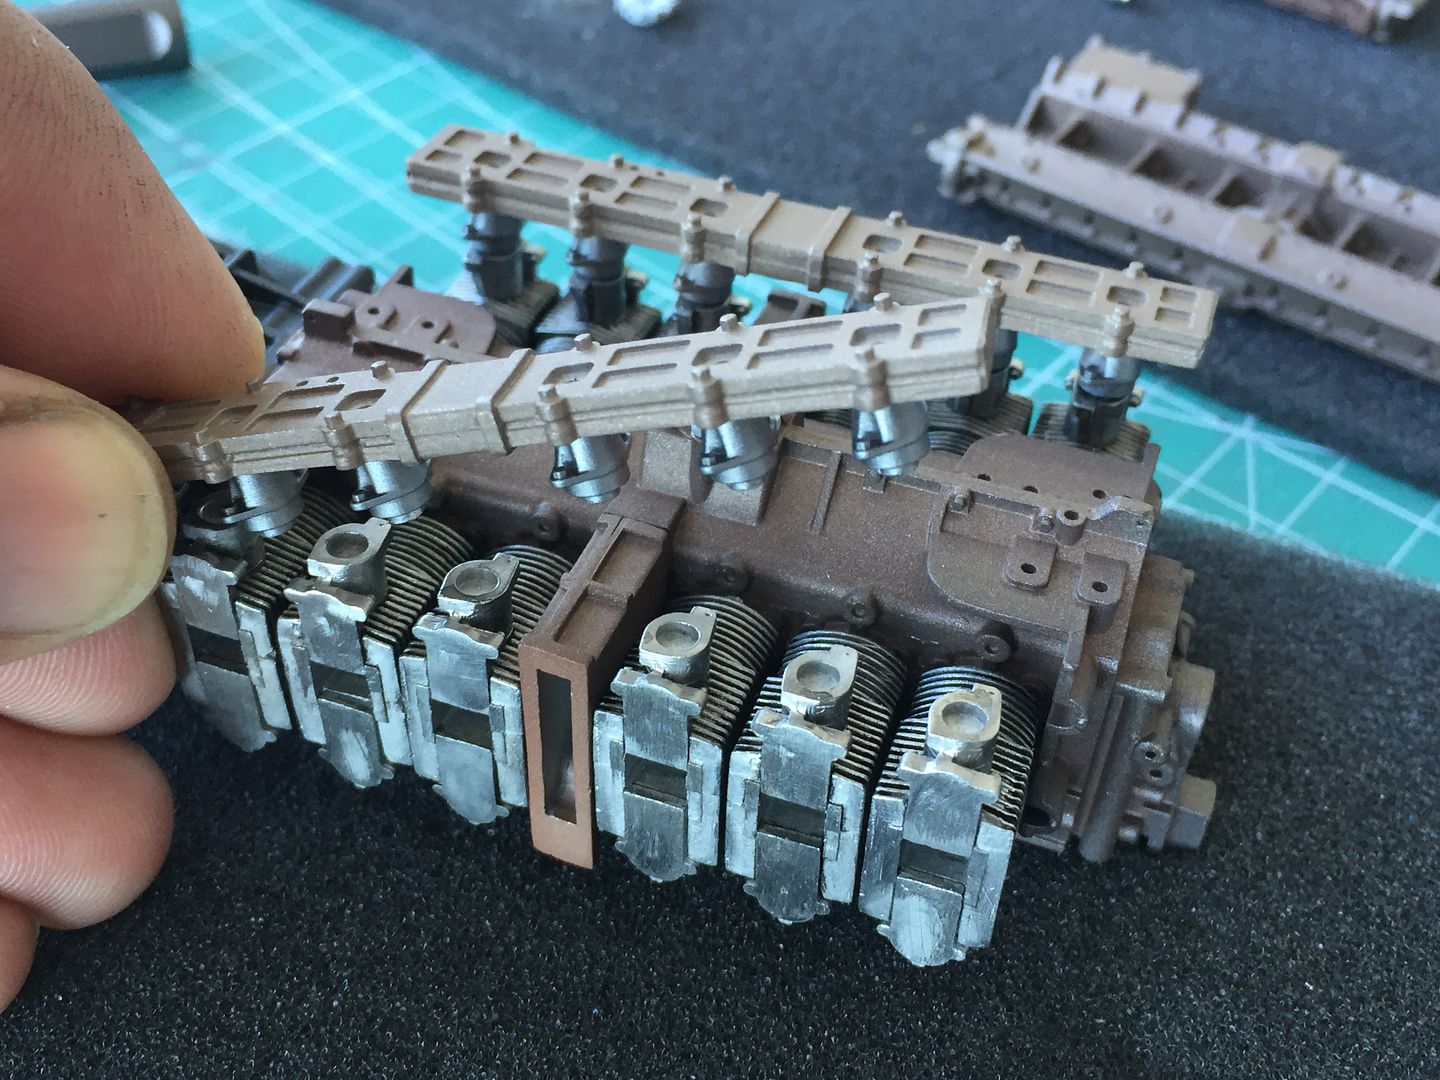
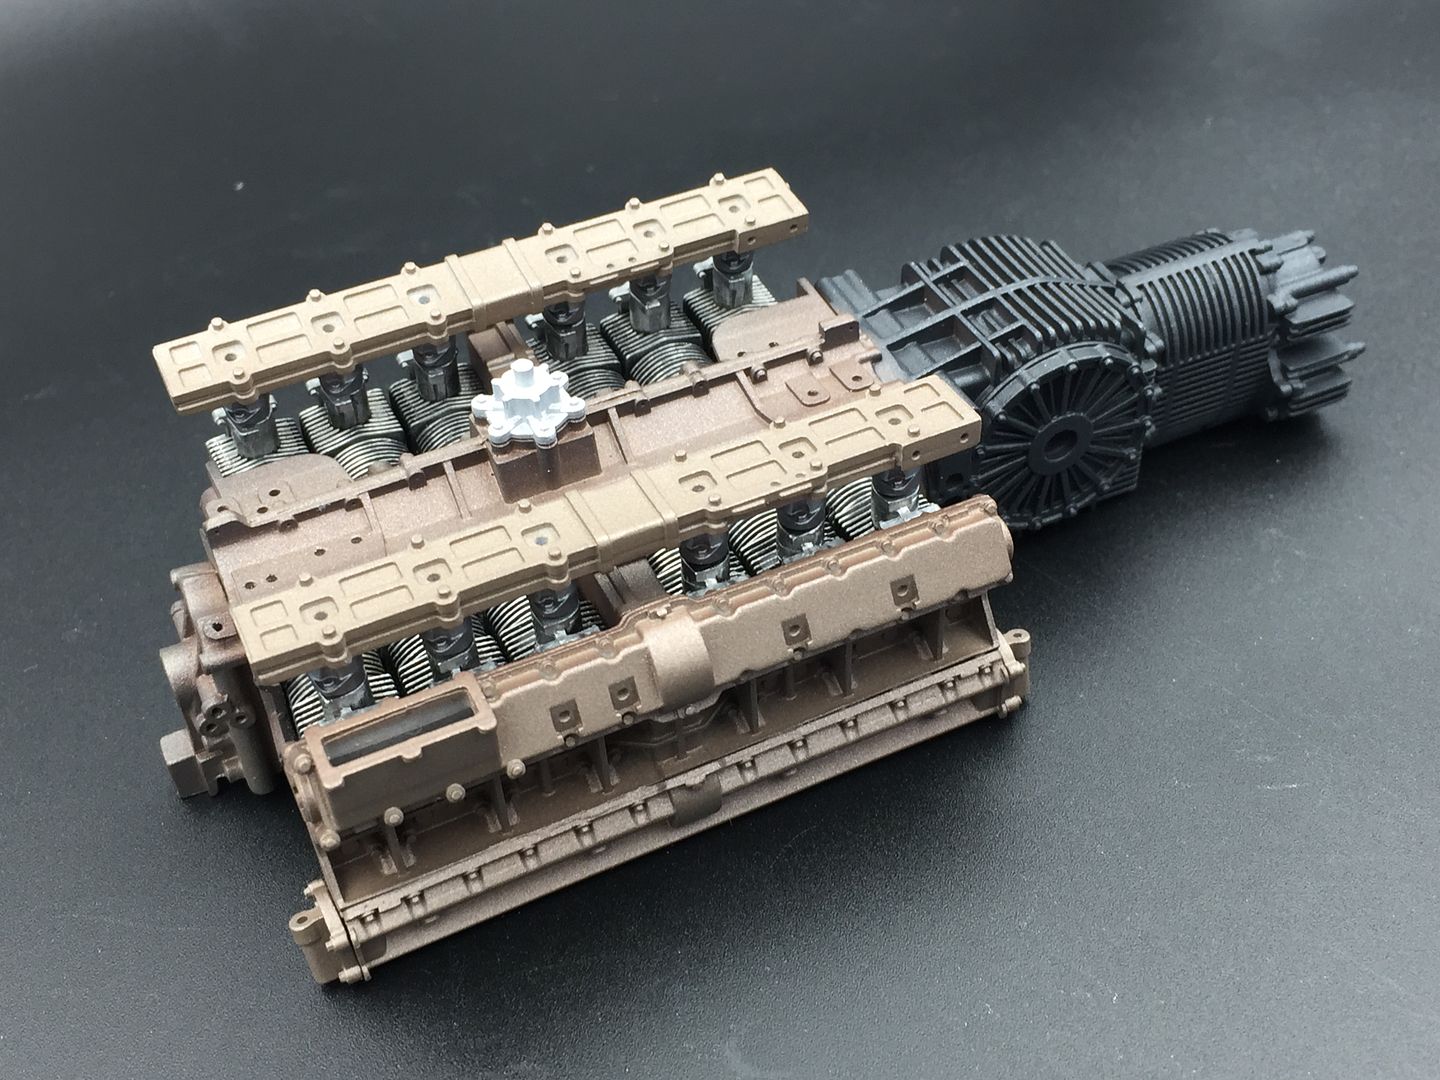
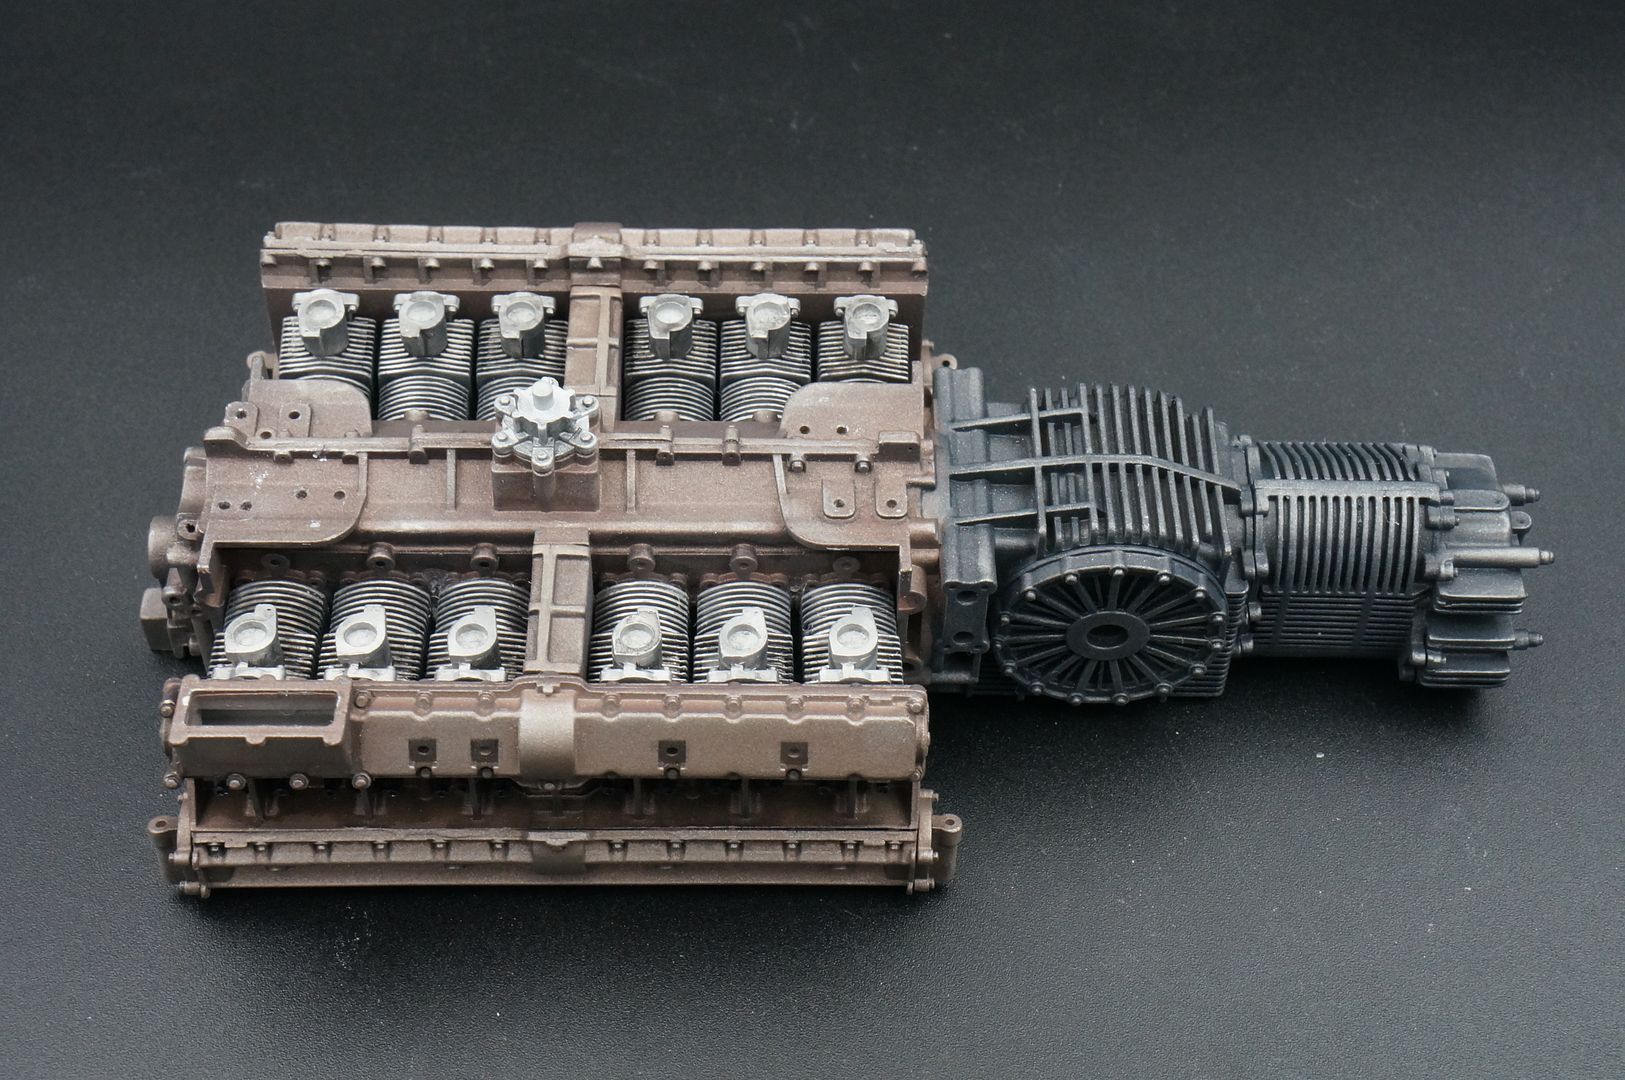
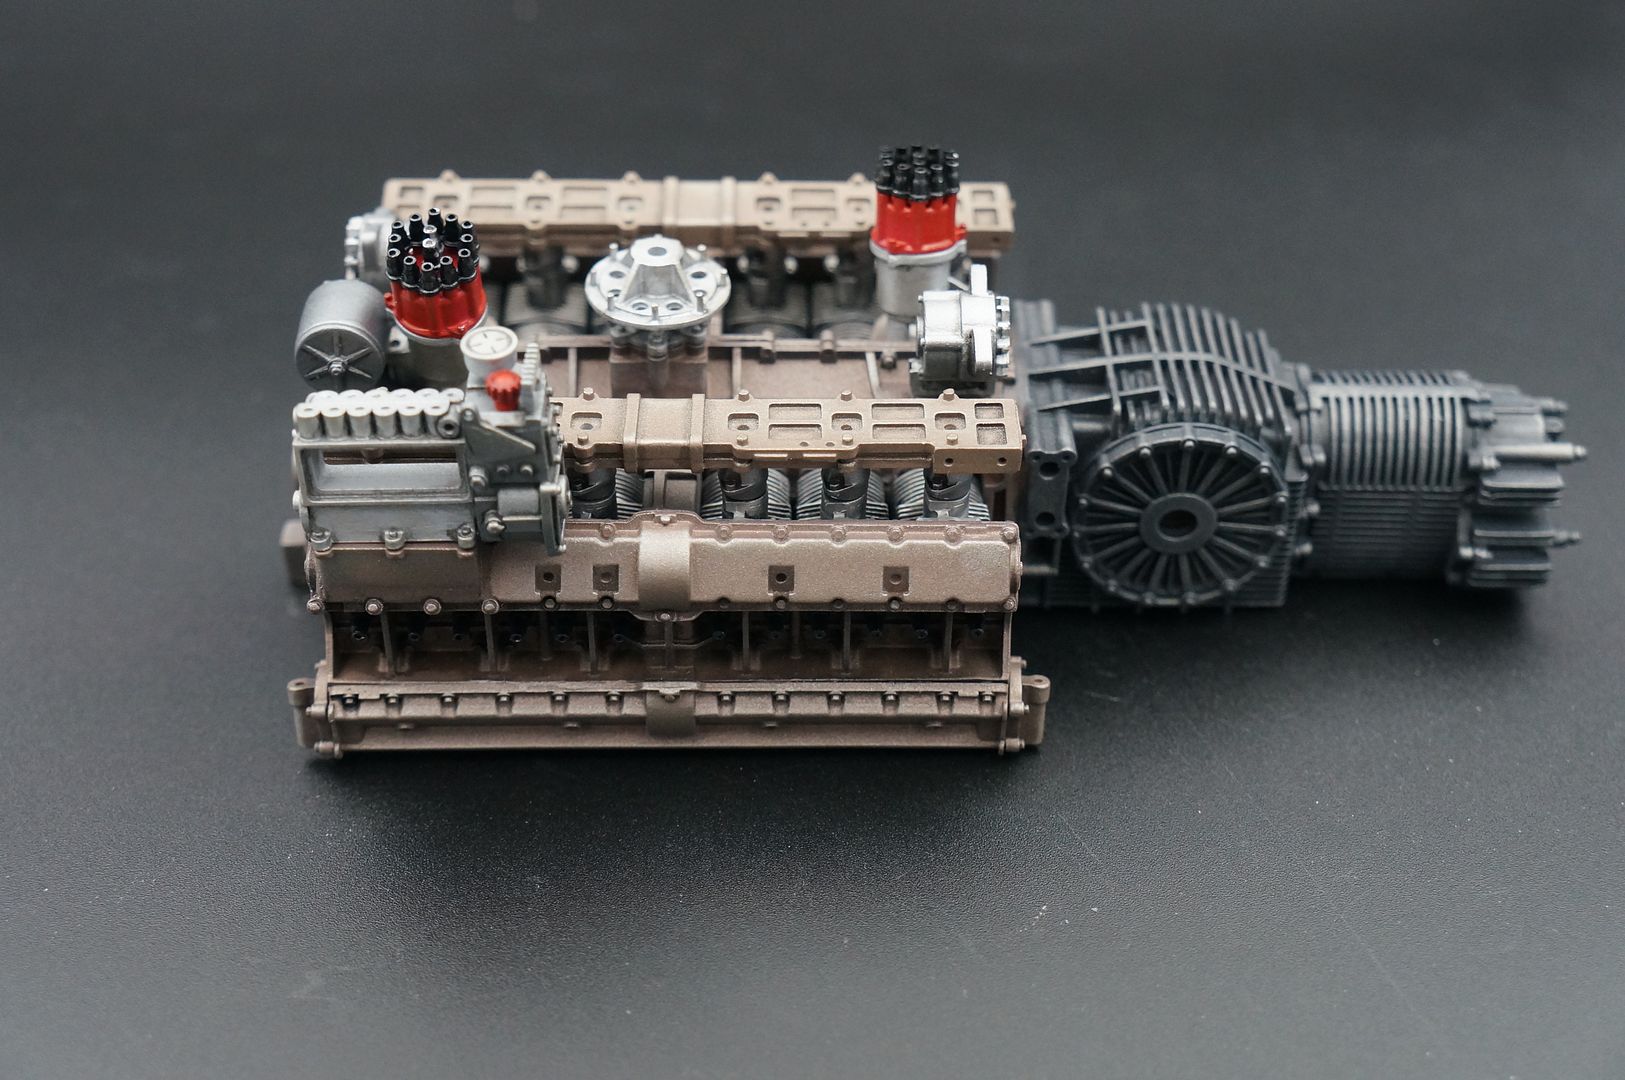
Right- progress...I've chosen to go for the 'brown' look on the engine - most of the pictures show this - it is a sort of 'glaze' that I recognize on my old VW engine - like an un-polished casting, with oxidization, fuel varnish etc etc - I am sure that is not WHY it is that color, but best way to describe...
A few ref images:
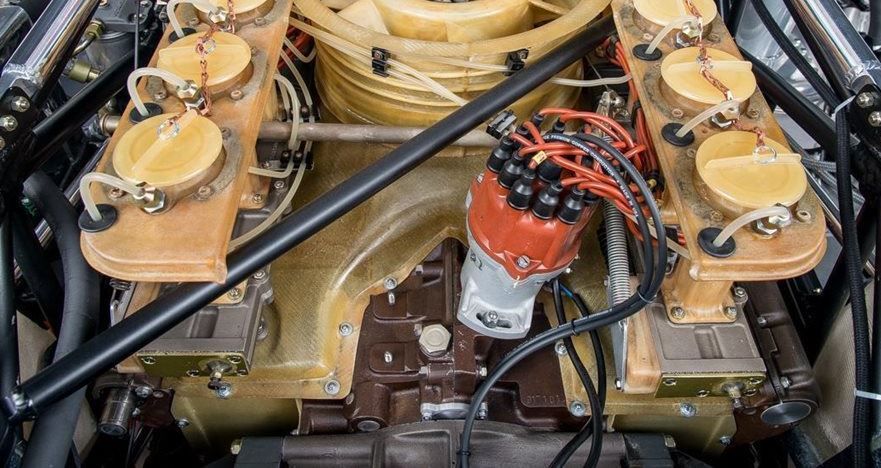
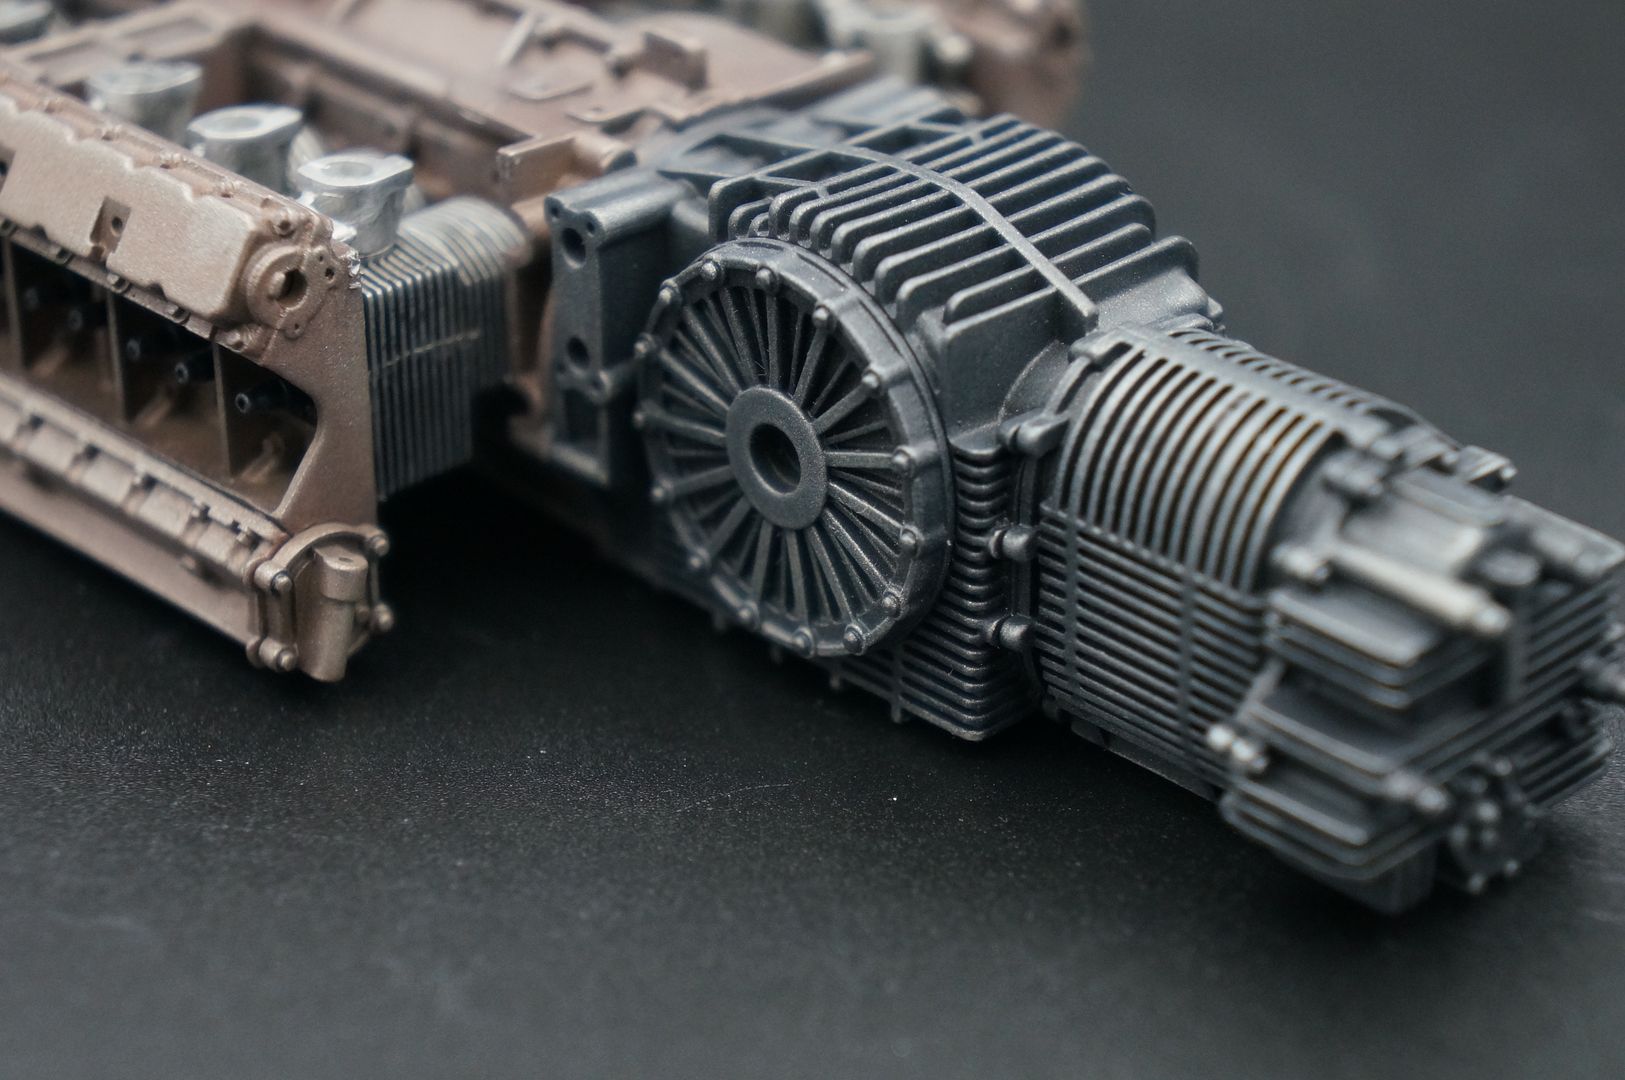
- you can see the main crank case colour, the cam shaft 'top' of the engine (either side on this boxer-style engine) and also the slightly lighter top/side pieces that are below the air intake trumpets. The gearbox is a much darker paint finish - semi-gloss black/gun metal.
I had to mix the paint - a mix of iron, gun metal, bronze, black, white etc etc - until it looked about right.
First layer was too metallic and 'bronze' - it was trial and error to be honest, and I'm still tweaking it with shading, more spray, buffing, pastels etc etc!
I really don't think there is a 'right' colour on these - every car looks different. All I know is that I haven't seen any 'polished' ali castings.
- the last photo shows the pieces between the inlet trumpets and the cylinder heads - a bit lighter than the main parts. These other bits needed to be dulled down a bit.

...a bit better.
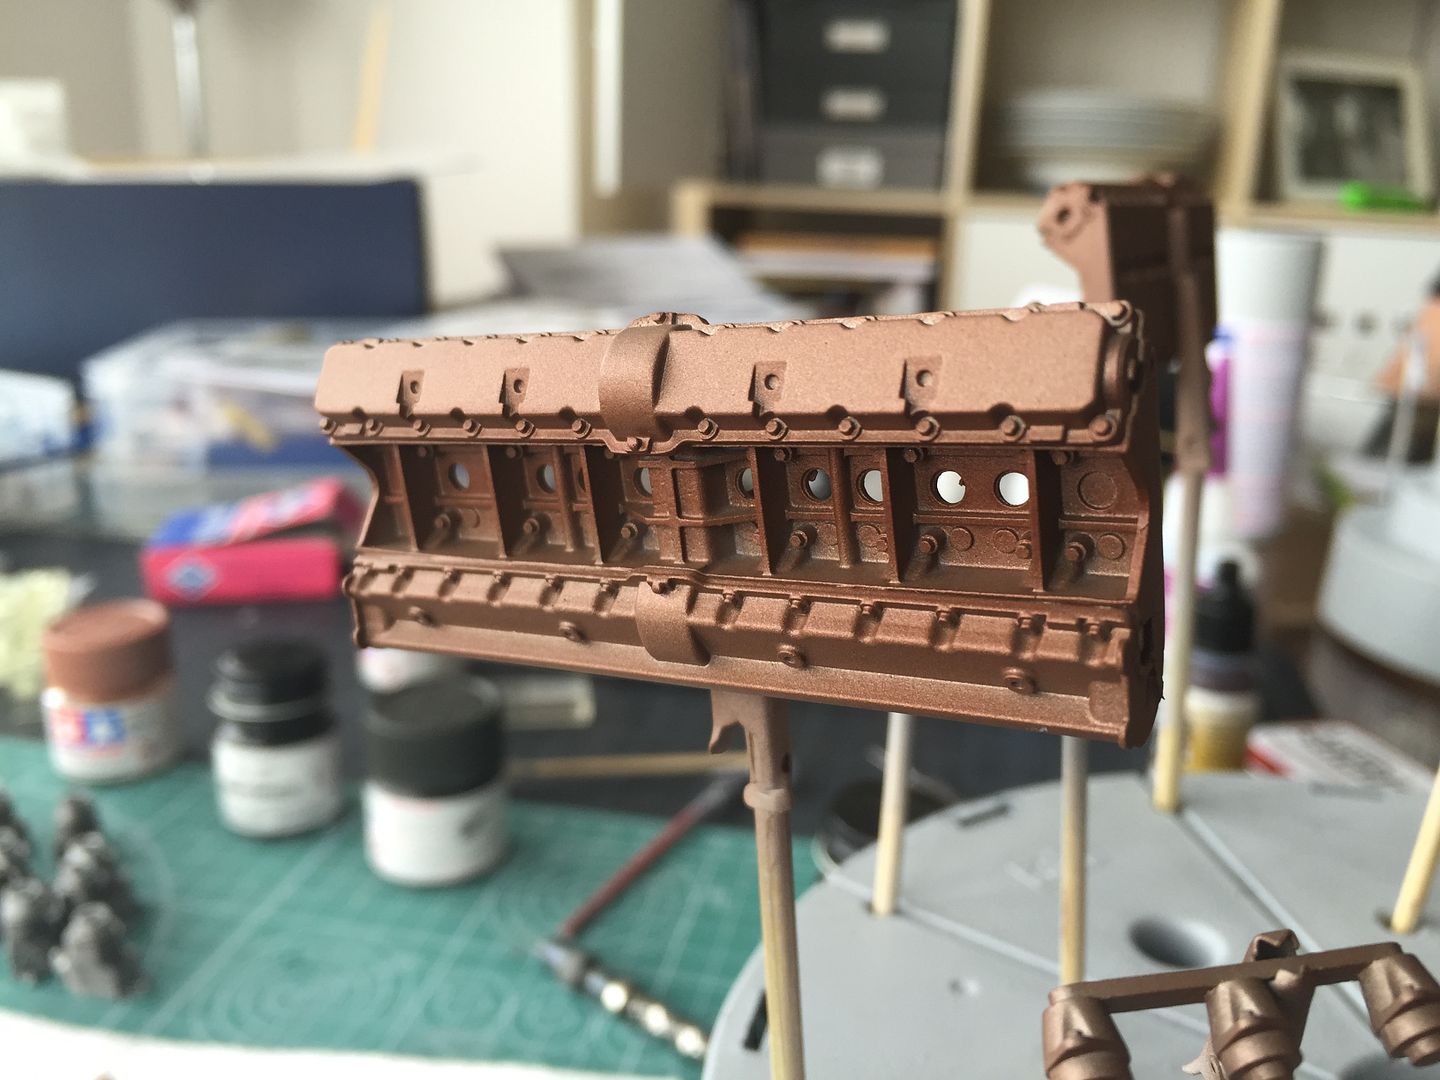
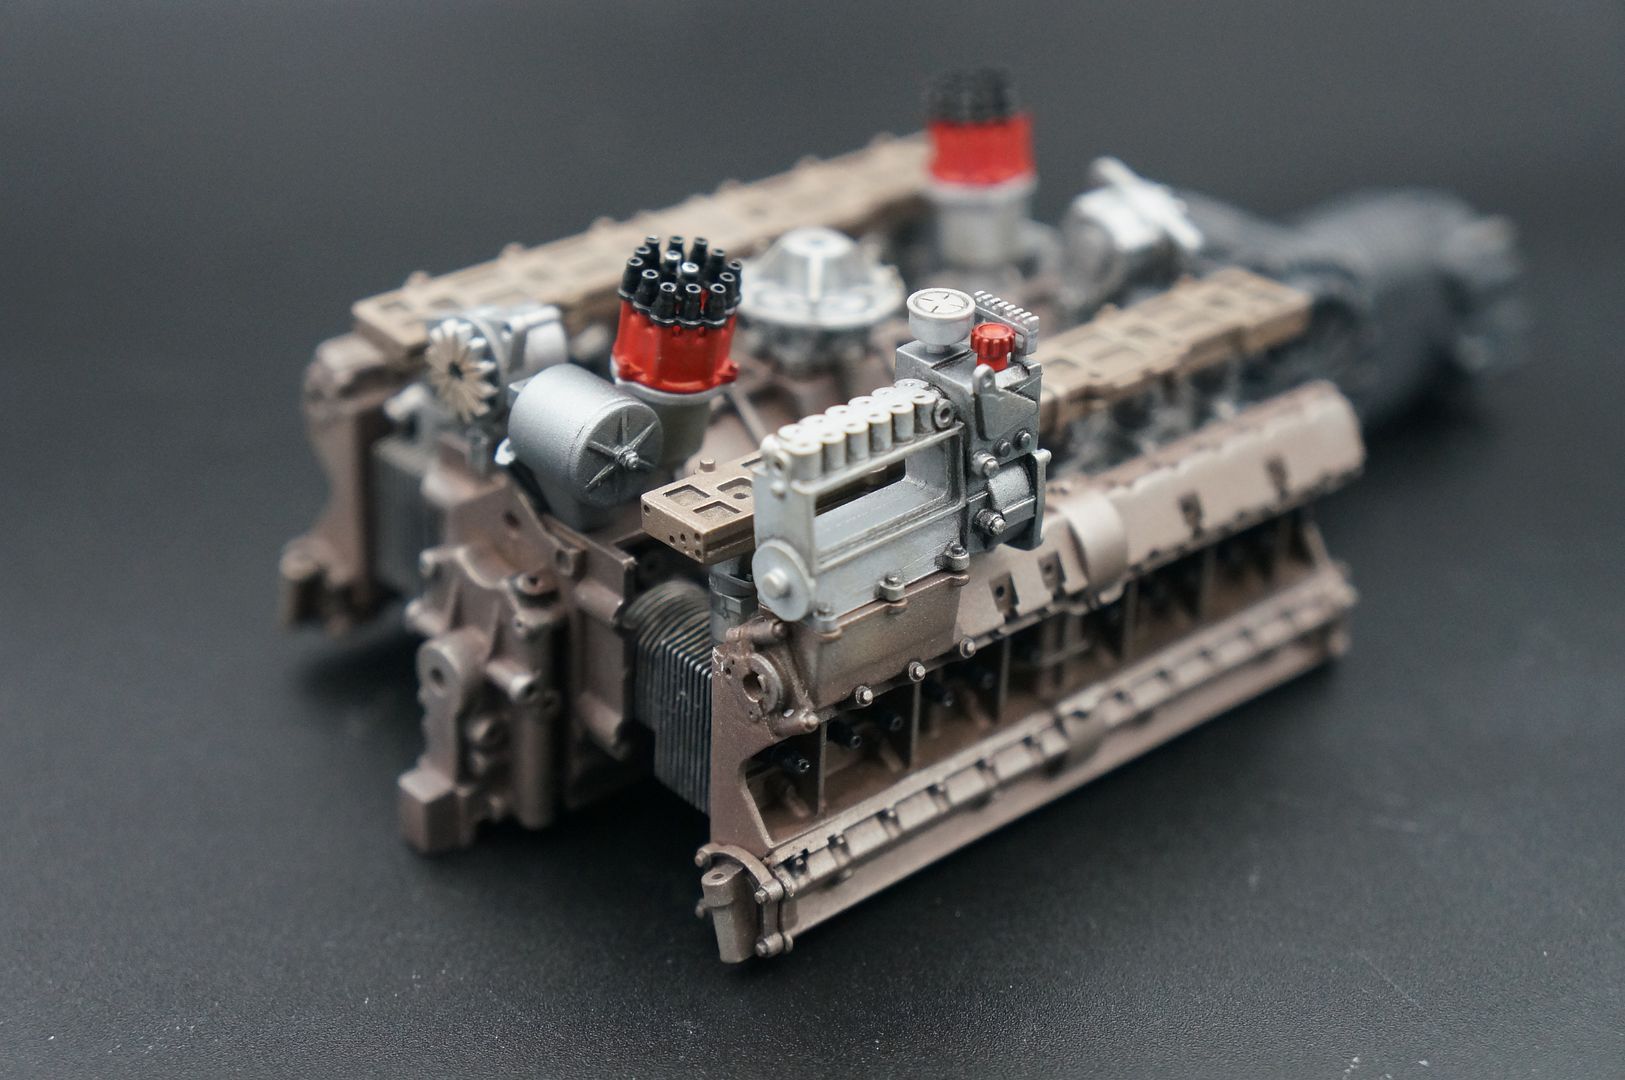
I decided to leave the cylinder heads themselves unfinished - before use they are polished (fin edges) or dull ali colour. It gives a nice colour contrast as well - even though they will all be covered up ultimately!

I did apply a liberal black wash to darken them and define the fins a bit more.
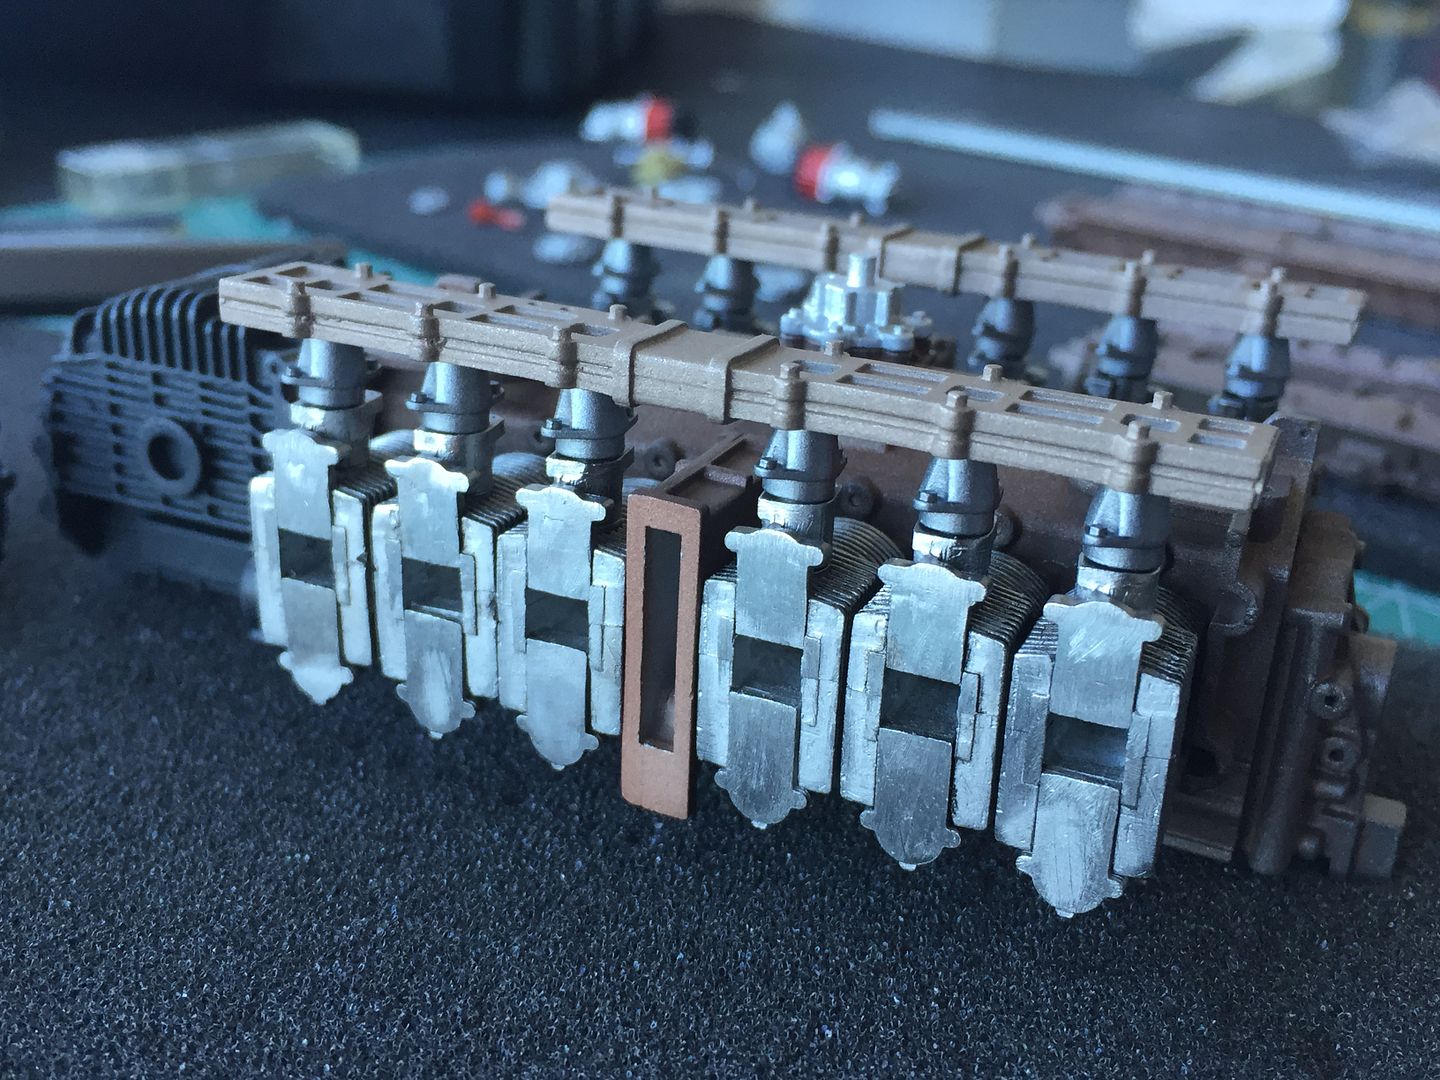
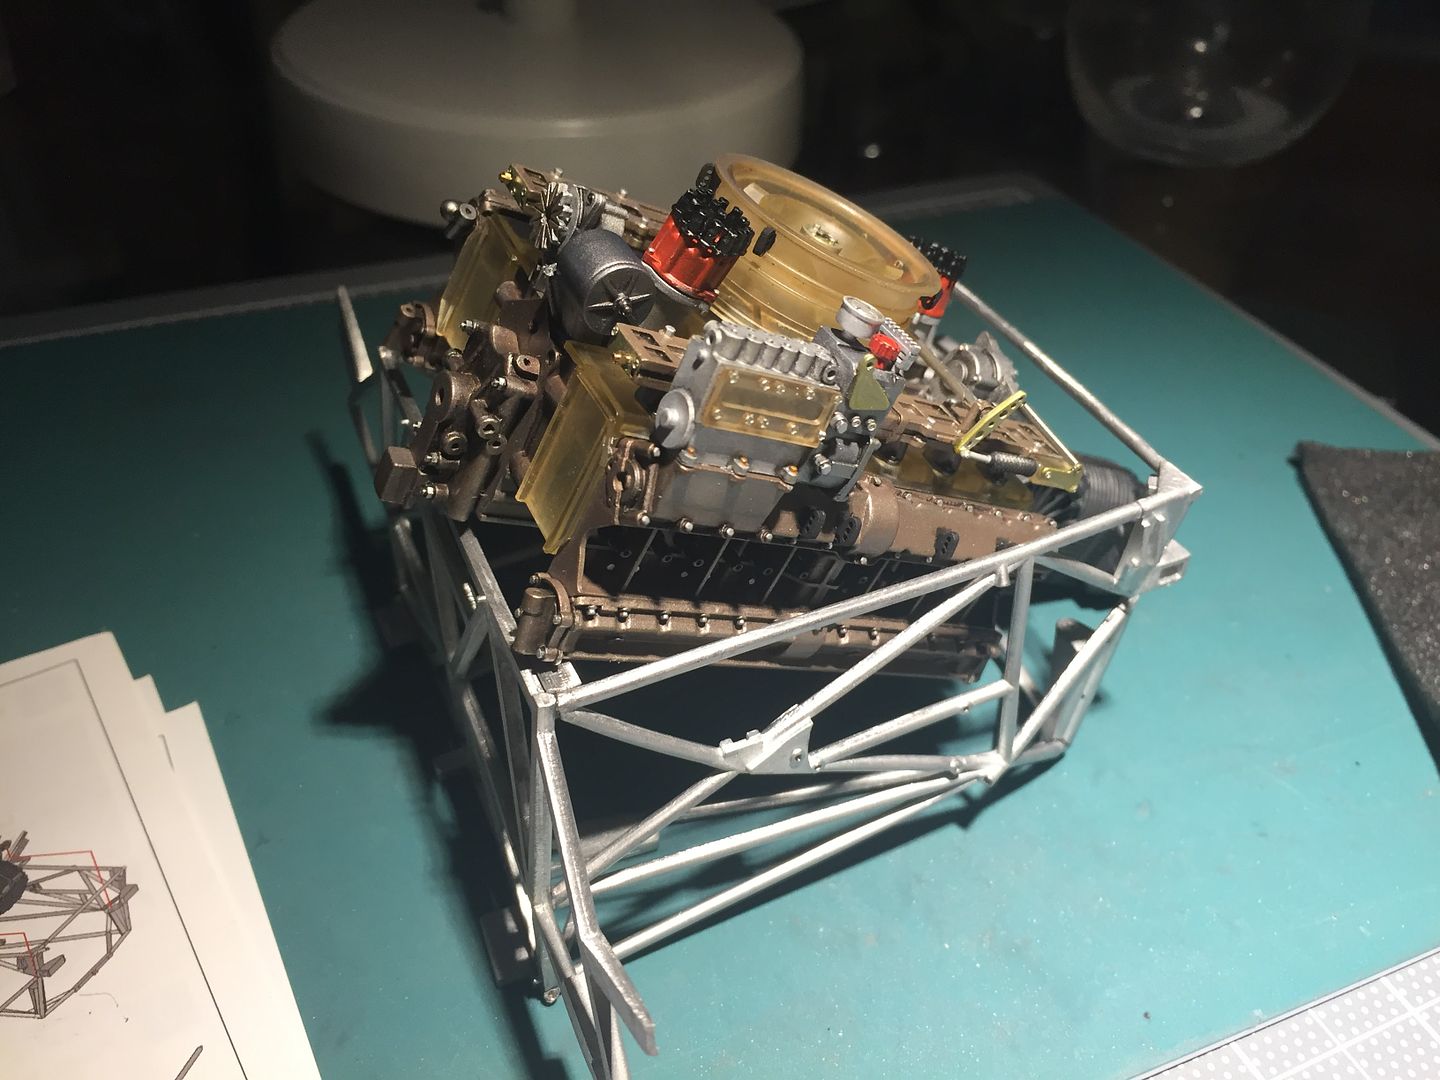
More test fitting...
There is a lot of lining up to do at this point...12 cylinder heads glues into the main casing, then the cam cases need to fit on the other end at a later stage...top tip is to dry-fit the part that goes on top - sort of inlet manifold I guess - which fixes into each cylinder head - this will space and line them all up correctly.
...anyway, brief update. Cleaned up, metal etch primed and grey primed a lot of engine bits.
Right- progress...I've chosen to go for the 'brown' look on the engine - most of the pictures show this - it is a sort of 'glaze' that I recognize on my old VW engine - like an un-polished casting, with oxidization, fuel varnish etc etc - I am sure that is not WHY it is that color, but best way to describe...
A few ref images:
- you can see the main crank case colour, the cam shaft 'top' of the engine (either side on this boxer-style engine) and also the slightly lighter top/side pieces that are below the air intake trumpets. The gearbox is a much darker paint finish - semi-gloss black/gun metal.
I had to mix the paint - a mix of iron, gun metal, bronze, black, white etc etc - until it looked about right.
First layer was too metallic and 'bronze' - it was trial and error to be honest, and I'm still tweaking it with shading, more spray, buffing, pastels etc etc!
I really don't think there is a 'right' colour on these - every car looks different. All I know is that I haven't seen any 'polished' ali castings.
- the last photo shows the pieces between the inlet trumpets and the cylinder heads - a bit lighter than the main parts. These other bits needed to be dulled down a bit.
...a bit better.
I decided to leave the cylinder heads themselves unfinished - before use they are polished (fin edges) or dull ali colour. It gives a nice colour contrast as well - even though they will all be covered up ultimately!
I did apply a liberal black wash to darken them and define the fins a bit more.
More test fitting...
There is a lot of lining up to do at this point...12 cylinder heads glues into the main casing, then the cam cases need to fit on the other end at a later stage...top tip is to dry-fit the part that goes on top - sort of inlet manifold I guess - which fixes into each cylinder head - this will space and line them all up correctly.
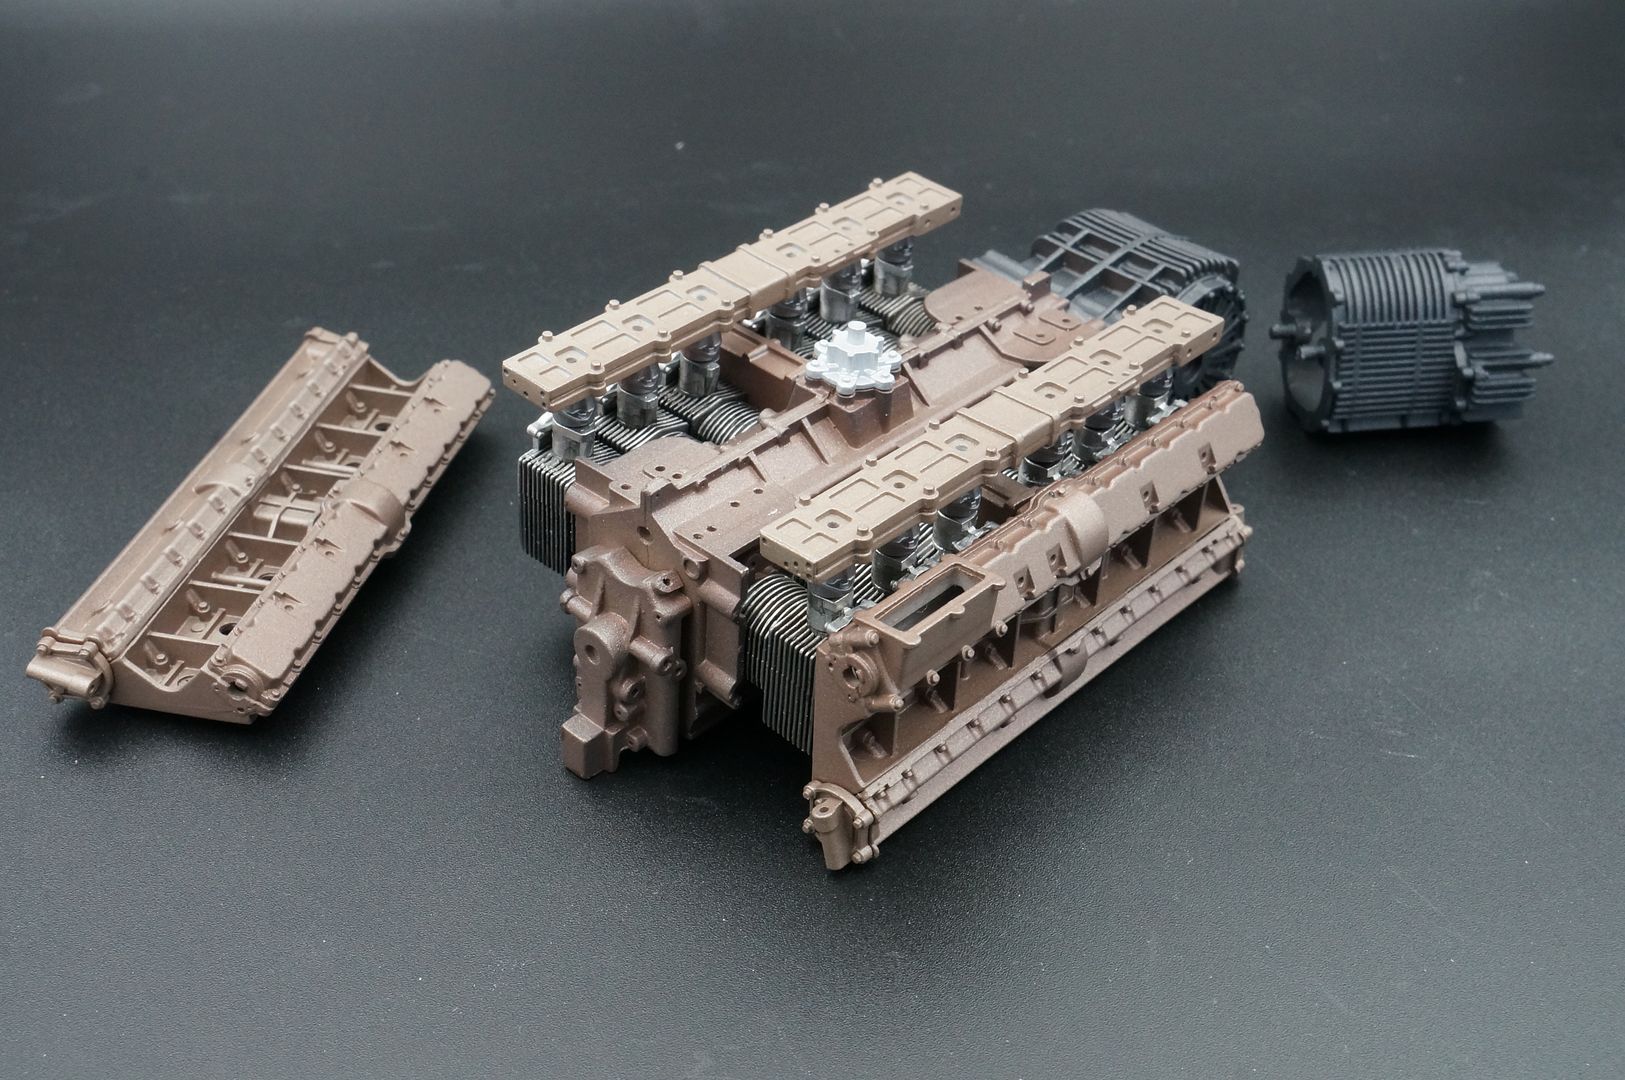
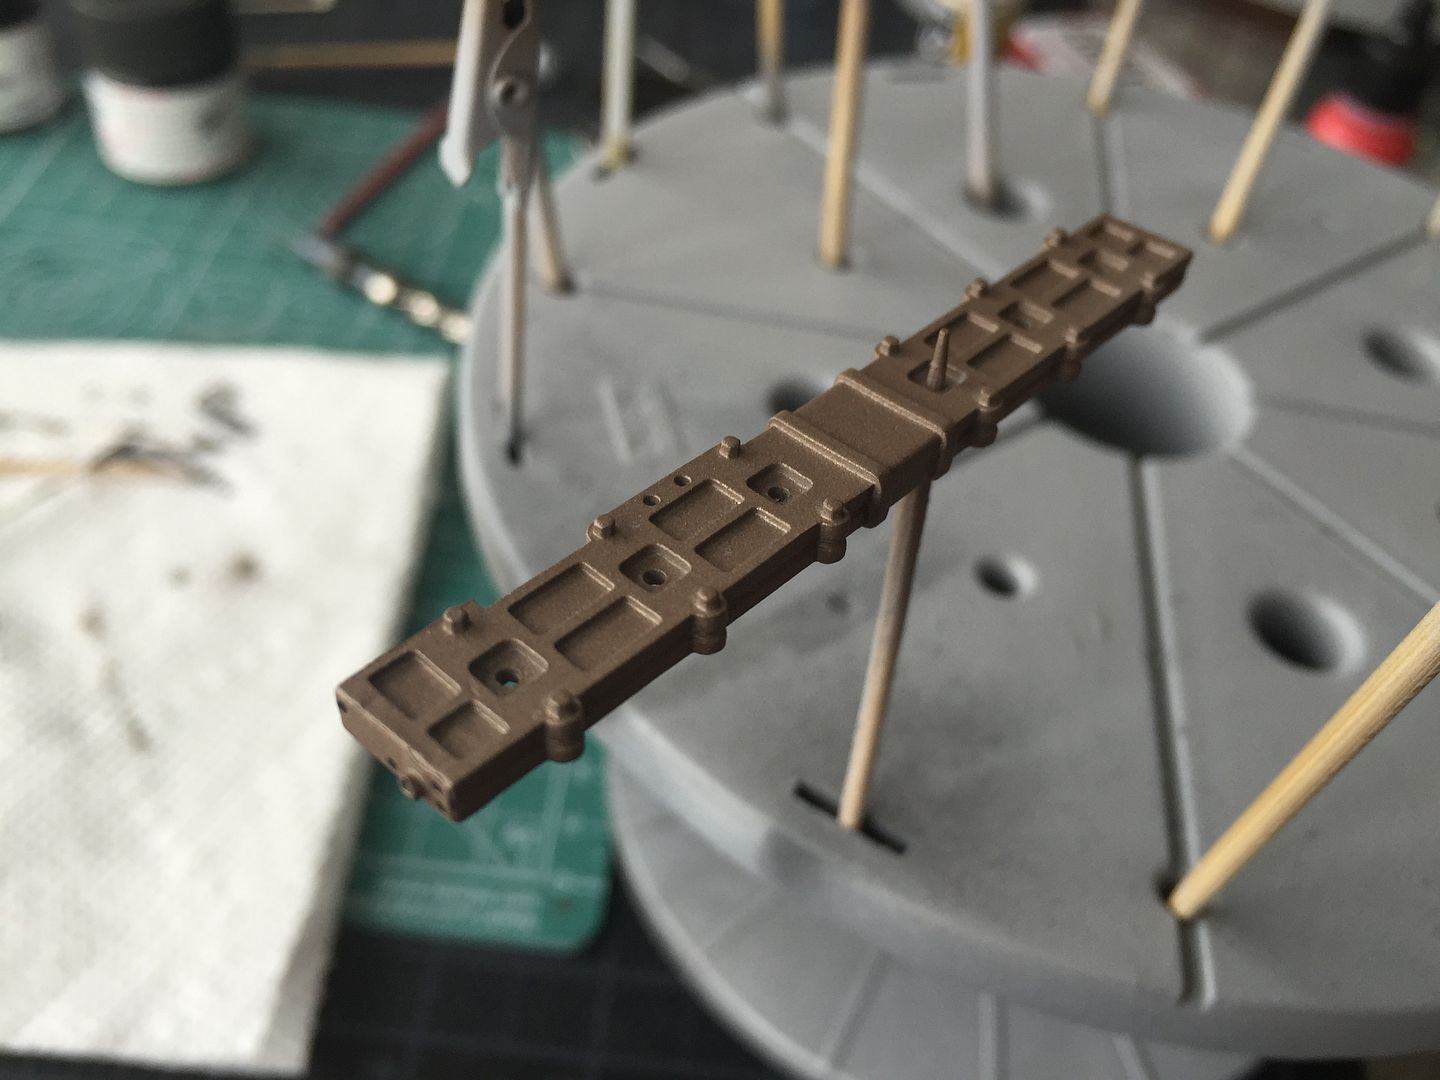
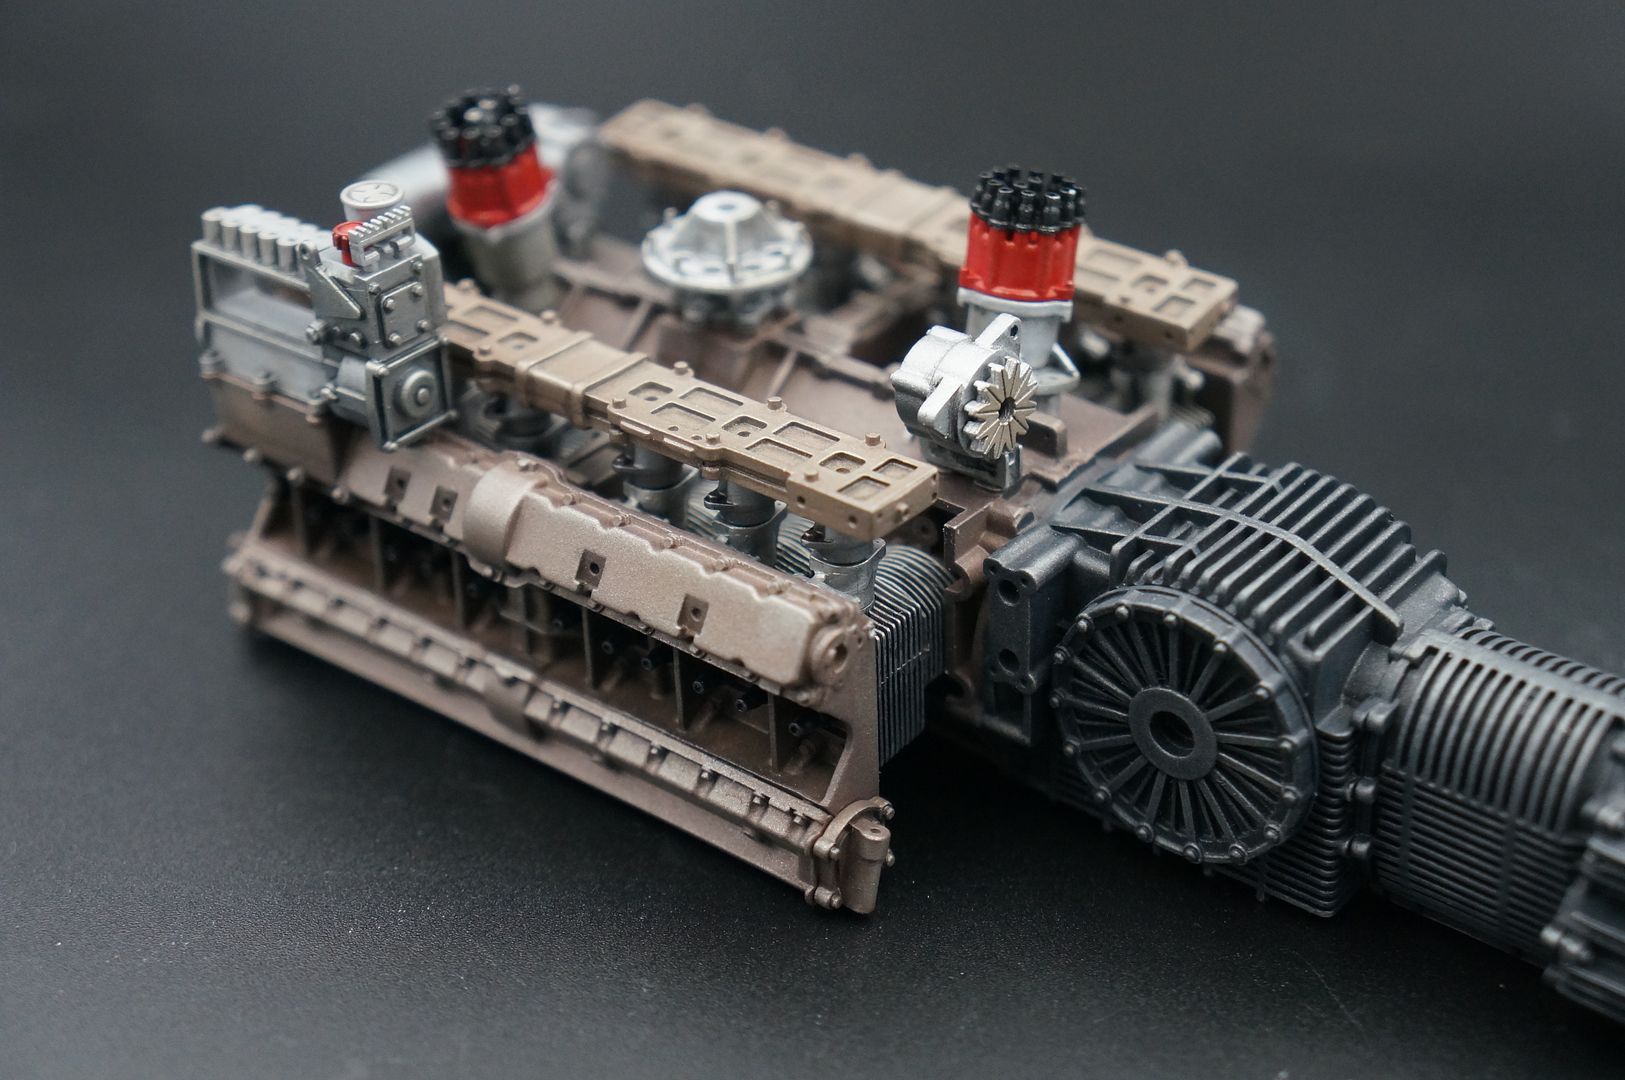
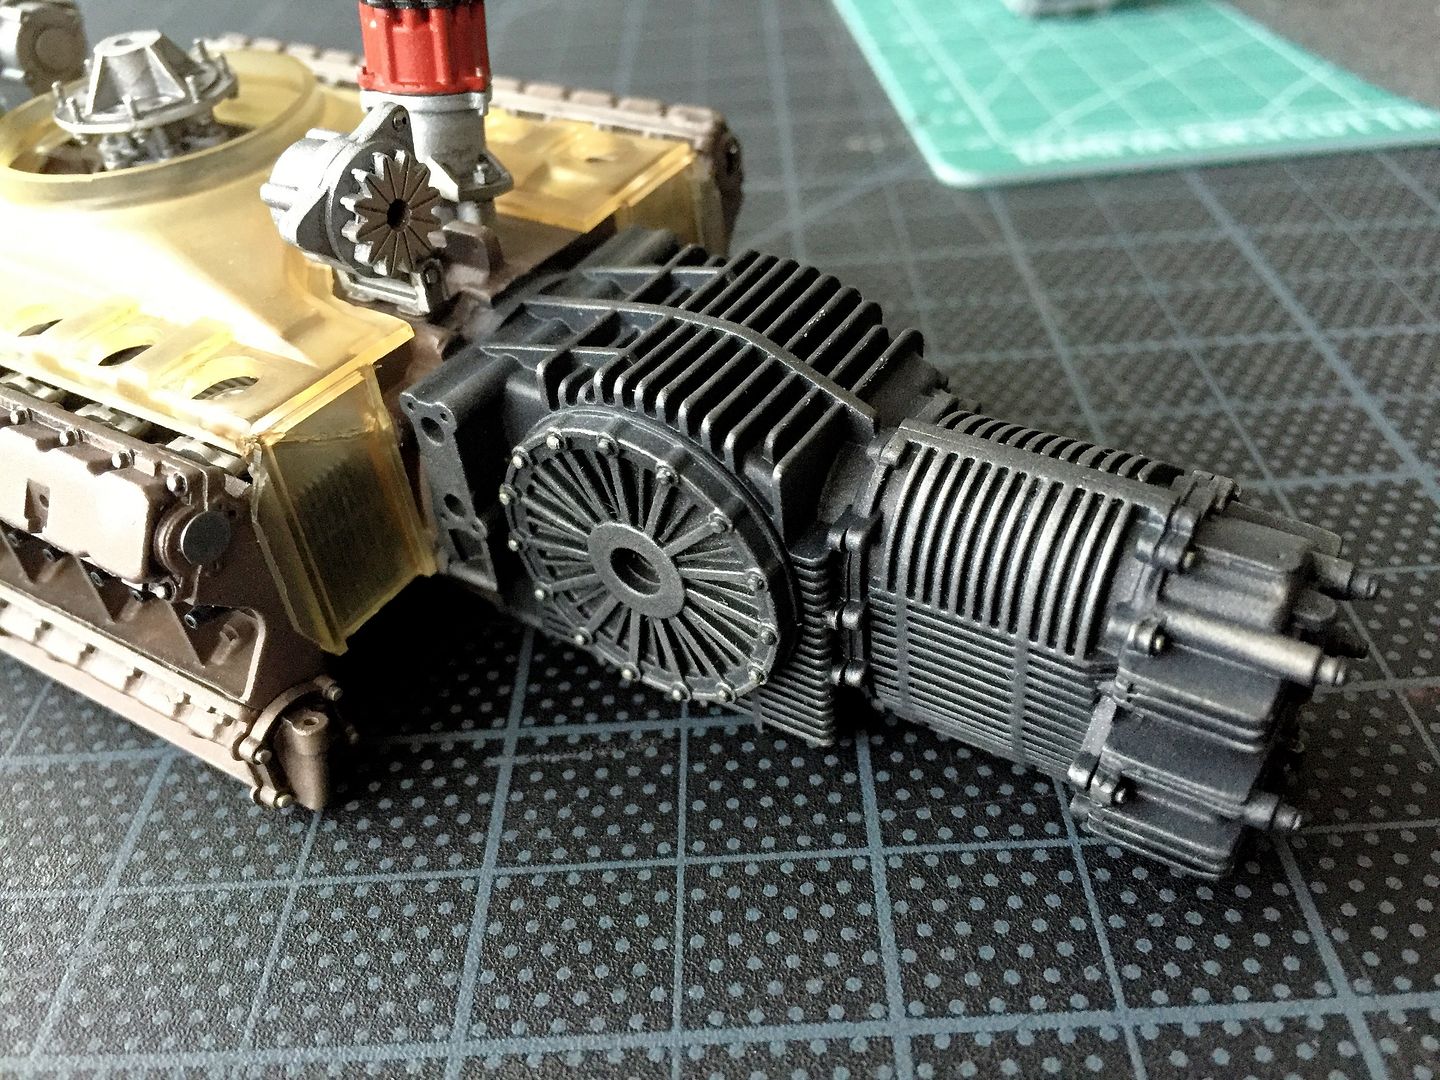
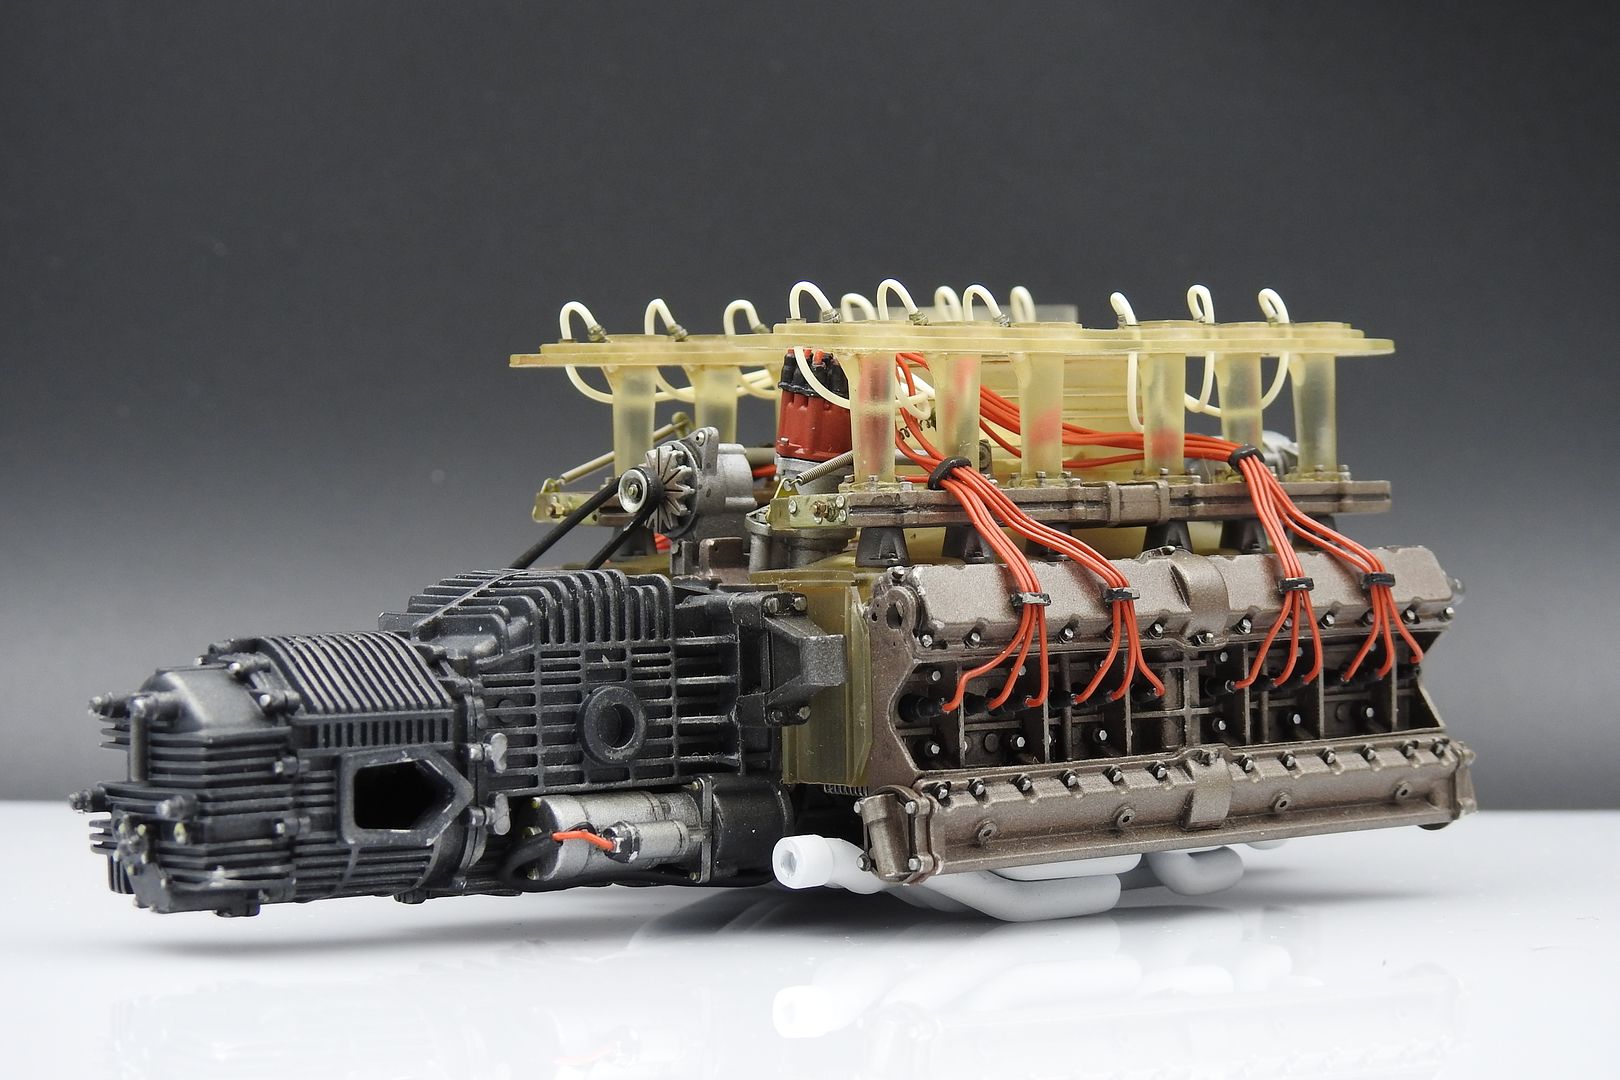
Needed to do a bit of filling on the end of the gearbox casing - when the two halves came together, they didn't mate very well with the rest of the gearbox that is part of the main engine case. I simple piece of plastic sheet sorted it very easily.
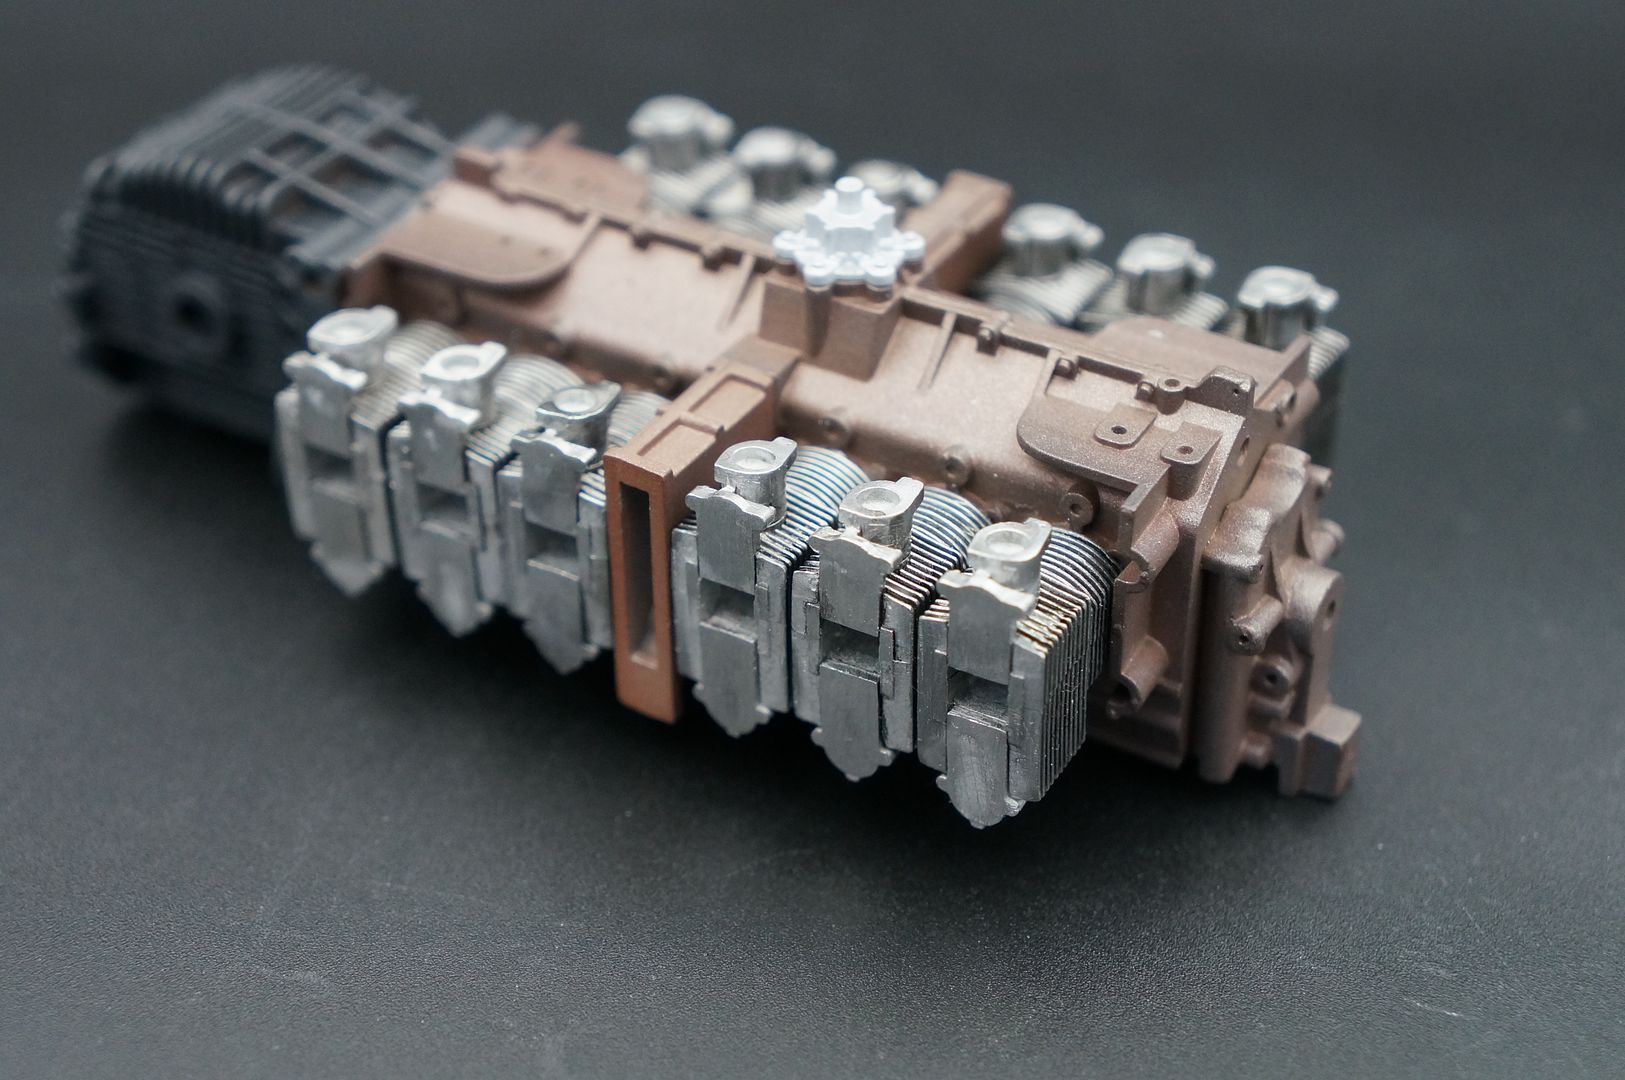
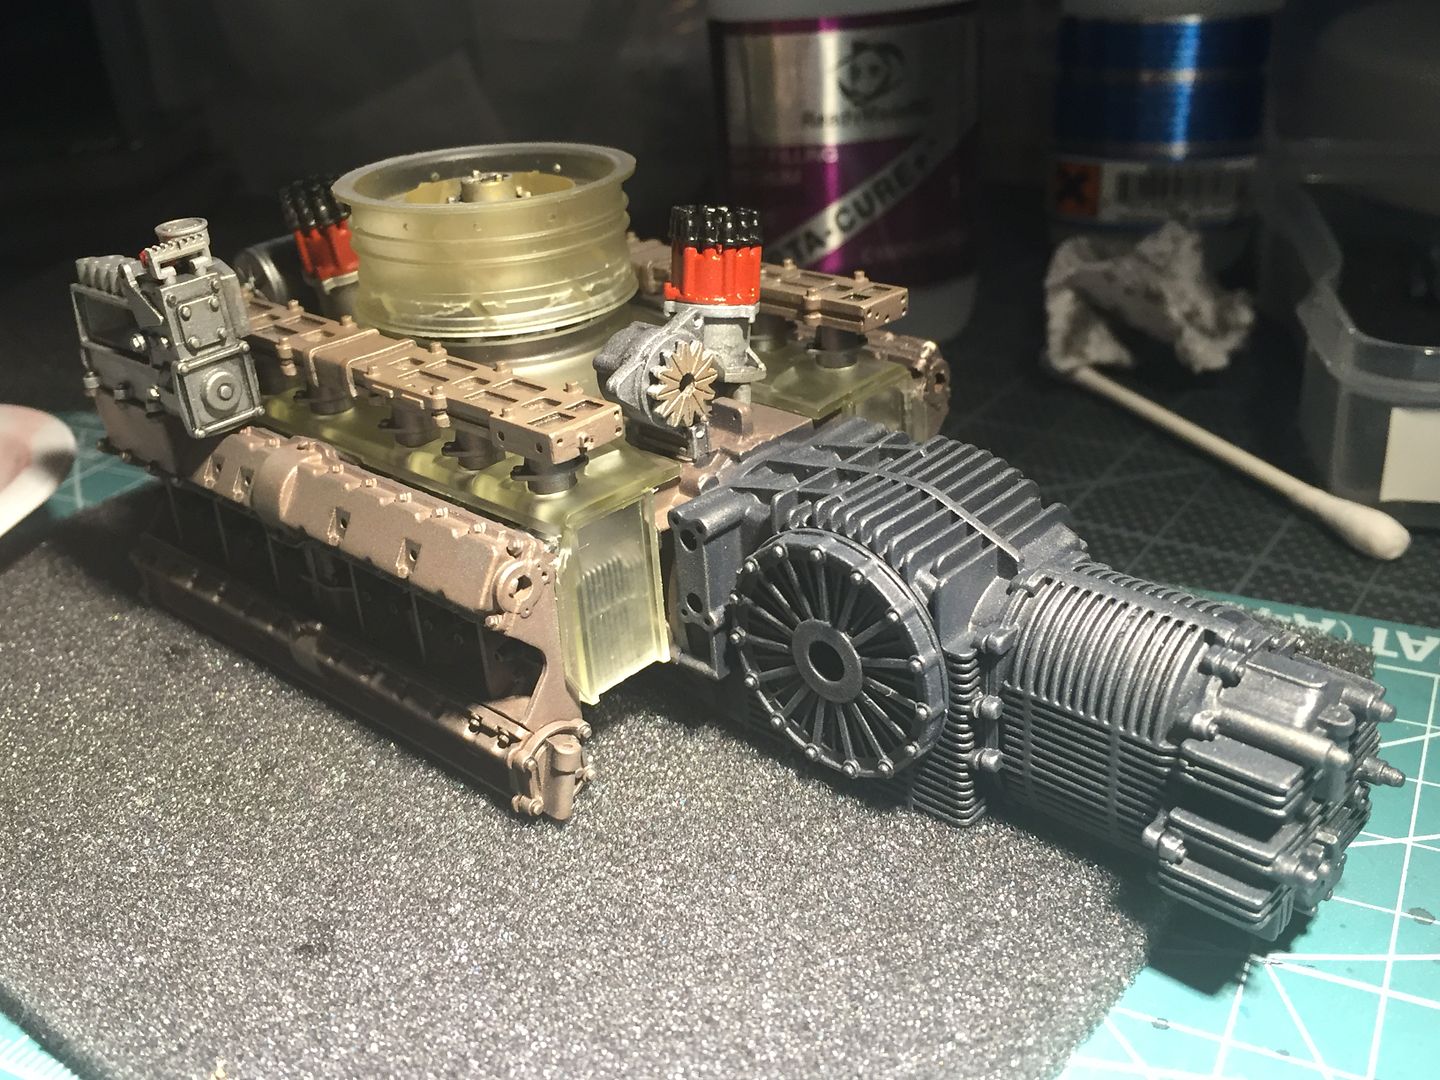
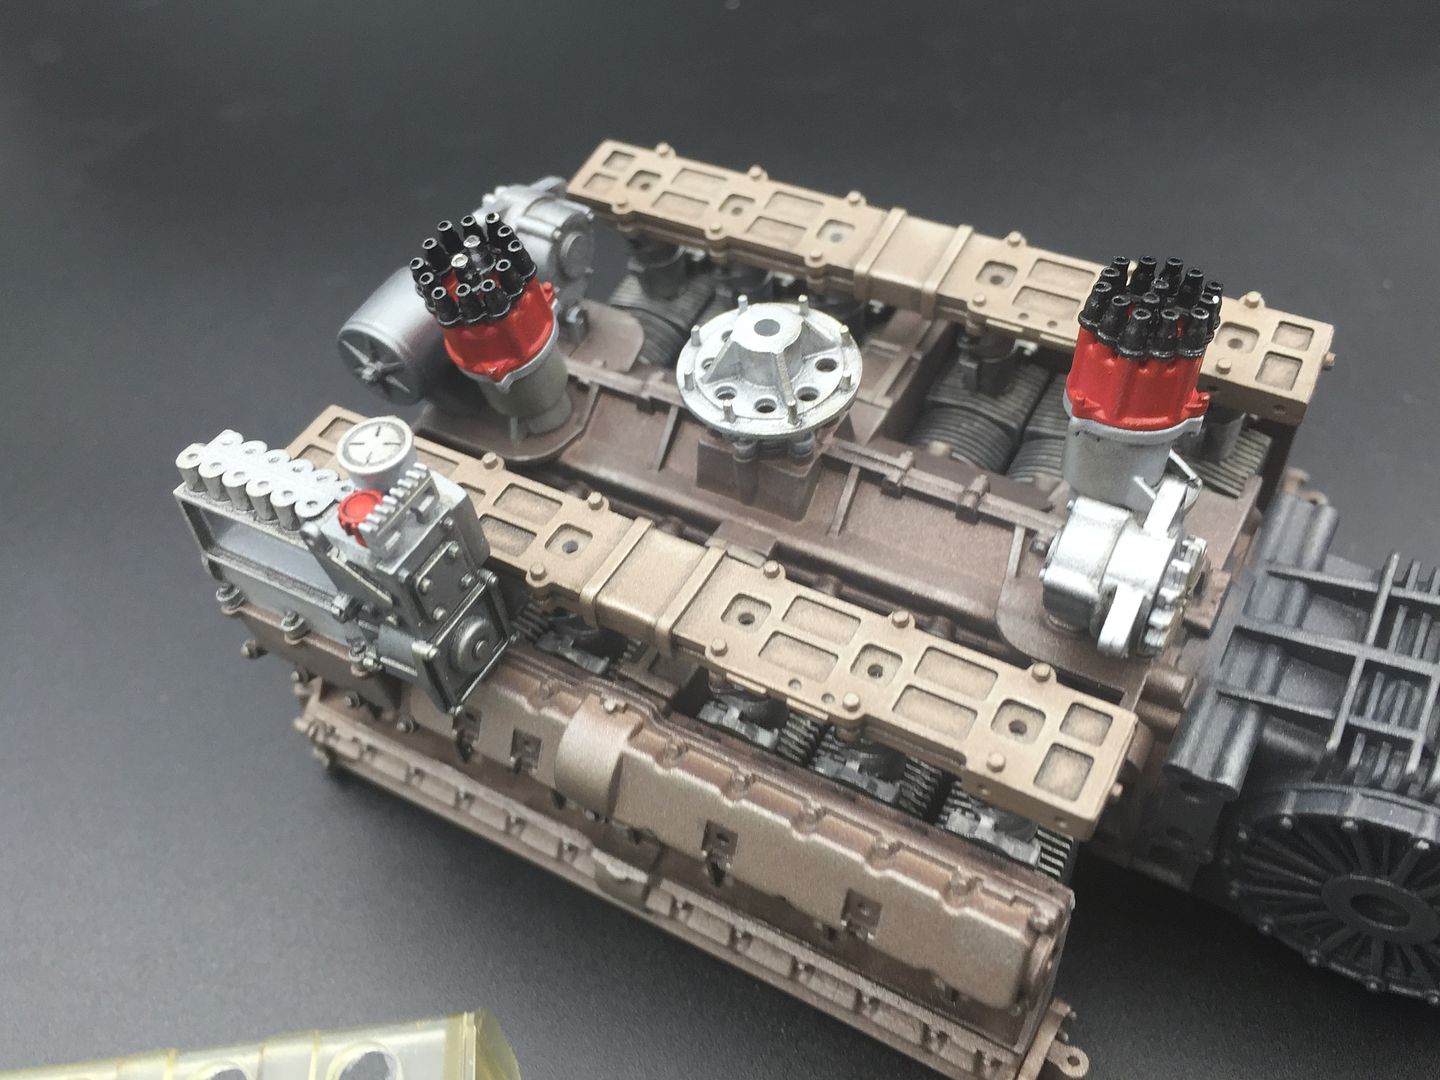
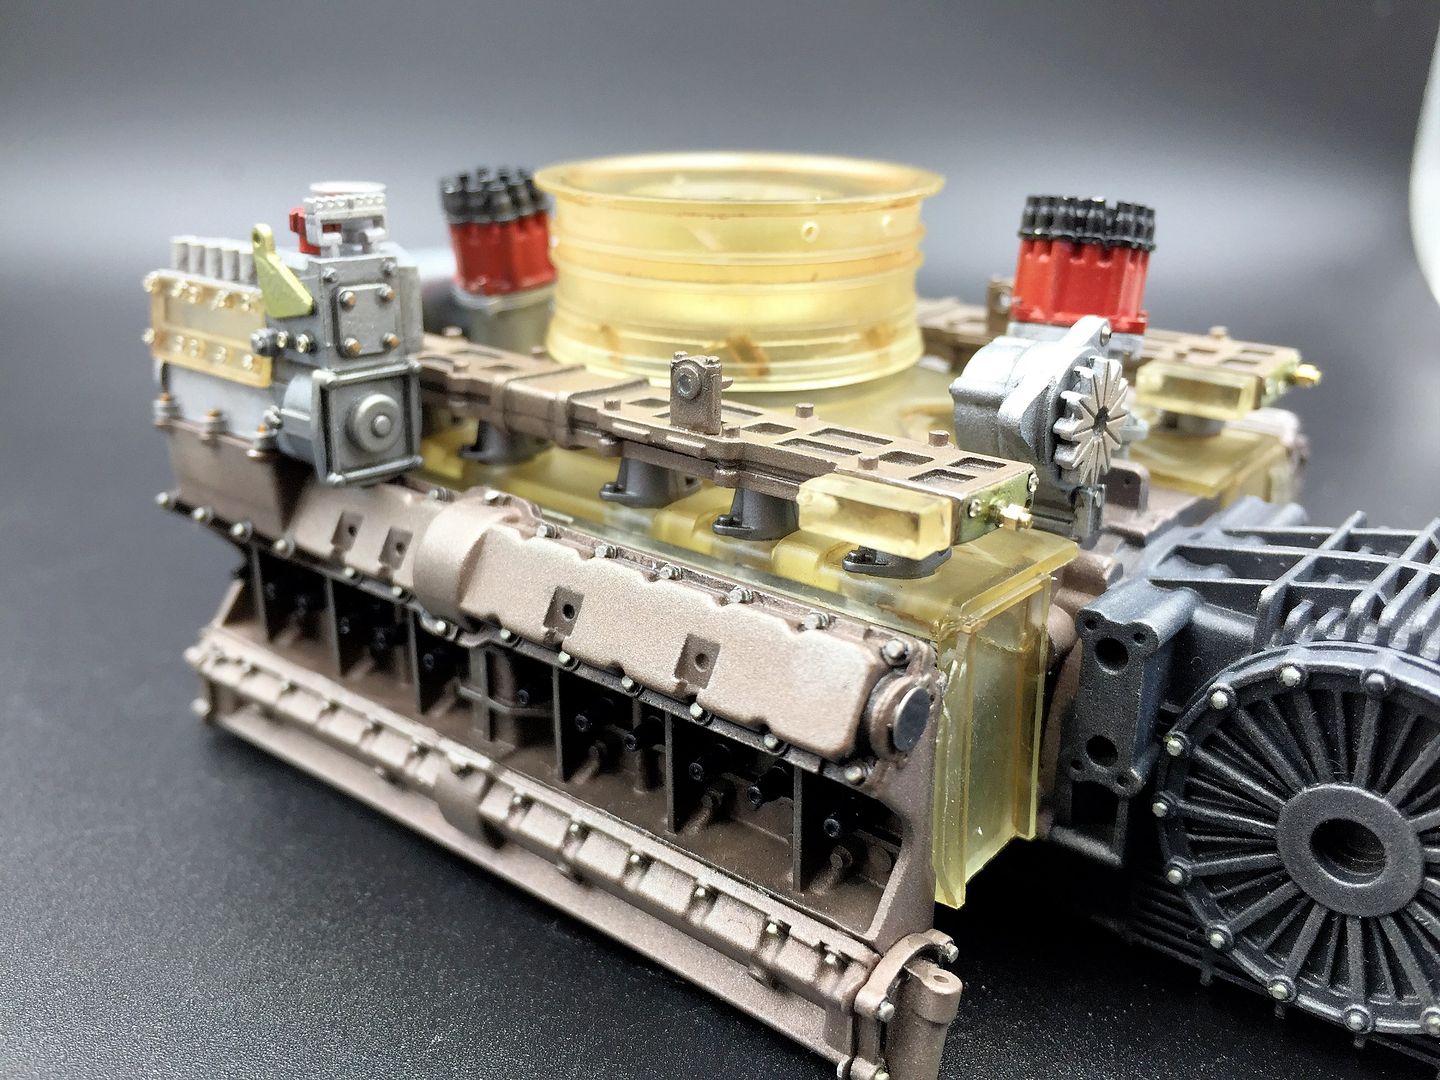
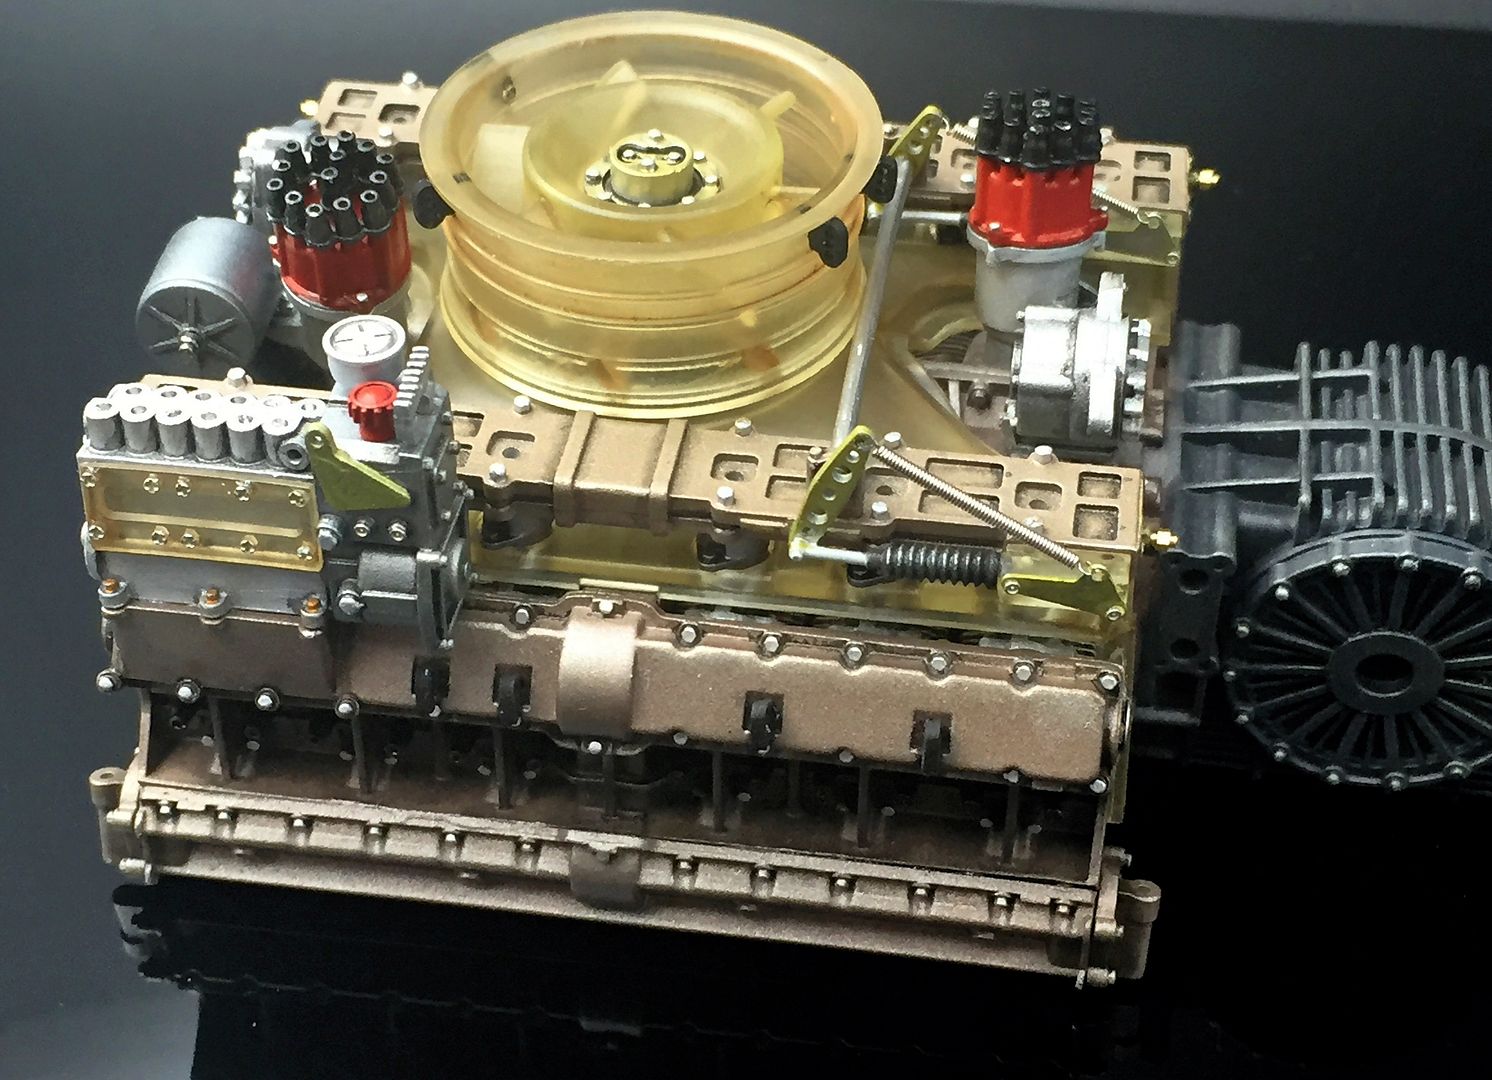
Colours still not final, but I am liking the slightly different hues of various components. Much of this is a dry fit at this point, as air-flow shrouds need to be fitted (that hide everything!)
Some pretty pictures...
Everything you see will be 'edited' - picking out nuts and bolts, replacing some with detail parts etc etc - weathering to pick out detail - this was all about getting the 'base' paint down.
I'm pretty happy with this, but may darken certain areas with some Tamiya smoke or similar - I've used silver crayons, weathering powders etc to pick out edges - new to that black art, but going ok so far - I used some black Tamiya wash to pick out details, but wasn't happy with the way it 'bled' when dry.
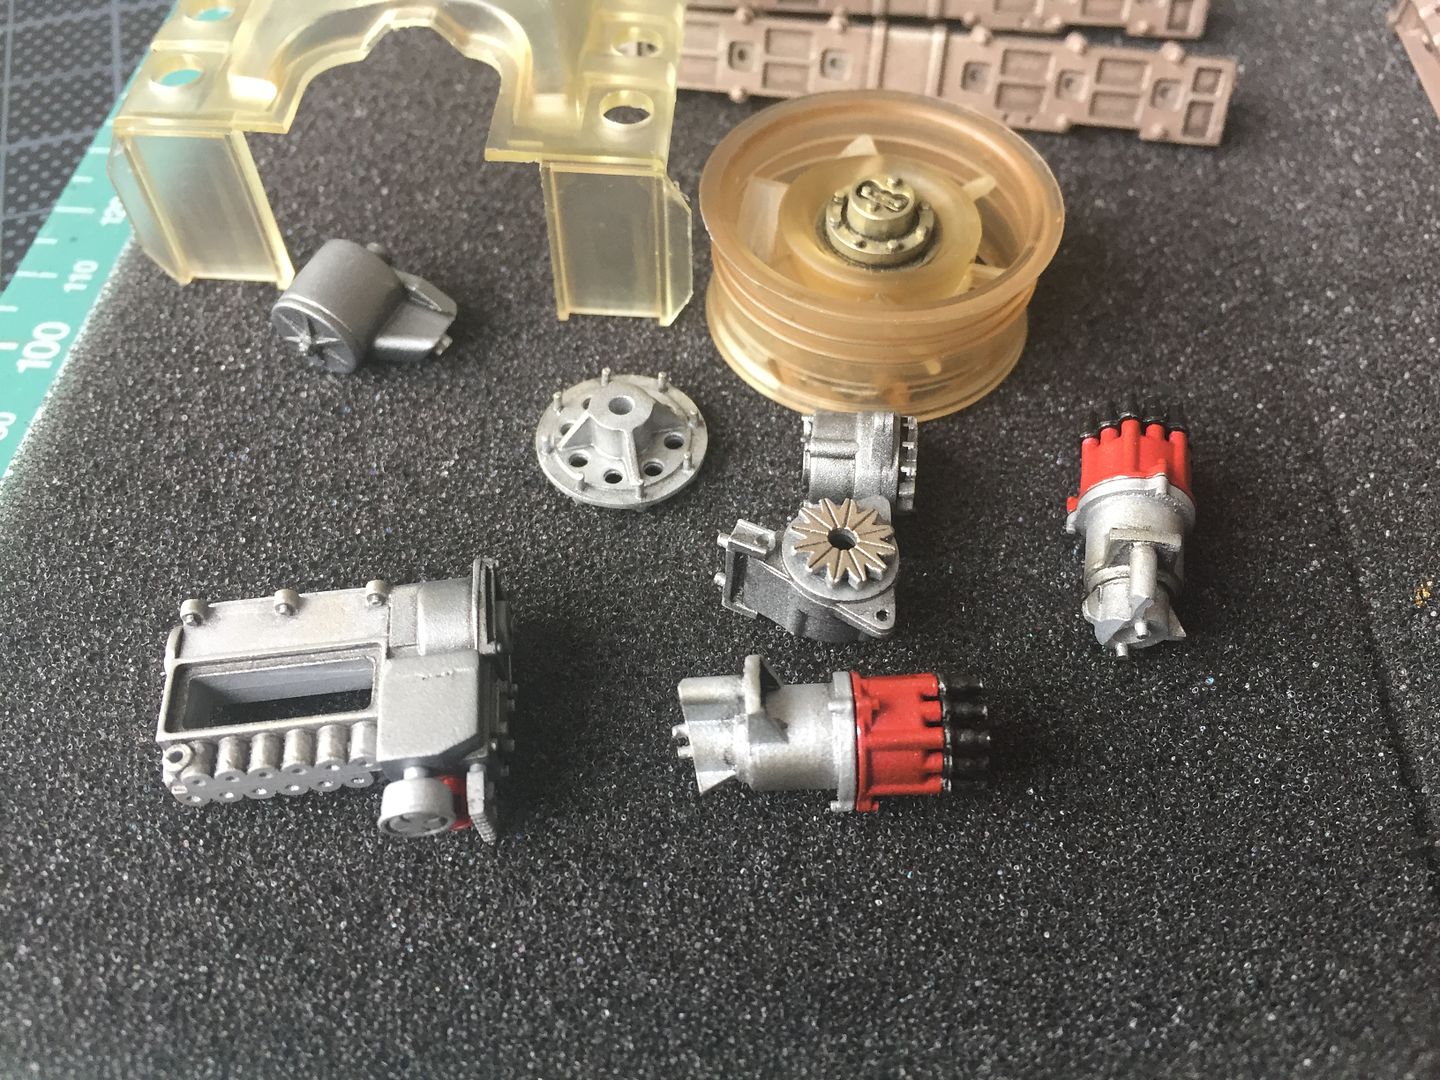
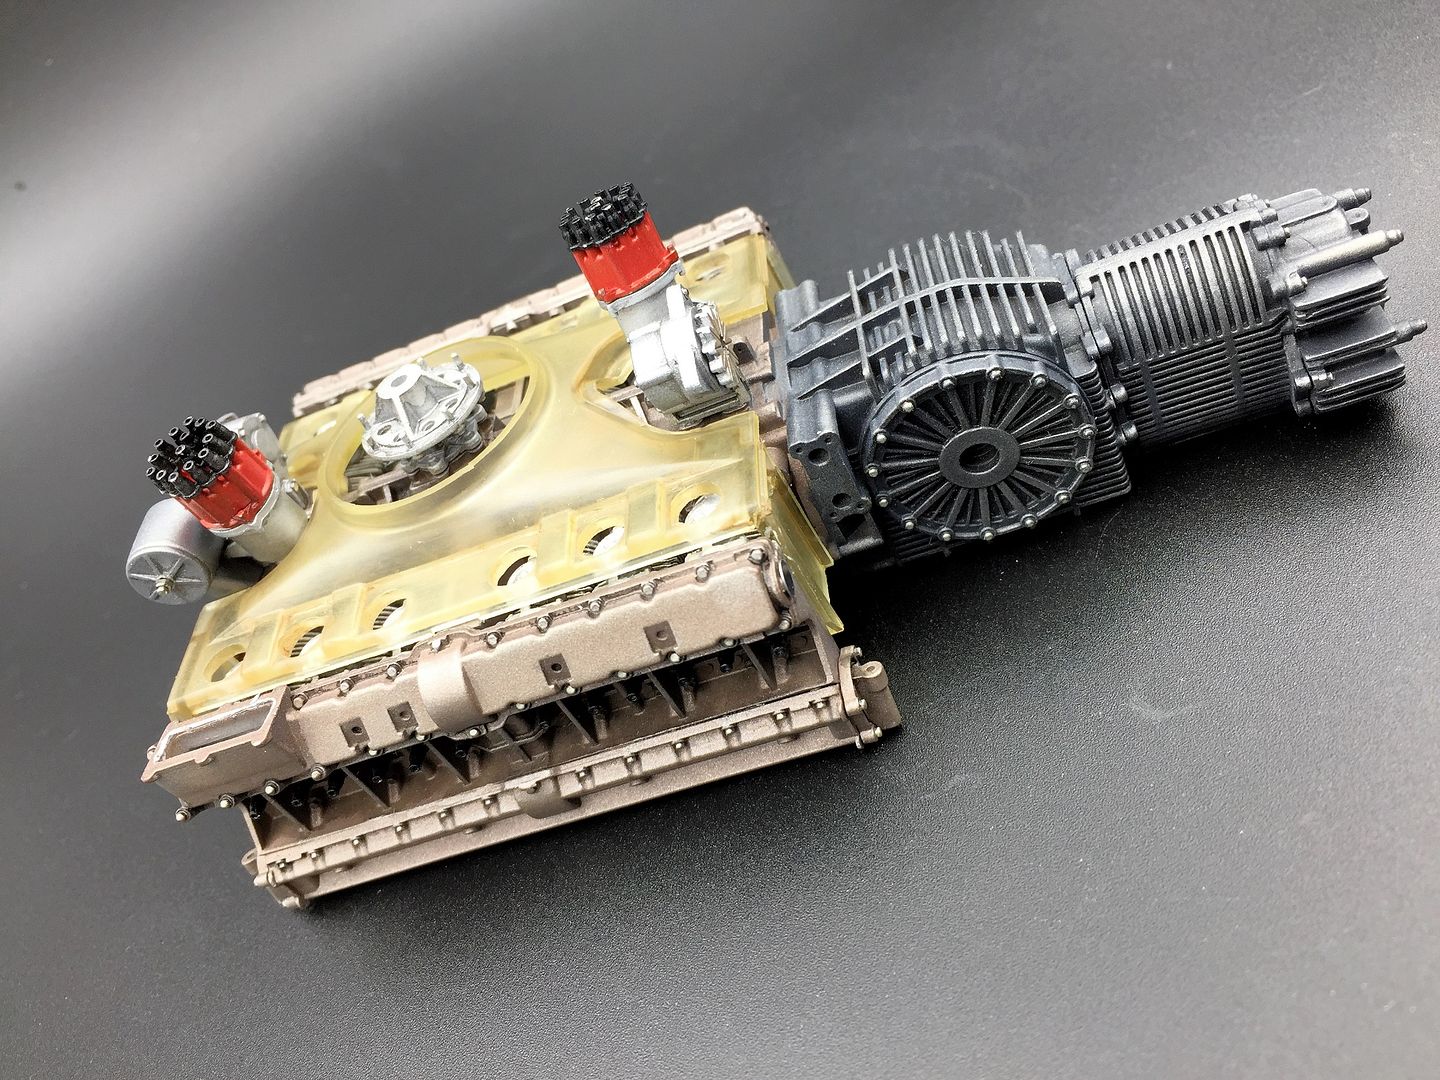
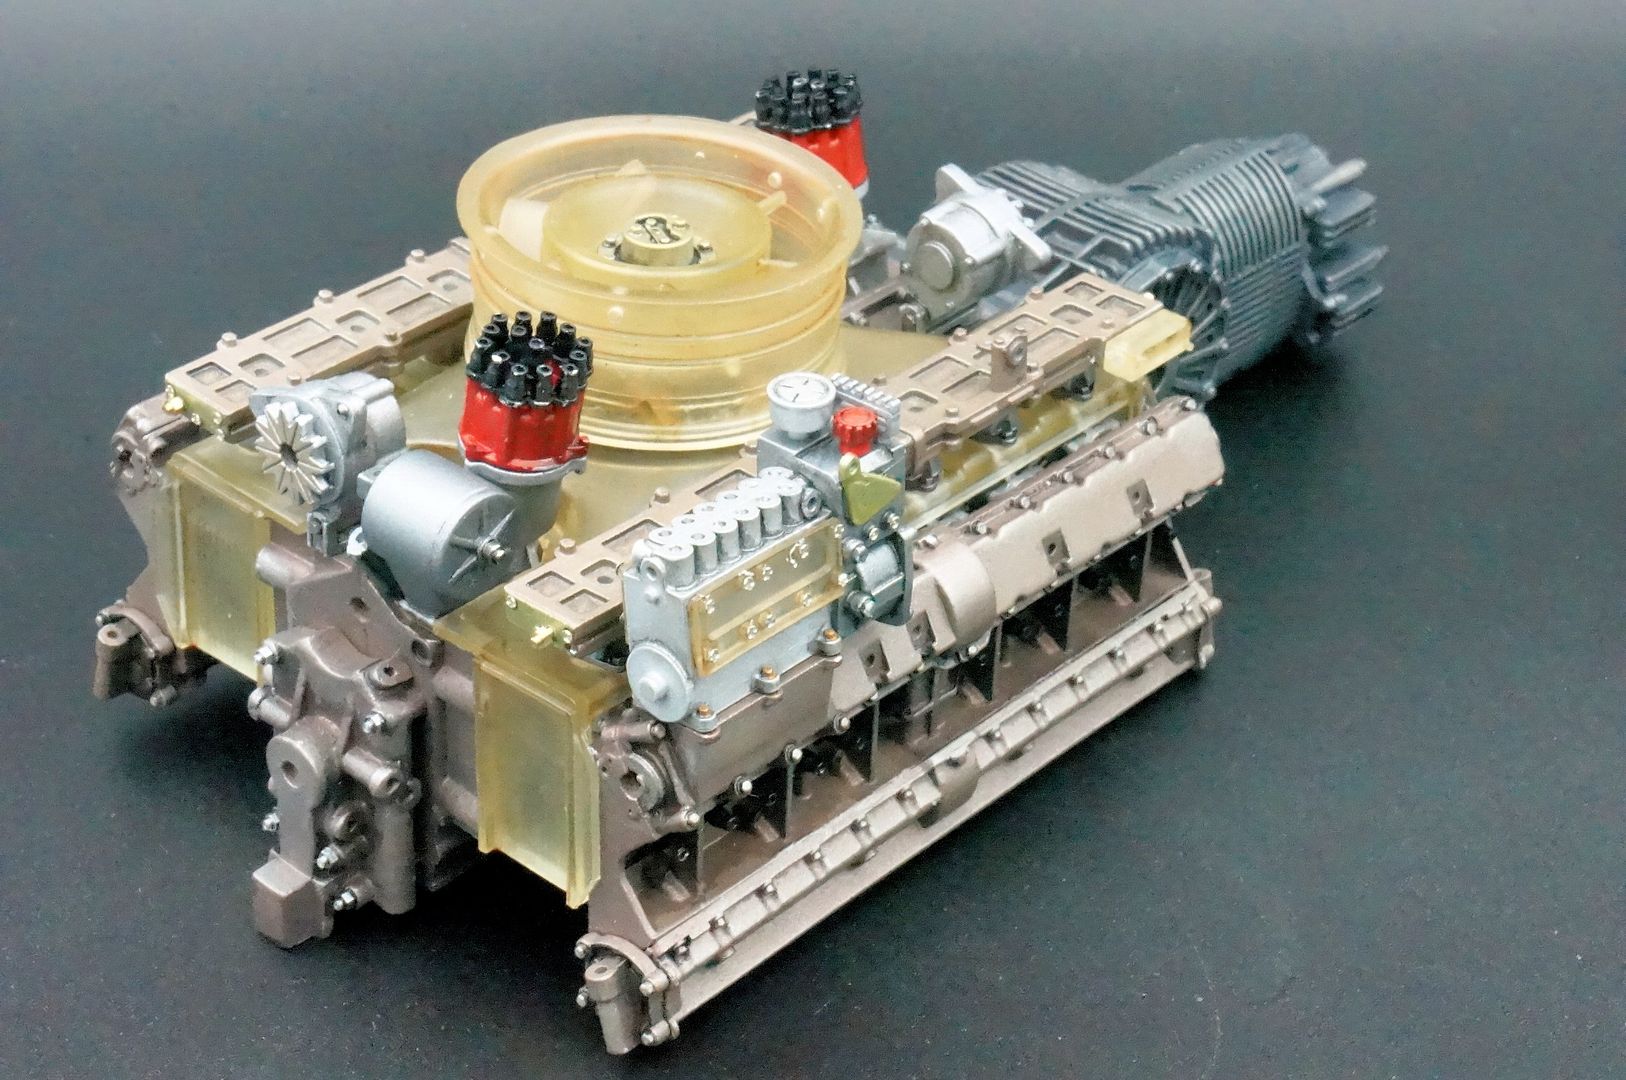
In what was quite a productive weekend, I also managed to trim, polish, prime, paint and assemble a lot of the engine ancillaries...it is so satisfying to see the engine grow
Lots and lots of finishing effects etc to do later...
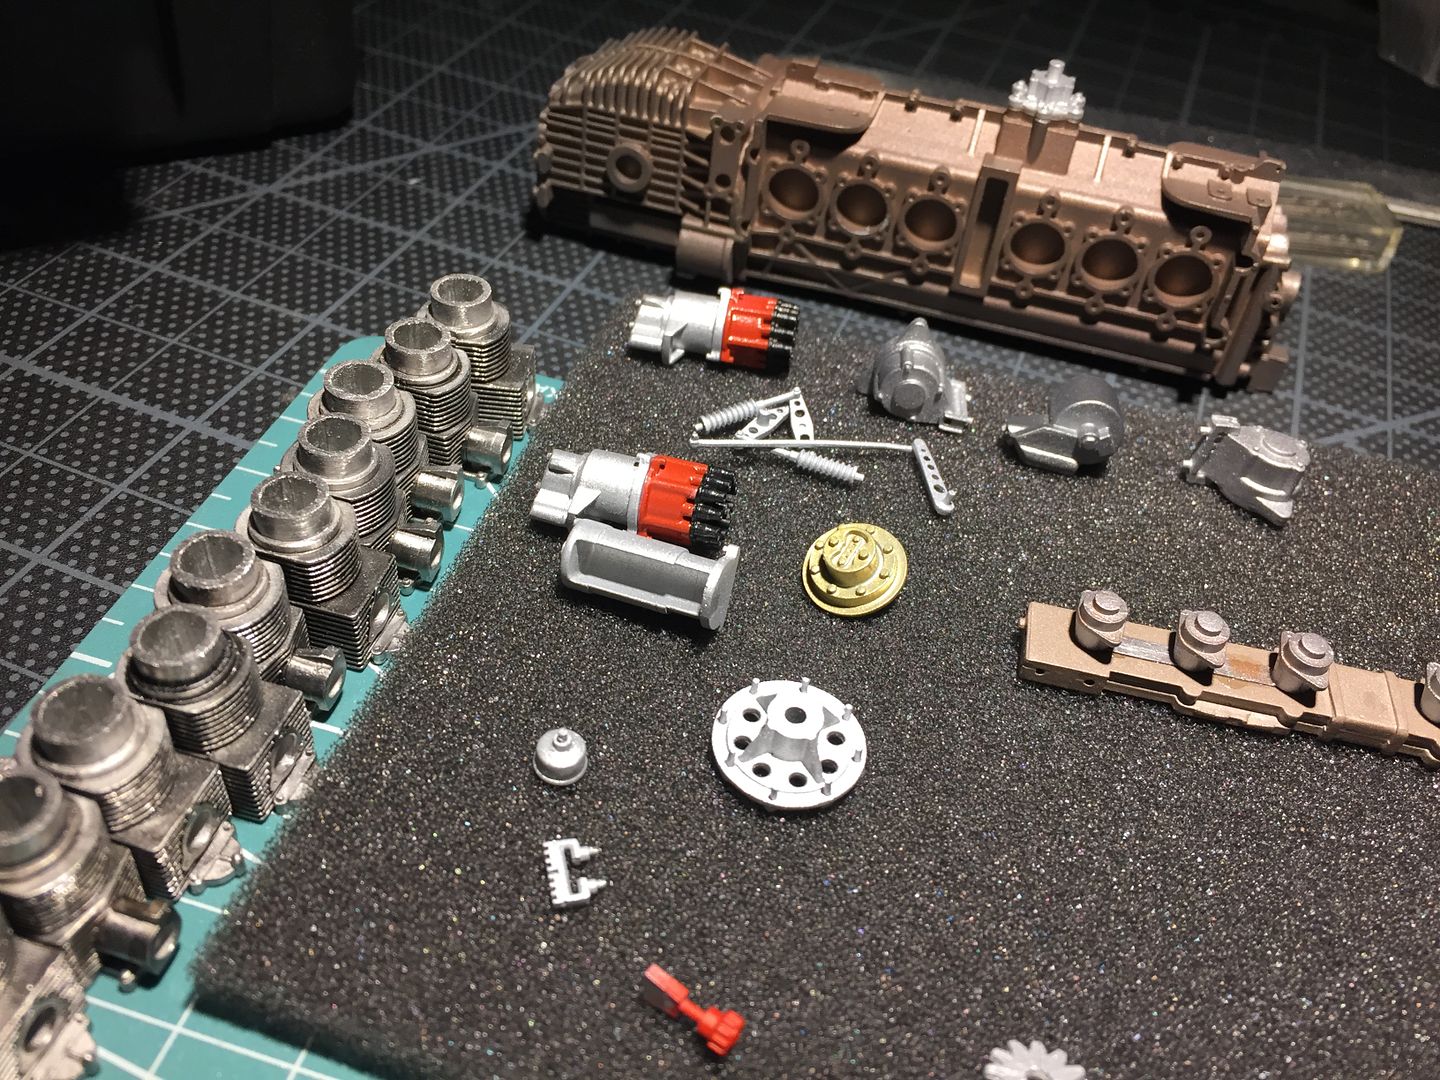
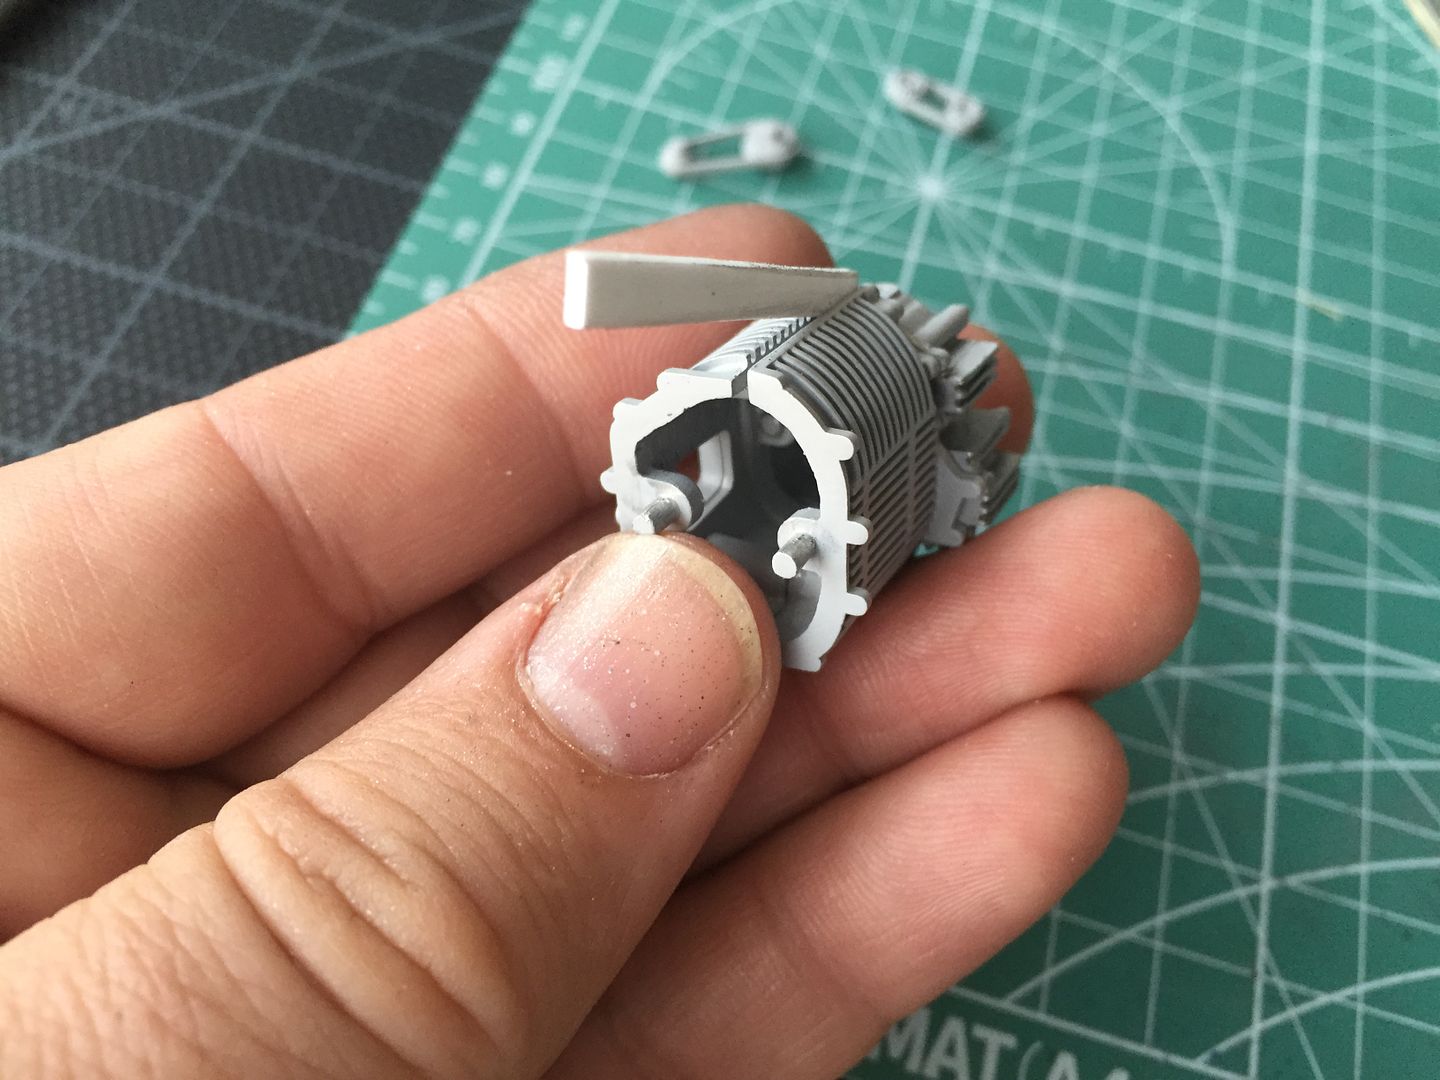
Some of these parts are little models in themselves...5 bits in this little guy...

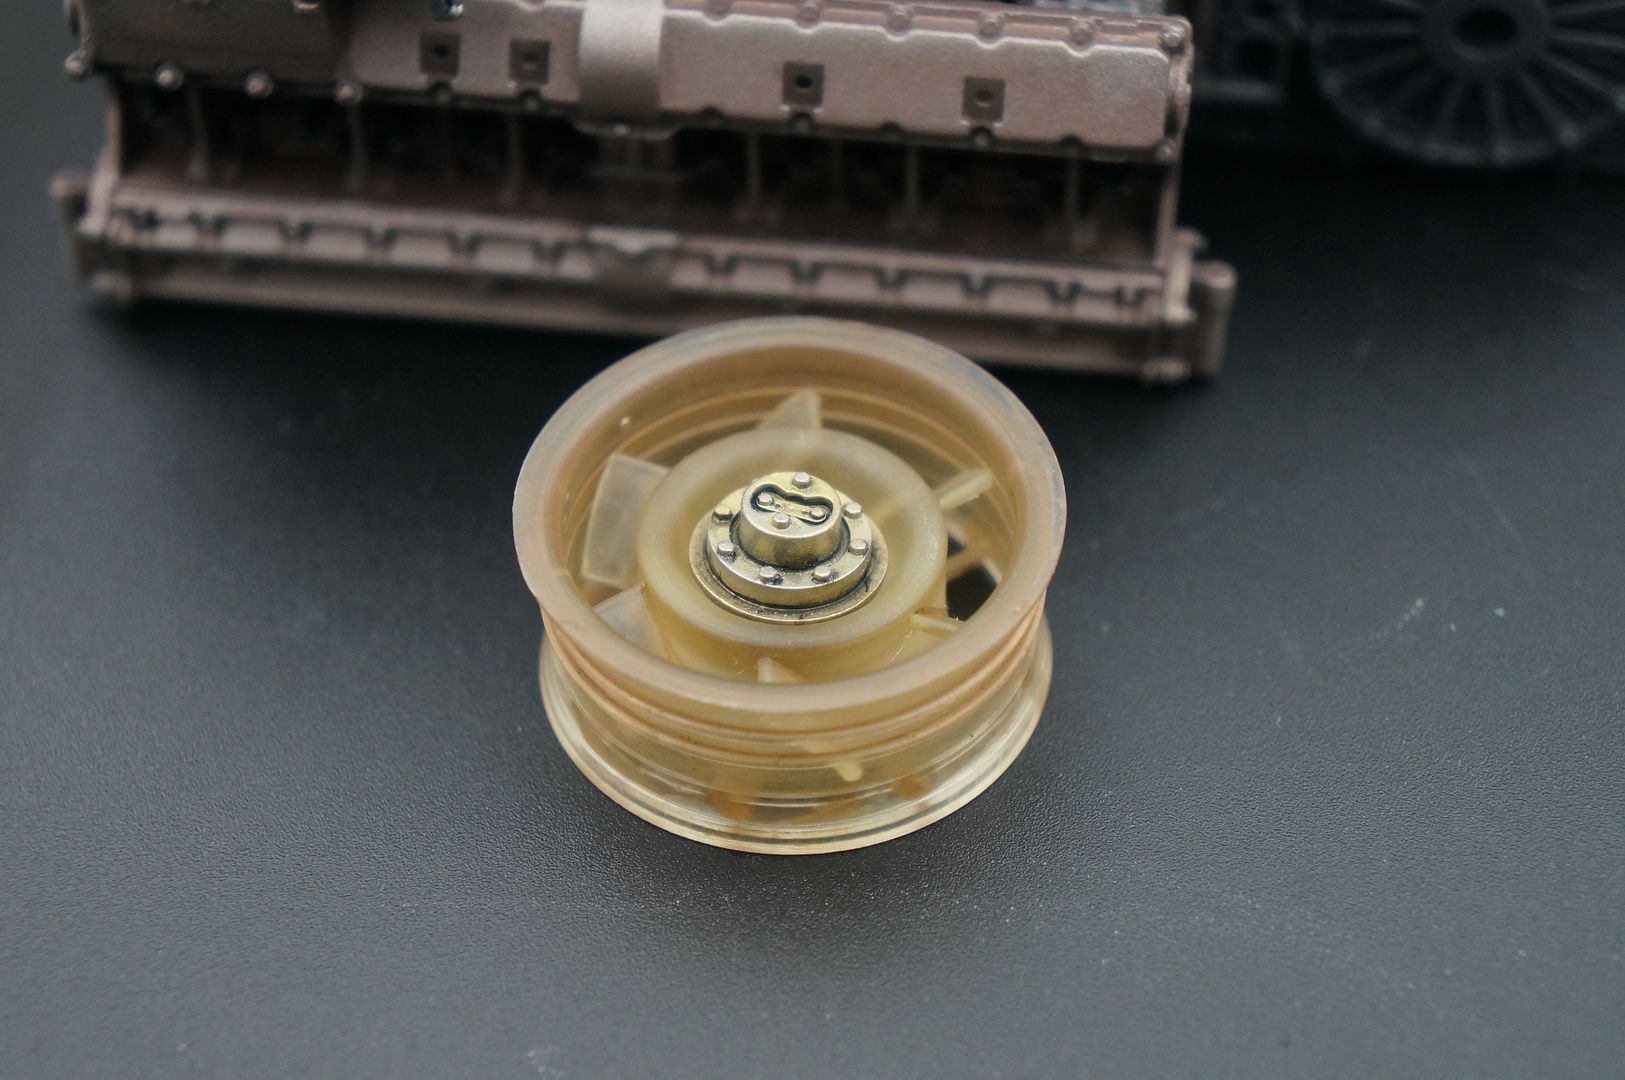
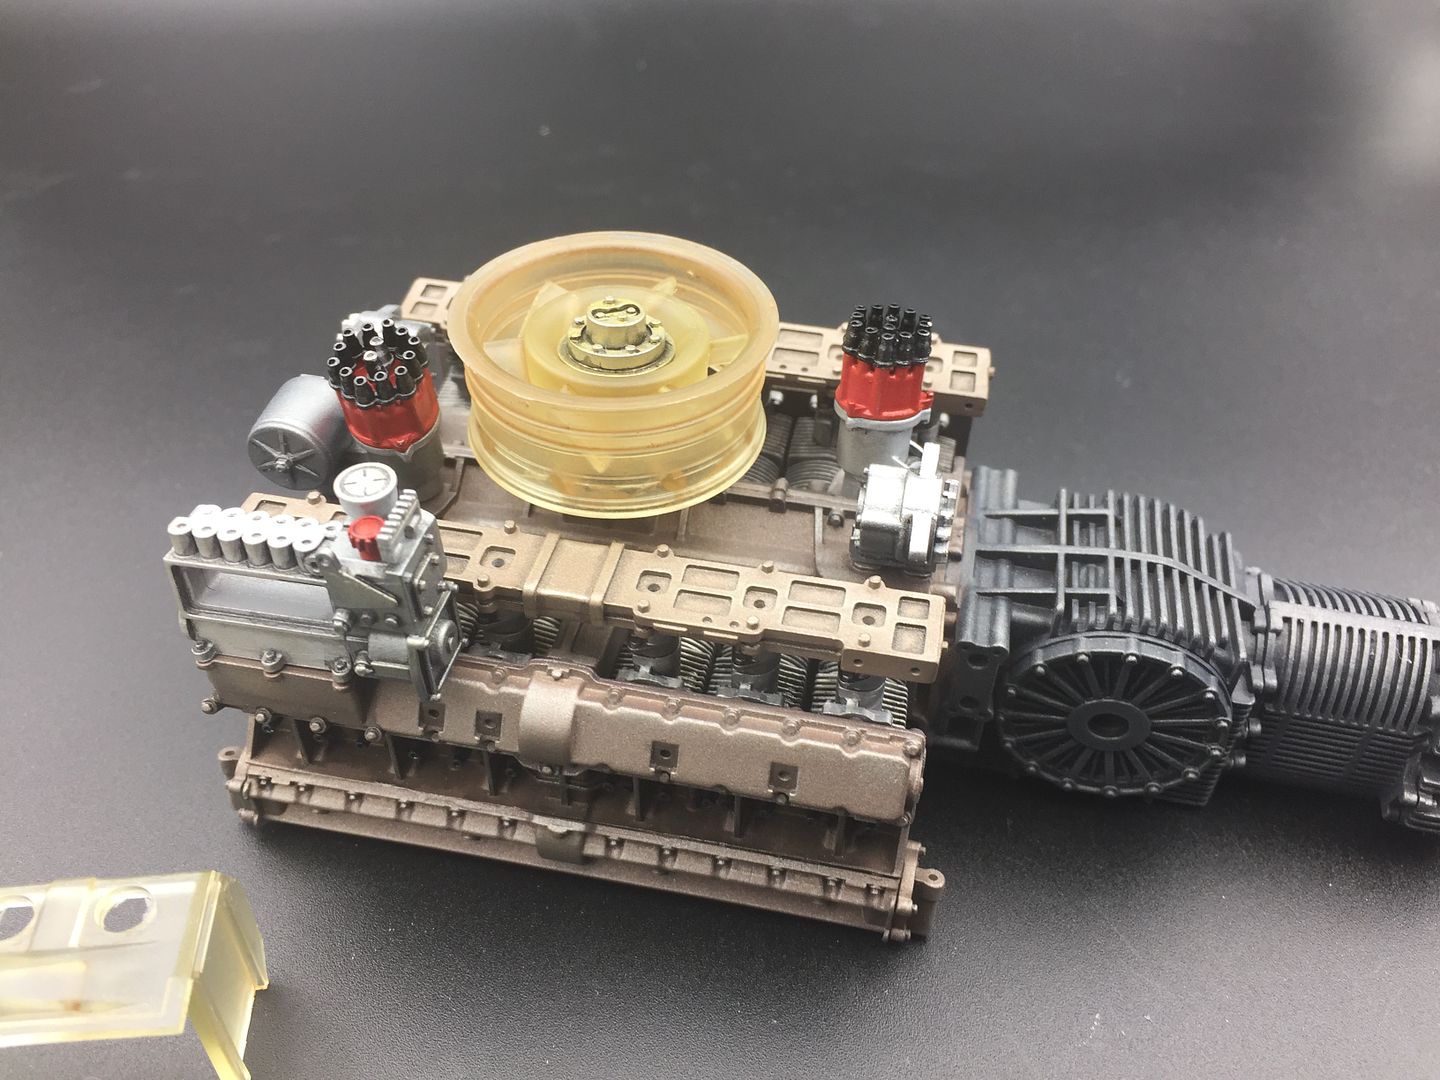
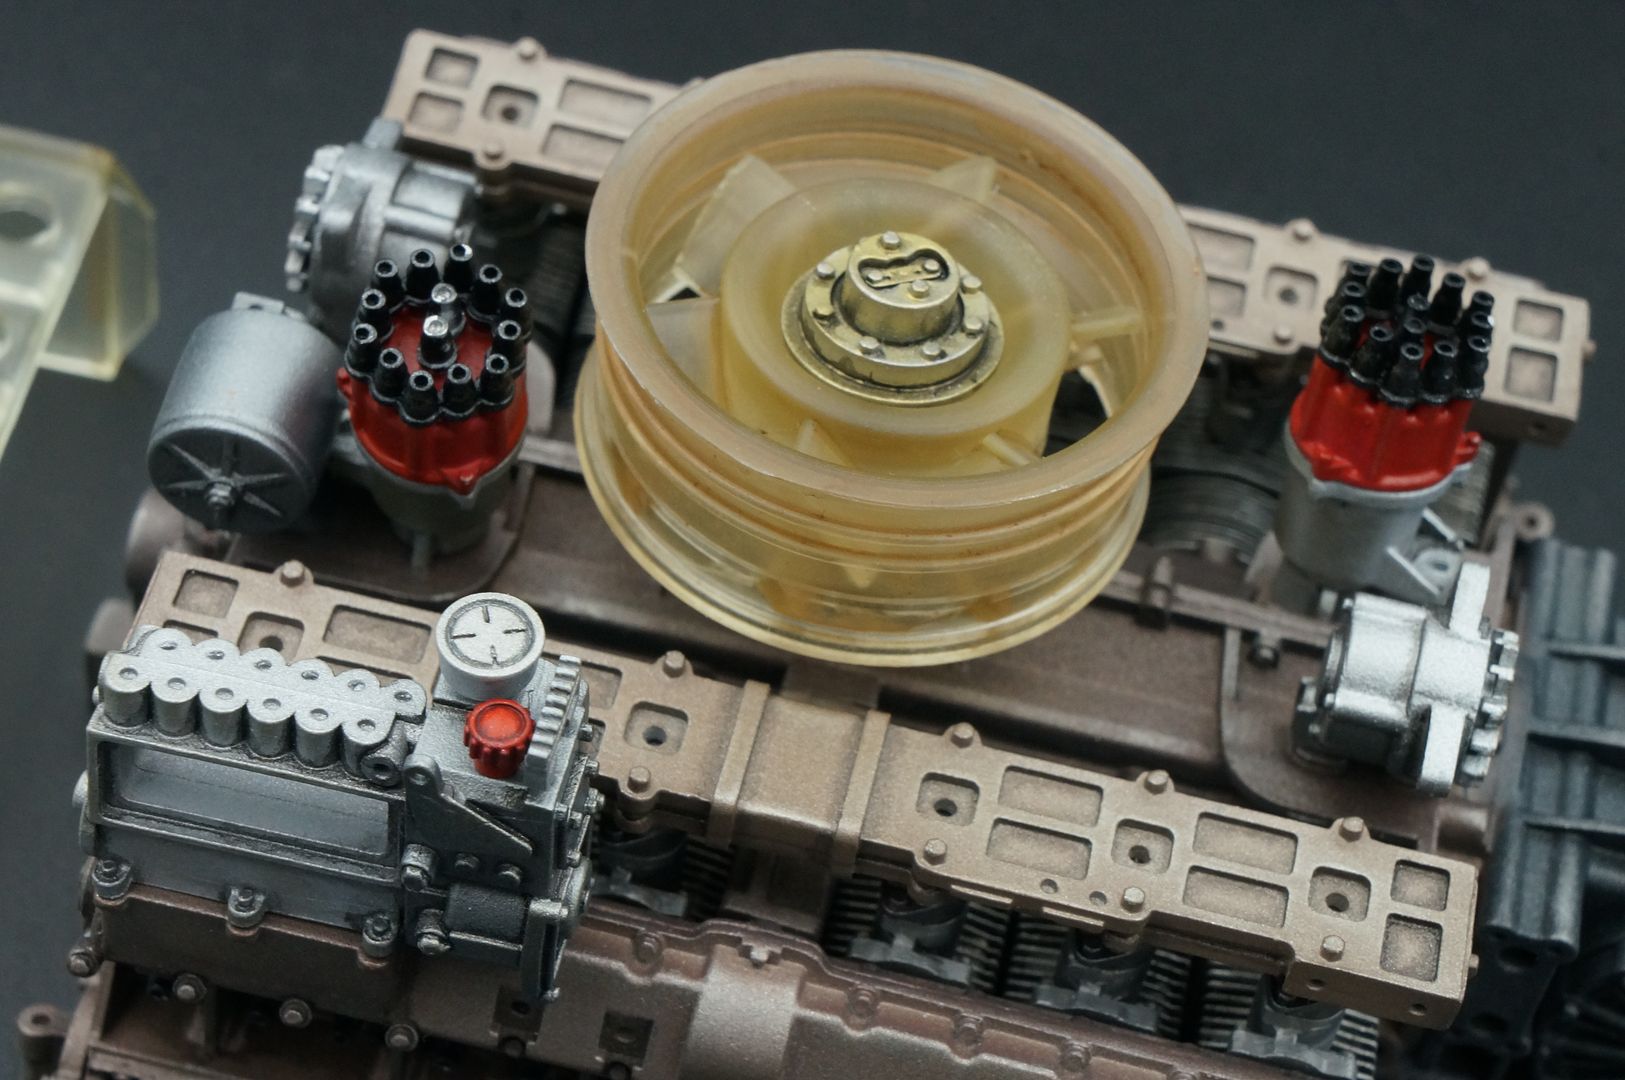
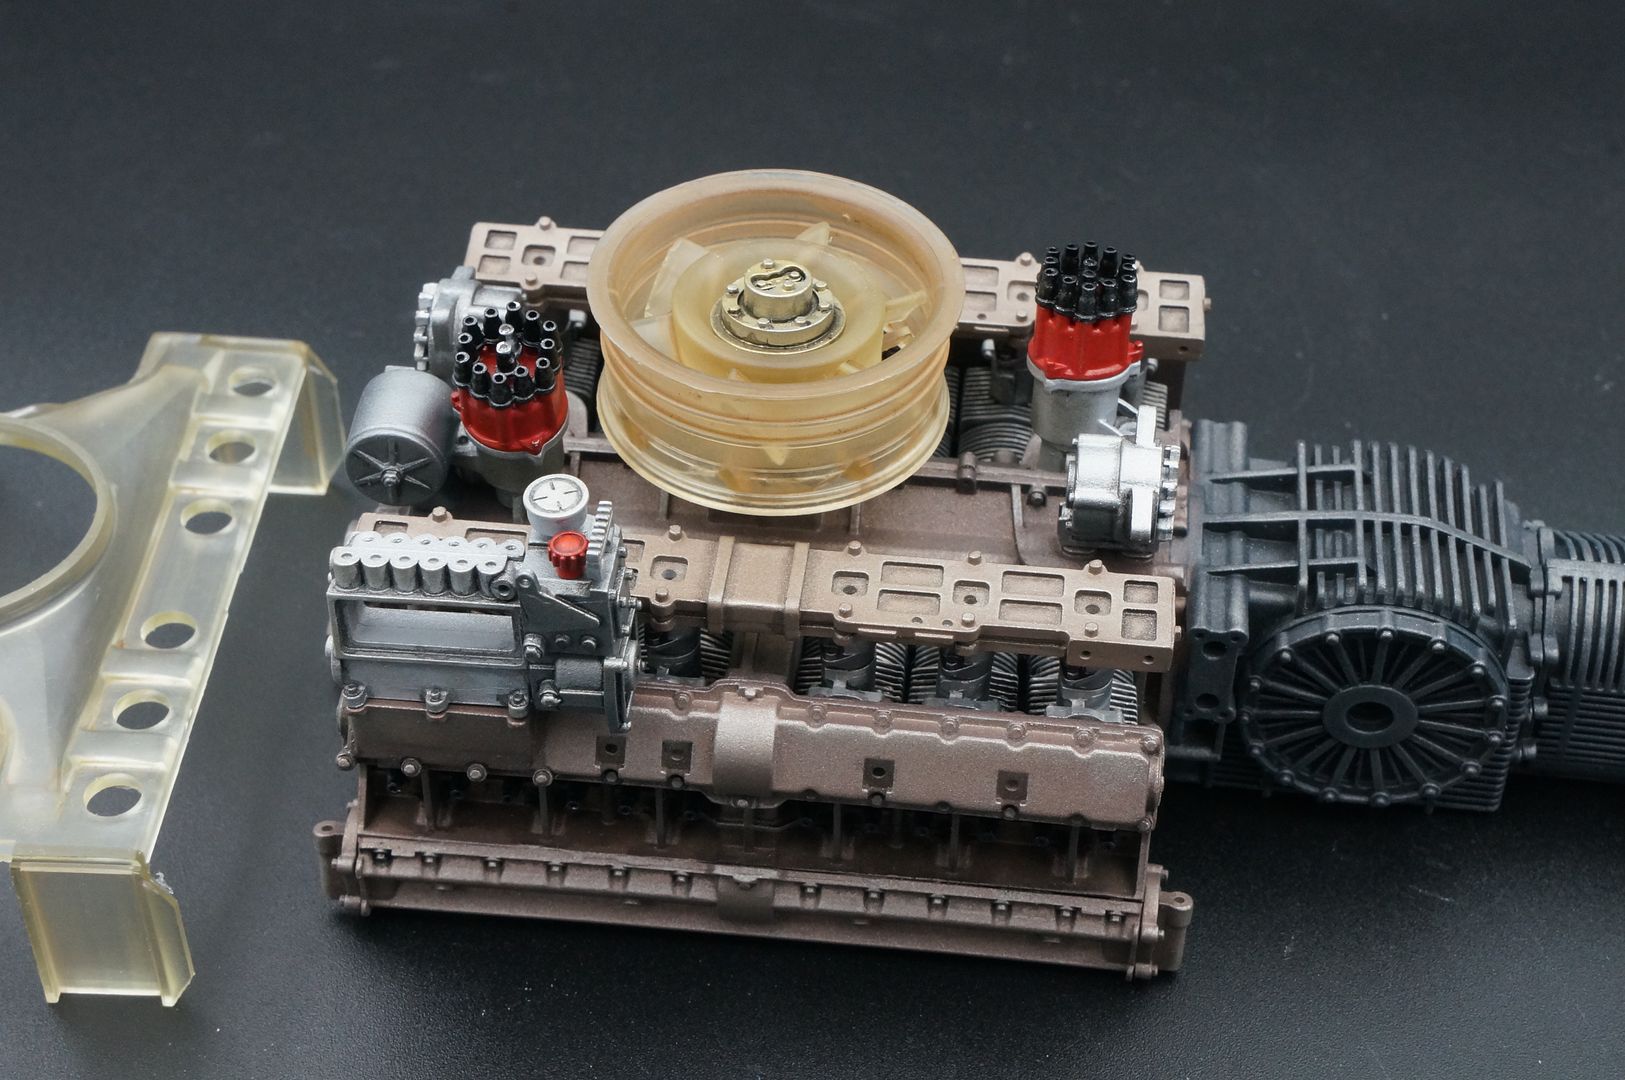
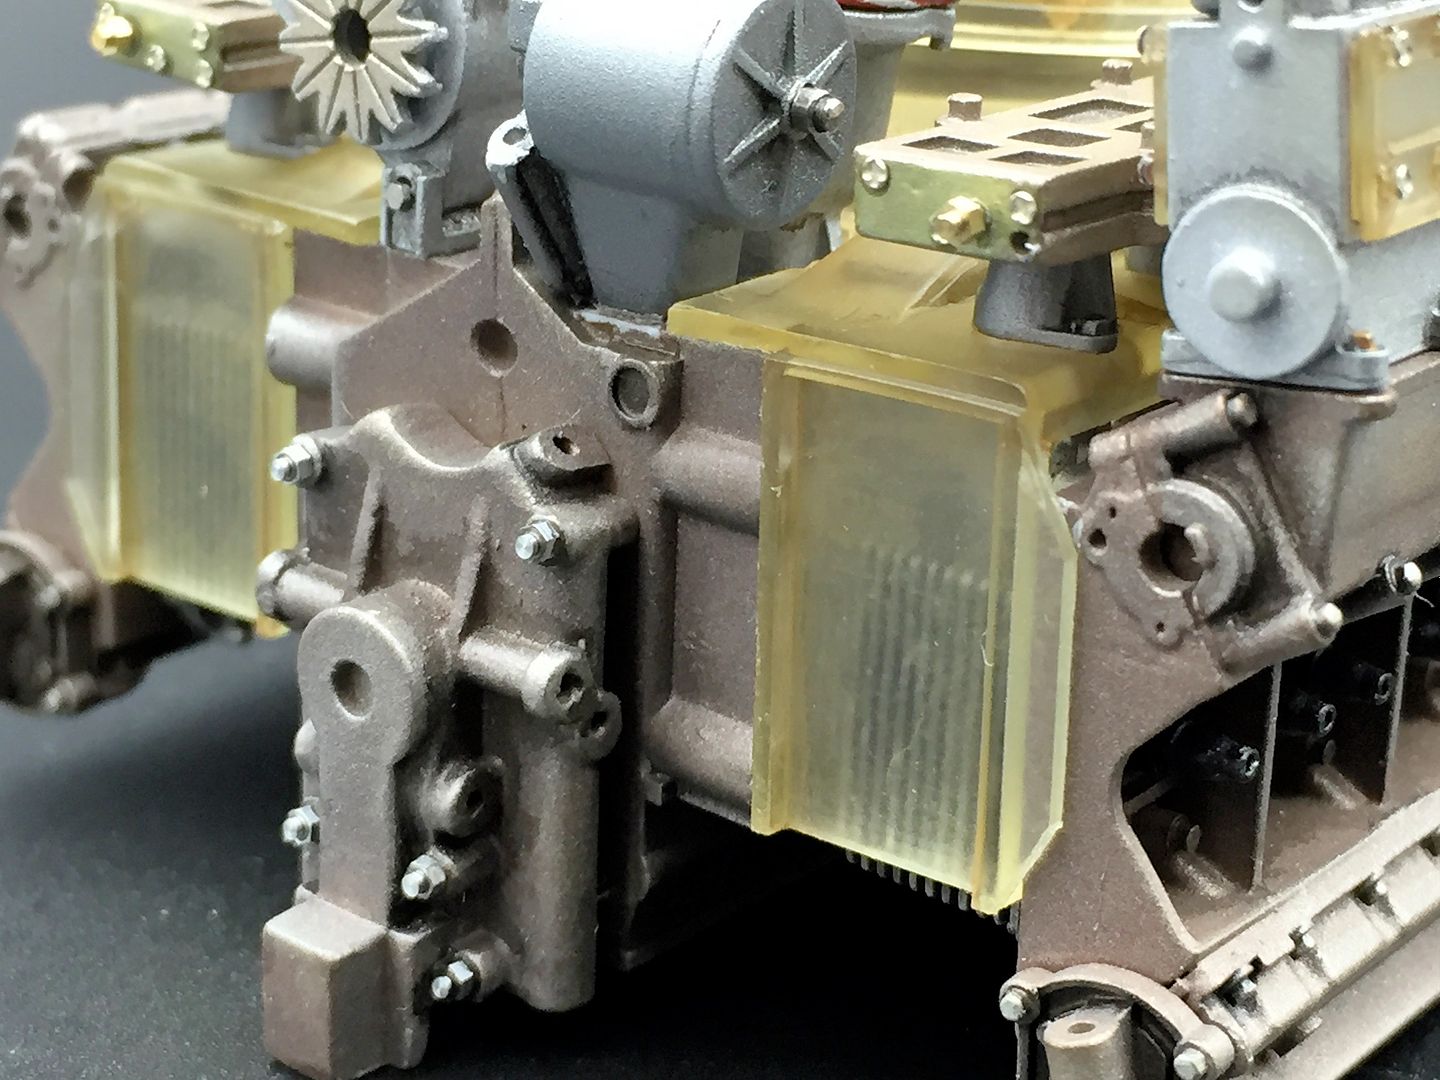
This MFH kit comes with some nicely cast 'resin' parts - that is parts that are unfinished GRP or resin on the real car (as opposed to the white resin bodywork) = these are tinted like the real engine, but IMO need a little darkening and some weathering to pick out the detail - none of them look 'clean' on the real cars...in the picture below you can see the fan housing (dry fit) is darker, where I have used a Tamiya weathering wash (brown) to tint it - it has worked really well I think - more to go, but a good start...
So of course with all these painted bits done, I had to dry-fit as much as I could, to see what it is going to look like
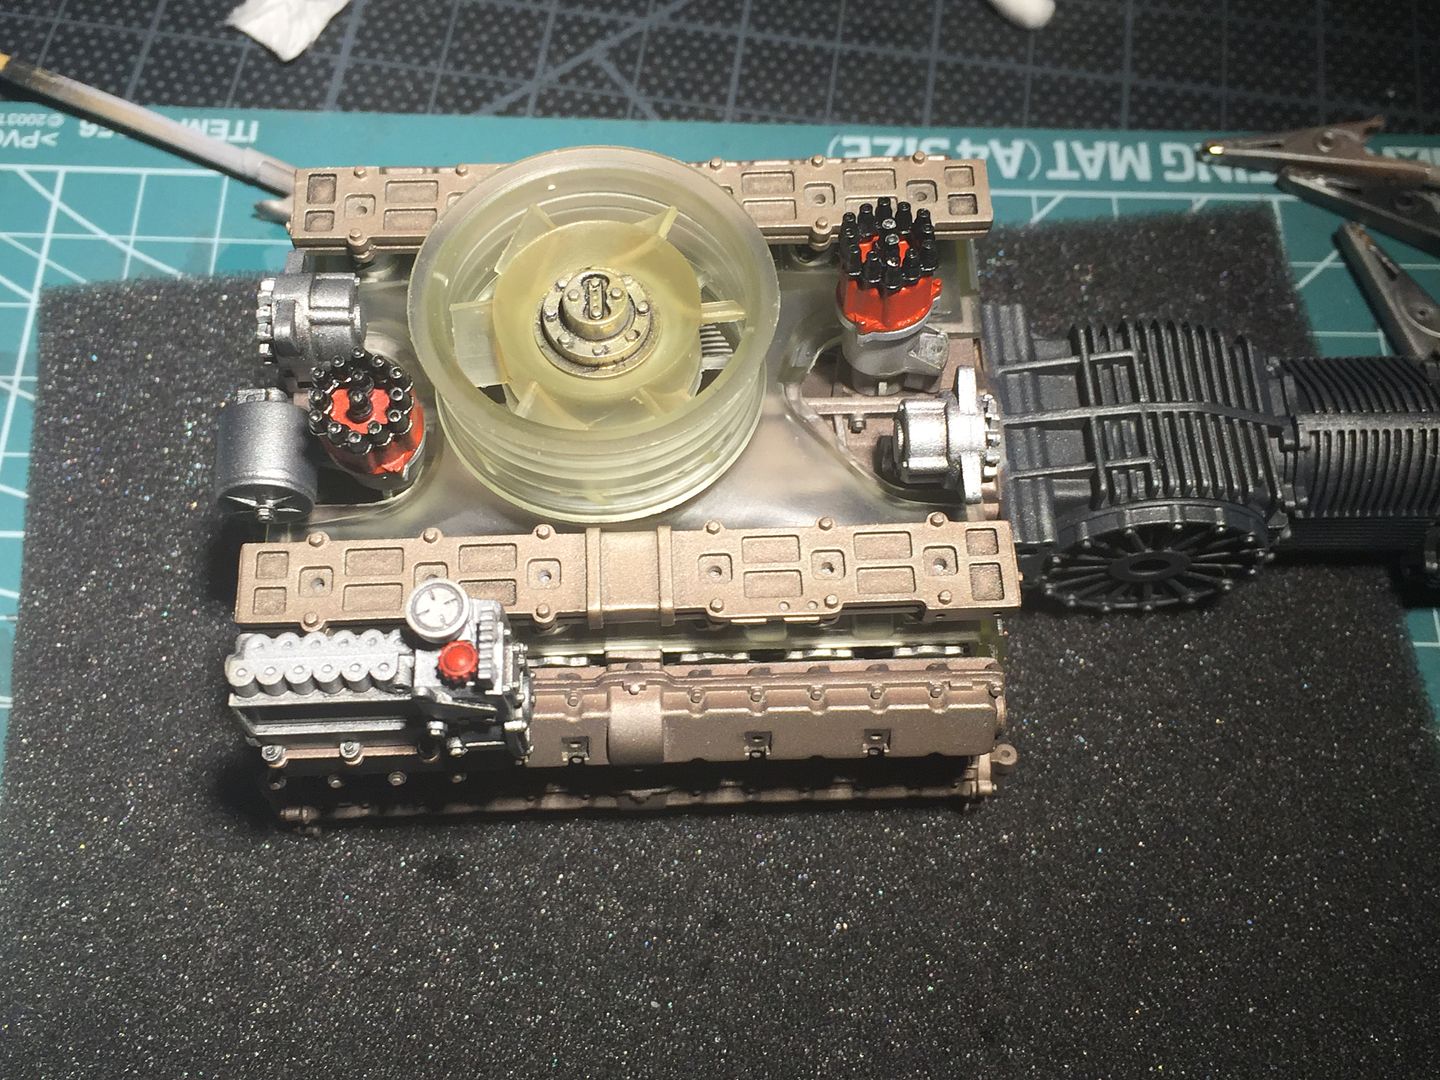
You can see how much the shrouding hides...
Rest of pictures are without shroud...
Right - back from my China travels, and a 'recovery' day meant a bit more modelling (and the opportunity for more MFH purchases - OMG I may be addicted)
So...continuing on with the engine (did you see that MFH are about to release a whole host of 'engine only' kits - the ones in cars are usually totally hidden - like this one will be. Damn them!!)
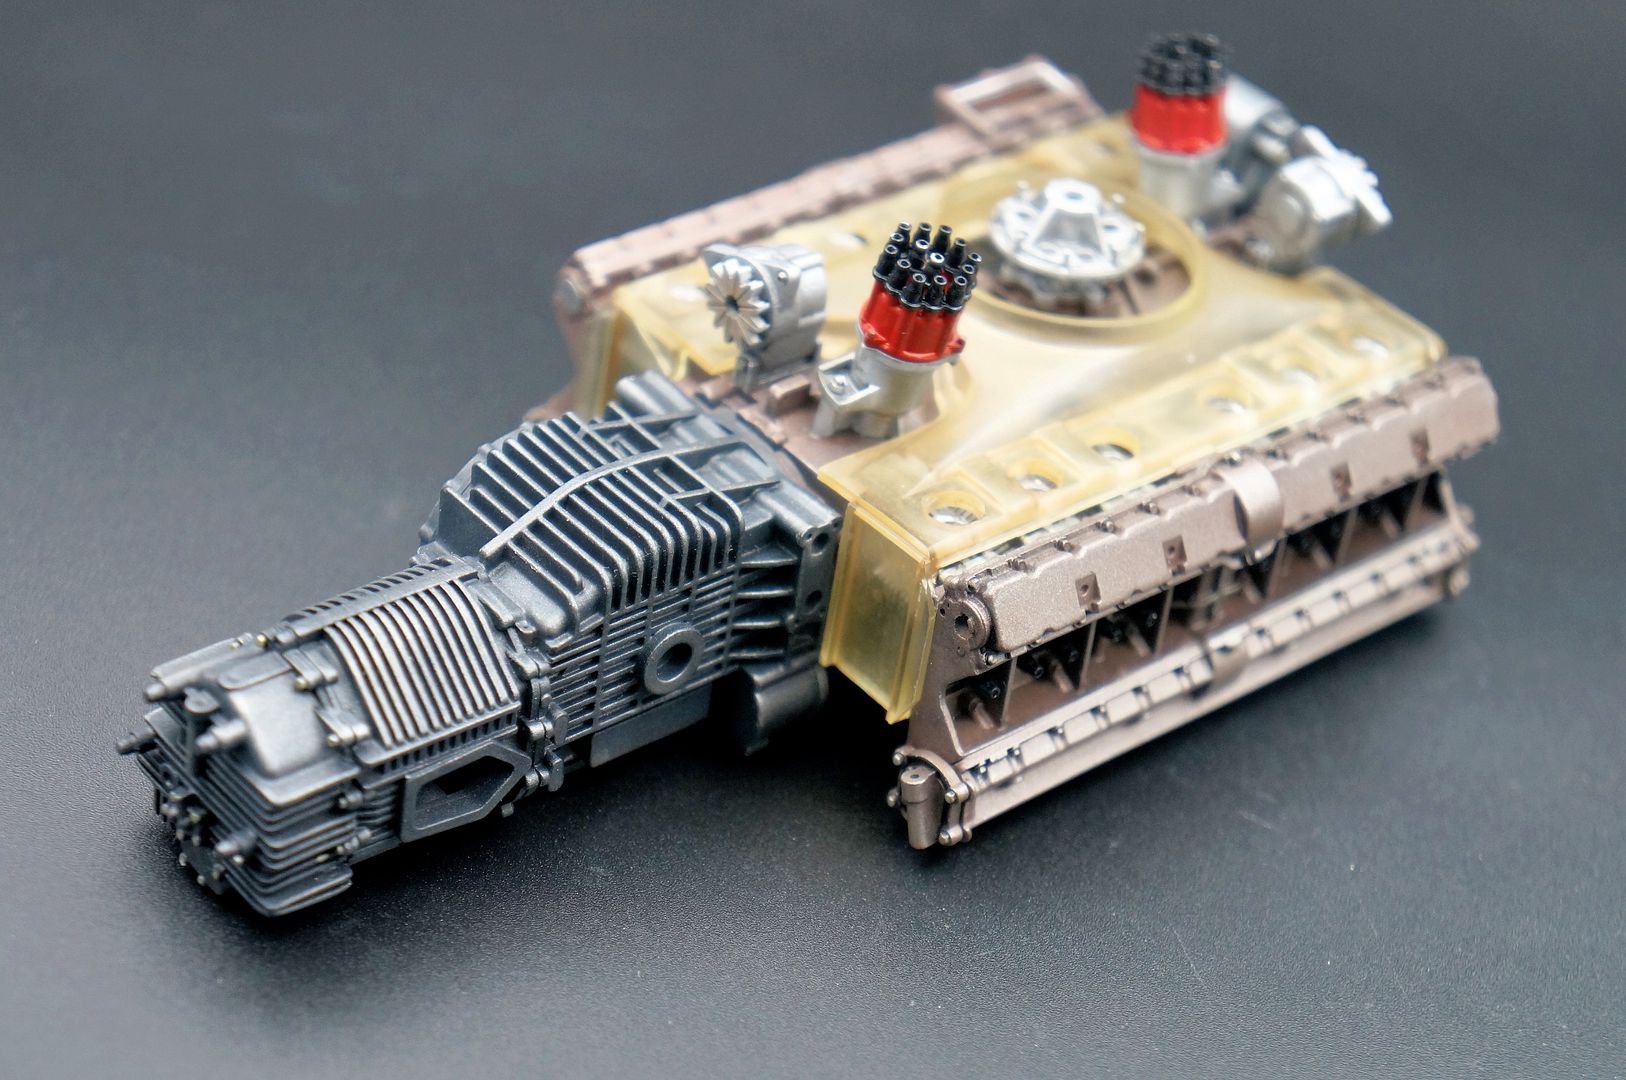
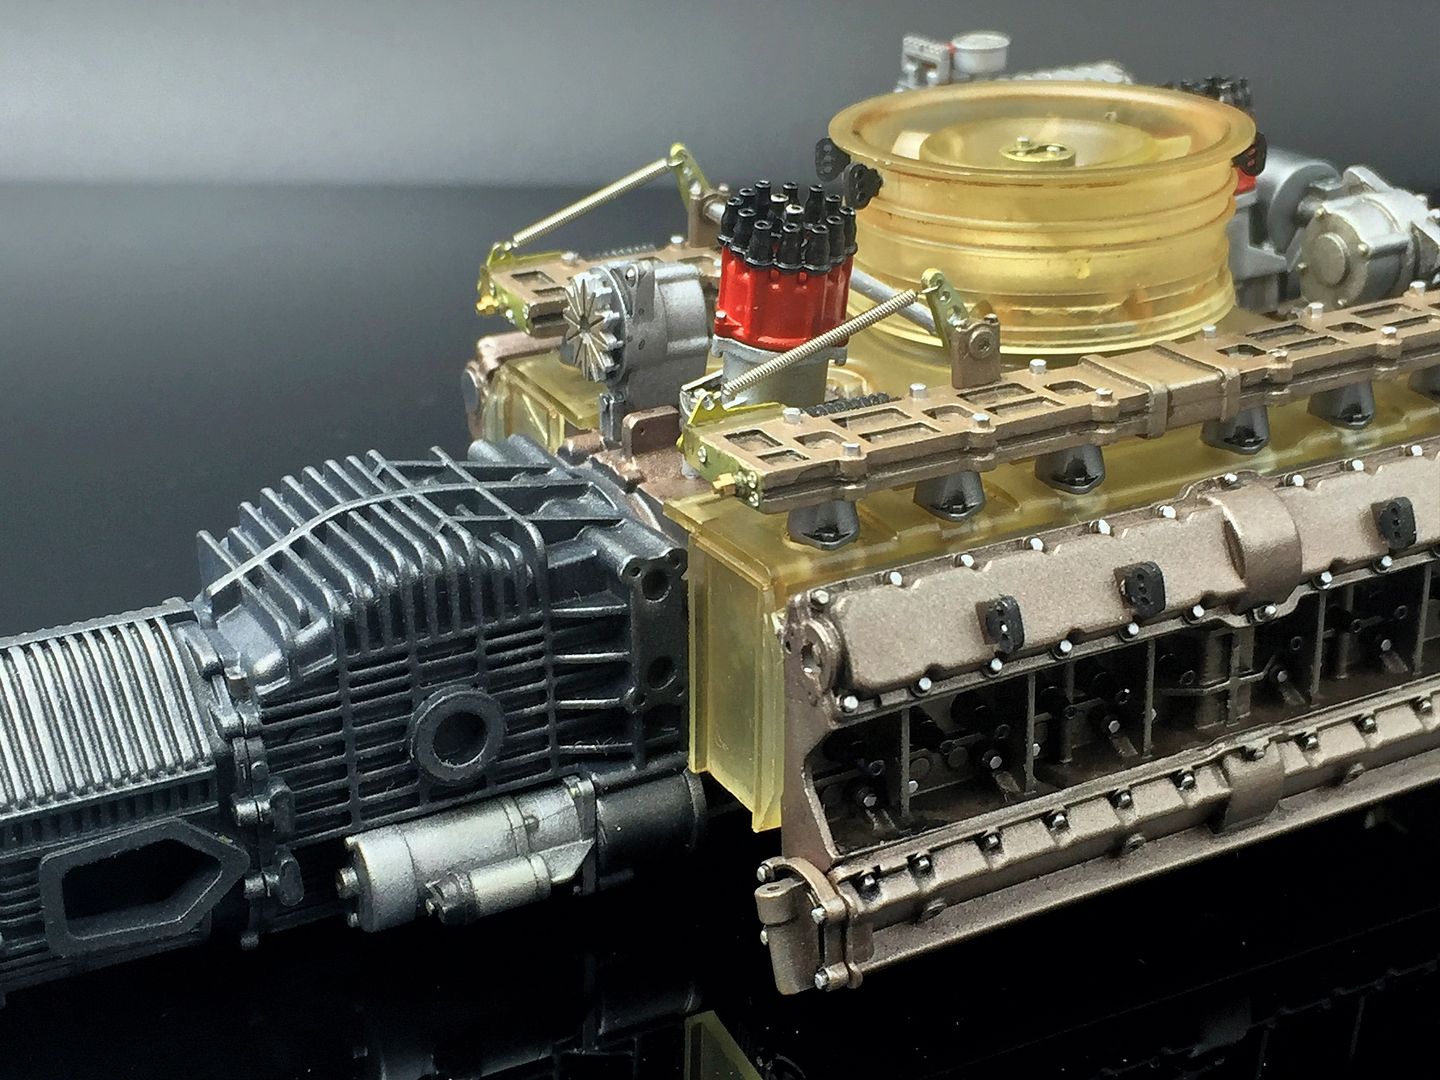
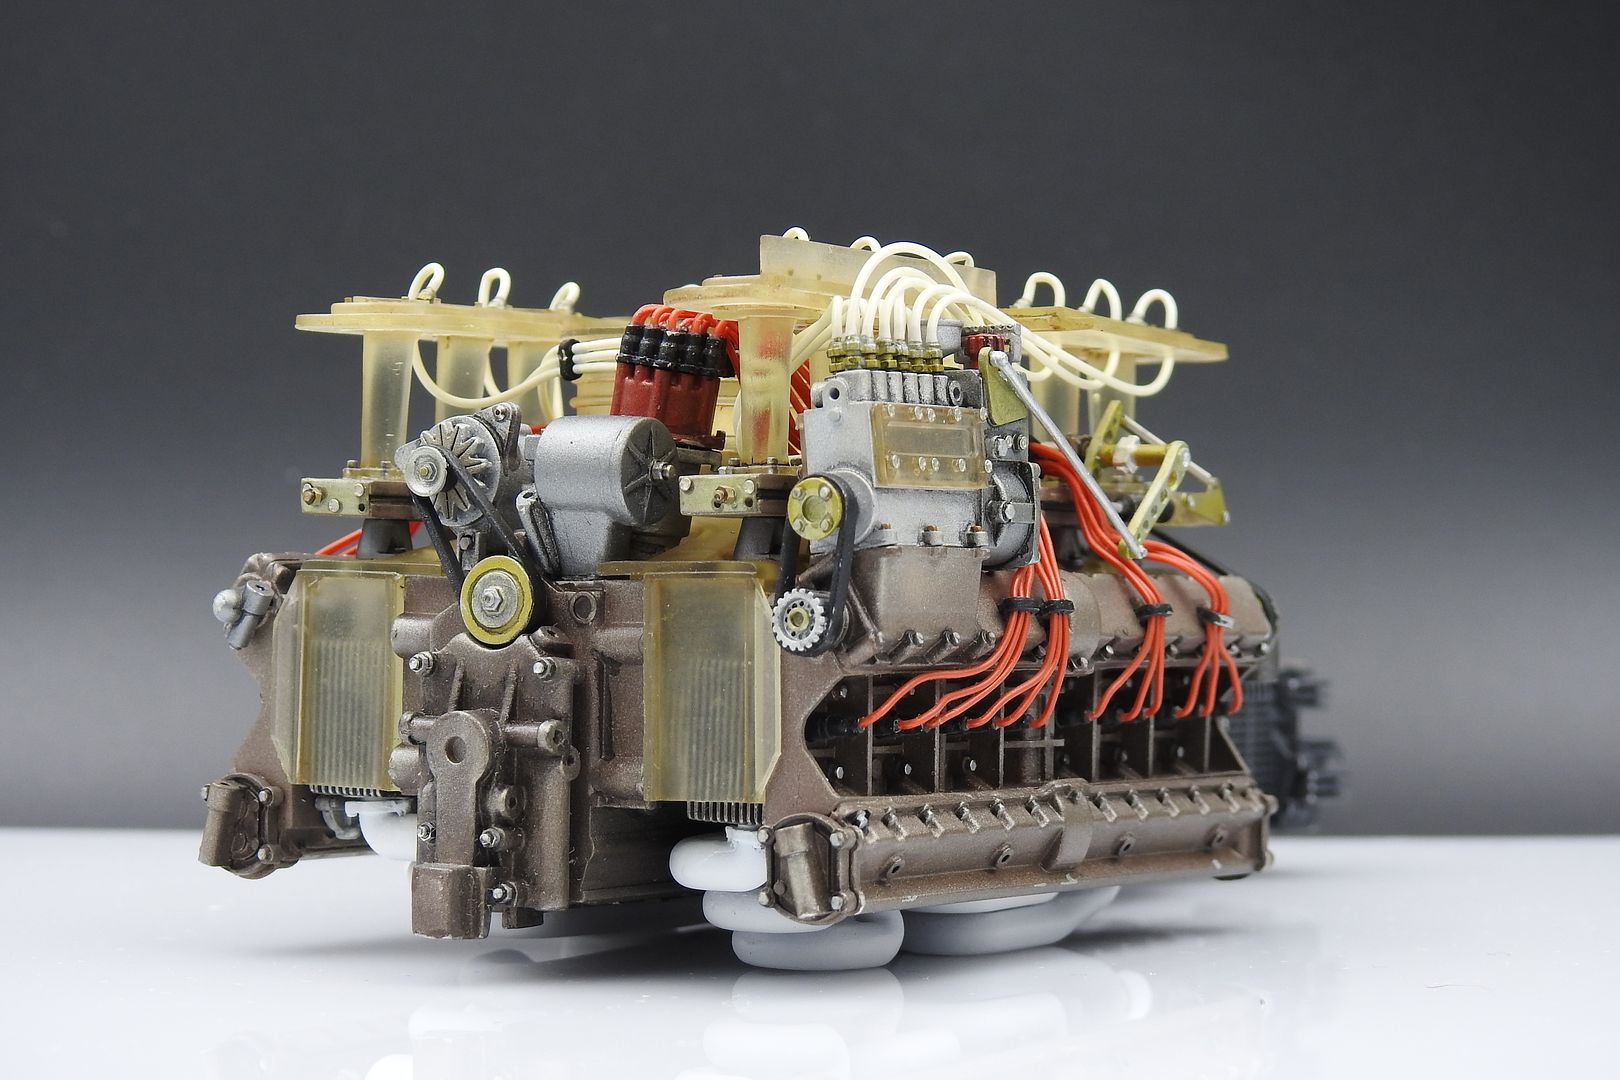
Fitted the resin shroud (guides the cooling air around the cylinder heads, from the massive fan on the top) after again tinting it with some brown tamiya 'weathering' wash - it just gives the already-yellow MFH resin parts a slightly darker look more in keeping with the real thing...
The fuel rails fit on top of this over the inlets - I had to widen some of the holes through that reson shroud to allow the rails to sit properly - the stretched holes won't be seen once everything is fitted. I used a milling bit in the Dremel to do this - a round file would also work. I managed to crack one of the end tabs off whilst stretching the shroud into position - bit of super glue repair, and hopefully it won;t be noticed...
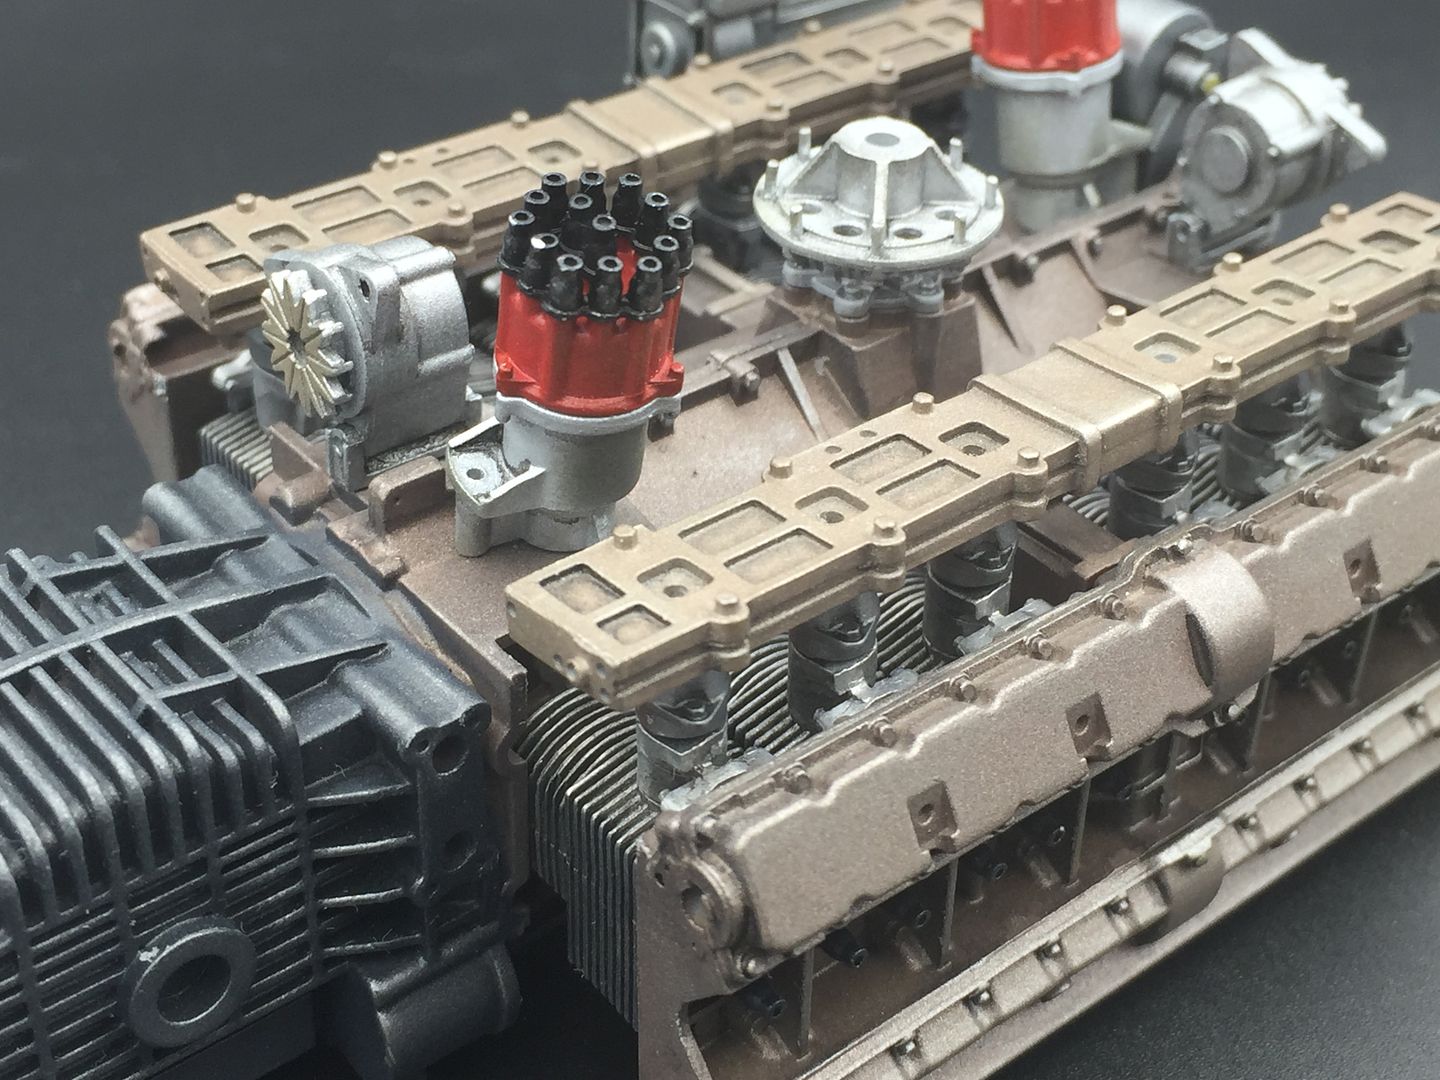
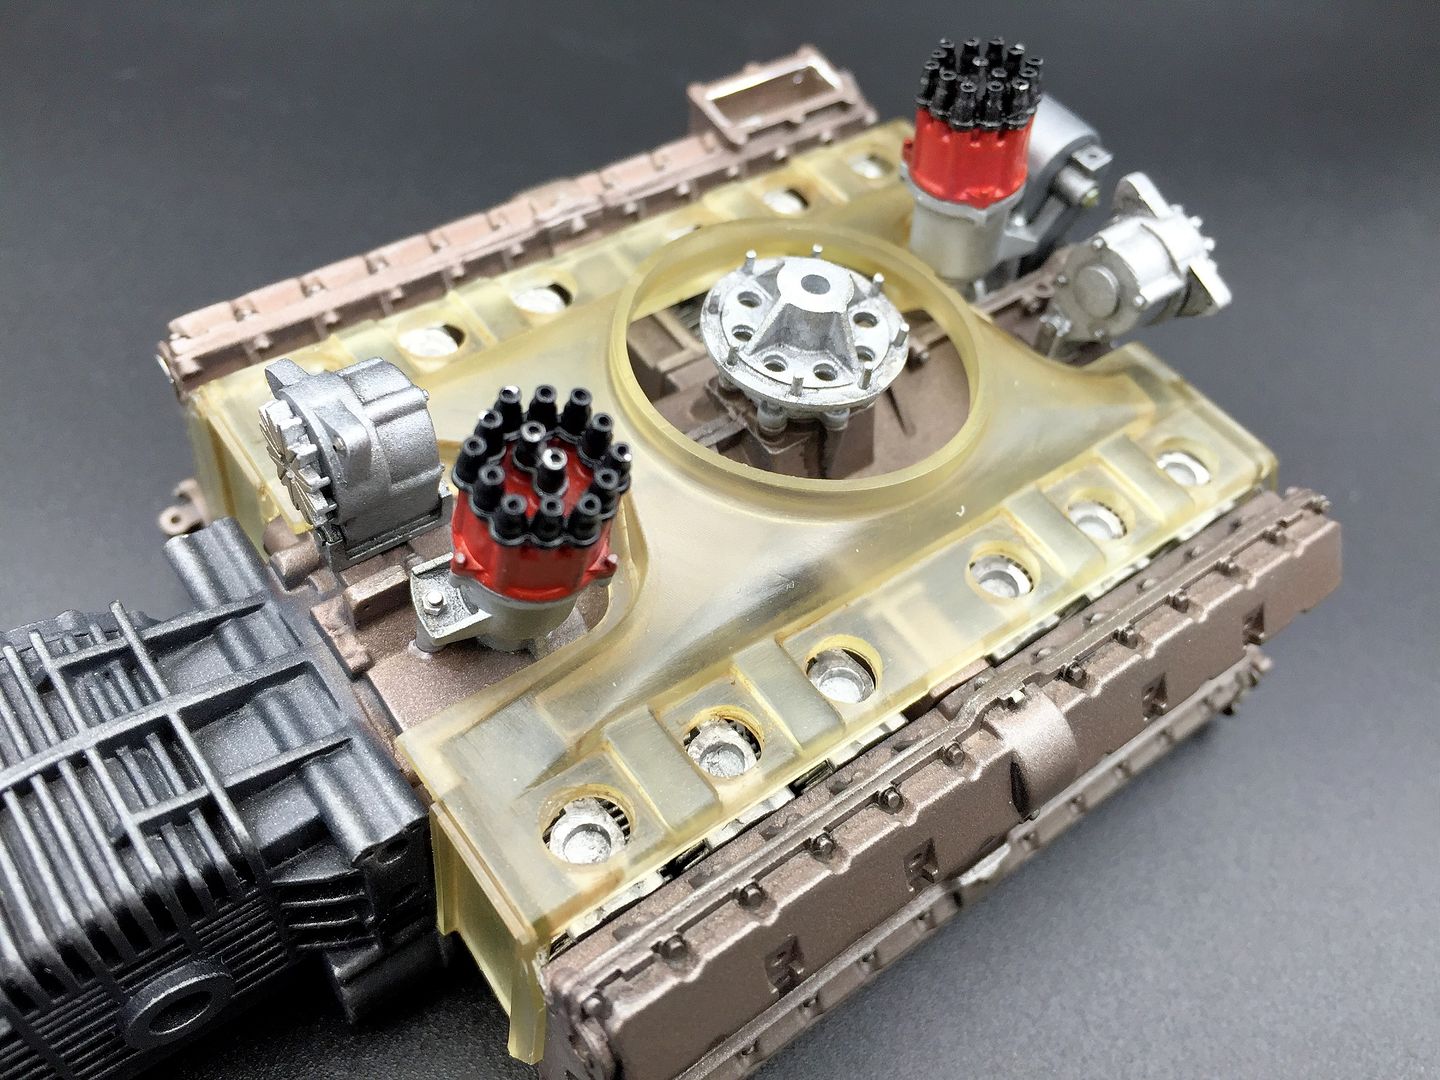
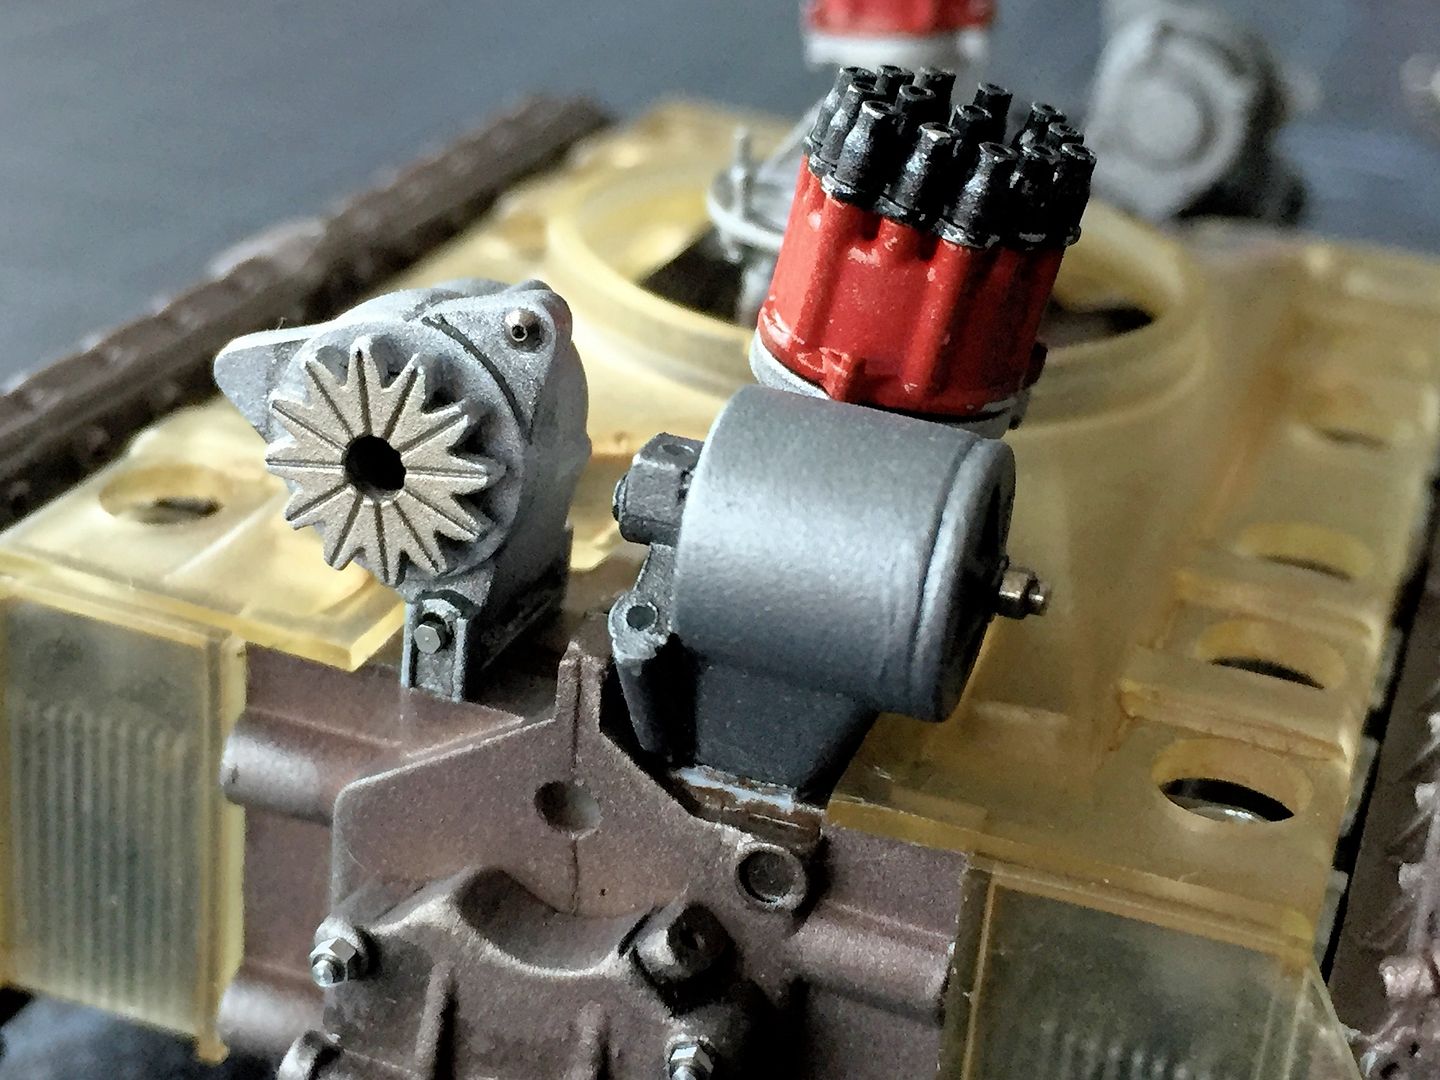
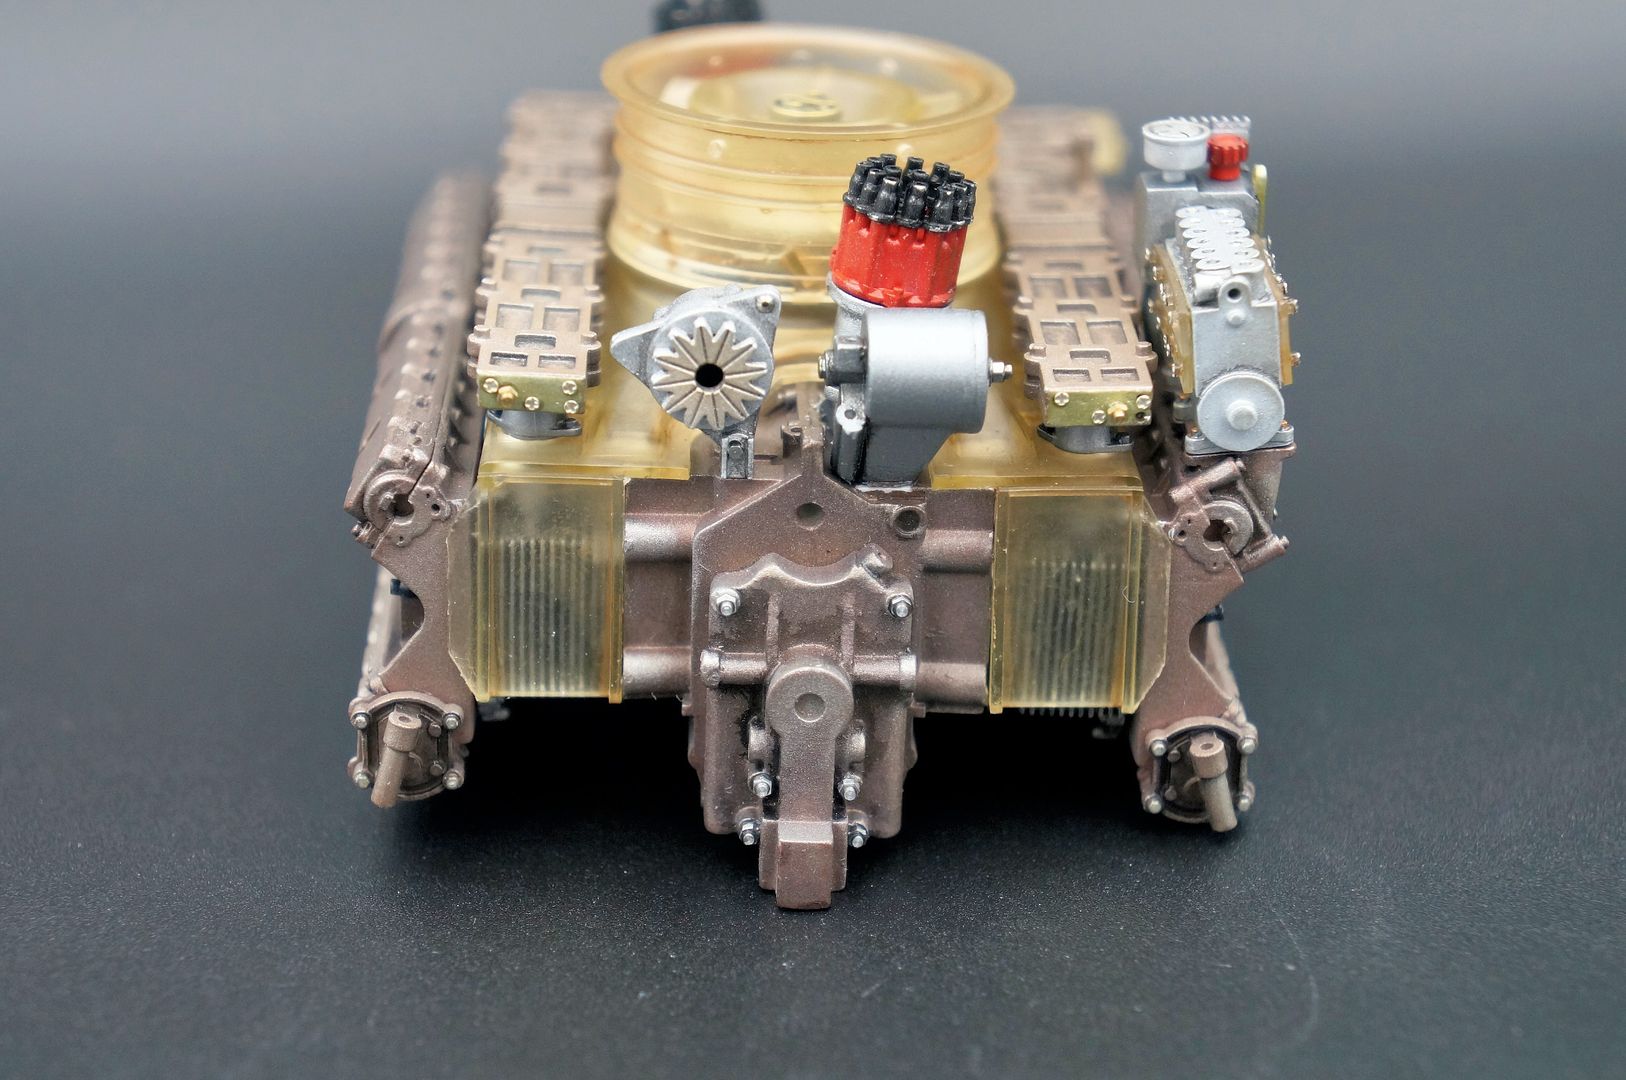
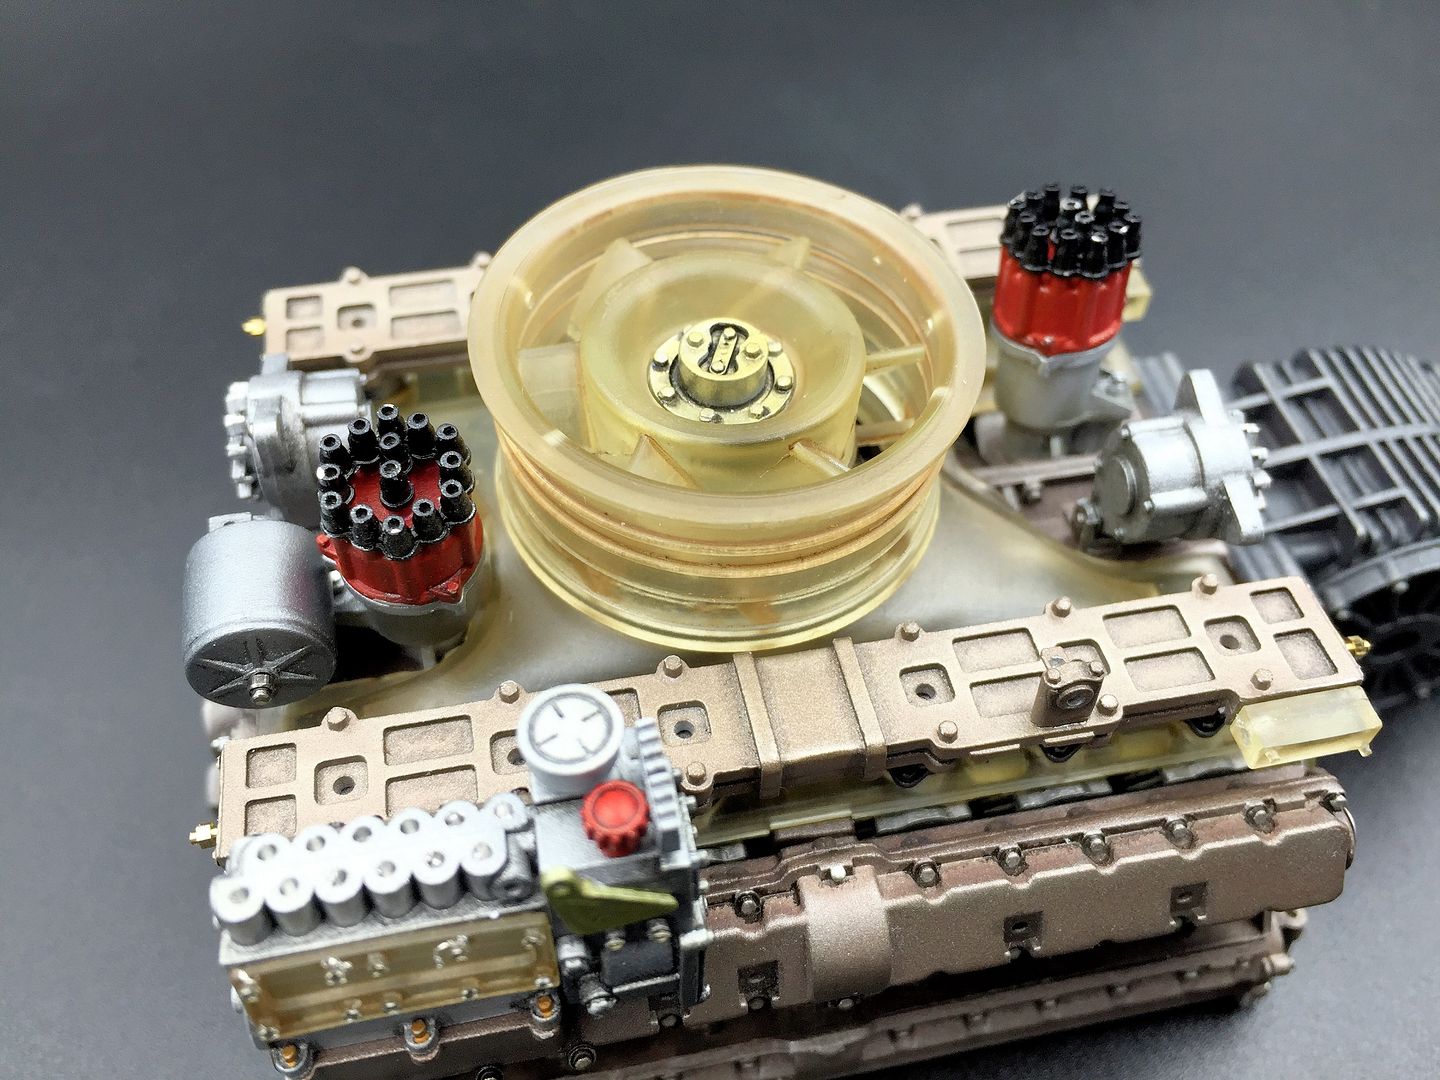
Once the shroud was in place, I could fit some of the ancillaries that I had already assembled - such as distributors, alternators etc...
I have used a few after-market nuts and bolts in these visible parts - filing or cutting off the MFH cast items. I have not gone mad on these as many really won't be seen. I'll save that for the separate engine kits I will no doubt make!
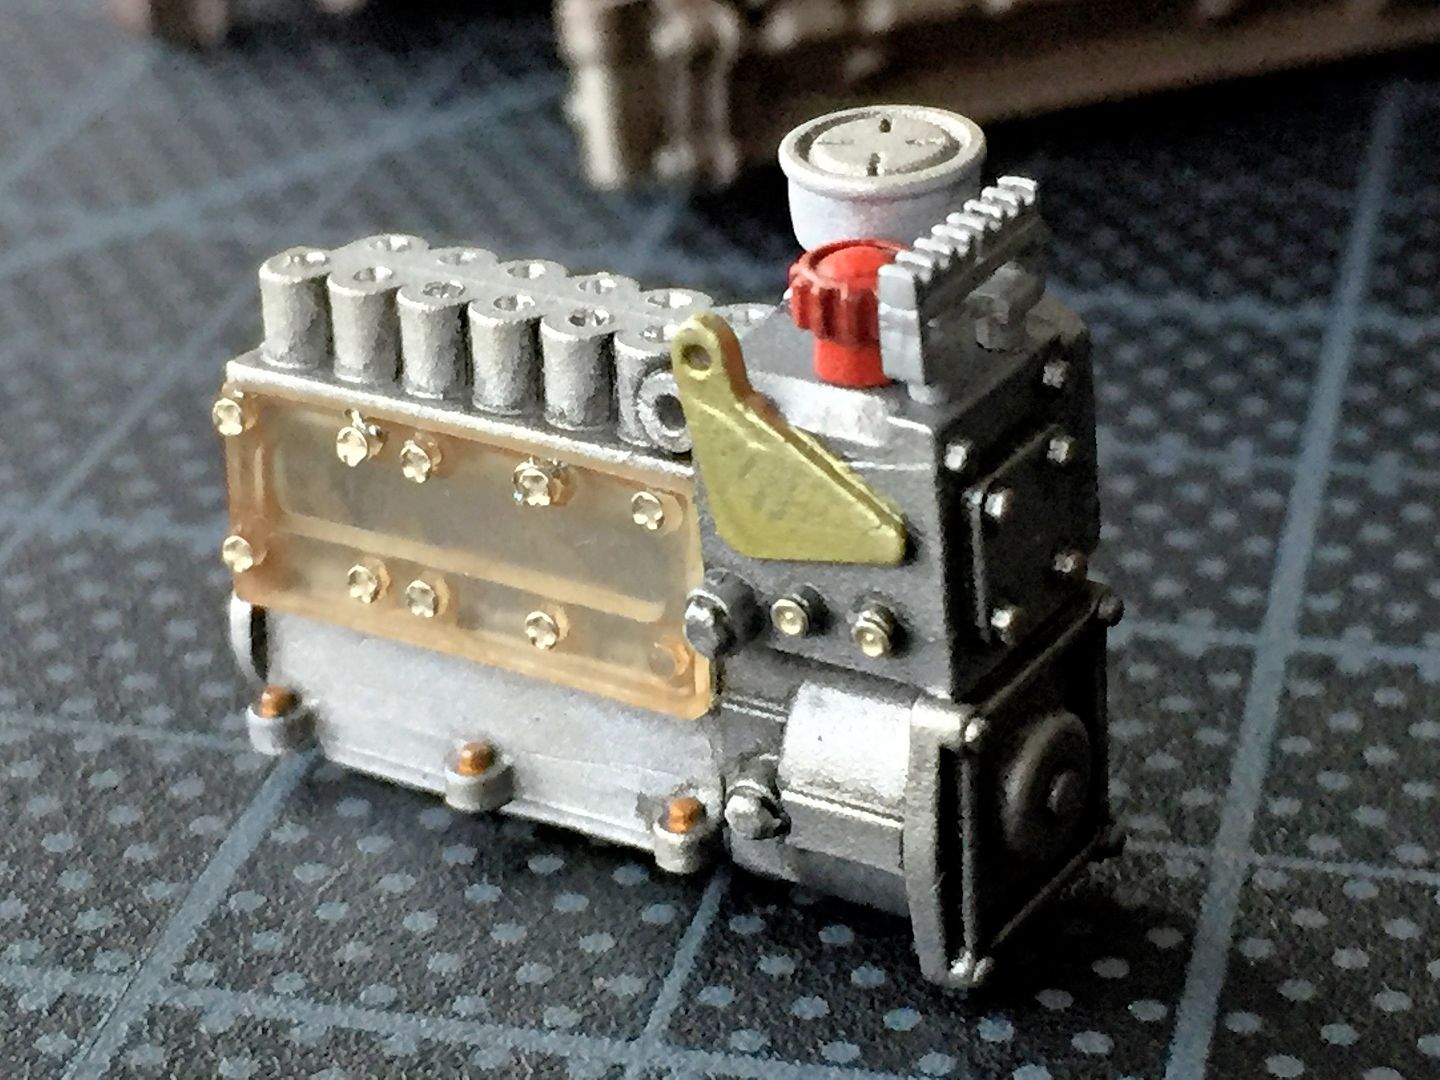
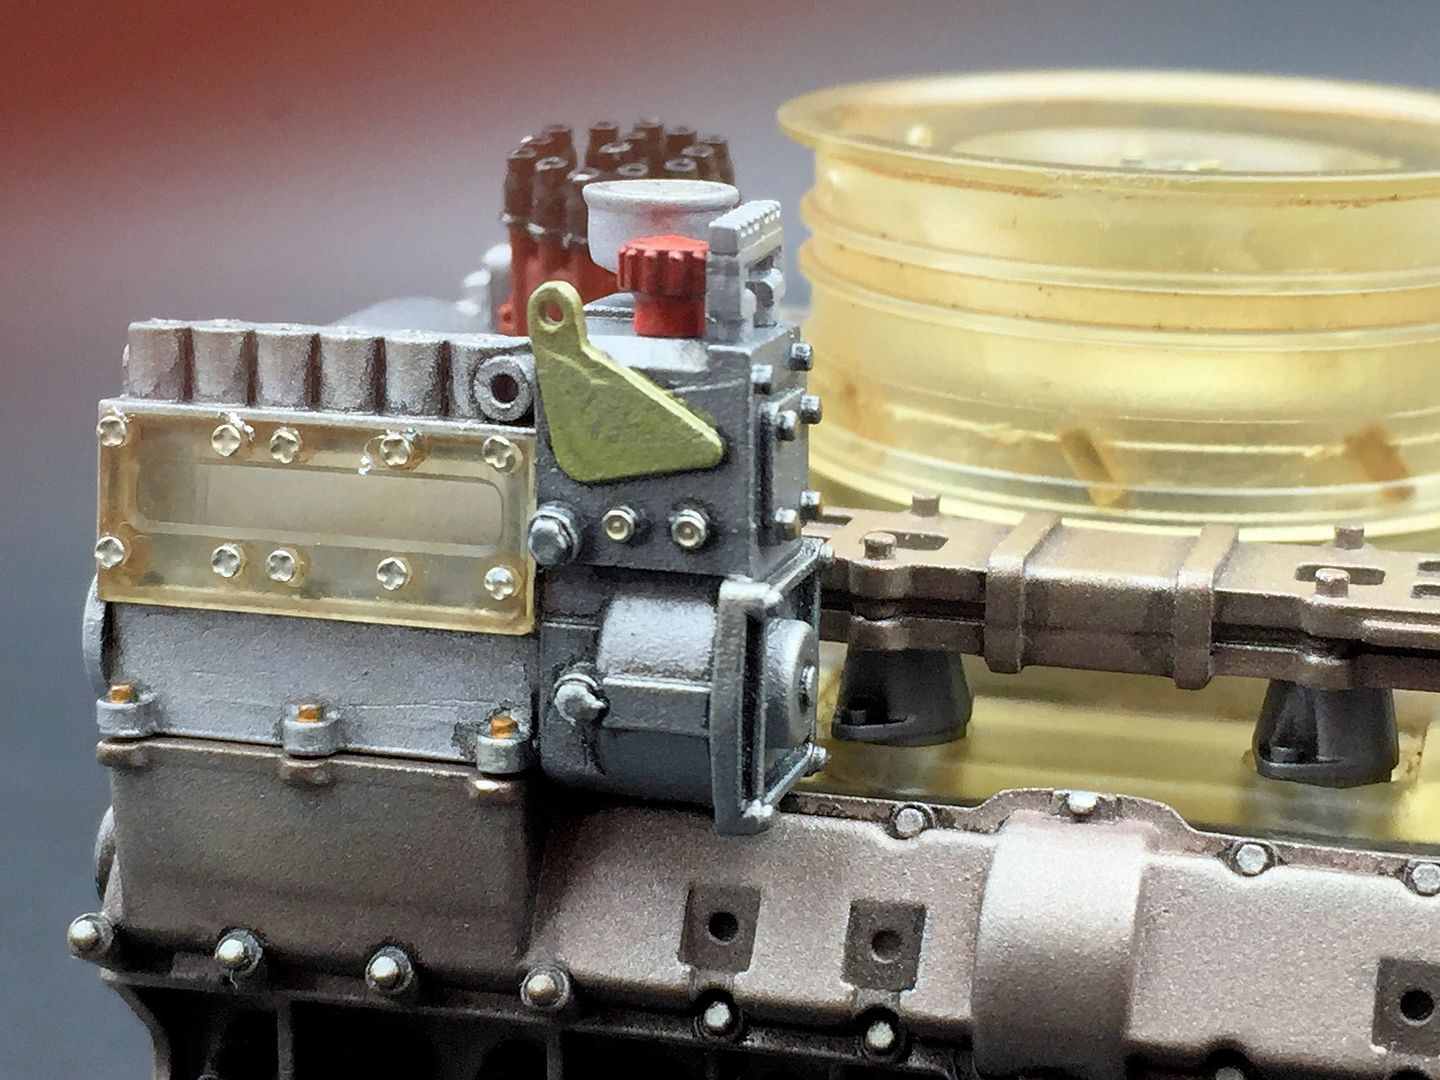
Really like this little assembly - fuel system... added a few PE screw heads to the clear windows, and will have more detail to add later...
I like how the gearbox looks - lucked out on that 'weathering'
Lots and lots of finishing effects etc to do later...
Some of these parts are little models in themselves...5 bits in this little guy...
This MFH kit comes with some nicely cast 'resin' parts - that is parts that are unfinished GRP or resin on the real car (as opposed to the white resin bodywork) = these are tinted like the real engine, but IMO need a little darkening and some weathering to pick out the detail - none of them look 'clean' on the real cars...in the picture below you can see the fan housing (dry fit) is darker, where I have used a Tamiya weathering wash (brown) to tint it - it has worked really well I think - more to go, but a good start...
So of course with all these painted bits done, I had to dry-fit as much as I could, to see what it is going to look like
You can see how much the shrouding hides...
Rest of pictures are without shroud...
Right - back from my China travels, and a 'recovery' day meant a bit more modelling (and the opportunity for more MFH purchases - OMG I may be addicted)
So...continuing on with the engine (did you see that MFH are about to release a whole host of 'engine only' kits - the ones in cars are usually totally hidden - like this one will be. Damn them!!)
Fitted the resin shroud (guides the cooling air around the cylinder heads, from the massive fan on the top) after again tinting it with some brown tamiya 'weathering' wash - it just gives the already-yellow MFH resin parts a slightly darker look more in keeping with the real thing...
The fuel rails fit on top of this over the inlets - I had to widen some of the holes through that reson shroud to allow the rails to sit properly - the stretched holes won't be seen once everything is fitted. I used a milling bit in the Dremel to do this - a round file would also work. I managed to crack one of the end tabs off whilst stretching the shroud into position - bit of super glue repair, and hopefully it won;t be noticed...
Once the shroud was in place, I could fit some of the ancillaries that I had already assembled - such as distributors, alternators etc...
I have used a few after-market nuts and bolts in these visible parts - filing or cutting off the MFH cast items. I have not gone mad on these as many really won't be seen. I'll save that for the separate engine kits I will no doubt make!
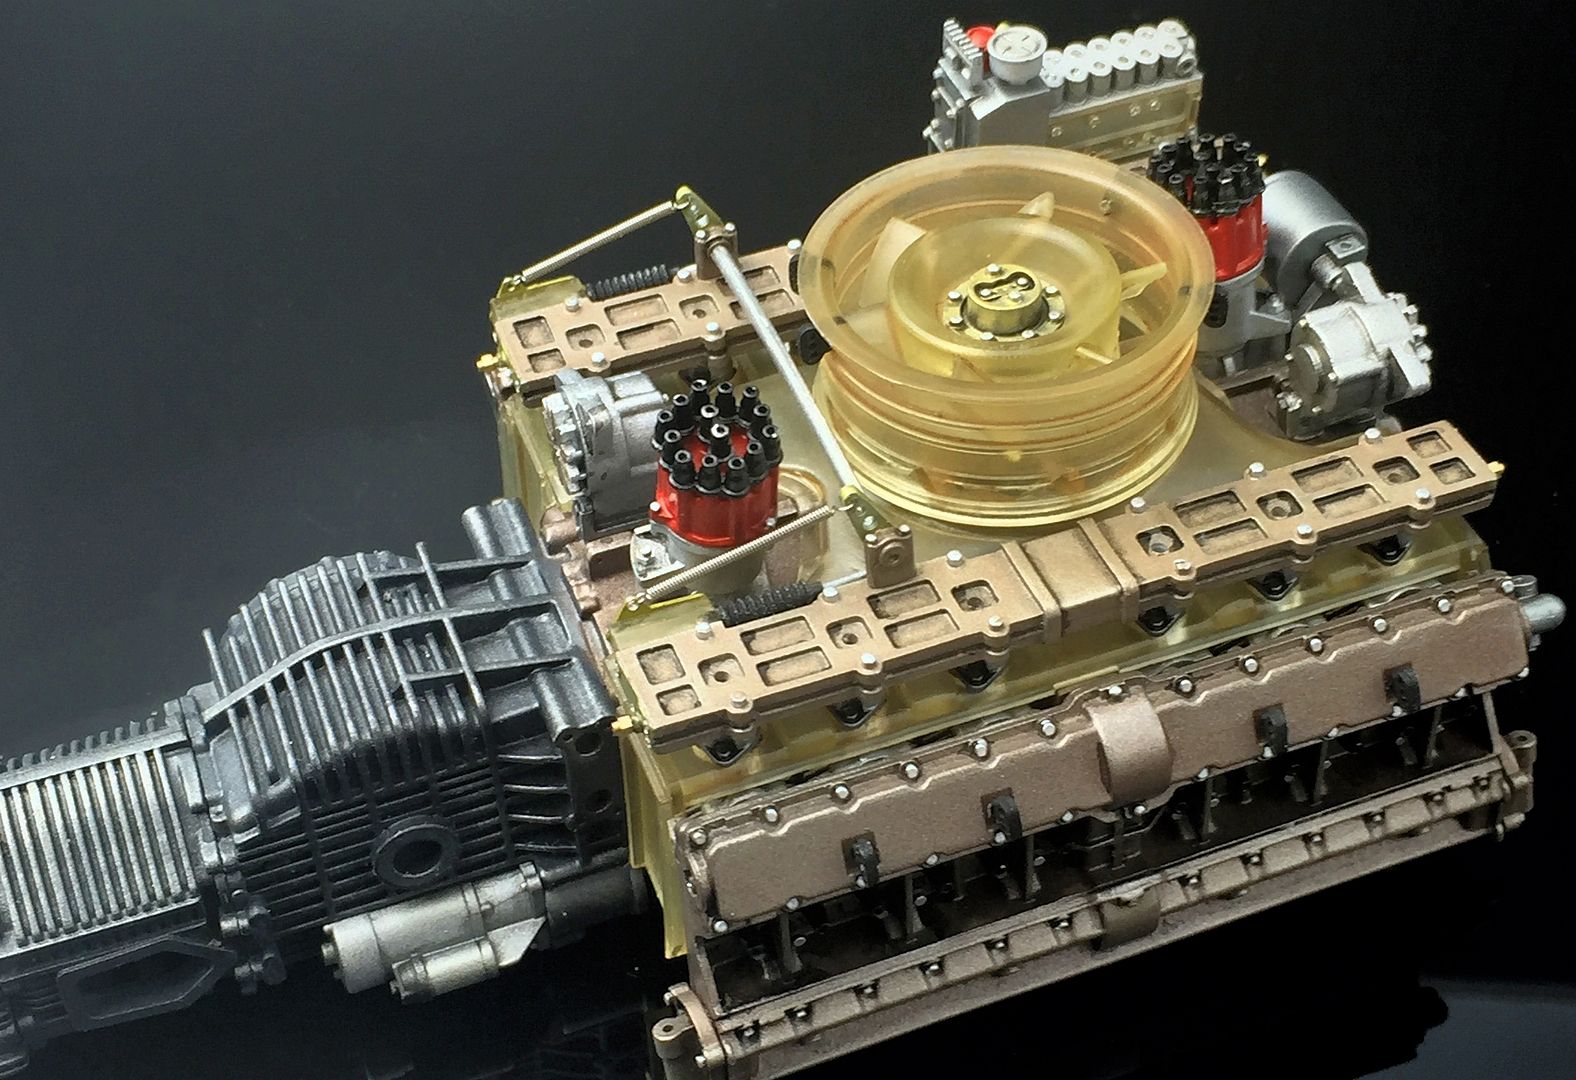
Really like this little assembly - fuel system... added a few PE screw heads to the clear windows, and will have more detail to add later...
I like how the gearbox looks - lucked out on that 'weathering'
The swarf you can see around the PE screw heads in this shot has since been blown off!
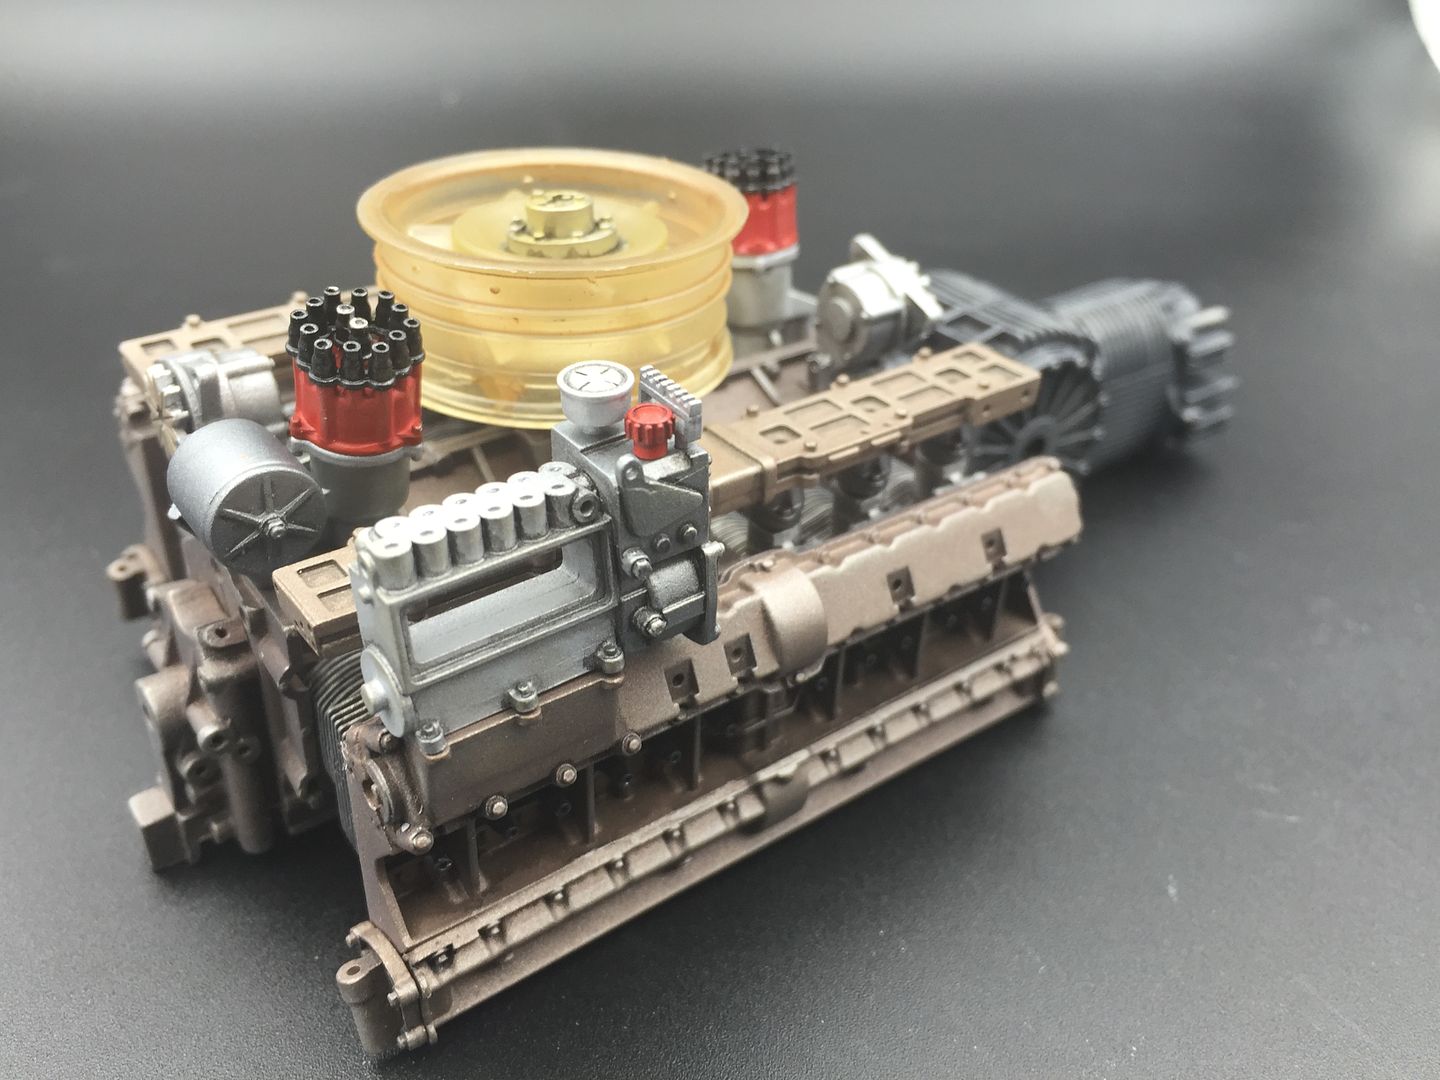
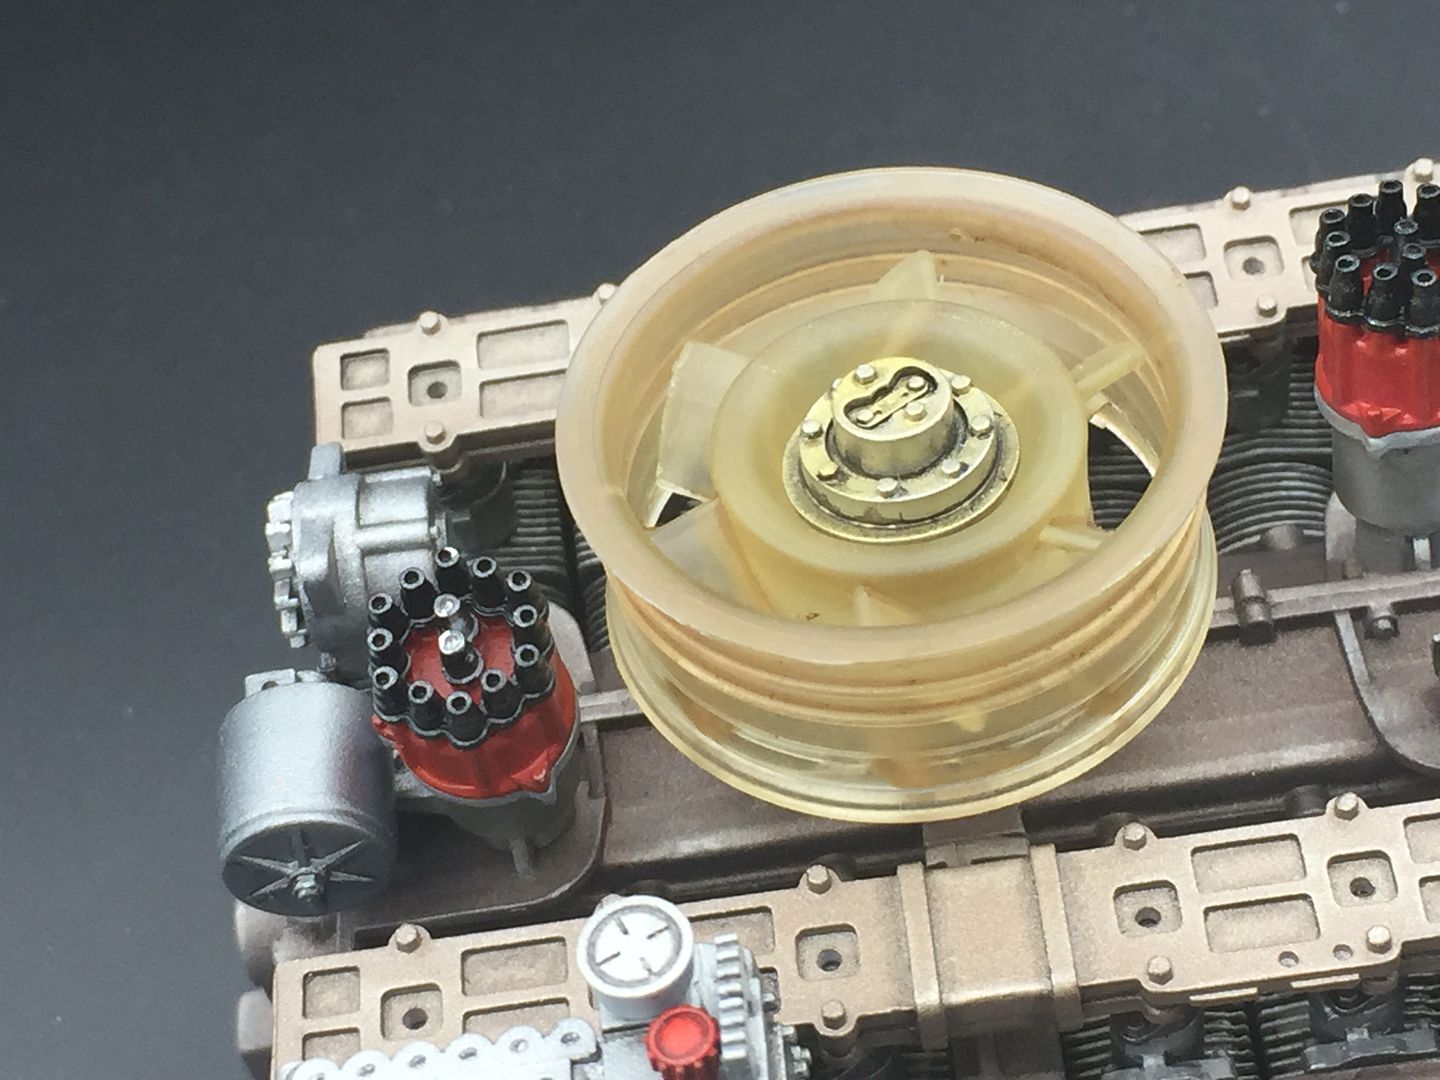
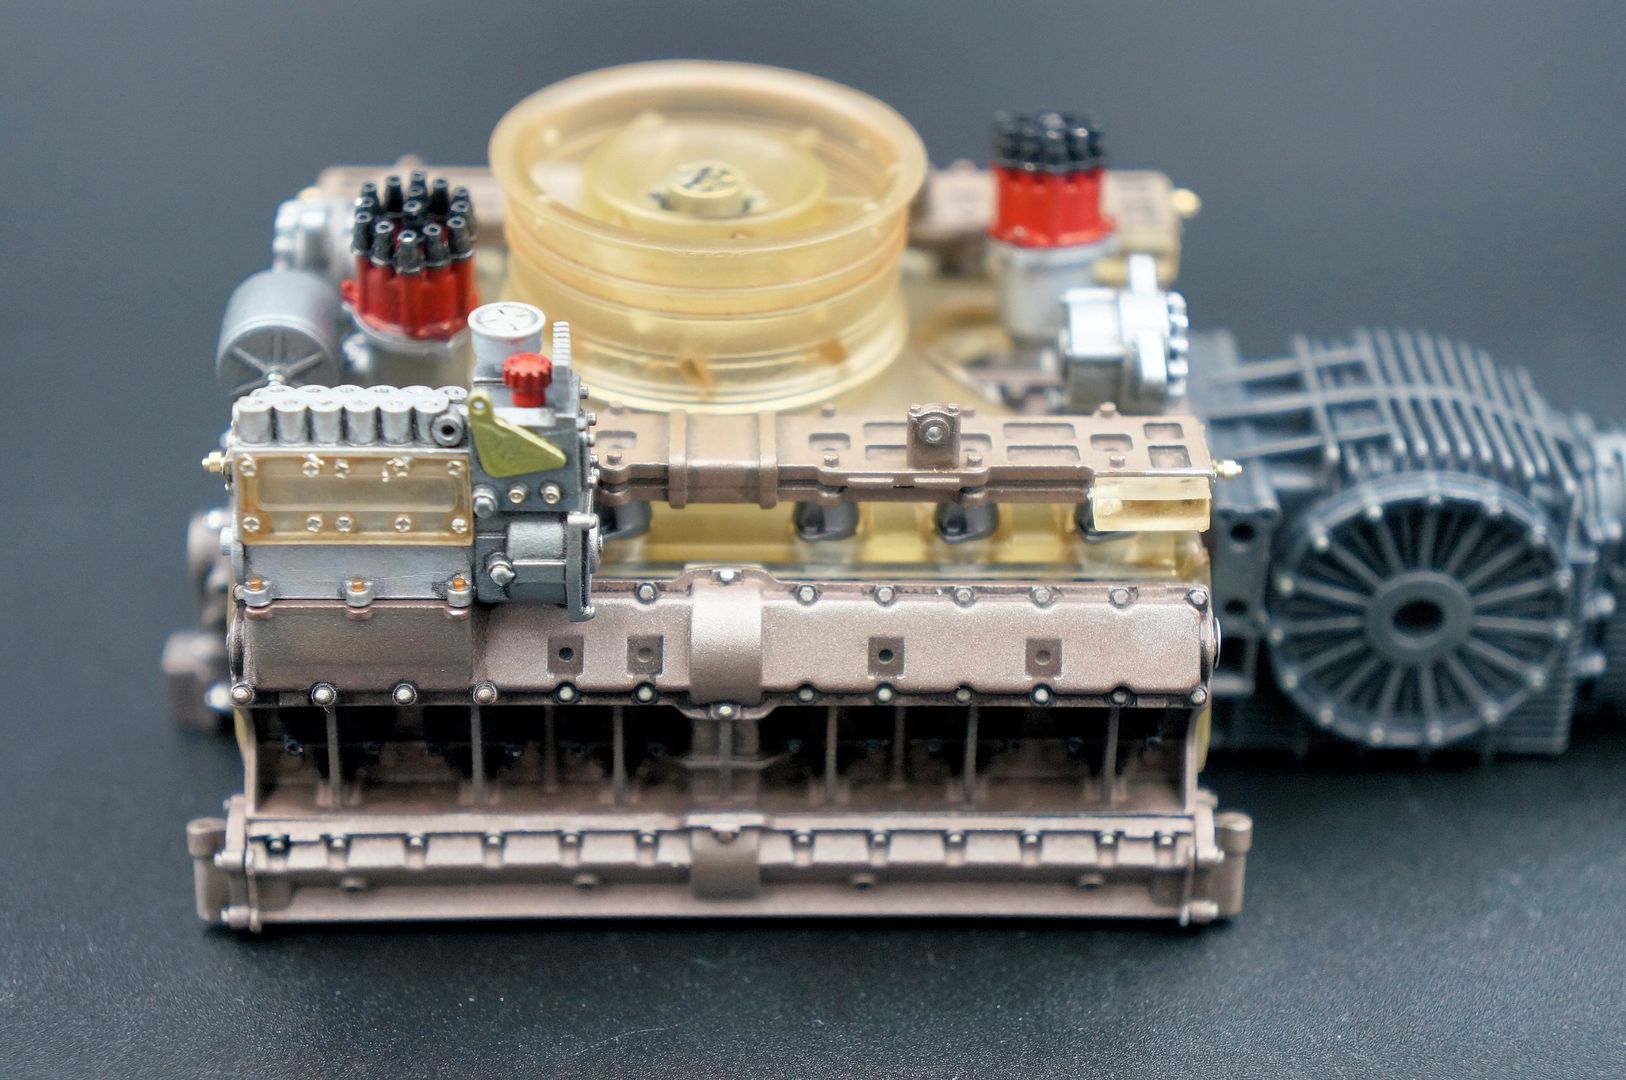
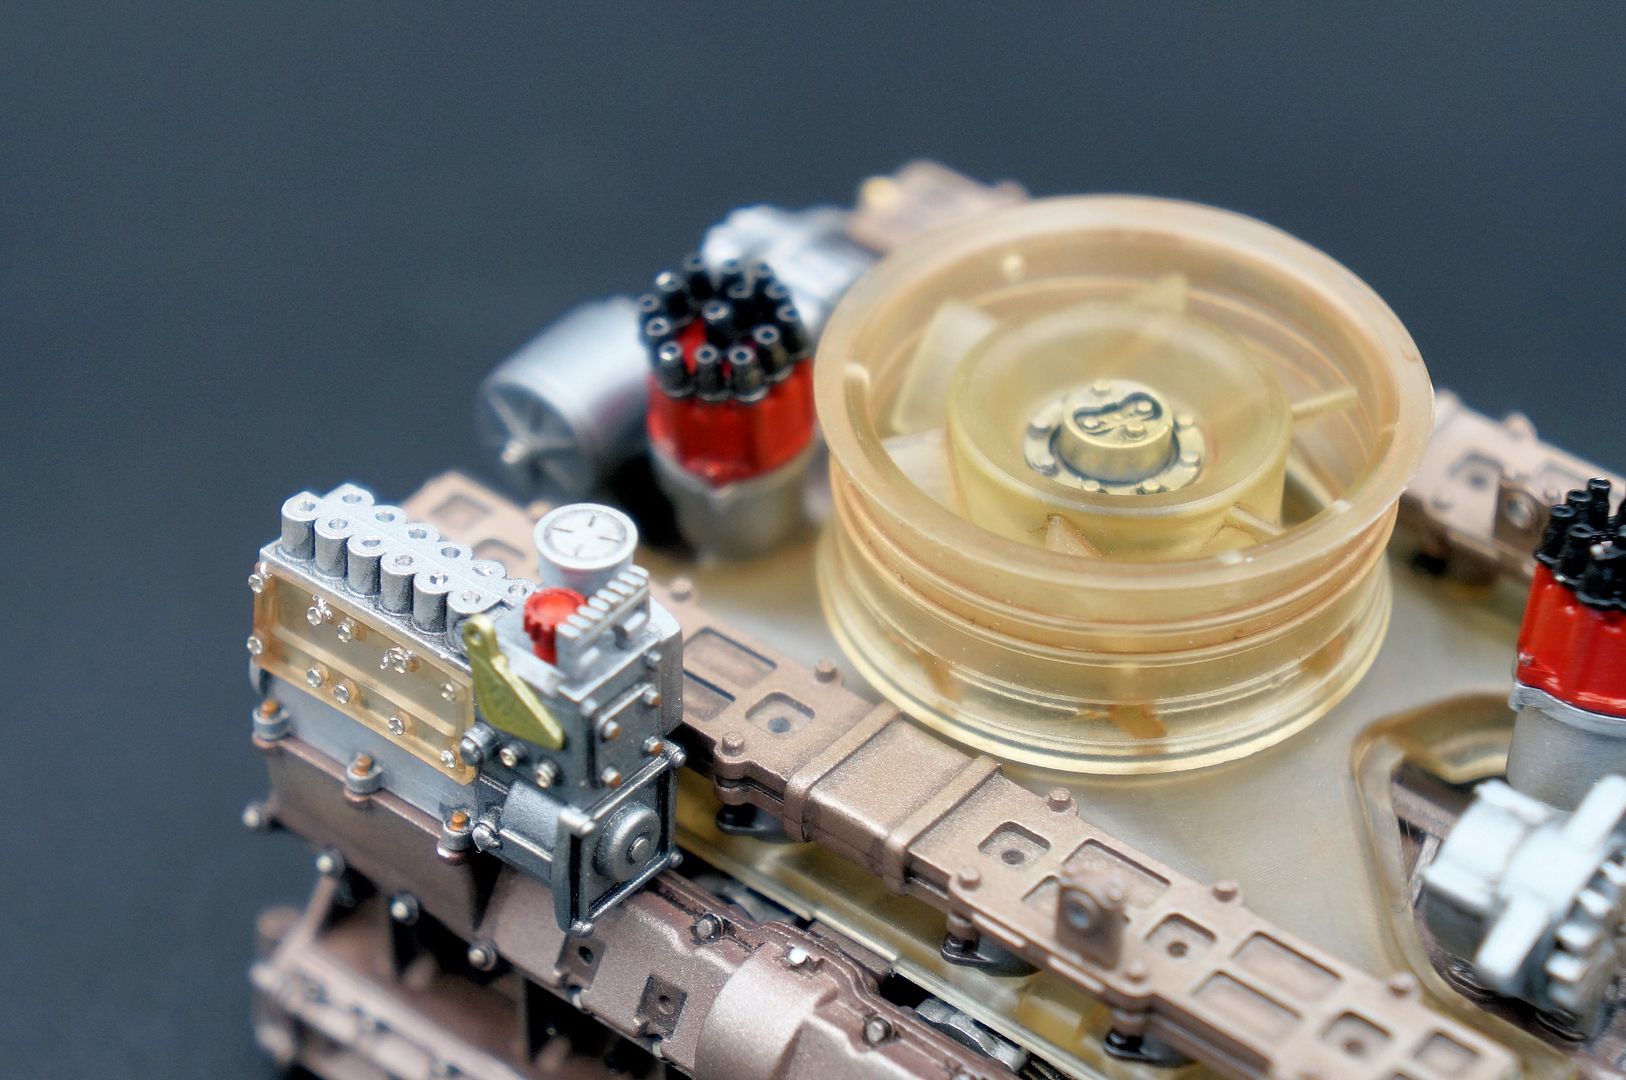
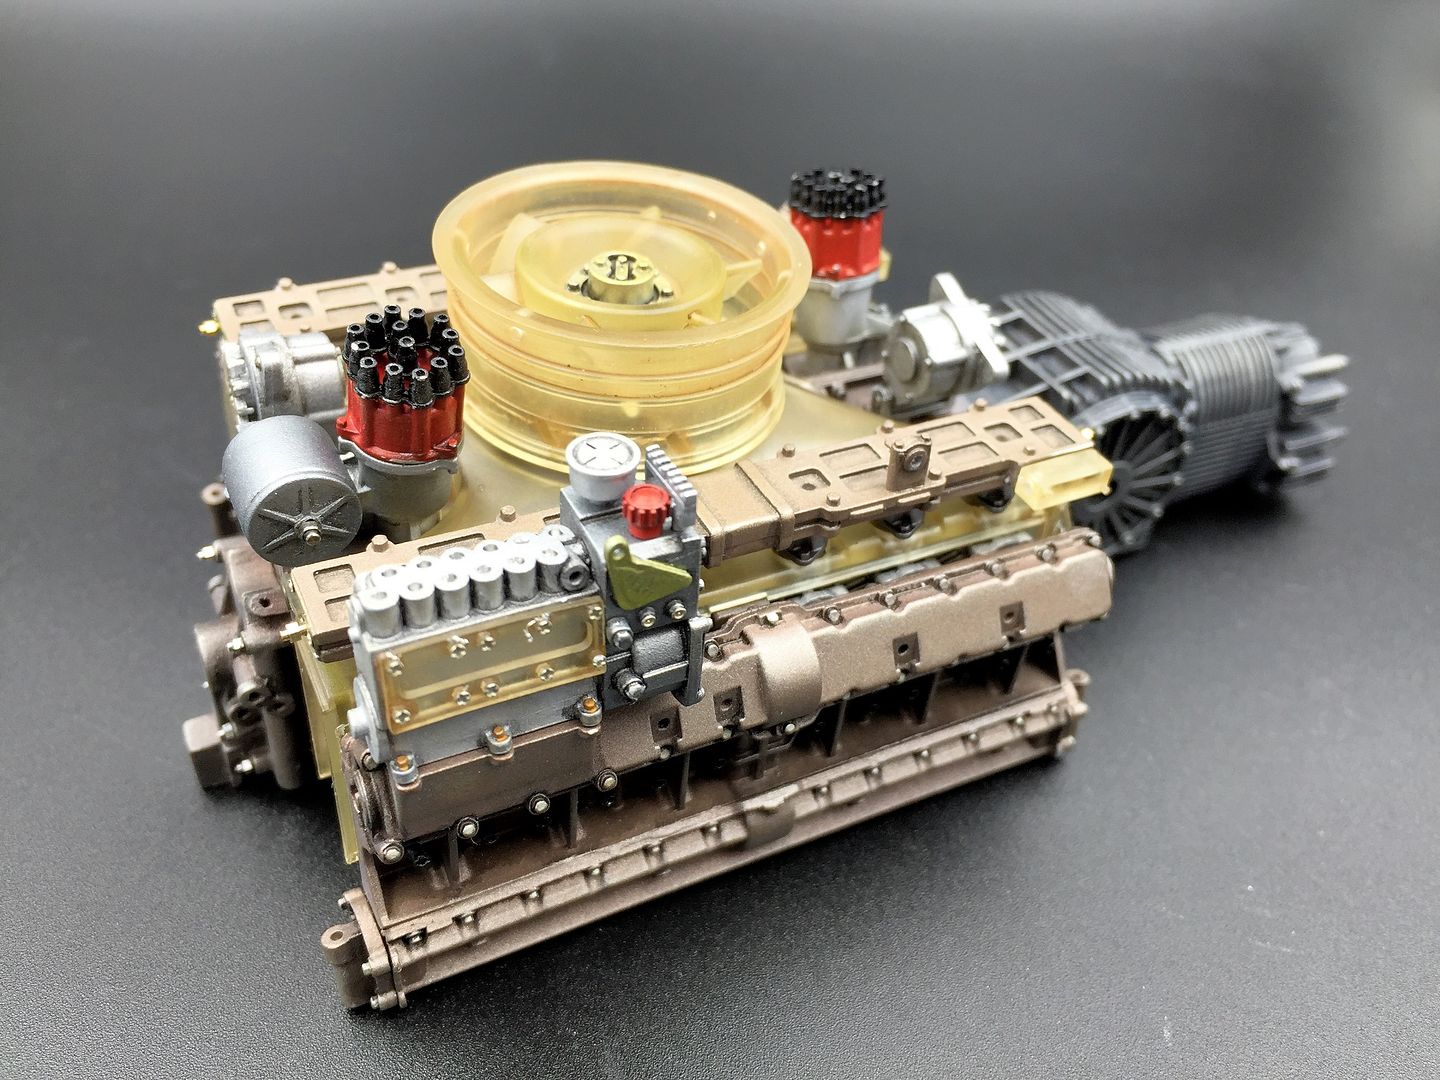
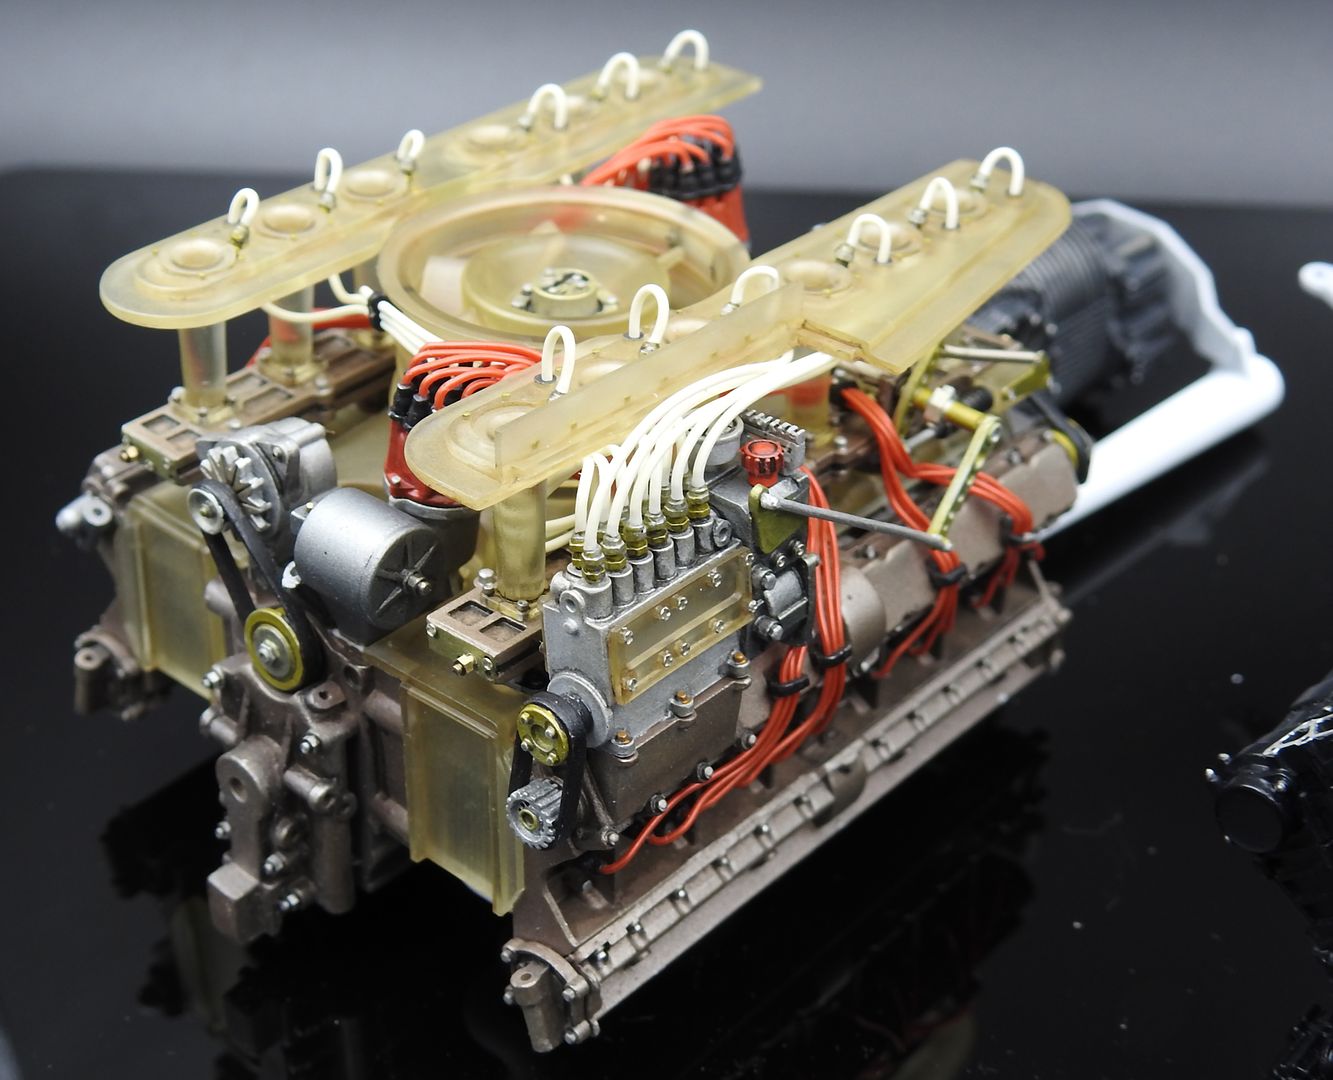
Fuel rails added, along with fan and fuel system - dry fit for now as lots of wiring/fuel lines etc to plan!
You can see some of the detail I have added to the end of the fuel rail - a brass fitting and some screw heads. Resin block will hold various springs and throttle linkages...

Showing some of the extra fittings I have added...
Next step is to start to add some of the detail work - fuel pipes, wiring etc as well as throttle linkages, springs, pulleys and belts etc...
Will certainly try the oil route for more control - thanks guys.
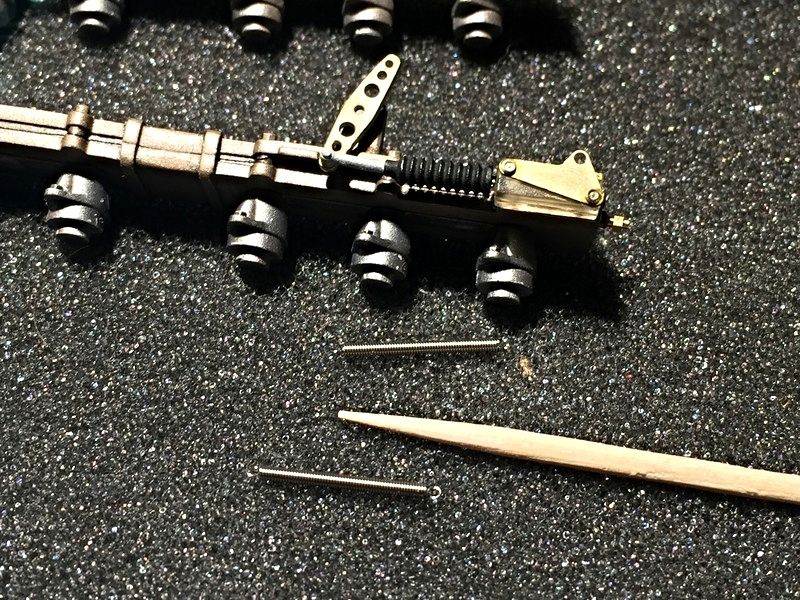
Very small update - fixing those springs is a nightmare...more assembly tonight I hope...
Gluing stuff together now!
Have glued the fuel rail blocks in place, and added some of the wire management fittings (the matt black tabs)
Also added the throttle actuators and springs...

Next are some belts and pulleys and then start with the wiring and plumbing.
I still feel there is another layer of 'texture' and 'depth' to be applied with various powders and washes....
Right - had dad visiting from the UK, so a bit of a break - back on now!
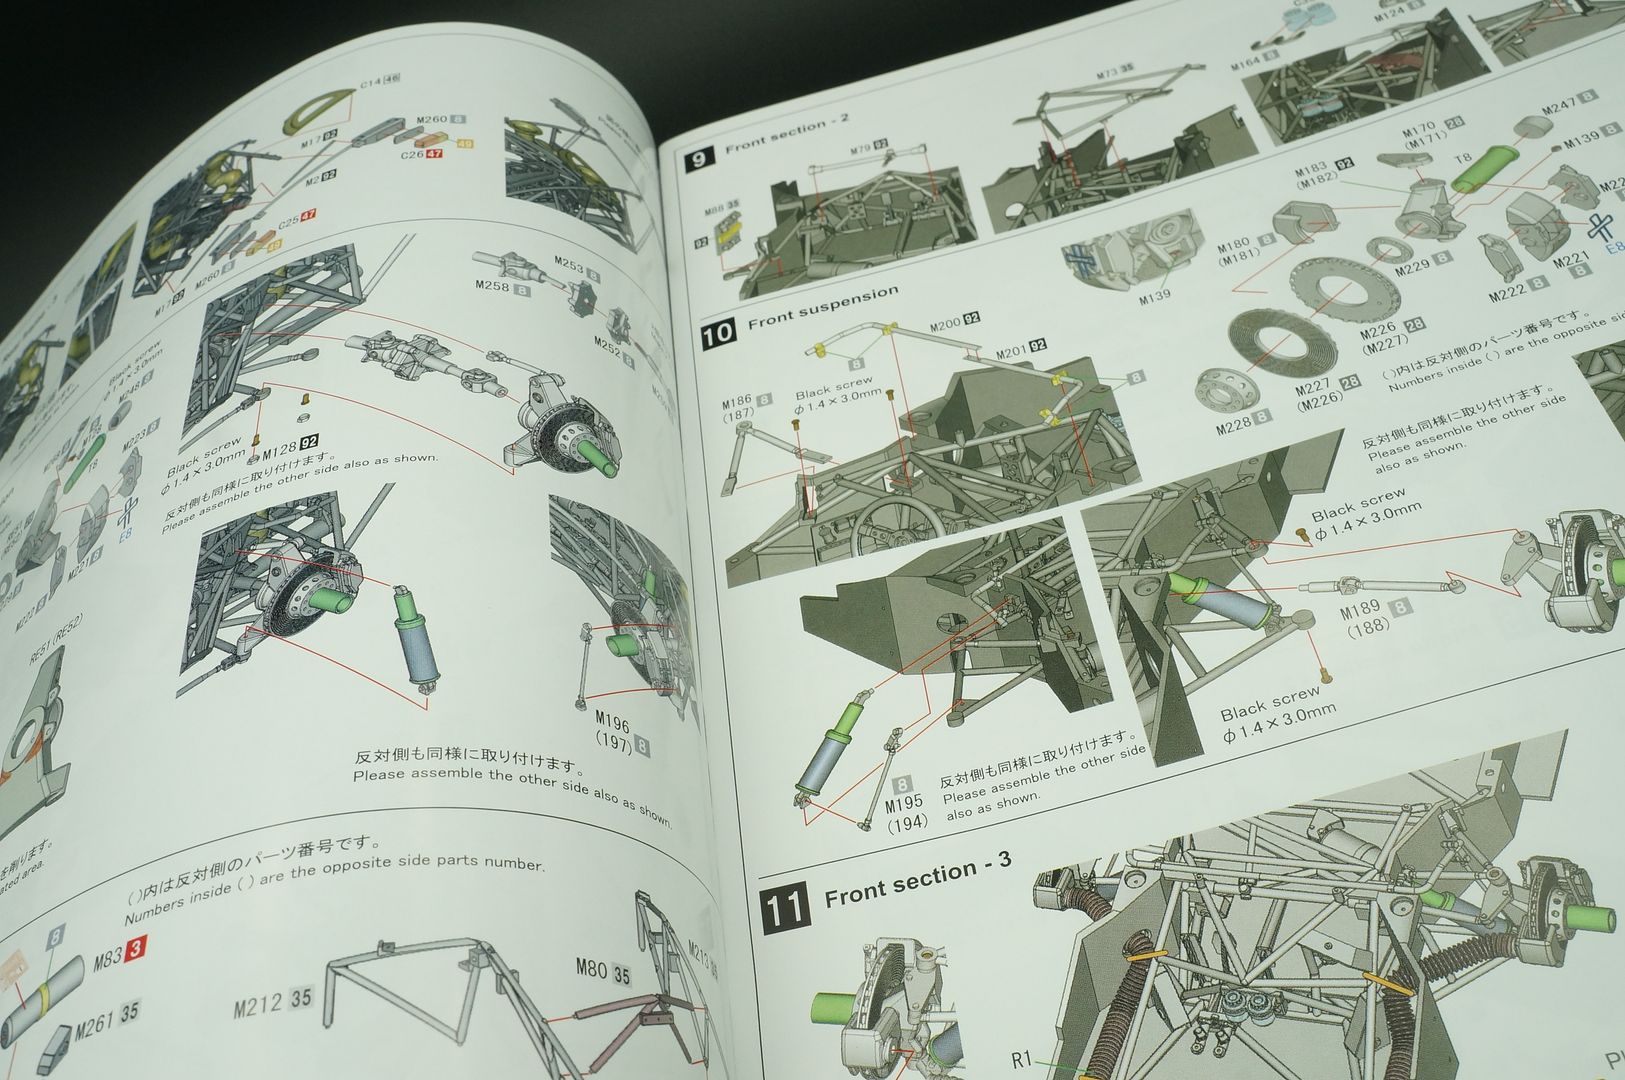
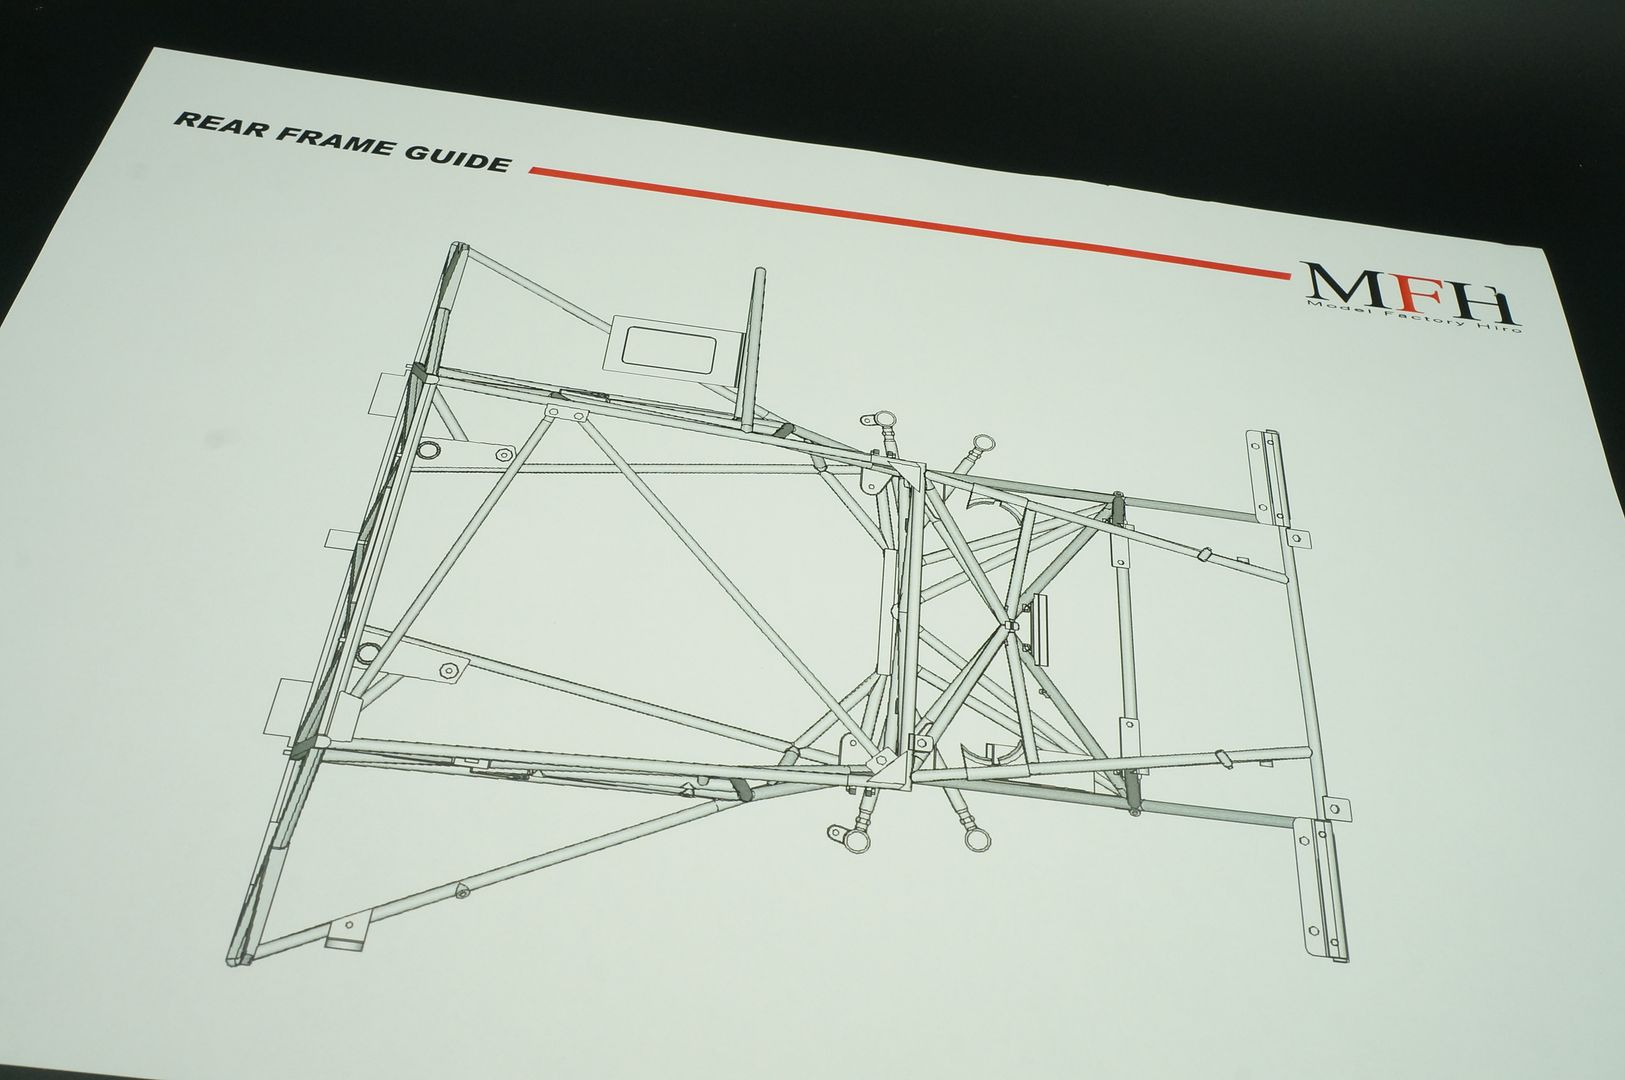
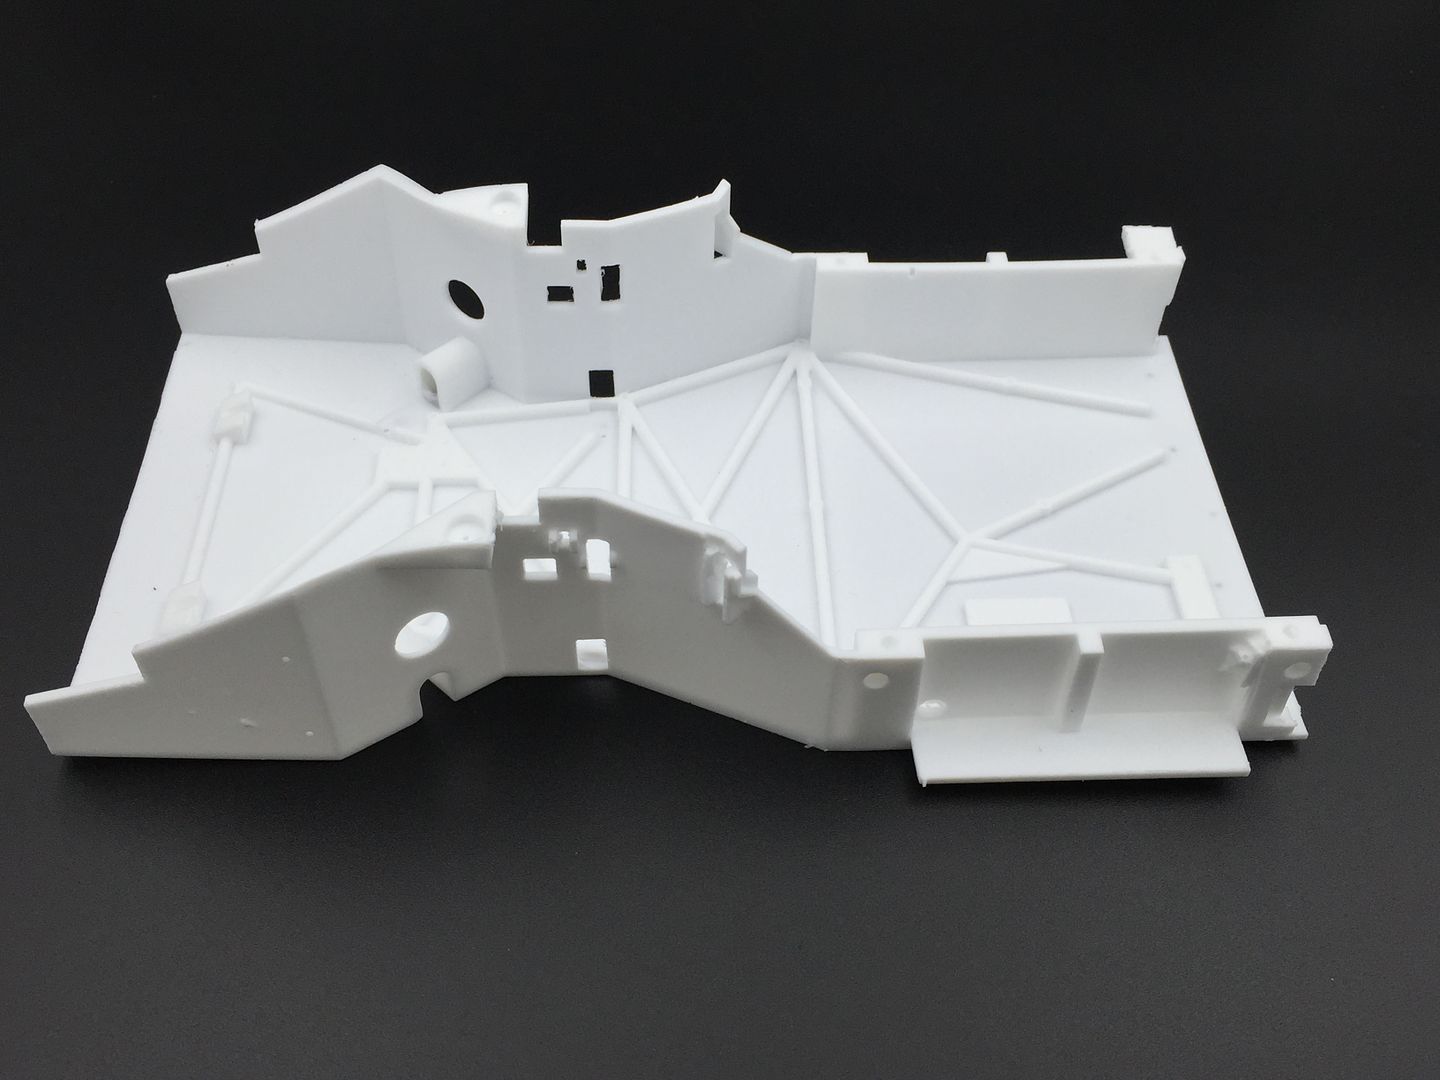
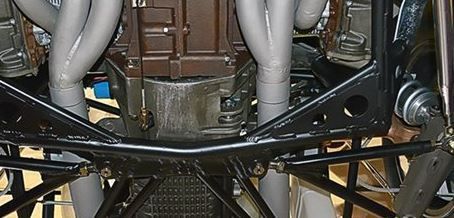
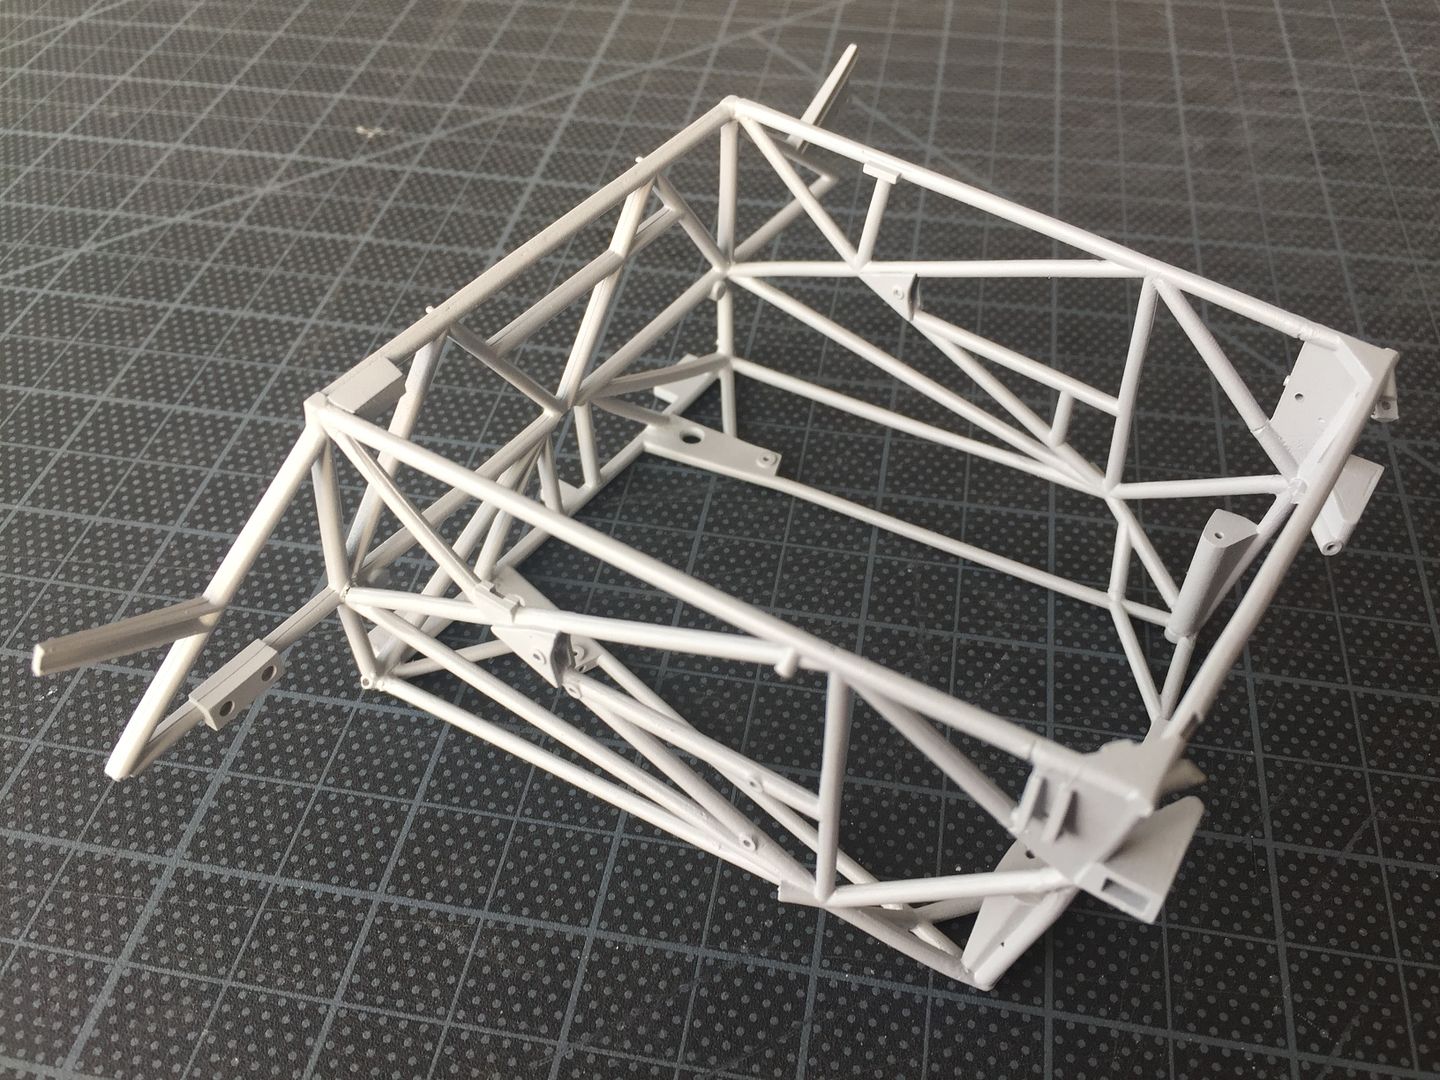
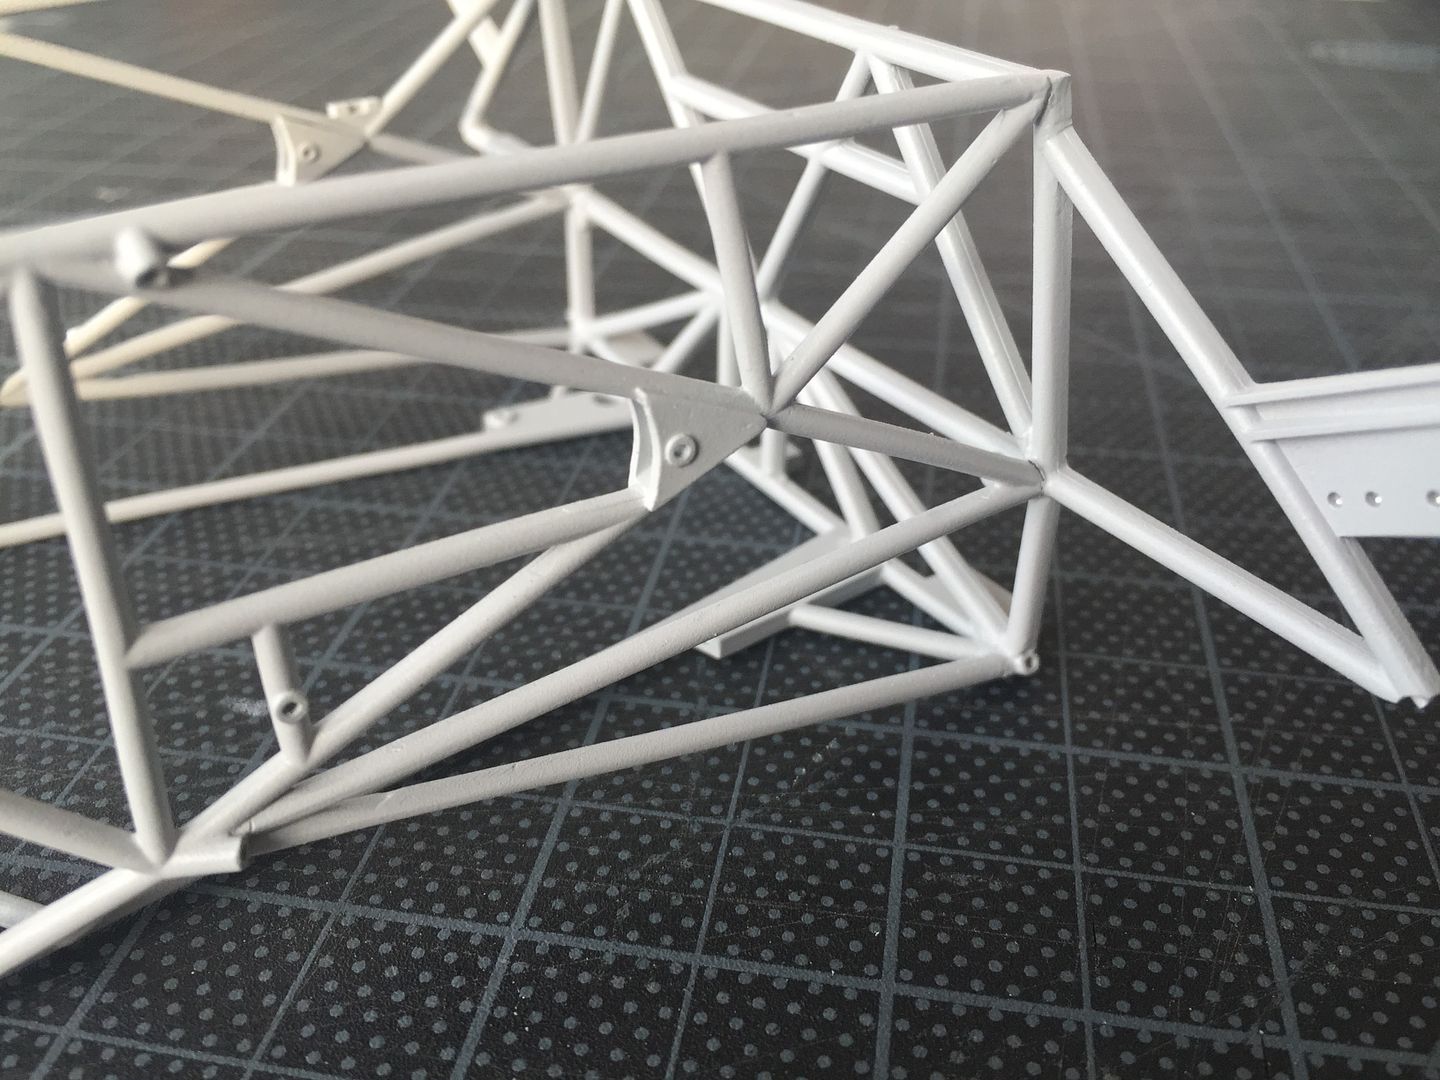
About to start plumbing the engine, but made a start on the tubular chassis framework as well. Need 4 hands to hold it togther as you glue, but once I had figured the best order of events, it actually went together ok.
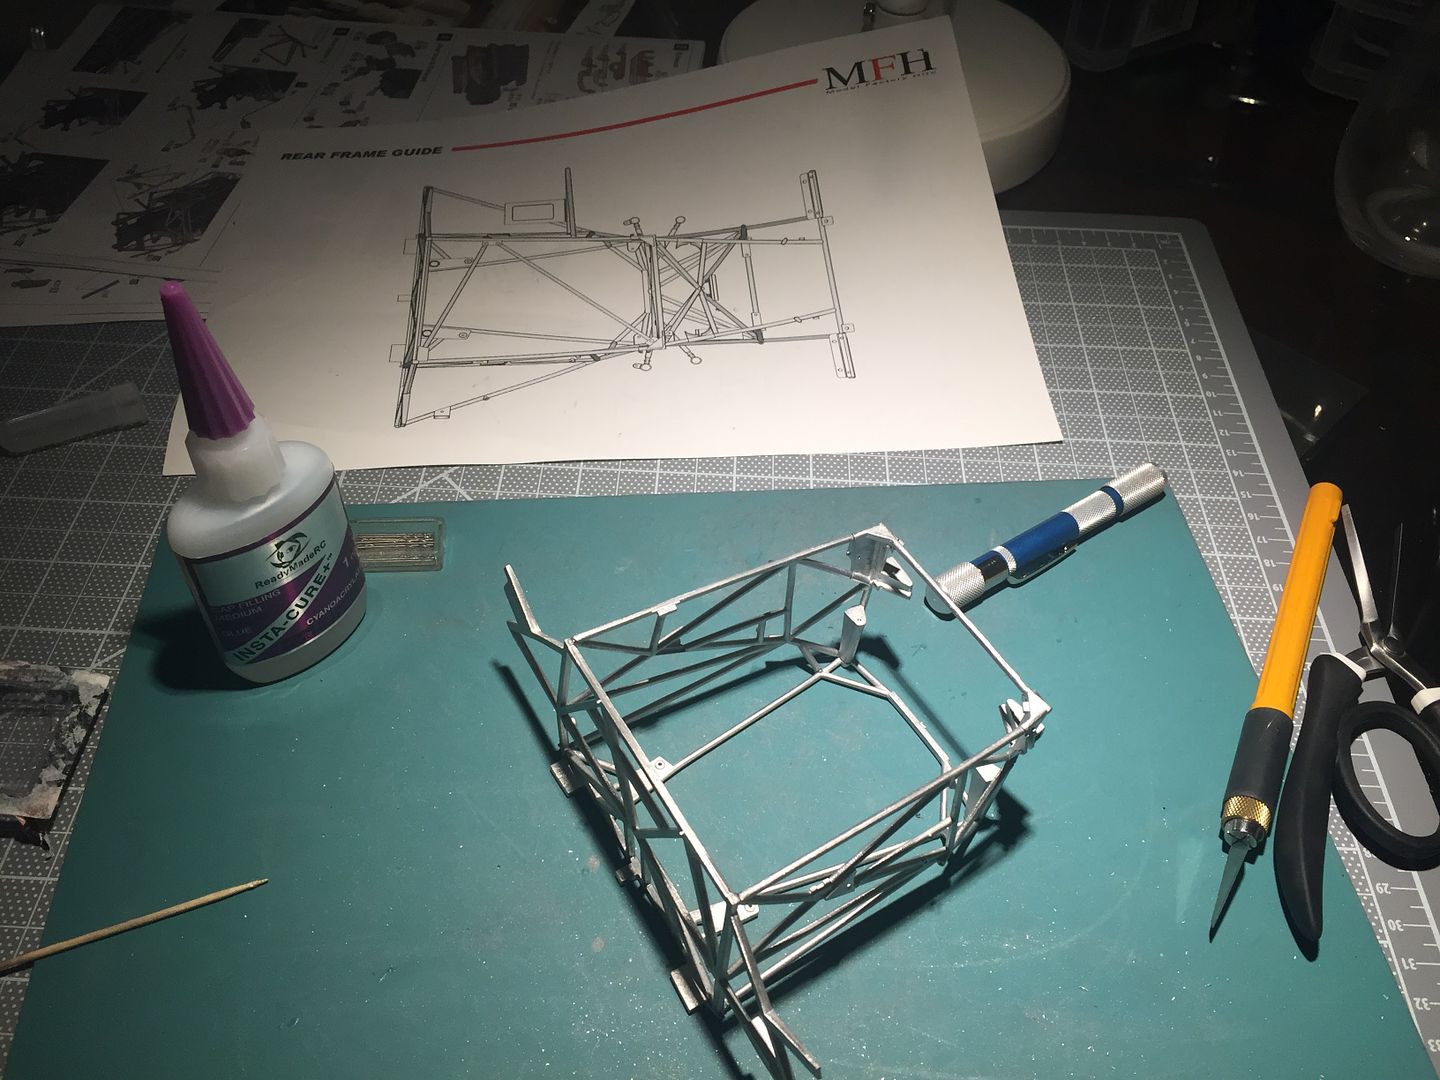
MFH provide an 'actual size' plan view of this part of the chassis tubes to help align everything...
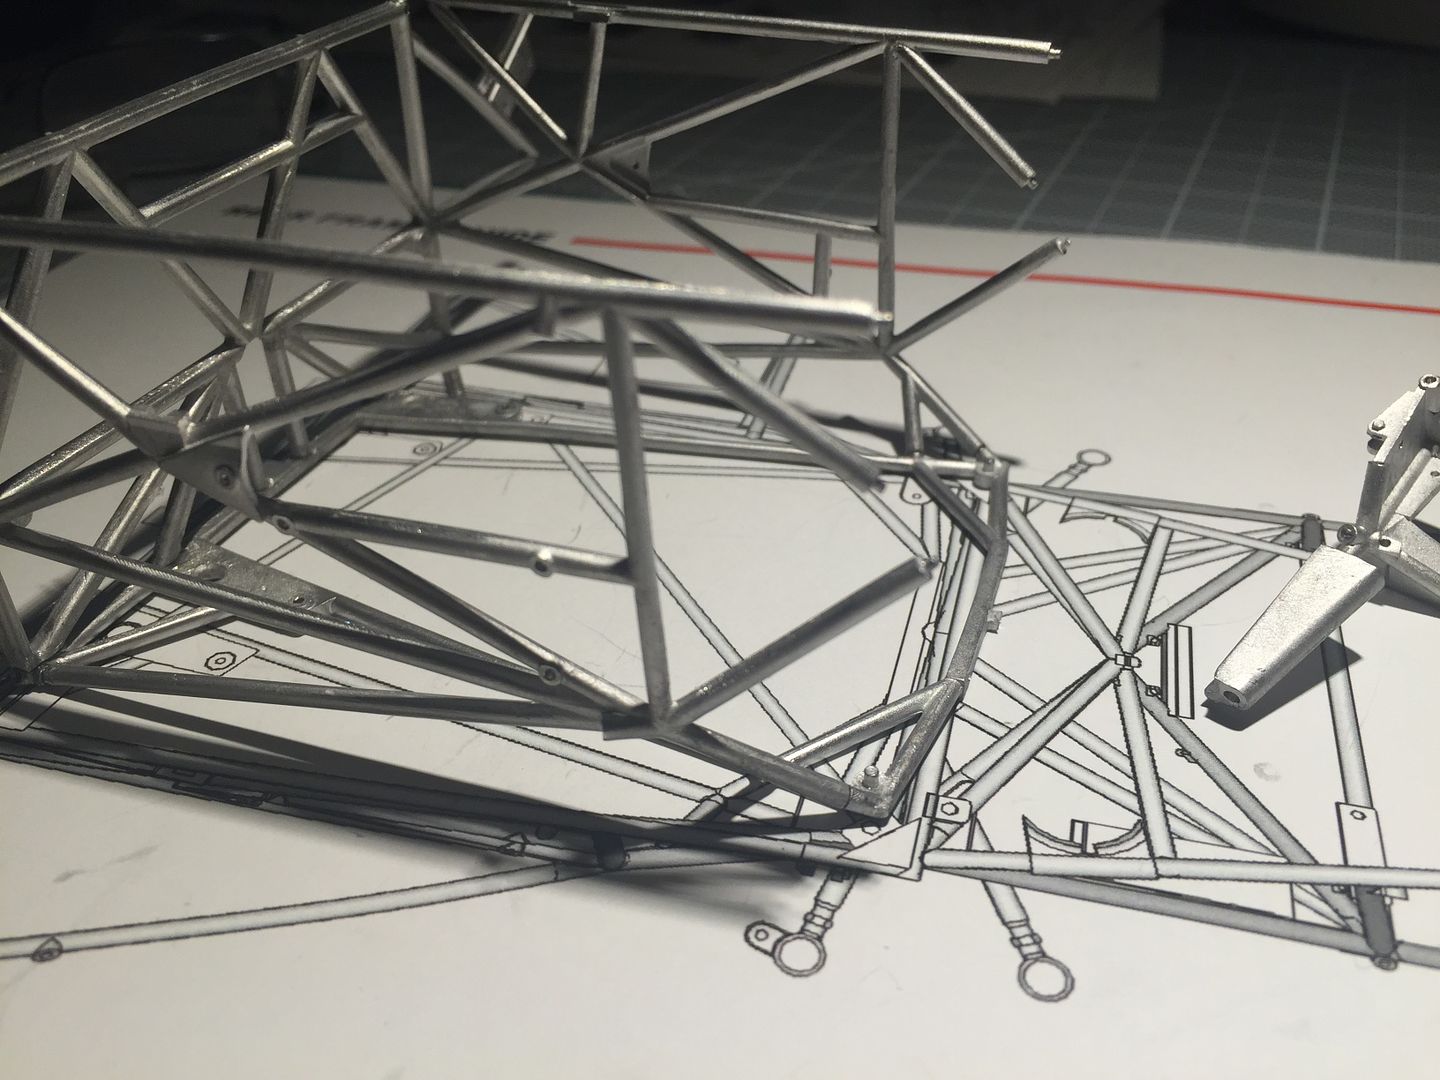
Ummm - this is going to be a very tight fit, especially being careful not to damage any paint etc....just like every engine I have ever done this with in 'real' scale!
I didn't get overly fussy about the clean joints - if you look at old pictures of the real thing, the welding was pretty rough!
Still just a first layer of primer (over metal etch primer) so I can see where there are cracks etc..
Right - as of 23rd May, up to date - after that massive dump of WIP!
Fuel rails added, along with fan and fuel system - dry fit for now as lots of wiring/fuel lines etc to plan!
You can see some of the detail I have added to the end of the fuel rail - a brass fitting and some screw heads. Resin block will hold various springs and throttle linkages...
Showing some of the extra fittings I have added...
Next step is to start to add some of the detail work - fuel pipes, wiring etc as well as throttle linkages, springs, pulleys and belts etc...
Will certainly try the oil route for more control - thanks guys.
Very small update - fixing those springs is a nightmare...more assembly tonight I hope...
Gluing stuff together now!
Have glued the fuel rail blocks in place, and added some of the wire management fittings (the matt black tabs)
Also added the throttle actuators and springs...
Next are some belts and pulleys and then start with the wiring and plumbing.
I still feel there is another layer of 'texture' and 'depth' to be applied with various powders and washes....
Right - had dad visiting from the UK, so a bit of a break - back on now!
About to start plumbing the engine, but made a start on the tubular chassis framework as well. Need 4 hands to hold it togther as you glue, but once I had figured the best order of events, it actually went together ok.
MFH provide an 'actual size' plan view of this part of the chassis tubes to help align everything...
Ummm - this is going to be a very tight fit, especially being careful not to damage any paint etc....just like every engine I have ever done this with in 'real' scale!
I didn't get overly fussy about the clean joints - if you look at old pictures of the real thing, the welding was pretty rough!
Still just a first layer of primer (over metal etch primer) so I can see where there are cracks etc..
Right - as of 23rd May, up to date - after that massive dump of WIP!
 h to drive until they sorted out the aerodynamics at the rear....
Murph7355 said:
Stunning Angus.
I think you need a more challenging external paint job though - full on psychedelic:
https://www.classicdriver.com/sites/default/files/...
Thanks mate! I think you need a more challenging external paint job though
- full on psychedelic:https://www.classicdriver.com/sites/default/files/...
They do that one in long-tail version. Very tempted as it does look amazing!
Eric Mc said:
Angus, are you back from the US now?
Hi Eric - nope, still in New York.The absence of the car (any car!) and a bit more $$ is what has prompted this return to modeling in some ways.
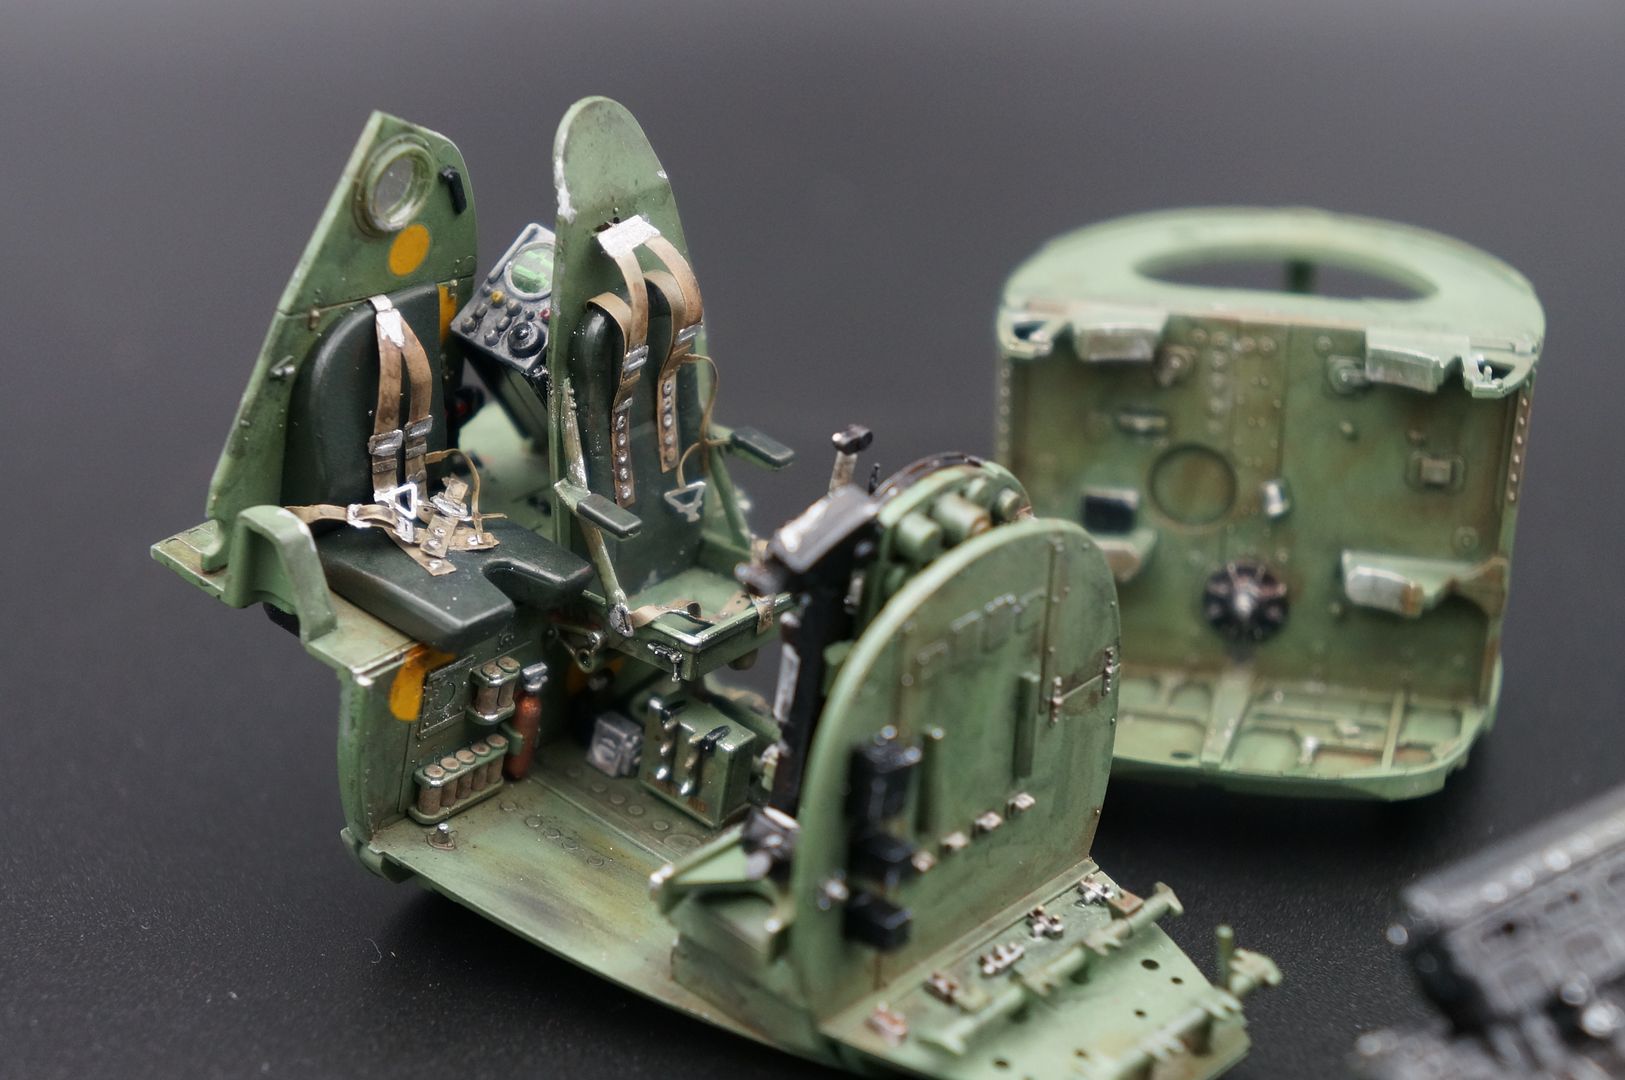
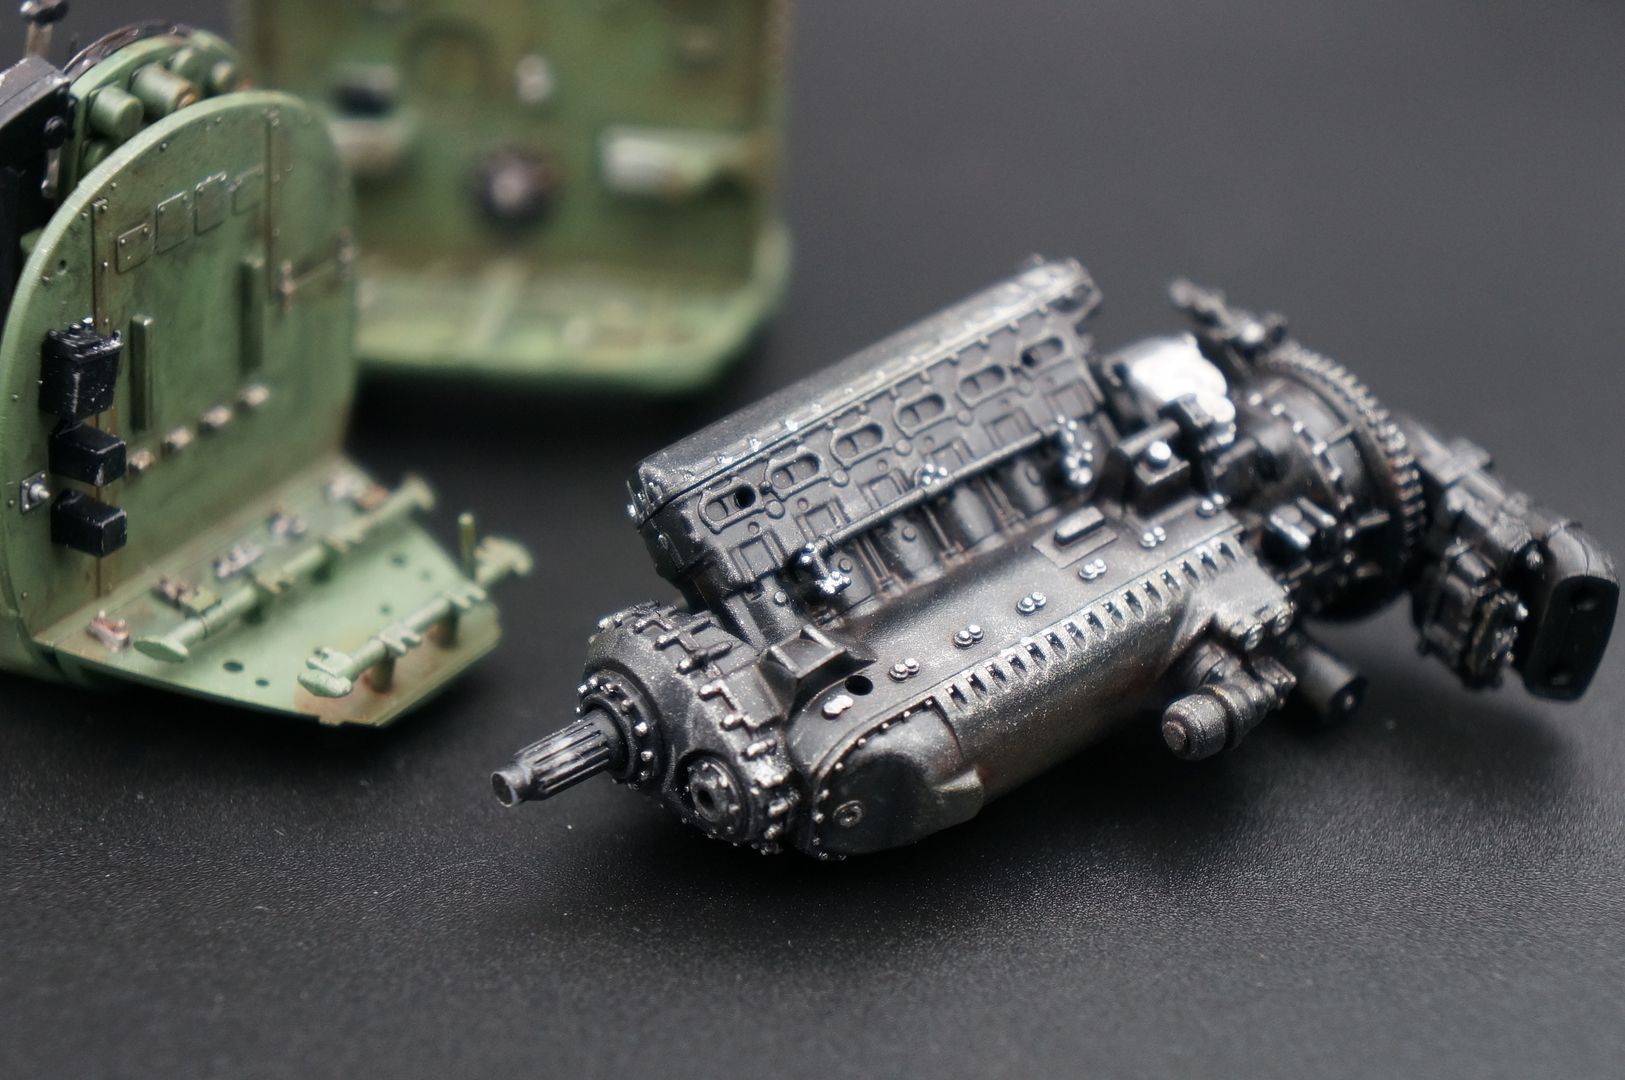
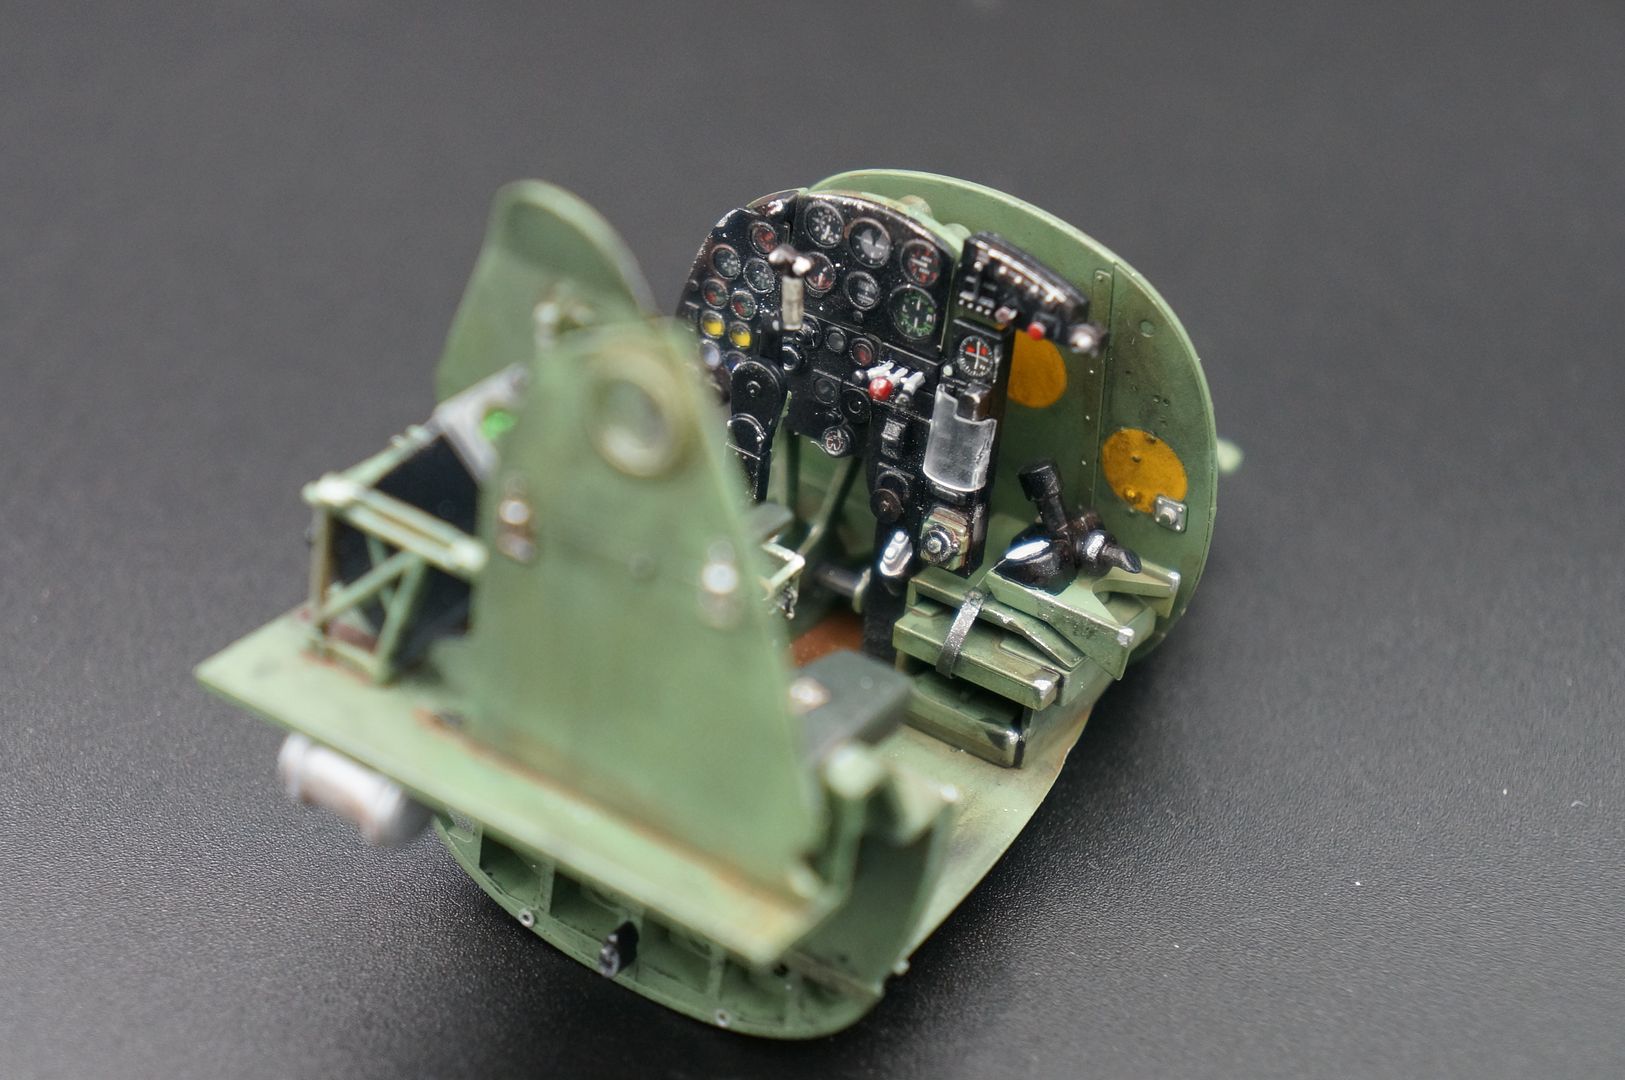
Also started the 1:32nd Tamiya Mosquito...first plane for probably 35 years! First use of airbrush and weathering as well!!
dr_gn said:
Very nicely weathered cockpit. You must have quite a few projects going at once now.
lol - yes! Went a bit mad when I got back into doing it again, and got an airbrush etc.Ebay, disposable income (should be saving blah blah) etc etc - could probably open a shop now...
Actually biggest influence has been these forums (F1M,Britmodeller etc) and seeing what can be done. I got back on to the Caterhams I'm building, then discovered MFH etc...and I have loved the Mosquito for years, so when I saw the 'big' kit...
Haven't done anything on the plane for a while - I saw your wood-covered model and thought I'd really love to do that big scale, but the weathered cockpit I had already done is too much for such a version...
I'm learning the weathering - went a bit heavy maybe on the cockpit. It is the most impressive thing on these modelling forums IMO.
I've also yet to spray any bodywork in this era of my modelling, so reading threads like your MP4/6 one are very educational.
My biggest pain is that over here in NYC I don't have a 'shed' or spare room where I can leave everything set up. Have to drag it all out for 2-3hrs in an evening, then put it all away again!
I need to focus a bit and not start anything new!
yep - the price thing is there for sure.
Swings and roundabouts - the MFH kits can be built totally OOB and look like museum models (I hope - not finished done yet!) - everything is in the kit - sure you can add some more nuts and bolts if you feel the need.
I've got the Tamiya MP4/6 1/12 kit whose initial purchase price is a 1/3rd of the price of an MFH, and over the years have collected the various detail-up kits that have been produced (Thunder Valley and now Top Studio), 'proper' decals etc etc - and now it would price out about the same!
Also, as Tamiya seem to have stopped with these 1/12 kits (or any recent stuff in fact) I'm really pleased that MFH exist to keep on producing new models.
Another way to look at it - although really this is 'man maths' and applies to any kit regardless of price) is the $/hr figure...(sorry, can't find the Pound symbol on this US keyboard!!) - if I divide the cost of the kit with the number of hours I'll spend working on it, and gaining enjoyment and satisfacton (for it is the construction process that I am buying, otherwise I'd collect die-cast!) then compared to virtually anything else (trackdays, driving, tyres(!)eating out, petrol etc etc etc) they are a bargain.
Having said that, of course, without a doubt - if the other half asks, the answer is always 'ooh, about 60 quid....'
Thanks guys!
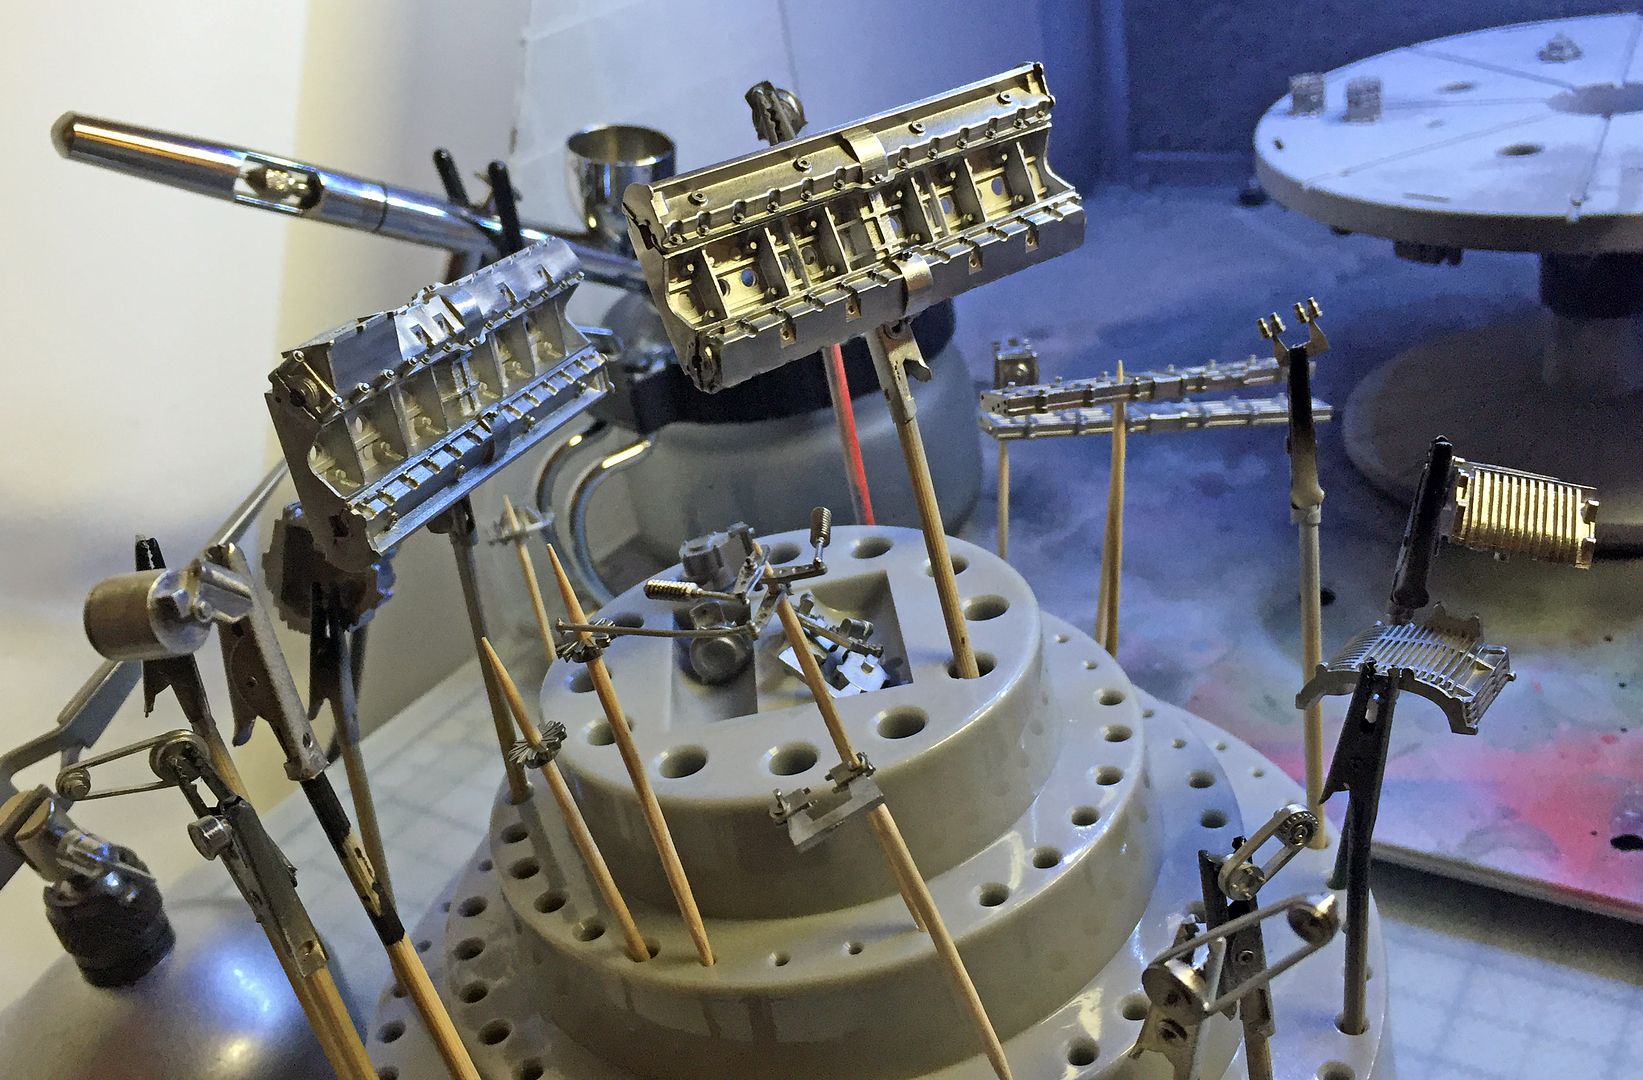
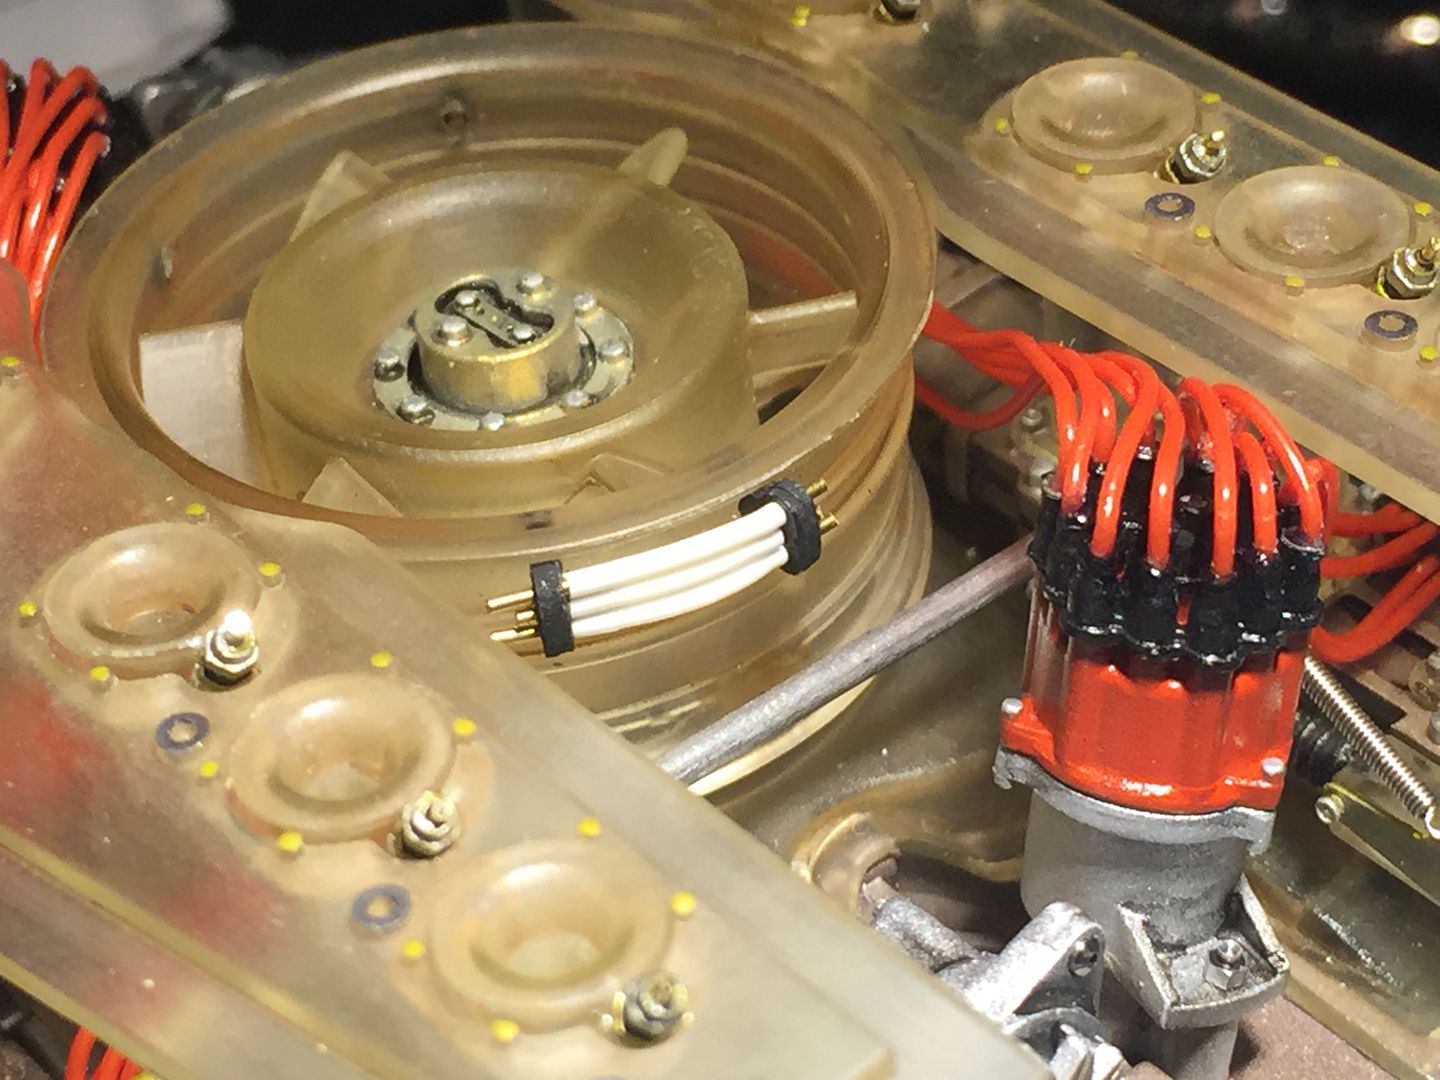
Right - started to add some details.
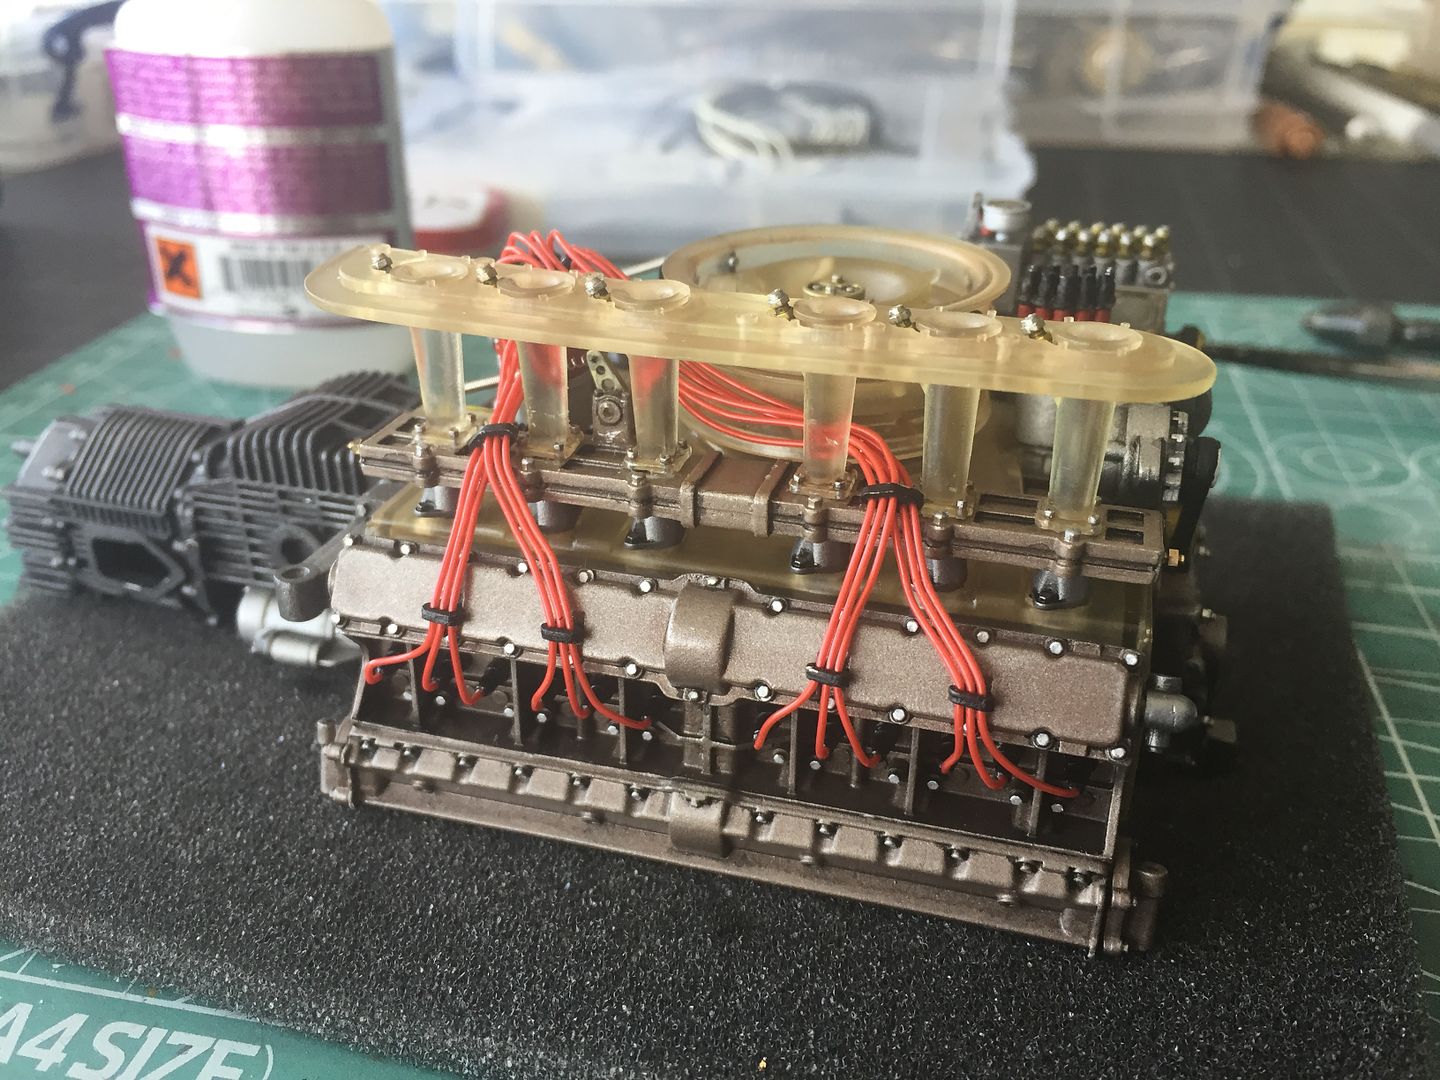
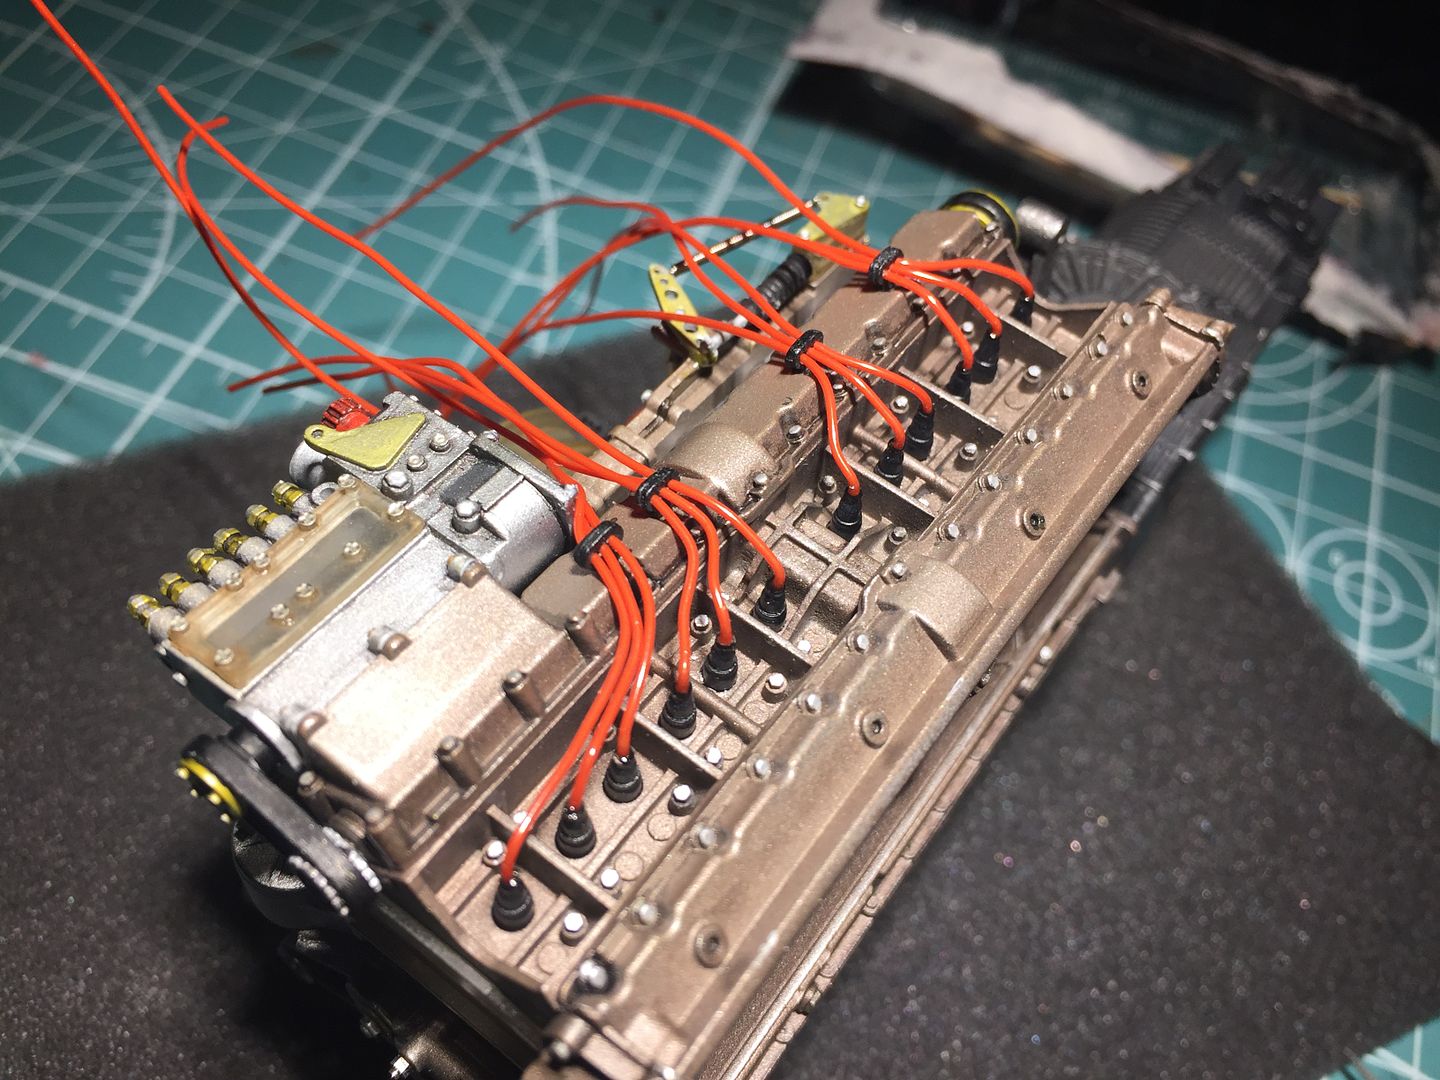
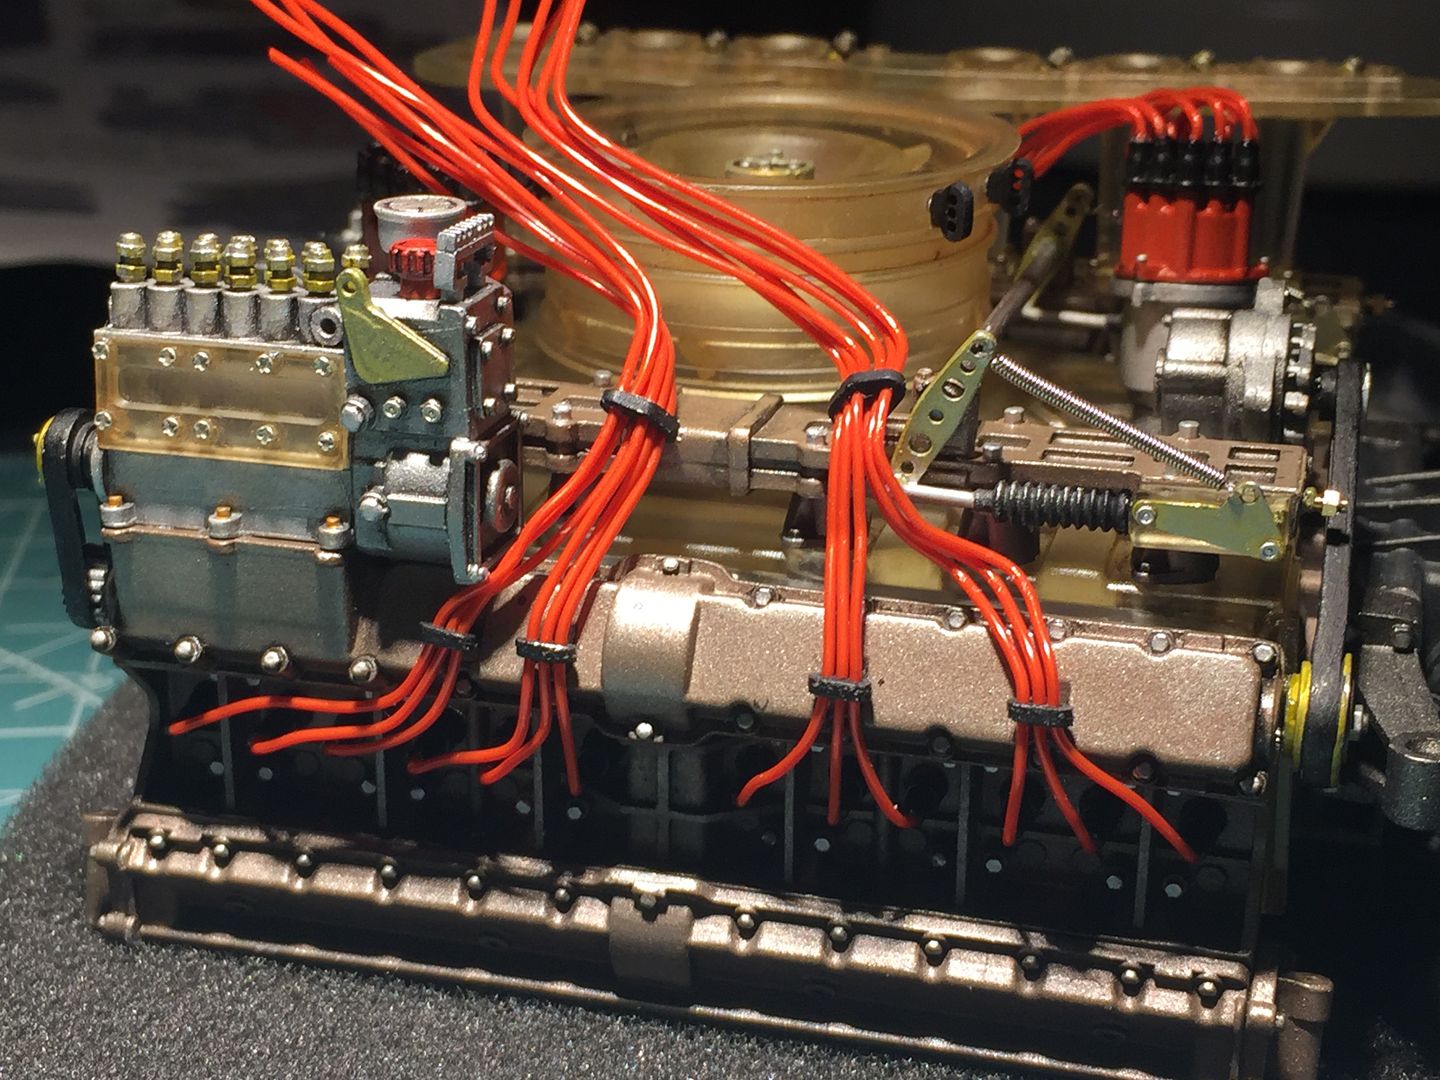
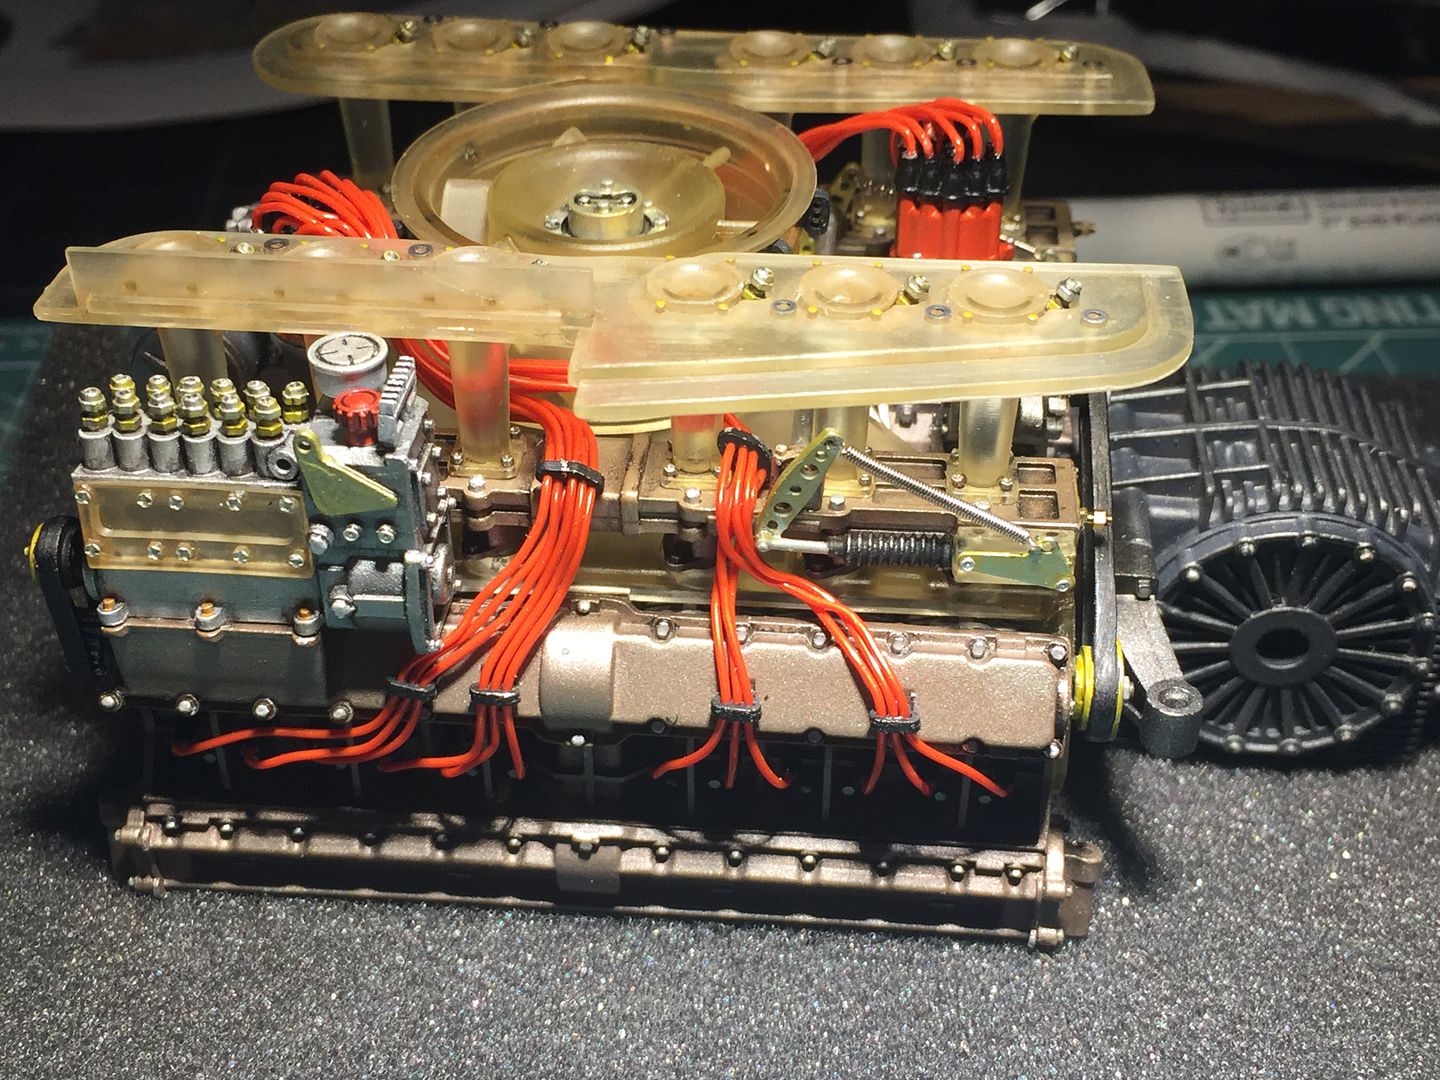
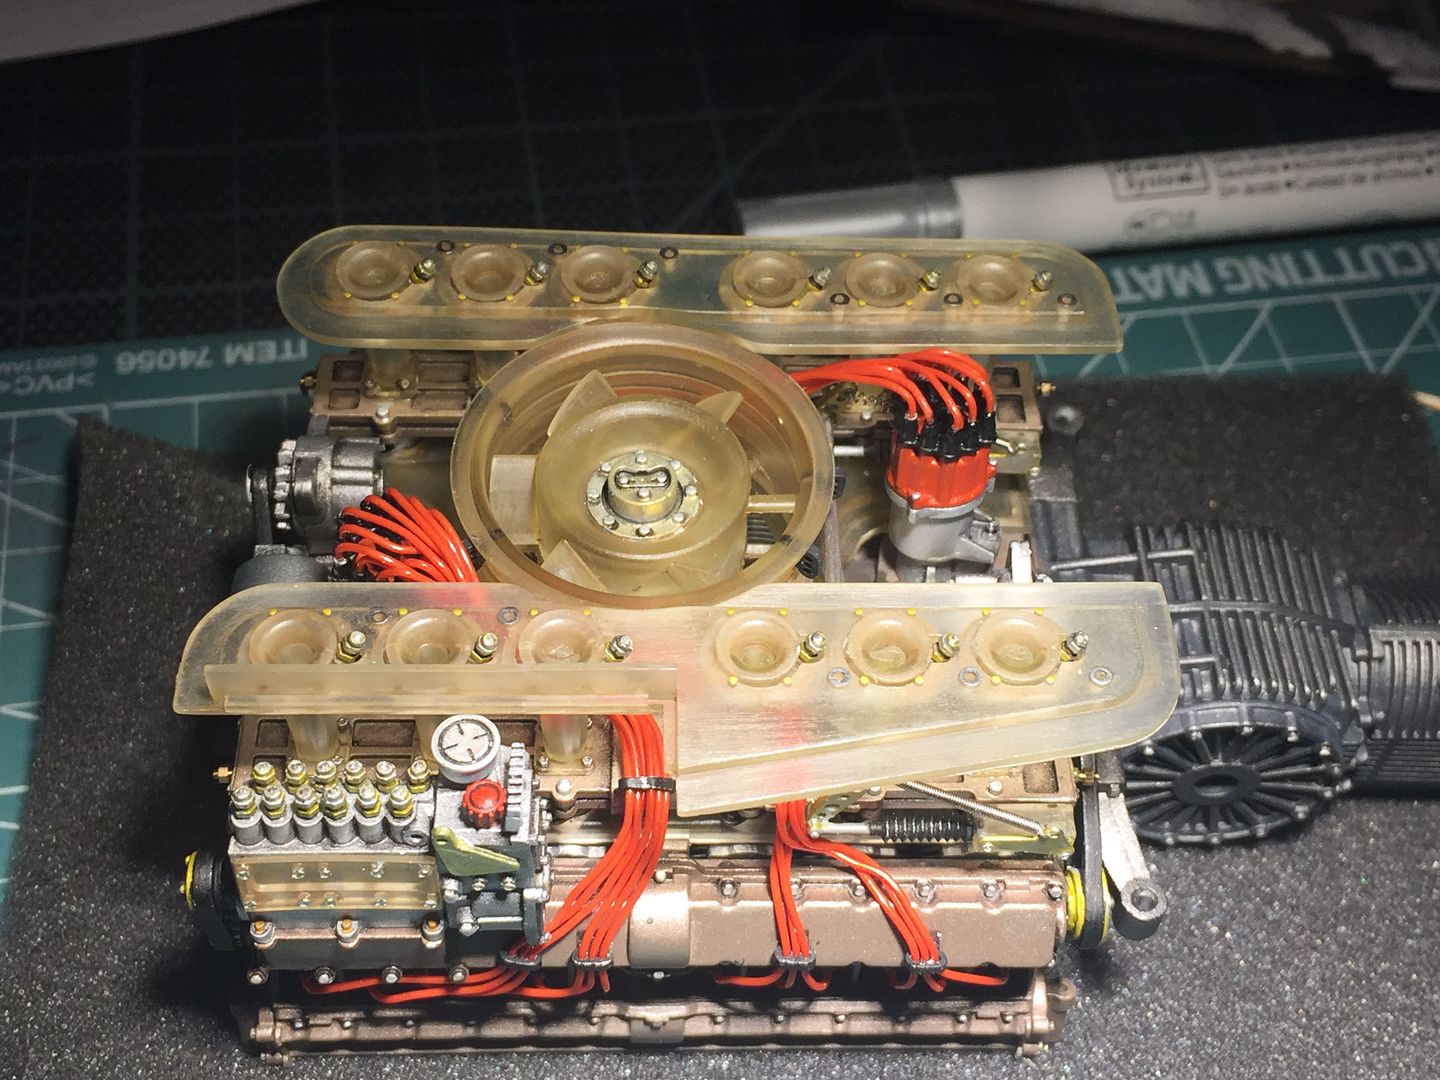
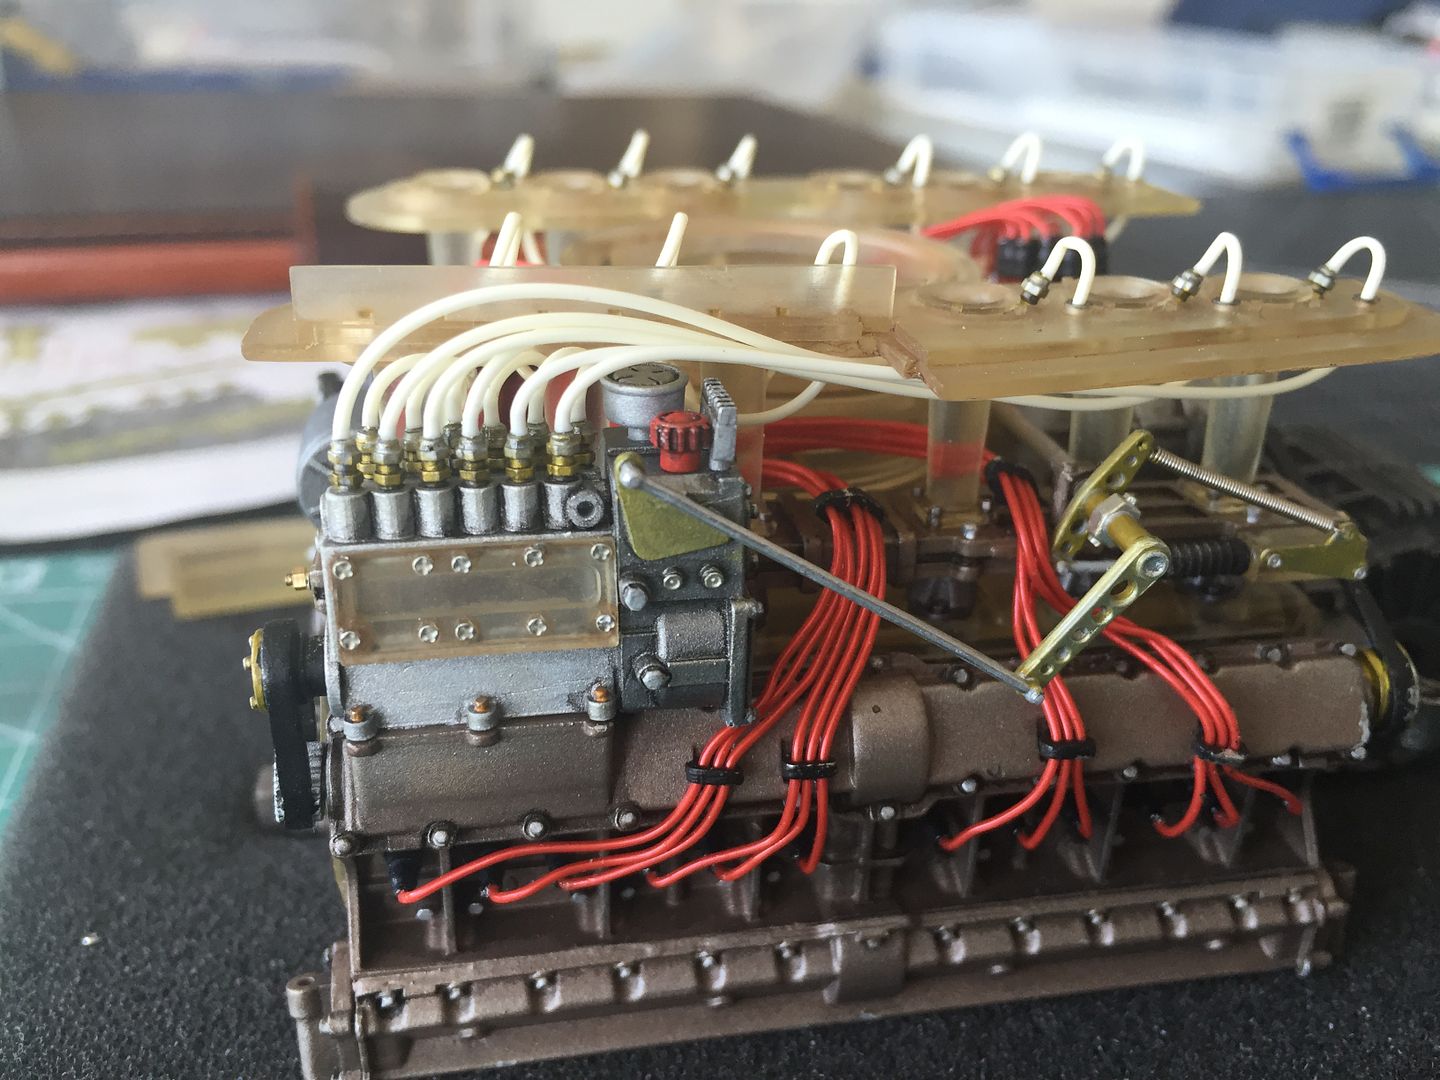
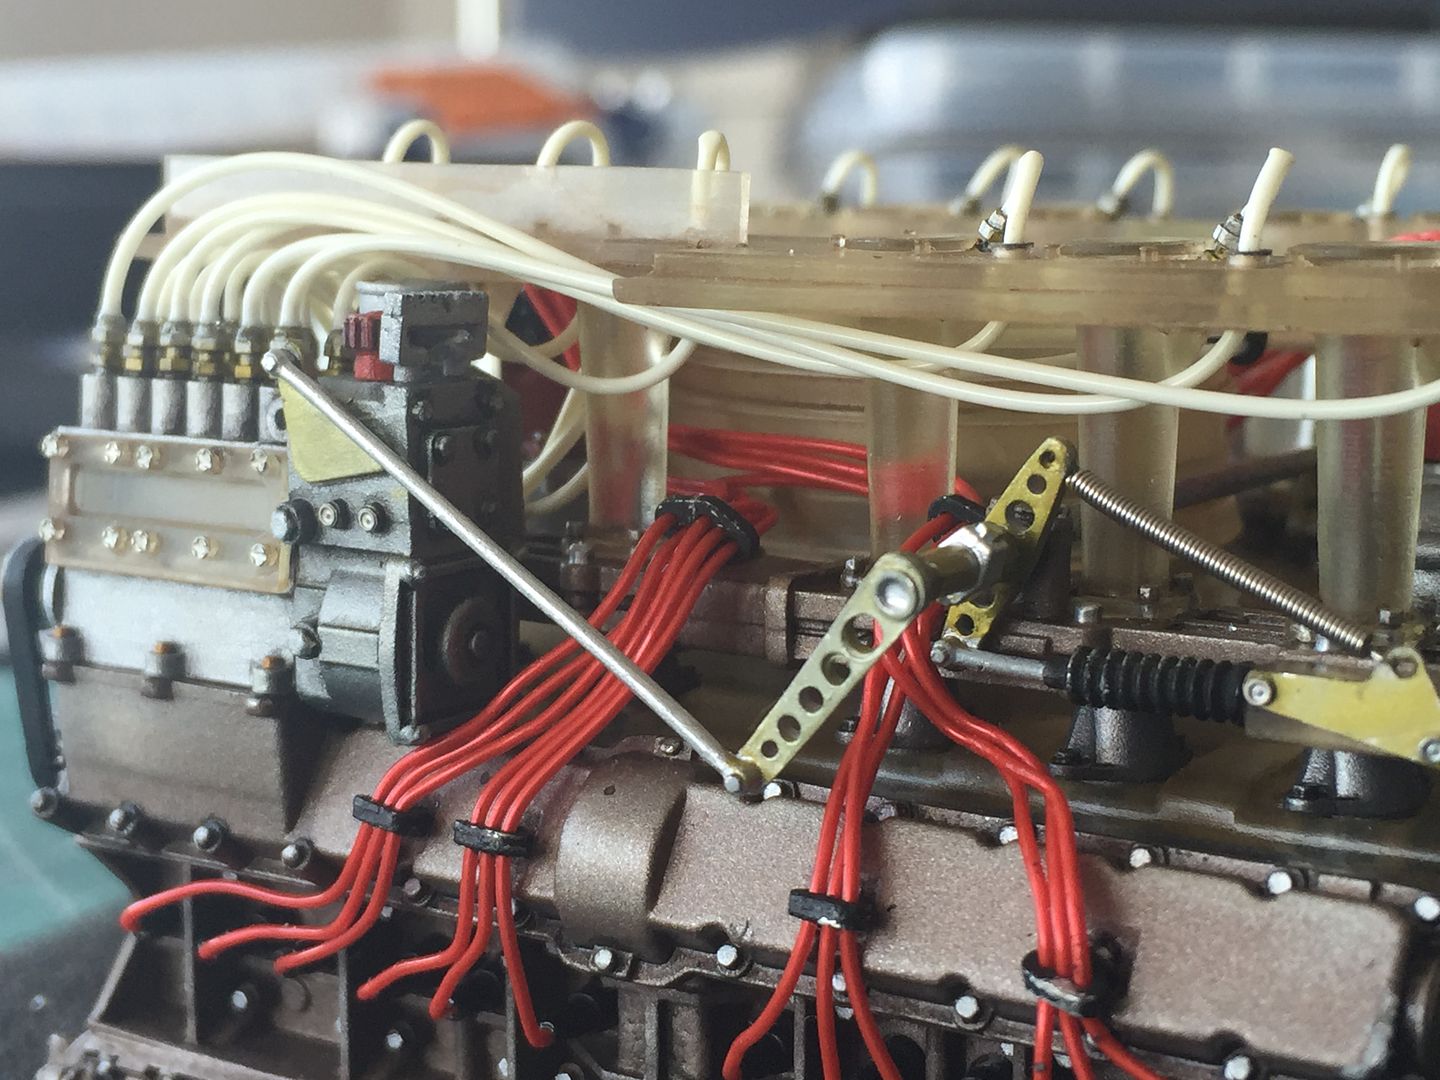
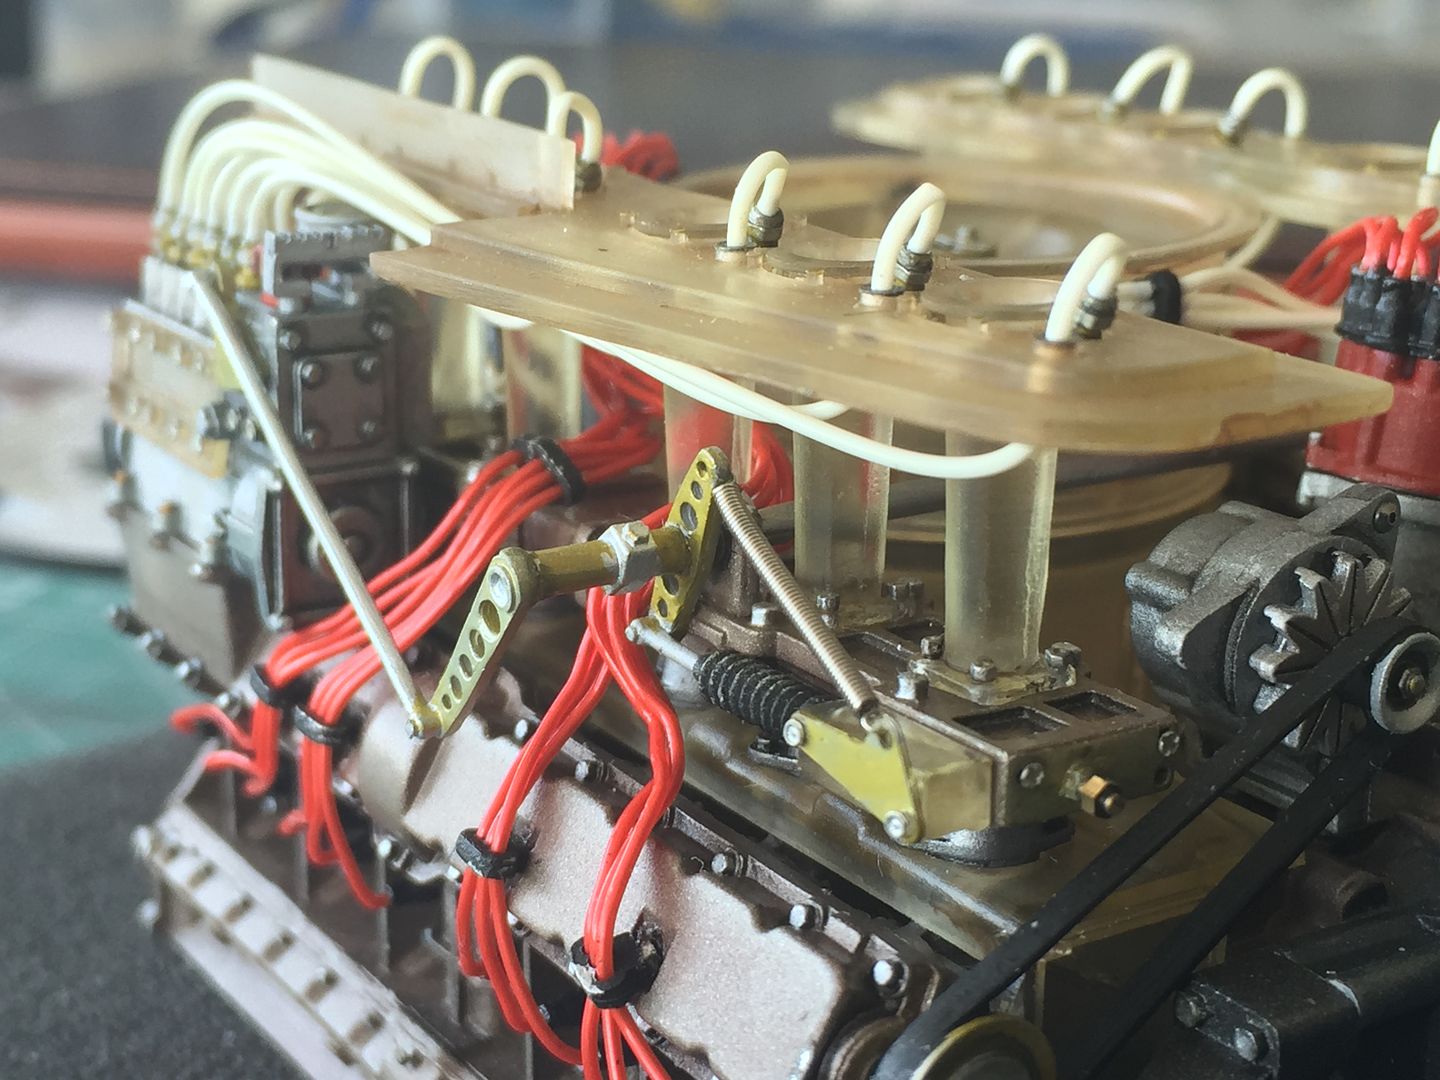
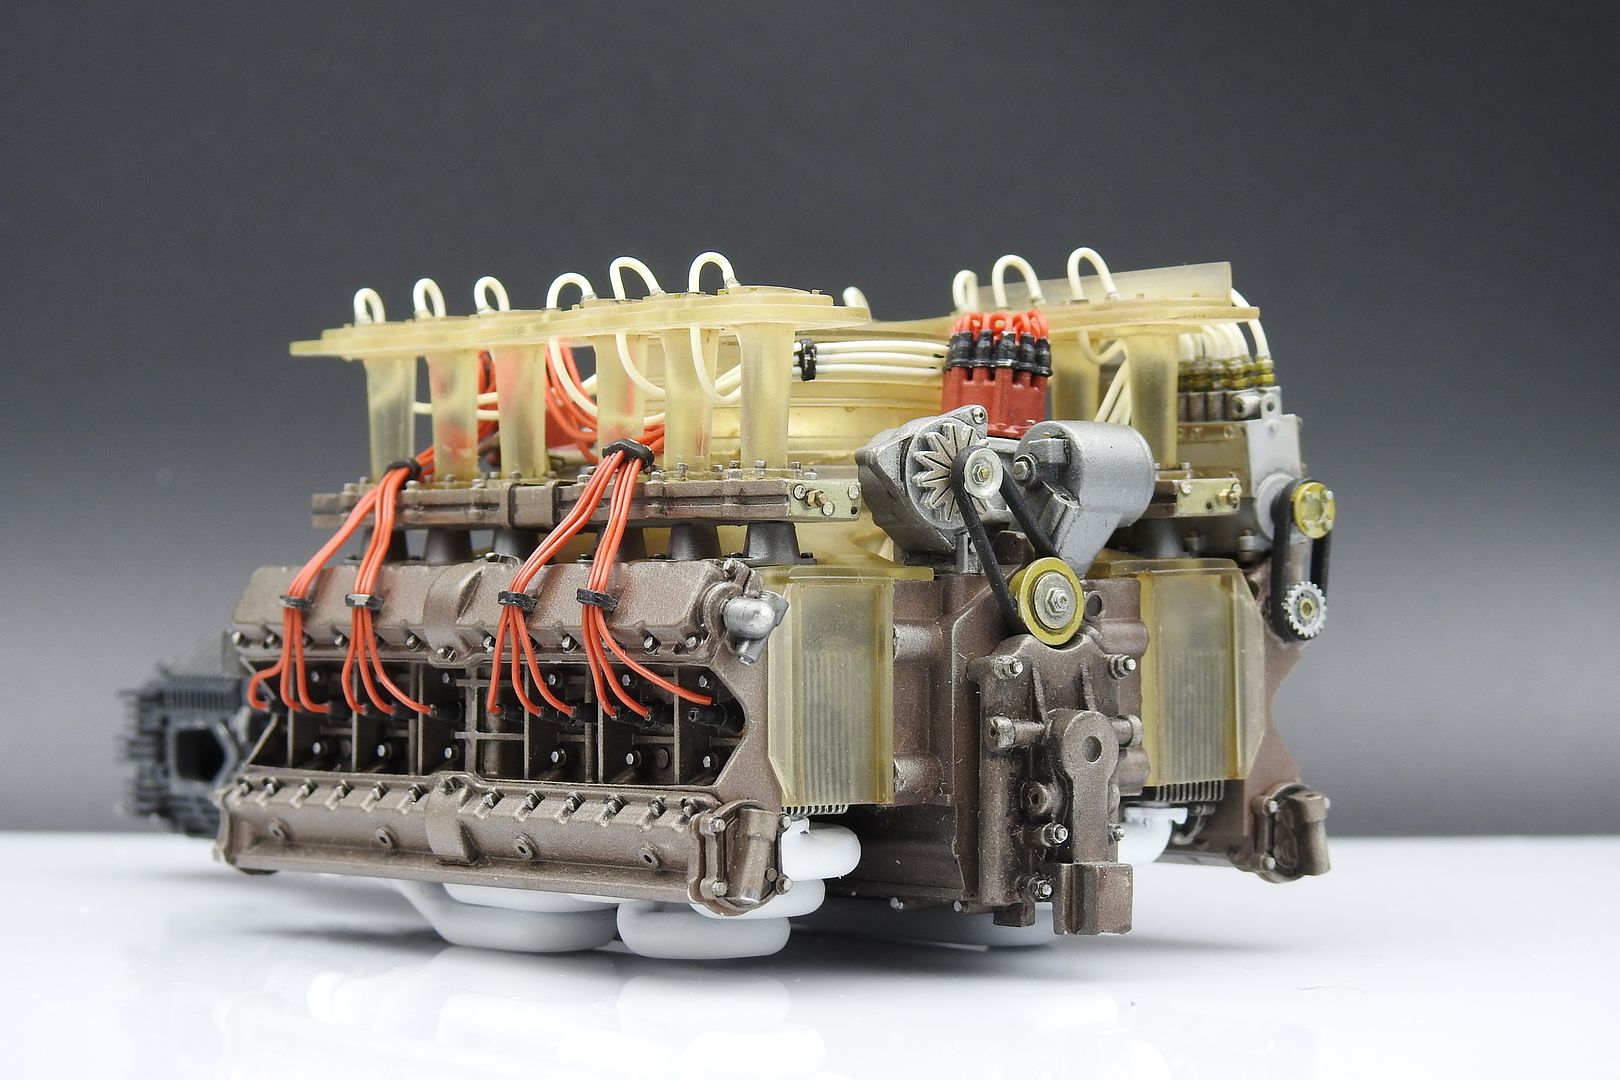
Belts and pulleys are cast - painted them and added and then started on the fun job of wiring the speak plugs!
Lots of wire (12 cylinder!) and lots of very fine drilling of holes for the wires to be glues in to. But it seems to have gone together ok so far - I want the cables to look neat and natural, so probably lots of tweaking once each end is 'glued' in.
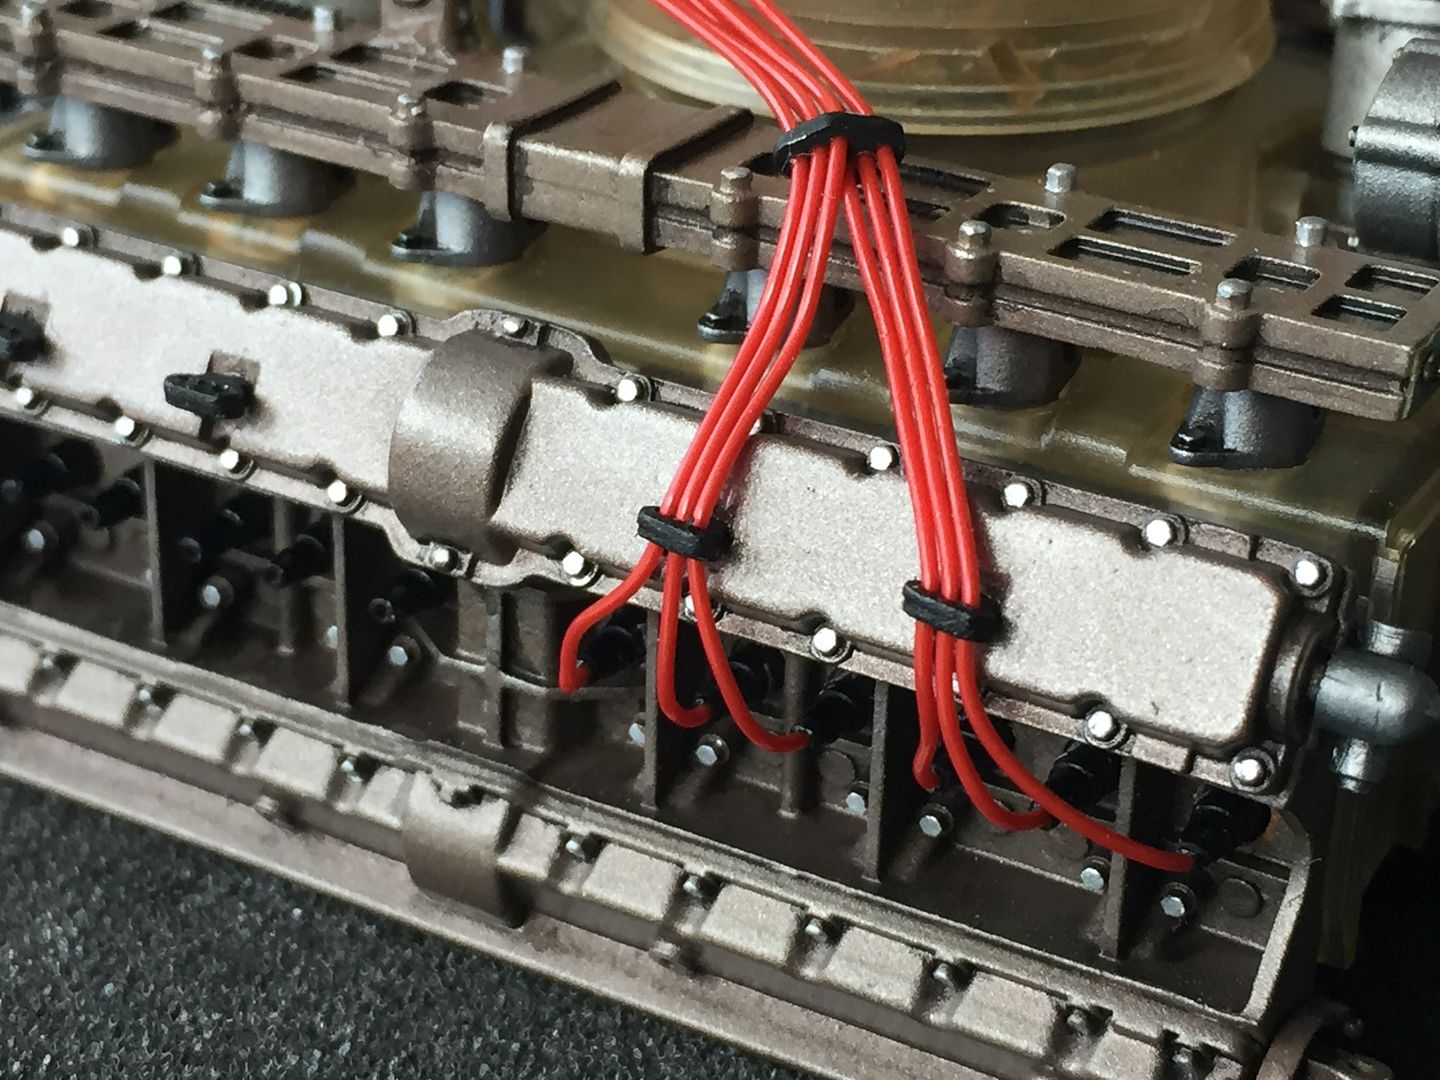
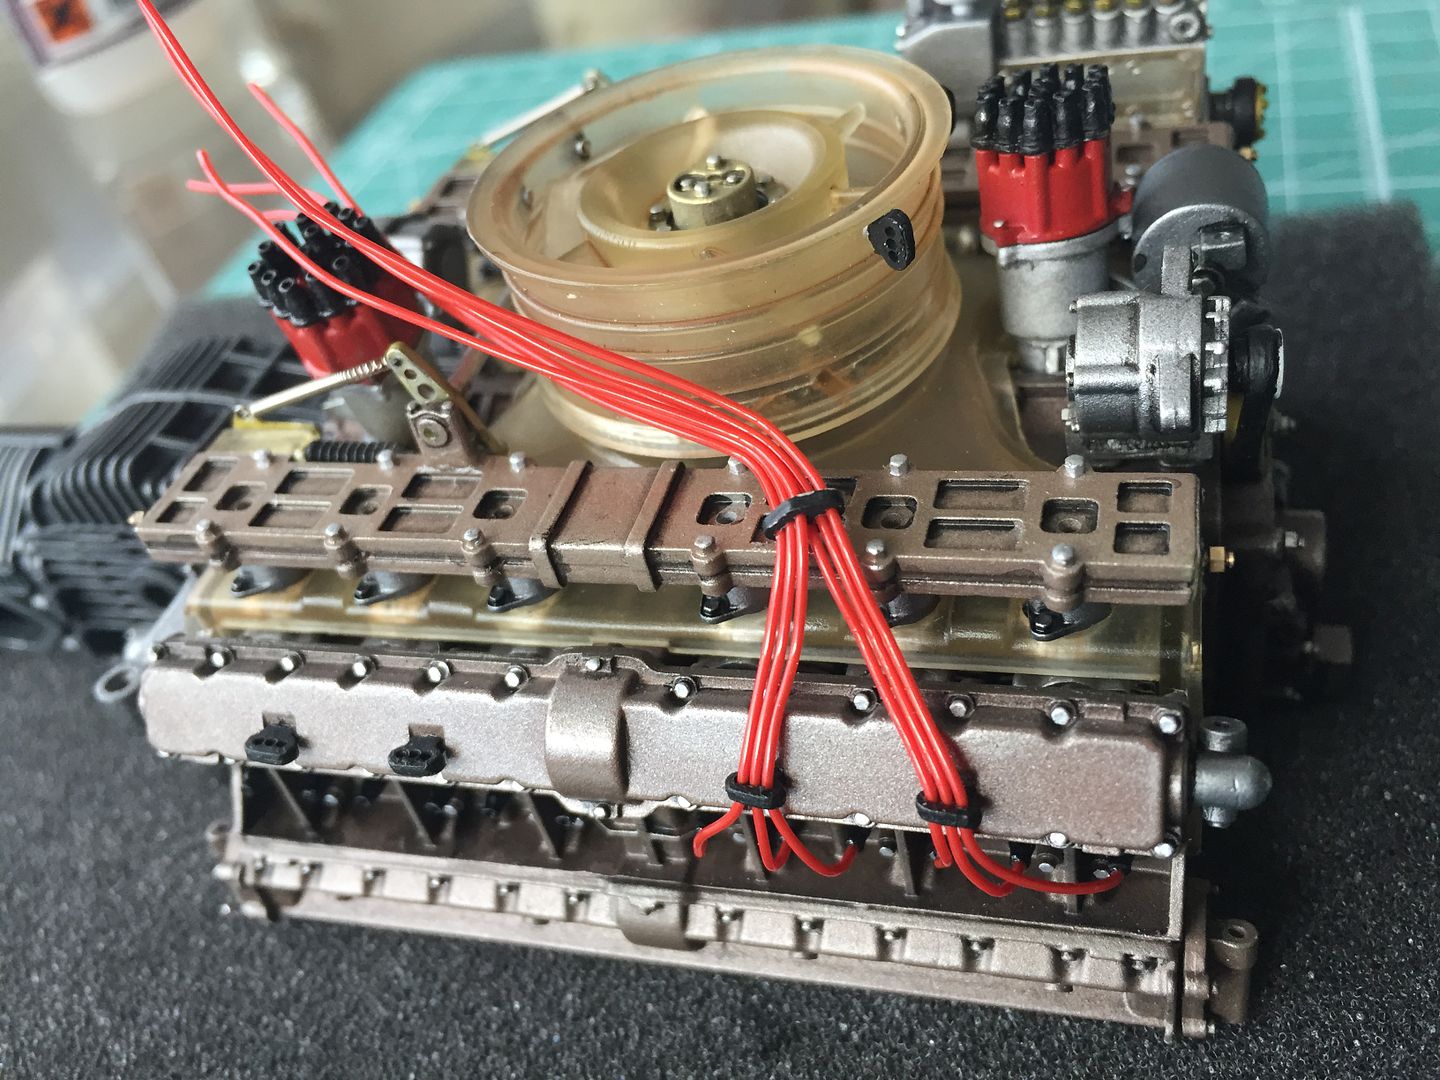
You have to be aware what components and other plumbing is coming, so you can route the wires suitably.
One example is the air intake trumpets. These ended up being a massive pain, due to one process I did ahead of time!
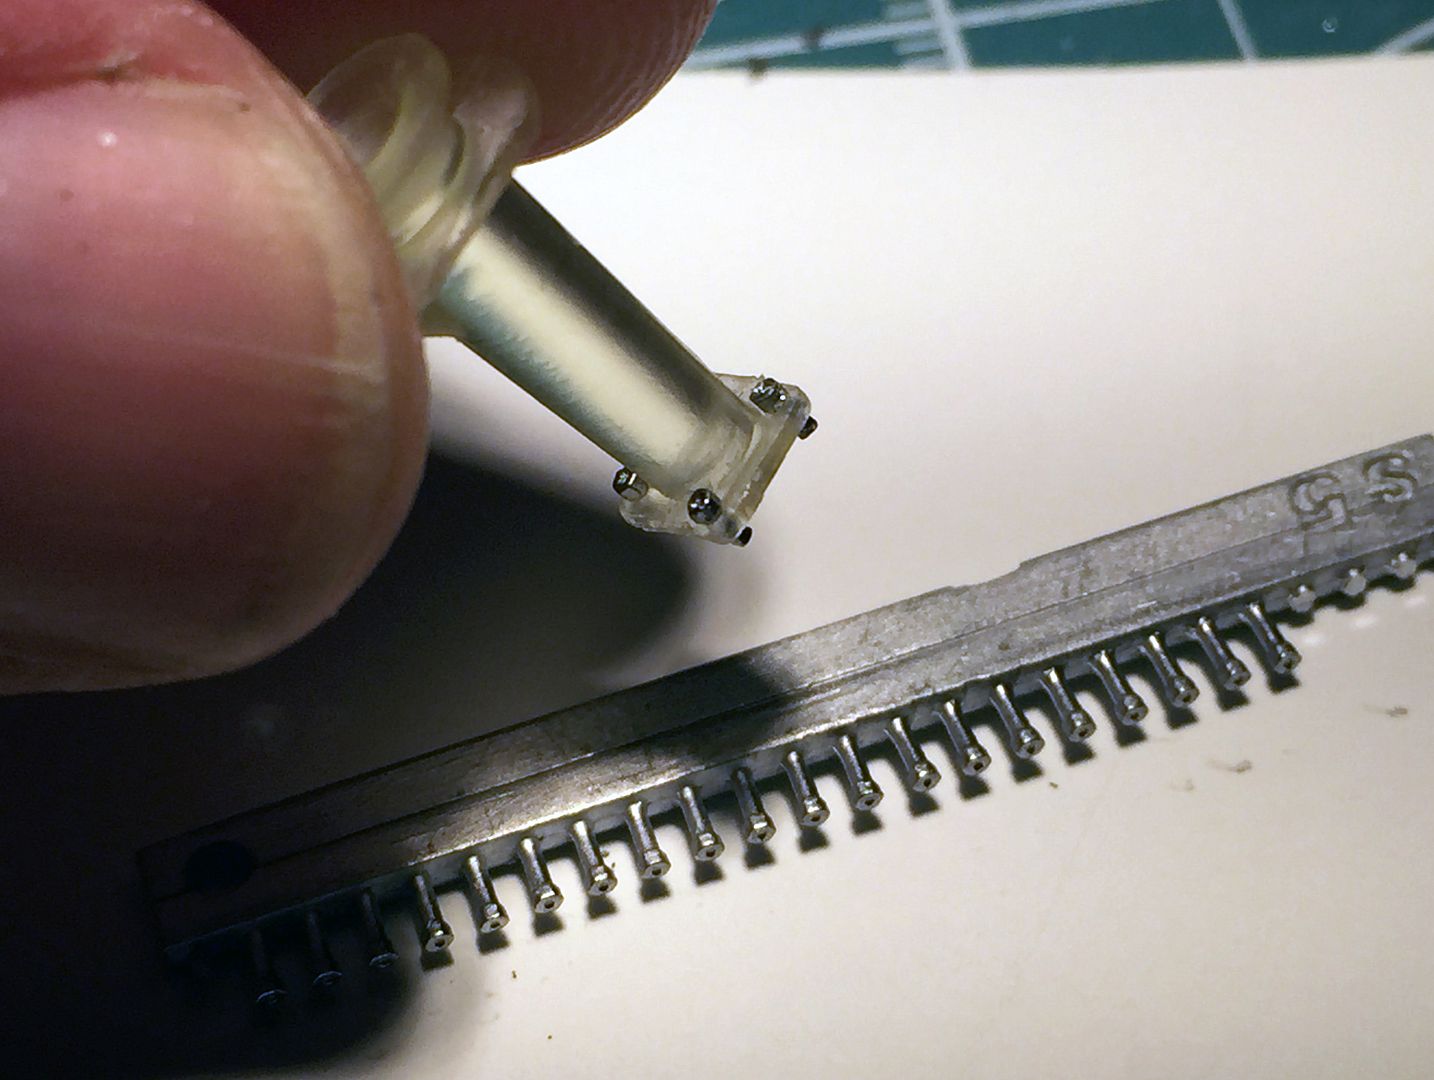
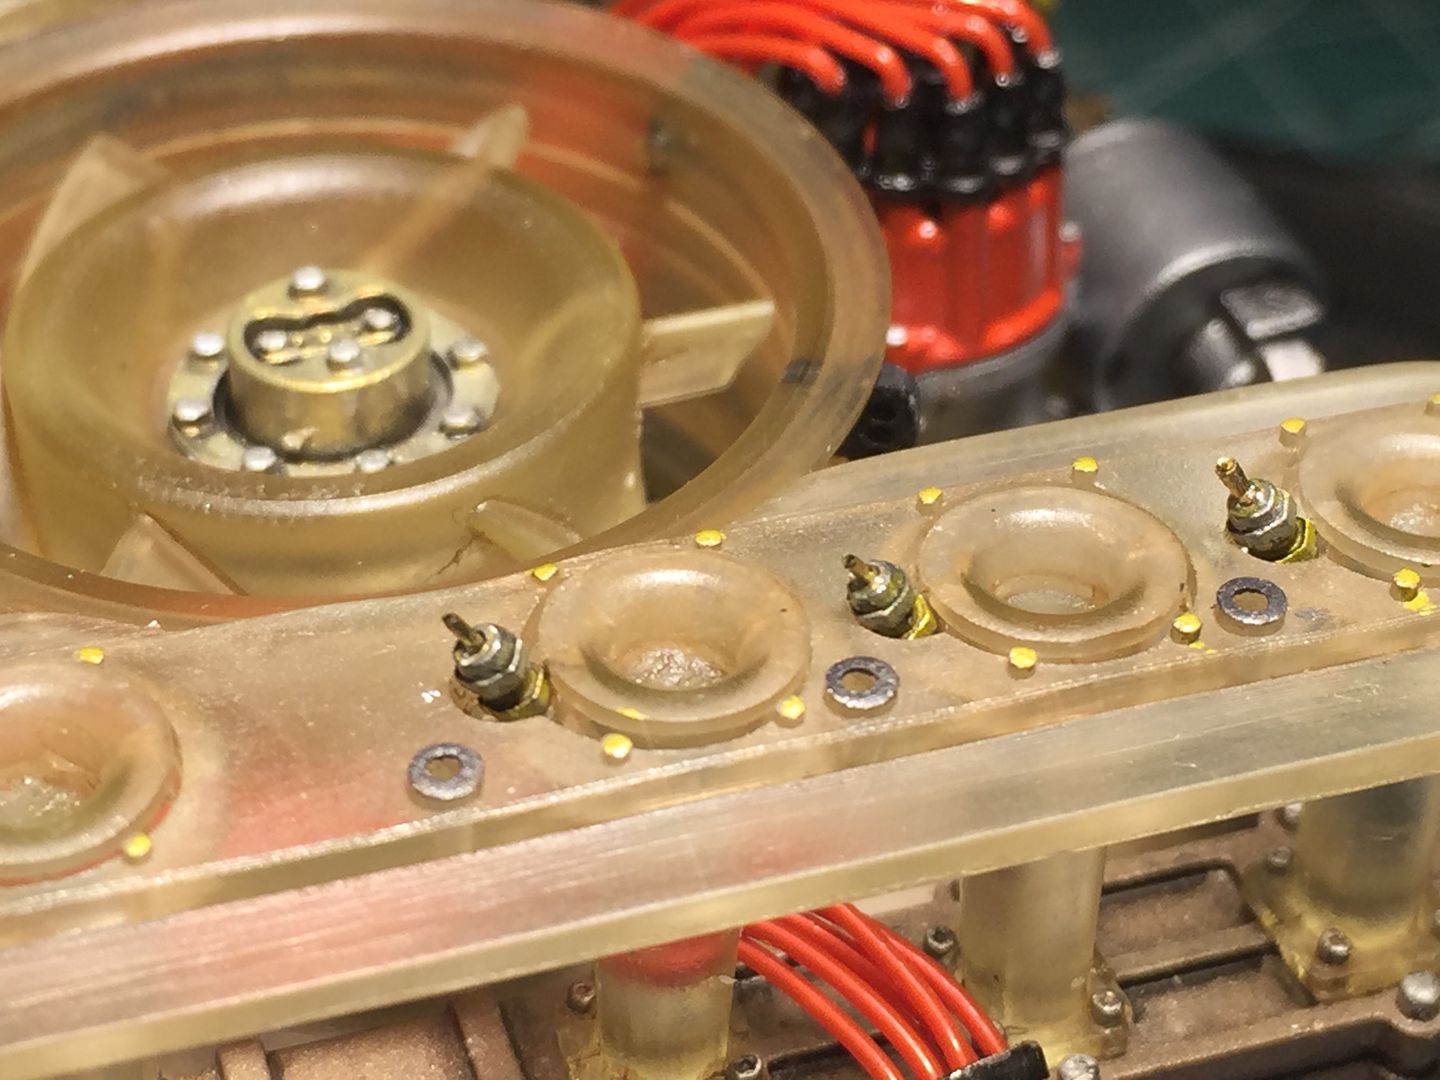
In the instructions for this kit, they suggest the addition of these bolts is 'optional' - though all parts are included. I gave the cast strip of fittings a gentle pass with the dremel brass wheel to add some shine, and drilled the 4 tiny holes required on each of the 12 trumpets - there is a tiny imprint to mark the hole location. They are so small that I had not realized they were 'hex' ended with a tiny hole until I saw this photo!
At the top of these trumpets there is an injector on each one - cast fitting. I added these at this point as well, after first using the earth colour wash I had used on the other 'resin' parts on the engine - (fan etc.) This ended up being a mistake...fitting these injectors meant that I could not simply place the shroud on top of them once I had glued them to the engine (I had wanted to do this in order to align them all) - I should have done that first THEN fitted the injectors...lesson learnt (the instructions do show the injectors being fitted after the shroud....)
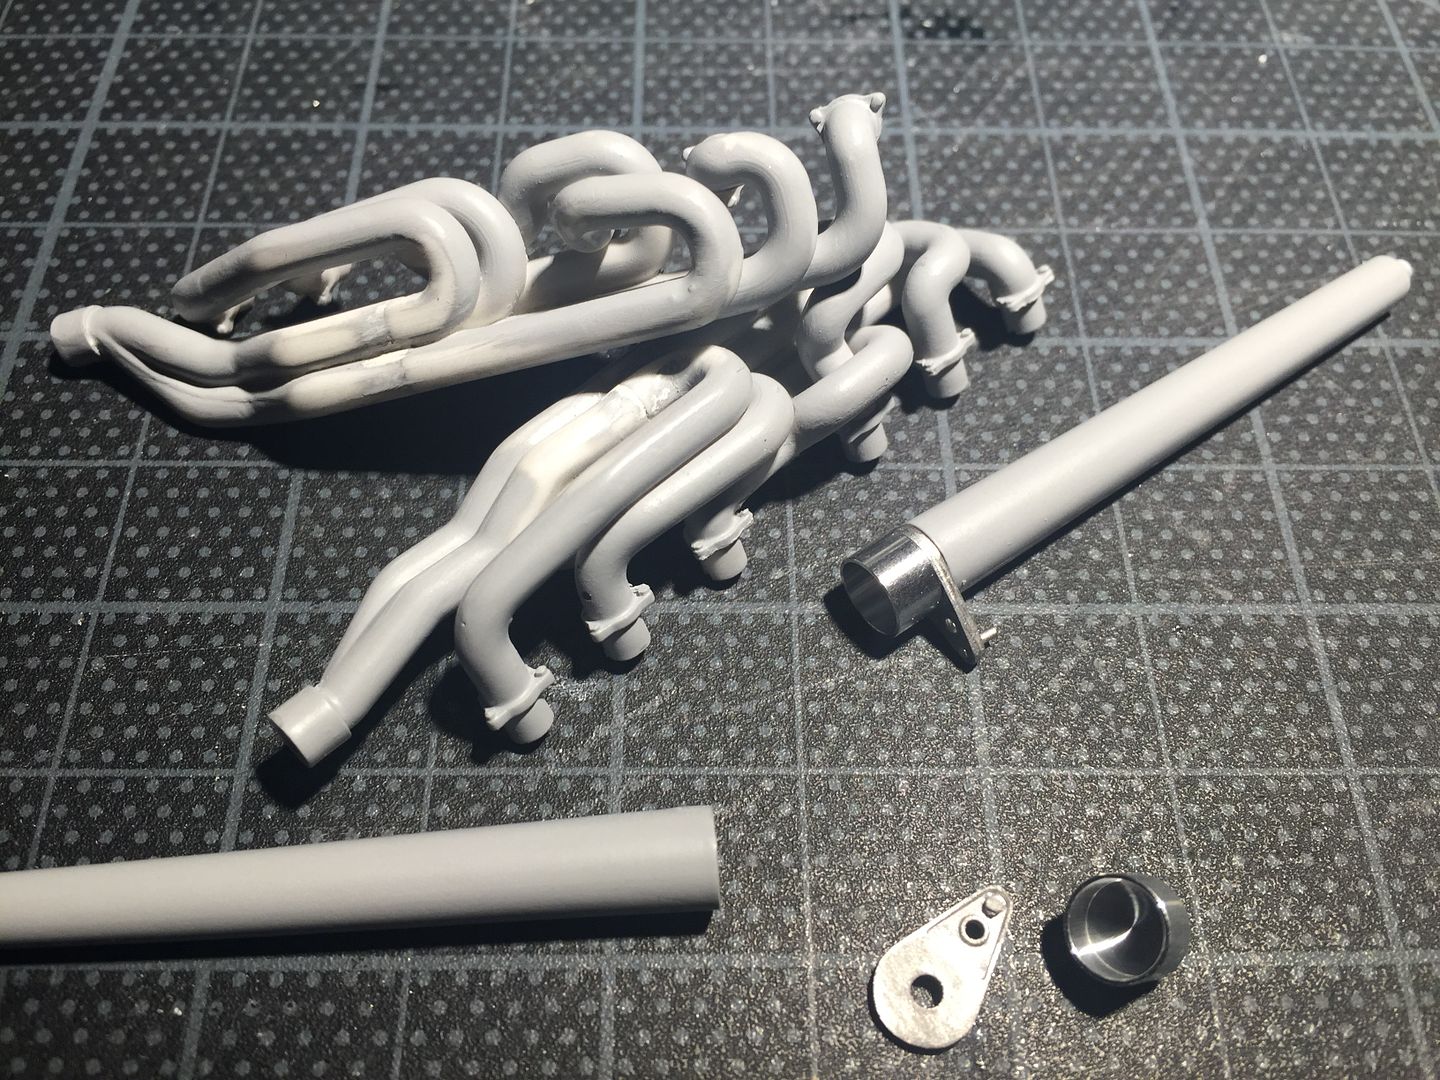
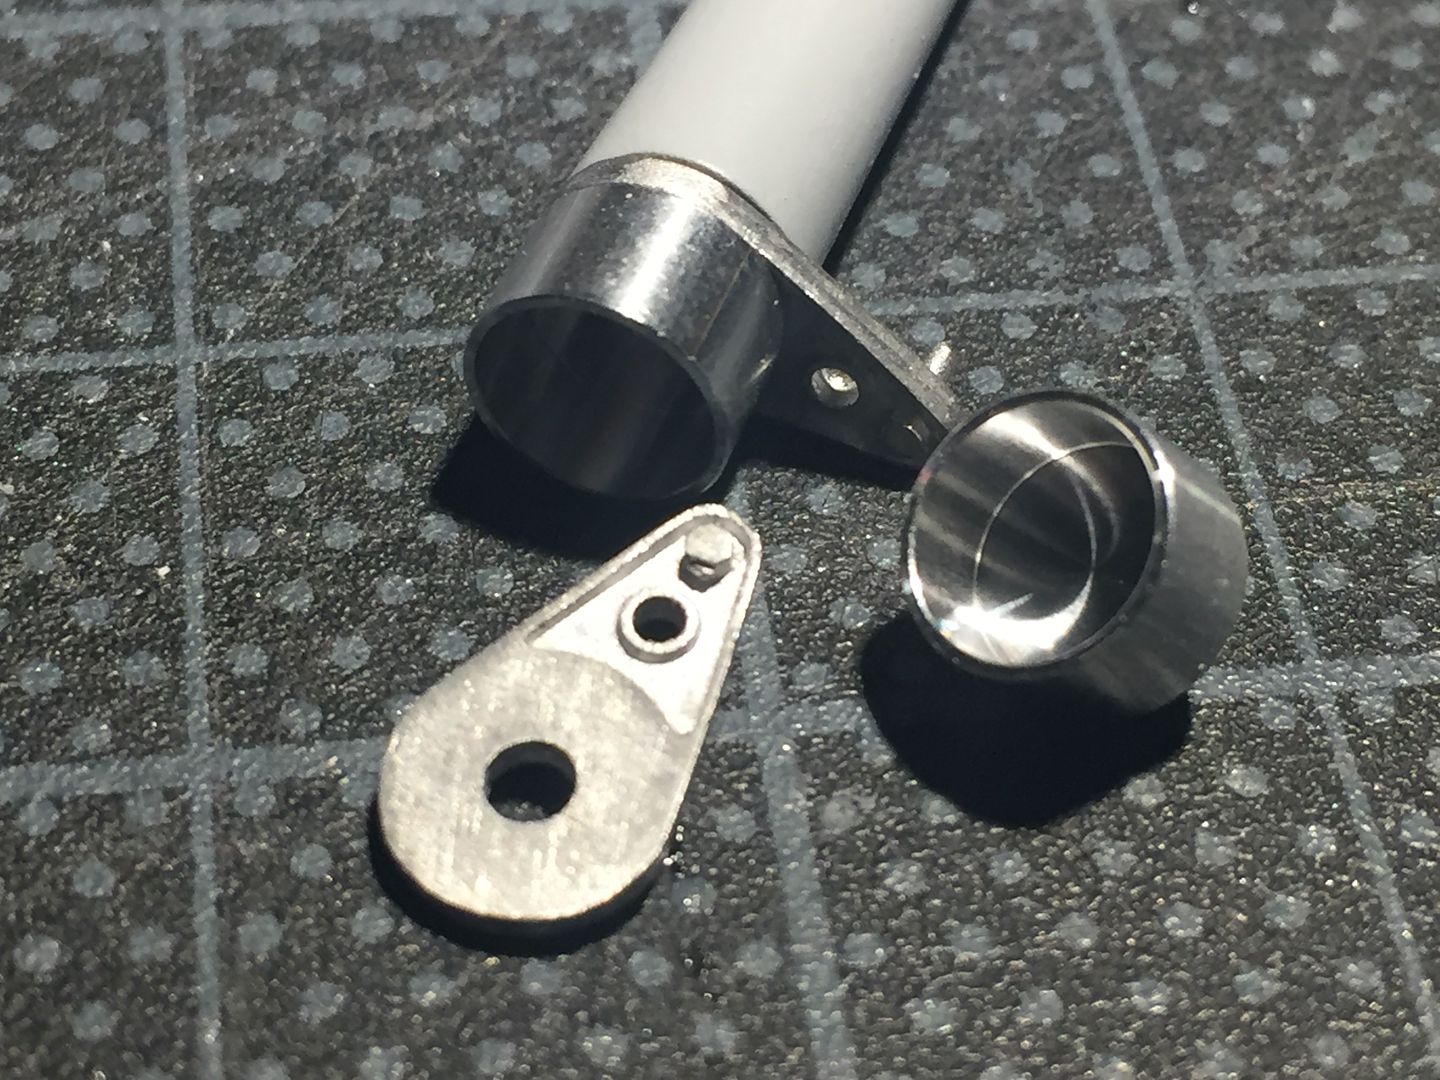
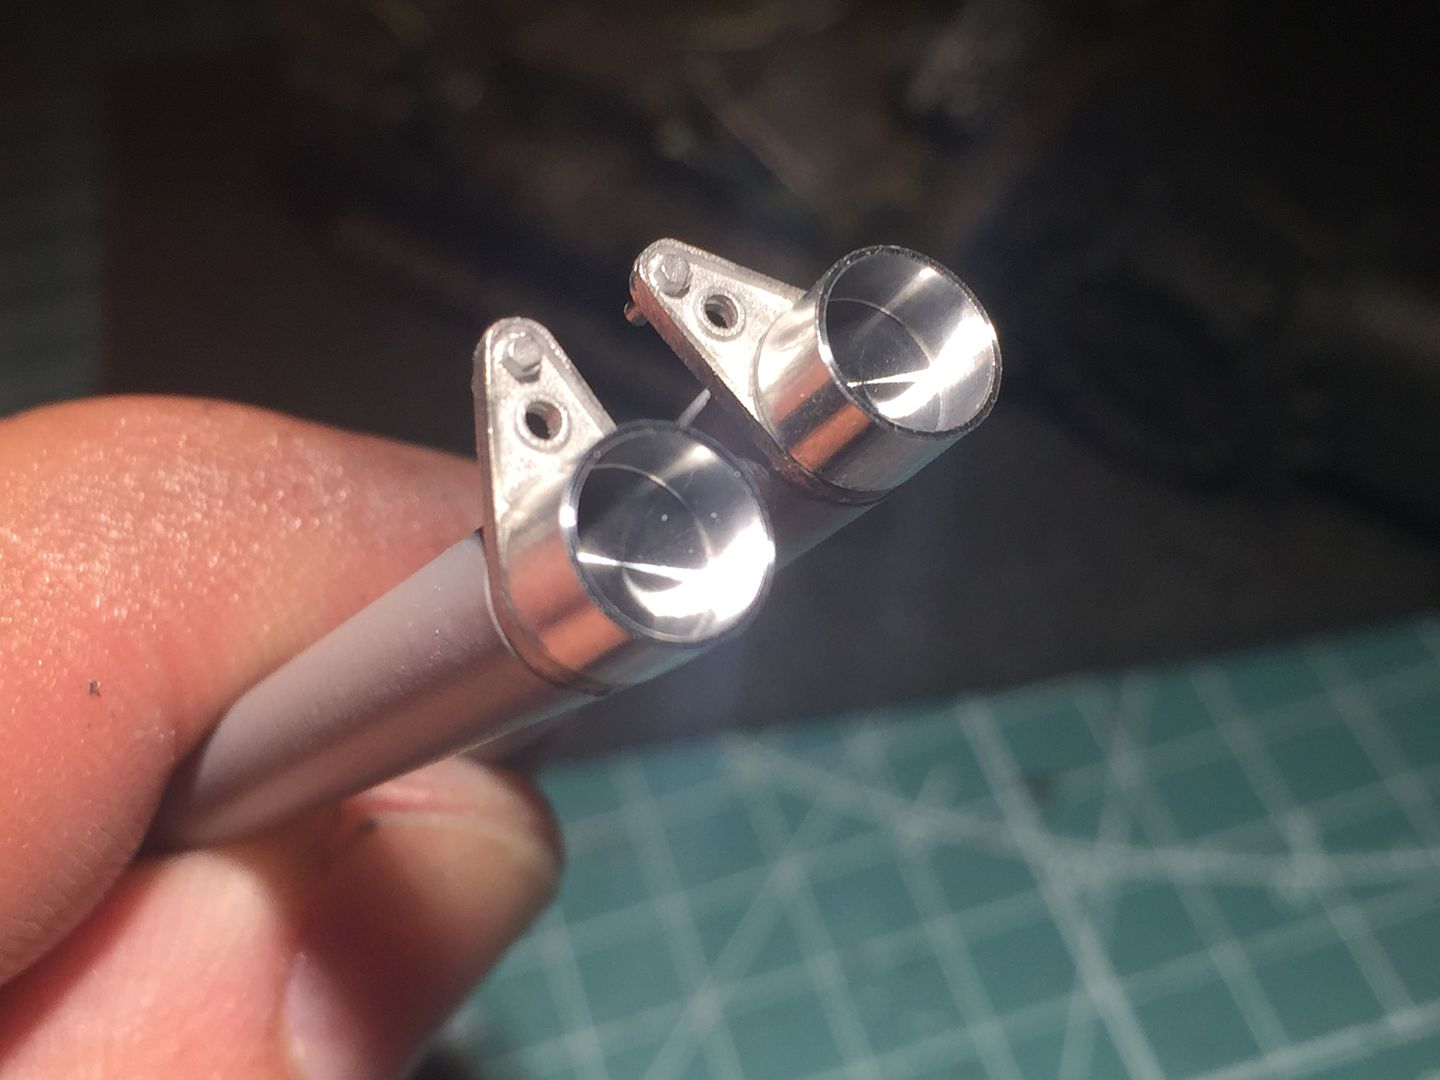
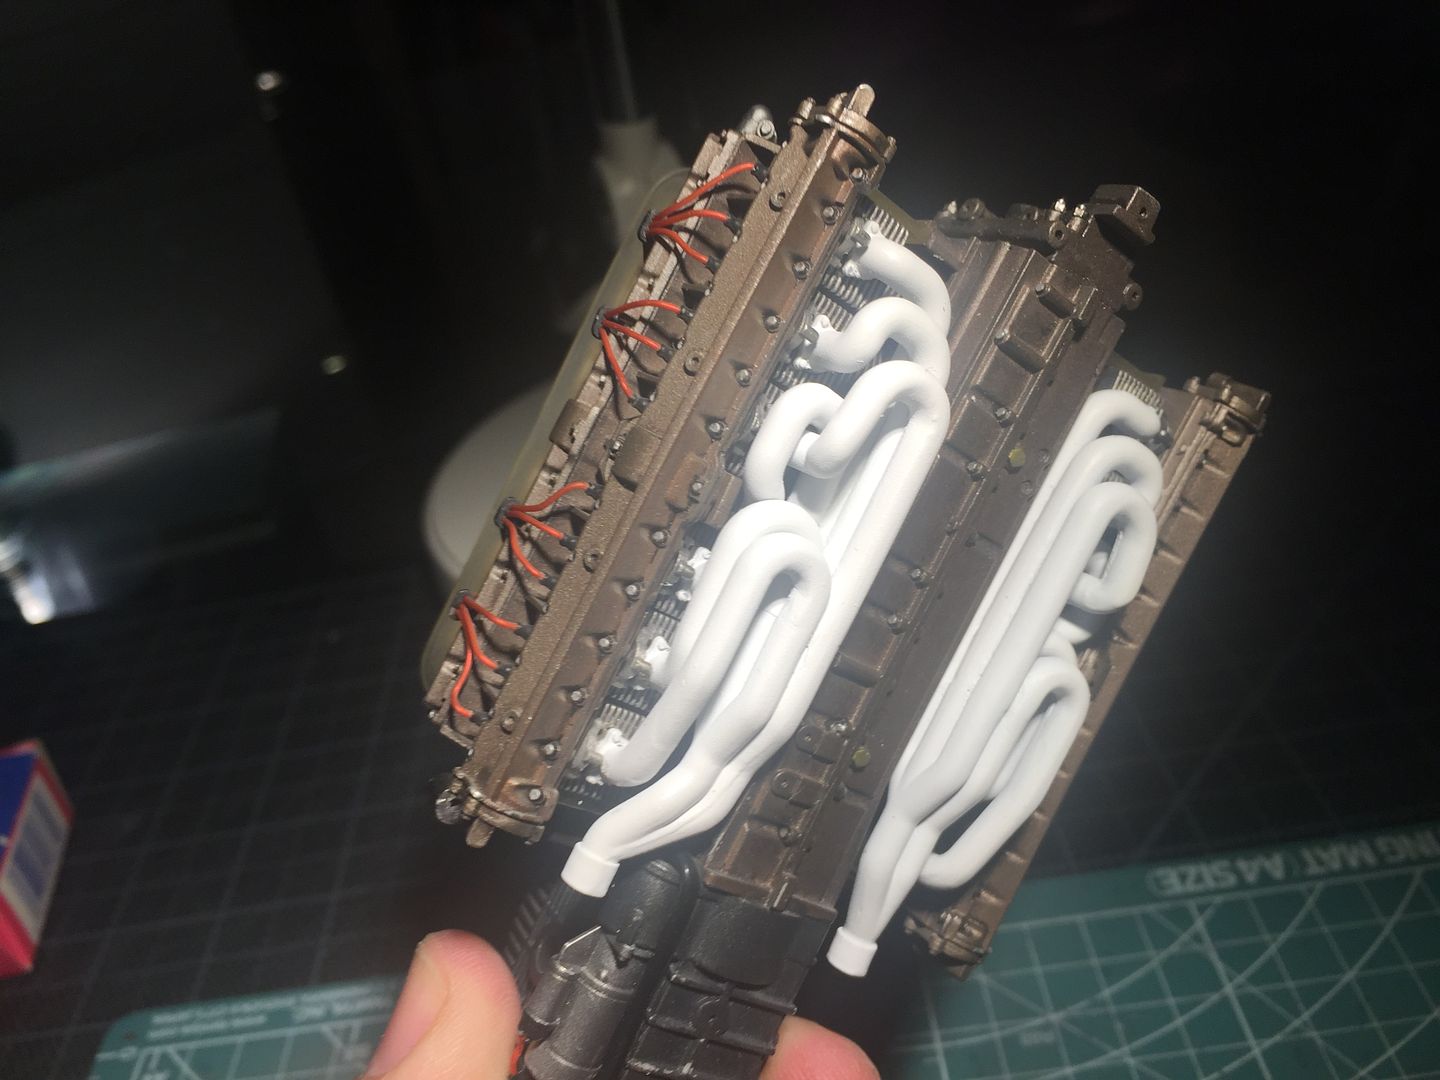
Quick test fit of the exhaust system...
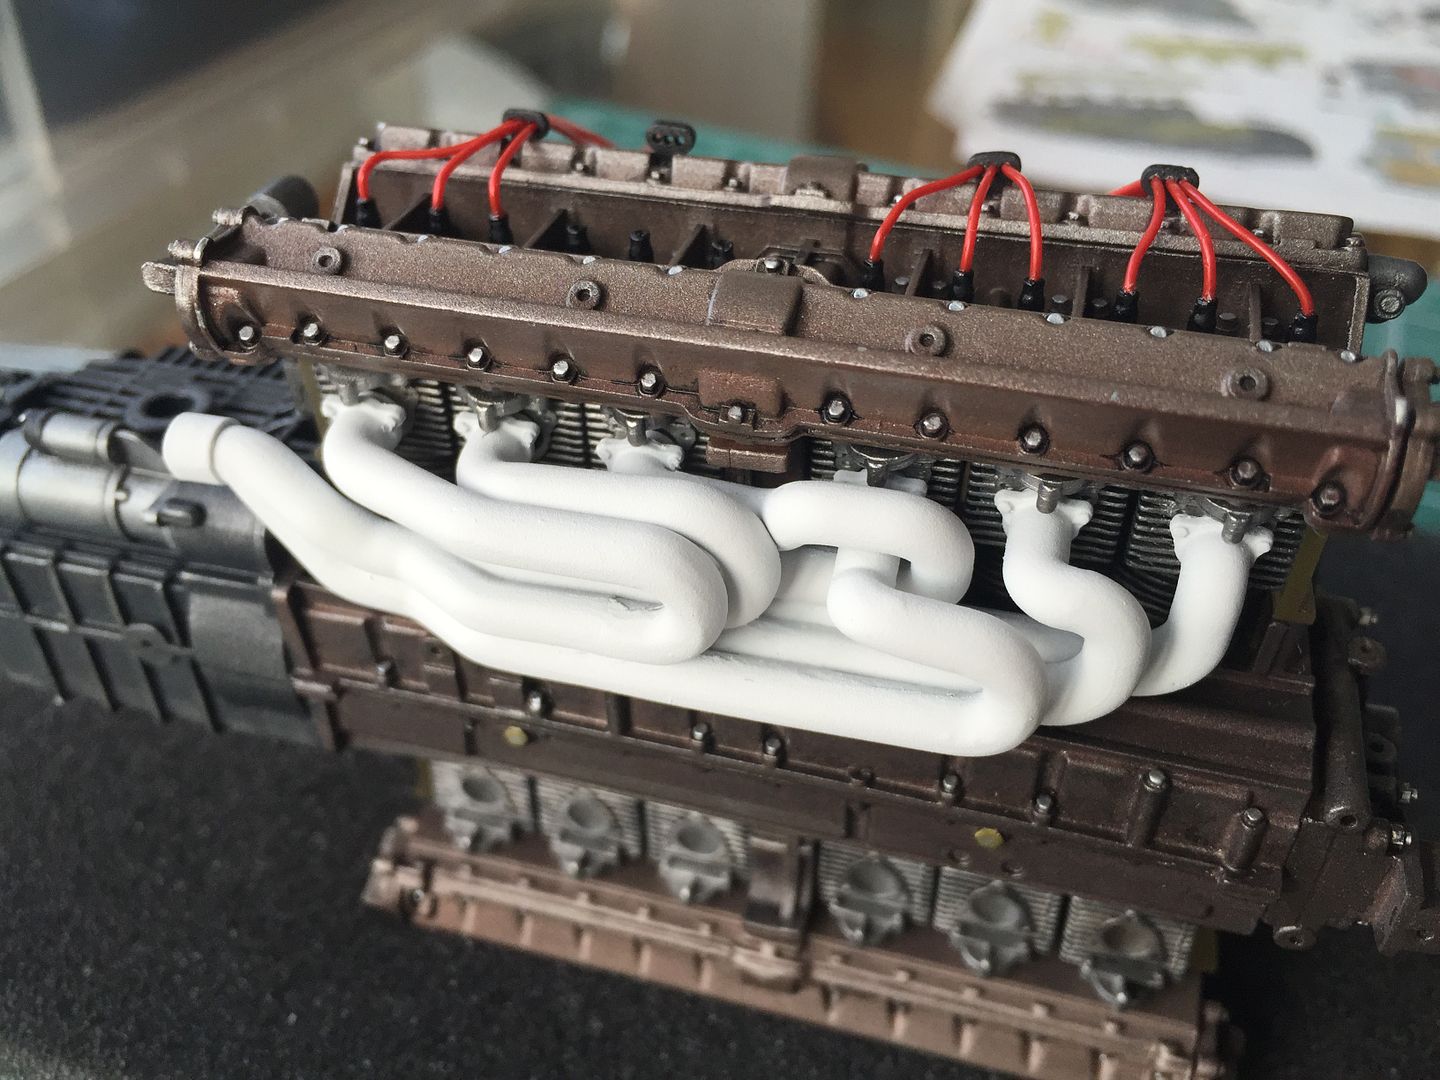
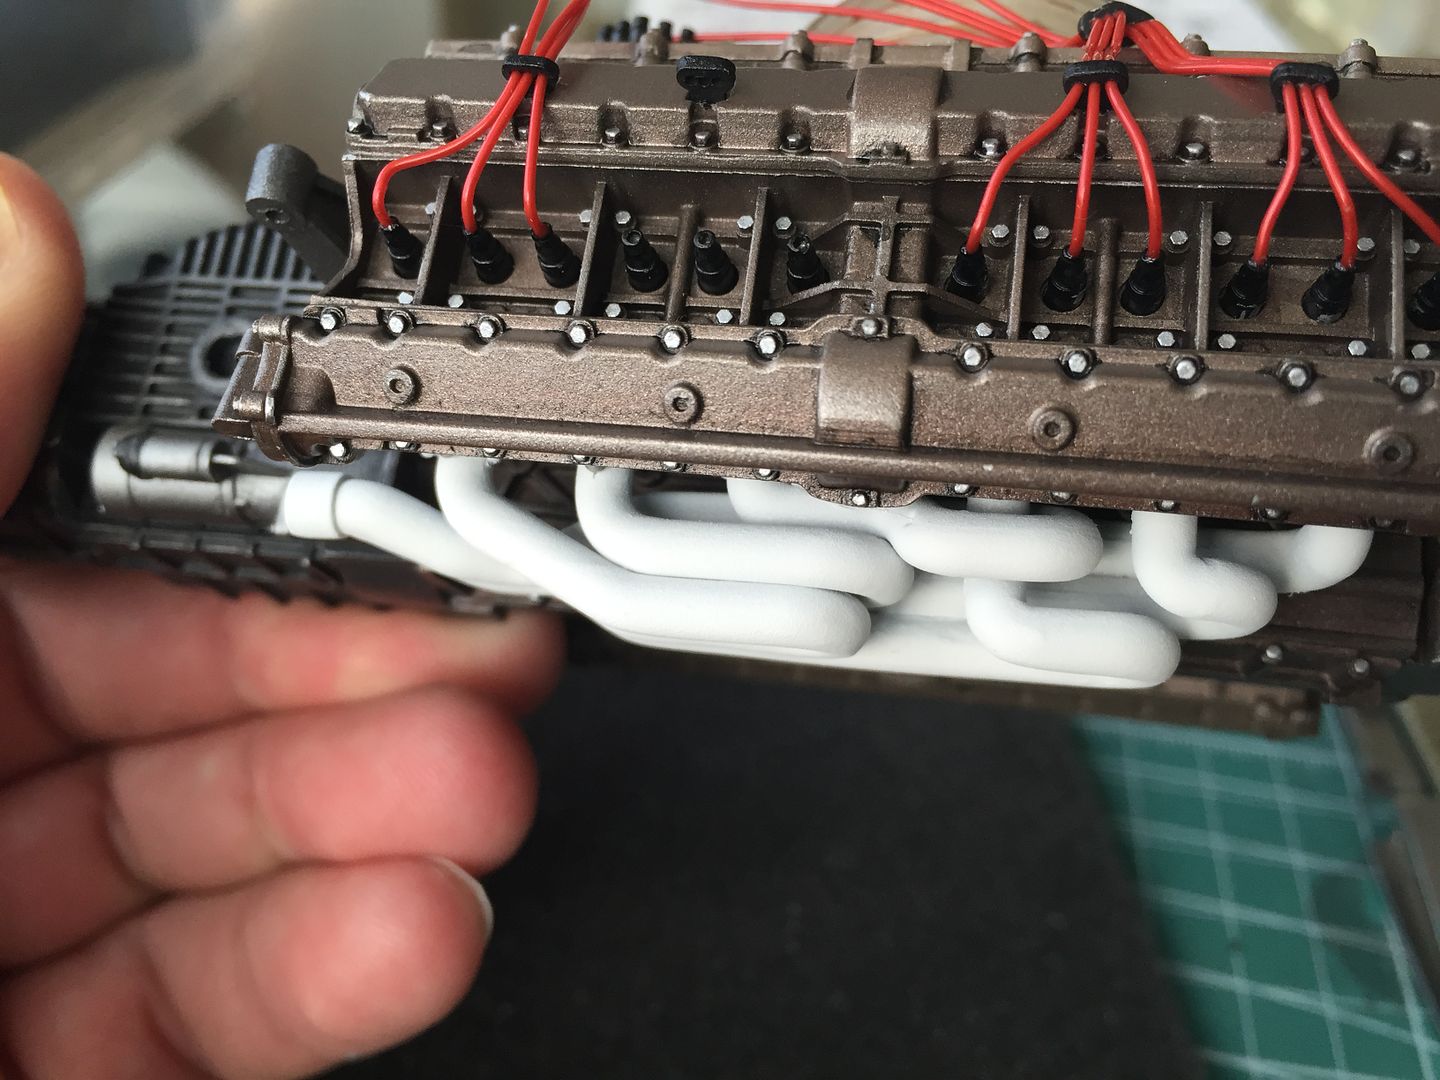
...not glued these in yet as I don't want to mark them, but they are fitted before mounting the engine in the framework.
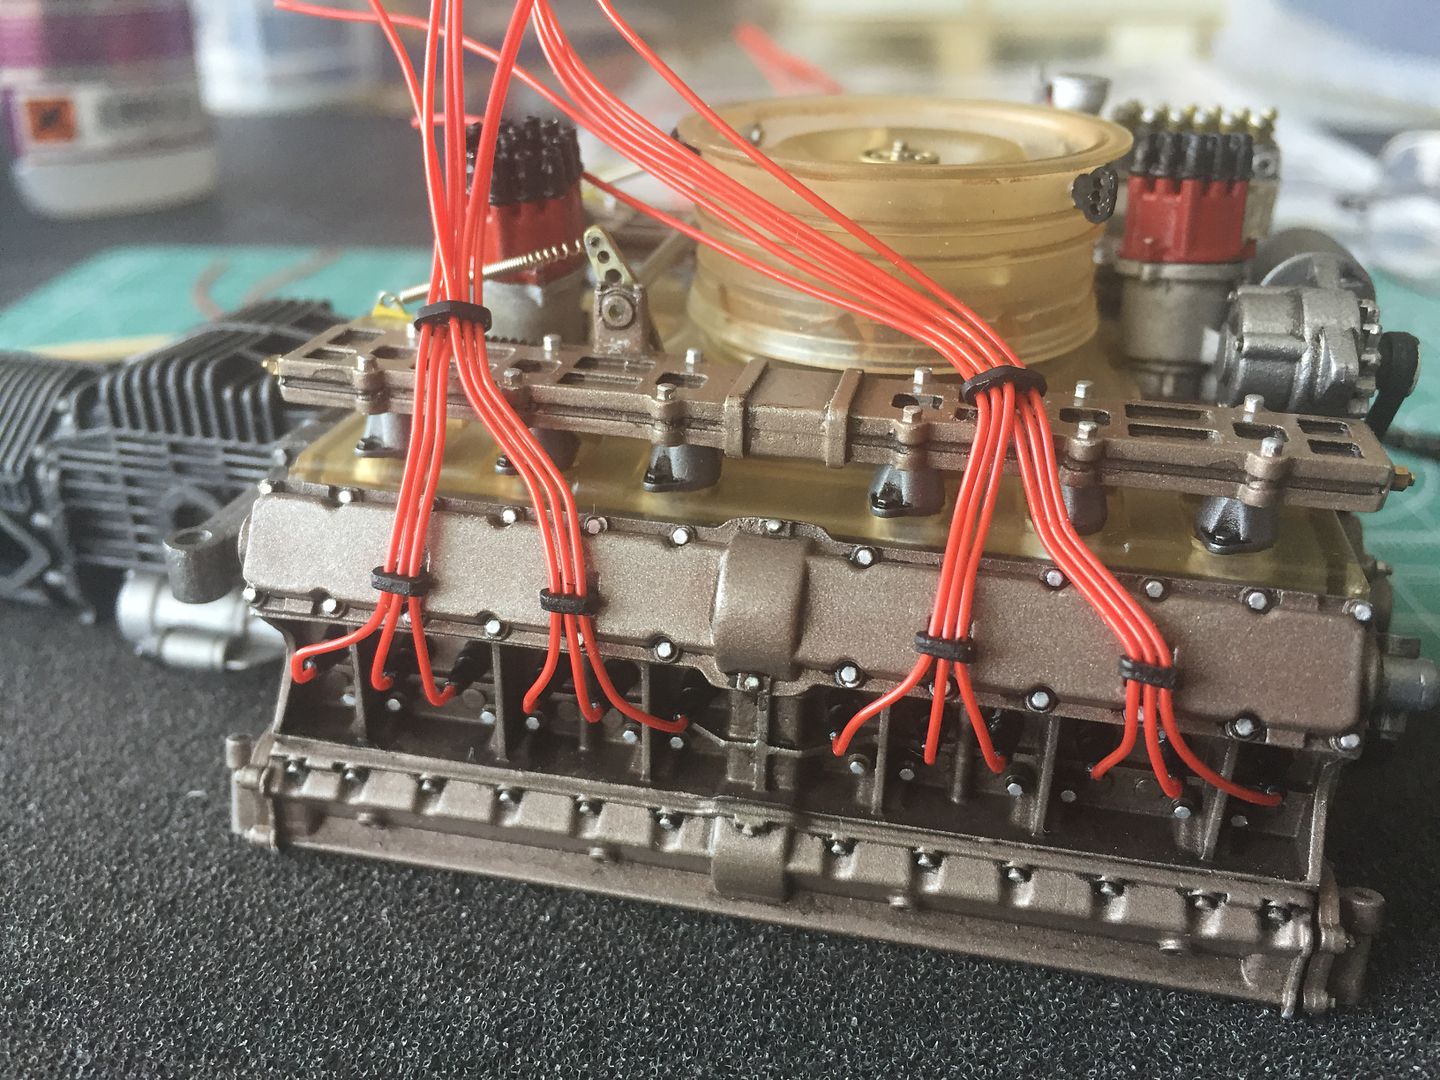
One side done (lots of swearing with those trumpets).
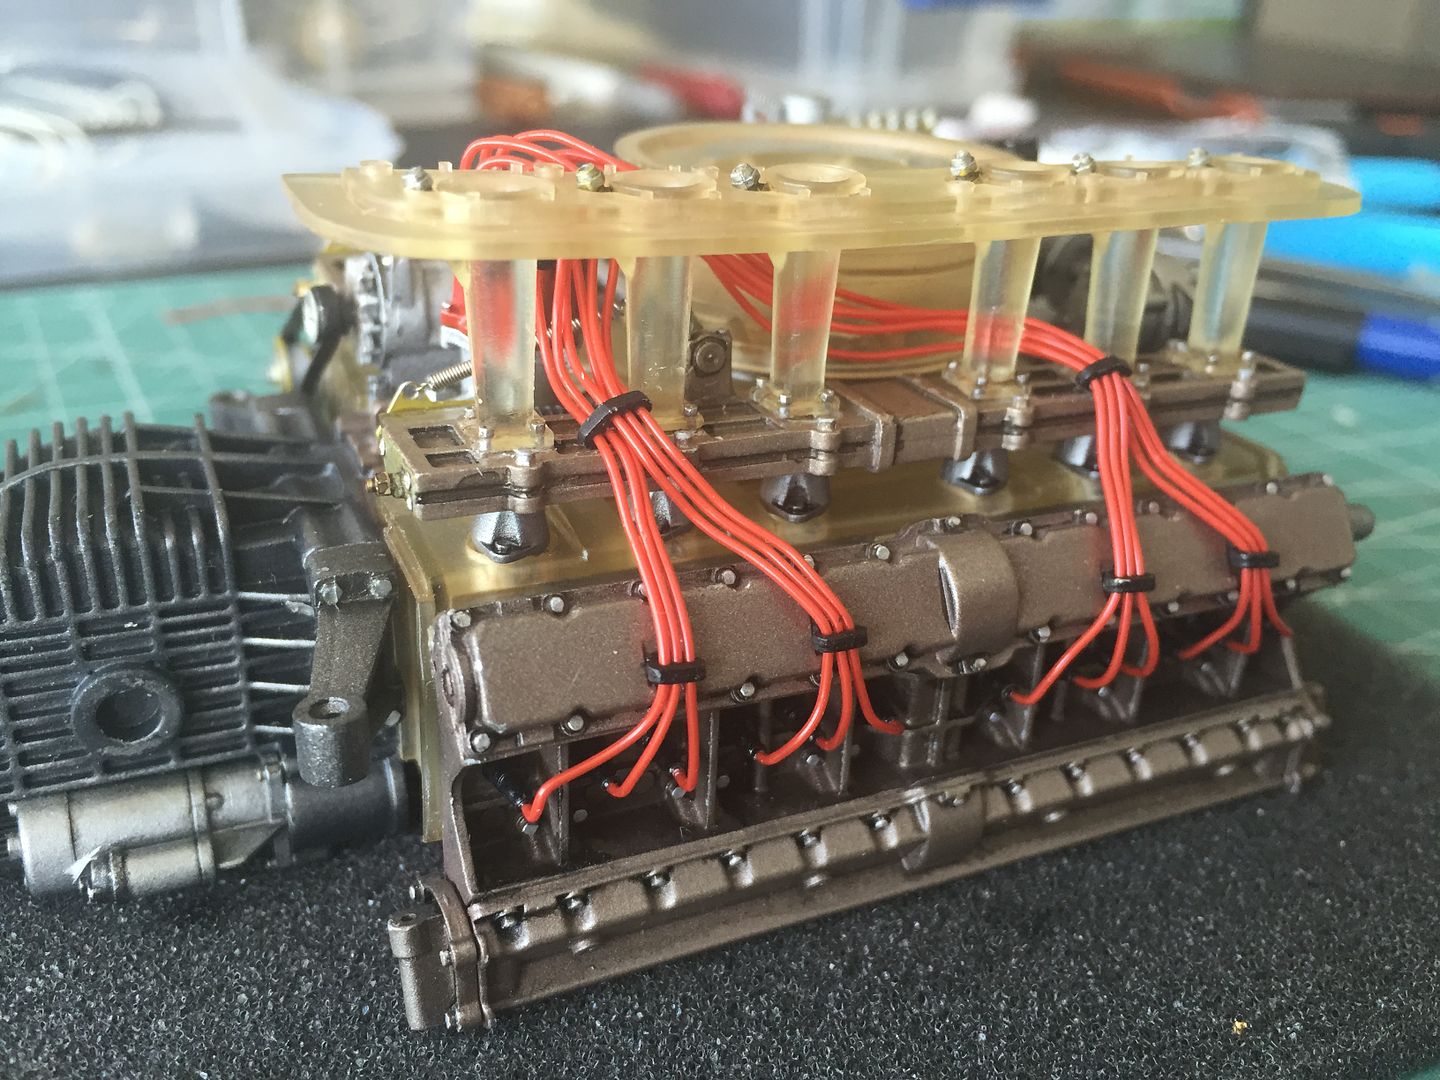
Then on to the other side....
Right - started to add some details.
Belts and pulleys are cast - painted them and added and then started on the fun job of wiring the speak plugs!
Lots of wire (12 cylinder!) and lots of very fine drilling of holes for the wires to be glues in to. But it seems to have gone together ok so far - I want the cables to look neat and natural, so probably lots of tweaking once each end is 'glued' in.
You have to be aware what components and other plumbing is coming, so you can route the wires suitably.
One example is the air intake trumpets. These ended up being a massive pain, due to one process I did ahead of time!
In the instructions for this kit, they suggest the addition of these bolts is 'optional' - though all parts are included. I gave the cast strip of fittings a gentle pass with the dremel brass wheel to add some shine, and drilled the 4 tiny holes required on each of the 12 trumpets - there is a tiny imprint to mark the hole location. They are so small that I had not realized they were 'hex' ended with a tiny hole until I saw this photo!
At the top of these trumpets there is an injector on each one - cast fitting. I added these at this point as well, after first using the earth colour wash I had used on the other 'resin' parts on the engine - (fan etc.) This ended up being a mistake...fitting these injectors meant that I could not simply place the shroud on top of them once I had glued them to the engine (I had wanted to do this in order to align them all) - I should have done that first THEN fitted the injectors...lesson learnt (the instructions do show the injectors being fitted after the shroud....)
Quick test fit of the exhaust system...
...not glued these in yet as I don't want to mark them, but they are fitted before mounting the engine in the framework.
One side done (lots of swearing with those trumpets).
Then on to the other side....
oh - NOW you tell me!! 
Would have been an awesome comment about 3 months ago...lol
Joking aside, you are probably right - various photos show a range of shades to be honest, but maybe next time a milky wash on the reverse might work. Access a bit tough now.
I'll just say I am building a 'clear canopy' version so you can see detail...
AND there is more engine detail I can add on that top photo!
To be honest, not being a 'production' car built by robots, every photo is different. The wiring and fuel line plumbing shown above is totally different from the pictures I'm about to post of mine!
..anyway, got a bit done over the holiday weekend.
Wired the other side, and managed to fit the shroud with less swearing on this side...
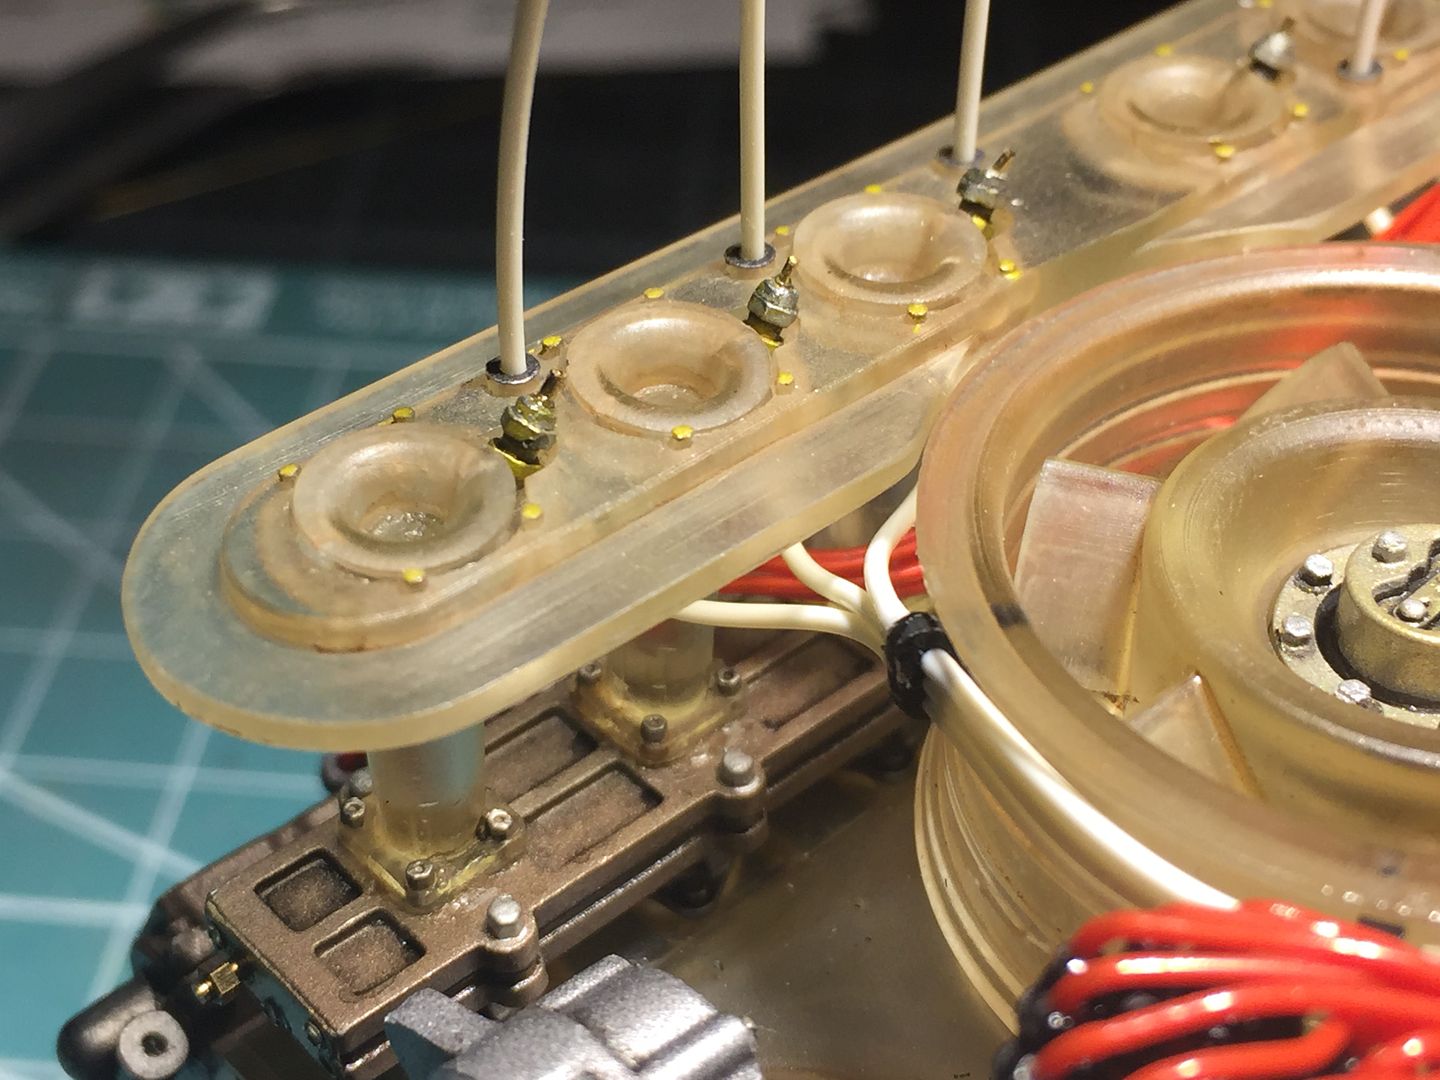
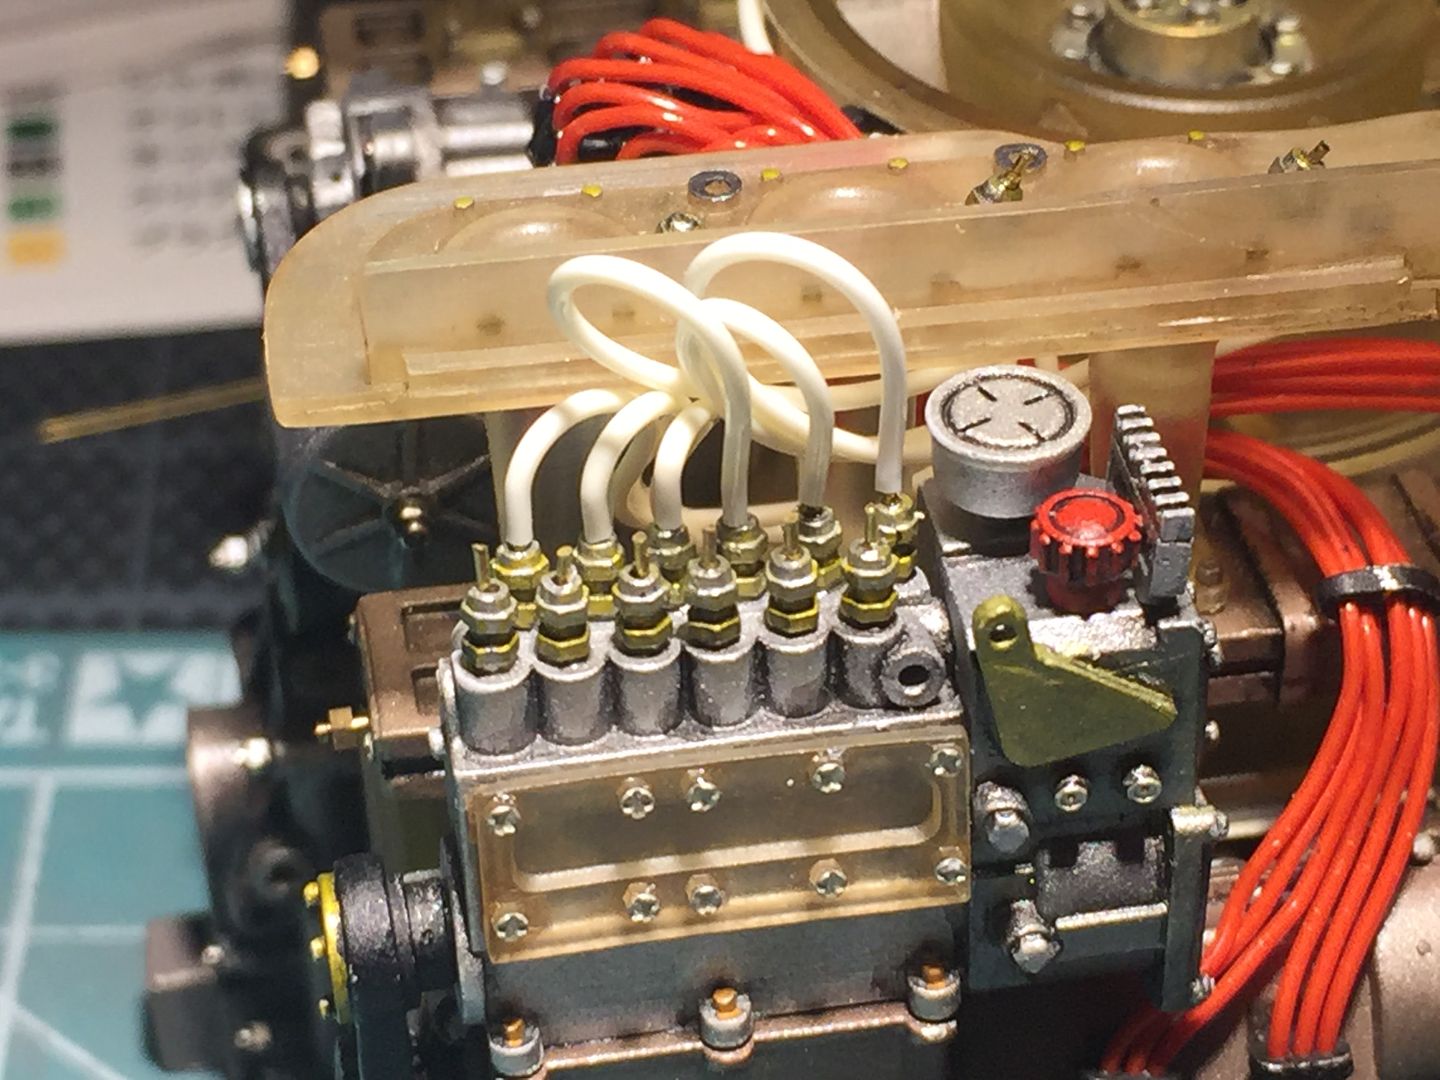
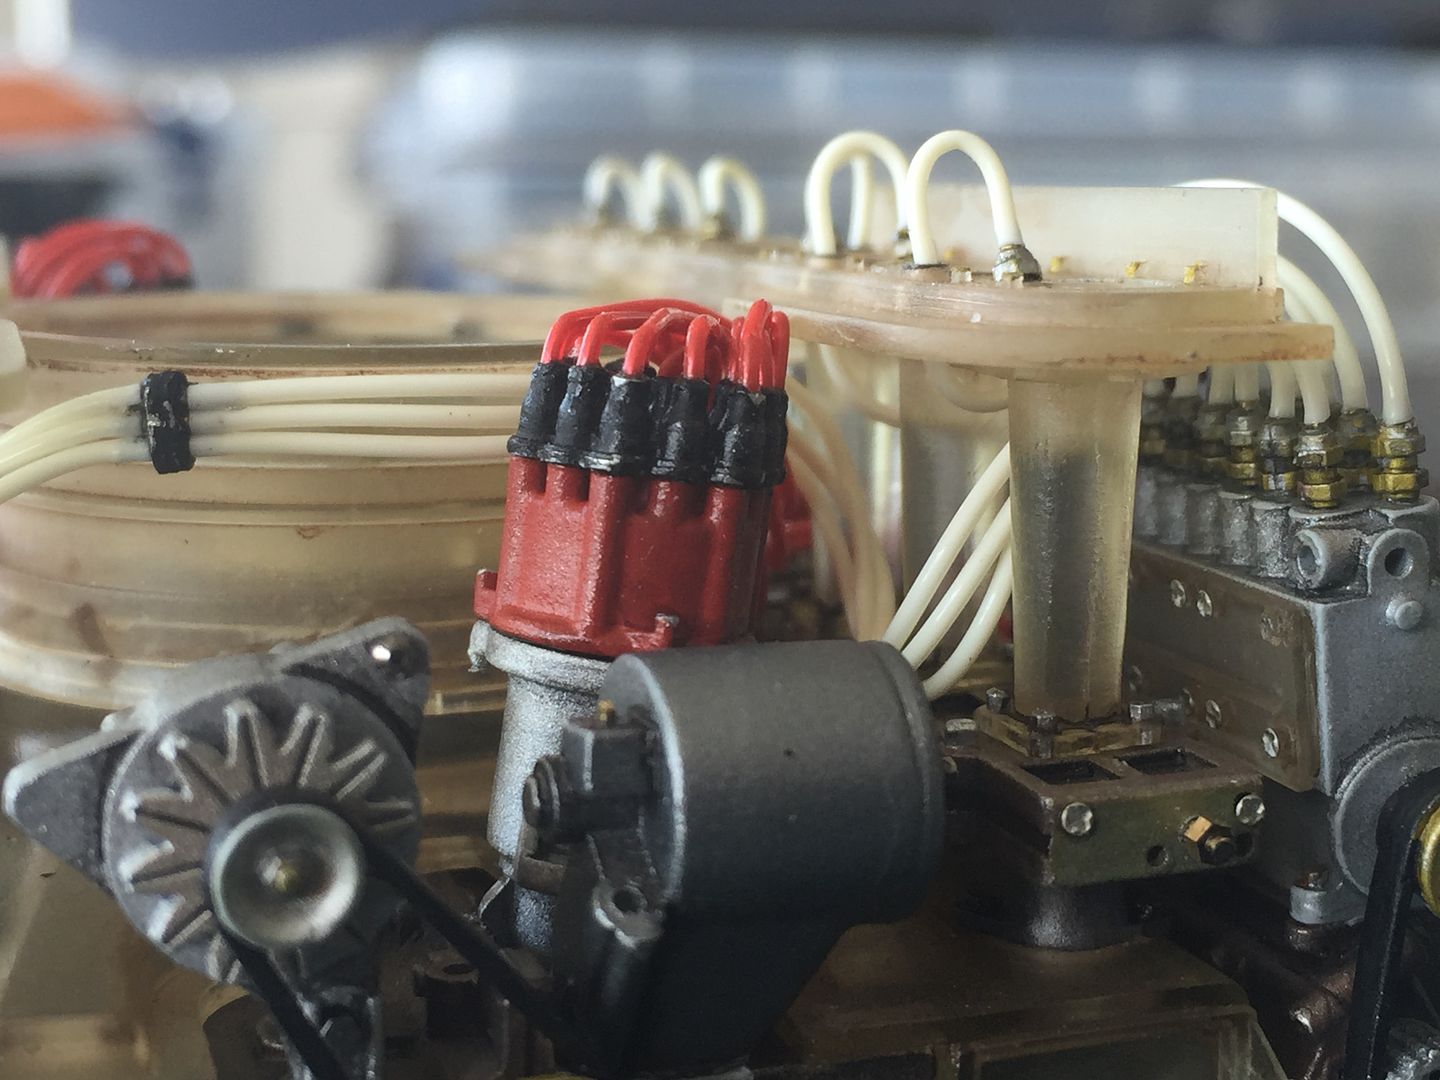
Now it was time to fit the fuel lines. These are cream in color (as shown on the flat-16!) and they thread through these tiny black pieces that I had drilled out and fitted a while back...
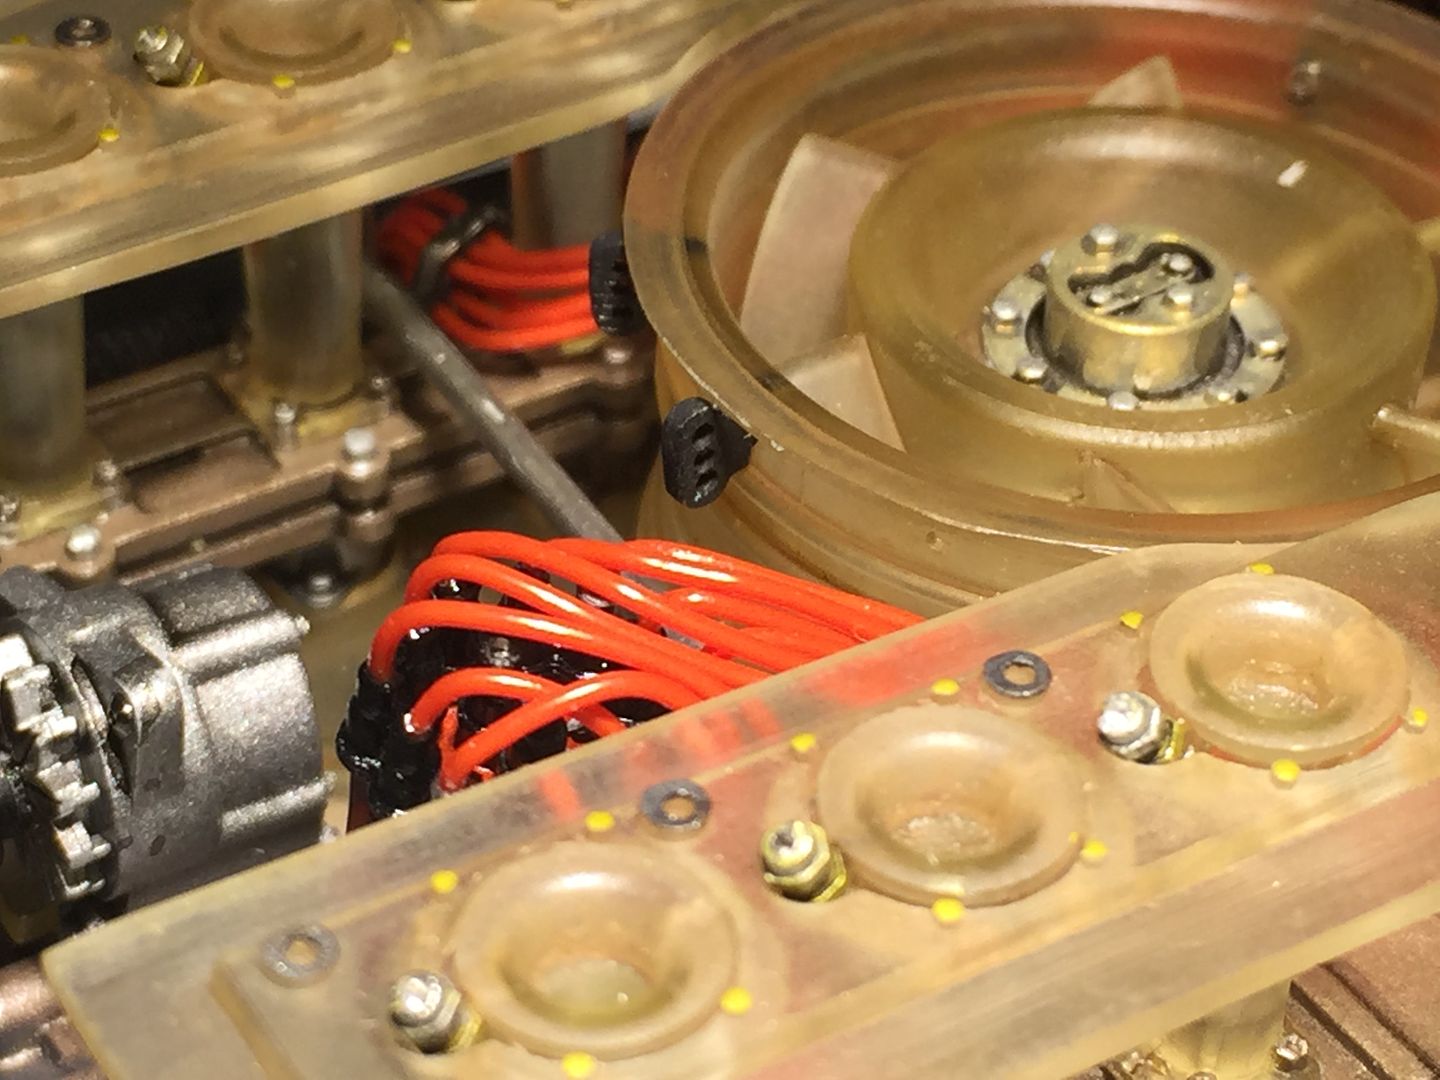
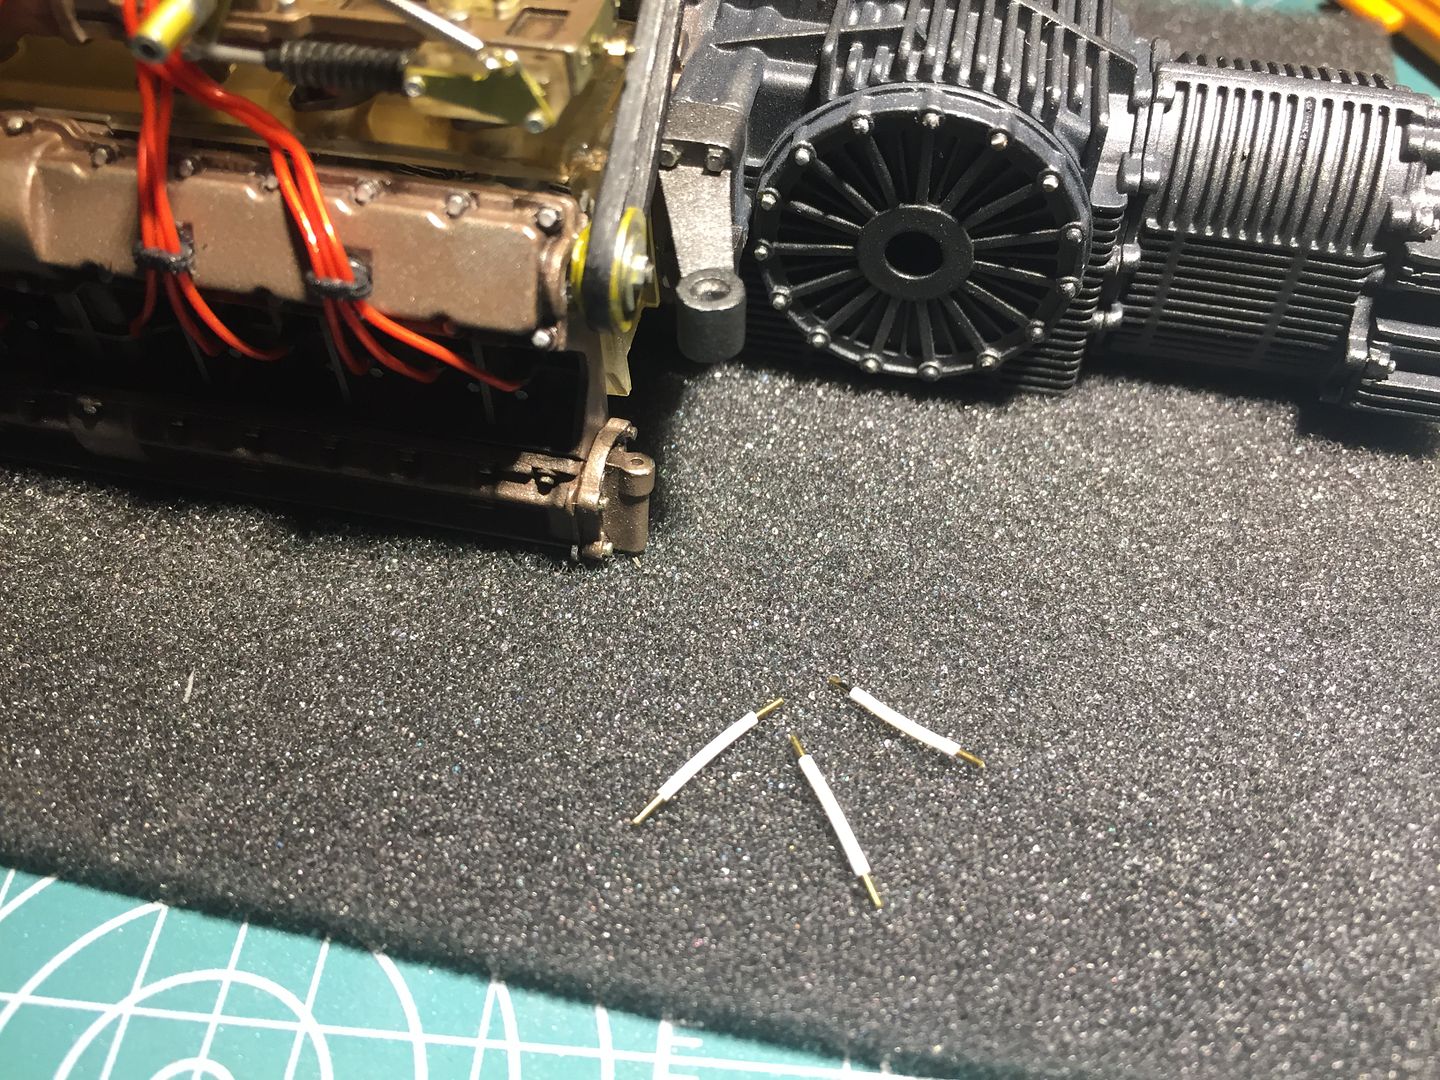
The red ignition wires are - wire. So they thread through tiny holes easily, as you can 'push' them. I discovered that the fuel lines are actually very soft tubing. It was going to be almost impossible to thread them - especially with the decreasing access to these pipe-guides. For the same reason, the tubing does not sit very easily 'IN' the holes I had drilled in injectors and fuel systems - again, the red wires were glued INTO holes. There was nothing to it but to fit some wire 'pegs' for the tubing to sit OVER. So, 24 of these little tiny pieces of brass wire added...

Showing them fitted to the injectors...
and a quick test fit with an off-cut...
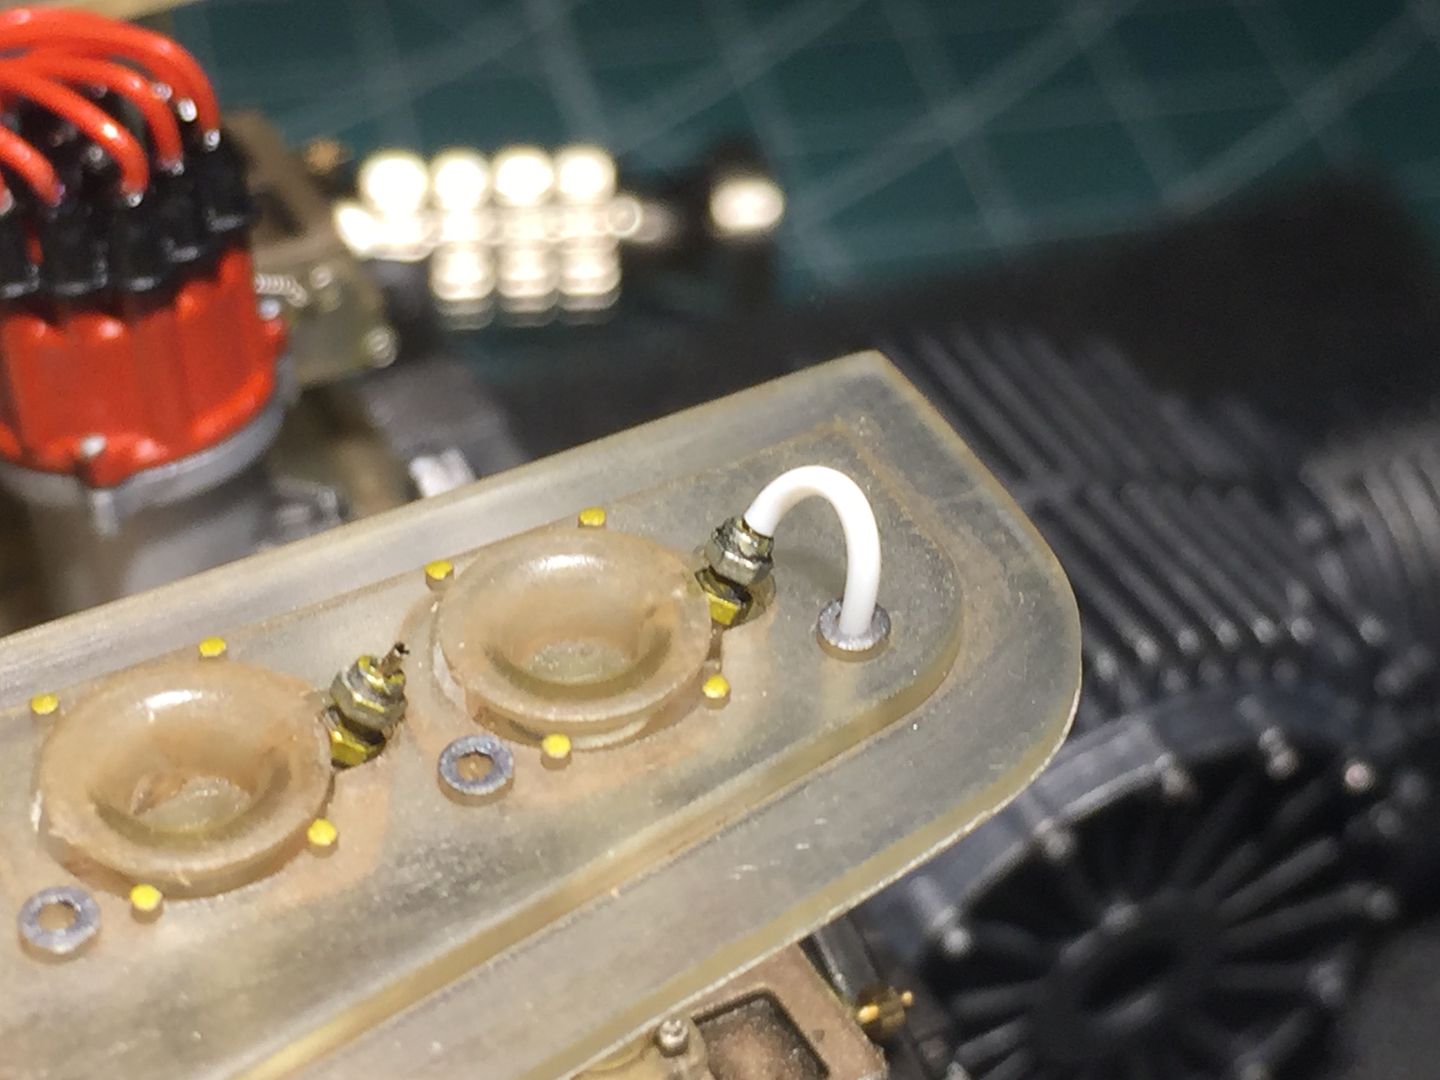
As I mentioned, there was no way I was going to be able to fit and thread the pipes through the guides that are on the fan housing, so I came up with a solution that I am quite pleased with, of providing wire 'pegs' to fit the tubing to either side of the guides...
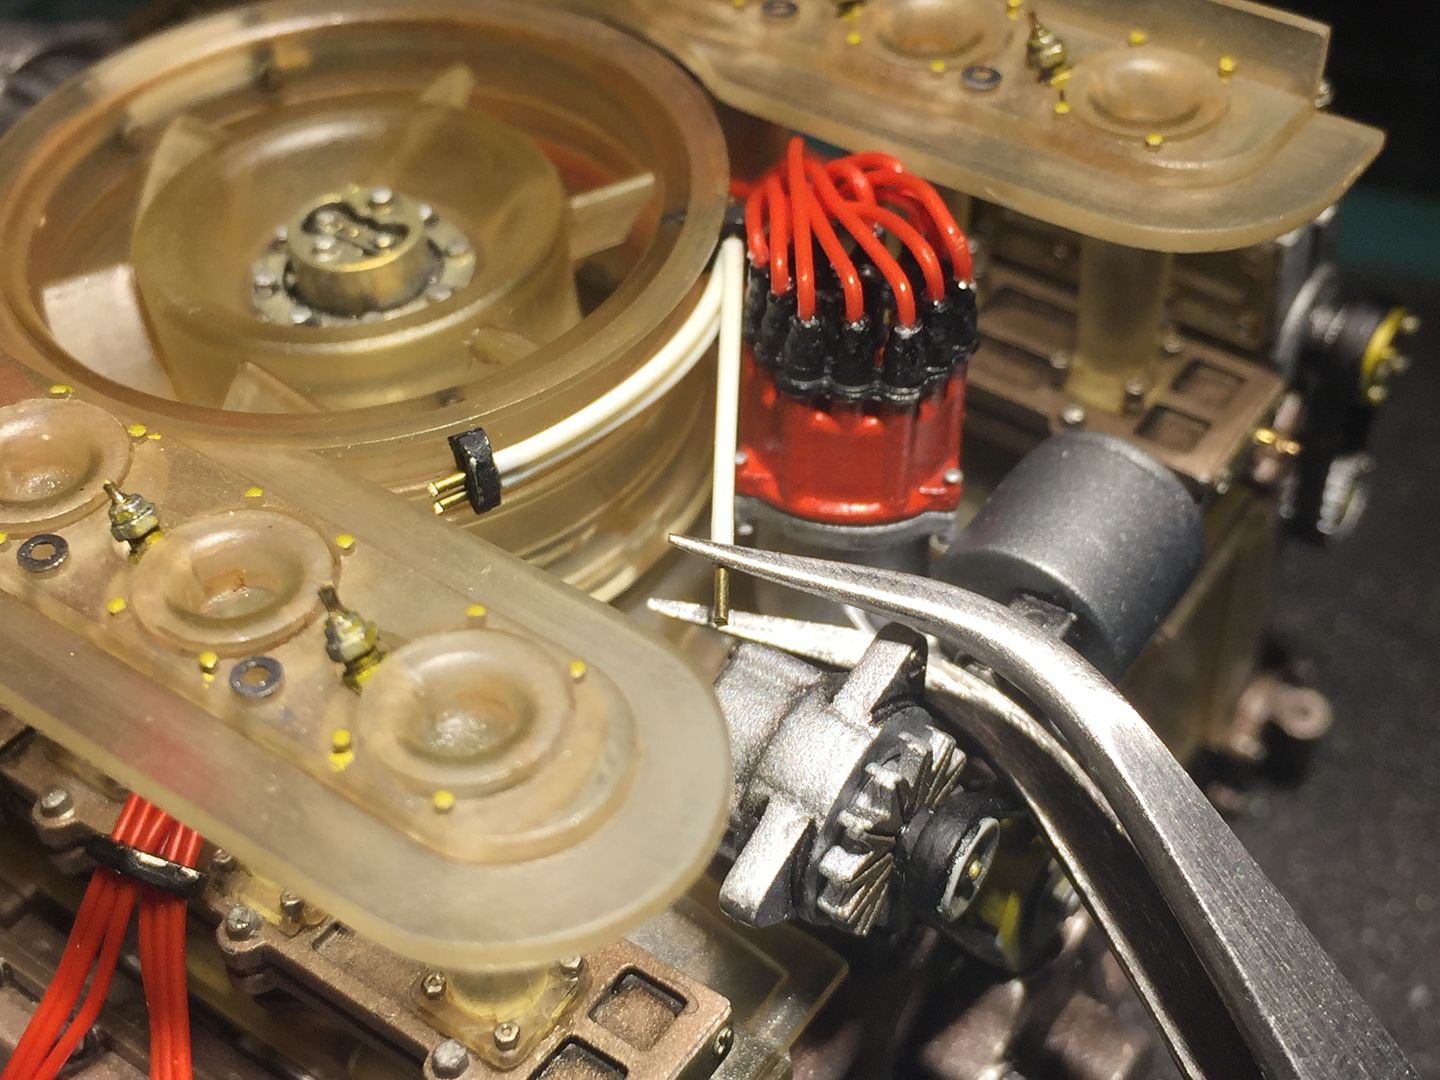
I can now (fairly) easily fit the tubing on to the ends with tweezers, and it will look like a continuous pipe...
Wired the other side, and managed to fit the shroud with less swearing on this side...
Now it was time to fit the fuel lines. These are cream in color (as shown on the flat-16!) and they thread through these tiny black pieces that I had drilled out and fitted a while back...
The red ignition wires are - wire. So they thread through tiny holes easily, as you can 'push' them. I discovered that the fuel lines are actually very soft tubing. It was going to be almost impossible to thread them - especially with the decreasing access to these pipe-guides. For the same reason, the tubing does not sit very easily 'IN' the holes I had drilled in injectors and fuel systems - again, the red wires were glued INTO holes. There was nothing to it but to fit some wire 'pegs' for the tubing to sit OVER. So, 24 of these little tiny pieces of brass wire added...
Showing them fitted to the injectors...
and a quick test fit with an off-cut...
As I mentioned, there was no way I was going to be able to fit and thread the pipes through the guides that are on the fan housing, so I came up with a solution that I am quite pleased with, of providing wire 'pegs' to fit the tubing to either side of the guides...
I can now (fairly) easily fit the tubing on to the ends with tweezers, and it will look like a continuous pipe...
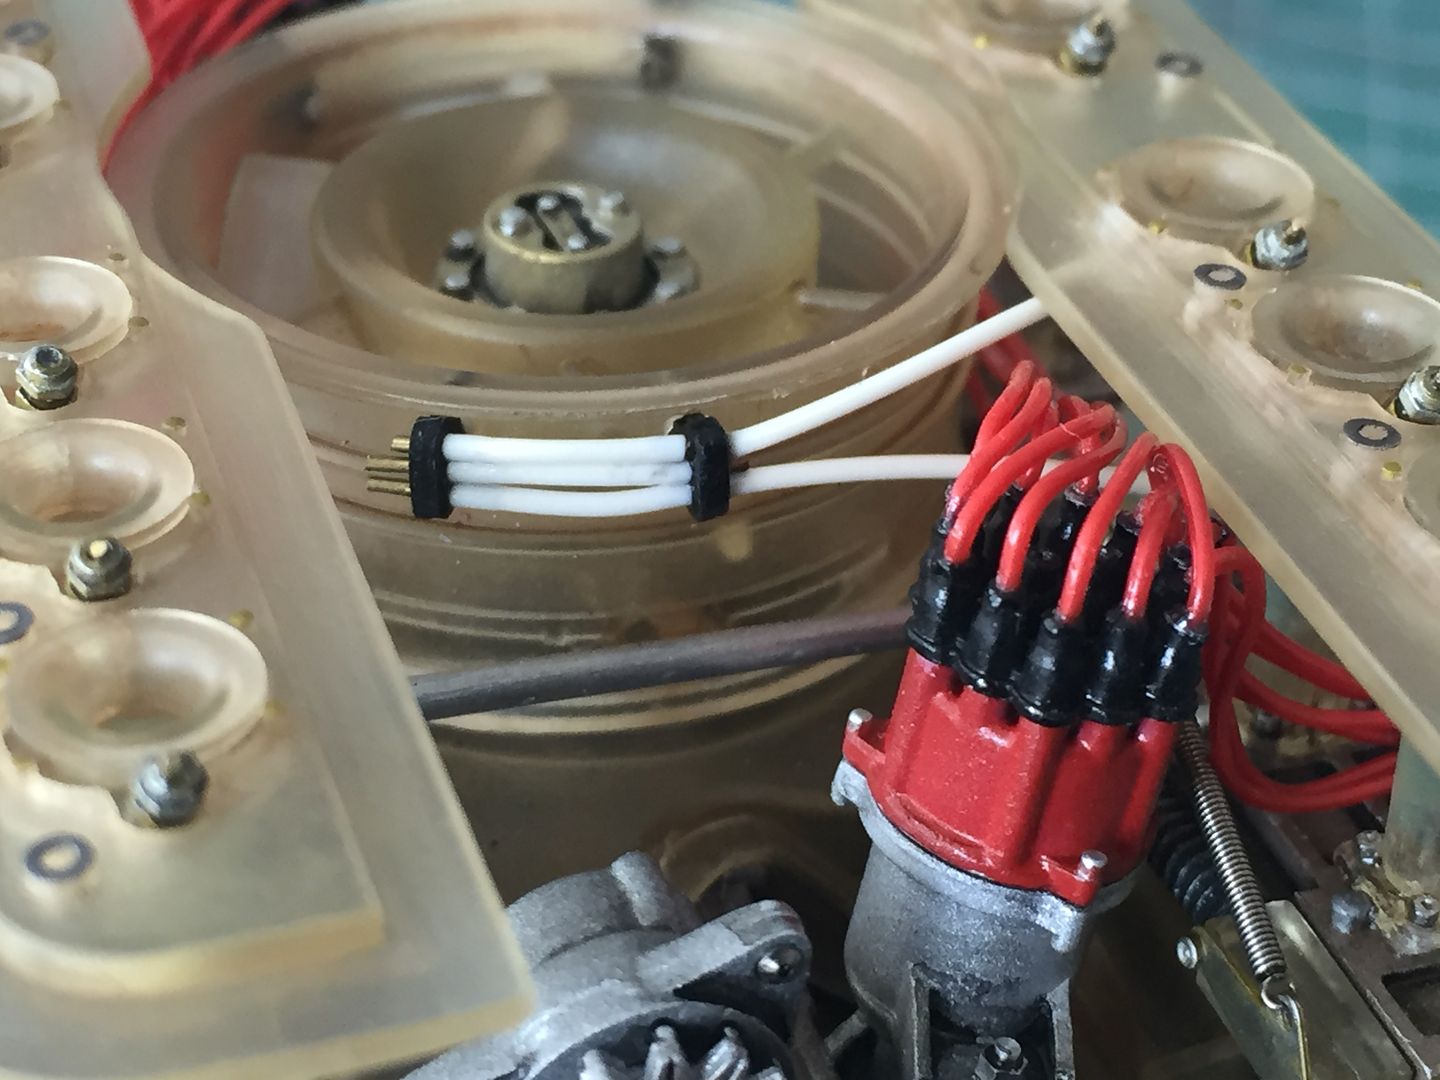
The white fuel lines were surprisingly easy - my 'cheat' around the pipe guides worked well, and the pegs in the ends of the injectors and the fuel system worked well and made fixing very easy.
I attached all the wires 'over-length' first just to get the routing neat, then trimmed and glued after that...bit of a pain trying not to let the pipe kink around the tight bend to injector, but no big deal...
over-length for test fit...

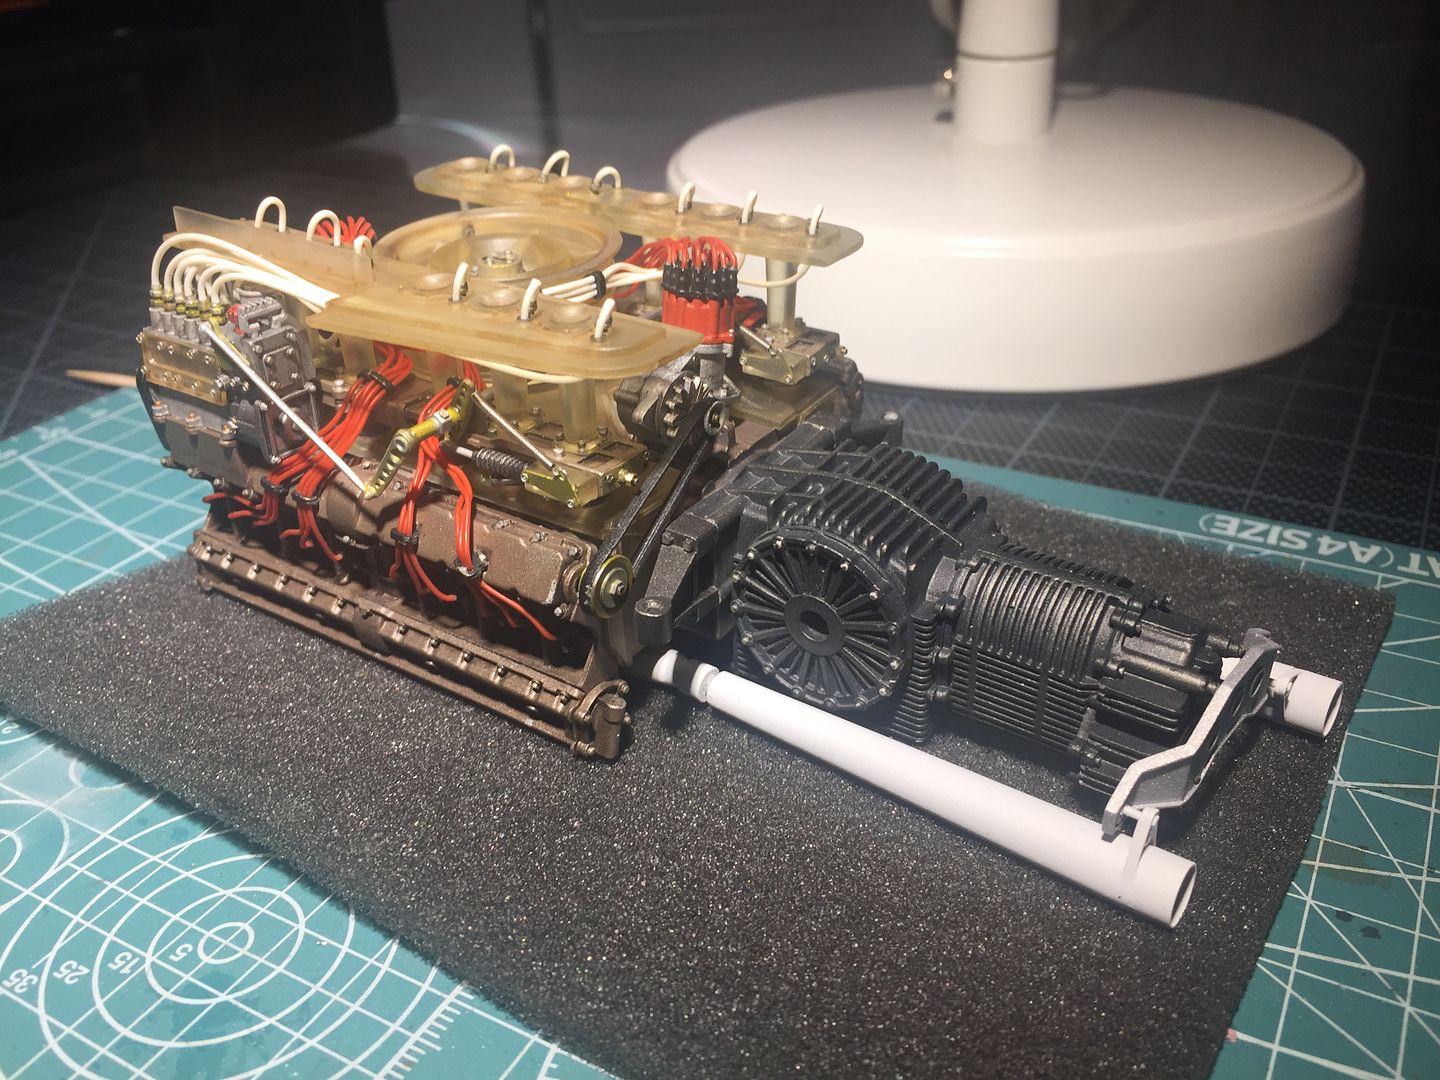
I'd also added the remaining linkage and connecting rod to the throttle...
...engine is almost there. Lots of tidying up - adding some more PE screw heads, a little bit of wash etc, and touching up scratched or chipped paint here and there. Exhausts to add, and some more wiring - starter, alternators etc.
Next stage is into the frame, but I kinda want to wait and work on some of my other 1/12 engines a bit more so that I can takes pictures of a 'line up' of classic engines. MP4/4 Honda, Williams Renault etc...
Doesn't stop me starting on other parts of the car though...
I attached all the wires 'over-length' first just to get the routing neat, then trimmed and glued after that...bit of a pain trying not to let the pipe kink around the tight bend to injector, but no big deal...
over-length for test fit...
I'd also added the remaining linkage and connecting rod to the throttle...
...engine is almost there. Lots of tidying up - adding some more PE screw heads, a little bit of wash etc, and touching up scratched or chipped paint here and there. Exhausts to add, and some more wiring - starter, alternators etc.
Next stage is into the frame, but I kinda want to wait and work on some of my other 1/12 engines a bit more so that I can takes pictures of a 'line up' of classic engines. MP4/4 Honda, Williams Renault etc...
Doesn't stop me starting on other parts of the car though...
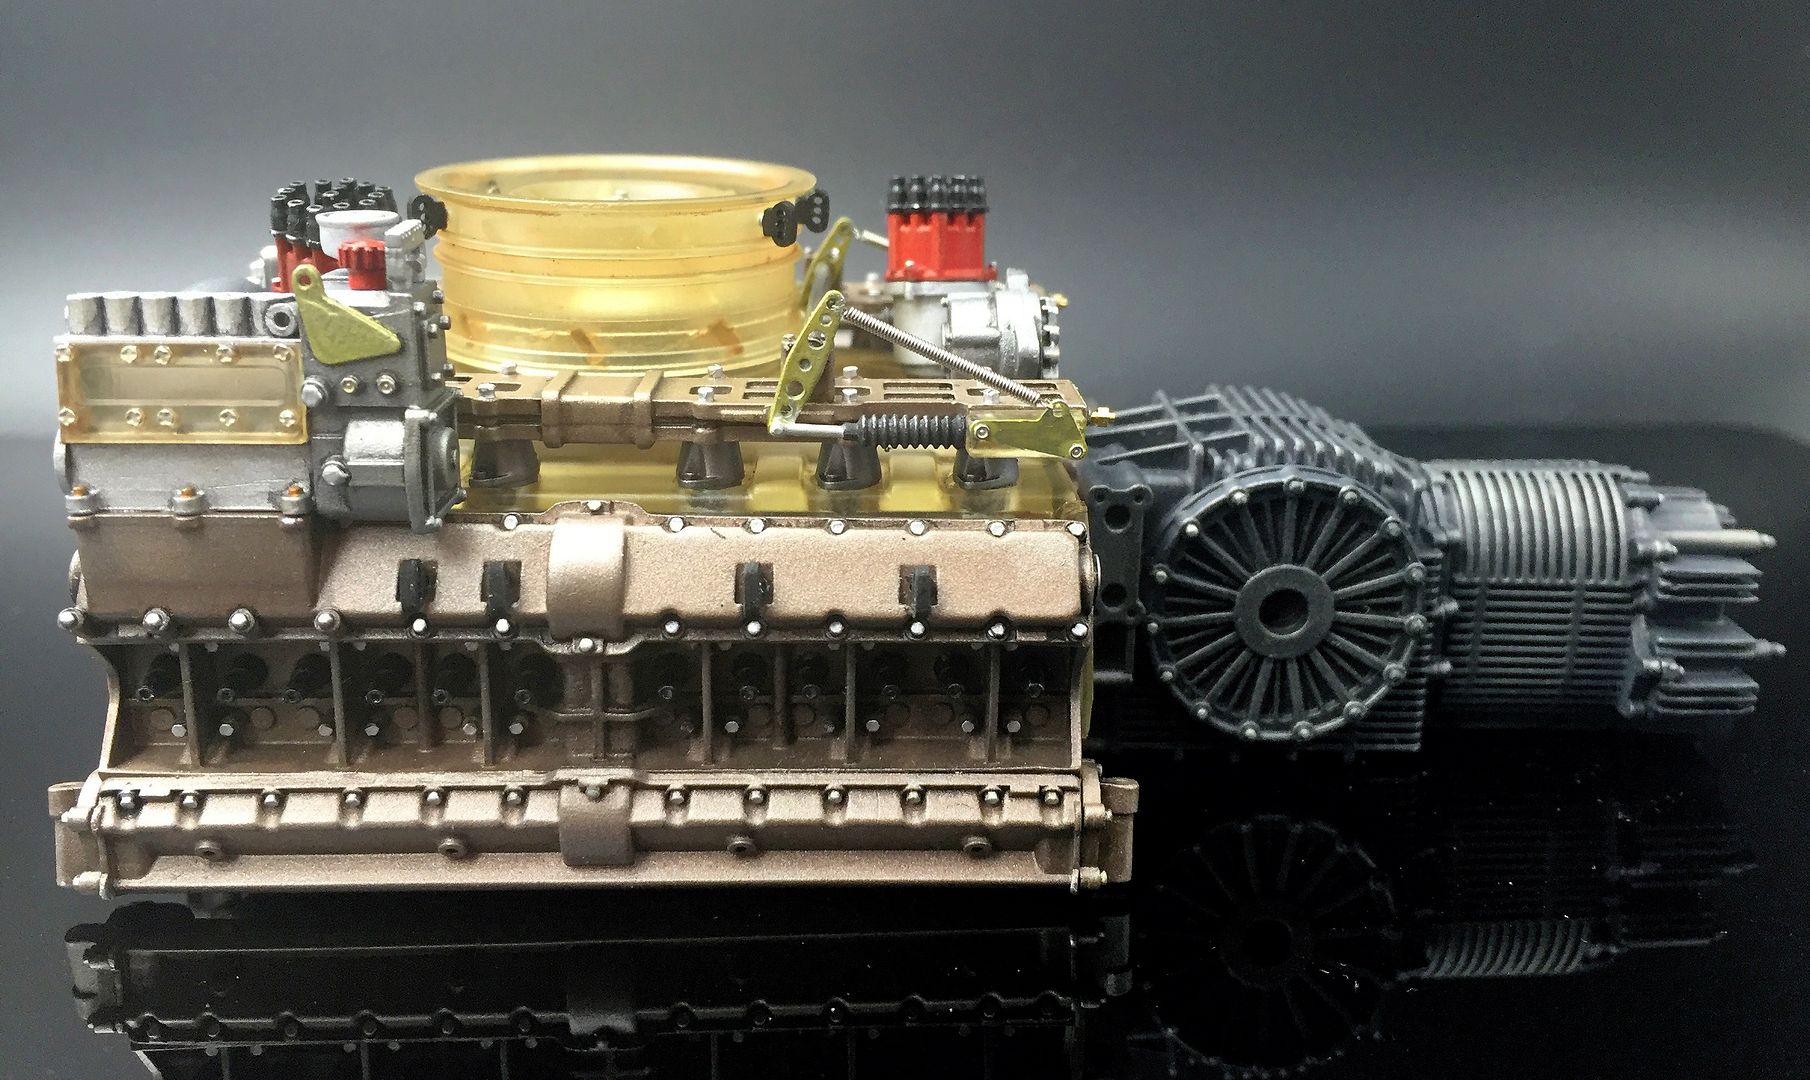
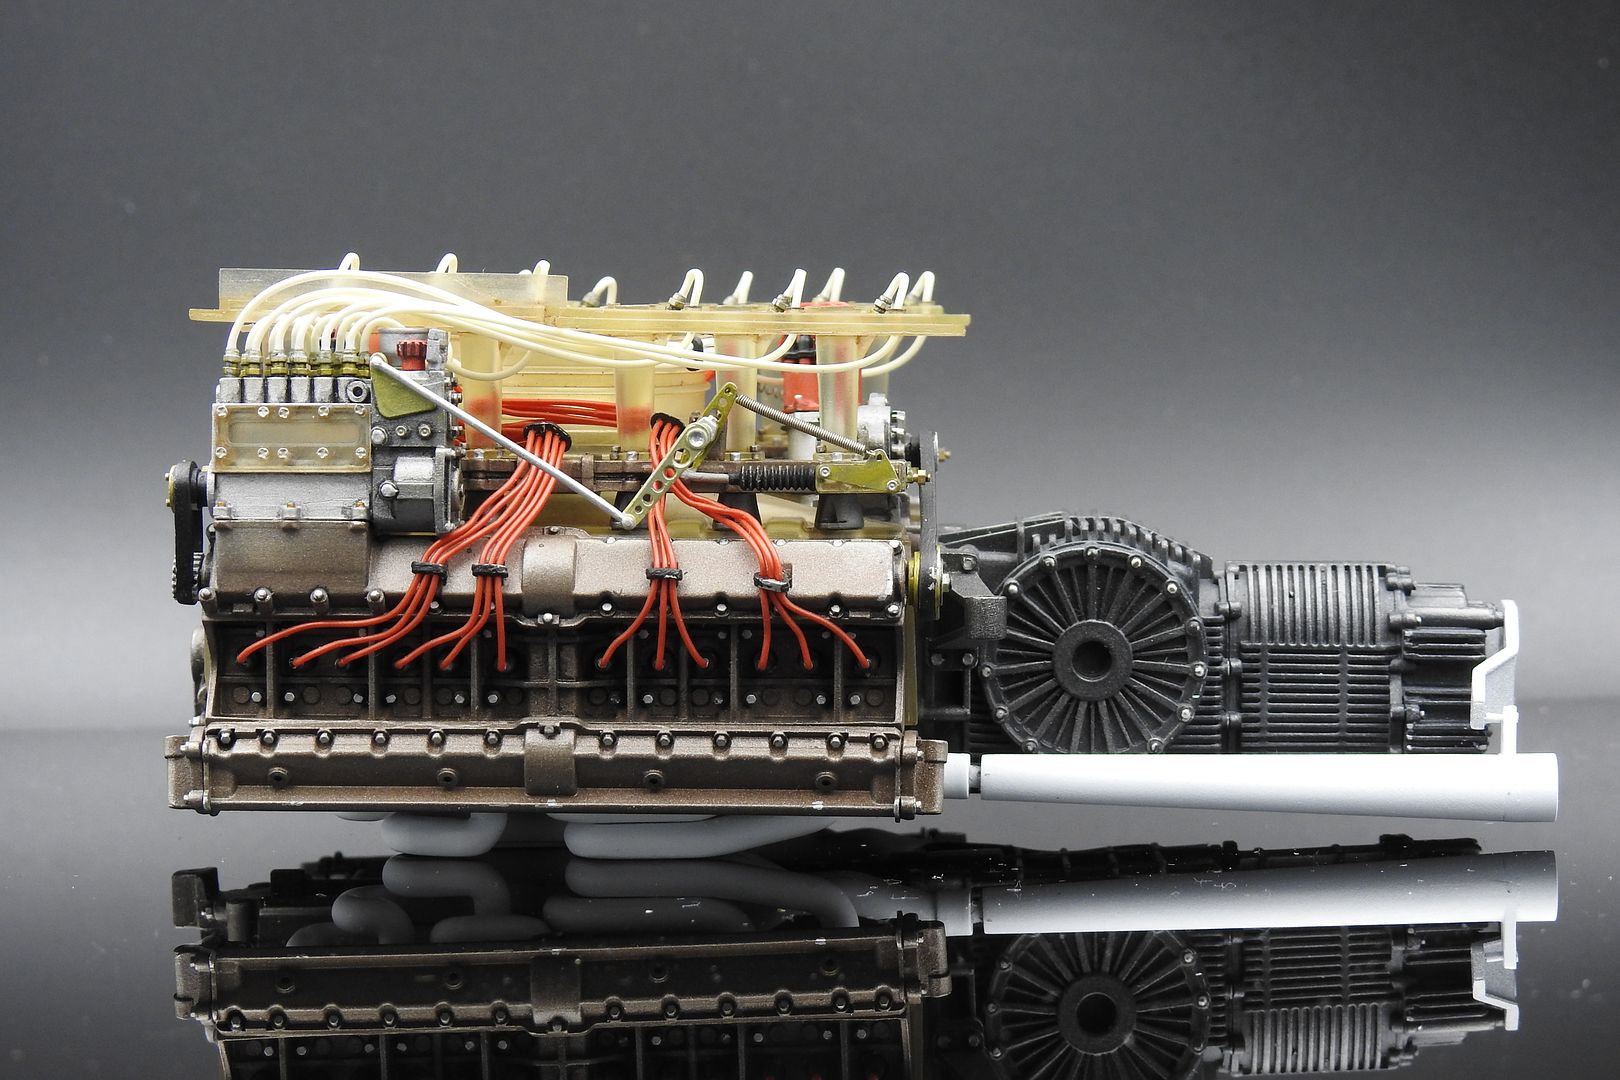
Fitting the main exhaust manifolds - rest of them are fitted after the engine is dropped into the frame, but I put one in place just for a few piccies...
Just before I did this, I took a bit of a risk and sprayed the whole engine with Tamiya 'smoke' which I hoped would 'darken' everything a little bit - I felt it was looking a little bright. I think it has worked, but I am sure I'll spray some 'matt' clear as well. Lots of touch-ups needed - the tiny details that make this sort of thing...
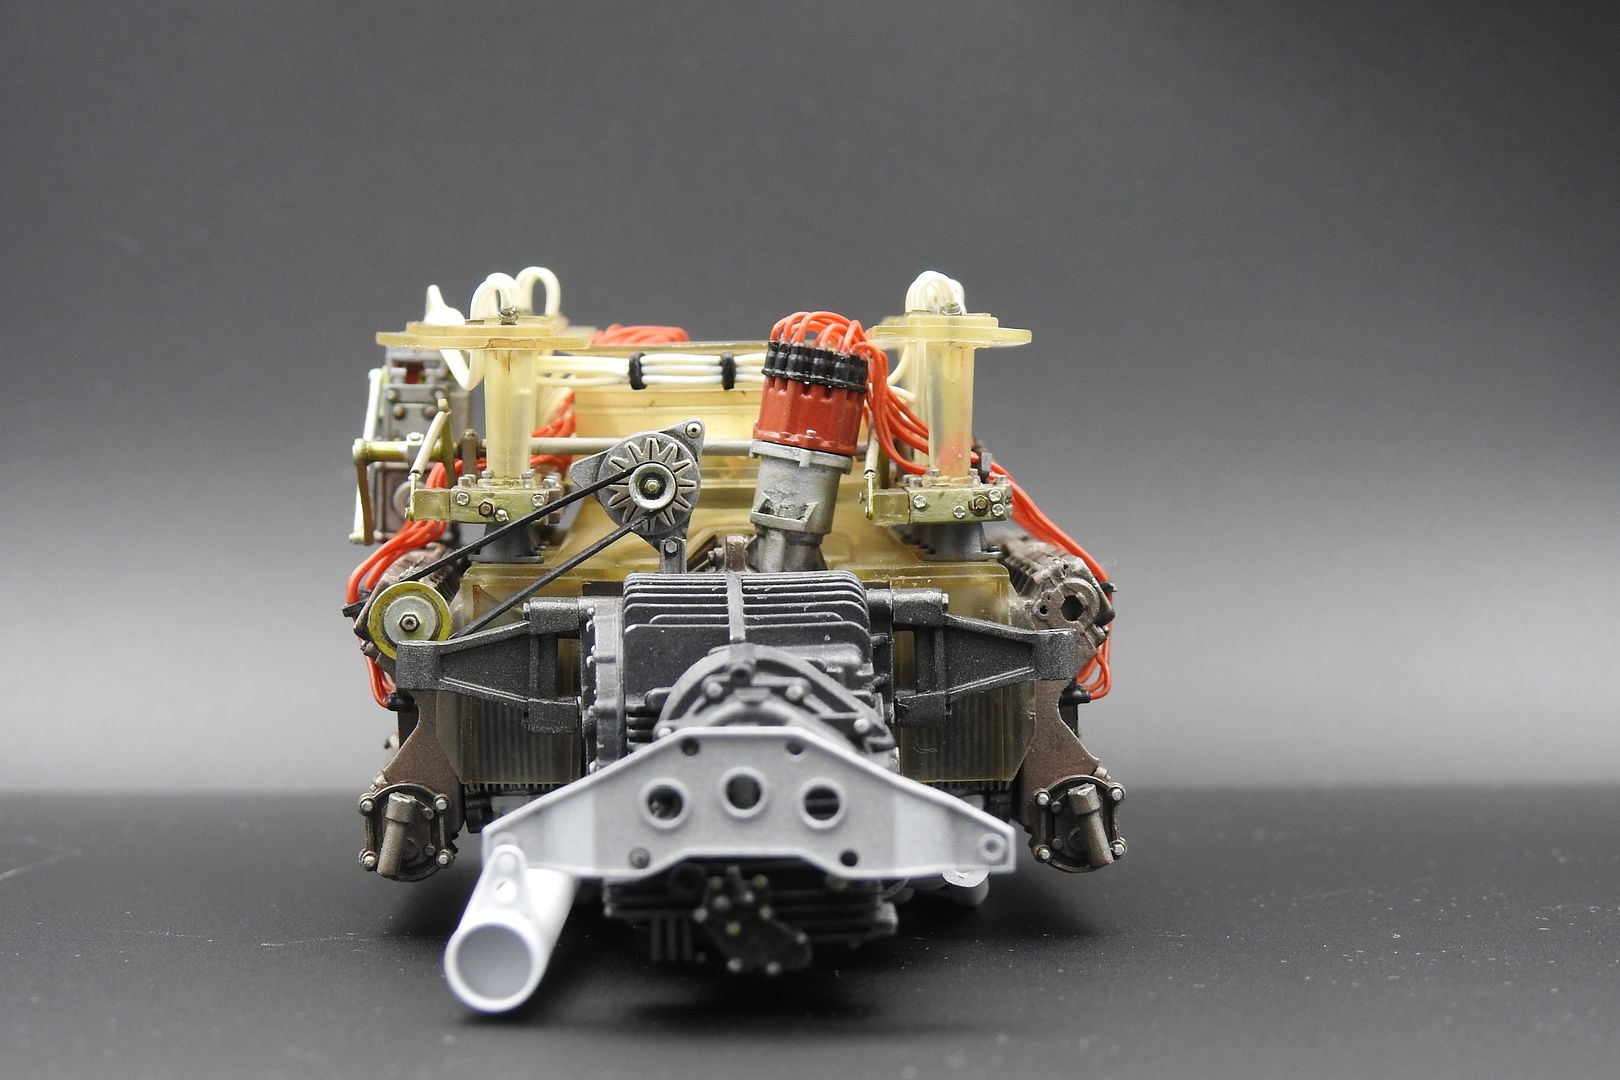
So - not 100% finished, but I took some fancy pictures anyway...
Just before I did this, I took a bit of a risk and sprayed the whole engine with Tamiya 'smoke' which I hoped would 'darken' everything a little bit - I felt it was looking a little bright. I think it has worked, but I am sure I'll spray some 'matt' clear as well. Lots of touch-ups needed - the tiny details that make this sort of thing...
So - not 100% finished, but I took some fancy pictures anyway...

Gassing Station | Scale Models | Top of Page | What's New | My Stuff