MGB Custom Build - RAC Rally of the Tests Spec
Discussion


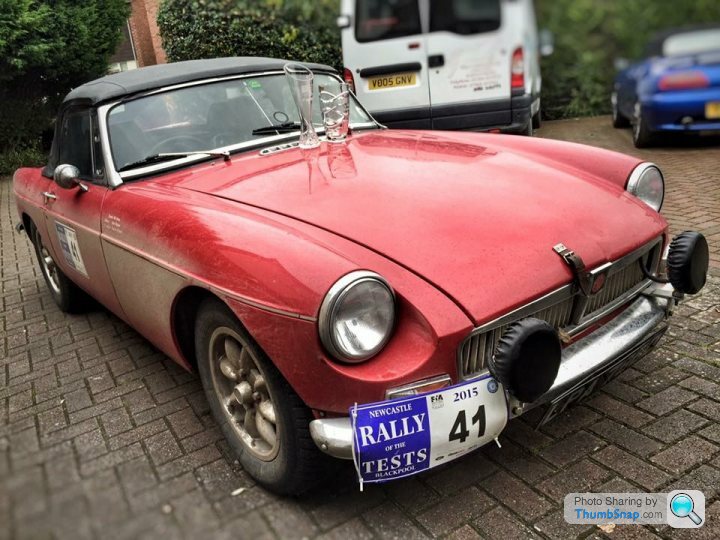
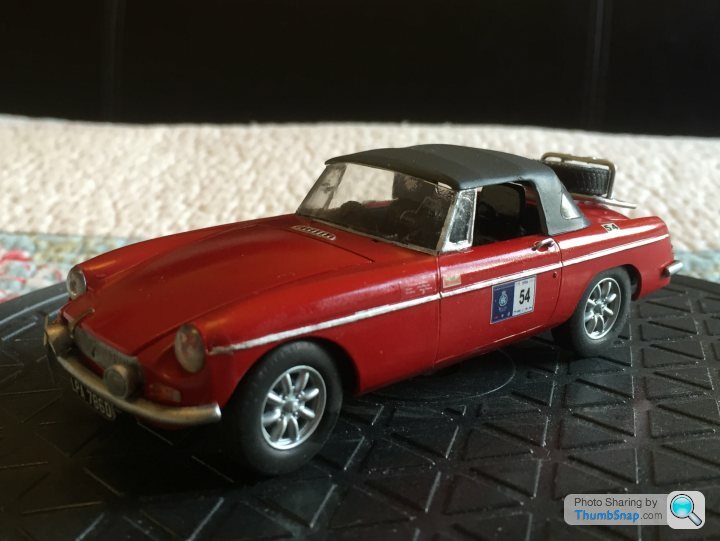
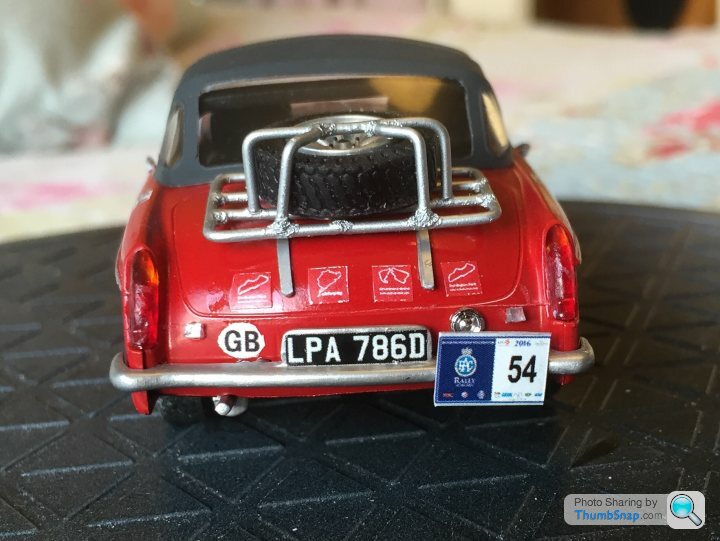
I have decided that a perfect Christmas present for my Dad this year is to create an exact replica model of his historic rally MGB, as per the 2016 RAC Rally of the Tests we just came third in.
Here is the car in the flesh...
Now I have the challenge of building this as a model in a month.
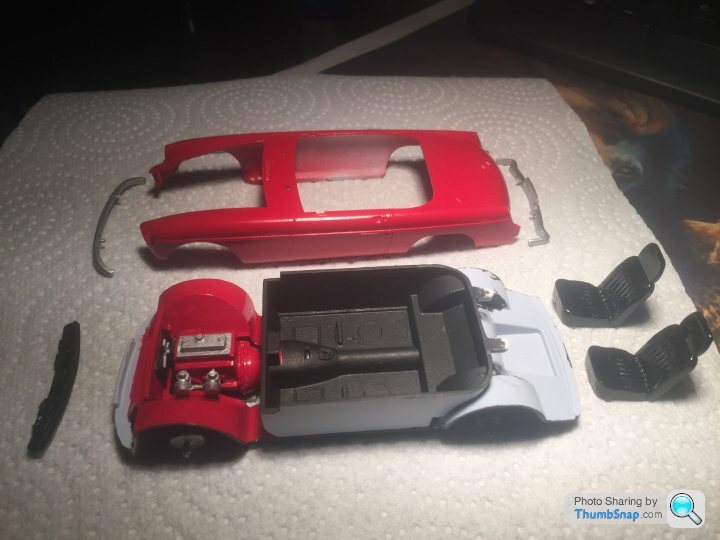
So I am thinking of using a base kit model to start with, so picked up a 1/32 Airfix kit for a fiver off eBay (from randomly a PHer's wife)
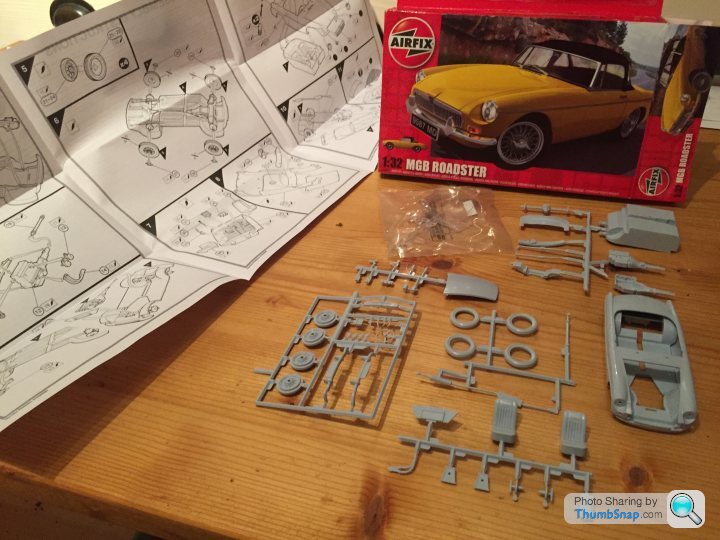
The kit is not brilliant after opening it up, for example the grille here.
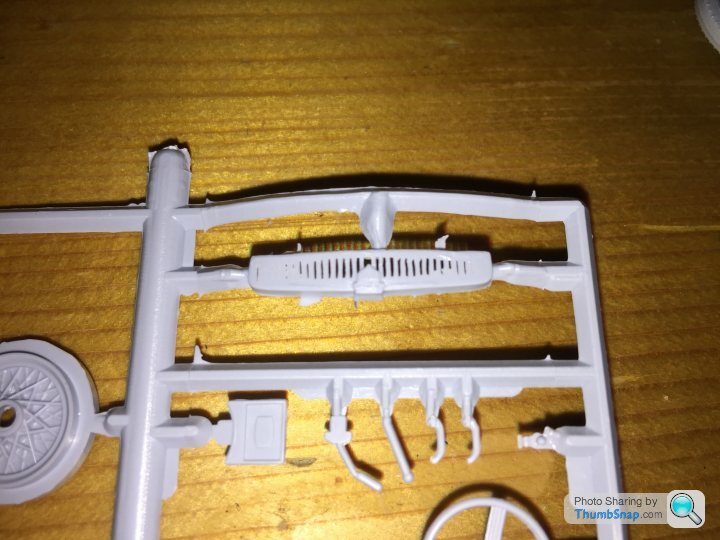
So has me thinking whether to choose a different base model, as there is another one on eBay at 1/24 scale, but not sure if any good either.
But what scale depends on the mods I need to do, which are:
- 14" minilite wheels (thinking scalextric wheels)
- front spots (take from another kit, or buy some scalextric mods)
- tyre rack on boot (not sure what to do for rack)
- custom decals (photoshop and some sort of decal I can print)
- rally plates (plasticard scratch built)
- leather bonnet strap (plasticard too)
- ideally have both me and my dad in the car as figures (???)
So using scalextric mods makes 1/32 the better choice, unless anyone knows of better 1/24 supplies?
Also, the car is MG Tarten Red - anyone know the model paint colour equivalent?
Will update here with the build as I go.
Here is the car in the flesh...
Now I have the challenge of building this as a model in a month.
So I am thinking of using a base kit model to start with, so picked up a 1/32 Airfix kit for a fiver off eBay (from randomly a PHer's wife)
The kit is not brilliant after opening it up, for example the grille here.
So has me thinking whether to choose a different base model, as there is another one on eBay at 1/24 scale, but not sure if any good either.
But what scale depends on the mods I need to do, which are:
- 14" minilite wheels (thinking scalextric wheels)
- front spots (take from another kit, or buy some scalextric mods)
- tyre rack on boot (not sure what to do for rack)
- custom decals (photoshop and some sort of decal I can print)
- rally plates (plasticard scratch built)
- leather bonnet strap (plasticard too)
- ideally have both me and my dad in the car as figures (???)
So using scalextric mods makes 1/32 the better choice, unless anyone knows of better 1/24 supplies?
Also, the car is MG Tarten Red - anyone know the model paint colour equivalent?
Will update here with the build as I go.
Thanks all for the input, really helps.
I have searched the Internet for the Rally version, and there is one in Japan but it won't be here by Christmas. So instead I have managed to get hold of the Club Race version, which will hopefully give me the rollbar too (which wasn't in my list of options above, but want to get the inside sorted). I am hoping (and looking at the pictures) it has the soft top and hard top in it, and also the bumpers. If not I still might pick up a standard kit from ebay if it doesn't go too high.
The kit is coming from Italy, so won't be here till the end of the month, which gives me chance to have a play with the Airfix kit and get back into modelling on that as well as try and source the other parts.
I have also started designing the decals for the car - not really researched this yet, but can you get decal sheets you print yourself to put on the car, or any other alternatives?
Also looked through Hiroboy and Grand Prix Models and can't see any decent drivers to put in the cars - prefer ones with flat caps that I can paint, anyone think of other sources for these at 1/24 scale?
Over the last few days I have been busy trying to source the details I need to finish this project.
I have got two versions of the Ayoshima kit coming: the racing spec one, and the standard one - so hoping one of those turns up in the next few days so I can start building.
In the meantime I have been "playing" with the Airfix kit and modifying it to a) get my eye in on modelling again as been a while since I did a car kit, and b) to trial a mockup before doing the real thing.
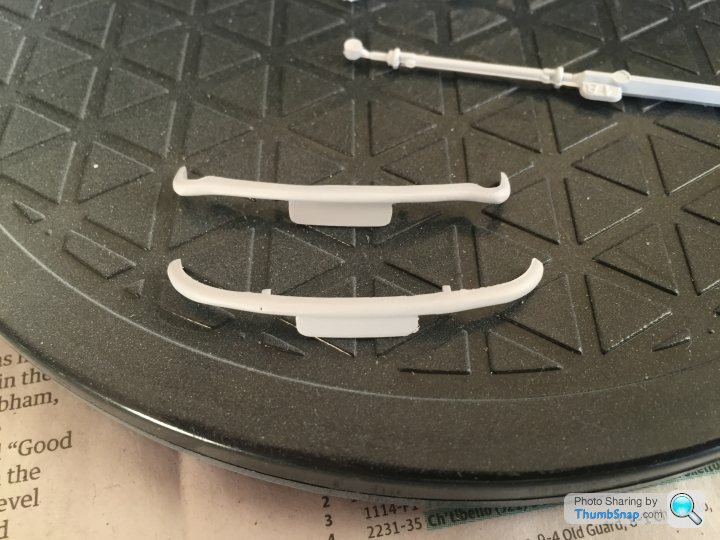
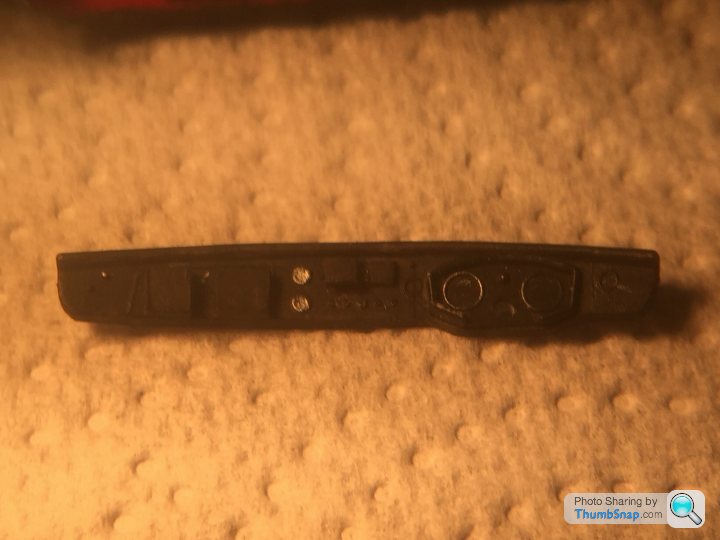
So for the Airfix kit I manage to get hold of some SCX minilite wheels for a couple of quid and have started to modify those to fit on the car. I have re-profiled the bumpers so that they are the rally spec version without the chrome bump stop parts (not sure what you call the lumps). Also modified the back of the car to include a little semi-circle where the exhaust is, which isn't in the original design
Bumpers before
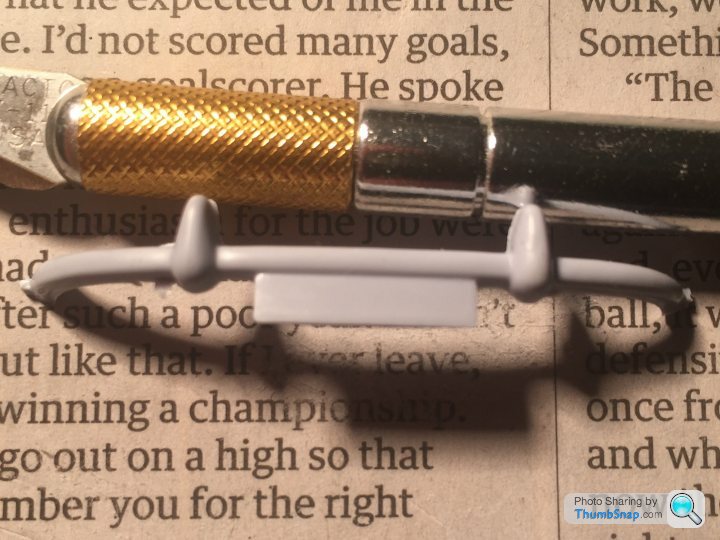
And after (with primer)
I have also been up to my parents and measured most things on the car to get the scale for the decals, spots, brantz rally computers and what I think will be the hardest thing to scratch build - the rear luggage rack!
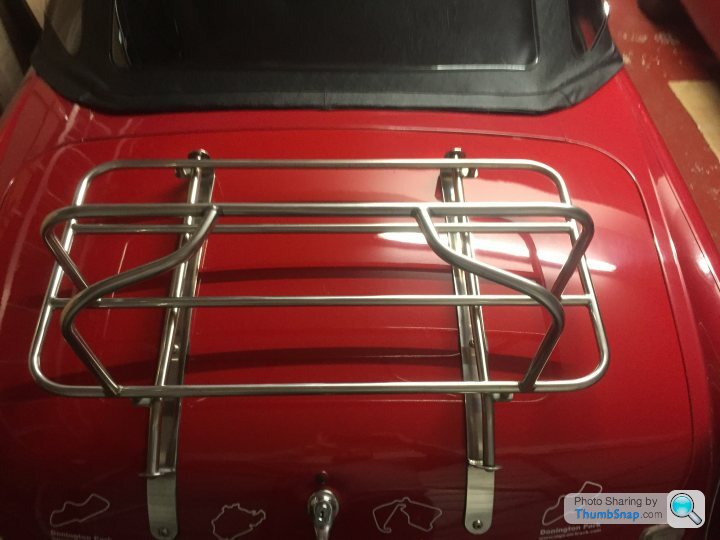
I am thinking of plasticard for this, so will make a mockup in CAD first to get the real size and scale down the components - hopefully!
I have also got hold of the actual graphics used by Hero for the Rally of the Tests numbers and rally plates (so a big thanks to them for supplying those). And a massive thank you to LufbraMatt for the decal paper he sent through.
I have got two versions of the Ayoshima kit coming: the racing spec one, and the standard one - so hoping one of those turns up in the next few days so I can start building.
In the meantime I have been "playing" with the Airfix kit and modifying it to a) get my eye in on modelling again as been a while since I did a car kit, and b) to trial a mockup before doing the real thing.
So for the Airfix kit I manage to get hold of some SCX minilite wheels for a couple of quid and have started to modify those to fit on the car. I have re-profiled the bumpers so that they are the rally spec version without the chrome bump stop parts (not sure what you call the lumps). Also modified the back of the car to include a little semi-circle where the exhaust is, which isn't in the original design
Bumpers before
And after (with primer)
I have also been up to my parents and measured most things on the car to get the scale for the decals, spots, brantz rally computers and what I think will be the hardest thing to scratch build - the rear luggage rack!
I am thinking of plasticard for this, so will make a mockup in CAD first to get the real size and scale down the components - hopefully!
I have also got hold of the actual graphics used by Hero for the Rally of the Tests numbers and rally plates (so a big thanks to them for supplying those). And a massive thank you to LufbraMatt for the decal paper he sent through.
dr_gn said:
Have you considered getting a new grille RP'd for the Airfix kit? I had a part done for a small scale aircraft model, and it worked very well.
As the airfix is my dummy trial I am not too bothered it is a bit rubbish (plus where the spots will go will hard the worst part of the flashing (sp?))Hopefully on the Aoshima it will be decent (will see when it comes) - though interestingly there might be some parts to think about getting done through RP'd - do you have any contacts/links as not sure what it would involve?

Tonight I came home from work to find two parcels waiting for me... And now proud owner of these two kits.

So the proper build can start.
Looking through the kits I see that the bumpers in both have the overriders (thanks Yertis for the name), so need to experiment cutting the chrome parts.
I am also struggling to find the right colour to paint the car, or find an equivalent colour in one of the model paint ranges (MG tartan red). Things I read says that you should use car paints over model paints, but not sure if true.
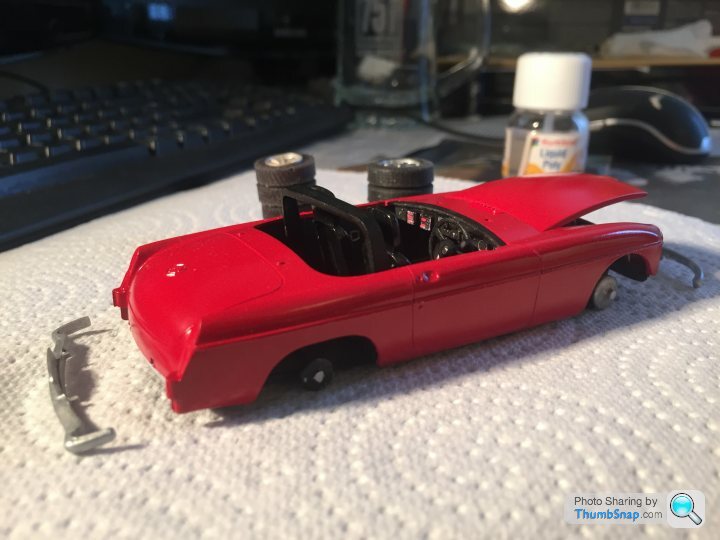
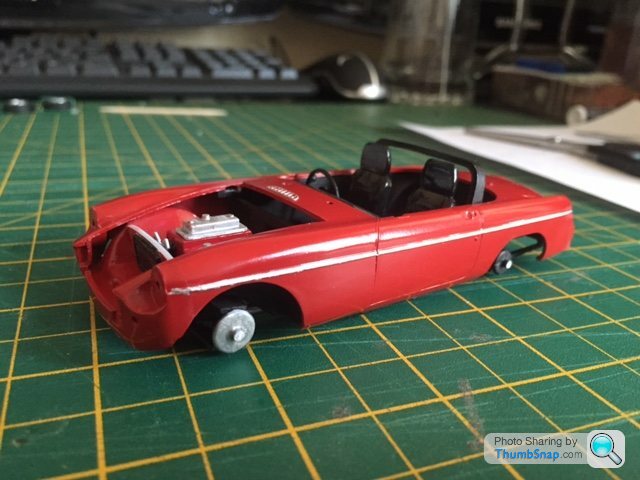
I am continuing to build the prototype in 1/32 scale and trying out different colours, and techniques that I haven't done for a while.
Thanks all for the paint suggestions. I decided to get a rattle can from Halfords and remembering my dad had an MG RV8 in a very similar colour I have gone for that (Rover Flame Red) - which looks like this.
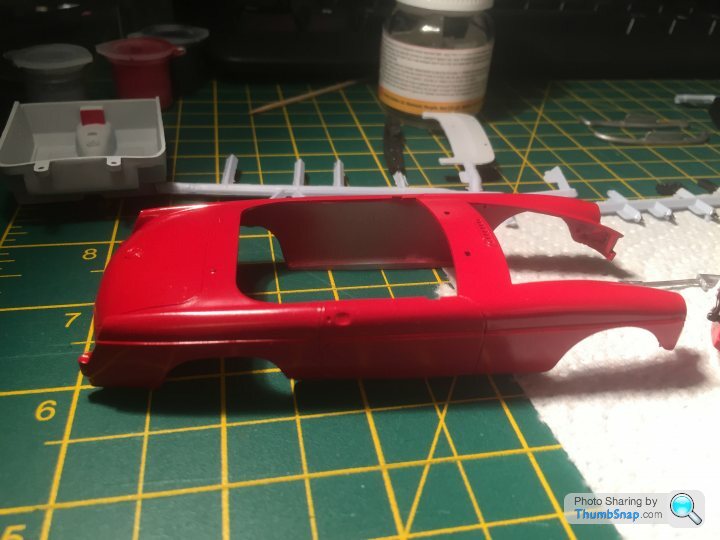
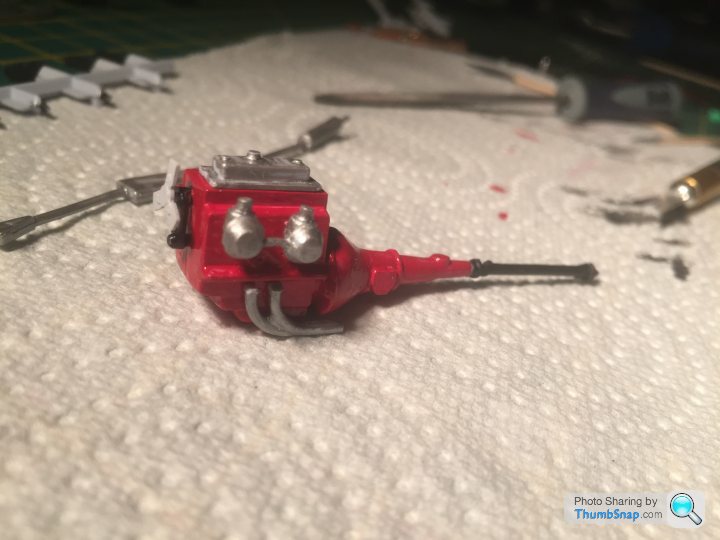
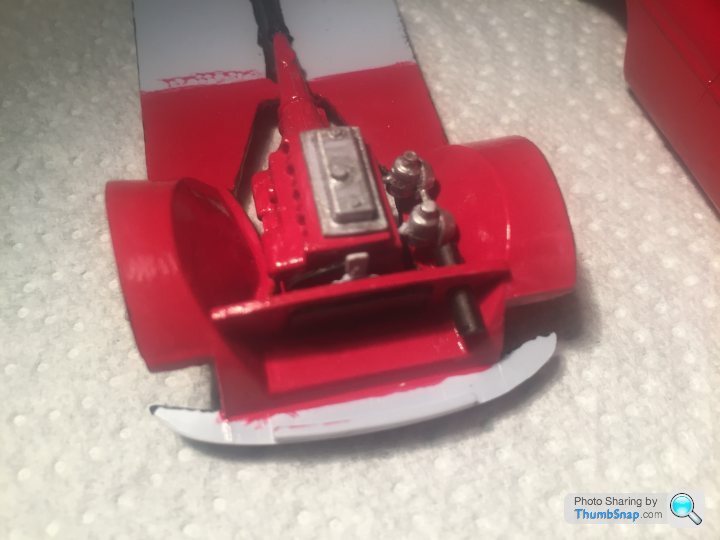
I am actually starting to like this kit and the engine was fun putting together, though I went a bit overkill on the red paint.
I did try some scalextric minilites from a Caterham I have, but it was going to make the ride height unrealistic, and also didn't fancy wrecking a scalextric car for a prototype.
Should start on the real thing next week when the paint order comes in, in the meantime I will play on with the prototype and start to sort out the graphics on the computer.
Thanks all for the paint suggestions. I decided to get a rattle can from Halfords and remembering my dad had an MG RV8 in a very similar colour I have gone for that (Rover Flame Red) - which looks like this.
I am actually starting to like this kit and the engine was fun putting together, though I went a bit overkill on the red paint.
I did try some scalextric minilites from a Caterham I have, but it was going to make the ride height unrealistic, and also didn't fancy wrecking a scalextric car for a prototype.
Should start on the real thing next week when the paint order comes in, in the meantime I will play on with the prototype and start to sort out the graphics on the computer.
Over the weekend I have started to trial some of the custom bits inside the car.
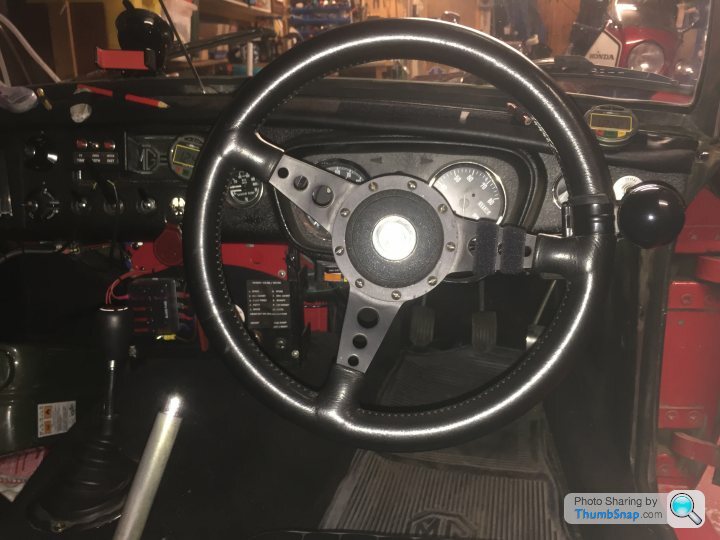
First the steering wheel in the 1/32 kit is not the race version in the car, so have sealed some spokes around and adding the wheel thing too.
What it should look like:
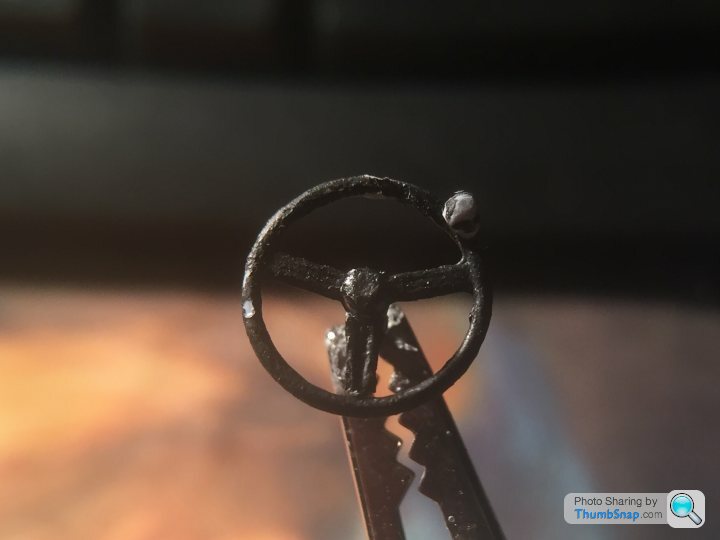
And what the mods currently look like - needs some more painting and thought around making the centre peice wider.
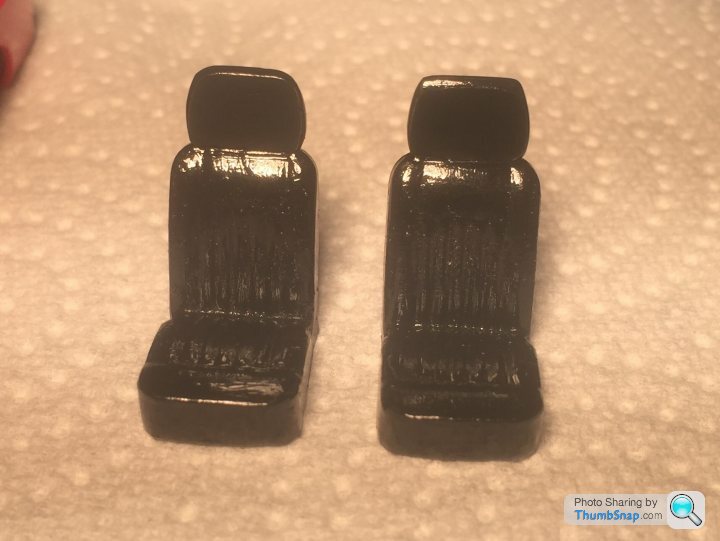
Next up was to add some headrests to the seats as per the car, these have gone quite well with some plasticard.
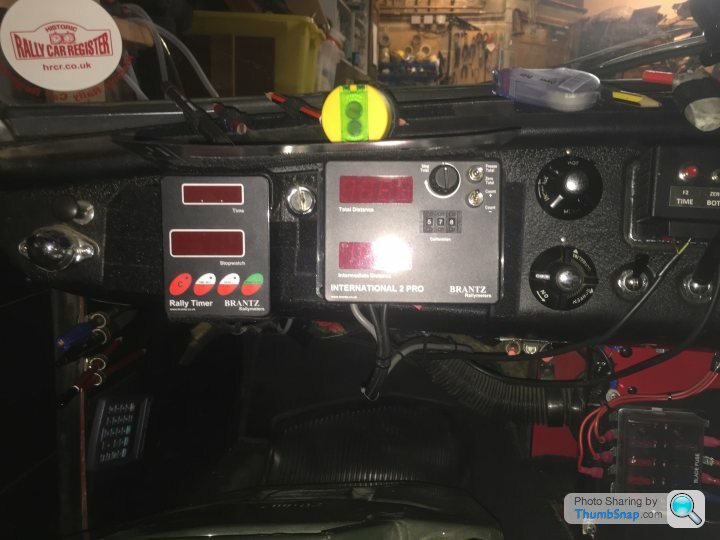
And then the last part was the dash. I have added the three bits of brantz equipment, ready for decals that will show them off properly.
What they look like in the real car:
And my attempt:
I am also ready to start assembling some more of the car.
On the 1/32 I am still hunting for the correct wheels, I have some scx ones now, but no rubber to go round as they are smaller than the scalextric rubber I have.
First the steering wheel in the 1/32 kit is not the race version in the car, so have sealed some spokes around and adding the wheel thing too.
What it should look like:
And what the mods currently look like - needs some more painting and thought around making the centre peice wider.
Next up was to add some headrests to the seats as per the car, these have gone quite well with some plasticard.
And then the last part was the dash. I have added the three bits of brantz equipment, ready for decals that will show them off properly.
What they look like in the real car:
And my attempt:
I am also ready to start assembling some more of the car.
On the 1/32 I am still hunting for the correct wheels, I have some scx ones now, but no rubber to go round as they are smaller than the scalextric rubber I have.
Not as much progress as I like in the last week, partly due to a failed paint order (which was quickly rectified by the supplier) and mainly due to too many Christmas events.
But I have managed to fit the internals in place:

I have also fitted an air intake into the engine bay, which is often fitted to help direct air flow at the carburettors and in my Dad's car
And I have finished off the decal sticker set (here with red background to show up the white decals)...
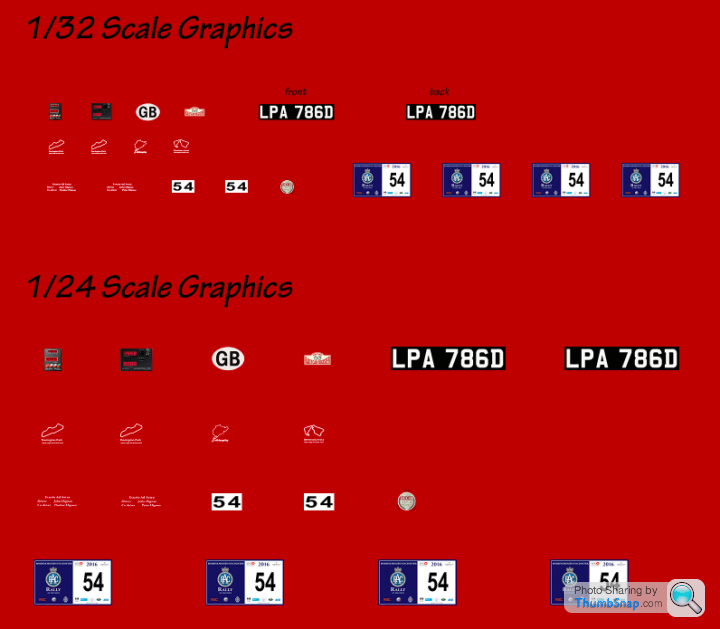
... which leaves me thinking how best to print the white (as most printers print the absence, rather than the colour), so on clear decal paper it is just going to do nothing??
Anyone have any ides on how to do these?
Those that are complete with white backgrounds (GB sticker, numbers) I was thinking on doing on white decal paper and cutting around the edges accurately.
But for the track decals they are the white outline of the race tracks and wording - and I am not that good with a cutting knife. I was thinking that maybe do them in an off-white colour the printer would recognise and print, but not sure what would look like white?
But I have managed to fit the internals in place:
I have also fitted an air intake into the engine bay, which is often fitted to help direct air flow at the carburettors and in my Dad's car
And I have finished off the decal sticker set (here with red background to show up the white decals)...
... which leaves me thinking how best to print the white (as most printers print the absence, rather than the colour), so on clear decal paper it is just going to do nothing??
Anyone have any ides on how to do these?
Those that are complete with white backgrounds (GB sticker, numbers) I was thinking on doing on white decal paper and cutting around the edges accurately.
But for the track decals they are the white outline of the race tracks and wording - and I am not that good with a cutting knife. I was thinking that maybe do them in an off-white colour the printer would recognise and print, but not sure what would look like white?
Riley Blue said:
Just watching the Hero Cup on MotorsTV and spotted 'LPA'!

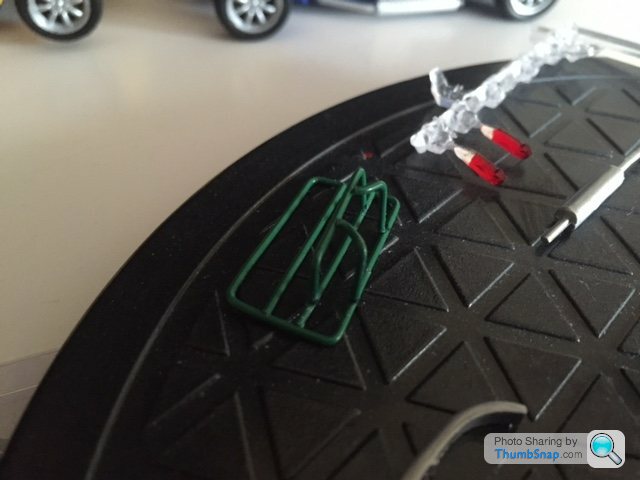
The model version is coming along nicely and I have finished the insides and stuck the bottom and top together.
Also custom made the rollbar fitted to the car, redid the steering wheel and got the decals for the Brantz trip and timer in.
Just sorting out the filler from the large gaps left by joining the chassis and body together.
Also got some gardening wire to make the rear tyre rack on the boot lid - Xmas is fast approaching.
Murph7355 said:
Is it lens like? I would think you'd be better off leaving the clear bit clear and paint whatever it sticks to chrome.
It is lens like (well with a flat side and convex the other) - So was thinking that painting the bit it sticks to, or the back might not make too much difference as it has a lot of plastic in between. Might try it with foil first and see how it looks.So time is approaching and the final jobs are getting sorted.
I have finished the tyres in the right colour
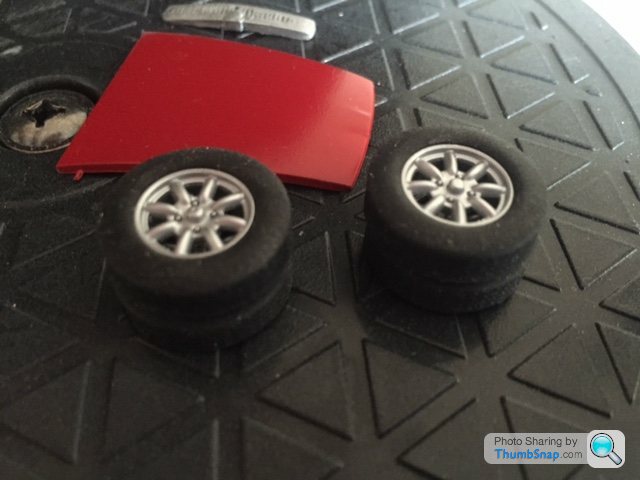
And have managed to make the rear tyre rack (and that was a really fiddly thing to do, so glad this is done as tried multiple methods to get this right), just needs painting tonight.
And the convertible rood is now sorted
Though I did rush the lines down the side of the car last night and not very happy with them, so I think a job for tonight is to sand them down, respray and do them again. Plus not make them as thick, as they are quite narrow on the actual car.
I have finished the tyres in the right colour
And have managed to make the rear tyre rack (and that was a really fiddly thing to do, so glad this is done as tried multiple methods to get this right), just needs painting tonight.
And the convertible rood is now sorted
Though I did rush the lines down the side of the car last night and not very happy with them, so I think a job for tonight is to sand them down, respray and do them again. Plus not make them as thick, as they are quite narrow on the actual car.
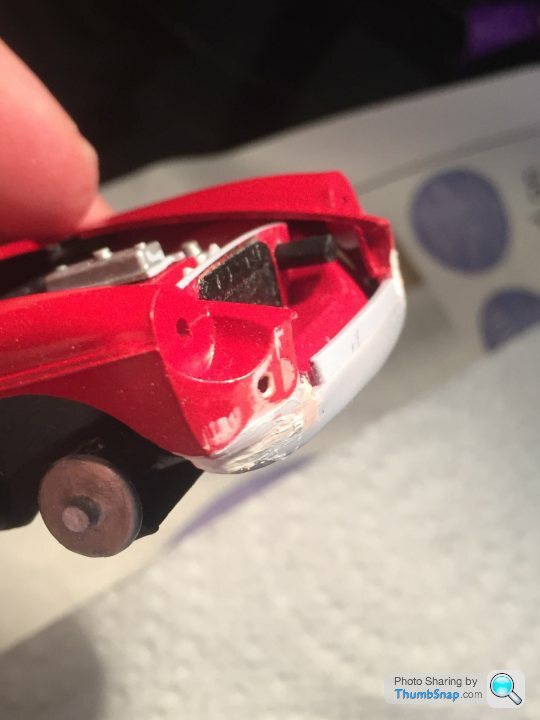
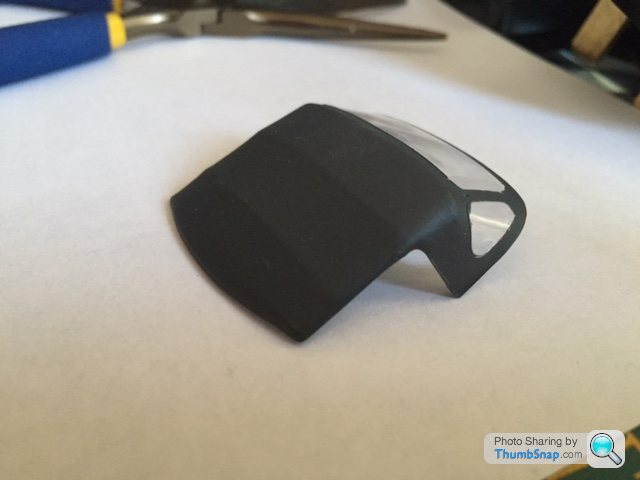
Disaster has struck..... Help!
The windscreen got itself under a hot lamp and melted, so trying to think of a plan. Best bet I am guessing is to cut out some clear plastic from packaging and use that instead.
Any other ideas - can't find a kit on the internet that will get here on time?!?
The windscreen got itself under a hot lamp and melted, so trying to think of a plan. Best bet I am guessing is to cut out some clear plastic from packaging and use that instead.
Any other ideas - can't find a kit on the internet that will get here on time?!?
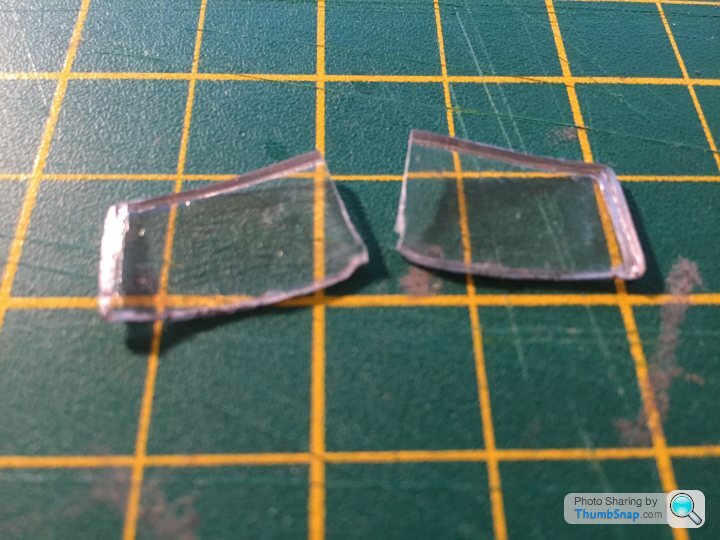
Disaster has been averted and a full session last night have sorted out all the final details needed. A big thank you to Lenor bottles whose plastic bottles are the correct curvature for the windscreen.
All assembled and ready to go as a present to my Dad. Not quite as good as some models here, but happy with the result in the time period I left myself - I could probably perfect the thing for months!
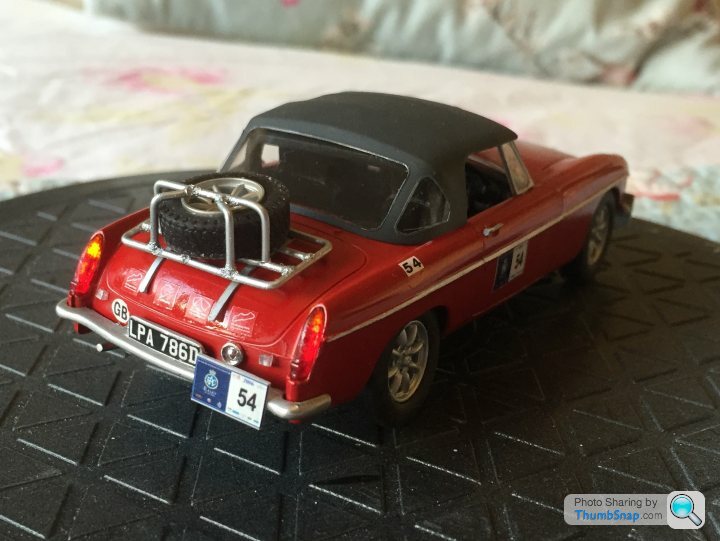

Thanks all for the help, tips and bits with the build.
All assembled and ready to go as a present to my Dad. Not quite as good as some models here, but happy with the result in the time period I left myself - I could probably perfect the thing for months!
Thanks all for the help, tips and bits with the build.
Gassing Station | Scale Models | Top of Page | What's New | My Stuff